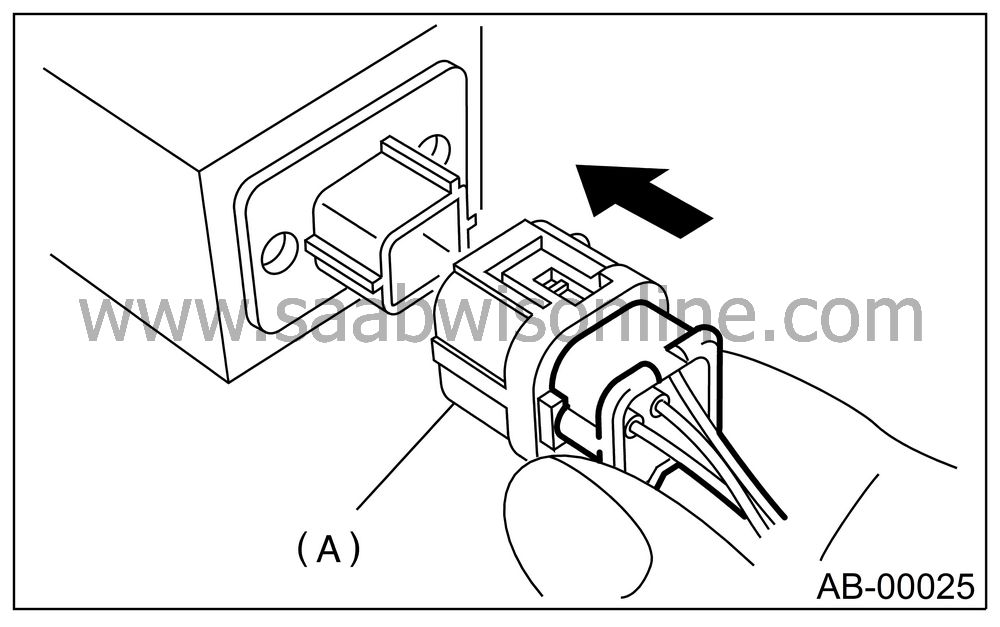
PROCEDURE
| PROCEDURE |
| POWER SUPPLY |
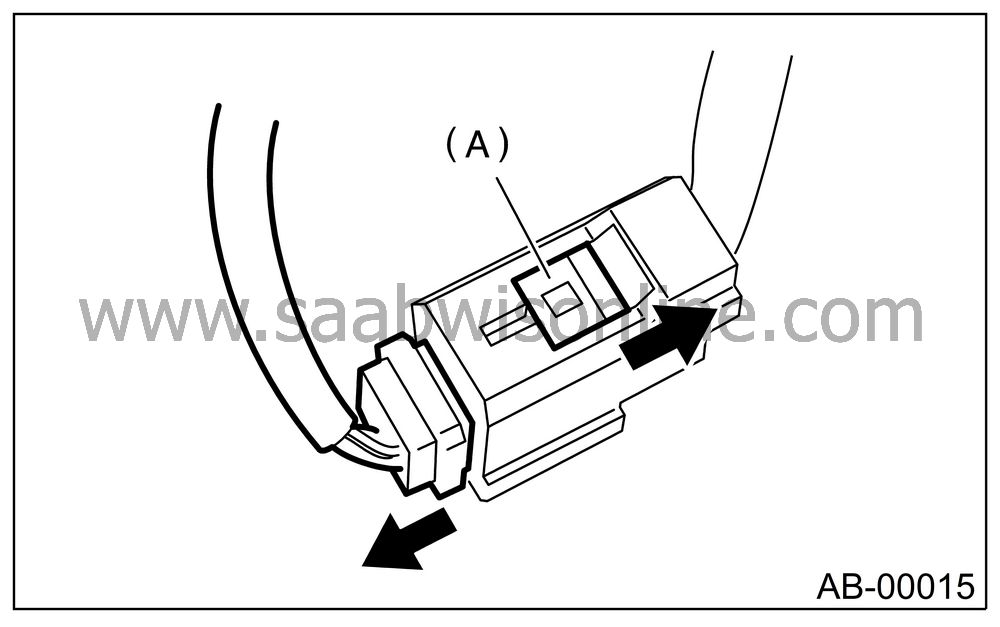
How to disconnect:
Move the slide lock (A) in the direction of the arrow.
Disconnect the connector with the slide lock (A) moved.
| Important | ||
|
When pulling, be sure to hold onto the connector and not the wire. |
||
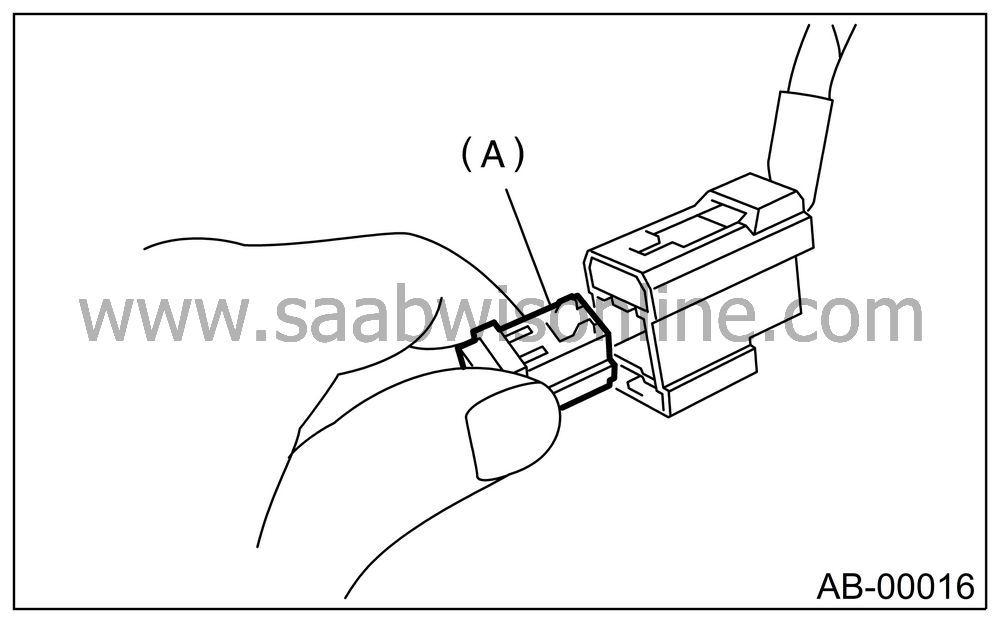
How to connect:
Holding the connector (A), and push it in carefully until a connecting sound is heard.
| Important | ||
|
Be sure to insert the connector in until it locks. |
||
|
Then pull on it gently to make sure that it is locked. |
||
| DRIVER’S AIRBAG (BETWEEN AIRBAG MAIN HARNESS AND ROLL CONNECTOR), PASSENGER’S AIRBAG AND SIDE AIRBAG |
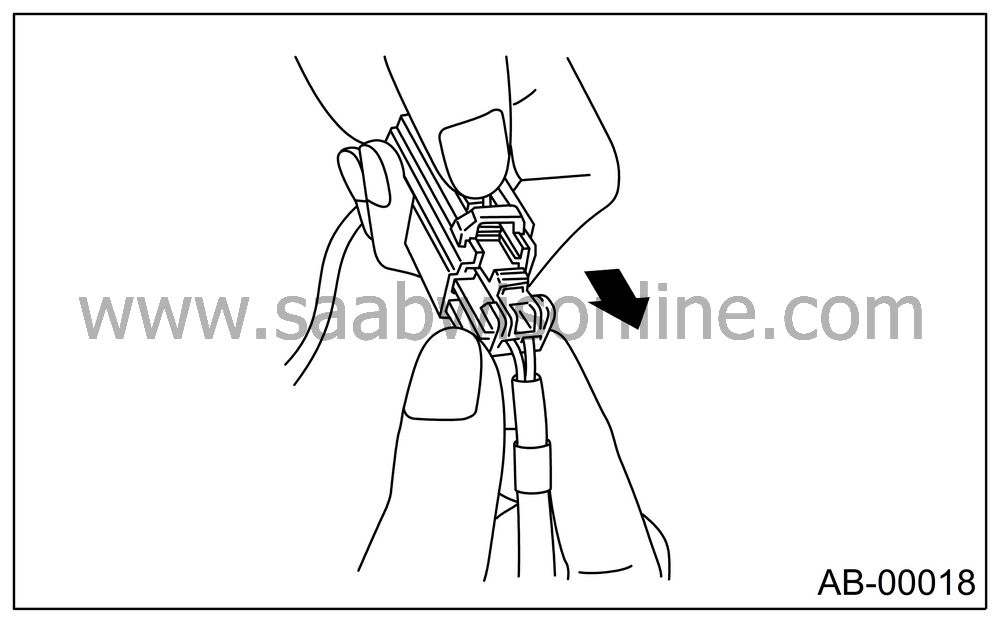
How to disconnect:
Push the lock arm (A).
With the lock arm (A) pushed in, move the slide lock (B) in the direction of the arrow.
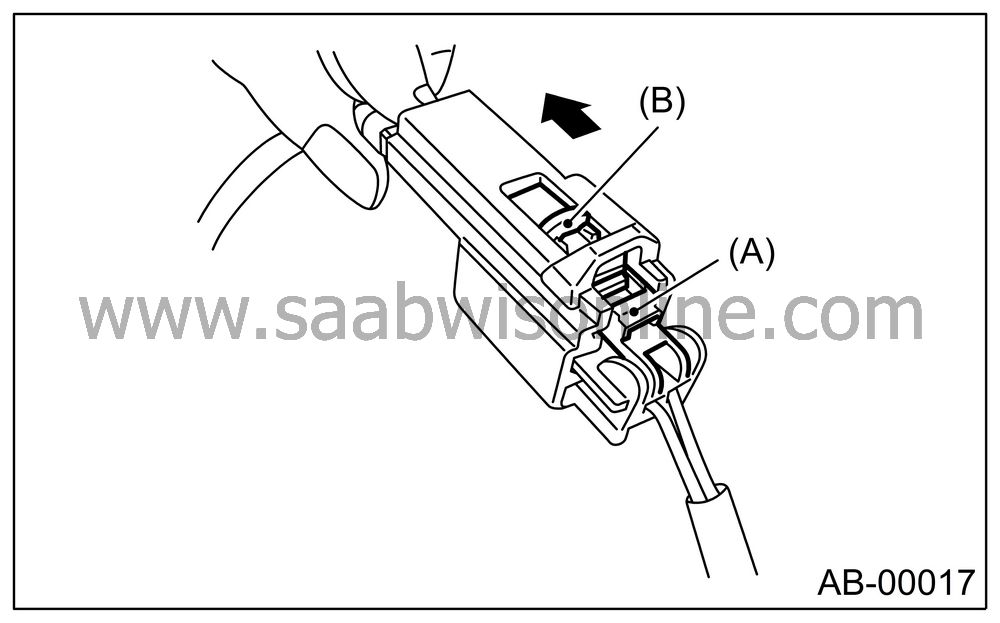
With the slide lock pulled, release the lock arm (to its original position) to separate the connector.
| Important | ||
|
When pulling, be sure to hold onto the connector and not the wire. |
||
How to connect:
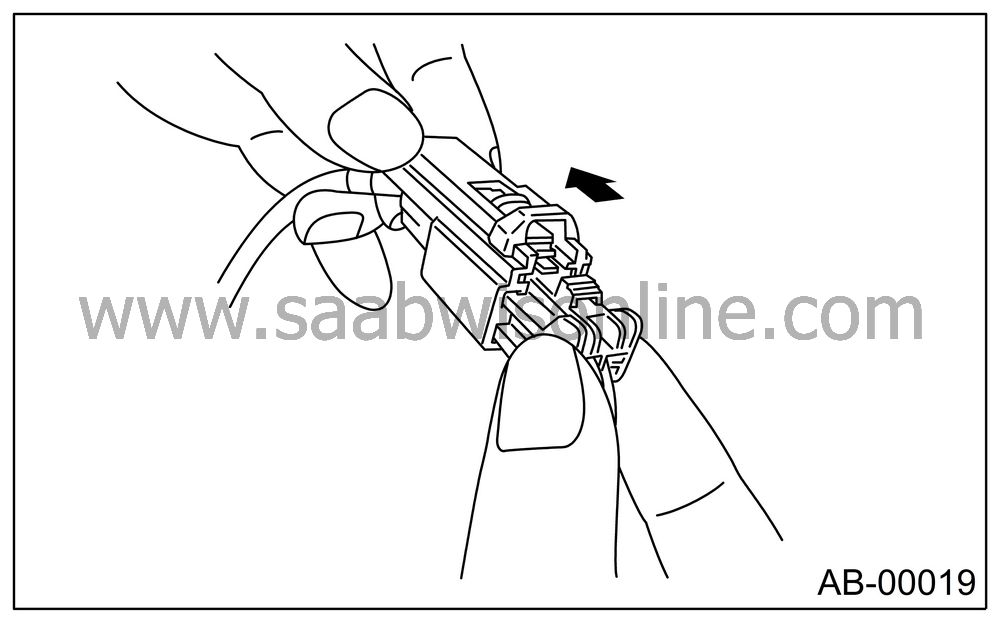
Holding the connector, push it in carefully until a connecting sound is heard.
| Important | ||
|
Be sure to insert the connector in until it locks. Then pull on it gently to make sure that it is locked. |
||
| DRIVER’S AIRBAG MODULE AND PRETENSIONER |
How to disconnect:
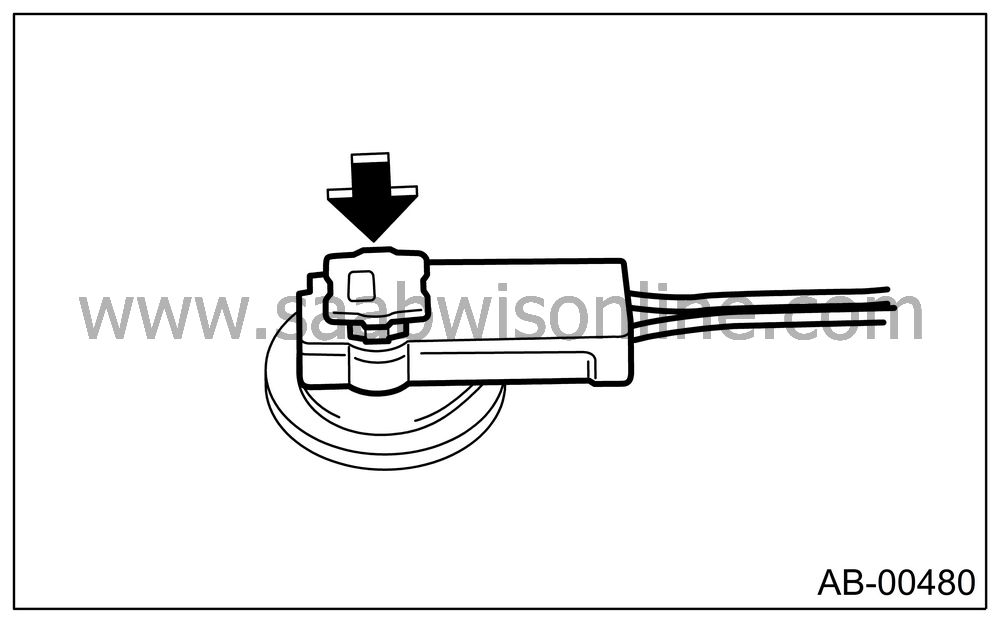
Using a flat tip screwdriver, pry the push lock upward to unlock.
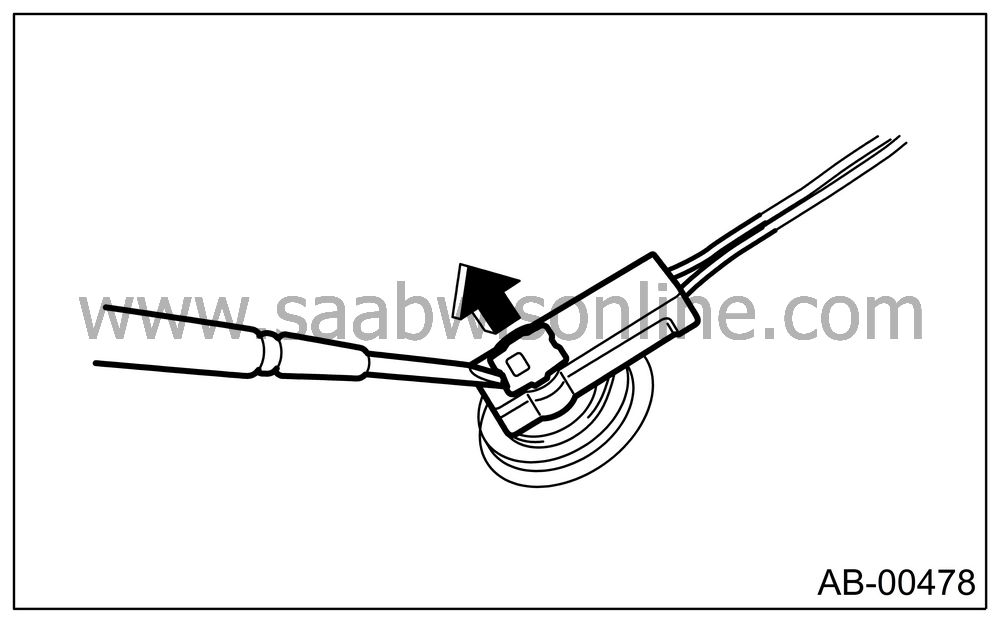
Pull the connector to disconnect from driver’s side airbag module assembly or retractor assembly.
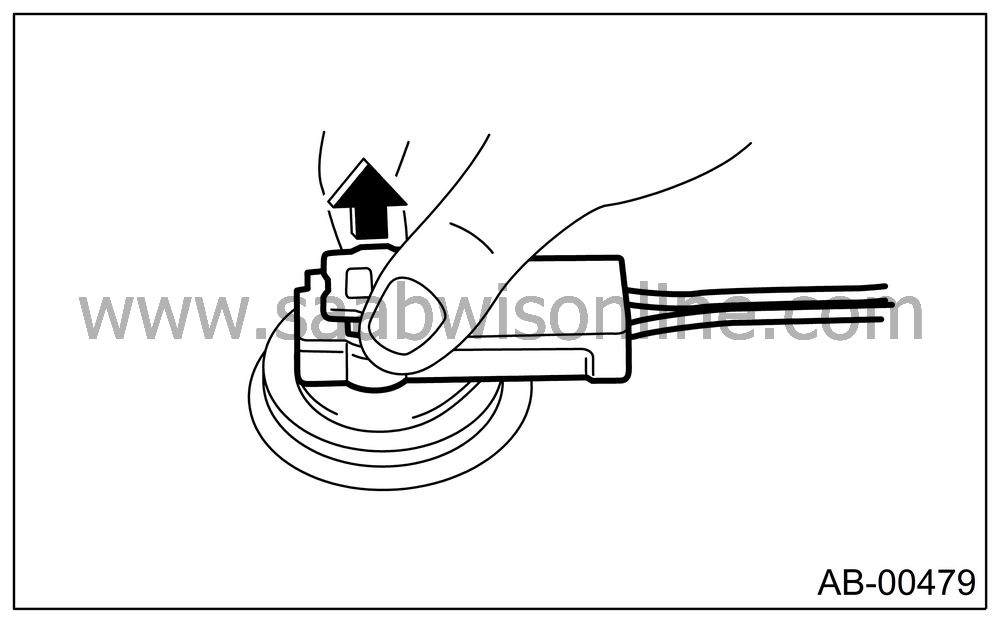
How to connect:
Connect the connector in reverse order of disconnecting. At this time, be sure to insert the push lock in until connecting sound is heard.
| Important | ||
| • |
Be sure to insert the connector
in until it locks. Then pull on it gently to make sure that it is
locked.
|
|
| • |
Be sure to push the push lock in securely.
|
|
| FRONT SUB SENSOR AND SIDE AIRBAG SENSOR |
How to disconnect:
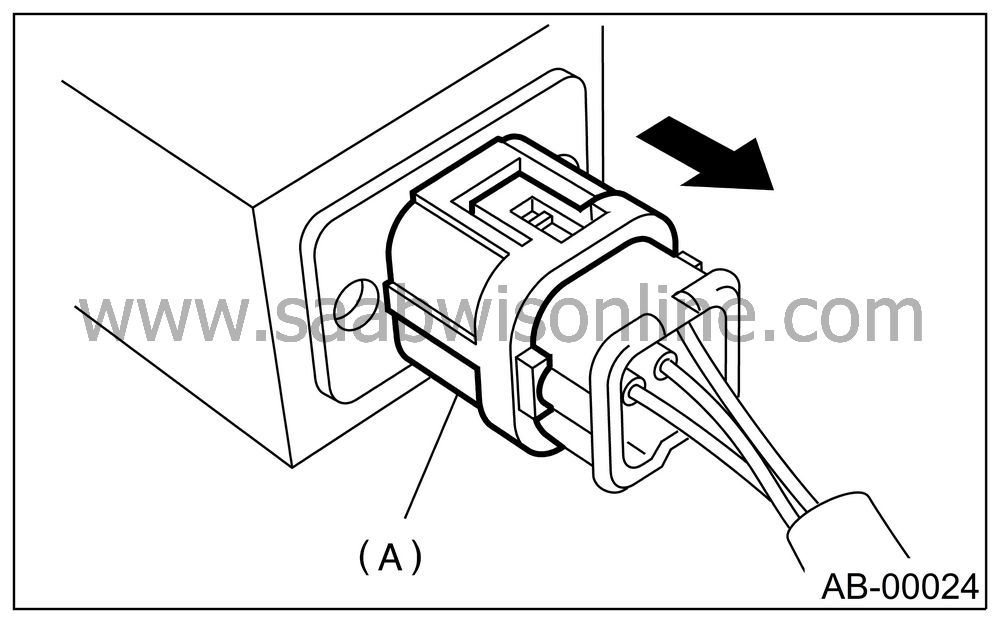
Holding outer part (A), pull it in the direction of the arrow.
| Important | ||
|
When pulling, be sure to hold onto the connector and not the wire. |
||
How to connect:
Holding the connector, push it in carefully until a connecting sound is heard.
| Important | ||
| • |
Outer (A) moves back, and so
do not put your hand on the outer part.
|
|
| • |
Be sure to insert the connector in until it locks. Then
pull on it gently to make sure that it is locked.
|
|
