Installation
| Installation |
| 1. |
Connect the
adapter cable
(25/9-pin, male/female) between the computer COM port and the hardware key.
|
|
| 2. |
Hardware key
(25/25-pin, male/female). This must be registered in order for it to work. See the heading
Hardware key registration
in the previous section.
|
|
| 3. |
Adapter
(25/9-pin, female/male).
|
|
| 4. |
Adapter
(DB9)
|
|
| 5. |
Adapter cable
(RS232)
|
|
| Installing and updating software |
| Note | ||
|
You must have administrator rights on your PC in order to install TIS2000. |
Installing TIS2000 on the computer
| 1. |
Insert the TIS2000 CD in the computer's CD drive.
|
|
| 2. |
Click on the Windows
Start
button and select
Run...
.
|
|
| 4. |

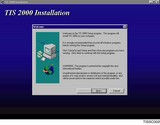
Click on Next to continue with the installation or Cancel to stop it. |
|
| 6. |

Select which language TIS2000 is to use. |
|
| 7. |

Approve the directory in which the computer wishes to install the program or indicate a different directory by clicking on Browse... and selecting the desired directory. |
|
| 8. |

Specify to which COM port TECH2 shall be connected (COM1). |
|
| 9. |

Specify to which COM port the hardware key shall be connected (same COM port as TECH2). |
|
| 10. |

Confirming the installation setting for a standalone computer. |
|
| 11. |

After a few minutes, the first part of the installation is finished. Click OK to confirm and continue. |
|
| 12. |

The computer must be rebooted to continue the installation process. If you wish to do that now, click Yes . To do so later, click No . Installation will continue after the reboot. Remove the CD. |
|
Updating TIS2000
| 1. |
Insert the CD with the new TIS2000 version in the computer's CD drive.
|
|
| 2. |
Start the current version of TIS2000 in the usual manner. The program will be updated automatically. Only the updated program files will be changed.
|
|
| Language and market settings |
Language selection
The program can be shown in another language:| 1. |
Select the
Configuration
menu and click on
Options
. The dialogue box
Options
will then open.
|
|
| 2. |

Click on the Language tab and mark the desired language in the list. |
|
| 3. |
Click
OK
to confirm the selection or
Cancel
to undo.
|
|
Market selection
Select the country based on the market for which the program shall be used.| 1. |
Select the
Configuration
menu and click on
Options
. The dialogue box
Options
will then open.
|
|
| 2. |

Click on the Country and mark the desired country in the list. |
|
| 3. |
Click
OK
to confirm the selection or
Cancel
to undo.
|
|
Make selection
It is currently only possible to select SAAB.
Dealer selection
It is currently only possible to select SAAB dealers.
| Hardware communication (incl. drivers, etc) |
Modifying an existing setting
If you need to change the settings of a connected unit, such as the hardware key (also known as a Dongle ) or TECH2, you can choose to either modify an existing setting or create a new setting for the unit. This is then saved under a new name as an extra presetting for the unit.| 1. |

Select the Configuration menu and click on IO Management . |
|
| 2. |

Select the unit for which the settings are to be modified in the I/O Management dialogue box. ( Dongle = hardware key; TECH2 = diagnostic tool ) |
|
| 4. |
Select another setting by clicking on the down arrow on the right-hand side and marking the desired setting.
|
|
| 5. |
Click
OK
if the setting is to be saved or
Cancel
if it is not to be saved.
|
|
Adding a new setting
The new setting is saved under a new name as an extra presetting for the unit in question.| 1. |

Select the Configuration menu and click on IO Management . |
|
| 2. |
Select the unit for which a new setting is being made. Click
Add
.
|
|
| 4. |
Click
OK
if the setting is to be saved or
Cancel
if it is not to be saved.
|
|
Deleting a setting
Existing and added settings can also be deleted.| 1. |

Select the Configuration menu and click on IO Management . |
|
| 2. |

Mark the setting / unit that is to be deleted. |
|
| 3. |
Click
Delete
in the dialogue box to delete the setting. The name of the setting disappears from the list.
|
|
| 4. |
Click
Close
to finish.
|
|
Installing a driver
New drivers can be installed for existing hardware.| 1. |

Select the Configuration menu and click on IO Management . |
|
| 3. |
Click
Browse...
. The dialogue box
Open
is shown. This allows you to select a driver from the computer hard drive, disk, CD or other media.
|
|
| 5. |

Click Install . The driver is installed and is then found in the field Installed Driver (Alternatively, click Cancel to cancel the installation). |
|
Driver information
Various information is available for a specific driver.| 1. |
Select the
Configuration
menu and click on
IO Management
.
|
|
| 2. |
Select the unit in the
I/O Management
field.
|
|
| 3. |
Click
Info
. Information on the selected driver is shown.
|
|
| 4. |


Click Close to close the information window. |
|
Testing a driver
A self-test can be run on installed drivers.| 1. |
Select the
Configuration
menu and click on
IO Management
.
|
|
| 2. |
Select the unit in the
I/O Management
field.
|
|
| 3. |
Click
Test
. The driver is tested and the results are displayed onscreen.
|
|
| 4. |


Click OK to close the information window. |
|
Uninstalling a driver
Uninstall a driver as follows:| 1. |

Select the Configuration menu and click on IO Management . |
|
| 2. |

Mark the unit for which the driver is to be deleted. Click Driver... . |
|
| 3. |

In the Installed Driver field of the dialogue box, click on the driver to be uninstalled. |
|
| 4. |
Click
Uninstall
. The driver is then removed from the field.
|
|
| 5. |
Click
Cancel
to finish.
|
|
| 6. |
Click
Close
to close the information window.
|
|
| Installing TCP/IP |
Installing TCP/IP in Windows 95/98
In order to successfully install TCP/IP on the computer you must have access to Windows 95/98 installation files either on CD or on the hard drive.| 1. |
Click on the
Start
button; select
Settings
and
Control panel
.
|
|
| 2. |
Select
Network
in the Control panel. A dialogue box opens. Click
Add
.
|
|
| 3. |
Mark
Protocols
in the list displayed and click
Add
.
|
|
| 4. |
Select
Microsoft
from the list of manufacturers.
|
|
| 5. |
Select
TCP/IP
from the list of network protocols. Click
OK
.
|
|
| 6. |
The computer asks for a network card; select
Microsoft
from the list of manufacturers. Select
Microsoft
driver for remote connection. Click
OK
.
|
|
| 7. |
Primary network login: Select Windows login. Click
OK
.
|
|
| 8. |
The computer will now install the drivers. Be prepared to insert the Windows 95/98 CD if the computer requests it. The path to the drivers on the hard drive or CD may need to be specified.
Reboot the computer after the installation. |
|
| 9. |
After the computer is rebooted, the Windows login box may open. Enter a user name. If you do not enter a password, the login box will not open the next time the computer is started.
|
|
Installing TIP/IP in Windows NT4
This installation is complicated and should only be done by a computer administrator. Administrator authority on the computer is required in order to modify network settings in Windows NT.In order to successfully install TCP/IP on the computer you must have access to Windows NT installation files either on CD or on the hard drive.
| 1. |
Click on the
Start
button; select
Settings
and
Control panel
.
|
|
| 2. |
Select
Network
in the Control panel. A dialogue box opens.
|
|
| 3. |
Select the
Network card
tab. A virtual network card shall be selected in the dialogue box. Click
Add
.
|
|
| 4. |
Click
MS Loopback adapter
in the list shown.
The computer will ask you to configure this. Do not do so. Click OK instead. |
|
| 5. |
Select the
Protocols
tab and click
Add
. Select
TCP/IP
from the list of network protocols.
|
|
| 6. |
Configure TCP/IP for Loopback adapter: Click
Properties
for TCP/IP.
|
|
| 7. |
Specify your own IP address: Enter it in the field. (Example of IP address: 10.0.0.1)
|
|
| 8. |
Netmask: enter 255.255.255.0
|
|
| 9. |
The computer is now configured with TCP/IP. Close all windows and reboot the computer.
Log in as usual. |
|


