Balancer shafts
| Balancer shafts |
| 1. |
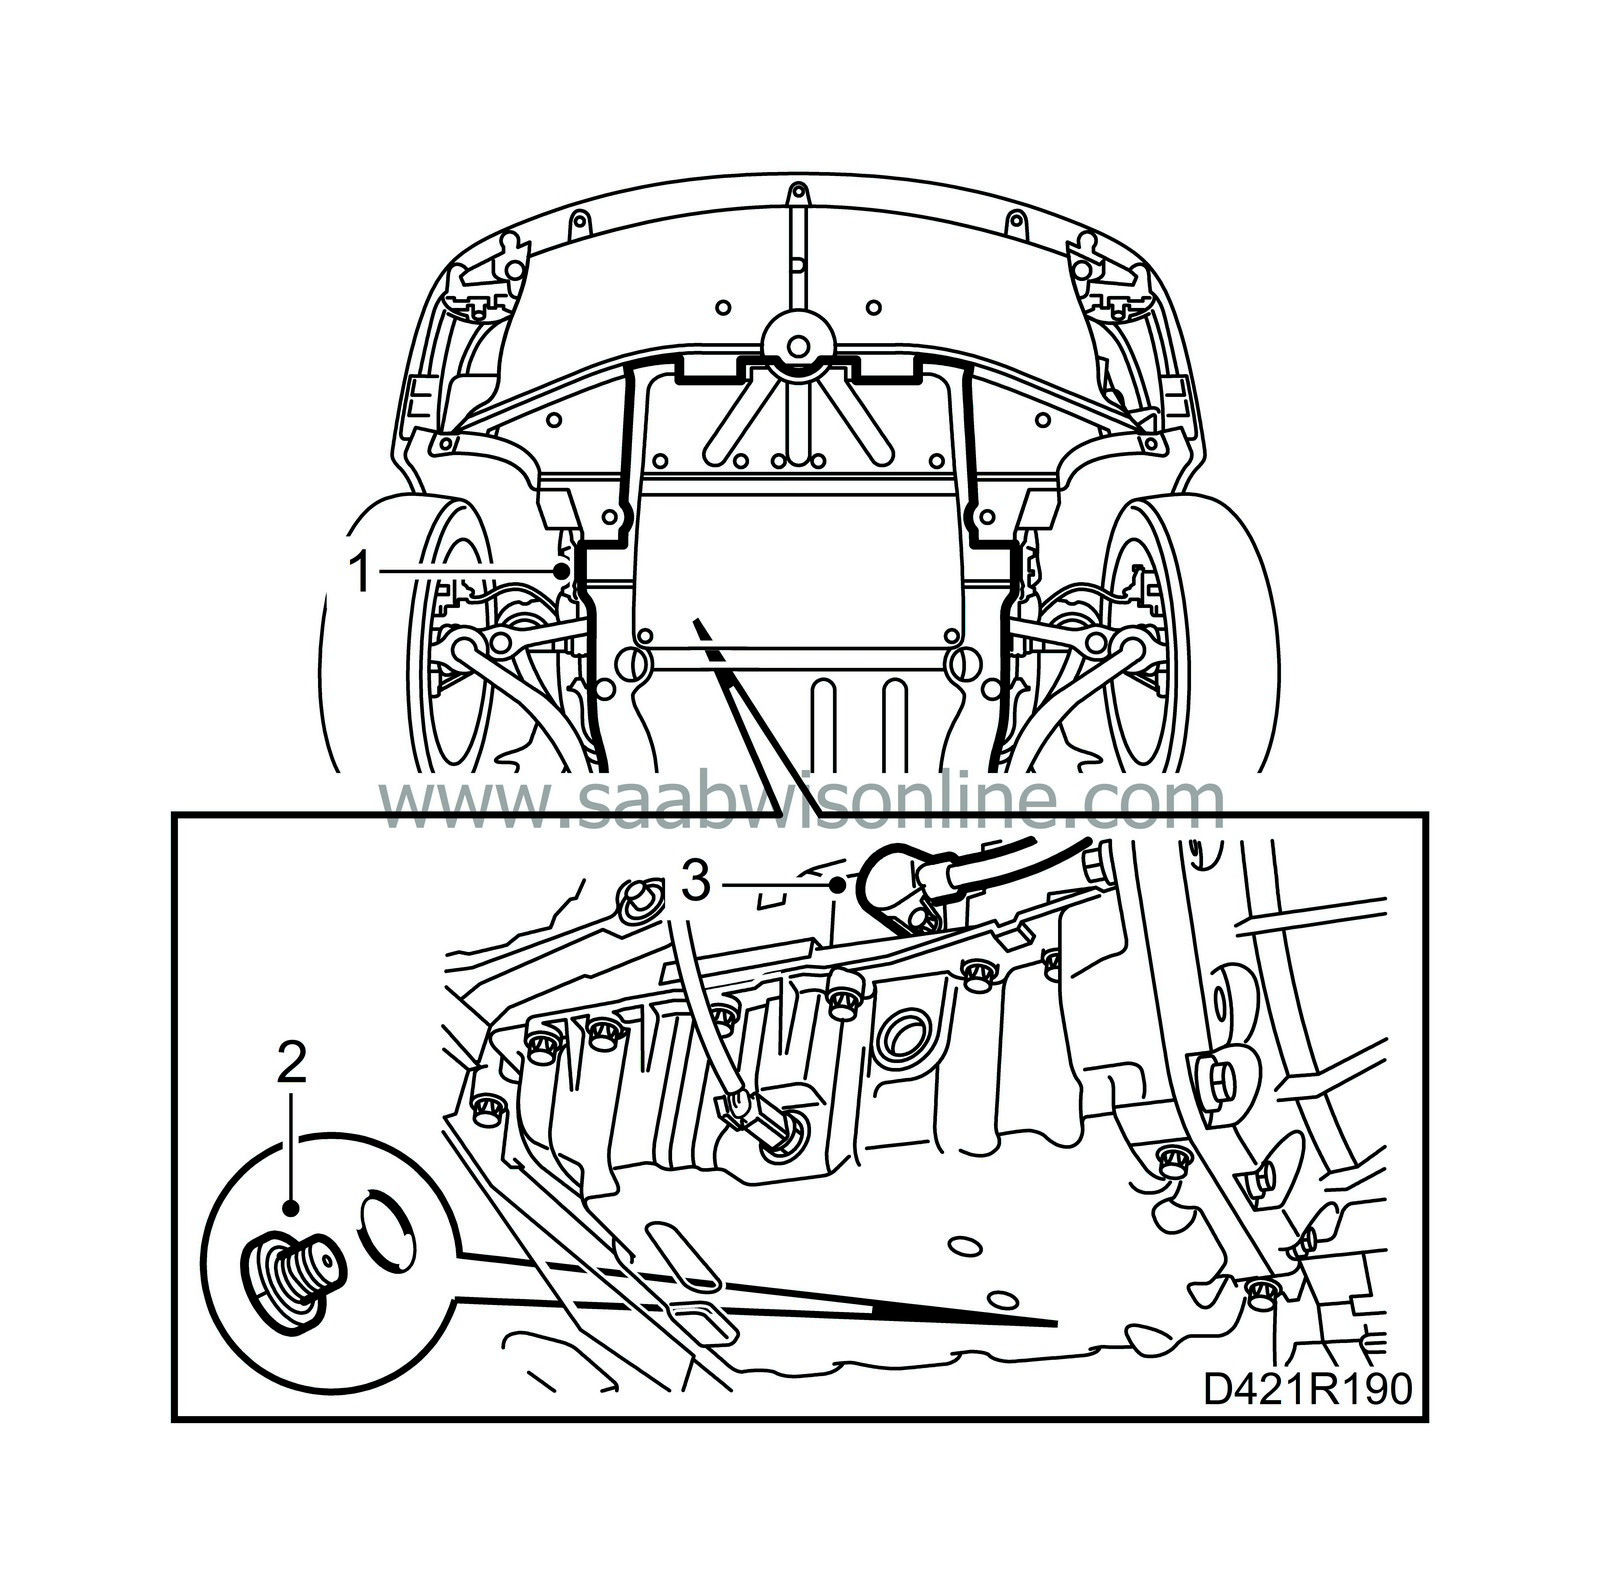
Raise the car and remove the lower engine cover.
|
|
| 2. |
Place a receptacle under the engine, undo the drain plug and drain the engine oil.
|
|
| 3. |
Dismantle the crankshaft position sensor with O-ring.
|
|
| 4. |
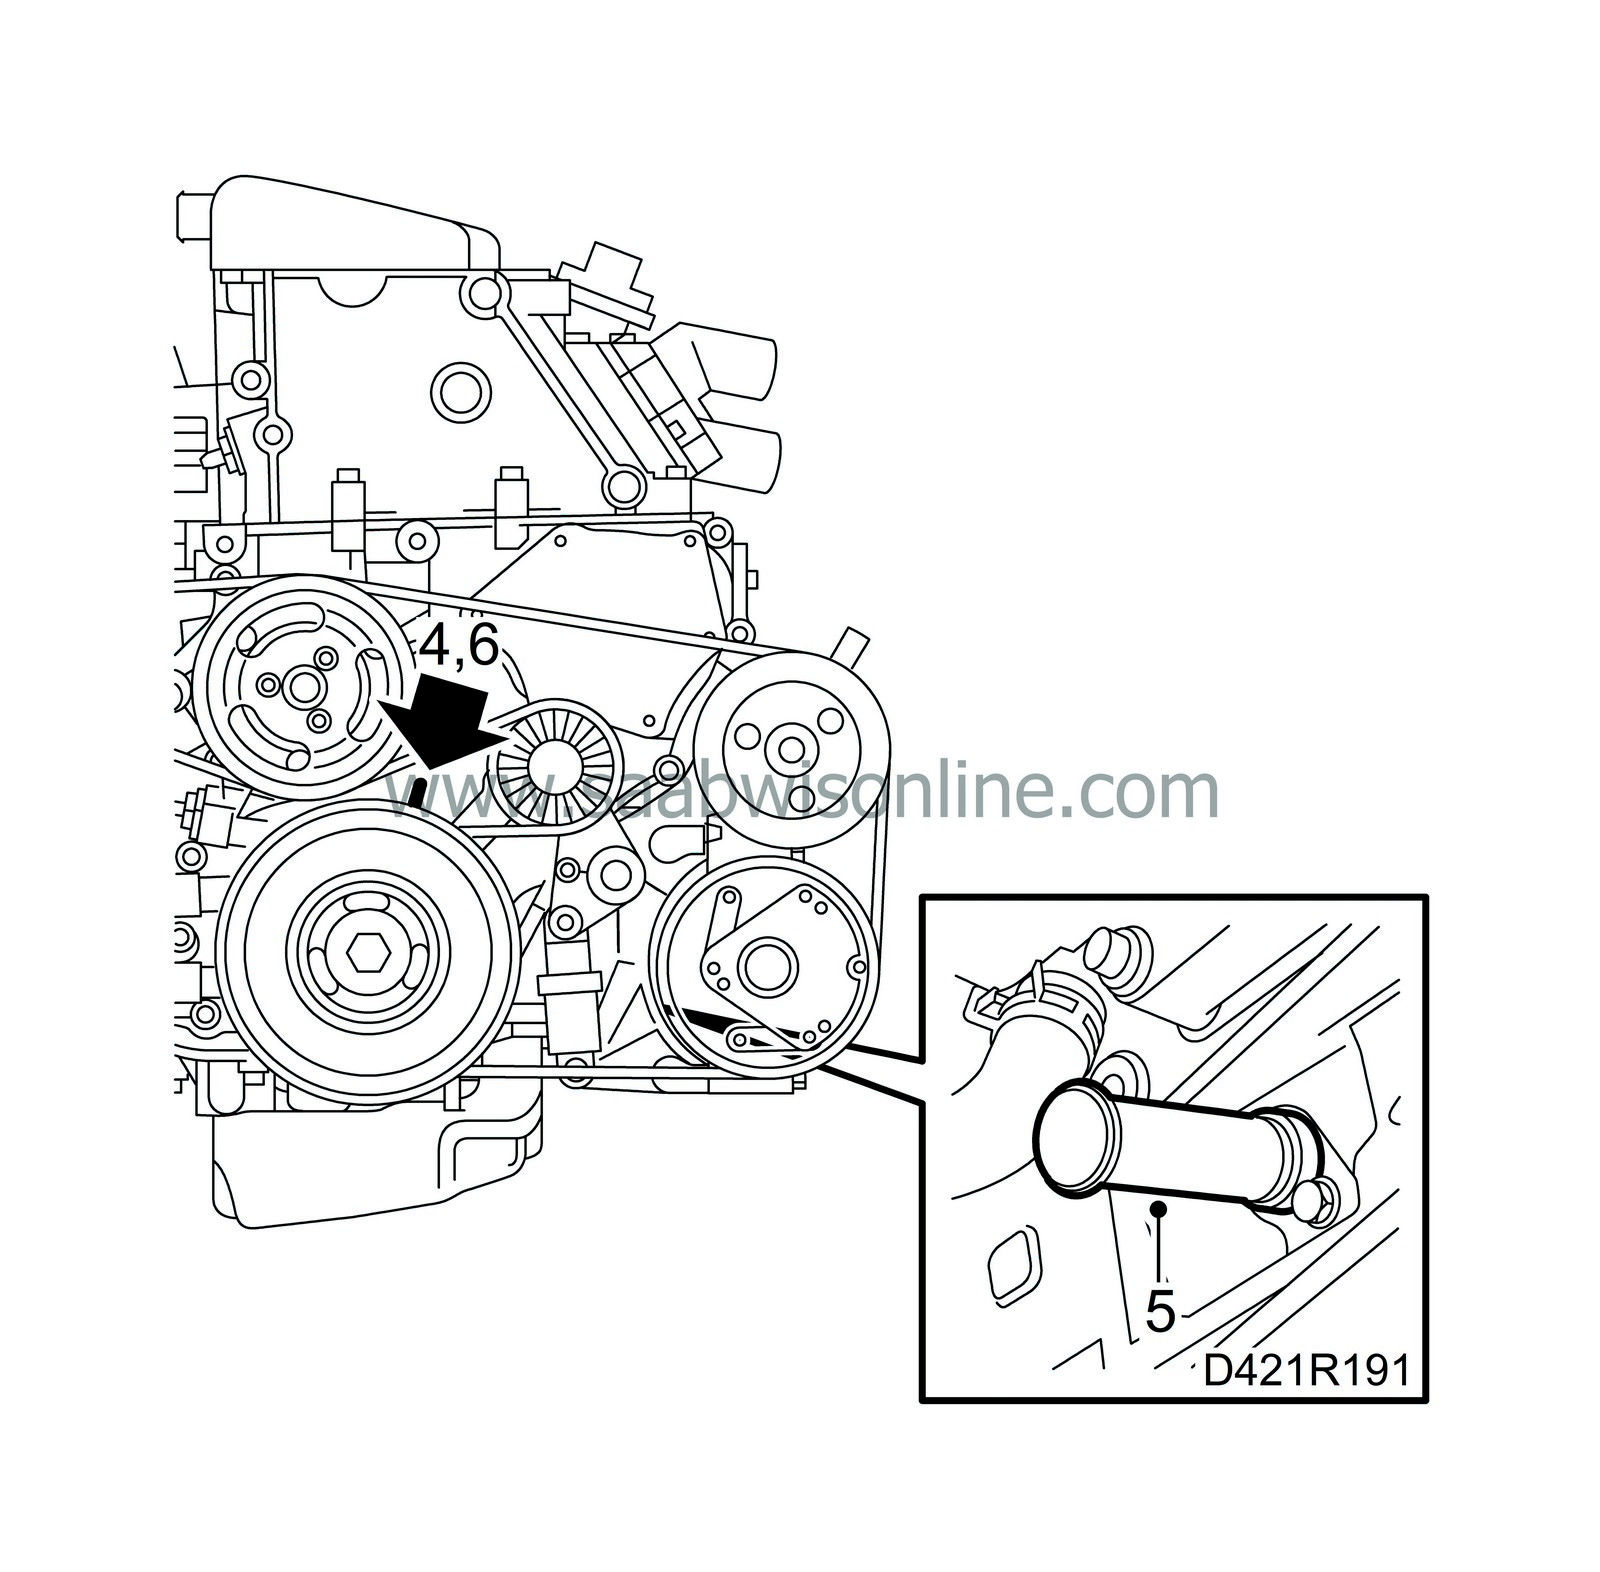
Turn the crankshaft with the centre bolt on the belt pulley until it is just before the mark for top dead centre in cylinder 1.
|
|
| 5. |
Position inspection gauge 83 95 352 inside the hole for the crankshaft position sensor. Press the tool inwards slightly at the same time as the crankshaft is turned to the zero mark. The tool will then enter a recess in the crankshaft and secure it.
|
|
| 6. |
Make sure the marks on the crankshaft belt pulley and the timing cover are aligned.
|
|
| 7. |
Disconnect the engine oil temperature sensor.
|
|
| 8. |
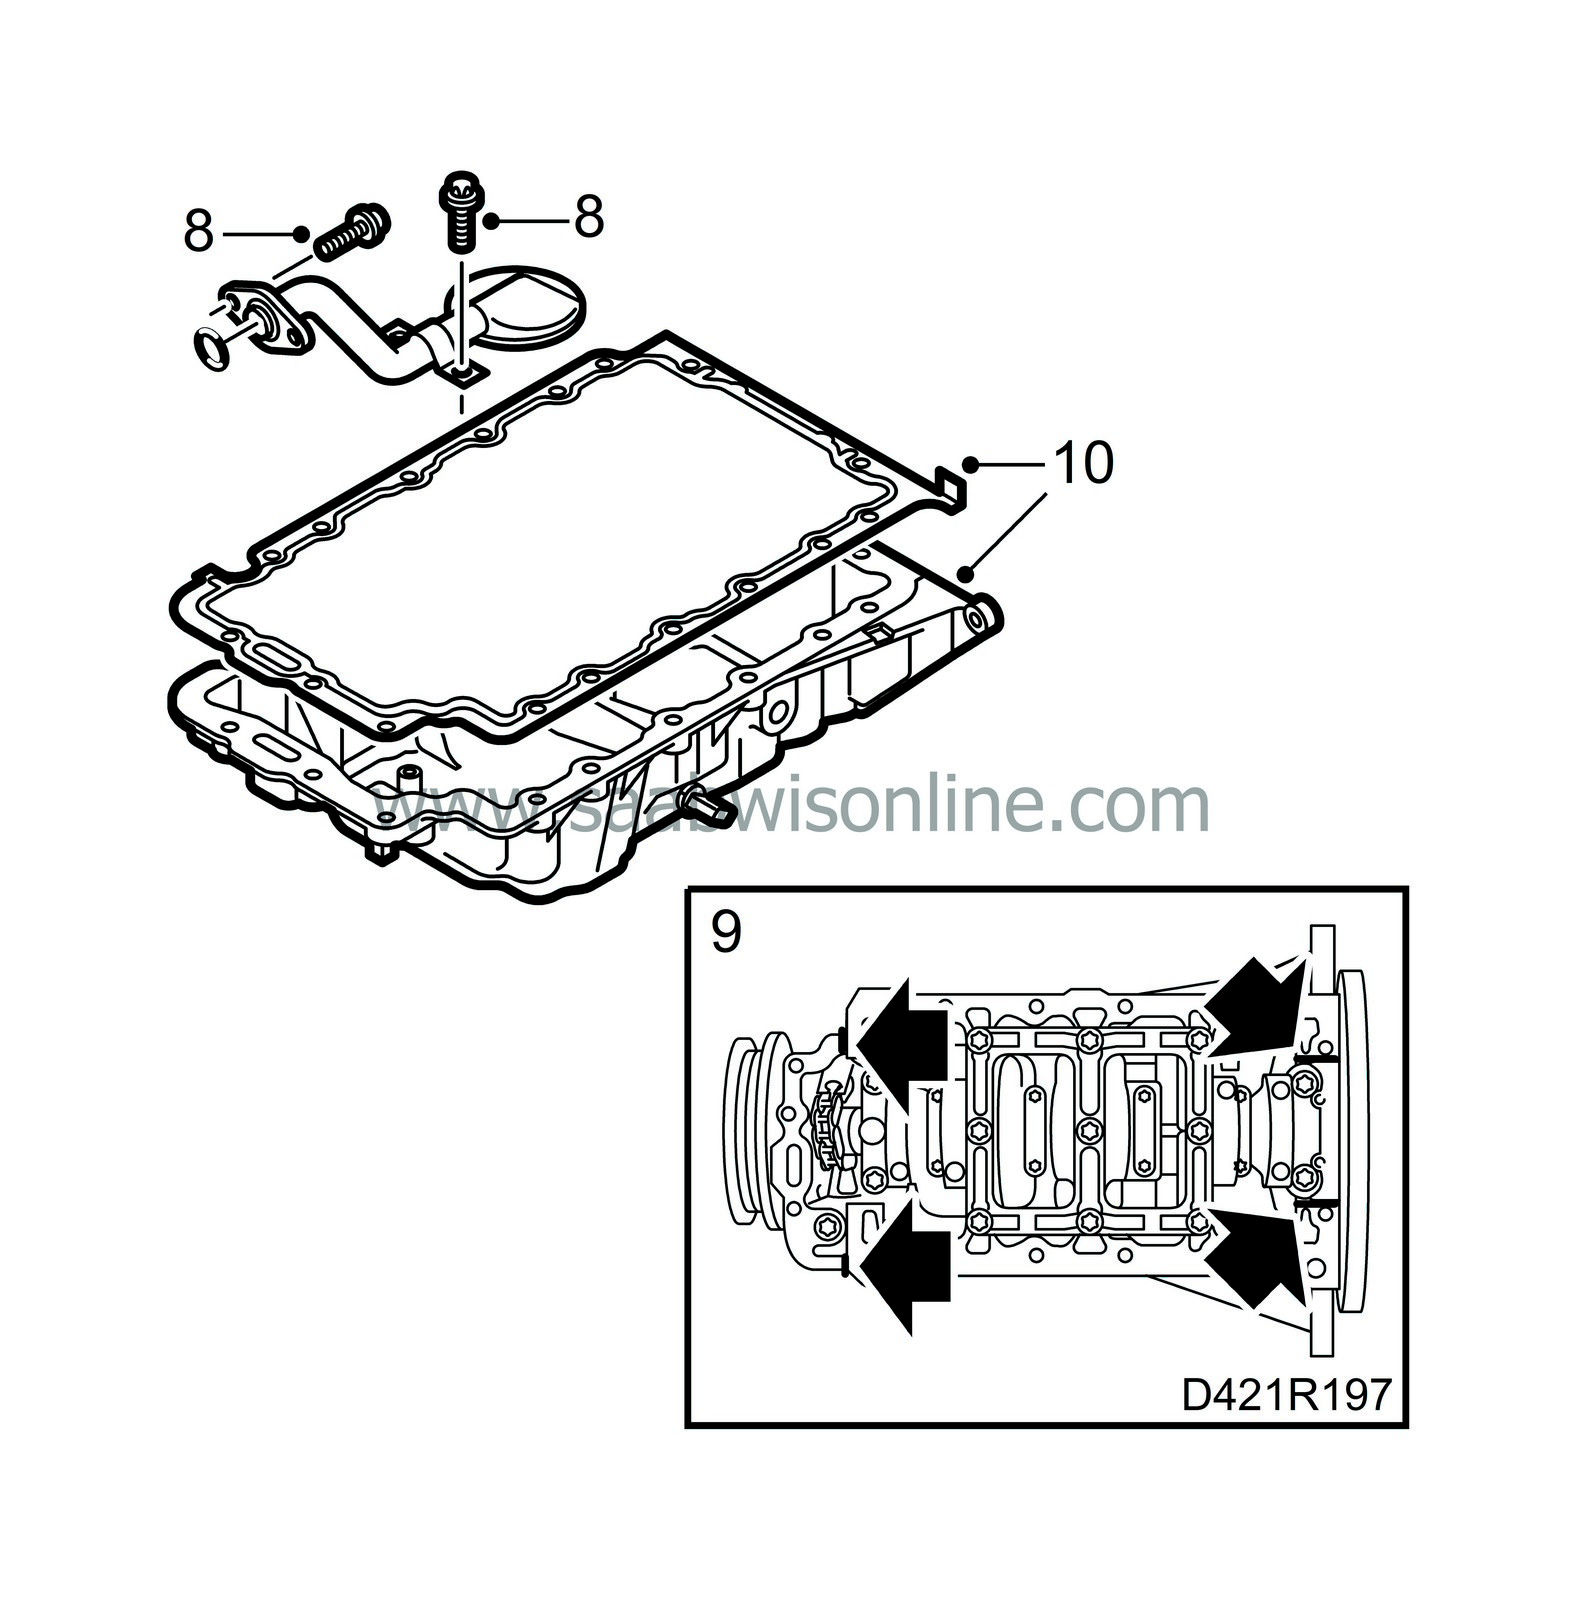
Dismantle the oil sump. Clean away dropping oil.
|
||||||||||
| 9. |
Inspect the oil suction pipe and replace if necessary.
|
|
| 10. |
Lock the balancer shafts with tool 83 95 469 and remove the cover over the balancer shaft chain transmission.

|
|
| 11. |
Push back and lock the balancer shaft chain tensioner and remove the sprocket from the balancer shaft.
|
|
| 12. |
Undo the 7 outer bolts and dismantle the balancer shafts as one unit.
|
|
| 13. |
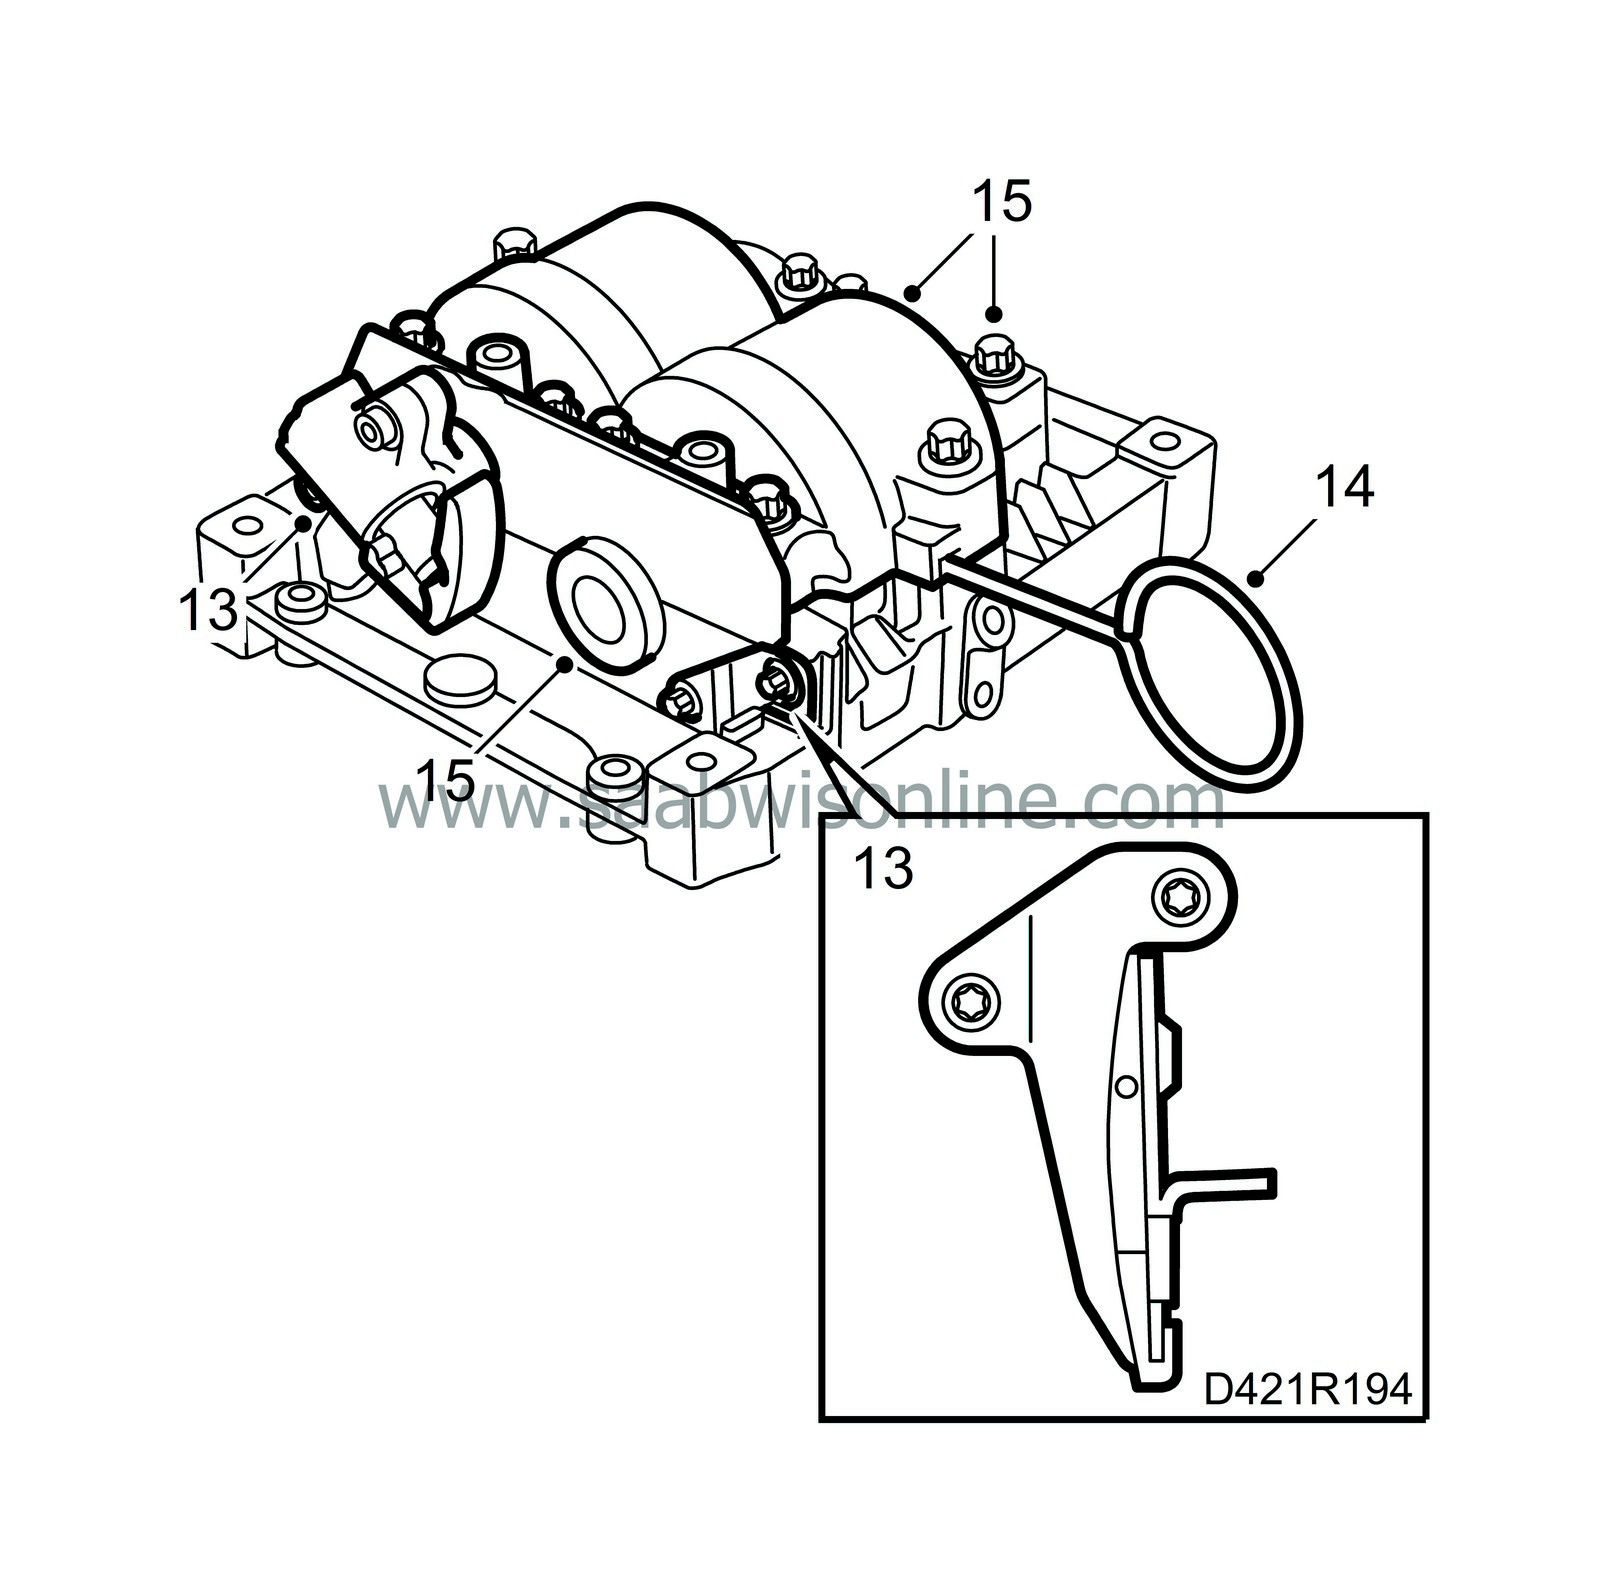
Place the balancer shaft unit on a well-cleaned workbench and remove the chain tensioner and catenary rule.
|
|
| 14. |
Remove the locking tool from the balancer shafts.
|
|
| 15. |
Undo the rest of the bolts, remove the cover, note how the balancer shafts are fitted and lift them out.
|
|
| To fit |

| 1. |
Lay the balancer shafts in their original positions, turn them so the weights are up, lock them with tool 83 95 469 and fit the cover.
|
|
| 2. |
Fit the chain tensioner and catenary rule.
|
|
| 3. |
Fit the balancer shaft unit.

Tightening torque: 20 Nm (15 lbf ft). |
|
| 4. |
Position the sprocket on the balancer shaft and tighten the bolt.
Tightening torque: 90 Nm (66.5 lbf ft). + 30°. |
|
| 5. |
Release the chain tensioner and fit the cover.
|
|
| 6. |
Remove the locking tool from the balancer shafts.
|
|
| 7. |
Check that there are no impurities or other foreign matter in the sump and clean the sealing surfaces with benzene.
|
|
| 8. |
Tighten the bolts on the oil suction pipe if it has been replaced.
Tightening torque: 8 Nm (6 lbf ft). |
|
| 9. |
Apply sealing compound 87 81 841 to the mating surfaces, see illustration.
|
|
| 10. |
Position the oil sump against the gearbox and fit it with new gaskets. If the gearbox has been dismantled, a steel rule must be put against the sealing surface to the gearbox to guide the position of the oil sump.
Tightening order: 1 Tighten all bolts by hand. 2 Tighten the bolts in the cylinder block and timing cover: 20 Nm (15 lbf ft) 3 Tighten the bolts in the gearbox: - 20 Nm (15 lbf ft) (M8) - 40 Nm (30 lbf ft) (M10) |
|
| 11. |
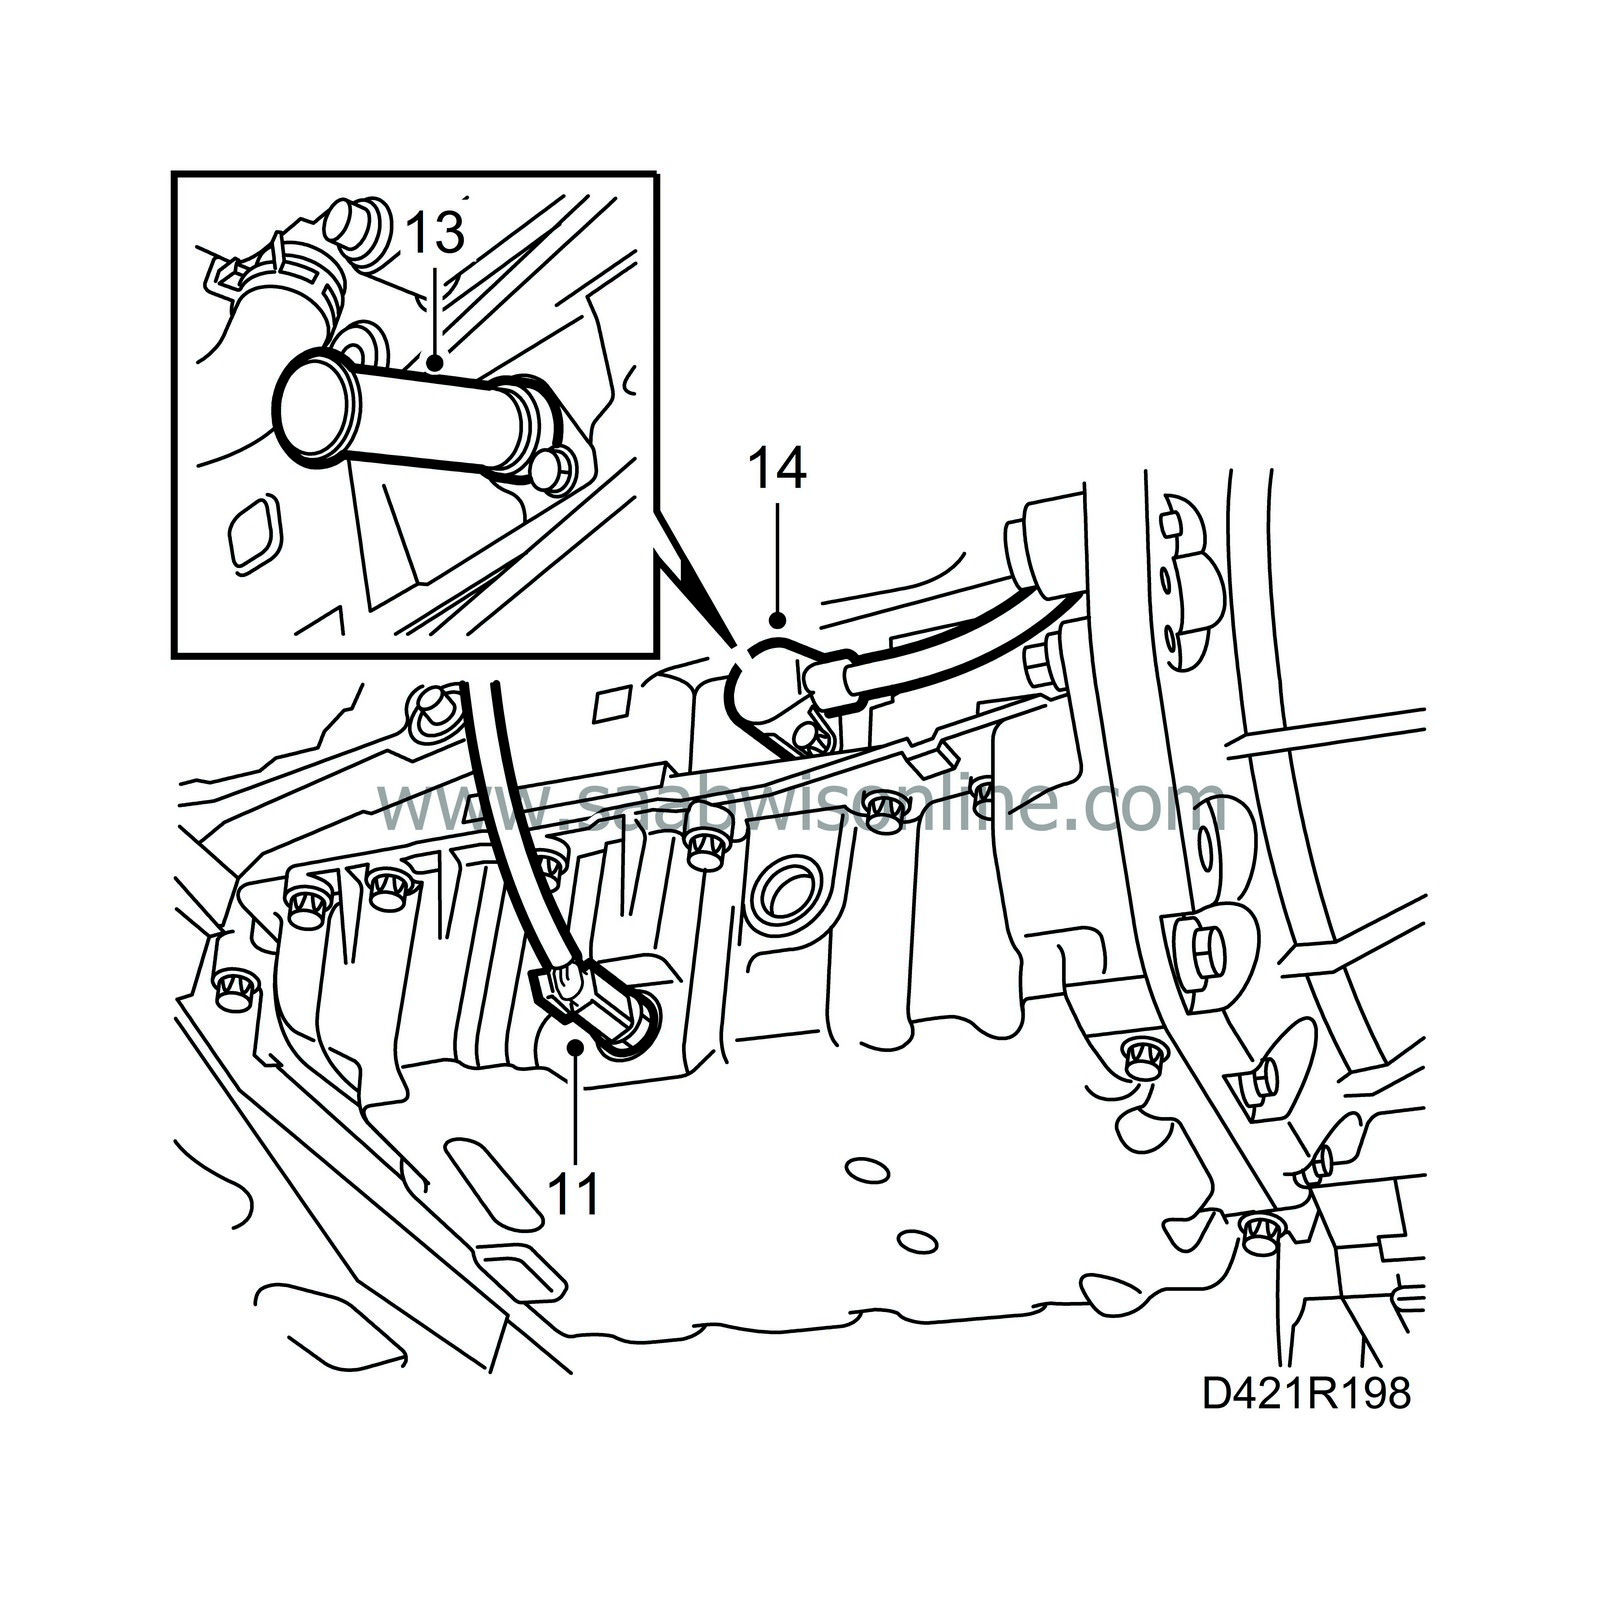
Connect the engine oil temperature sensor.
|
|
| 12. |
Refit the oil plug with a new seal.
Tightening torque: 18 Nm (13 lbf ft). |
|
| 13. |
Remove the inspection gauge.
|
|
| 14. |
Fit the crankshaft position sensor with a new O-ring.
Tightening torque: 8 Nm (6 lbf ft). |
|
| 15. |
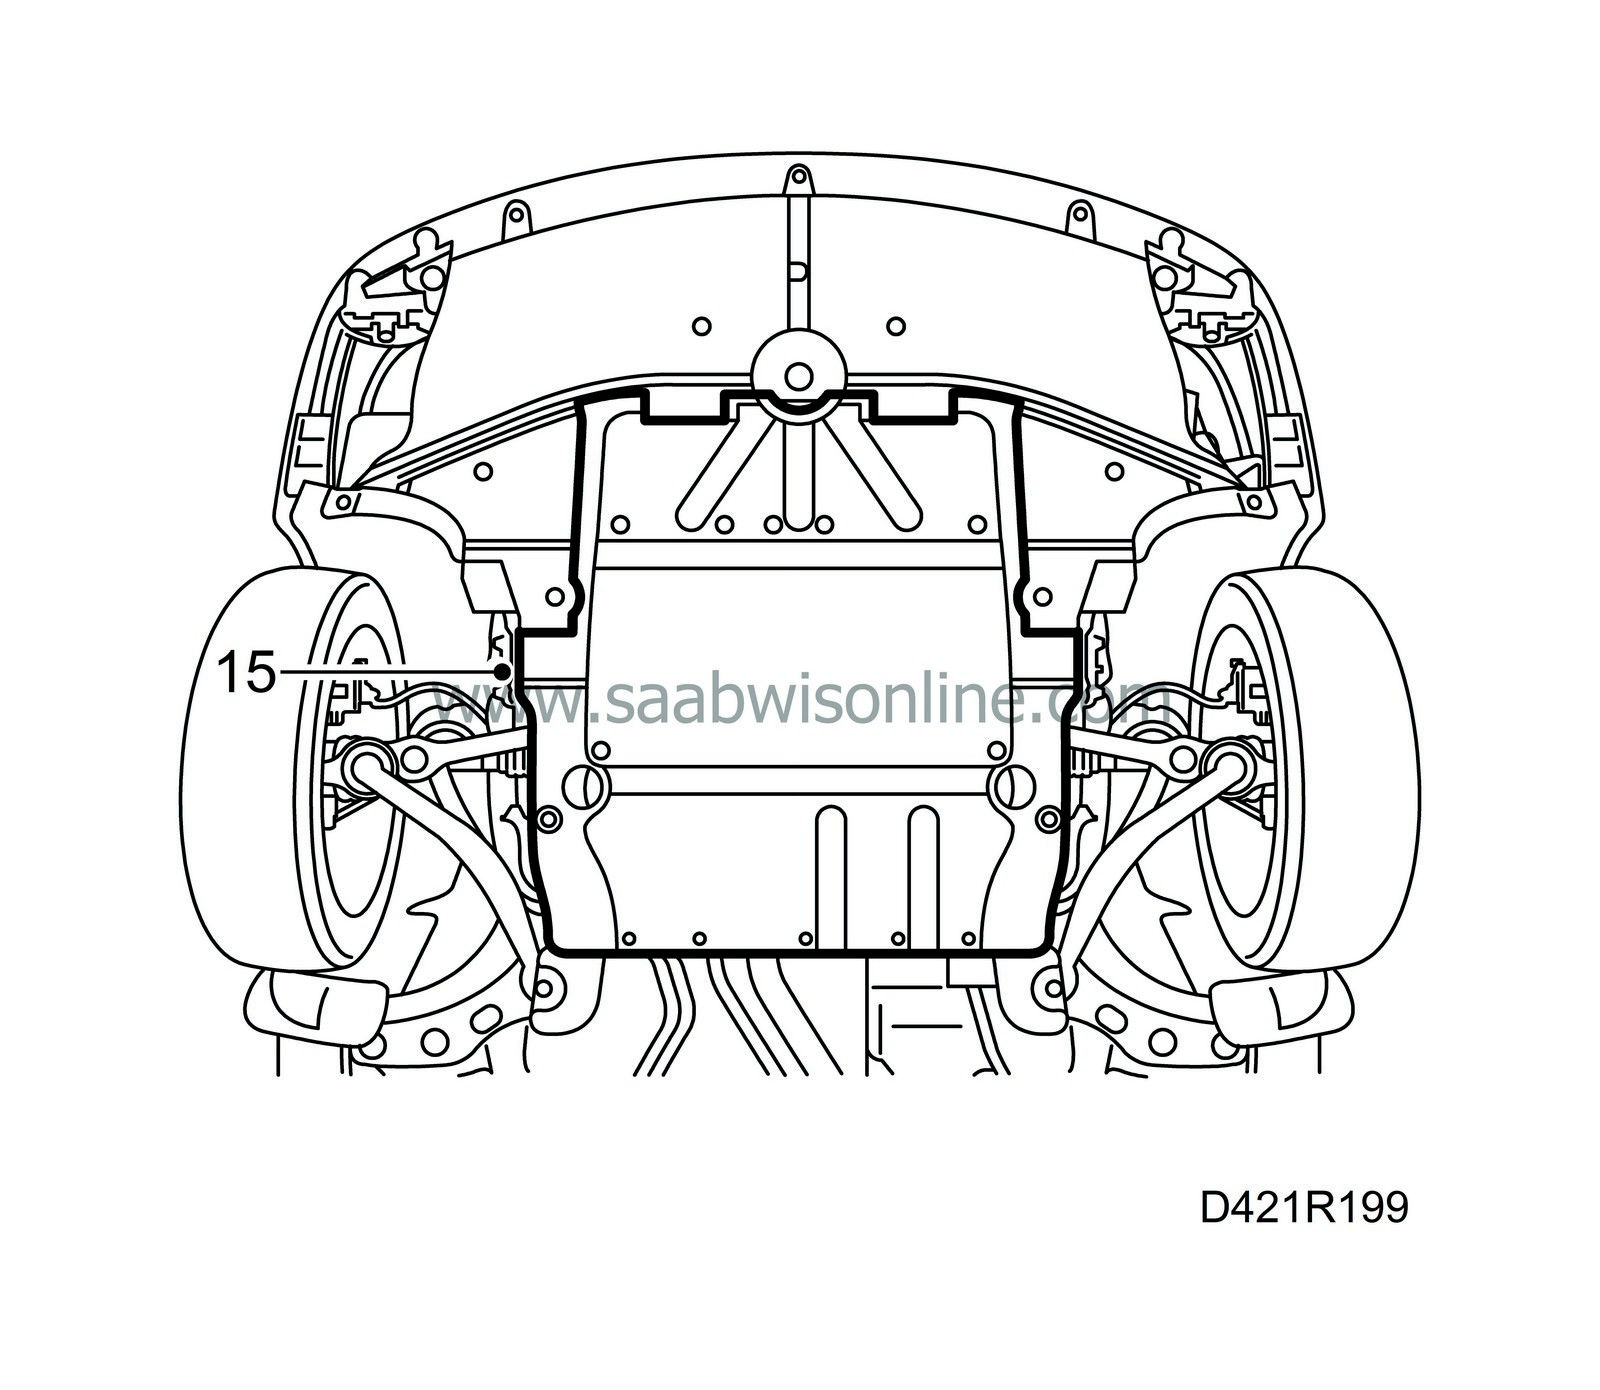
Fit the lower engine cover and lower the car.
|
|
| 16. |
Fill with engine oil as specified, see
 .
.
|
|

