(234-2349) Filler cap replacement, 9-3 TiD
Symptom: Fuel leak from tank return line
|
MODIFICATION INSTRUCTION
|
|
Bulletin Nbr:
|
234-2349
|
|
Date:
...........
|
Oktober 2002
|
|
Market:
|
enligt separat lista
|
|
|
Filler cap replacement, 9-3 TiD
|
Cars in stock must be rectified before delivery.
Cars already delivered must be rectified in connection with a scheduled visit to the garage for service or repairs.
Saab 9-3 (9400) M98-M02 with engine variant D223L and VIN within the range W2050007-22038723

The pressure when opening the filler cap combined with a clogged roll-over valve can deform the fuel tank due to a vacuum that is created. This results in deformation of the tank sensor armature, which in turn results in higher pressure in the fuel return line so that its snap-on coupling can loosen and fuel leakage can occur. To ensure that there is an adequate air supply, a new filler cap has been produced to change the opening pressure from -8 kPa to -2 kPa.
Symptoms
Fuel leak from tank return line
53 36 060 Filler cap (The cap contains the text DIESEL and a label, part no. 51 72 655)
If a new modification identity plate is required
49 00 007 Modification identity plate
79 72 490 Pop rivet
16-30 15 948 Teroson Terotex HV 200 Extra T108
Before proceeding, check box C5 (M98), D5 (M99; if necessary, new modification identity plate must be fitted according to the instructions below), A5 (M00) or C5 (M01-M02) on the modification identity plate. If the box is not filled in, continue as follows.
|
1.
|
Remove the existing filler cap.
|
|
2.
|
If the cap has a strap, remove it by pulling it loose from the tank hatch. The new cap does not have a strap.
|
|
3.
|
Fit the new filler cap.
|
|
Marking the modification identity plate
|
After completion of the procedure, the modification identity plate must be marked as follows:
Model year
|
Modification identity plate box
|
M98
|
C5
|
M99
|
D5 (new modification identity plate)
|
M00
|
A5
|
M01-02
|
C5
|
If the procedure has been performed by an importer, mark the box "7". Mark with "8" if the procedure has been performed by a dealer.
|
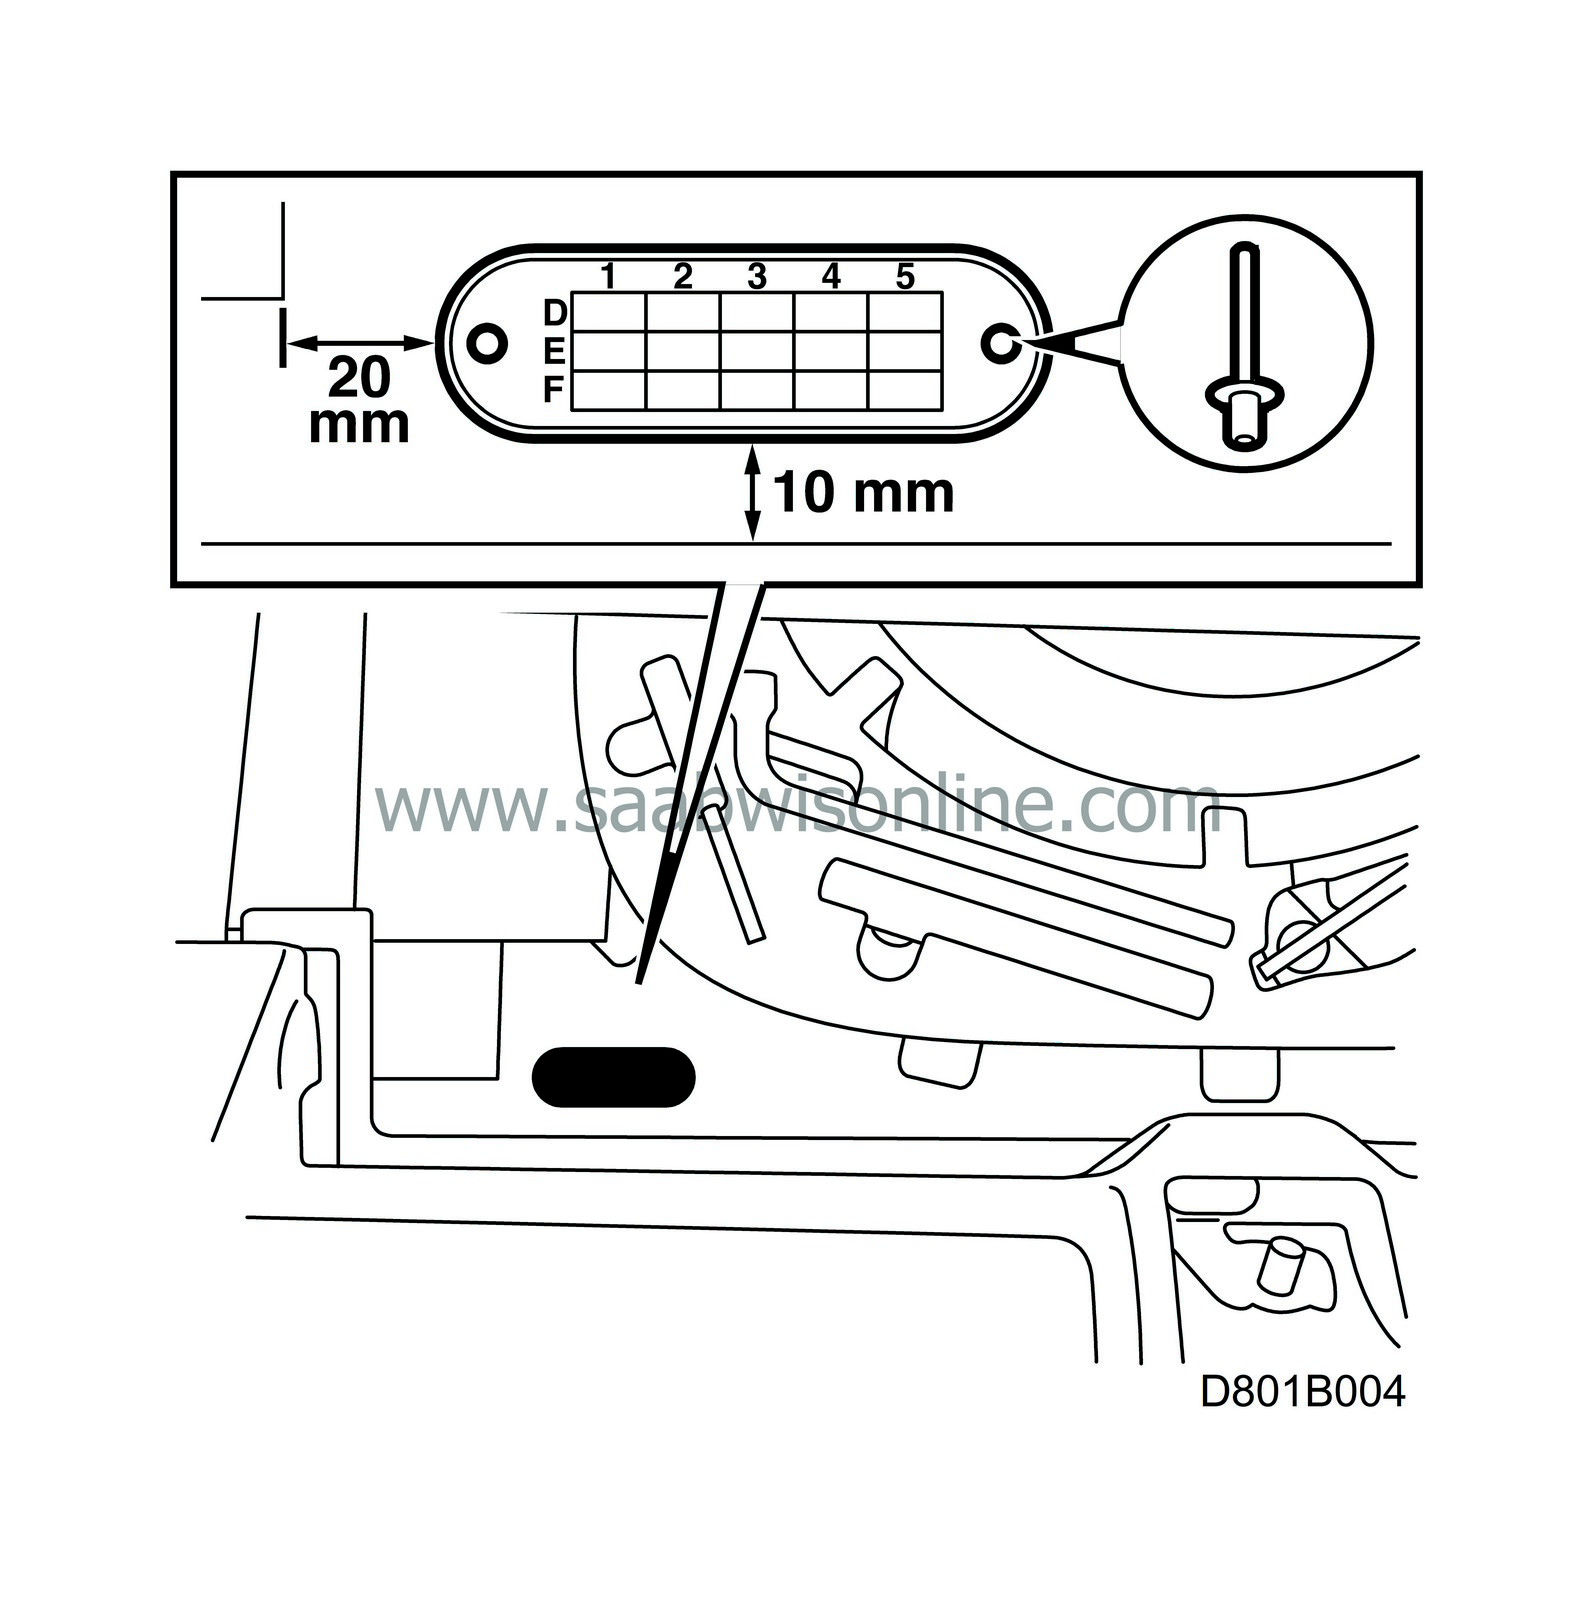
Fitting modification identity plate, M99
|
|
1.
|
Open the boot lid and fold up the boot mat.
|
|
2.
|
Position the modification identity plate as shown in the illustration without removing the protective paper from the back.
|
|
3.
|
Mark the drill holes and drill with a 4 mm bit.
|
|
4.
|
Apply anti-corrosion treatment to the inside of the holes.
|
|
5.
|
Remove the protective paper from the back of the modification identity plate and align the plate with the holes. Fit the modification identity plate with the pop rivets.
|
|
6.
|
Apply anti-corrosion treatment to the underside of the floor.
|
|
7.
|
Remove burrs from the boot with a vacuum and fold the boot mat back into place. Close the boot lid.
|
|
Standard times-/Warranty information
|
See separate information.


