P1847, P1848 , P1849
Symptom: CHECK GEARBOX warning lamp on.
TCM in Limp-Home mode.
Solenoid Pressure Regulation. Open Circuit / Short to Ground.
Solenoid Pressure Regulation. Short to B+.
Solenoid Pressure Regulation. Solenoid Shorted.
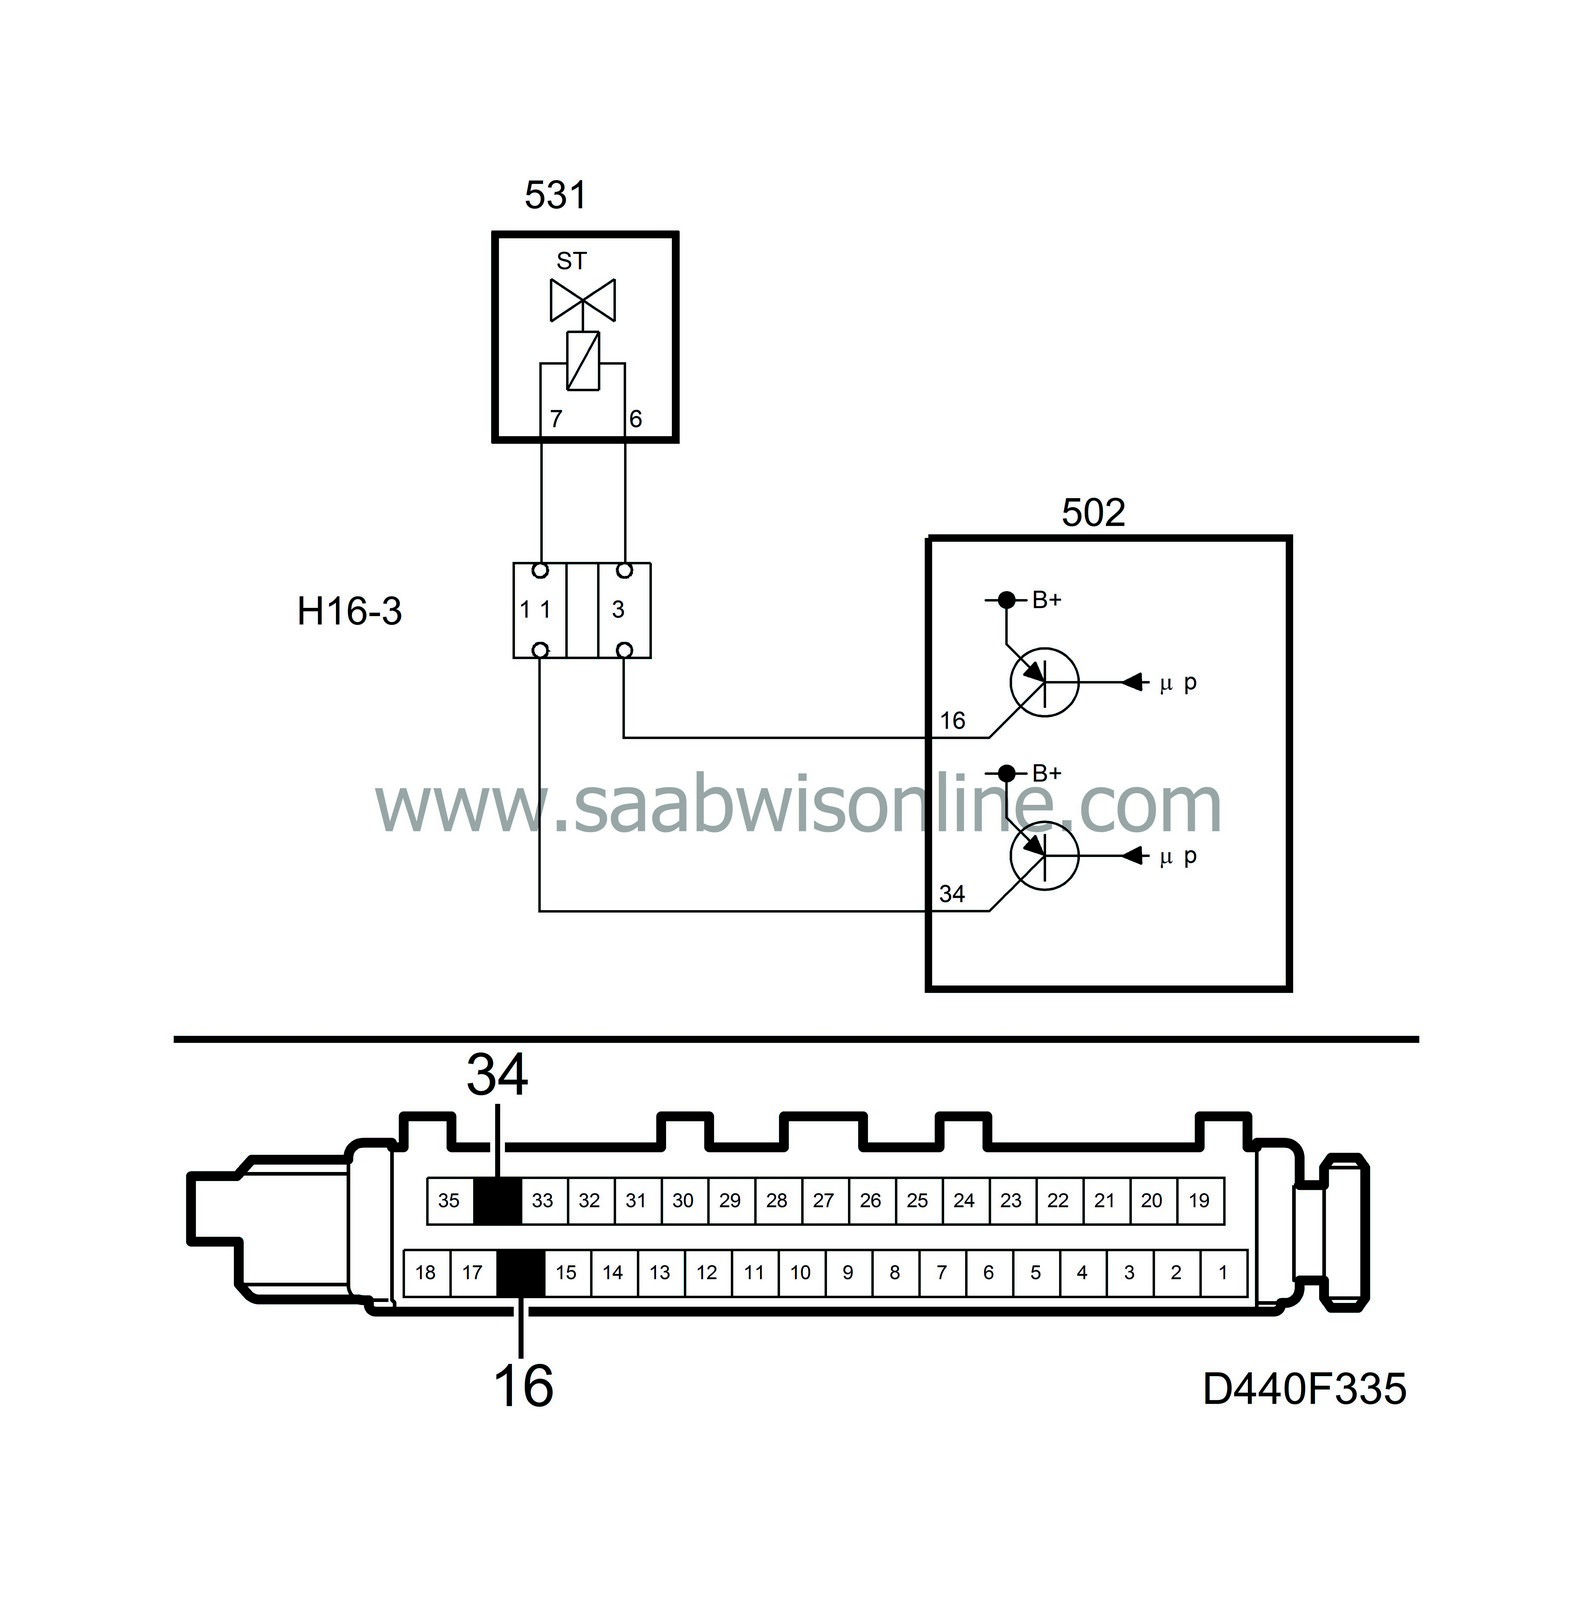
Fault symptoms
CHECK GEARBOX warning lamp on.
TCM in Limp-Home mode.
Conditions
P1847: Short circuit to Ground/Open circuit
P1848: Short circuit to B+.
P1849: Short-circuited Solenoid.
Diagnostic help
The status of the pressure control solenoid can be ascertained with the diagnostics instrument.
Select "
Data Display / Output Control (New)"
Select "
Solenoid Pressure Regulation (mA)"
The pressure control solenoid regulates the transmission's system pressure.
The pressure control solenoid can be activated with the diagnostics instrument.
|
-
|
Select "
Data Display / Output Control (New)"
|
|
-
|
Select "
Solenoid Pressure Regulation"
|
Check the wiring
Jiggle the wiring harness at several points and in different directions to reveal intermittent breaks and short circuits in the various leads. Observe the multimeter, test lamp or diagnostic instrument while carrying out this check.
Diagnostic procedure
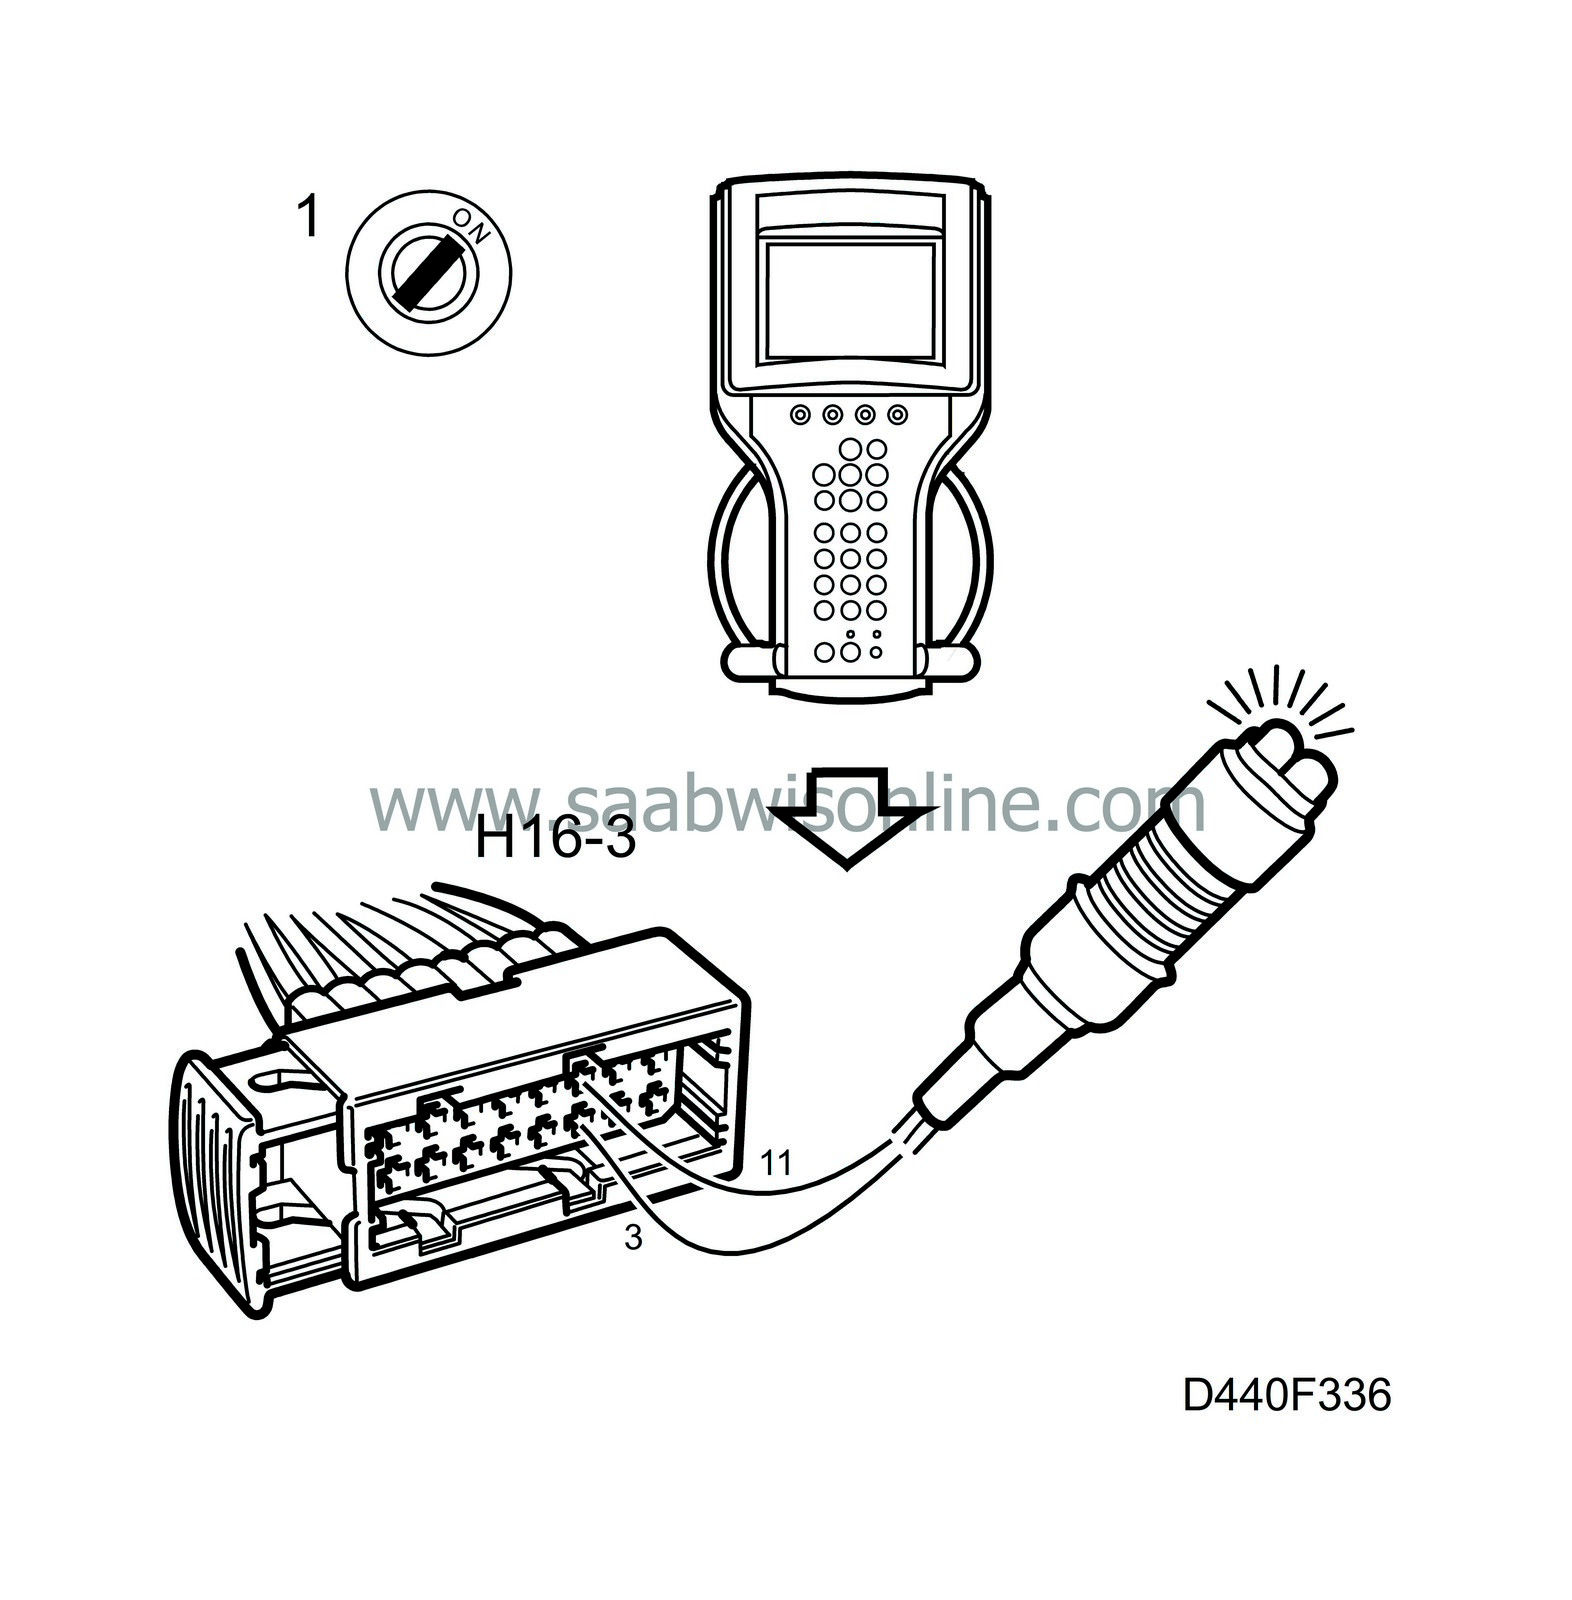
1 Check the control module outputs to the pressure control solenoid.
|
-
|
Unplug connector H16-3 by the battery tray.
|
|
-
|
Connect a test lamp between pin 3 and pin 11 in the female connector.
|
|
-
|
Connect a diagnostic tool.
|
|
-
|
Turn the ignition to the ON position.
|
|
-
|
Activate “
Solenoid Pressure Regulation”.
|
The lamp should light up dimly.
All OK?
Continue with step 2.
Rectify the relevant lead and continue with step 4, final check.
2 Check the wiring harness from the 16-pin connector to the grommet into the gearbox.
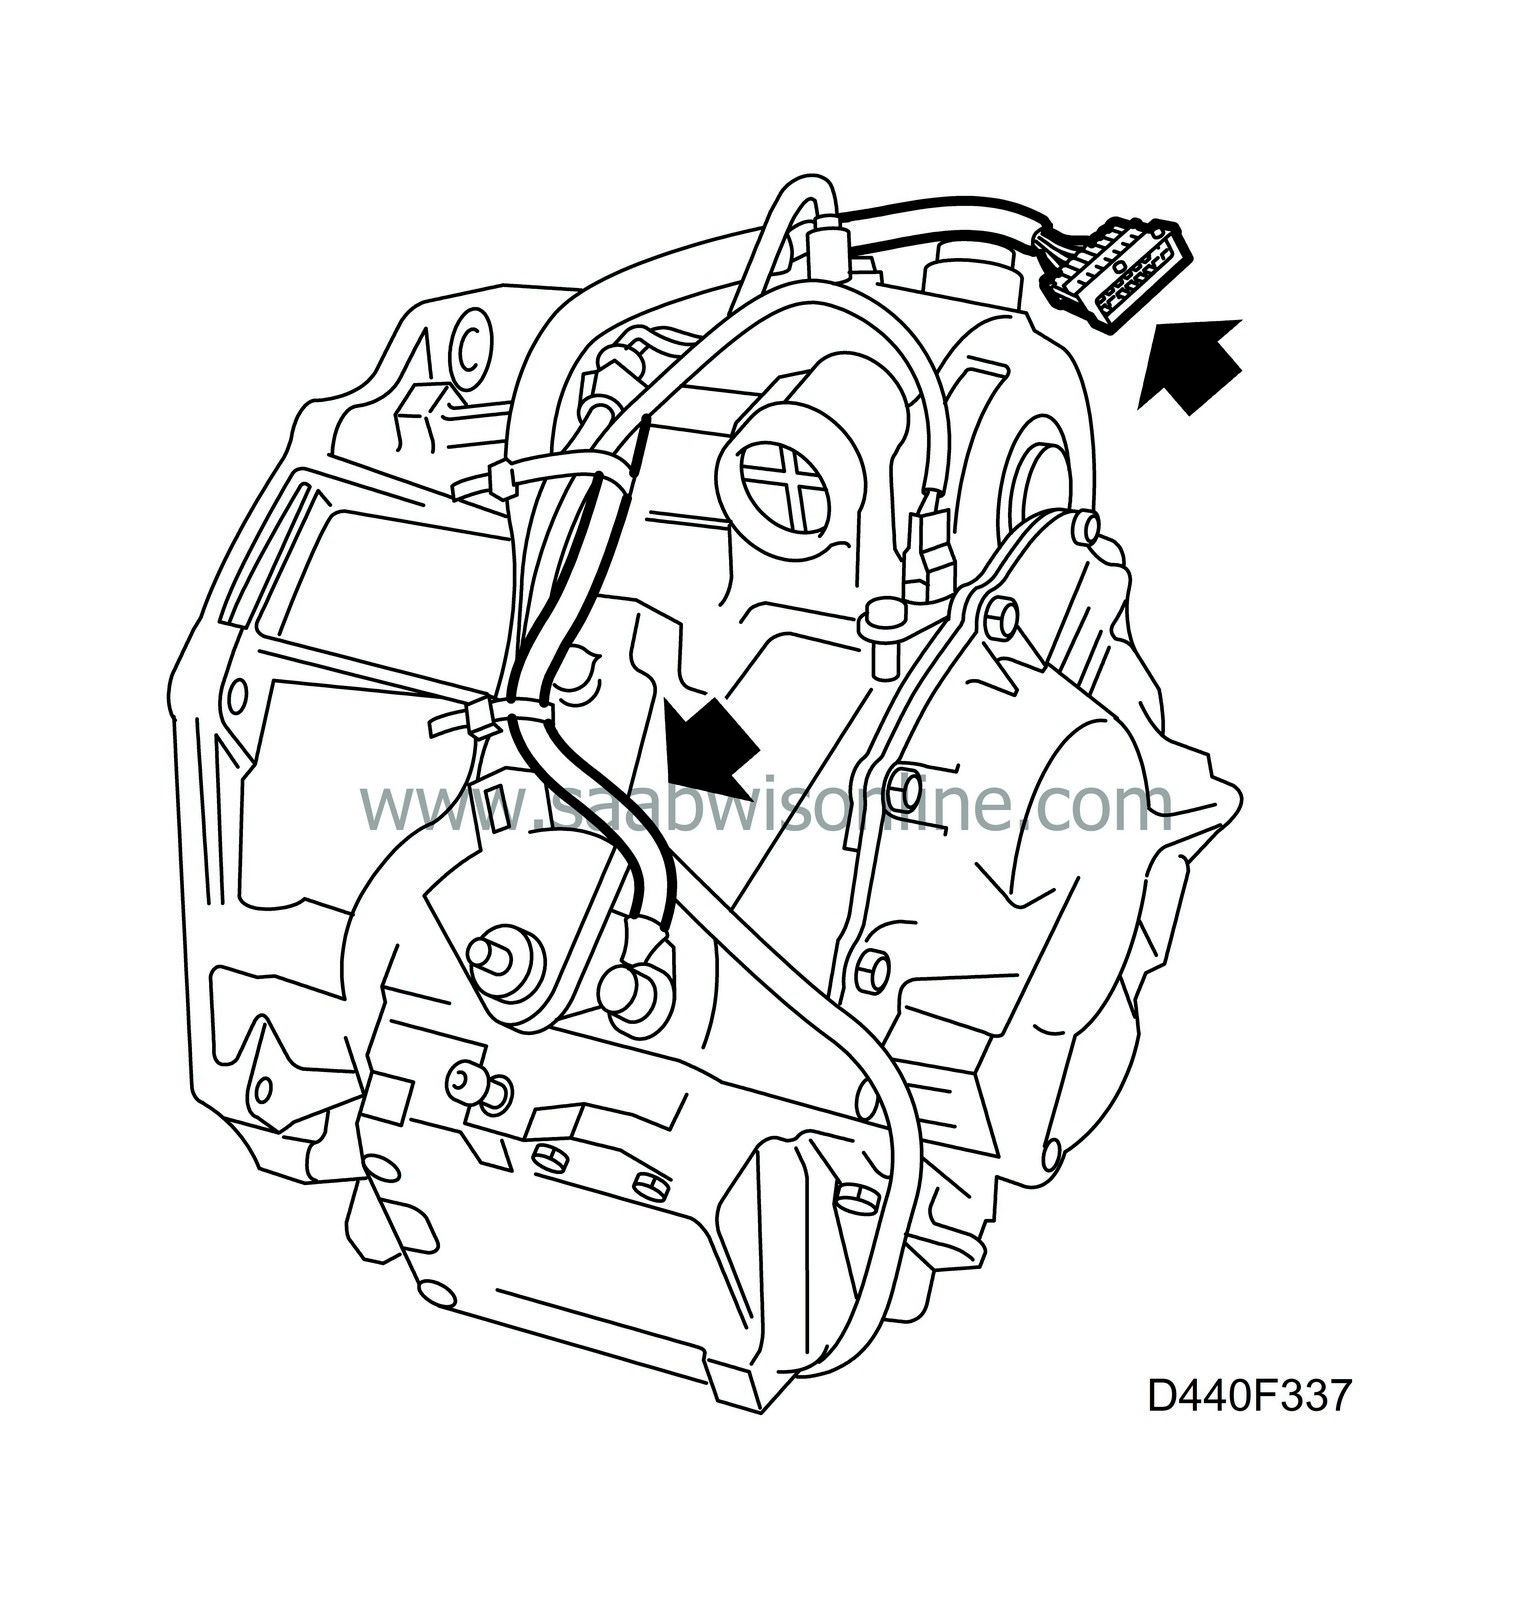
Inspect for external damage to the wiring harness.
Is there any external damage?
Rectify the damage and continue with step 4, final check.
Continue with step 3.
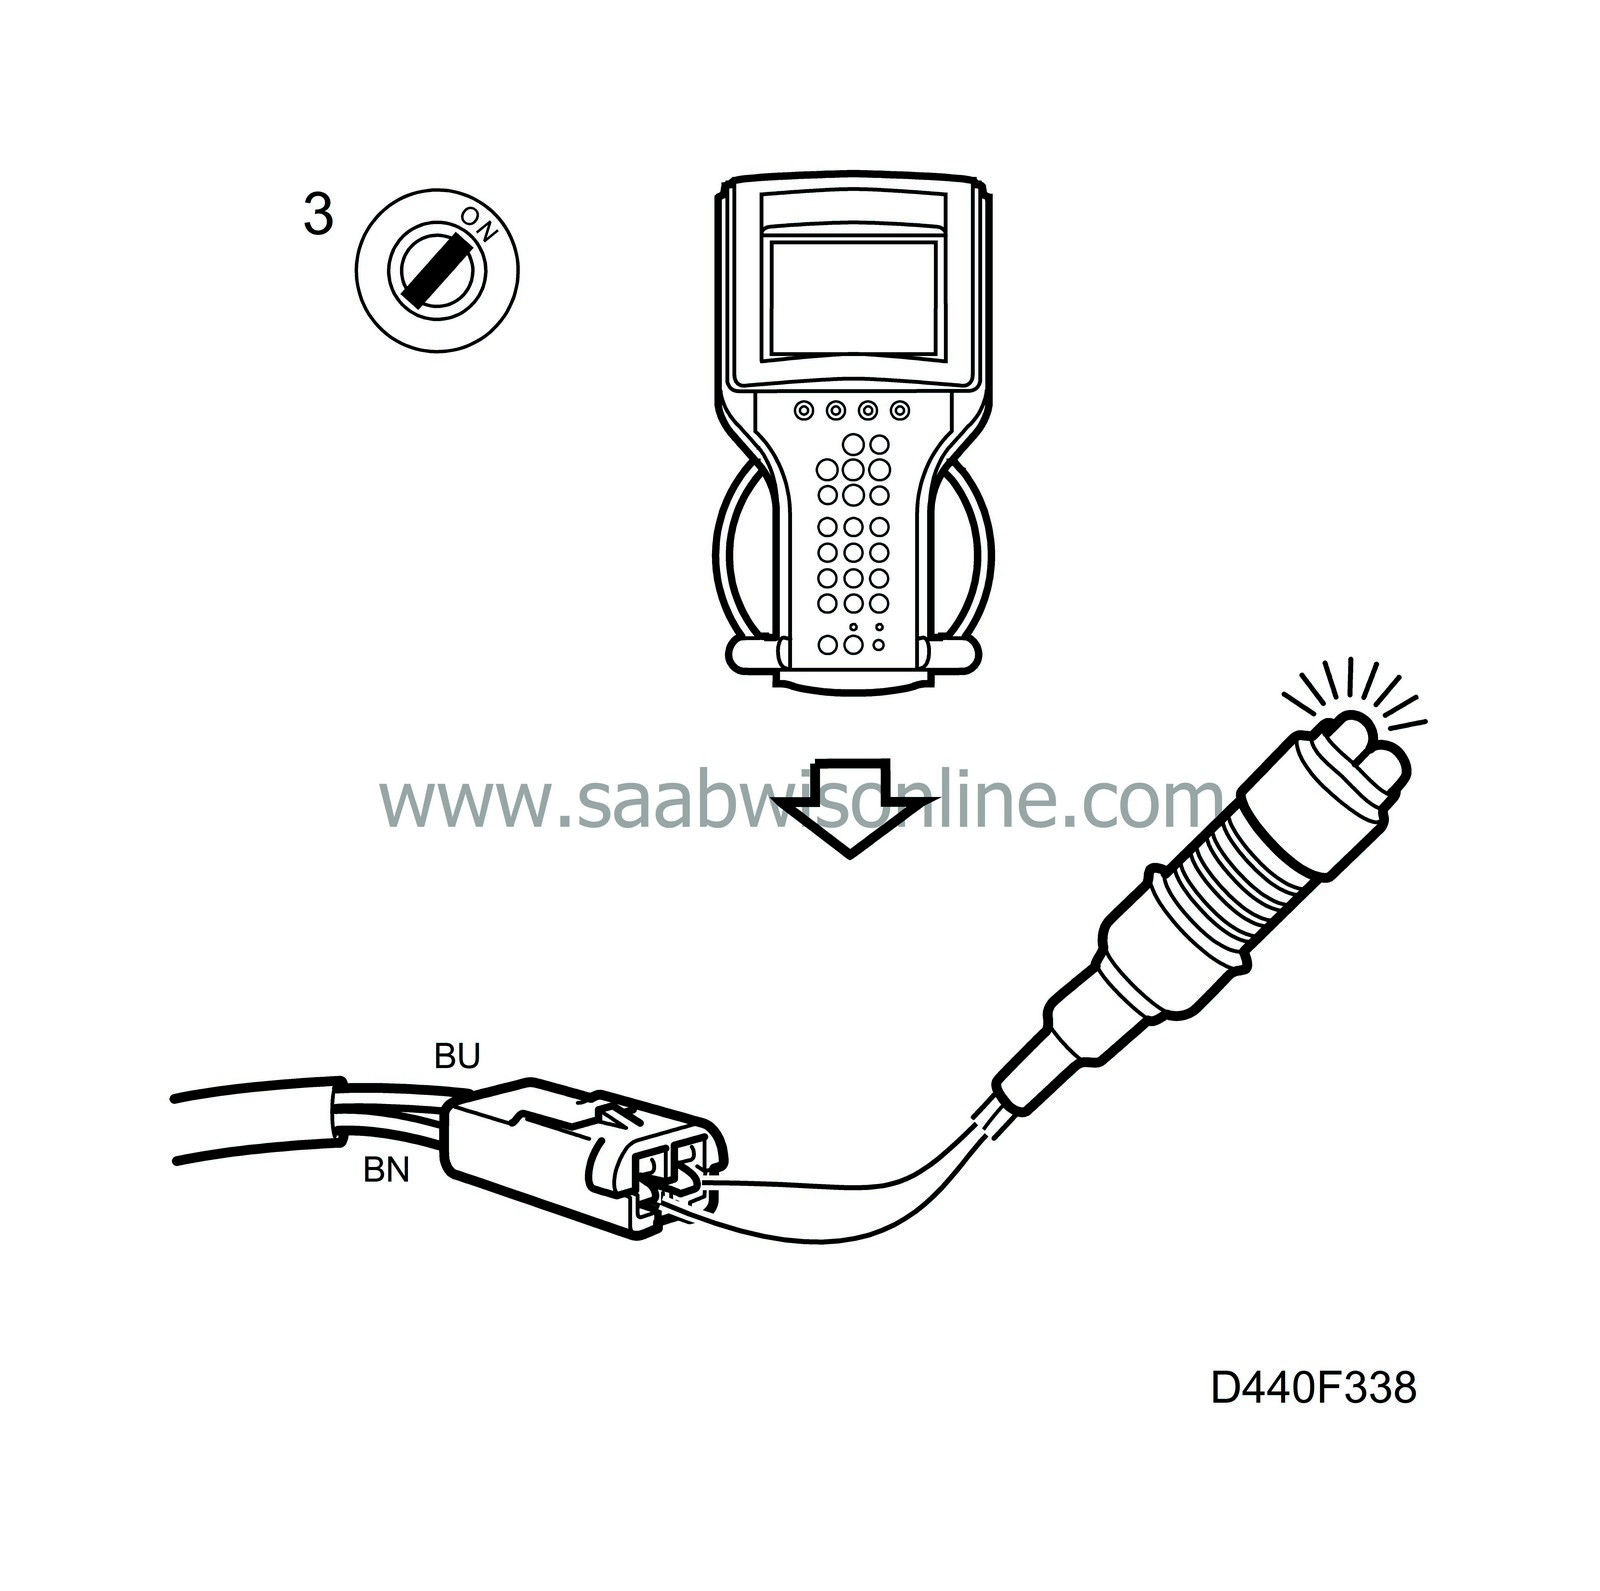
3 Check the lead between the 16-pin connector and the pressure control solenoid.
|
-
|
Plug in connector H16-3 by the battery tray.
|
|
-
|
Remove the cover on the valve housing.
|
|
-
|
Unplug the connector for the pressure control solenoid.
|
|
-
|
Connect a test lamp between pin 1 and pin 2 in the female connector.
|
|
-
|
Connect a diagnostic tool.
|
|
-
|
Turn the ignition to the ON position.
|
|
-
|
Activate “
Solenoid Pressure Regulation”.
|
The lamp should light up dimly.
All OK?
Change the pressure control solenoid and continue with step 4, final check.
Rectify the relevant lead between the connector for the pressure control solenoid and pin 3 respectively pin 11 in the 16-pin connector and continue with step 4, final check.
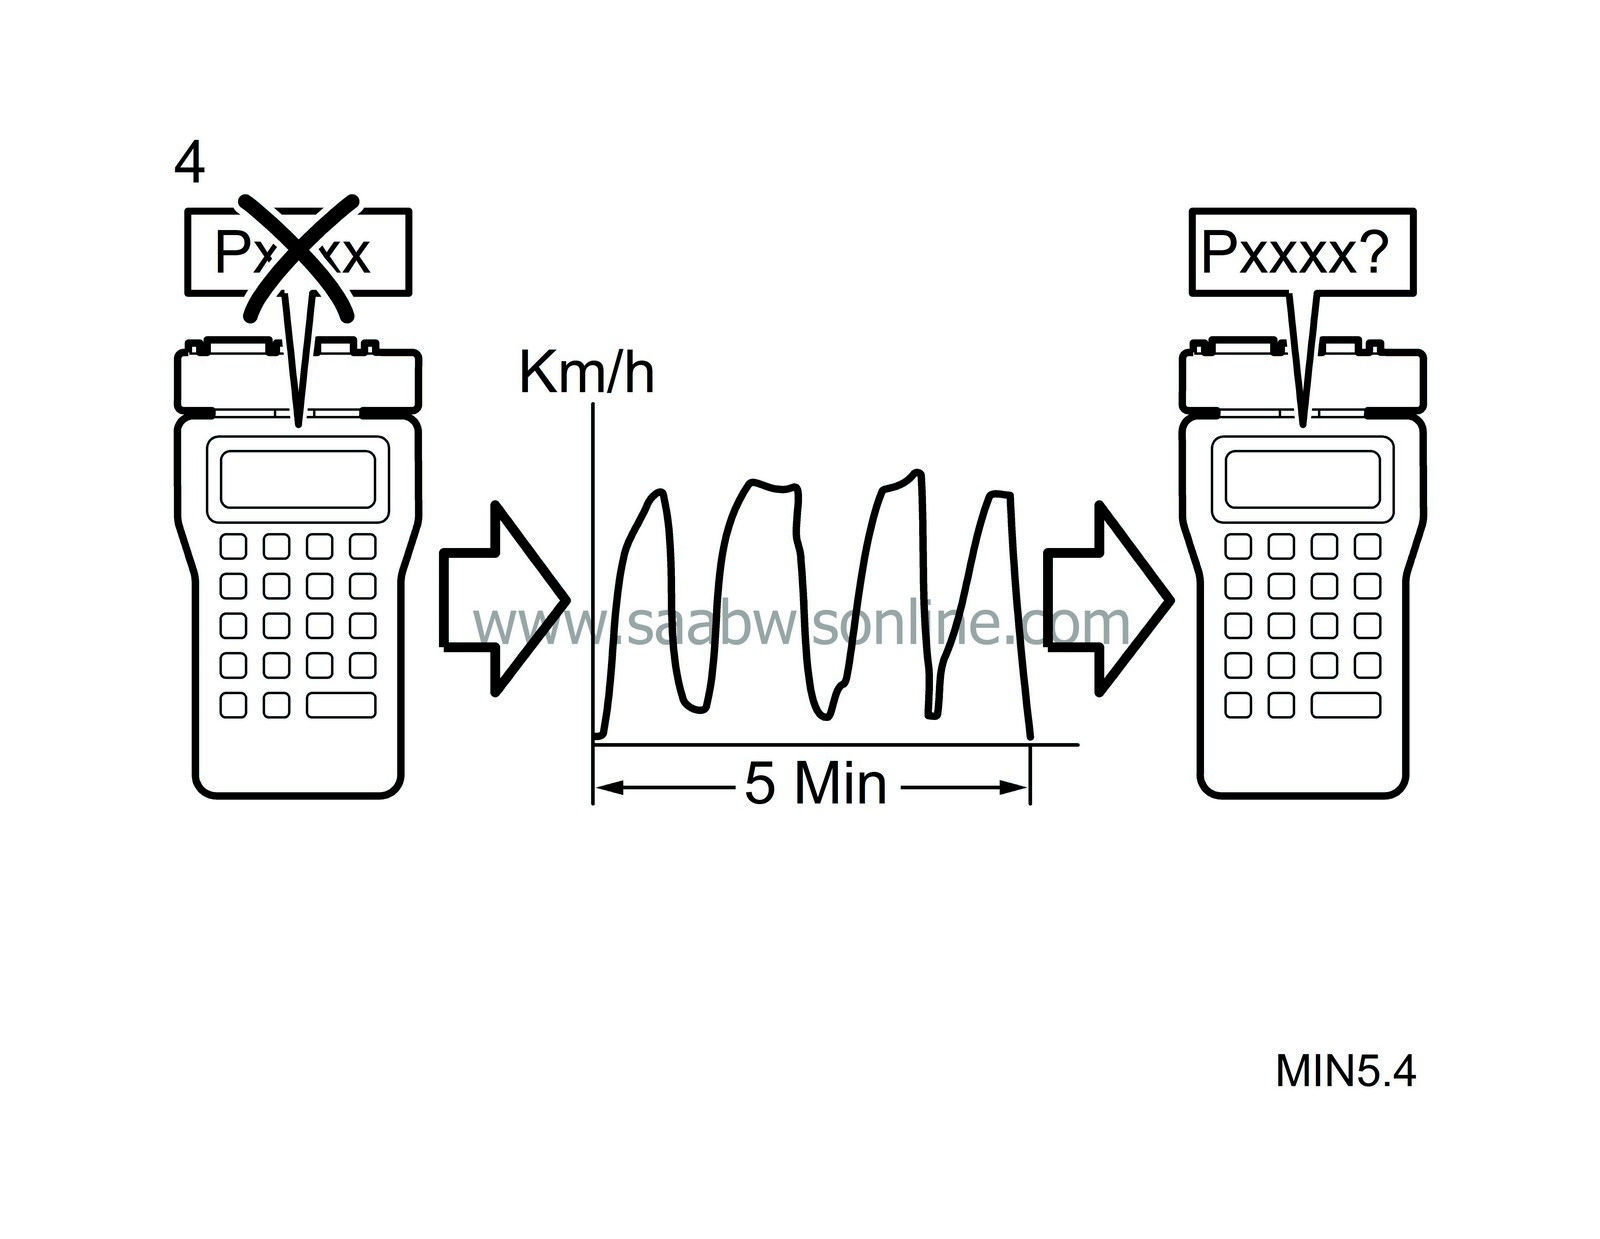
4 Final check
|
-
|
Clear all diagnostic trouble codes in the system.
|
|
-
|
Perform a driving cycle:
|
|
|
•
|
Drive the car at varying loads and engine speeds for 5 minutes.
|
|
-
|
Evaluate the driving cycle:
|
|
|
•
|
Make sure the trouble code has not recurred.
|
Has the trouble code recurred?
Continue with “
Diagnostic procedure before replacing control module
"
The steps taken to rectify the fault were correct.


