P1852, P1853
Symptom: CHECK GEARBOX warning lamp on.
TCM in Limp-Home mode.
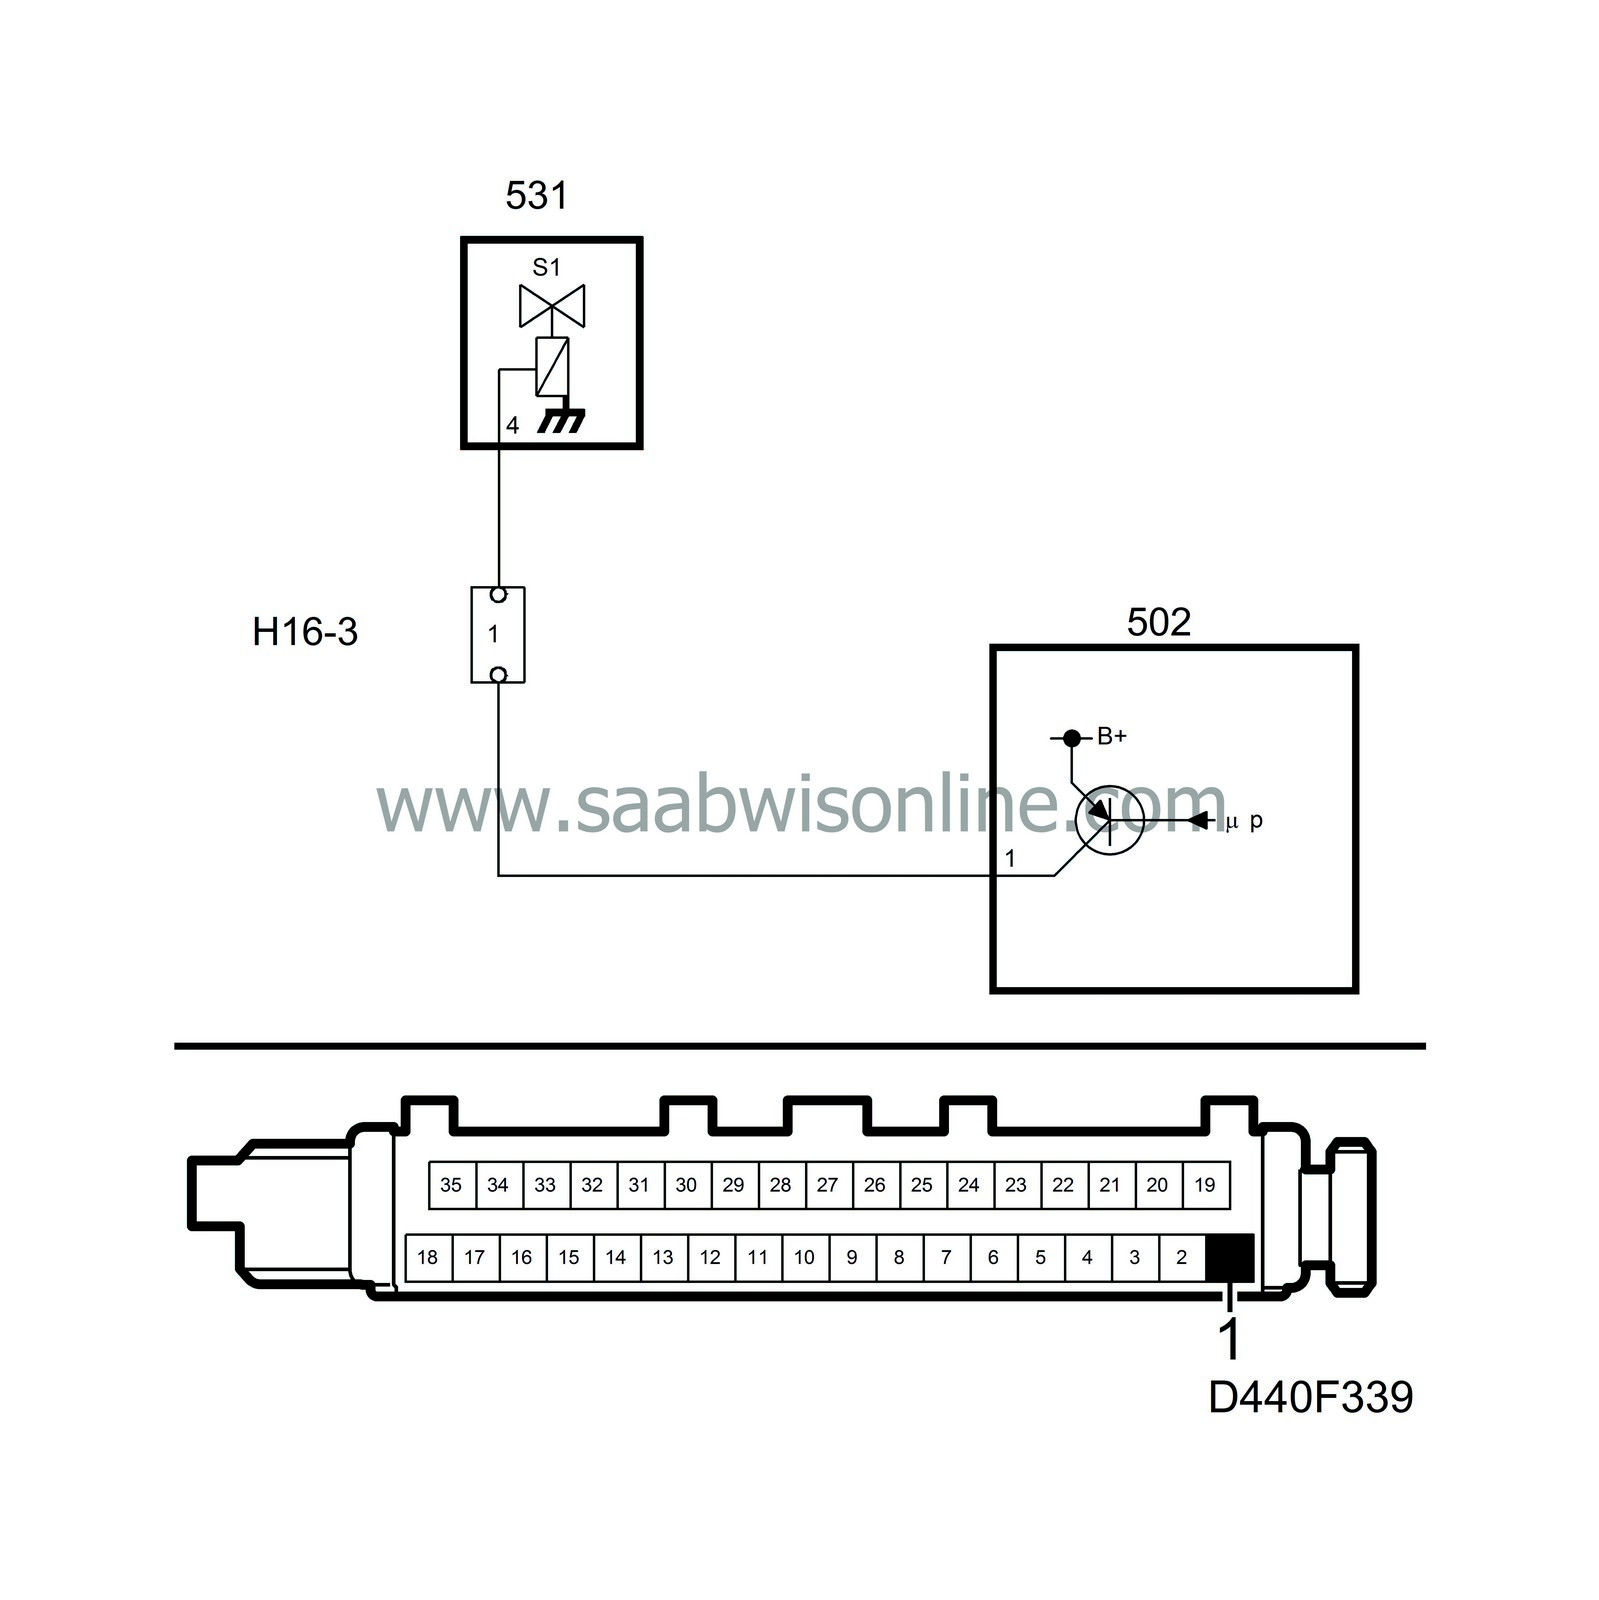
Solenoid 1-2/3-4. Short to Ground.
Solenoid 1-2/3-4. Open Circuit / Short to B+.
Fault symptoms
CHECK GEARBOX warning lamp on.
TCM in Limp-Home mode.
Conditions
P1852: Short circuit to ground.
P1853: Short circuit or open circuit to B+
Diagnostic help
The status of the 1-2/3-4 shift solenoid (S1) can be ascertained with the diagnostics instrument.
Select "
Data Display / Output Control (New)"
Select "
Solenoid 1-2/3-4 (S1)"
The 1-2/3-4 shift solenoid (S1) should be activated (ON) in 1st and 3rd gears when the car is being driven and not activated (OFF) in the other gears.
The 1-2/3-4 shift solenoid (S1) can be activated with the diagnostics instrument.
|
-
|
Activate “
Solenoid 1-2/3-4”
|
Diagnostic procedure
1 Check the control module outputs to solenoid 1-2/3-4 (S1).
|
-
|
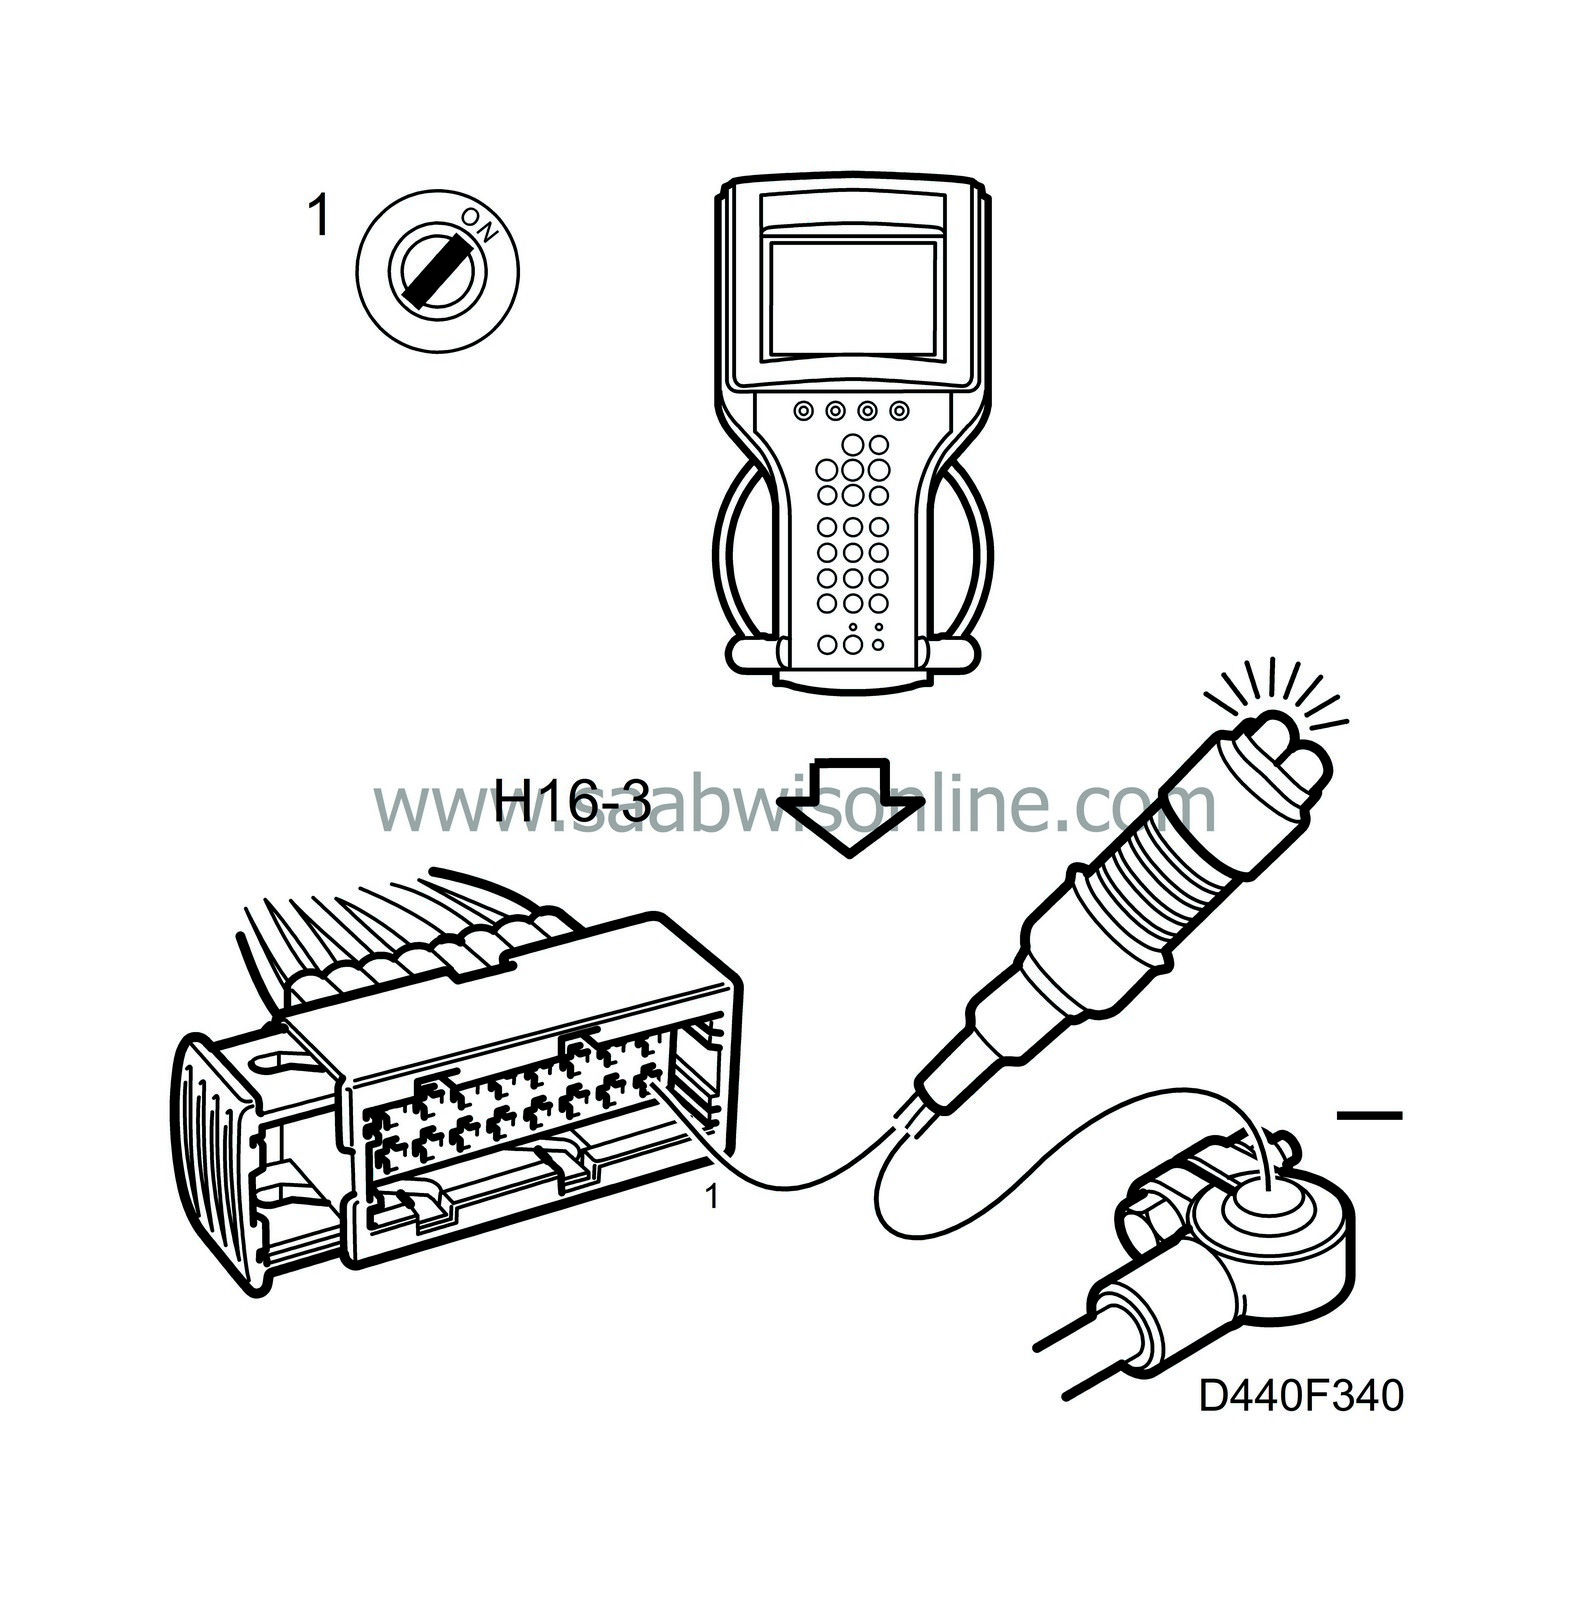
Unplug connector H16-3 by the battery tray.
|
|
-
|
Connect a test lamp between pin 1 in the female connector and a good grounding point.
|
|
-
|
Connect a diagnostic tool.
|
|
-
|
Turn the ignition to the ON position.
|
|
-
|
Activate “
Solenoid 1-2/3-4”.
|
The lamp should go on.
All OK?
Continue with step 2.
Rectify the relevant lead and continue with step 4, final check.
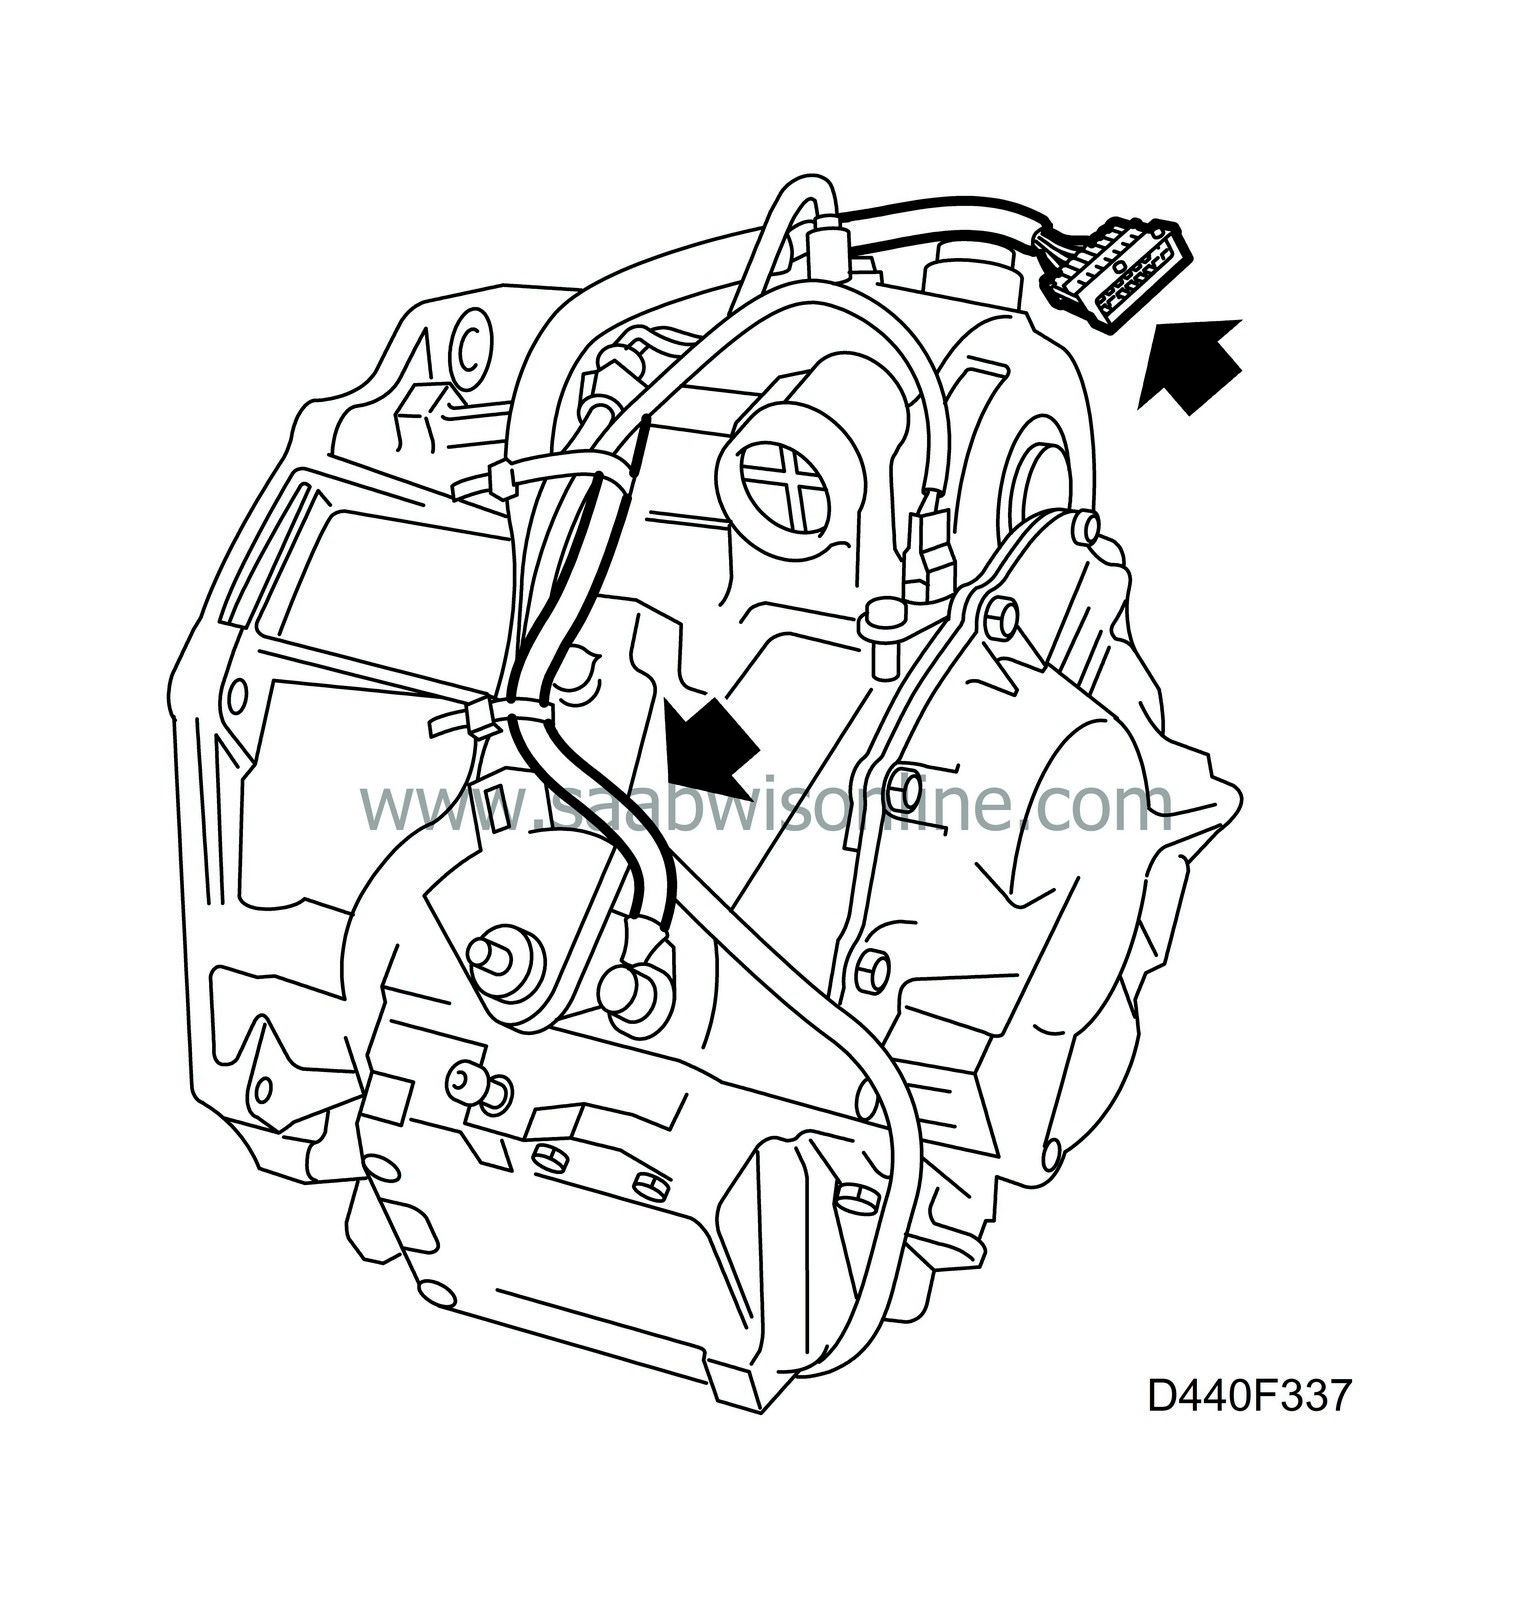
2 Check the wiring harness from the 16-pin connector to the grommet into the gearbox.
|
-
|
Turn the ignition key to the OFF position
|
Inspect for external damage to the wiring harness.
Is there any external damage?
Rectify the damage and continue with step 4, final check.
Continue with step 3.
3 Check the lead between the 16-pin connector and Solenoid S1.
|
-
|
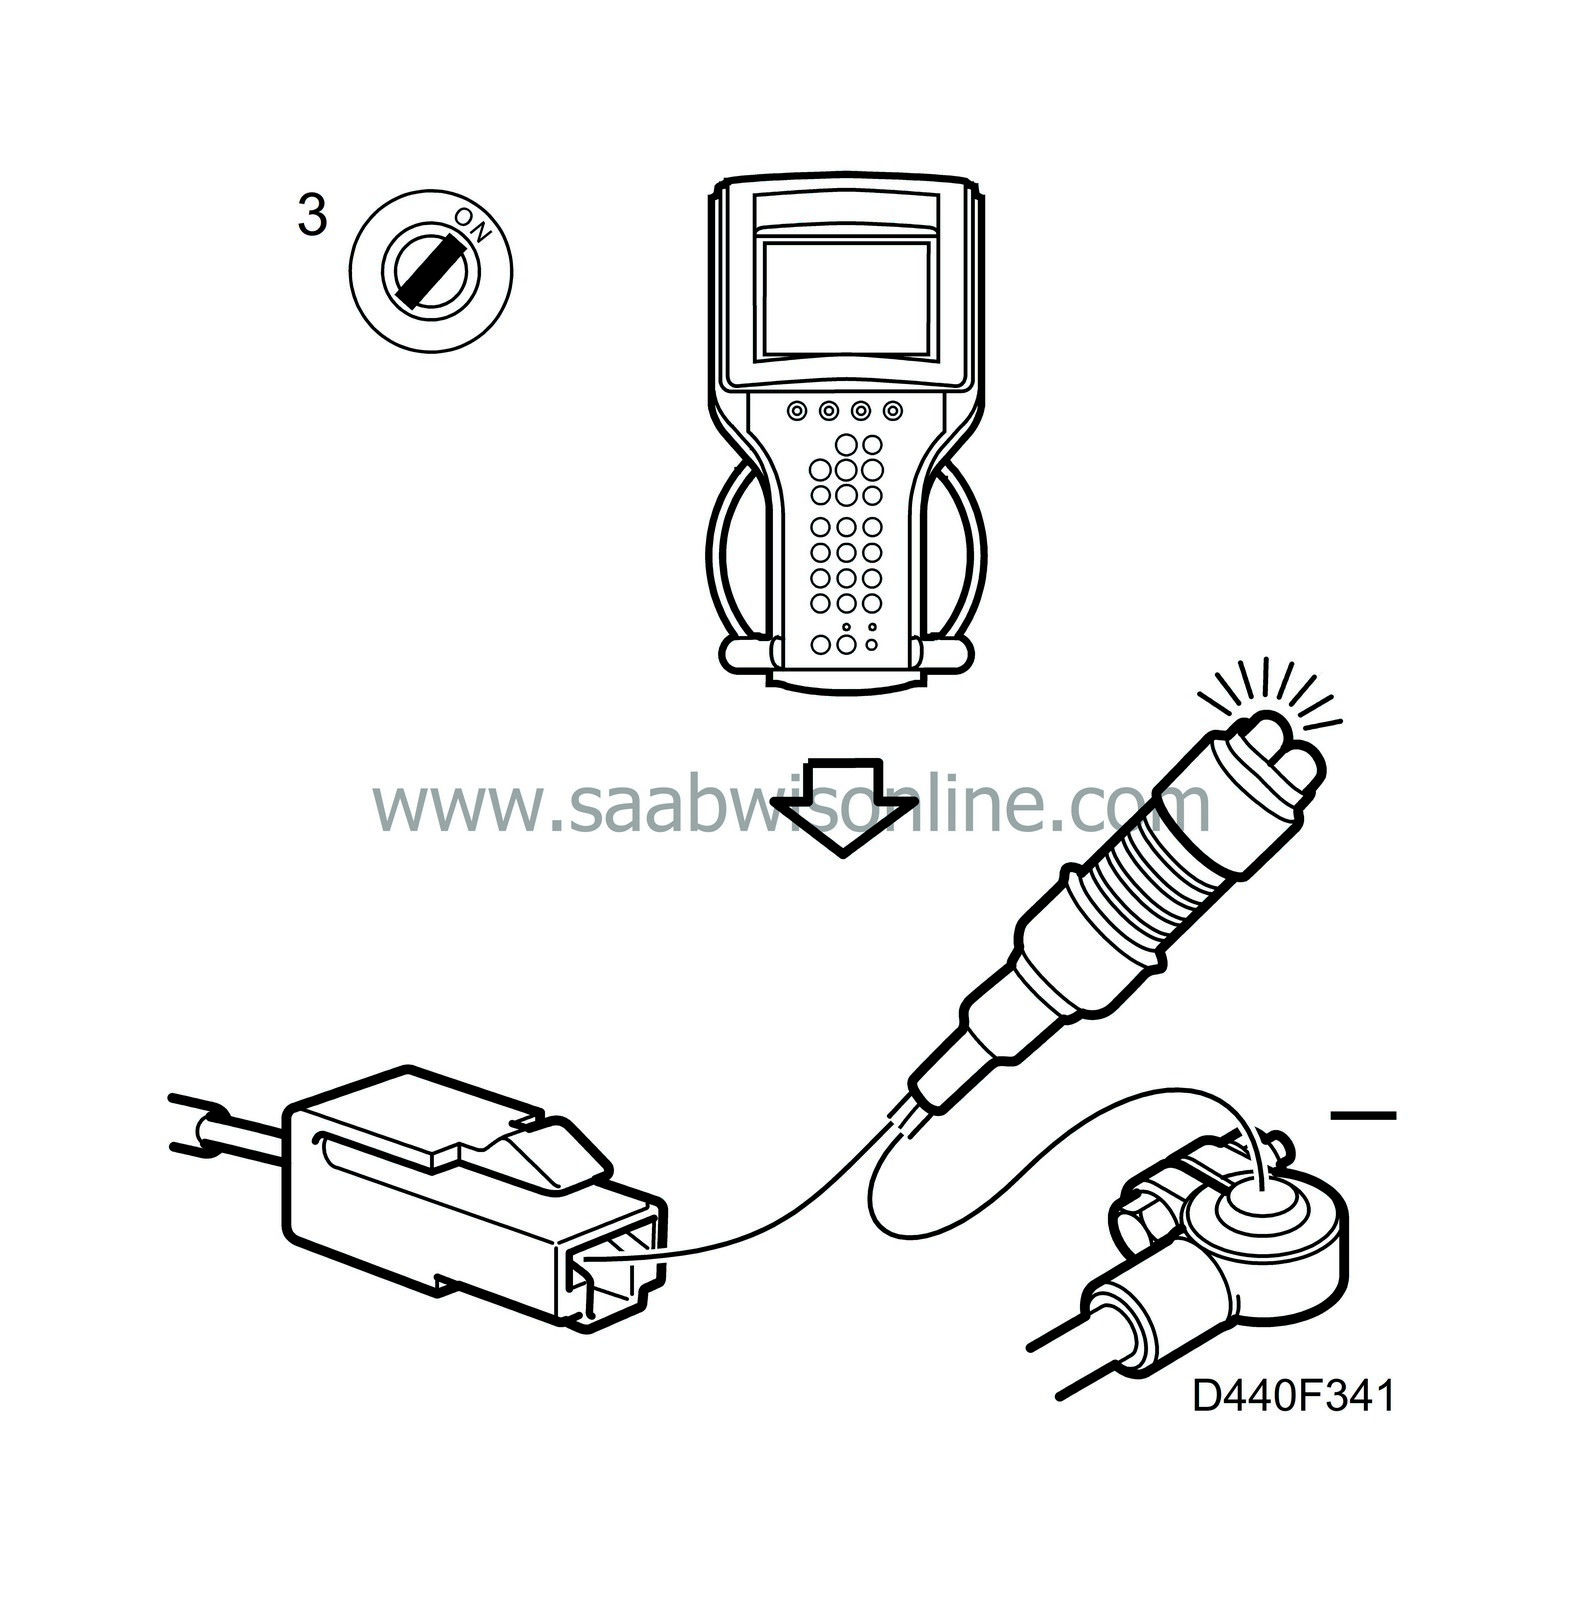
Plug in connector H16-3 by the battery tray.
|
|
-
|
Remove the cover on the valve housing.
|
|
-
|
Unplug the connector for solenoid 1-2/3-4 (S1).
|
|
-
|
Connect a test lamp between the connector pin and a good grounding point.
|
|
-
|
Connect a diagnostic tool.
|
|
-
|
Turn the ignition to the ON position.
|
|
-
|
Activate “
Solenoid 1-2/3-4”.
|
The lamp should go on.
All OK?
Change solenoid 1-2/3-4 (S1) and continue with step 4, final check.
Rectify the relevant lead between the connector for solenoid 1-2/3-4 (S1) and pin 1 in the 16-pin connector, and continue with step 4, final check.
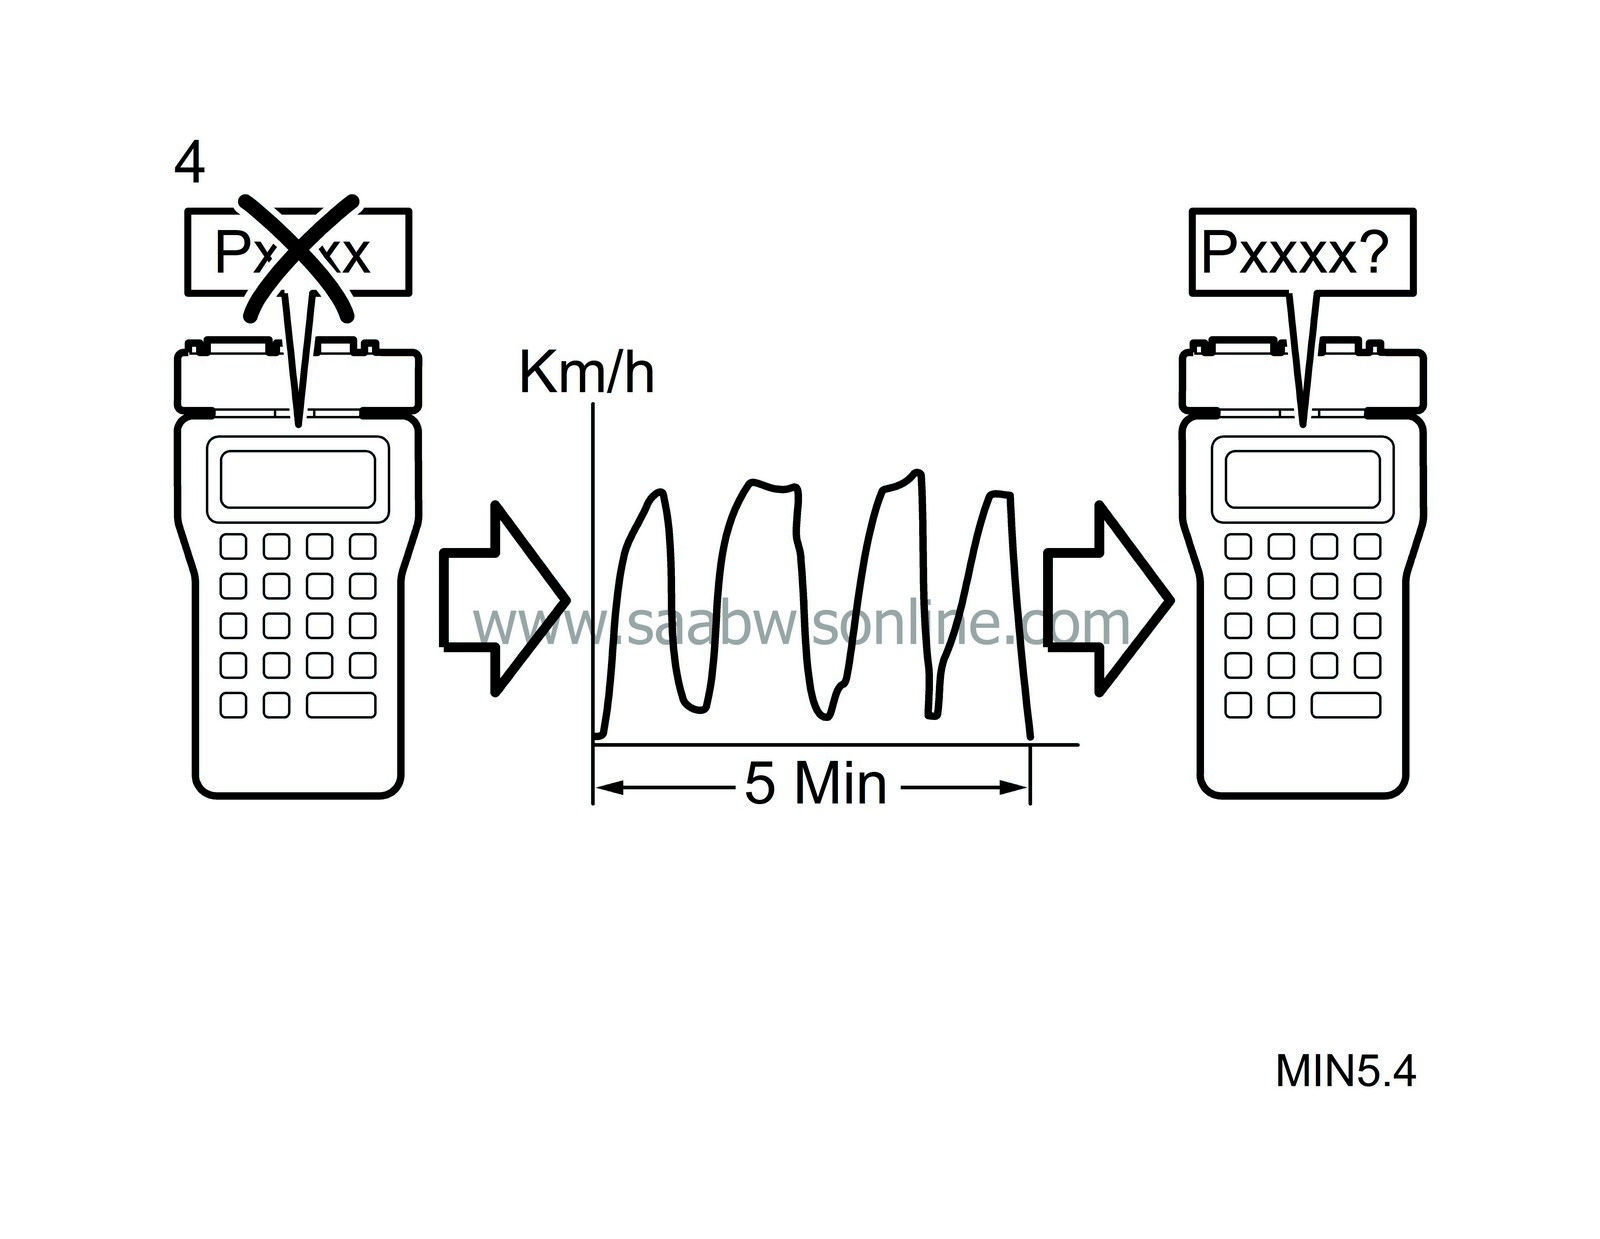
4 Final check
|
-
|
Clear all diagnostic trouble codes in the system.
|
|
-
|
Perform a driving cycle:
|
|
|
•
|
Drive the car at varying loads and engine speeds for 5 minutes.
|
|
-
|
Evaluate the driving cycle:
|
|
|
•
|
Make sure the trouble code has not recurred.
|
Has the trouble code recurred?
Continue with “
Diagnostic procedure before replacing control module
"
The steps taken to rectify the fault were correct.


