Intermediate shaft (Petrol)
|
|
Intermediate shaft (Petrol)
|
|
1.
|
Disconnect the battery's negative lead.
|
|
2.
|
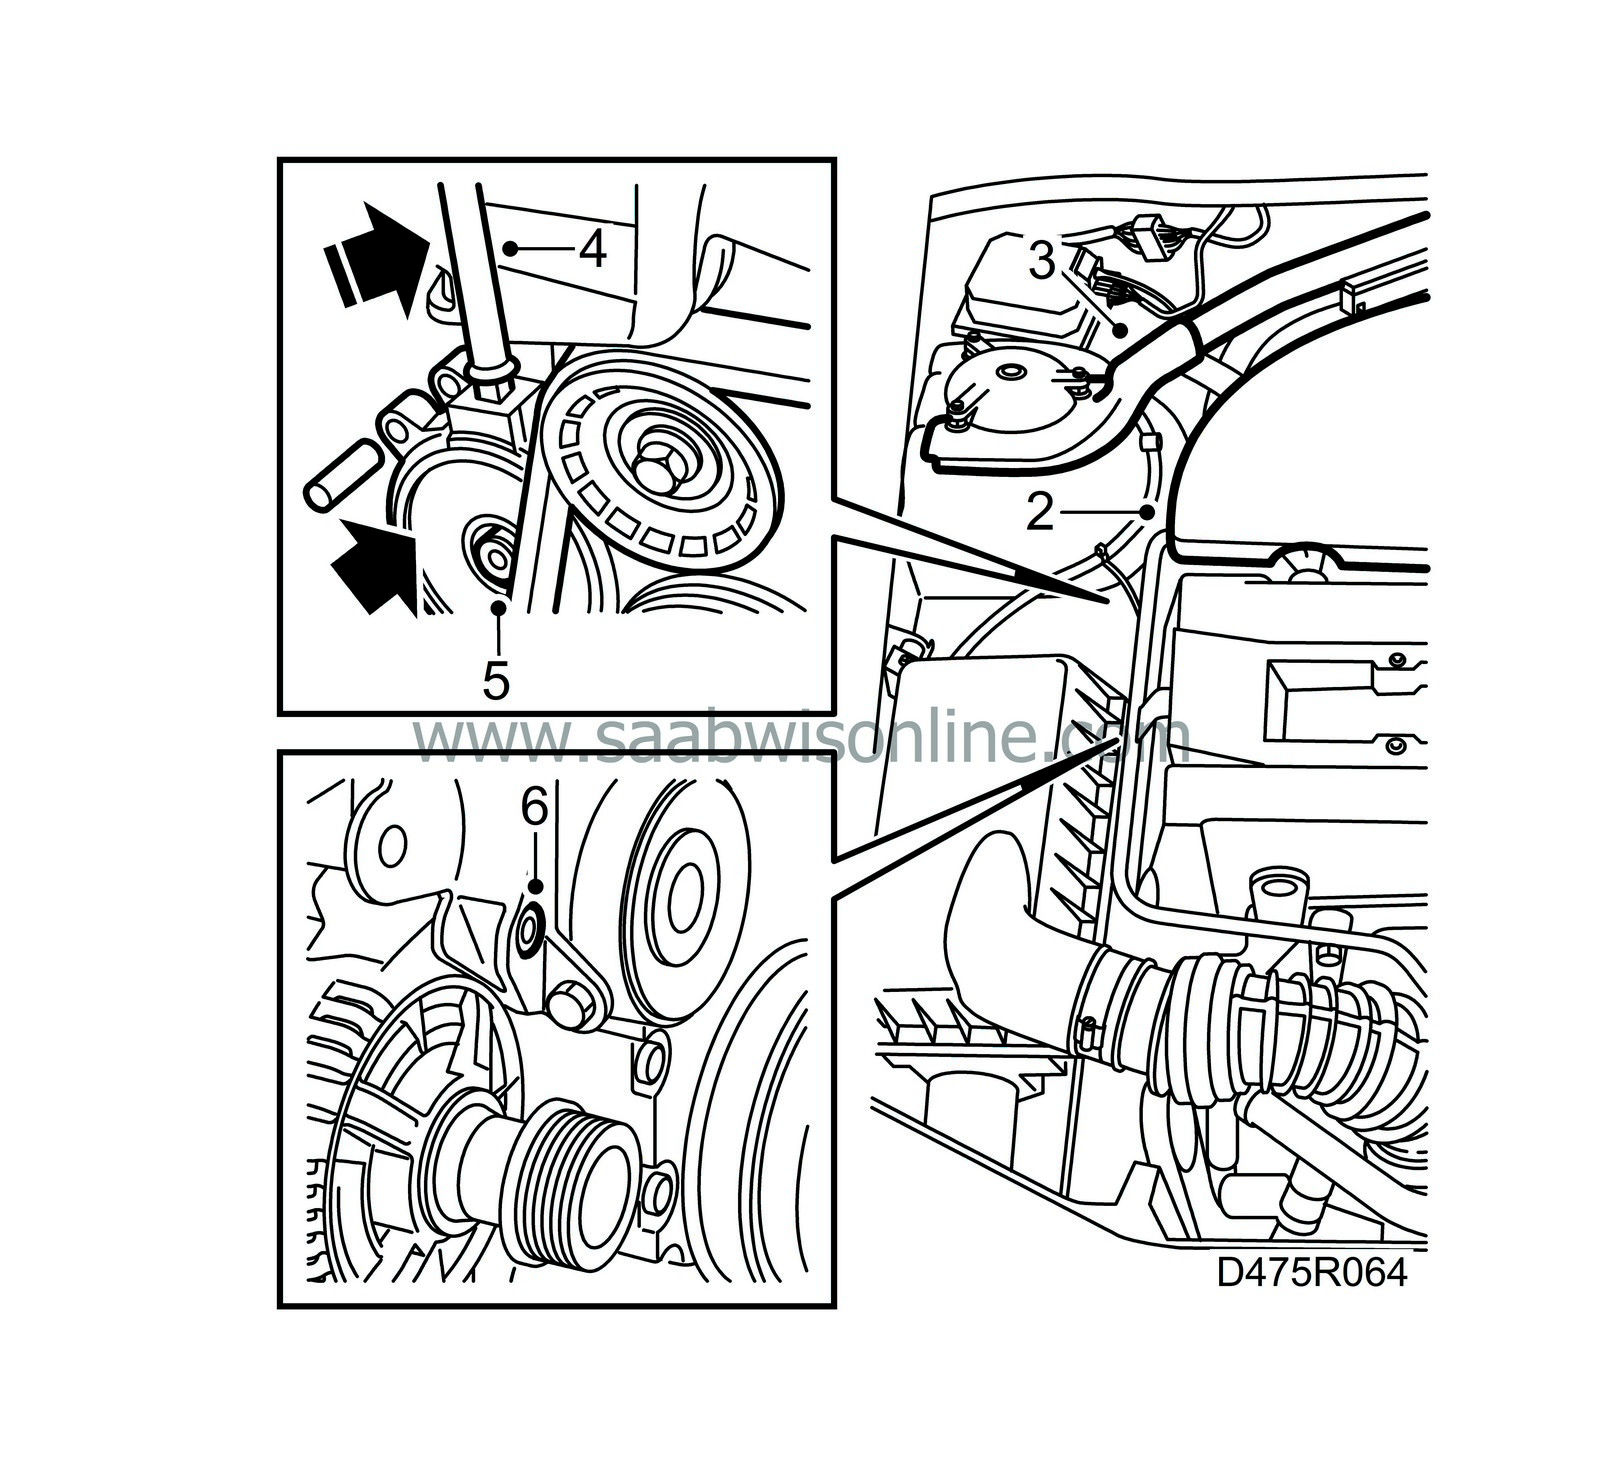
Place wing protectors over the wings and remove the upper engine cover.
|
|
3.
|
Remove the stay between the suspension strut towers
(RHD only)
.
|
|
4.
|
Use a ½" flexible handle to relieve the belt tensioner of tension.
|
|
5.
|
Remove the belt tensioner, using an 8 mm Allen key.
|
|
6.
|
Remove the generator's upper screw, using an 8 mm Allen key.
|
|
8.
|
Remove the right-hand wheel.
|
|
9.
|
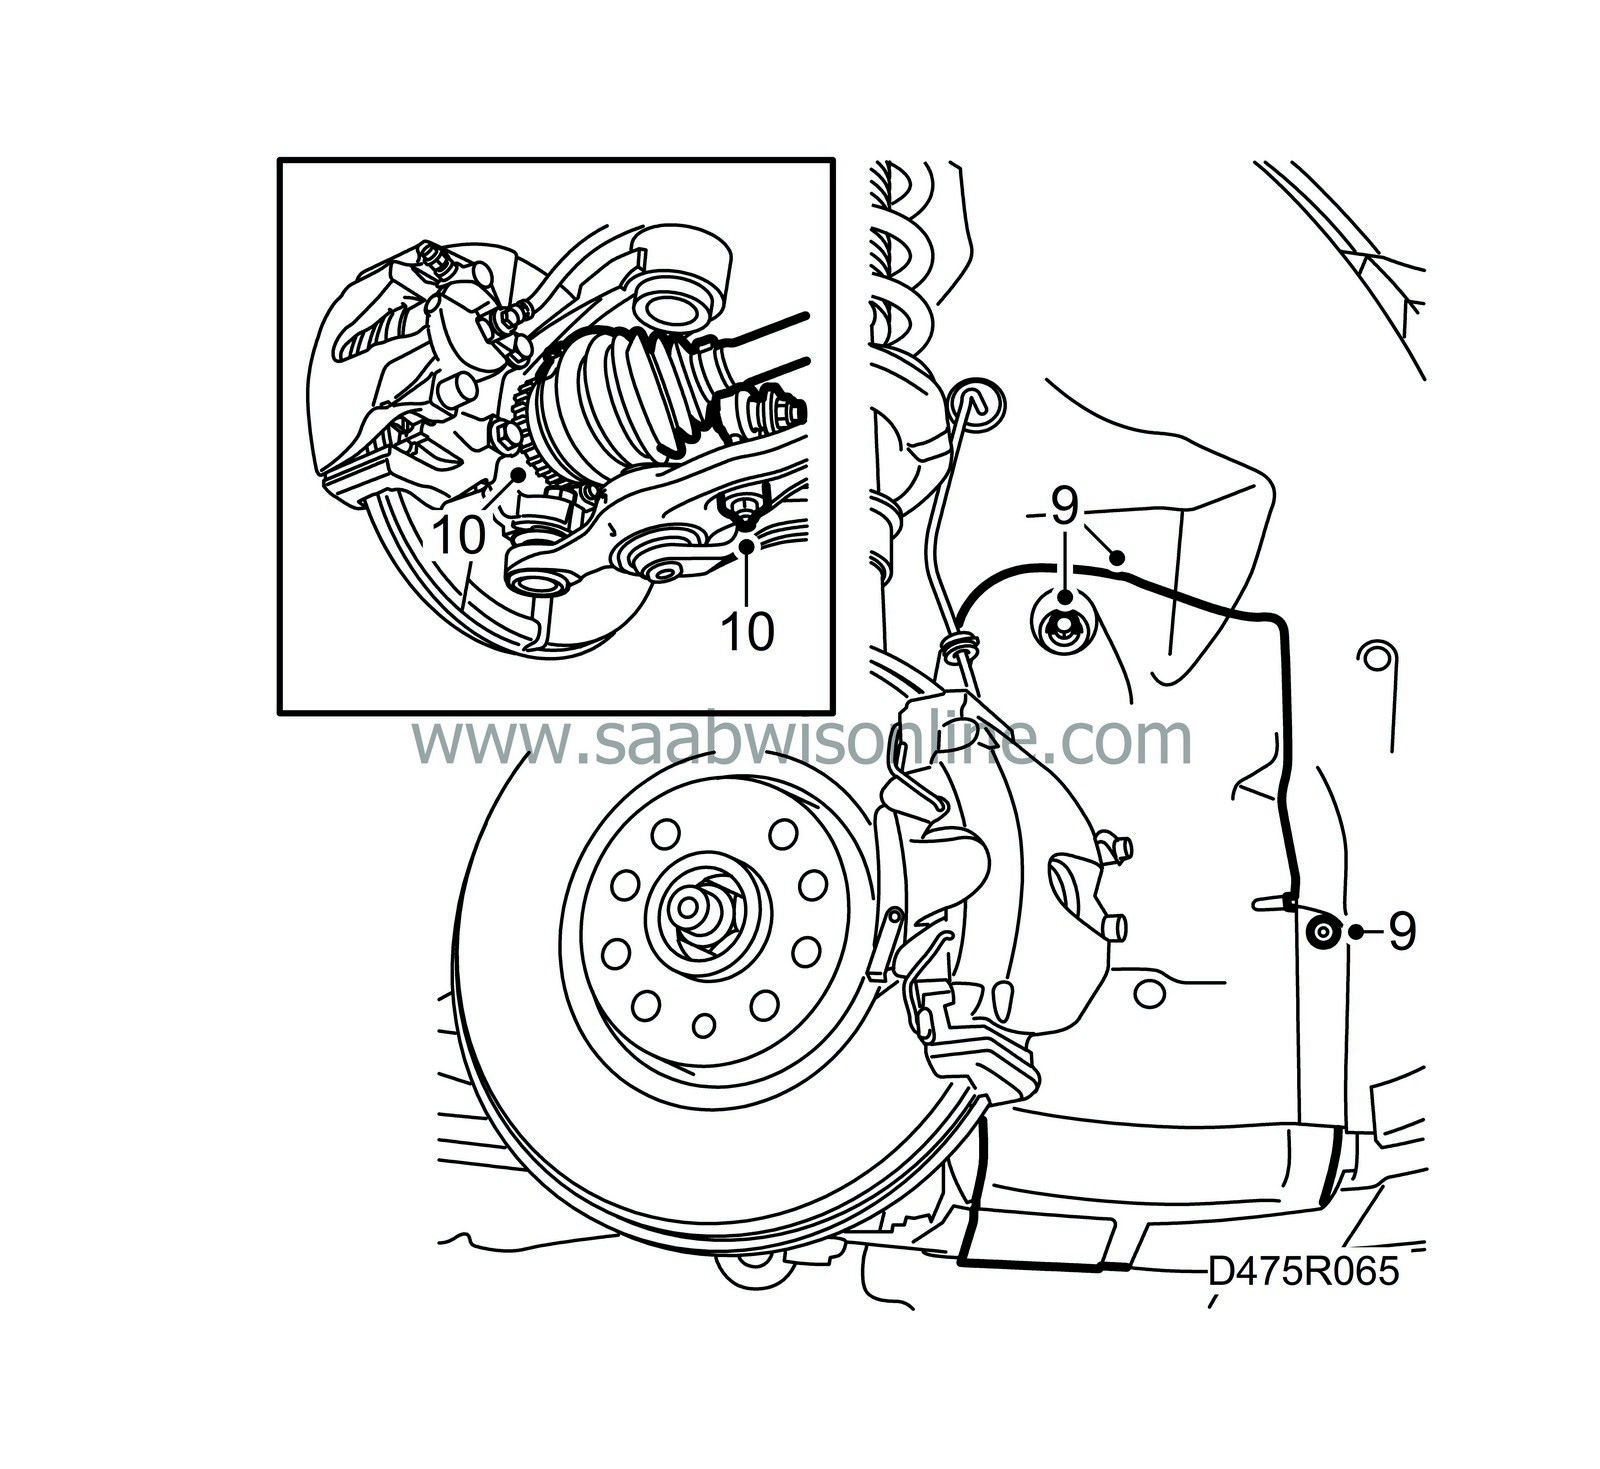
Remove the belt circuit cover.
|
|
10.
|
Undo the nuts securing the anti-roll bar and the suspension arm's ball joint. Use
89 96 696 Puller
.
|
|
11.
|
Lower the suspension arm and fix it in position with a block of wood inserted between the suspension arm and the anti-roll bar.
|
|
12.
|
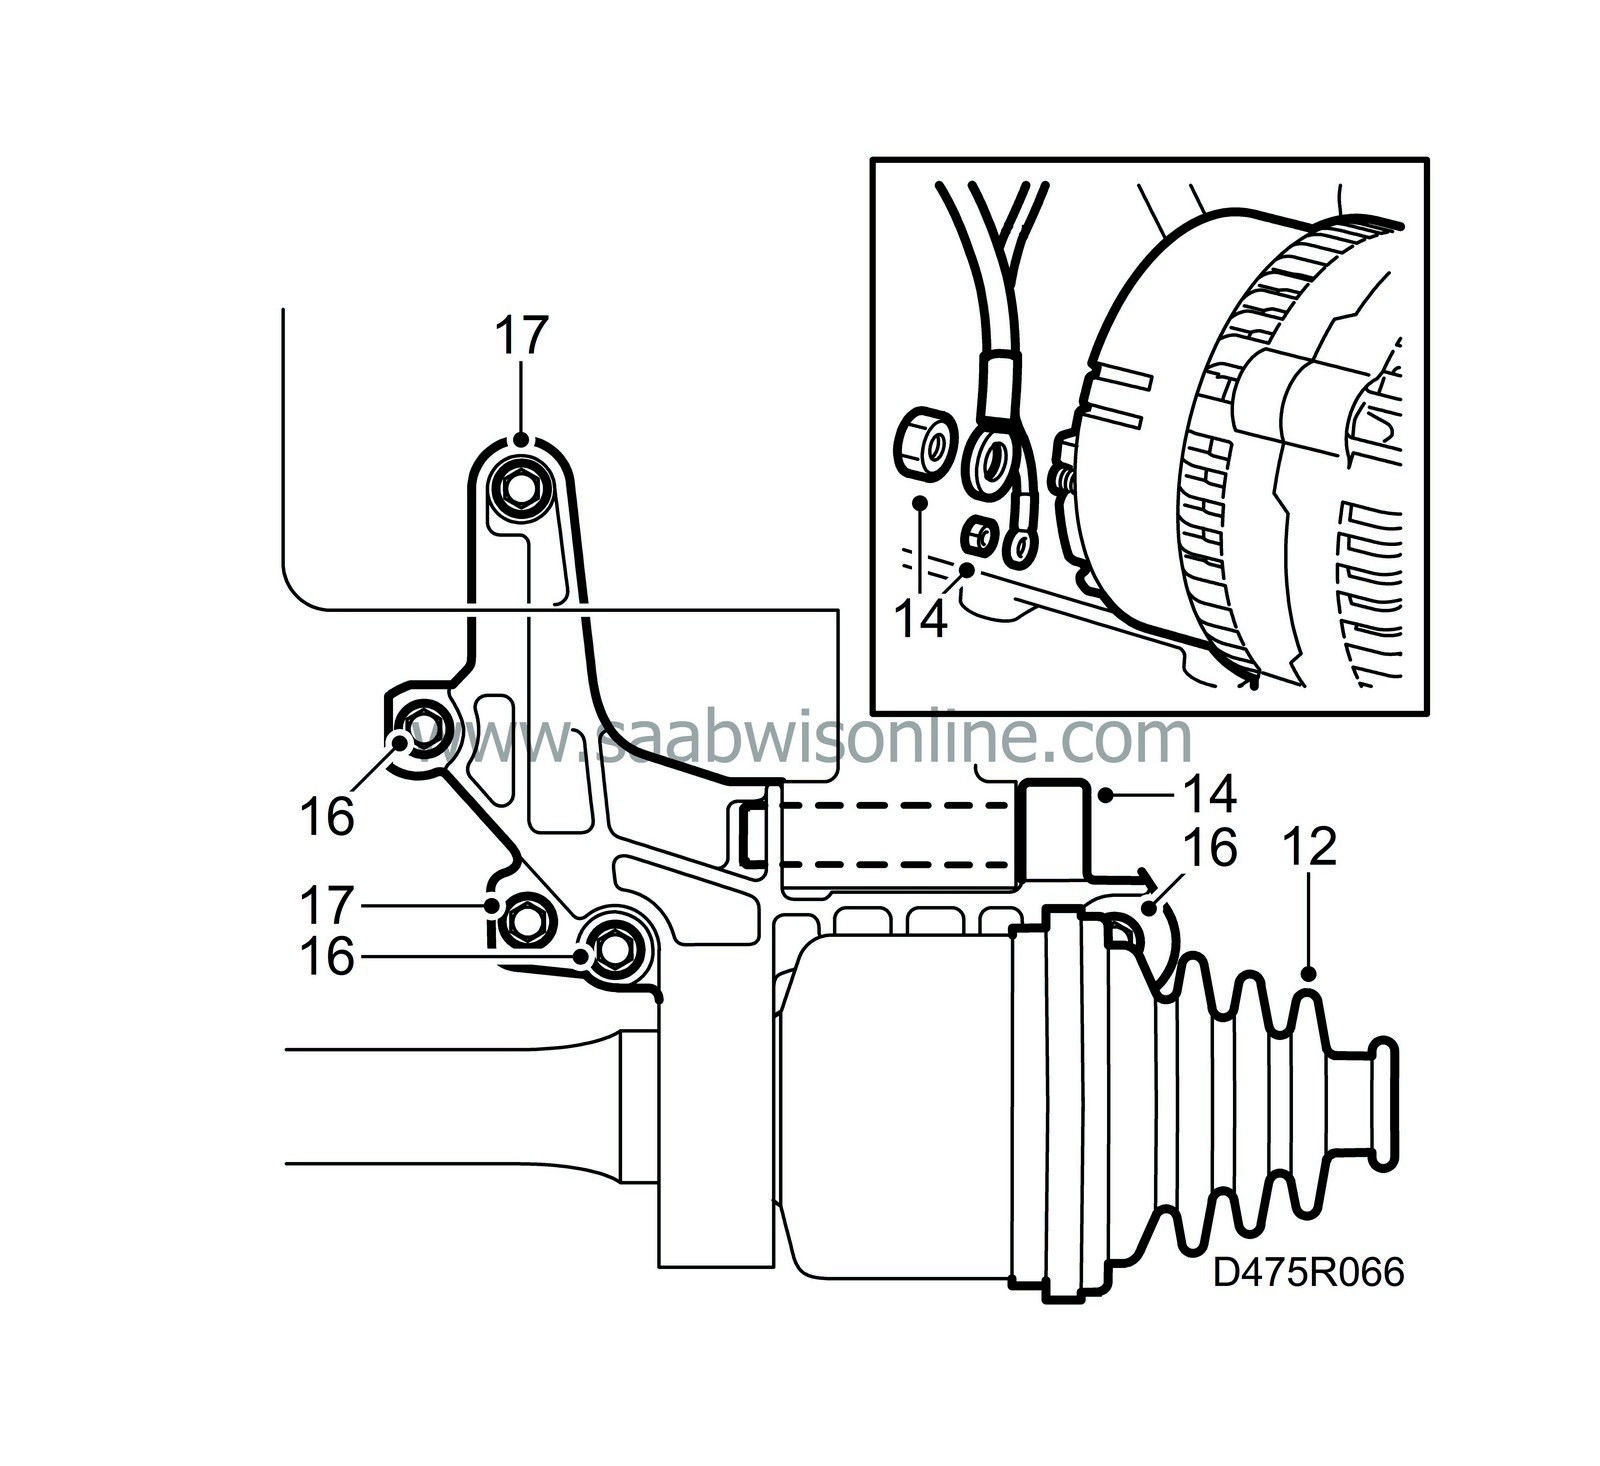
Remove the clamp and pull down the gaiter.
|
|
13.
|
Swing the wheel to the left to facilitate removal of the drive shaft.
|
Important
|
|
Make sure that no dirt gets into the universal joint.
|
|
Cover the universal joint and driver with plastic bags or the like.
|
|
|
|
|
14.
|
Disconnect the generator cables and the generator bracket's lower bolt.
|
|
15.
|
Move the generator aside.
|
|
16.
|
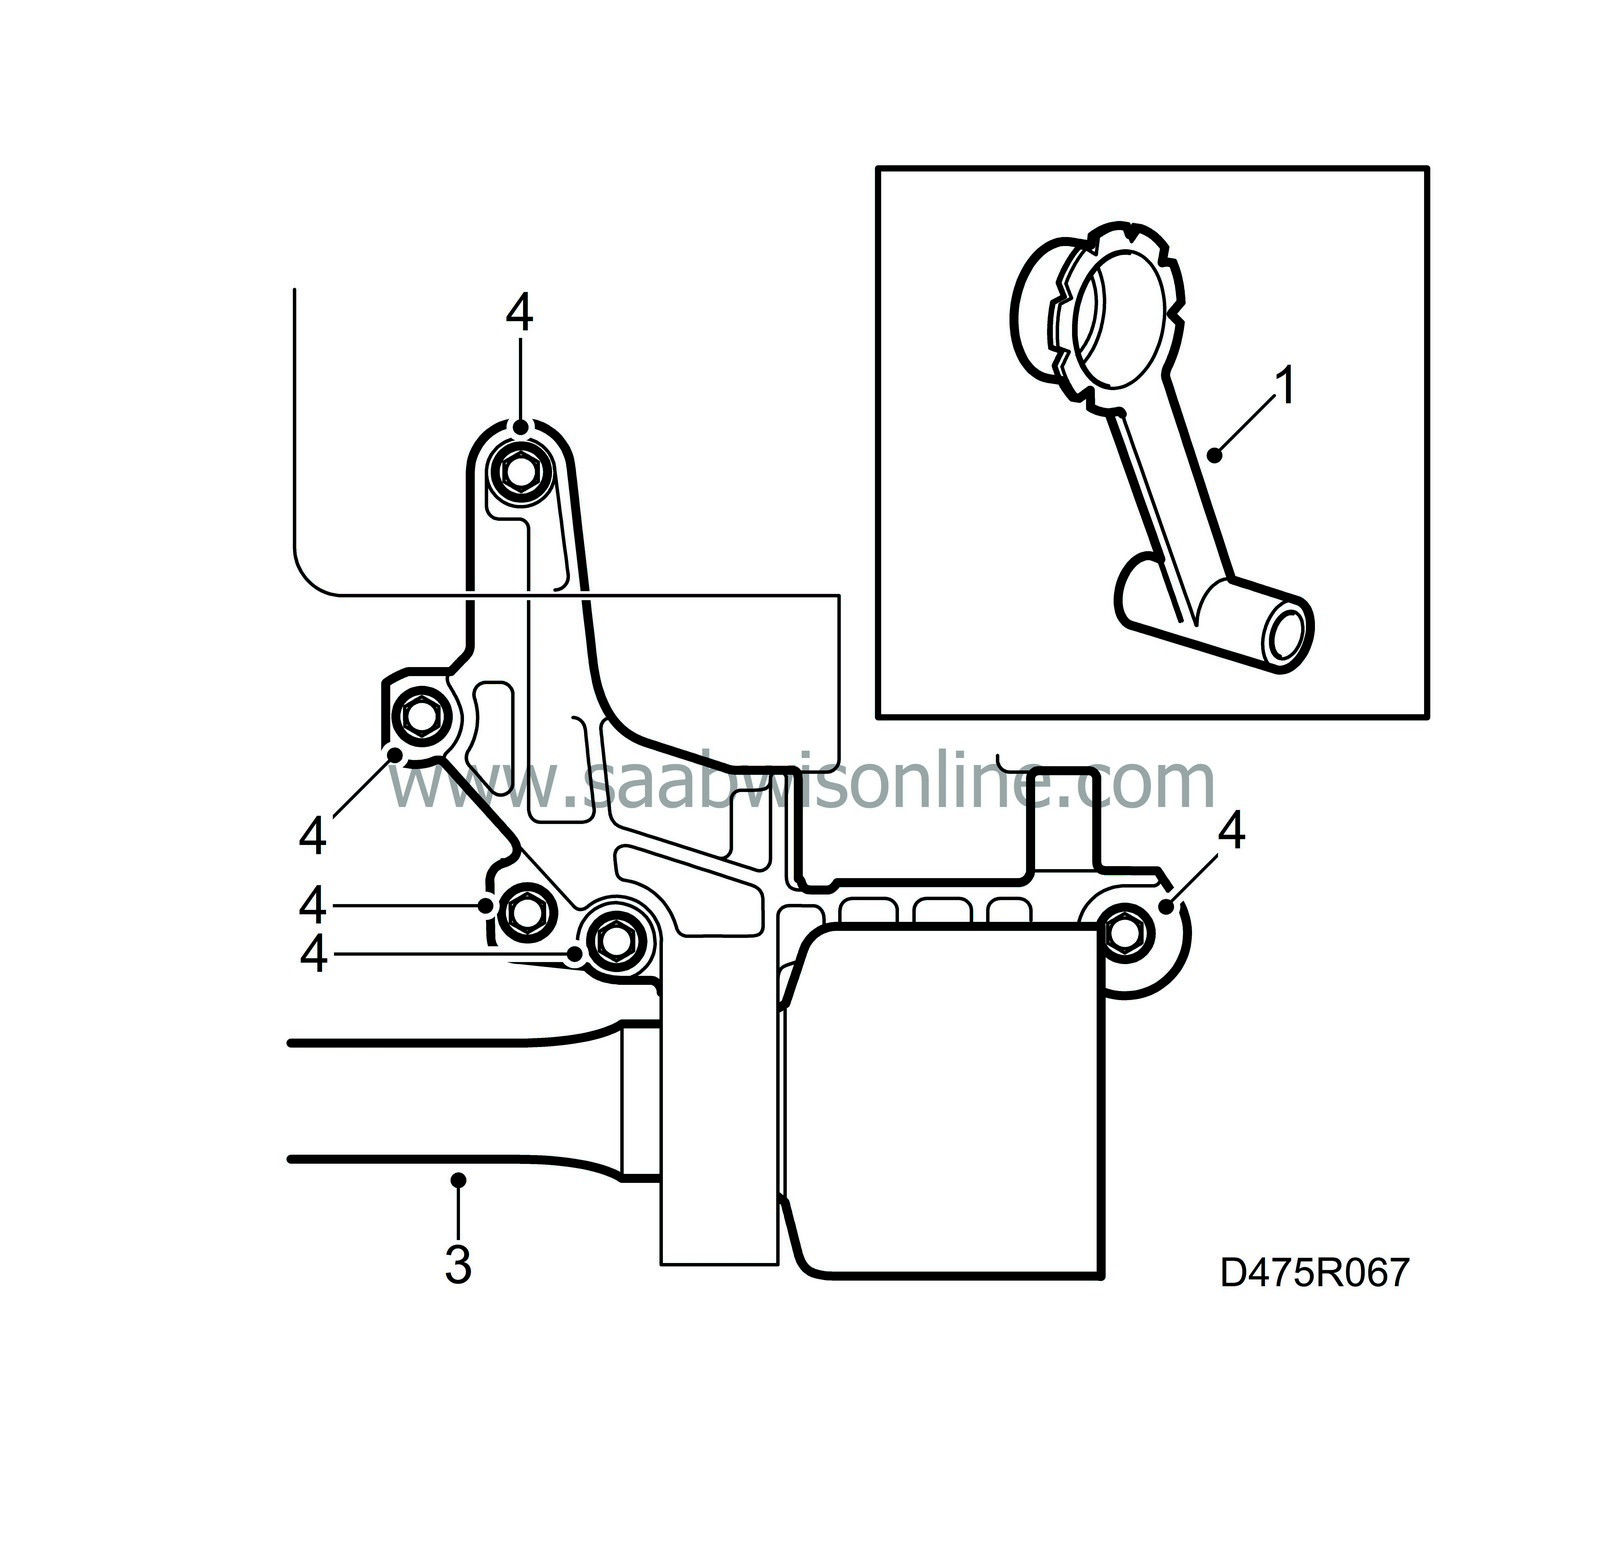
Unscrew the support bearing bracket bolts.
|
Important
|
|
Place a receptacle under the gearbox to avoid spilling oil on floor.
|
|
|
|
|
17.
|
Pull the support bearing bracket away from the guide pins in the engine block and withdraw the intermediate shaft from the gearbox.
|
|
2.
|
Make sure that the intermediate shaft is clean and then fit the shaft in the tool.
|
Important
|
|
Insert the intermediate shaft in the gearbox until about 20 mm of it remains and withdraw the tool before the shaft's sealing surface reaches the shaft seal.
|
|
|
|
|
3.
|
Insert the remainder of the shaft.
|
|
4.
|
First guide the support bearing bracket to the upper guide pin and then tighten the bearing bracket.
Tightening torque 24 Nm (18 lbf ft)
|
|
5.
|
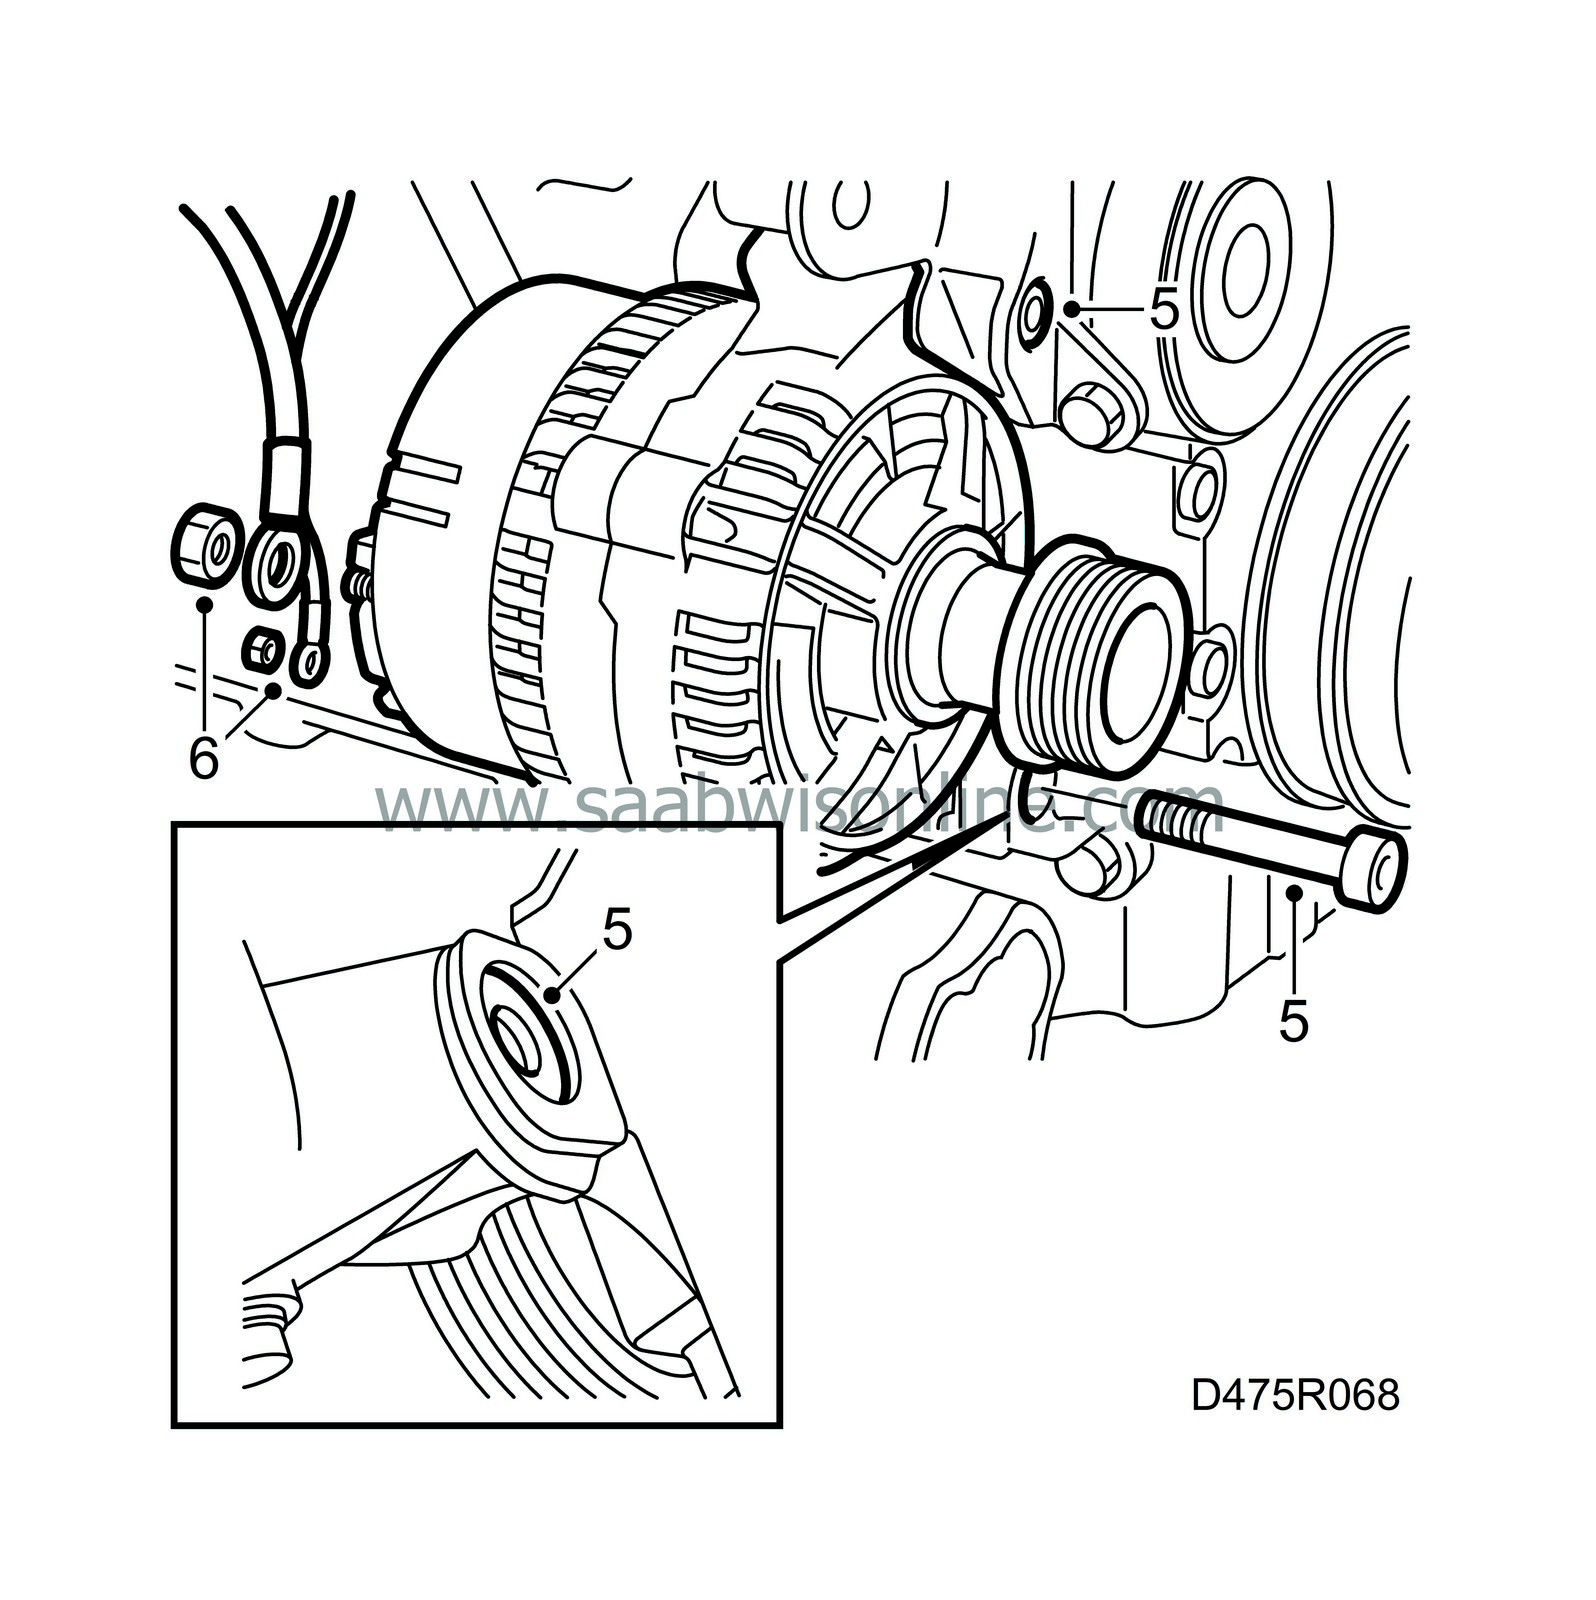
Make sure that the adjusting sleeves are tapped out about 1 mm to facilitate fitting the generator on the mountings. Then fit the two generator retaining bolts and tighten the lower one.
Tightening torque 47 Nm (35 lbf ft).
|
|
6.
|
Connect the generator cables.
|
|
7.
|
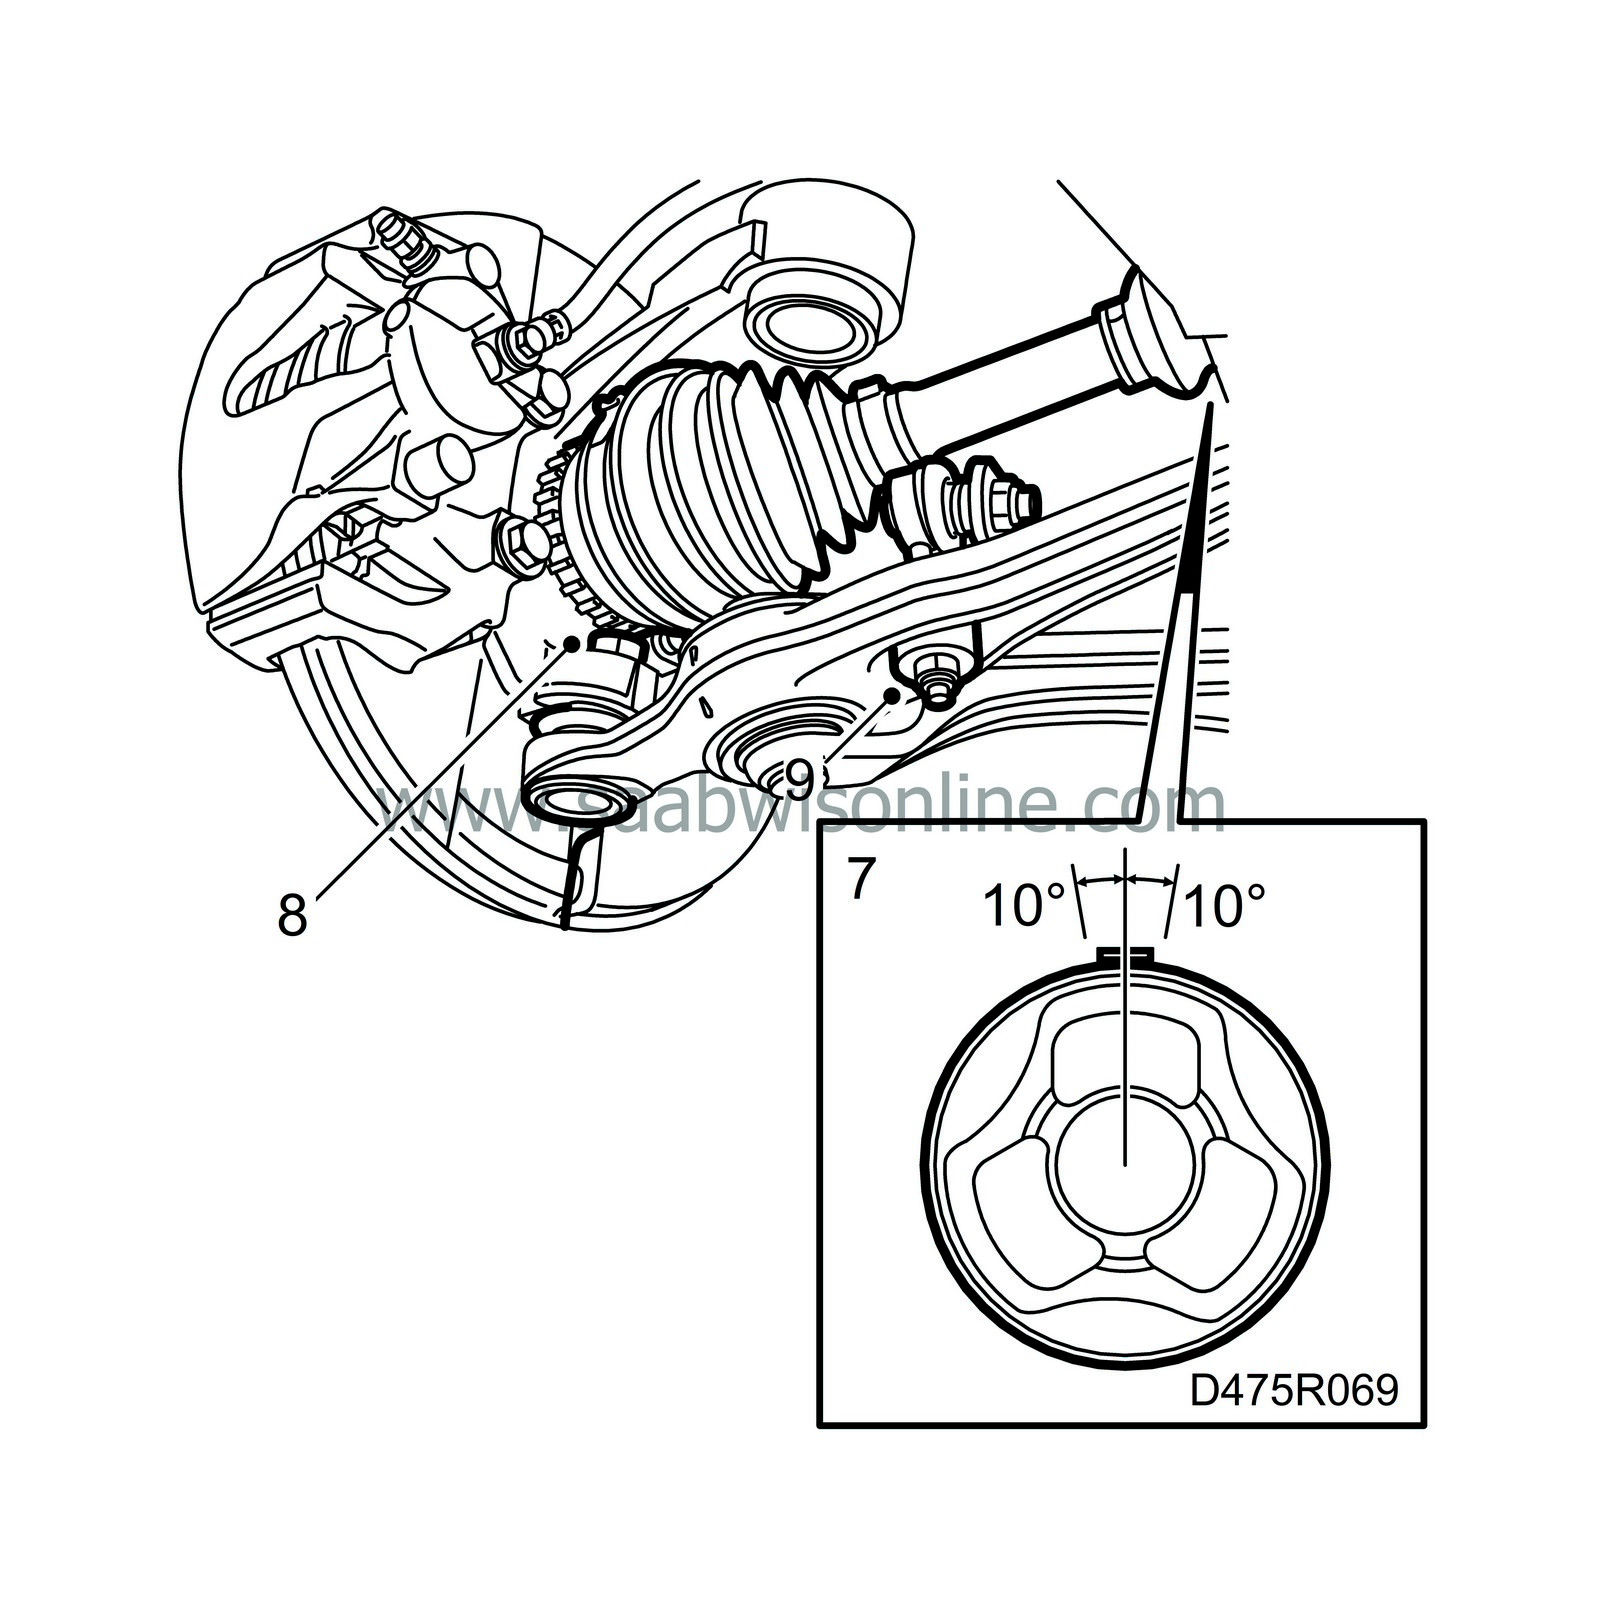
Fill grease, (16) 87 92 624, in the gaiter and driver and connect the universal joint to the driver. Fit a new clamp on the gaiter and wipe away excess grease. It is important that the clamp is fitted as illustrated.
|
|
8.
|
Remove the wooden block, swing the suspension arm back and connect it to the steering swivel member. Fit the bolt and tighten it.
Tightening torque 75 Nm (55 lbf ft).
|
|
9.
|
Secure the anti-roll bar.
|
|
10.
|
Lower the car to the floor.
|
|
11.
|
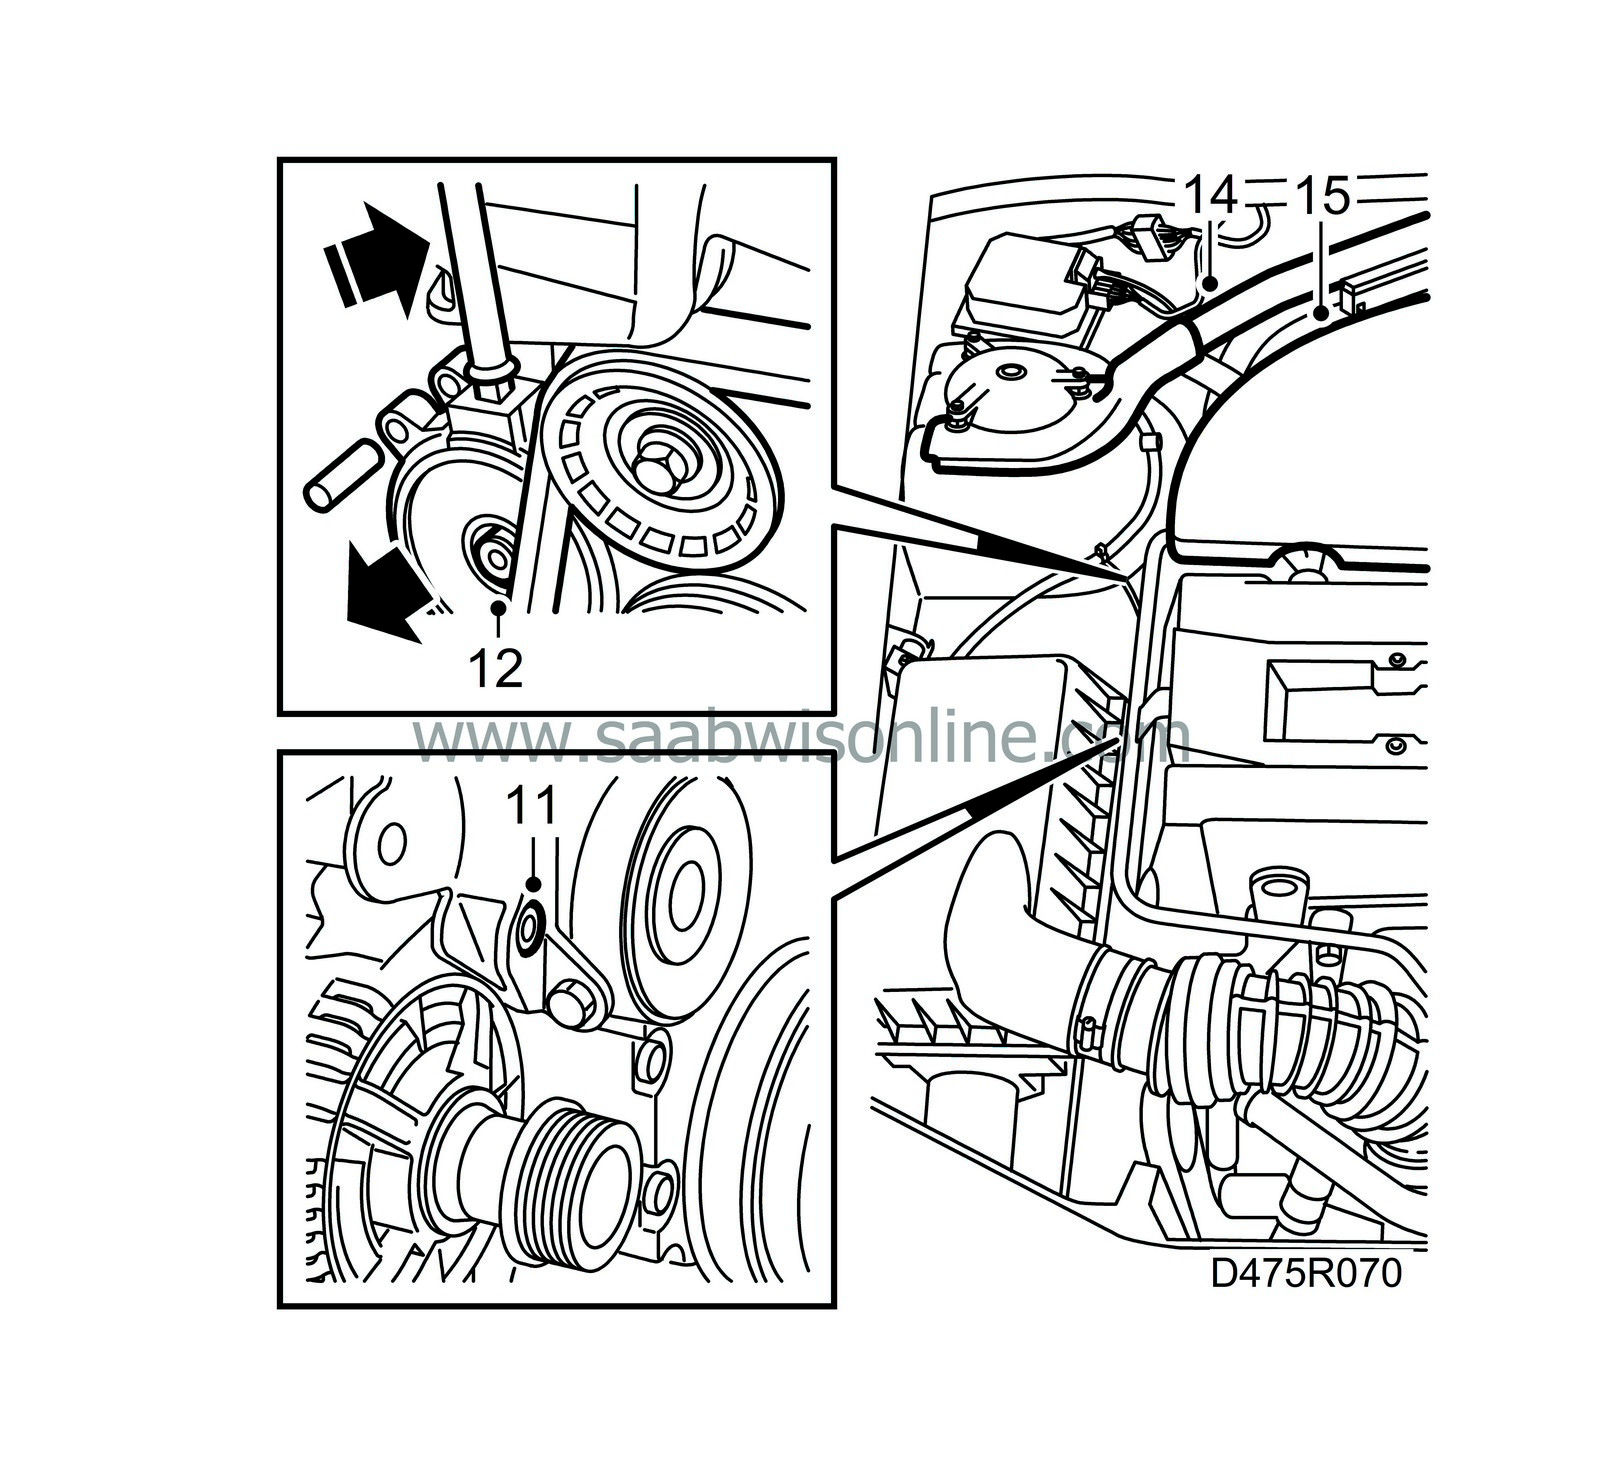
Tighten the generator's upper bolt.
Tightening torque 47 Nm (35 lbf ft).
|
|
12.
|
Fit the belt tensioner.
|
|
14.
|
Fit the stay between the suspension strut towers and press the protective caps in place
(RHD only)
.
Tightening torque 24 Nm (18 lbf ft)
|
|
15.
|
Press the cover over the intake manifold into place.
|
|
16.
|
Connect the negative lead to the battery.
|
|
17.
|
Fill the gearbox with oil to the correct level.
|
|
18.
|
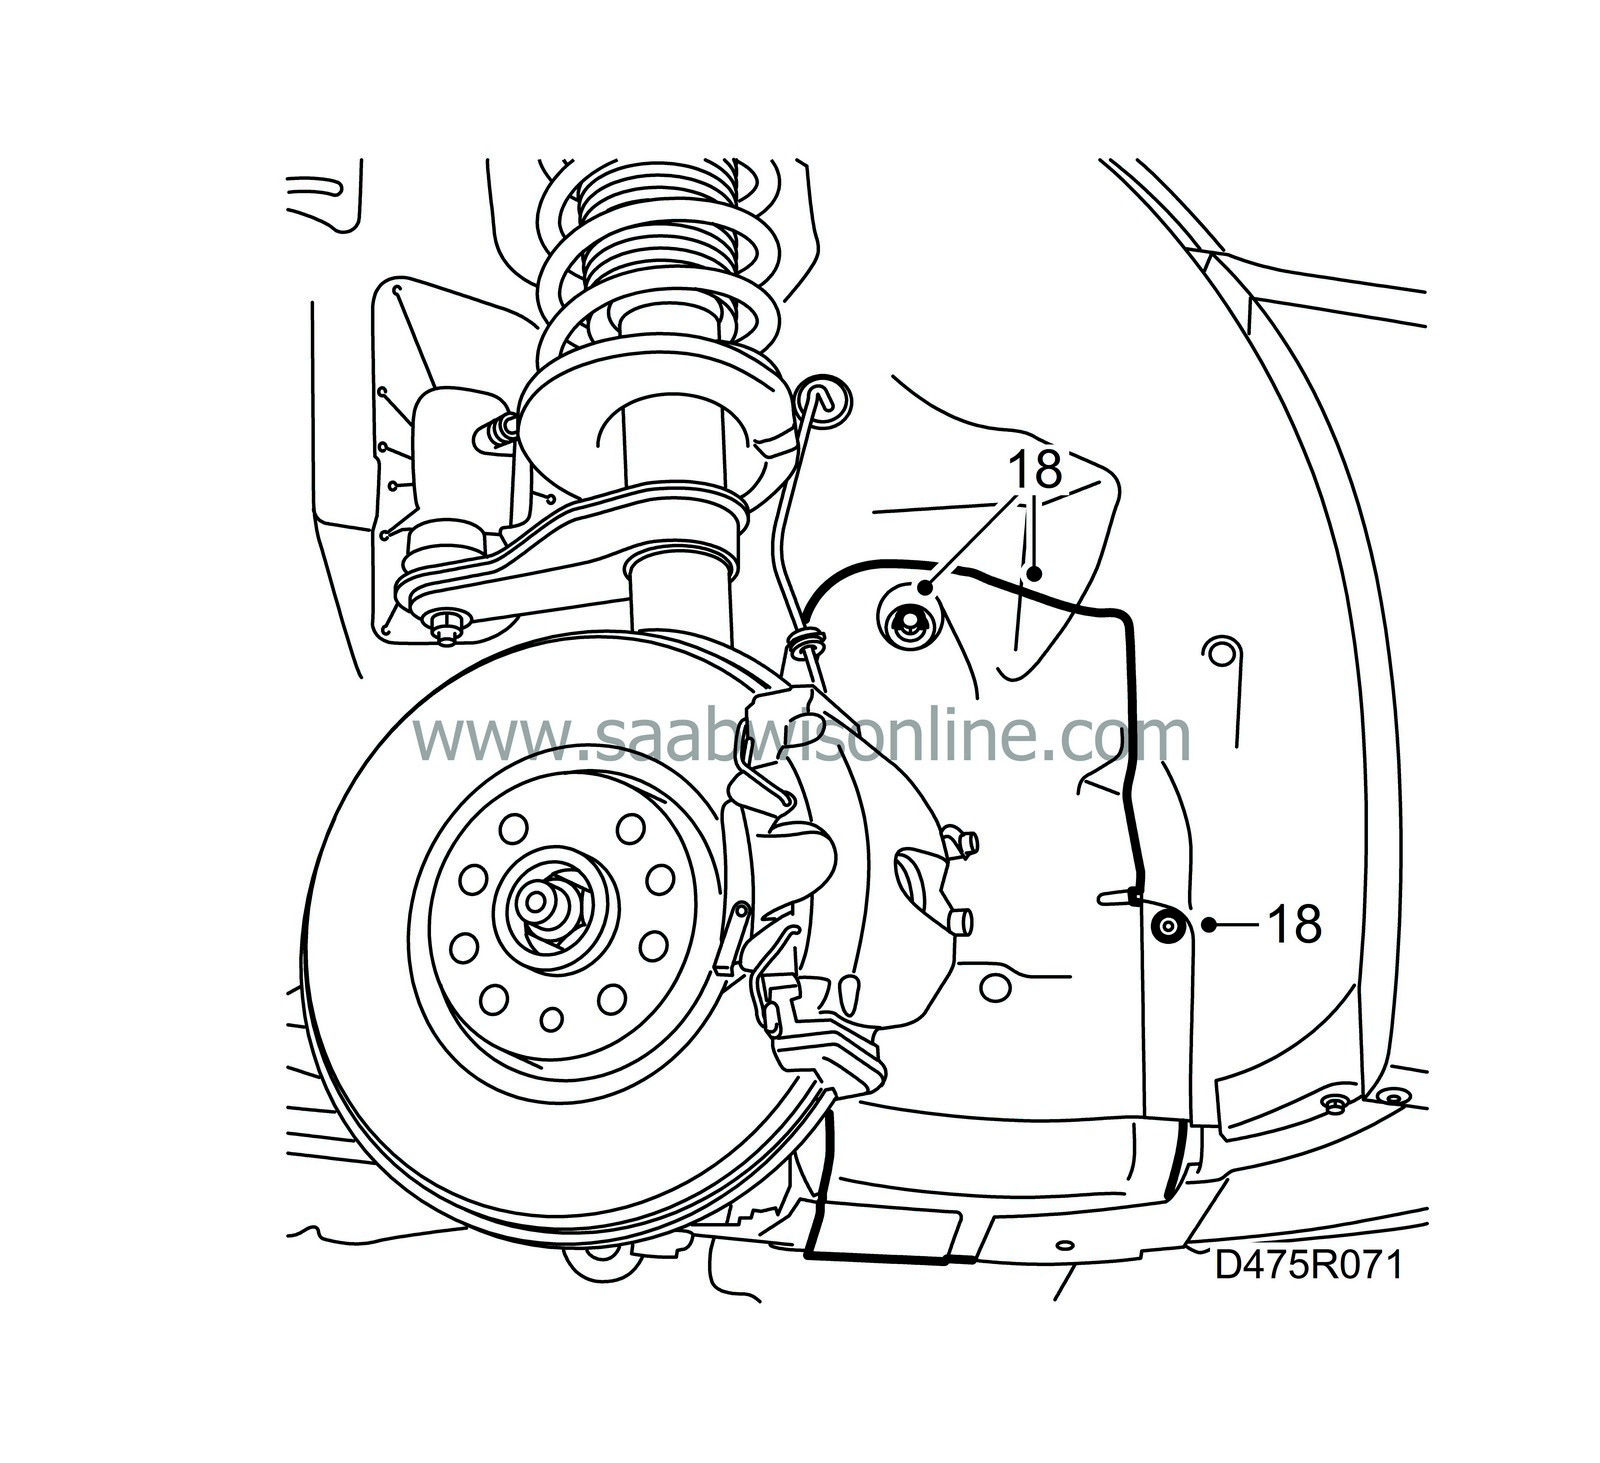
Raise the car and fit the cover over the belt circuit.
|
|
19.
|
Fit the wheel.
Tightening torque 110 Nm (81 lbf ft)
|
Important
|
|
The wheel should hang freely when the wheel bolts are tightened.
|
|
|
|
|
20.
|
Lower the car to the floor.
|
|
21.
|
Set the clock and any radio code.
|


