SRS control module
| SRS control module |
| 1. |
Ignition switch in the OFF position.
|
|
| 2. |
Apply the parking brake.
|
|
| 3. |
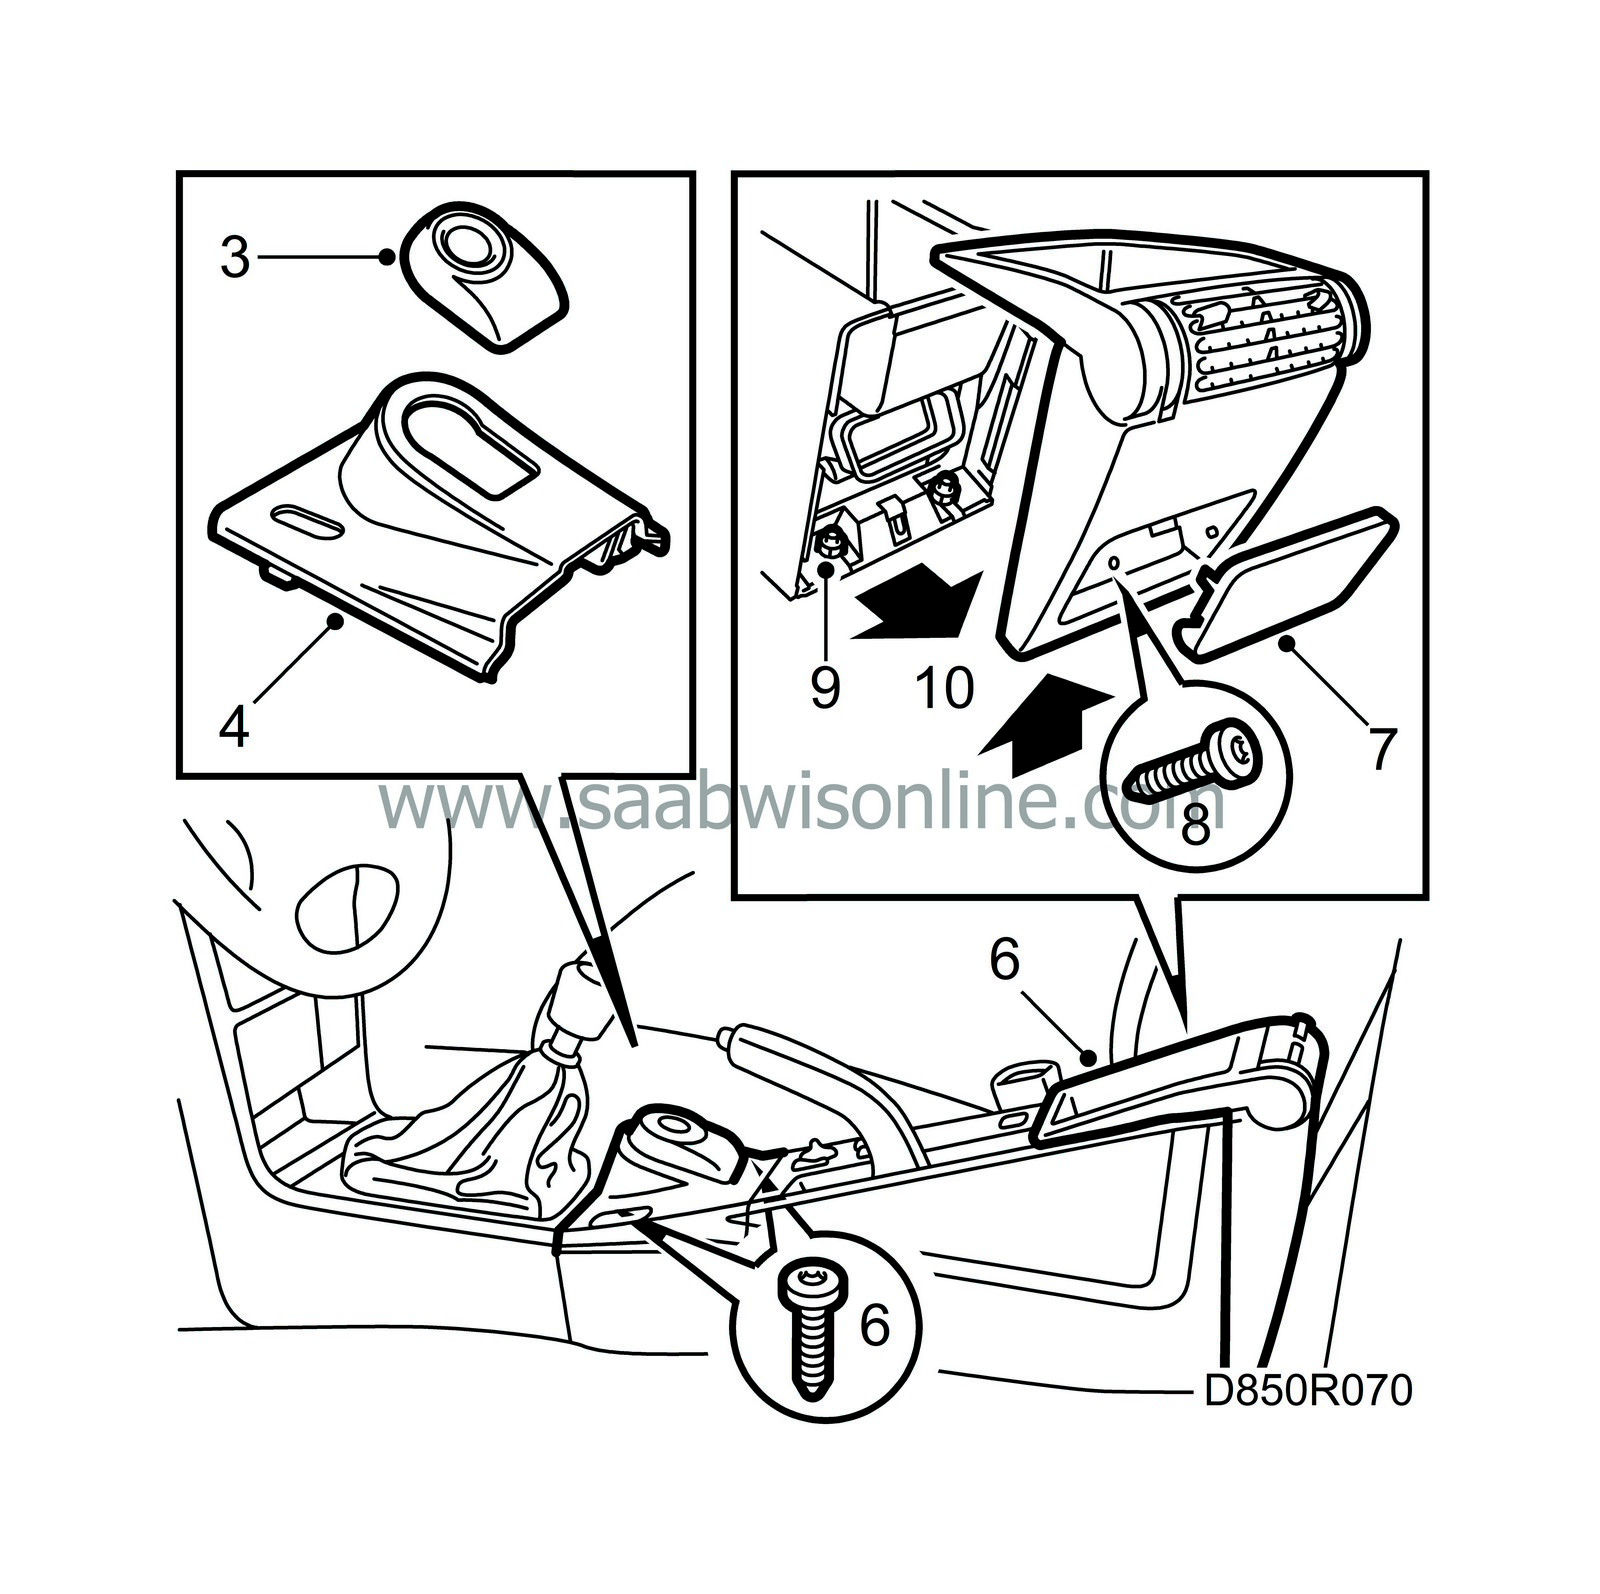
Remove the immobilizing unit, which has a bayonet fitting. Unplug the connector of the unit.
|
|
| 4. |
Remove the cover plate of the ignition switch by first lifting the rear edge of the cover clear and then disengaging the front edge.
|
|
| 5. |
Unplug the connector of the ignition-switch lighting.
|
|
| 6. |
Undo the retaining screws of the floor console.
|
|
| 7. |
Take out the rear ashtray/cover plate.
|
|
| 8. |
Remove the rear cowl, which is secured by a single torx screw.
|
|
| 9. |
Remove the two retaining nuts of the floor console.
|
|
| 10. |
Work the floor console loose by pulling it straight back and slightly lifting it.
|
|
| 11. |
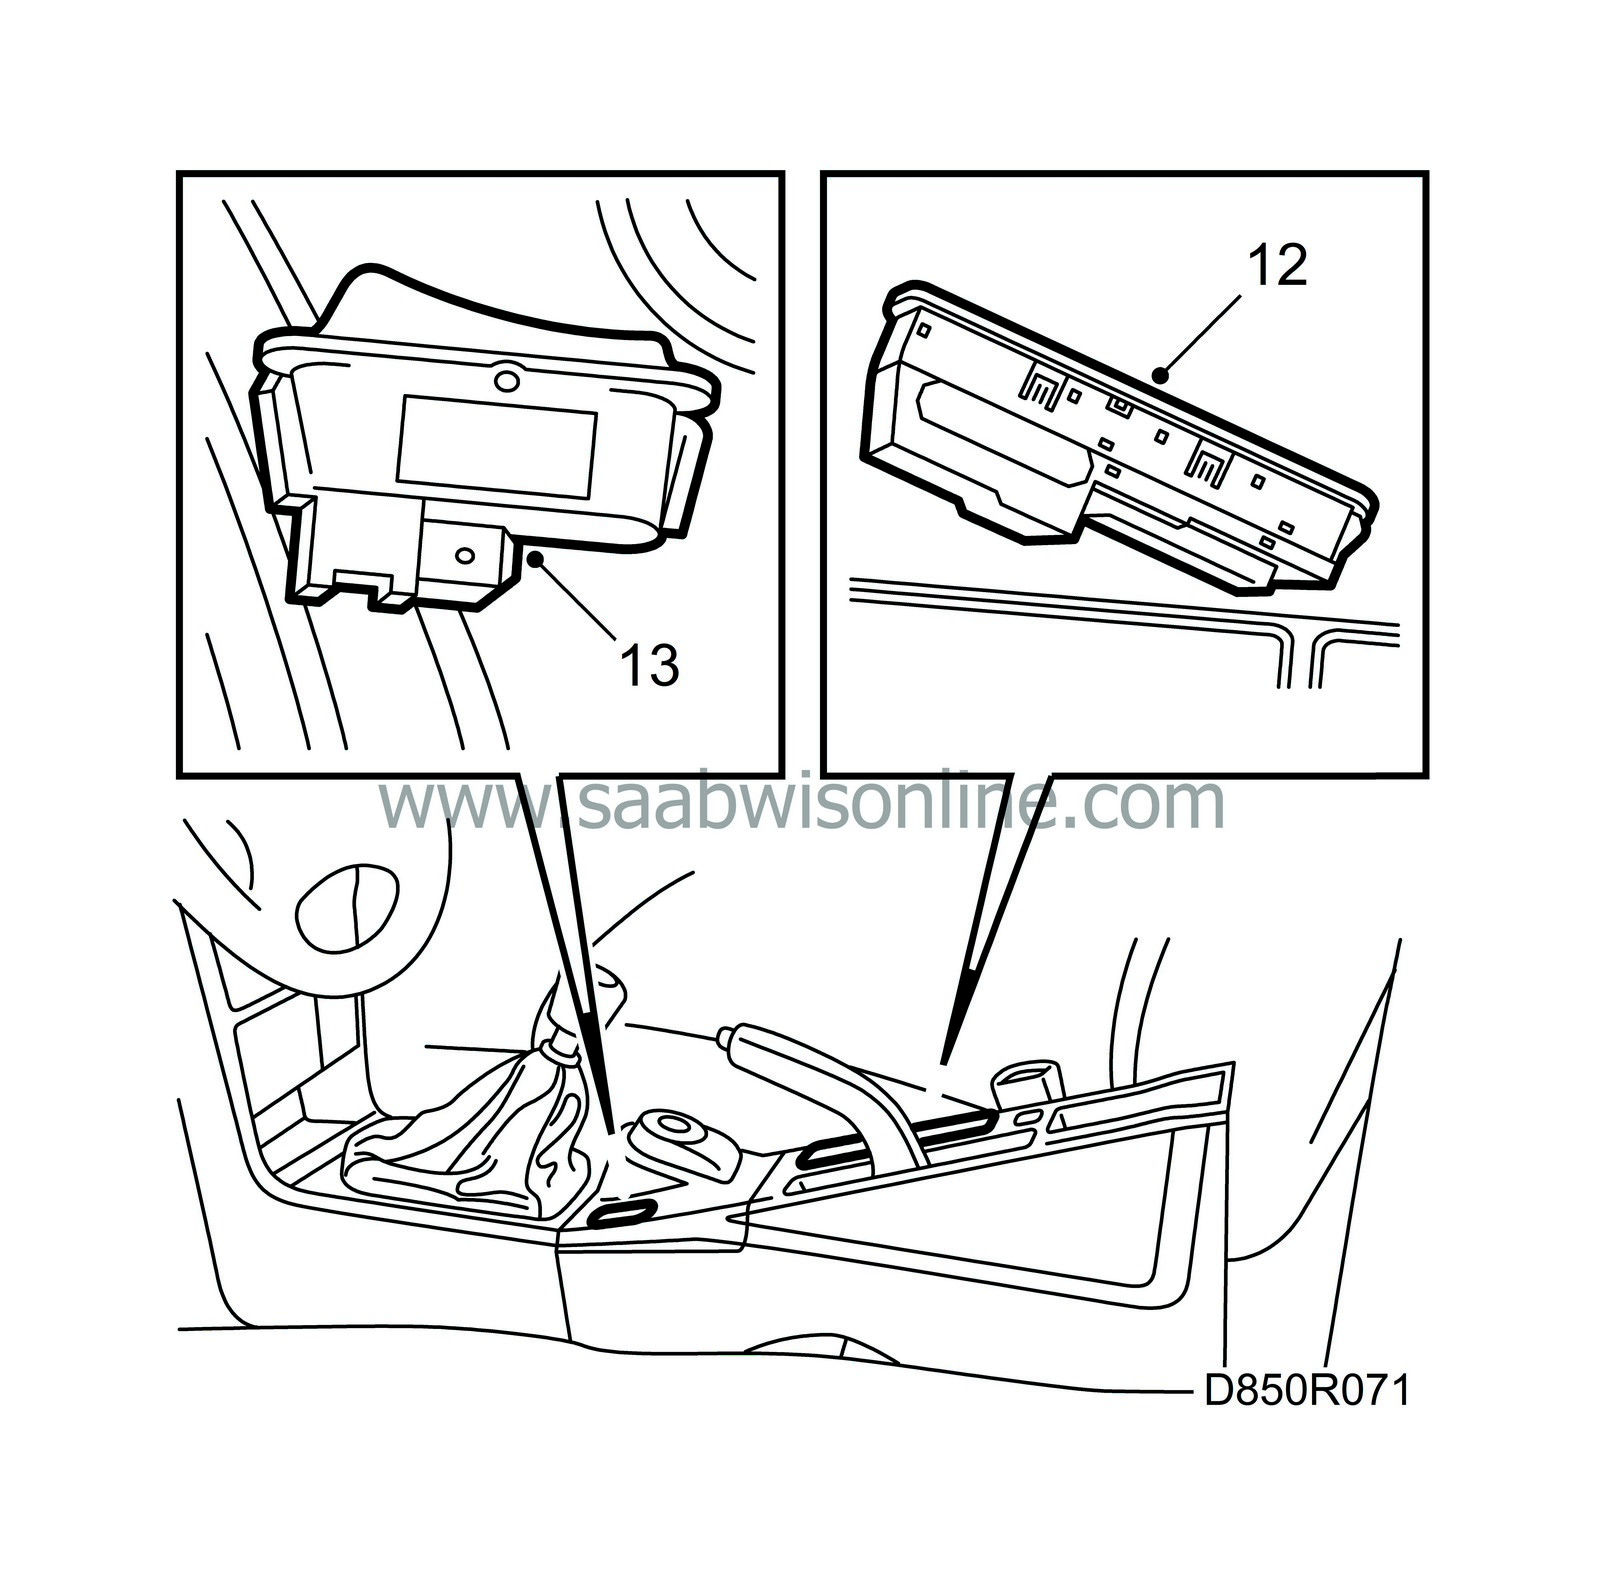
Detach the switch of the rear-seat heater. Unplug the switch connector.
|
|
| 12. |
Detach the window-lift module by freeing the front edge (snap fastener). Unplug the connector of the window-lift module.
|
|
| 13. |
Detach the switch of the dome lighting and unplug its connector (convertible). Lift the floor console clear.
|
|
| 14. |
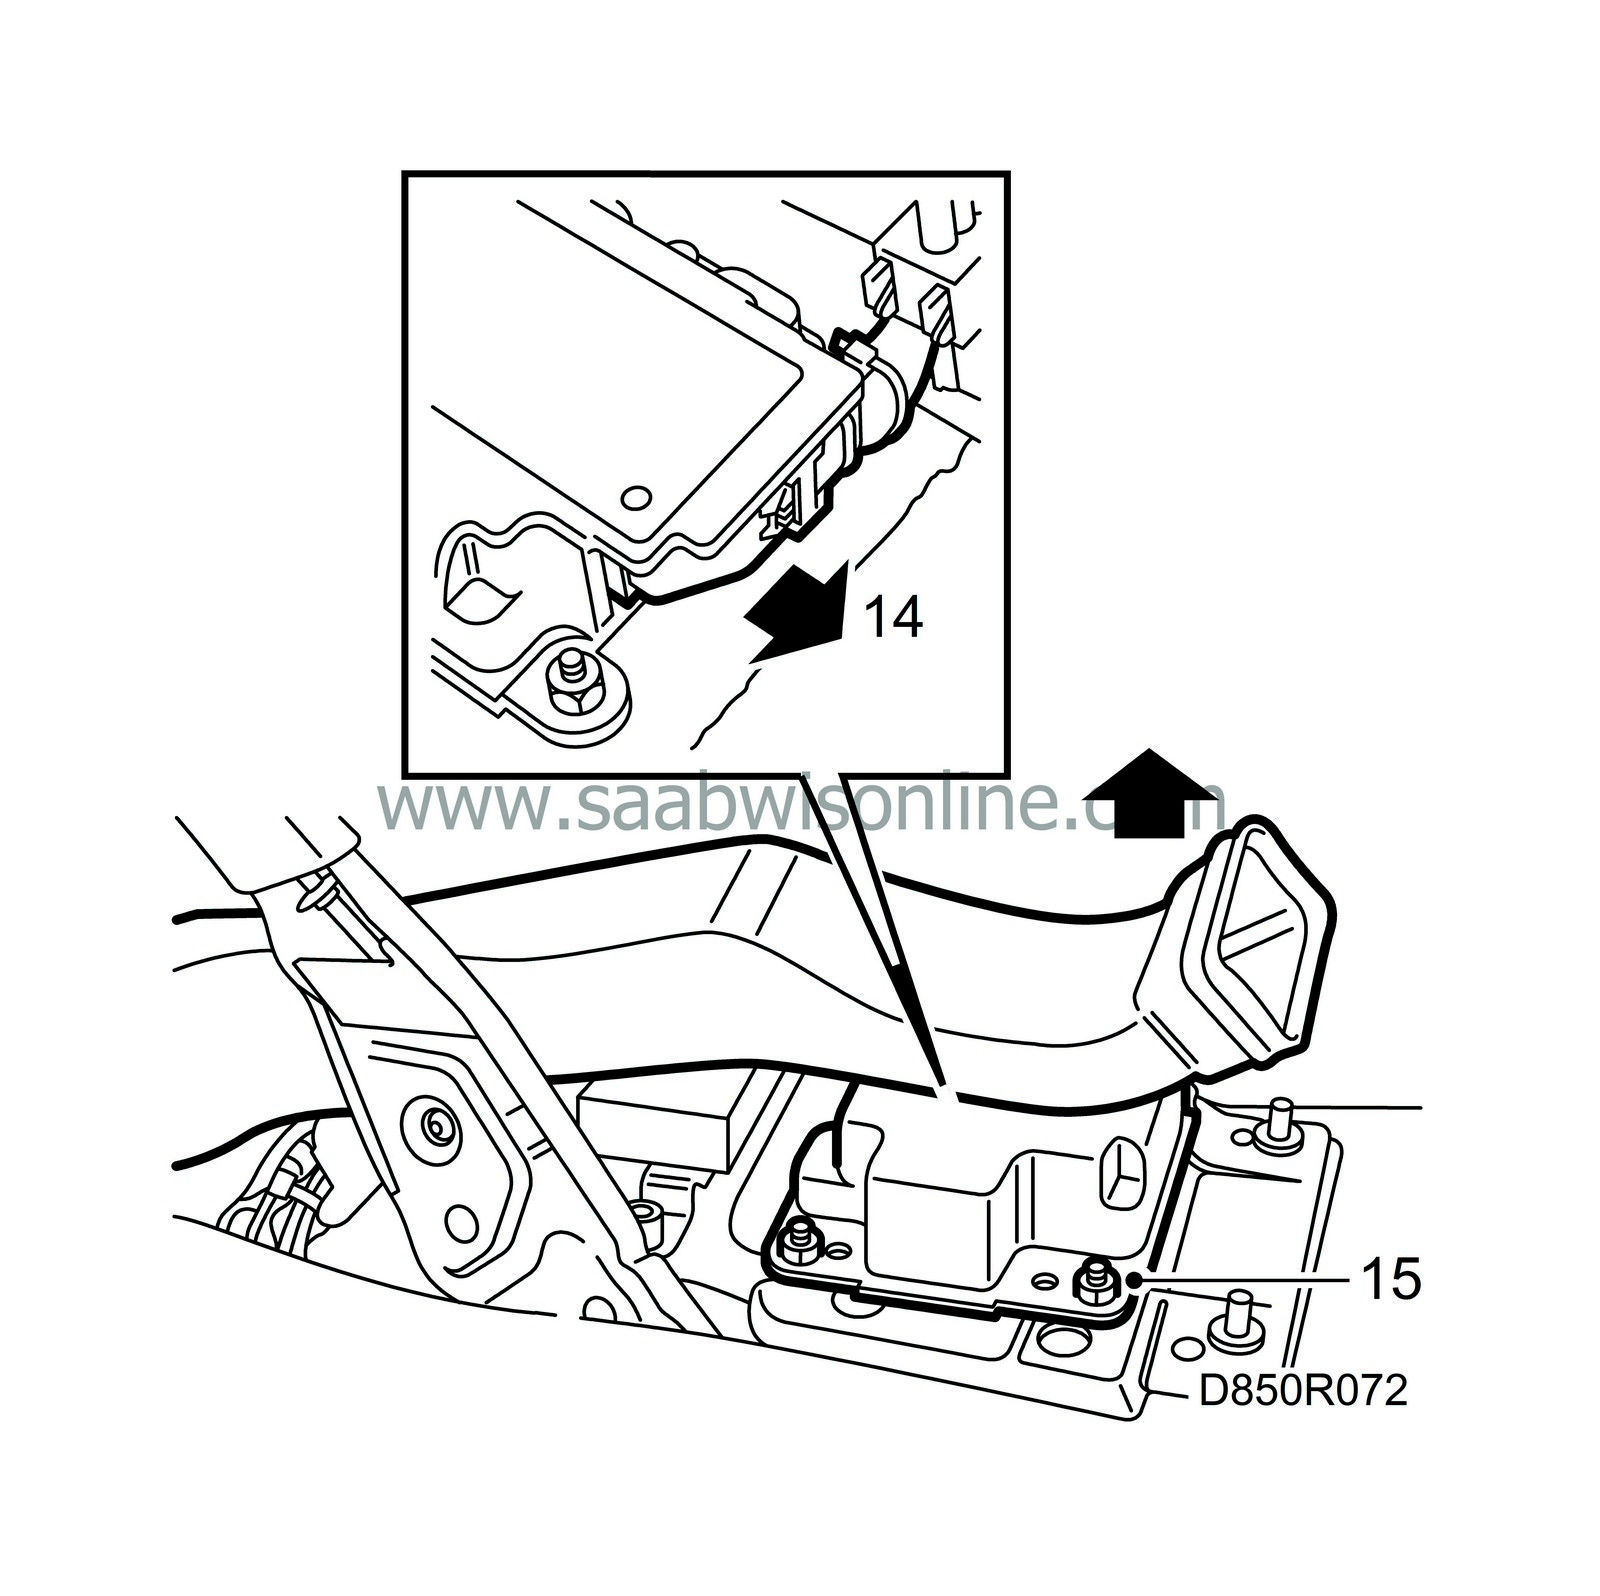
Unplug the control module's connector.
|
|
| 15. |
Undo the 3 control module retaining nuts.
|
|
| To fit |
The mounting of the control module is directionally dependent. The Supplementary Restraint System (SRS) will not work if the control module is fitted incorrectly.
When a control module is being replaced the new module must be programmed in order to work properly. This is done using the diagnostic instrument and the ”Programming” function, see

|
|||||||
| 1. |
Fit the control module in position.
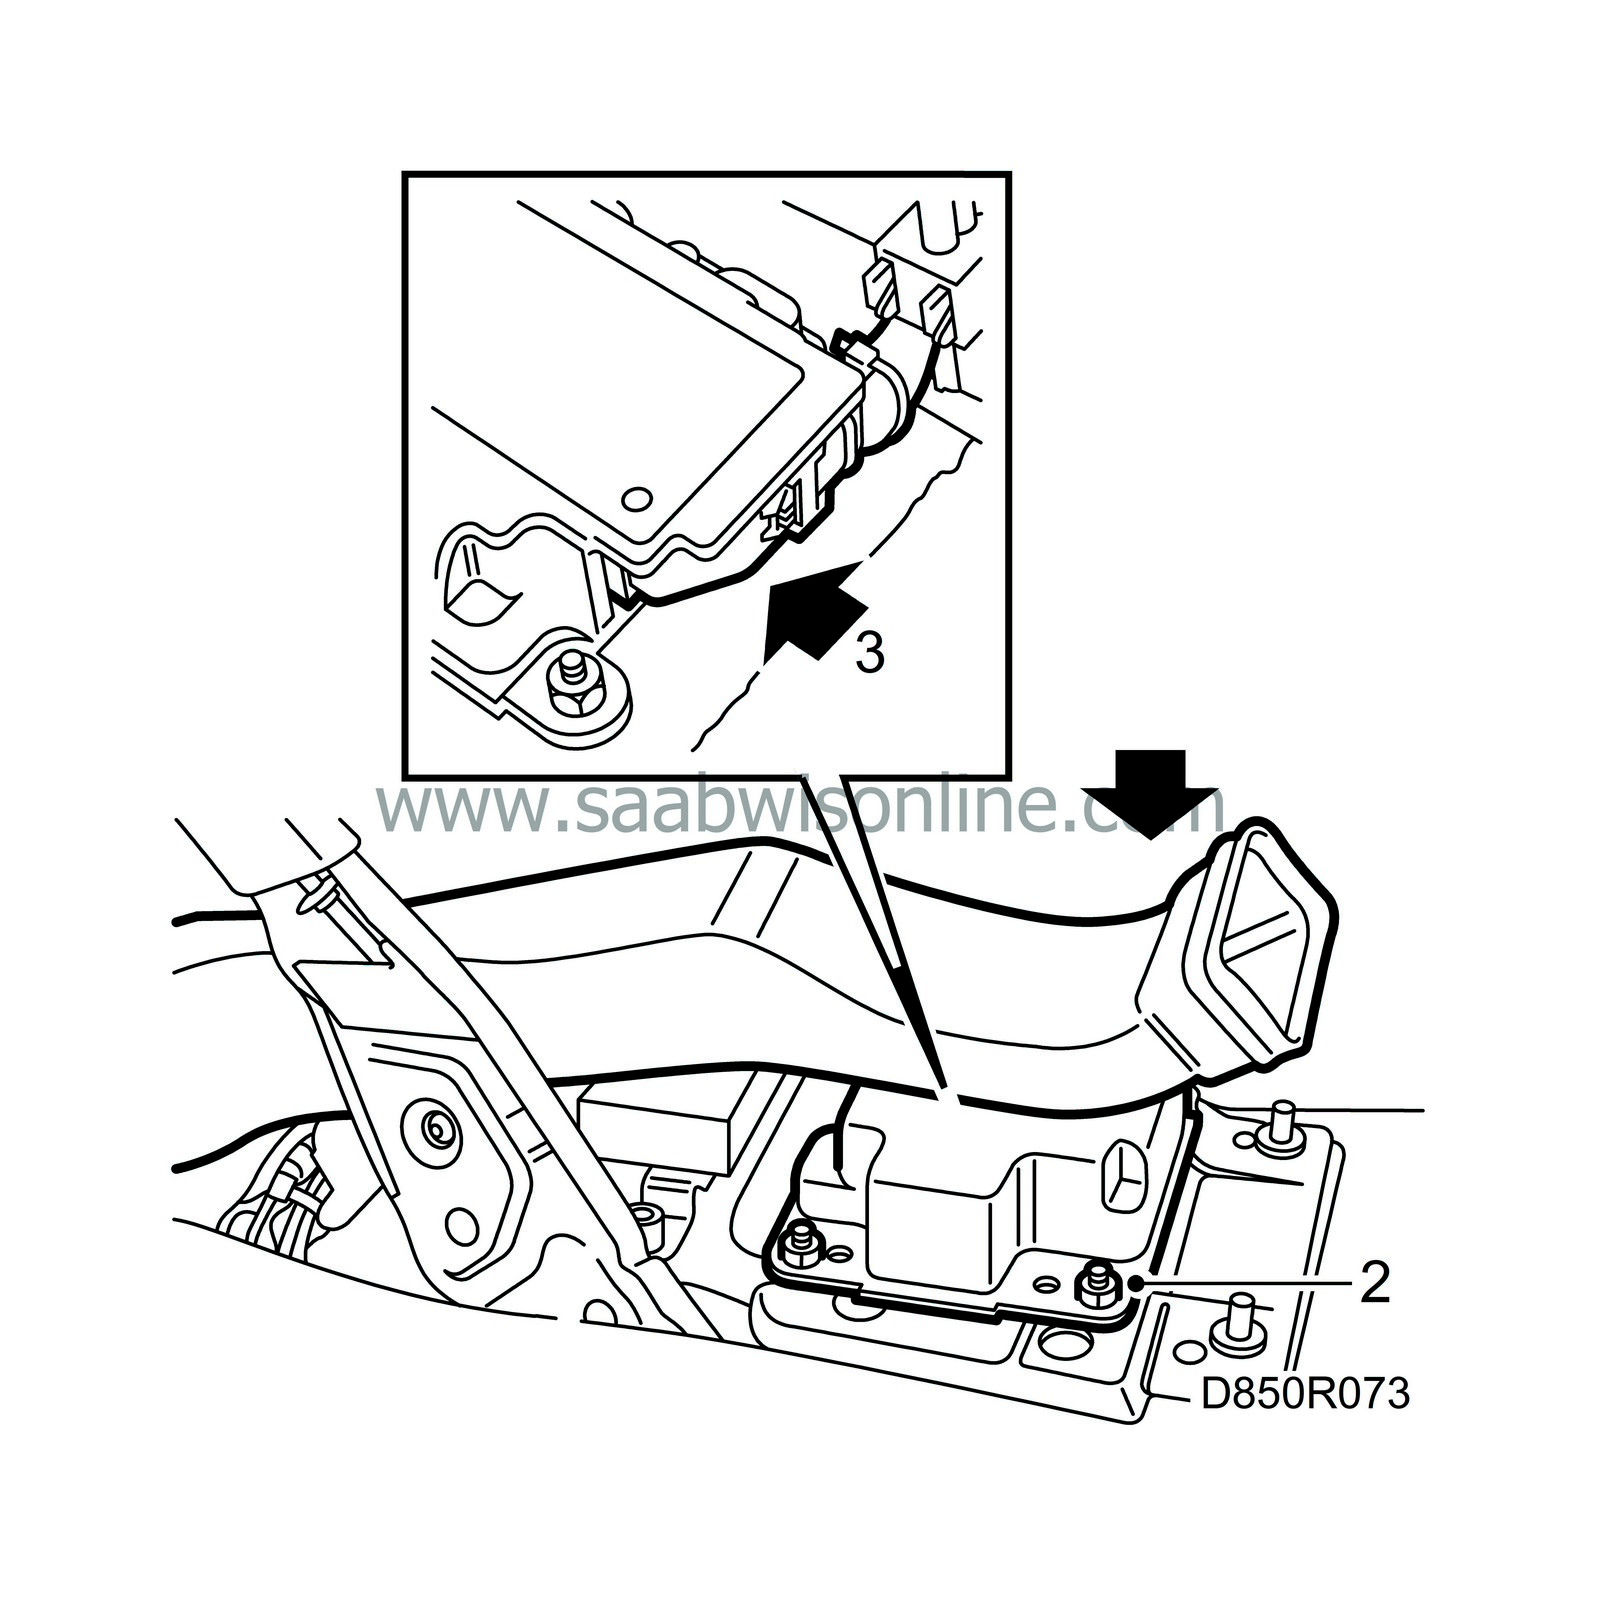
Check that the arrow on the control module points towards the front of the car. |
|
| 2. |
Tighten the 3 control module retaining nuts.
|
|
| 3. |
Plug in the control module's connector.
|
|
| 4. |
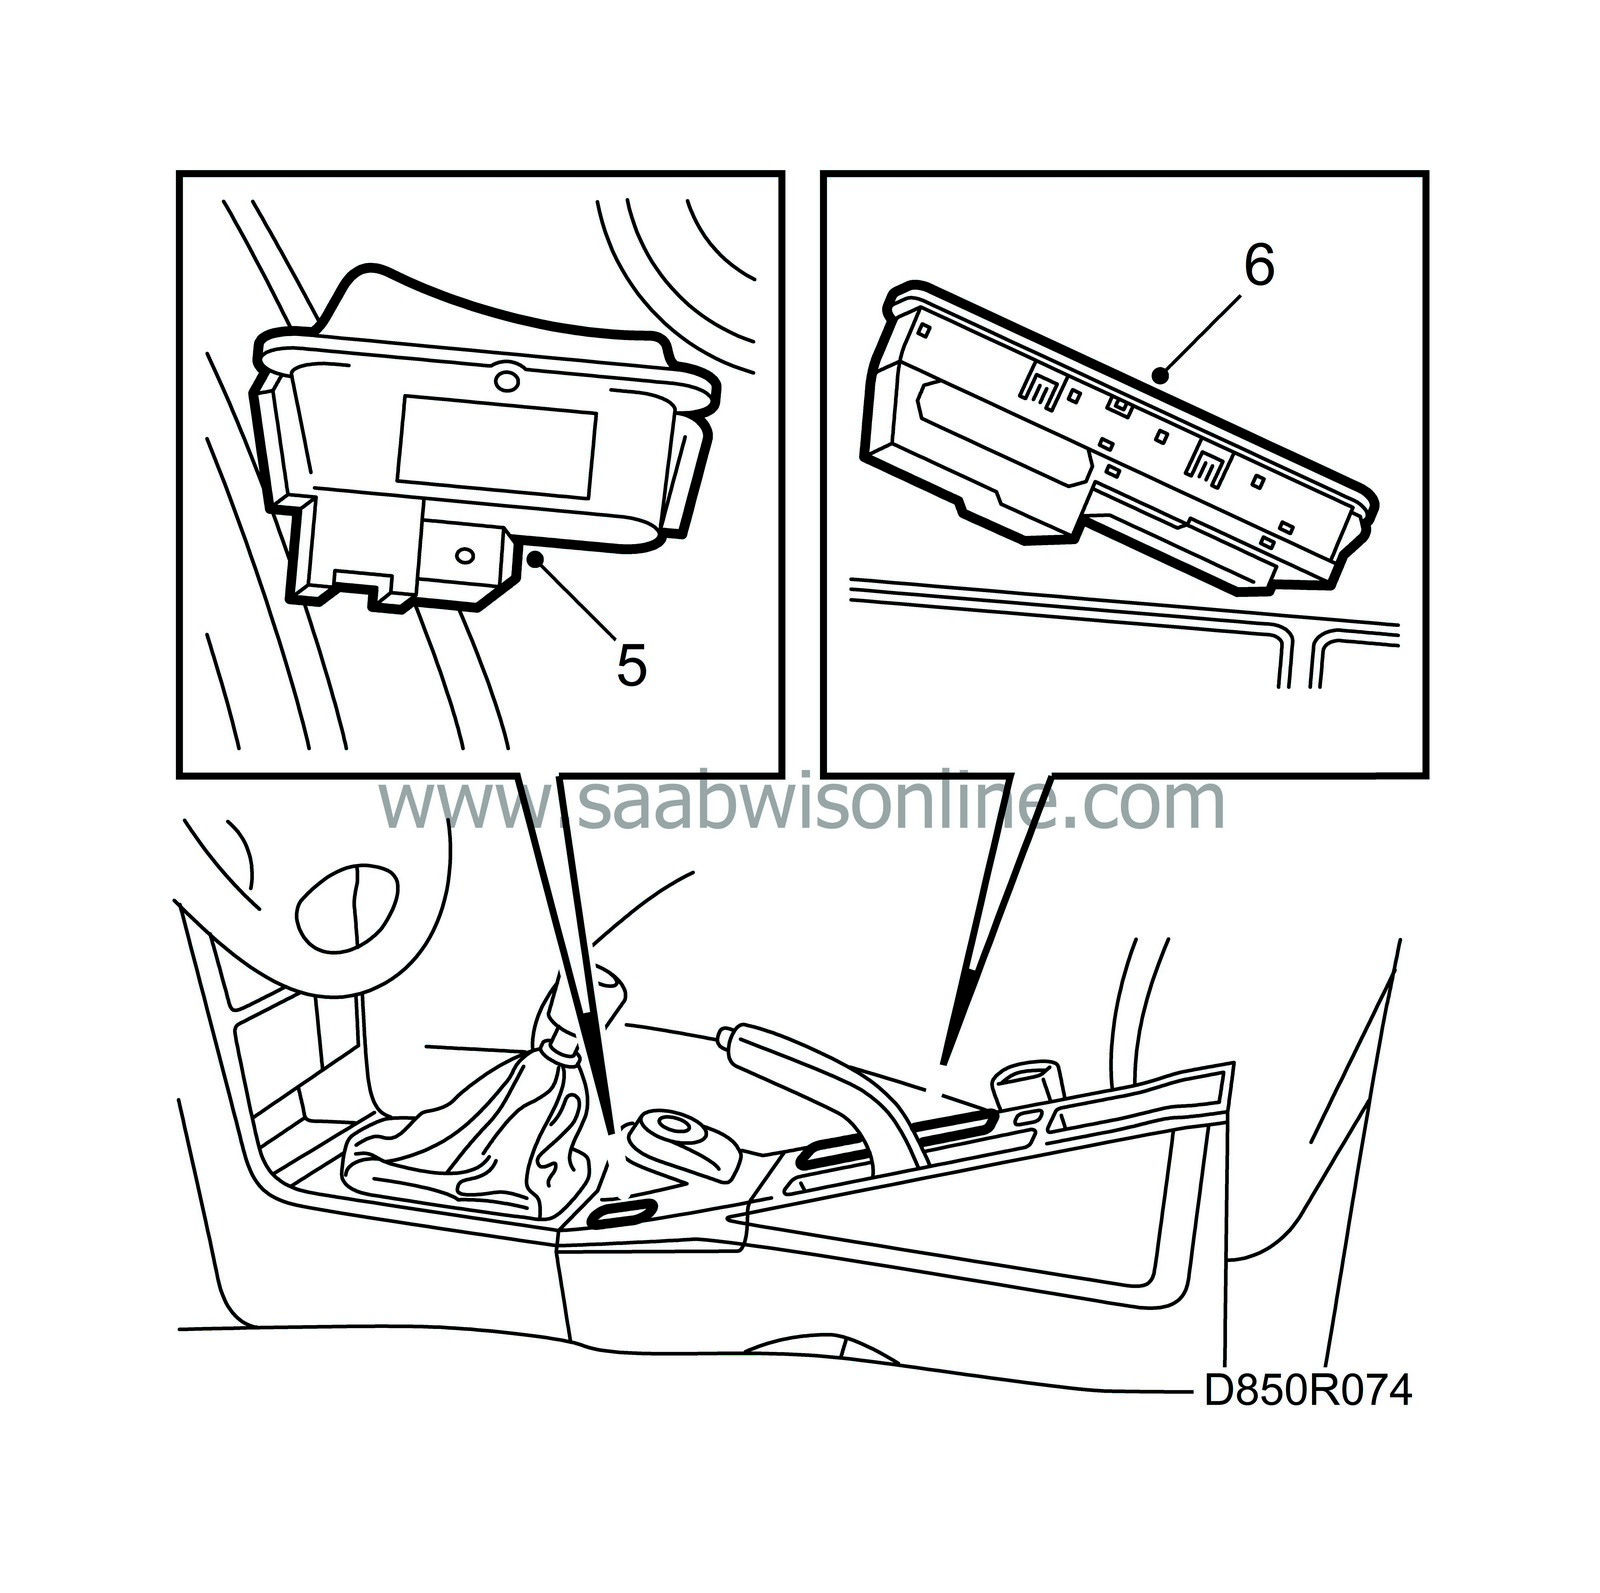
Fit the floor console over the handbrake. Do not press it down into place - just position it loosely.
|
|
| 5. |
Fit the switch of the dome lighting and plug its connector together (convertible).
|
|
| 6. |
Pass the connectors of the window-lift module and the rear-seat heater through the appropriate holes. Connect up the connector of the window-lift module and install the module.
|
|
| 7. |
Connect up the connector of the rear-seat heater and install the switch.
|
|
| 8. |
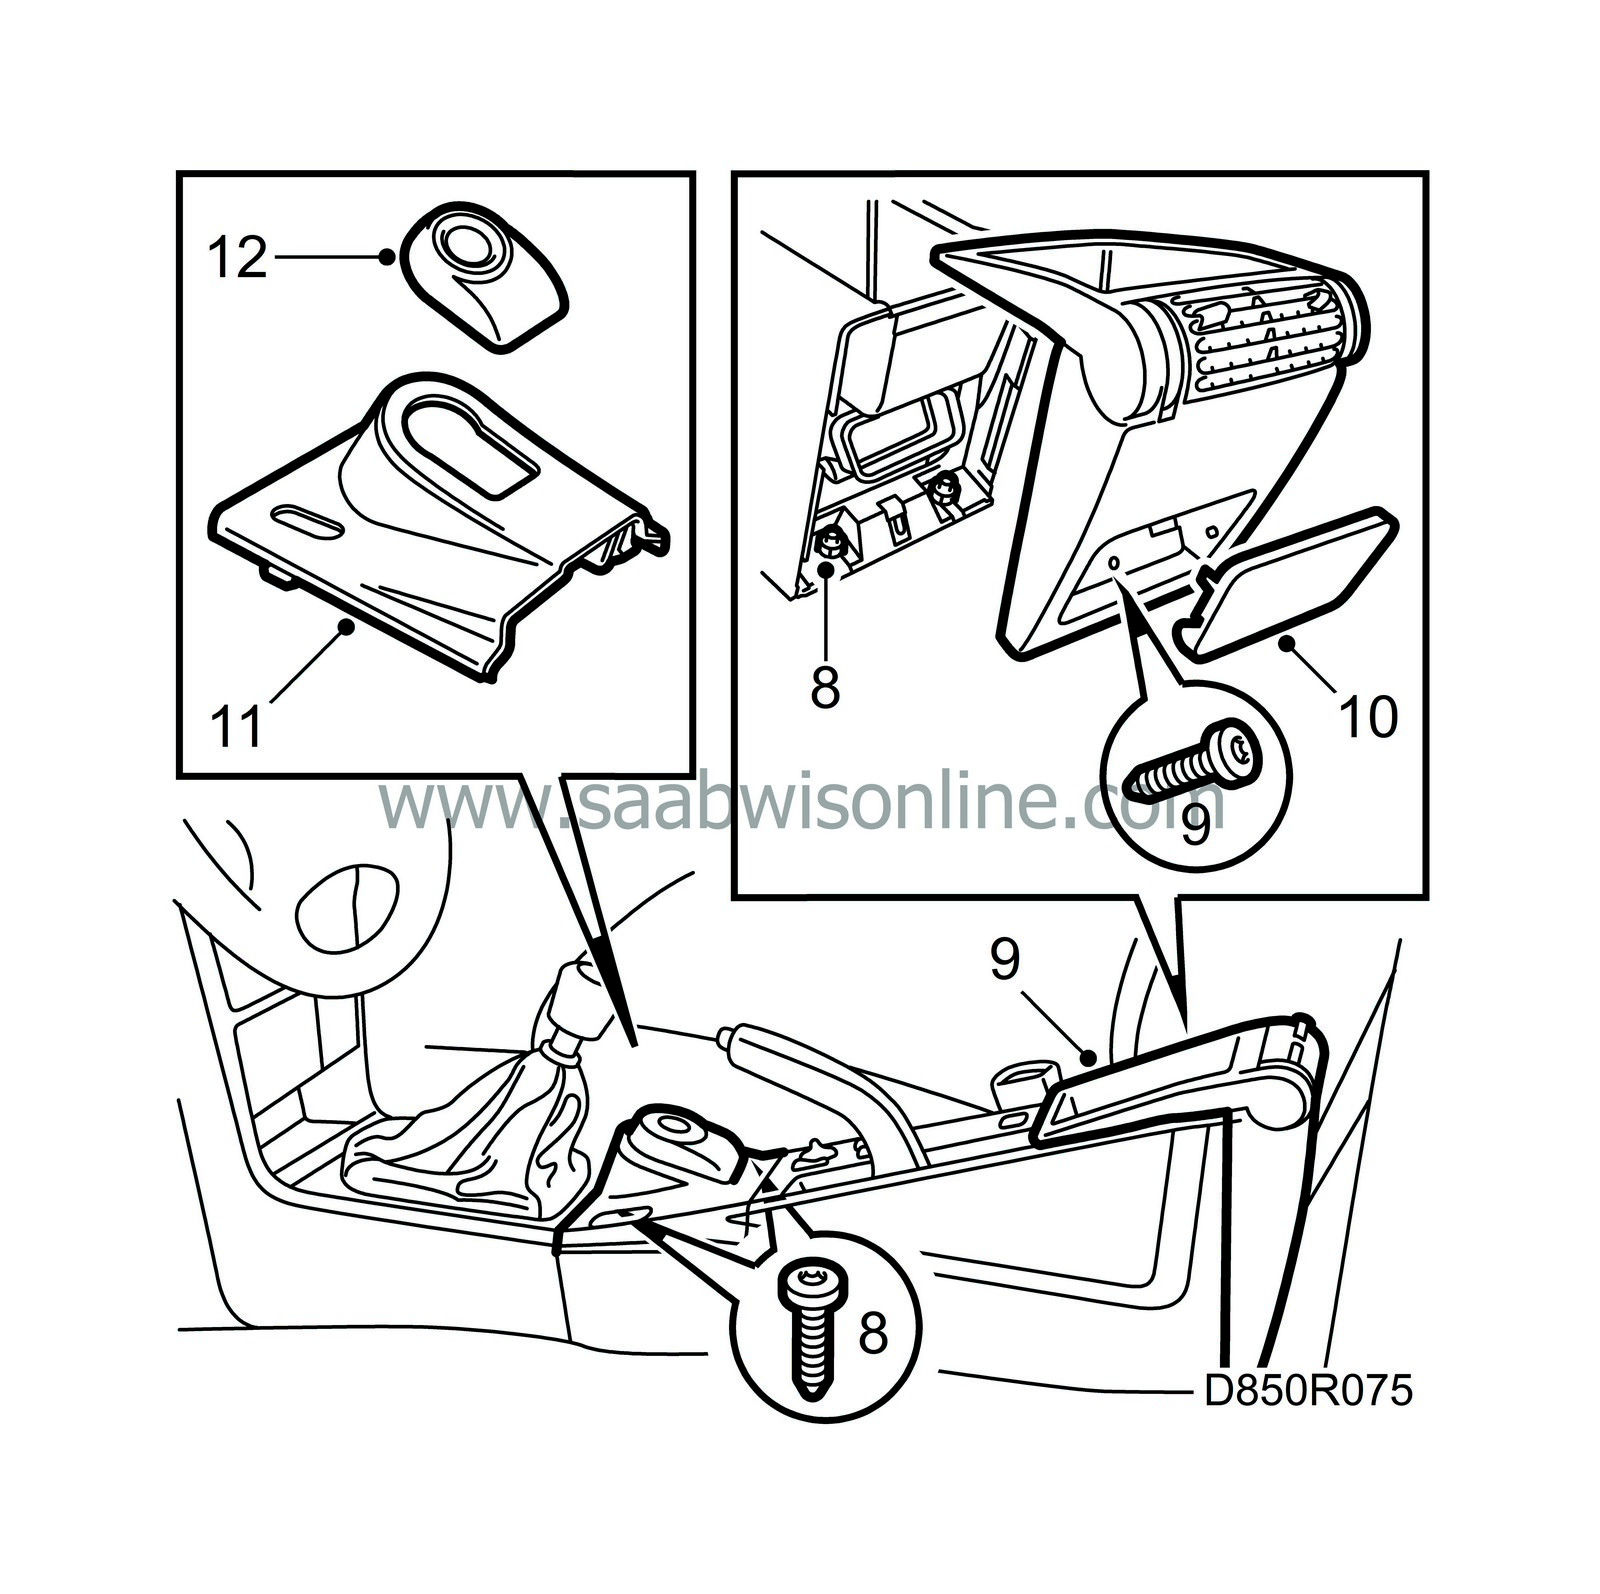
Tighten the two retaining screws and the two retaining nuts of the floor console.
|
|
| 9. |
Put the rear cowl into place, making sure that the air duct seats properly against the nozzle. Secure the cowl with one torx screw.
|
|
| 10. |
Put the ashtray/cover plate back into place.
|
|
| 11. |
Fit the cover plate of the ignition switch.
|
|
| 12. |
Connect up the connector of the immobilizing unit. Install the unit, which has a bayonet fitting.
|
|
| 13. |
New control module:
|
|
| 14. |
Switch the ignition on and check the SRS system and the control module using the diagnostic tool as follows:
Connect the diagnostic tool to the diagnostic socket under the dashboard. Clear any diagnostic trouble codes that are present. Turn the ignition off and on again. Wait at least 10 seconds with the ignition on. Check whether a diagnostic trouble code is shown: If a diagnostic trouble code is shown: Carry out the relevant fault diagnosis as described under the respective DTC. If no diagnostic trouble code is shown: The installation is successful. Disconnect the diagnostic tool. |
|

 Warning
