(850-2013) Checking wiring harness for side impact sensor
|
MODIFICATION INSTRUCTION
|
|
Bulletin Nbr:
|
850-2013
|
|
Date:
...........
|
NOVEMBER 1998
|
|
Market:
|
SE SEPARAT LISTA
|
|
|
Checking wiring harness for side impact sensor
|
Cars in stock should be rectified before delivery.
Cars already delivered should be rectified next time they are brought in for regular servicing or repairs.
All cars within the following VIN interval:
3D:
W2050308-W2059794 and X2000095-X2005351
CV:
W7050095-W7053499 and X7000063-X7001724
The wiring harness in the door may be damaged due to incorrect length.
Inspection
79 71 880 Cable tie
Replacement
51 06 786 Wiring harness, driver's door
51 06 794 Wiring harness, passenger door
44 94 951 Water barrier, left door mirror
44 94 969 Water barrier, right door mirror
Before taking any measures, box A1 on the modification identity plate must be checked. If the box is empty, proceed as follows:
|
1.
|
The ignition key must be in OFF position.

|
|
2.
|
Remove the tailgate opening button.
|
|
3.
|
Undo the cover on the door handle mounting and remove the door handle.
|
|
4.
|
Remove the cover on the door mirror.
|
|
5.
|
Remove the door pull cover.
|
|
6.
|
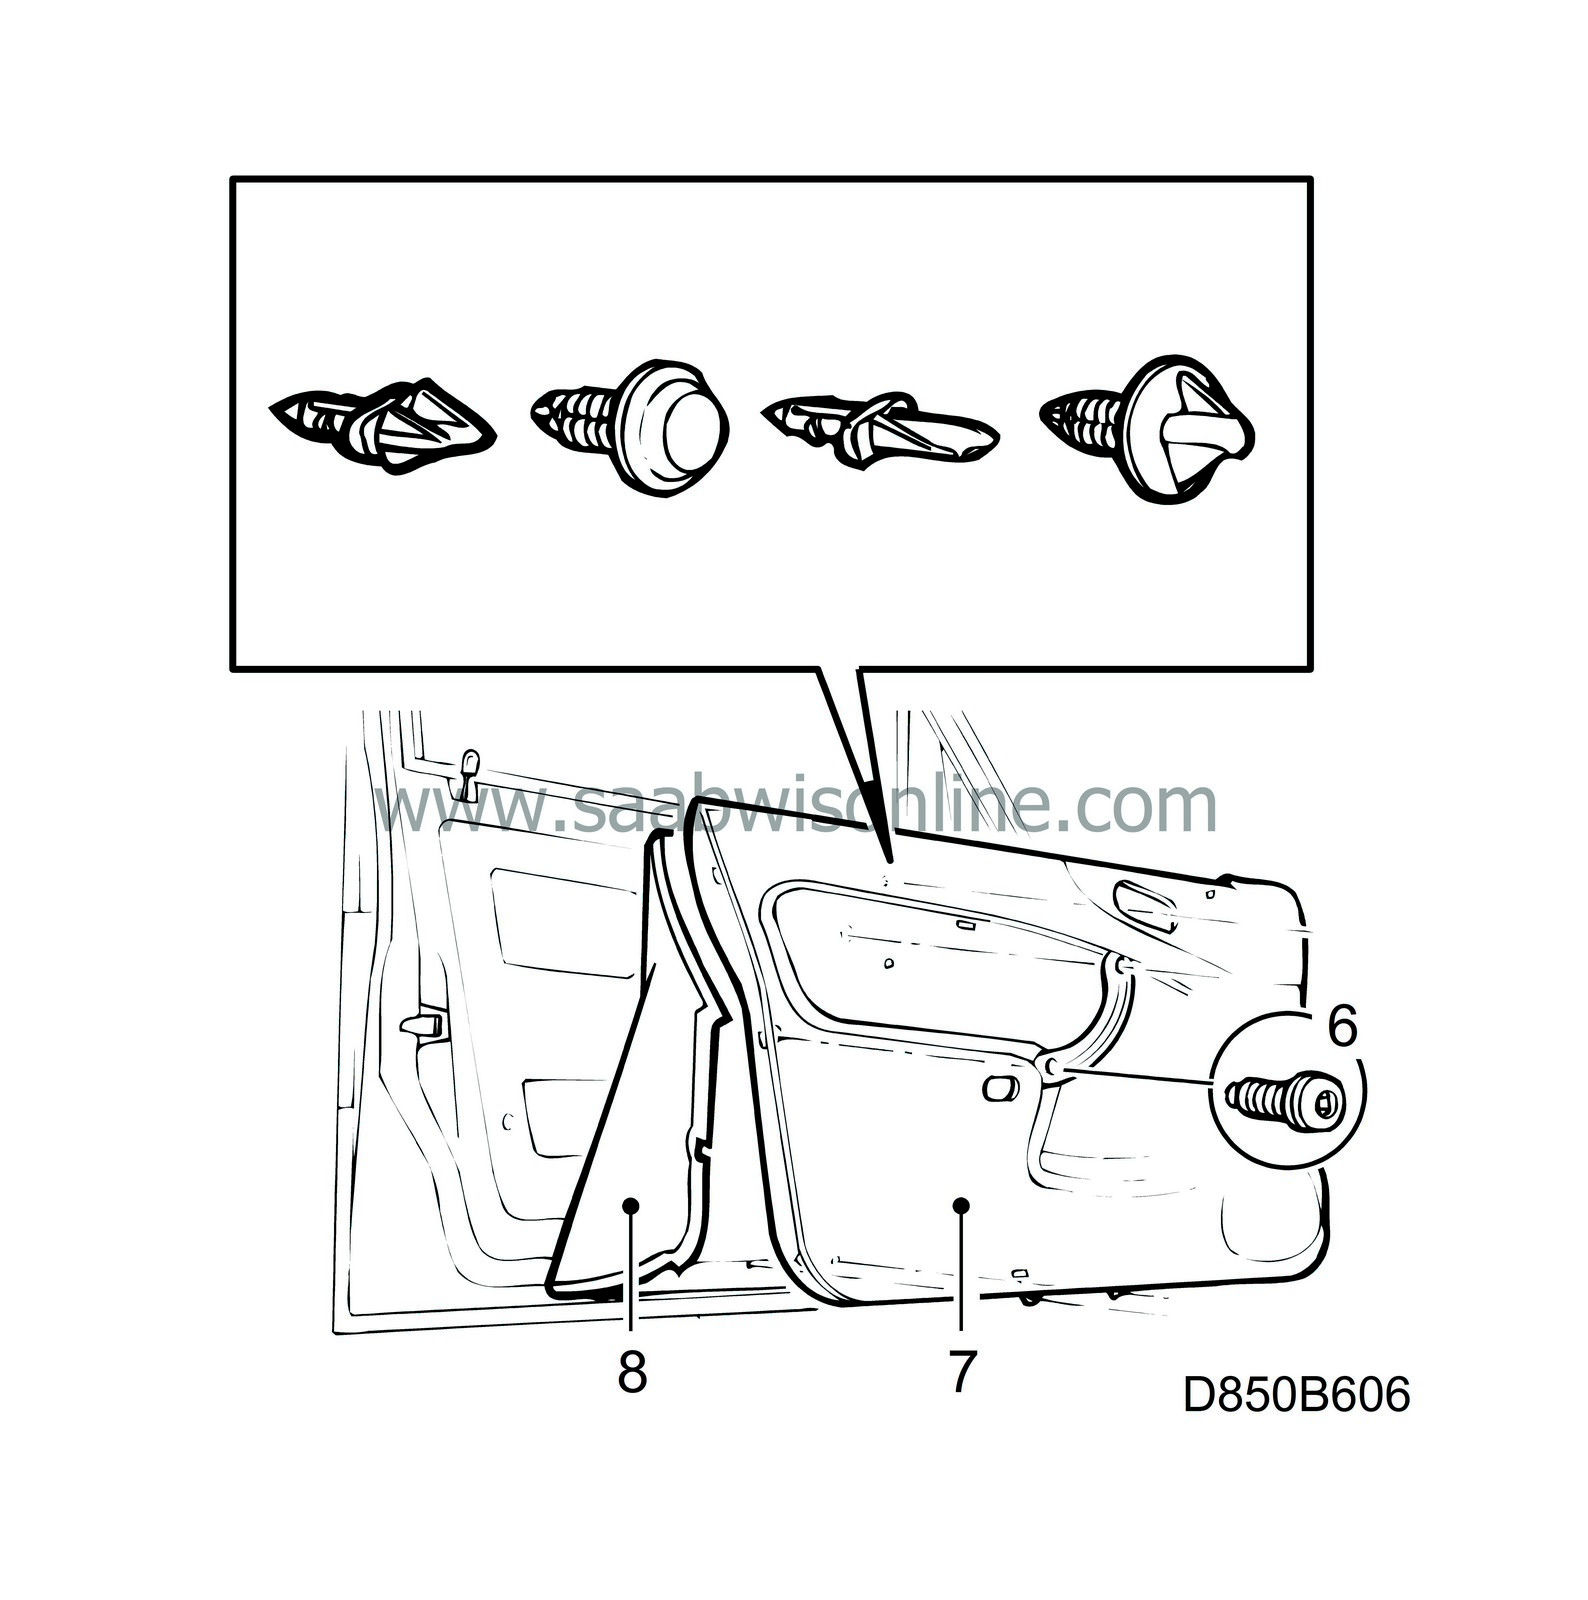
Undo the screw securing the door trim.
|
|
7.
|
Pull off the door trim (fastened with clips) and lift it off the lock button.
|
|
8.
|
Carefully remove the water barrier.
|
|
9.
|
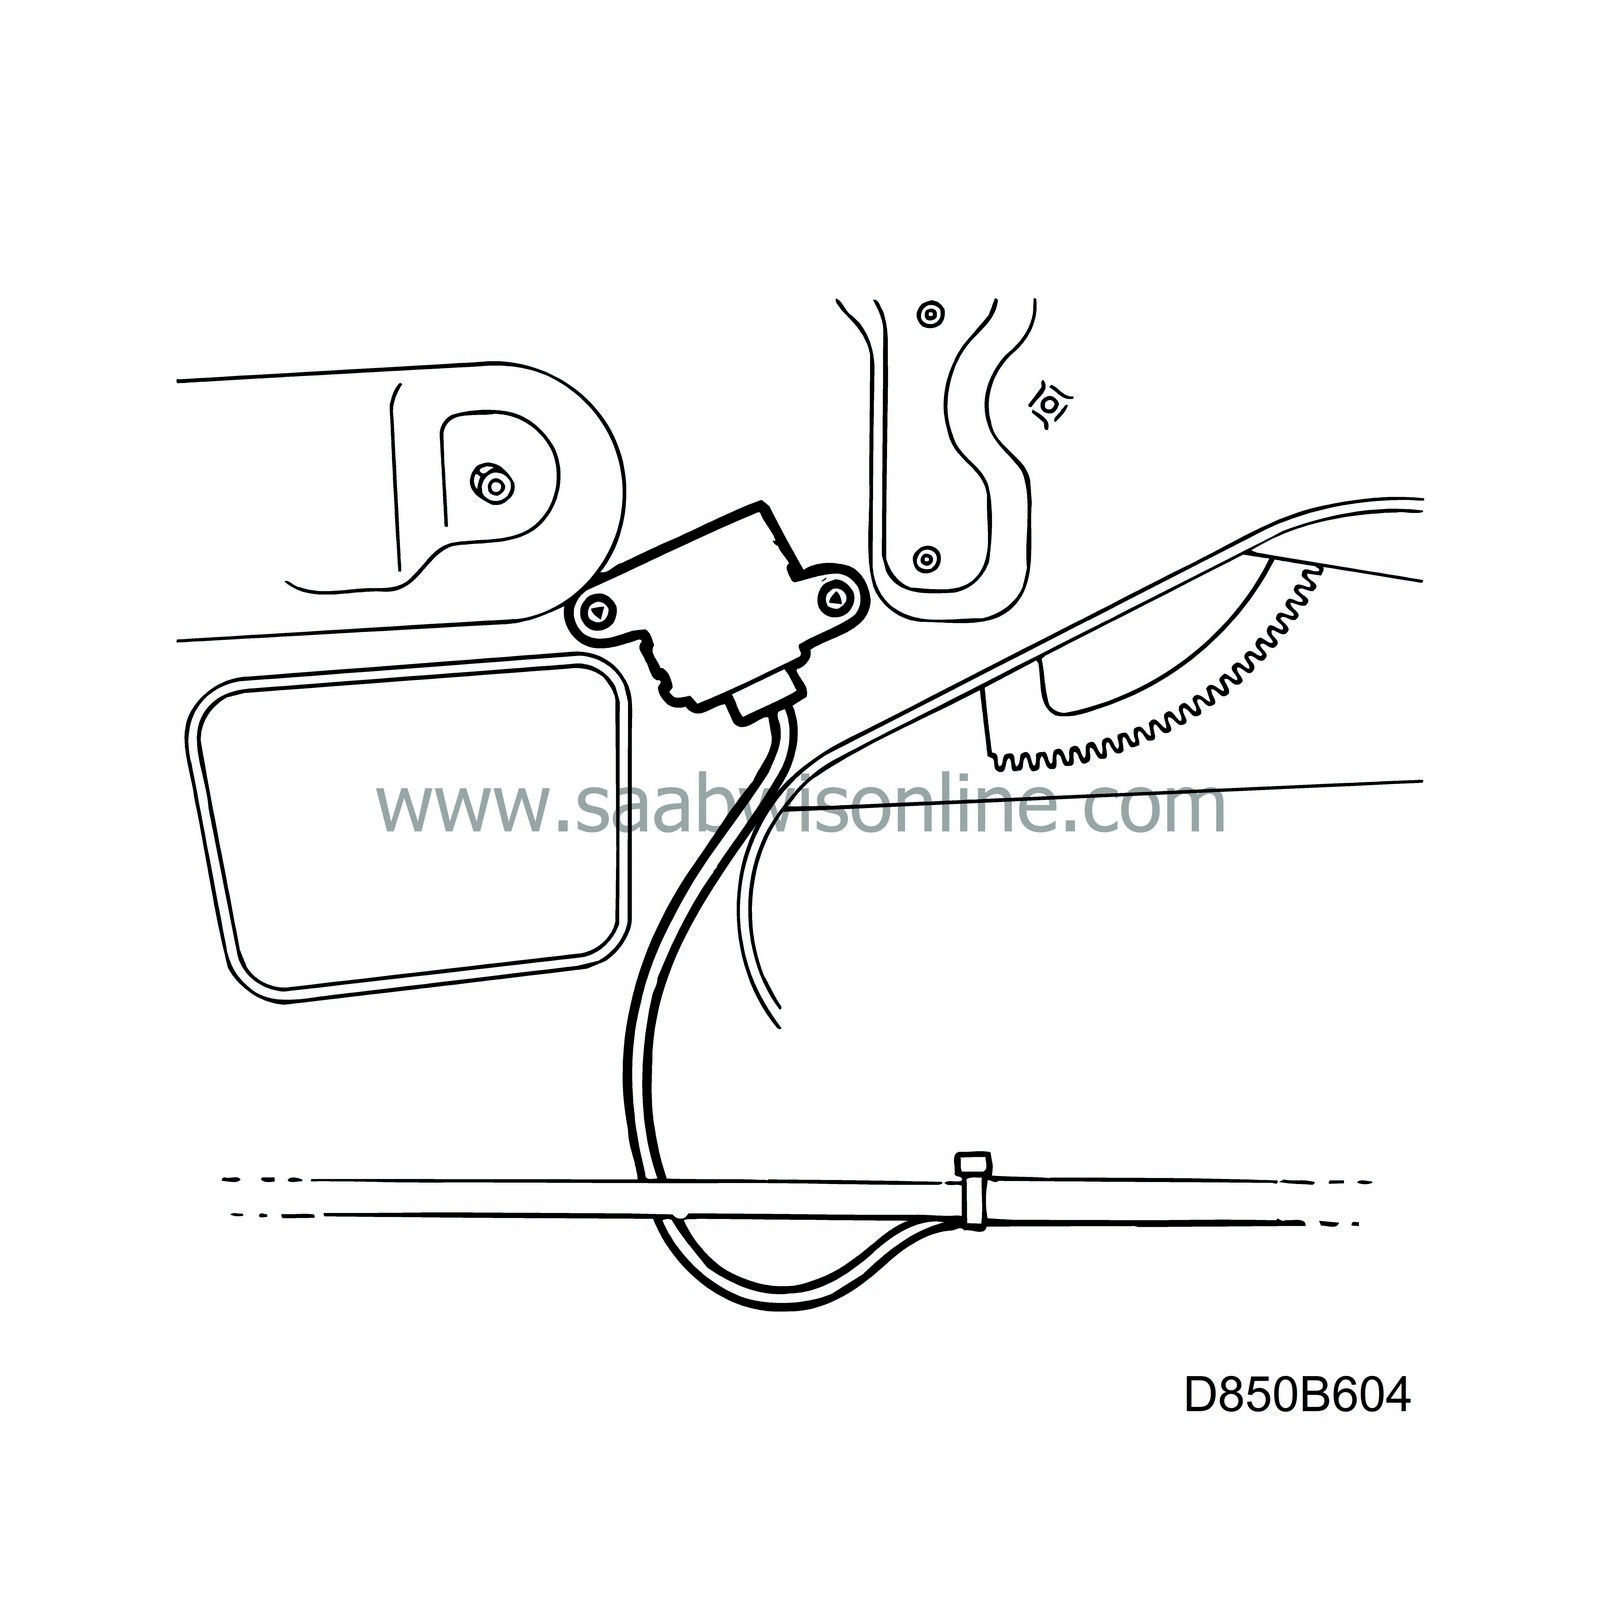
Undo the wiring harness clip (number 2 from rear edge).
|
|
10.
|
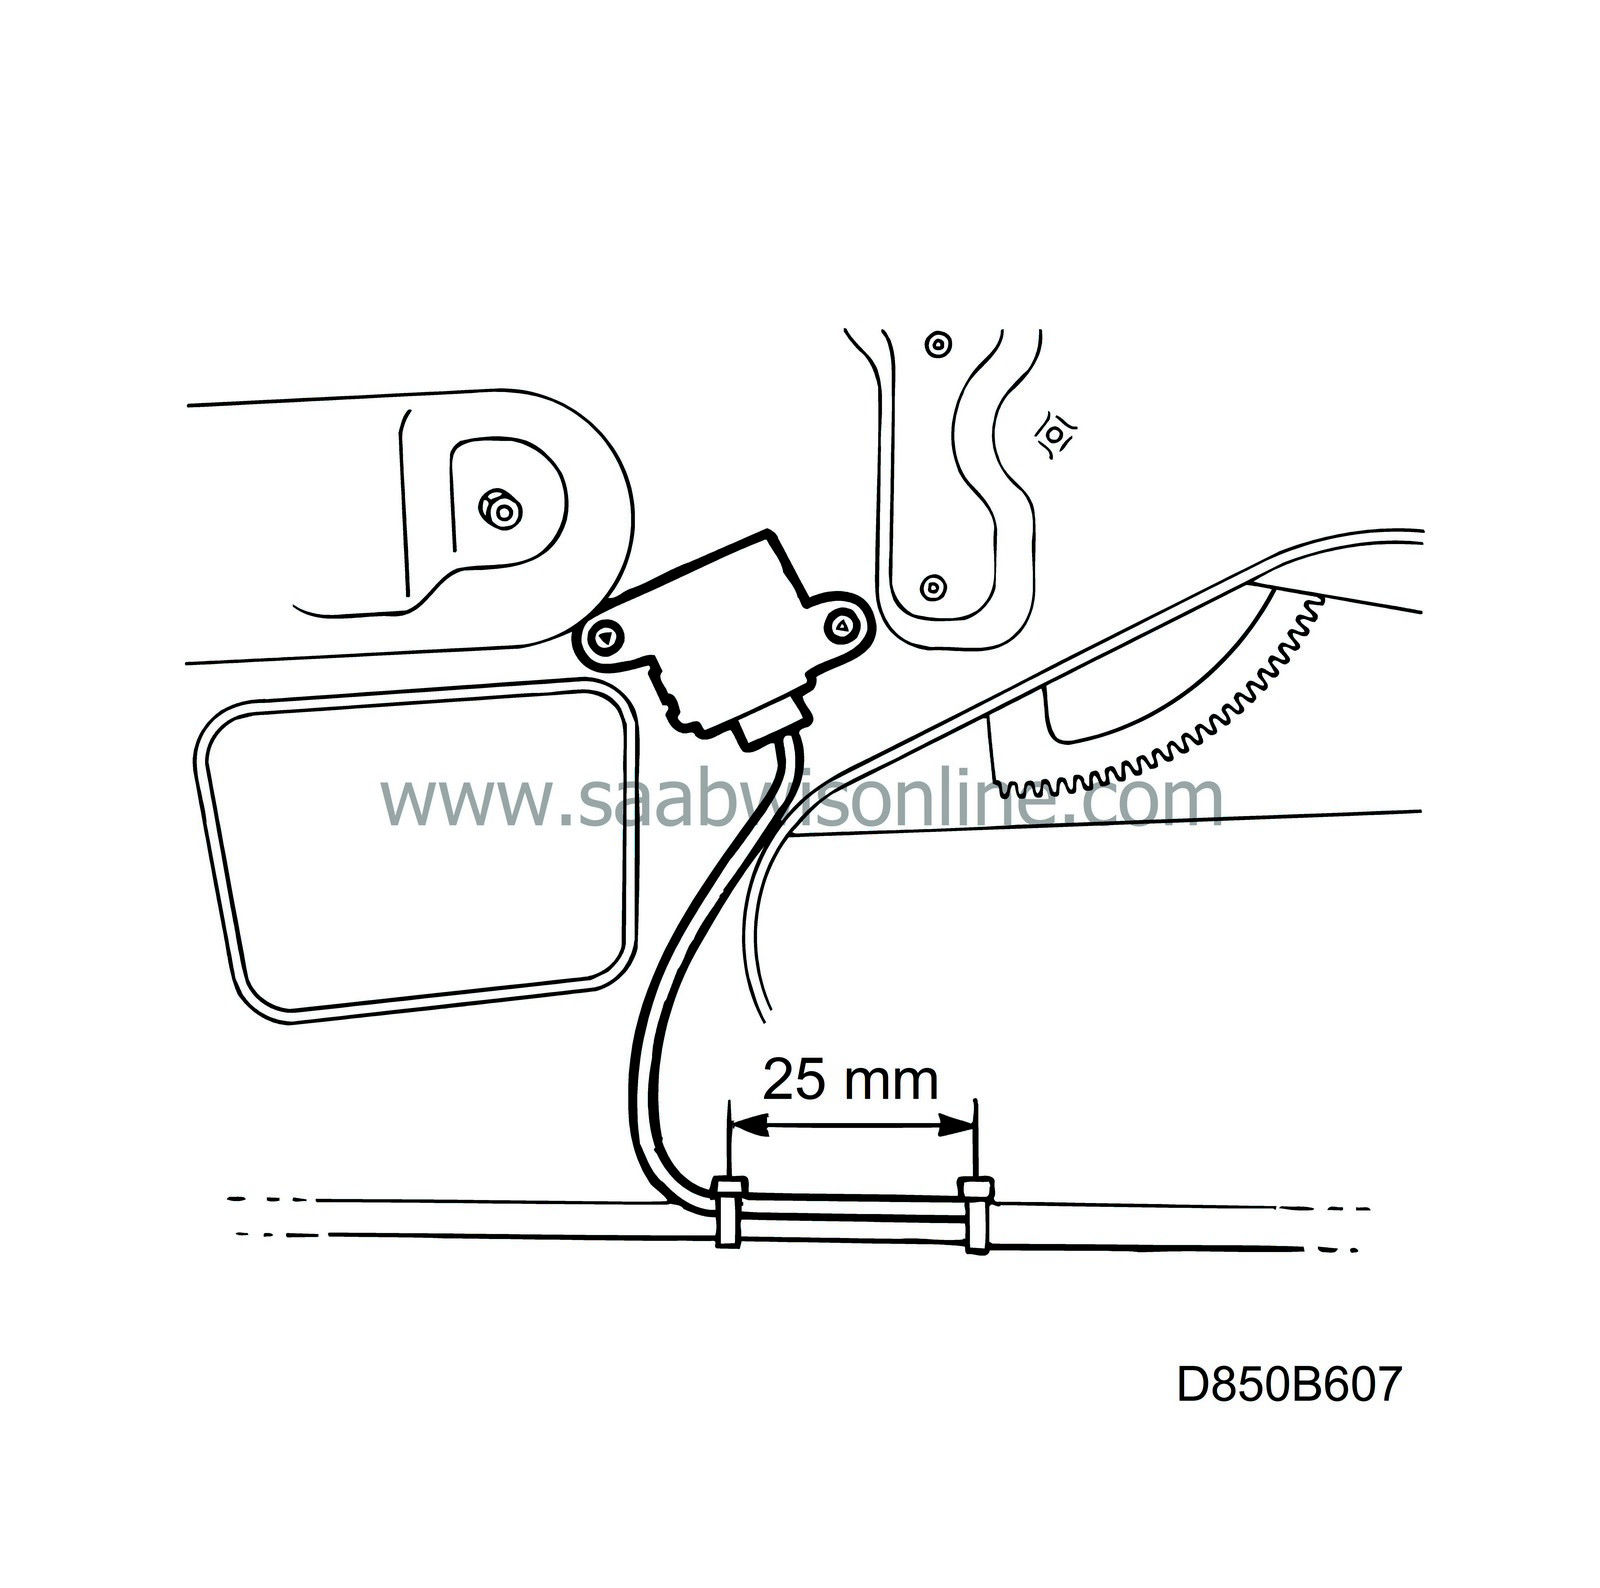
Make sure the wiring harness has not been damaged by chafing or pinching. If the wiring harness is damaged, it must be replaced. See 3. Electrical System, Wiring harnesses, Adjustment/replacement, Wiring harness, driver's door or Wiring harness, passenger door. In other cases, refit the clip and secure the wiring harness with another cable tie 25 mm from the branching point, see illustration.
|
|
11.
|
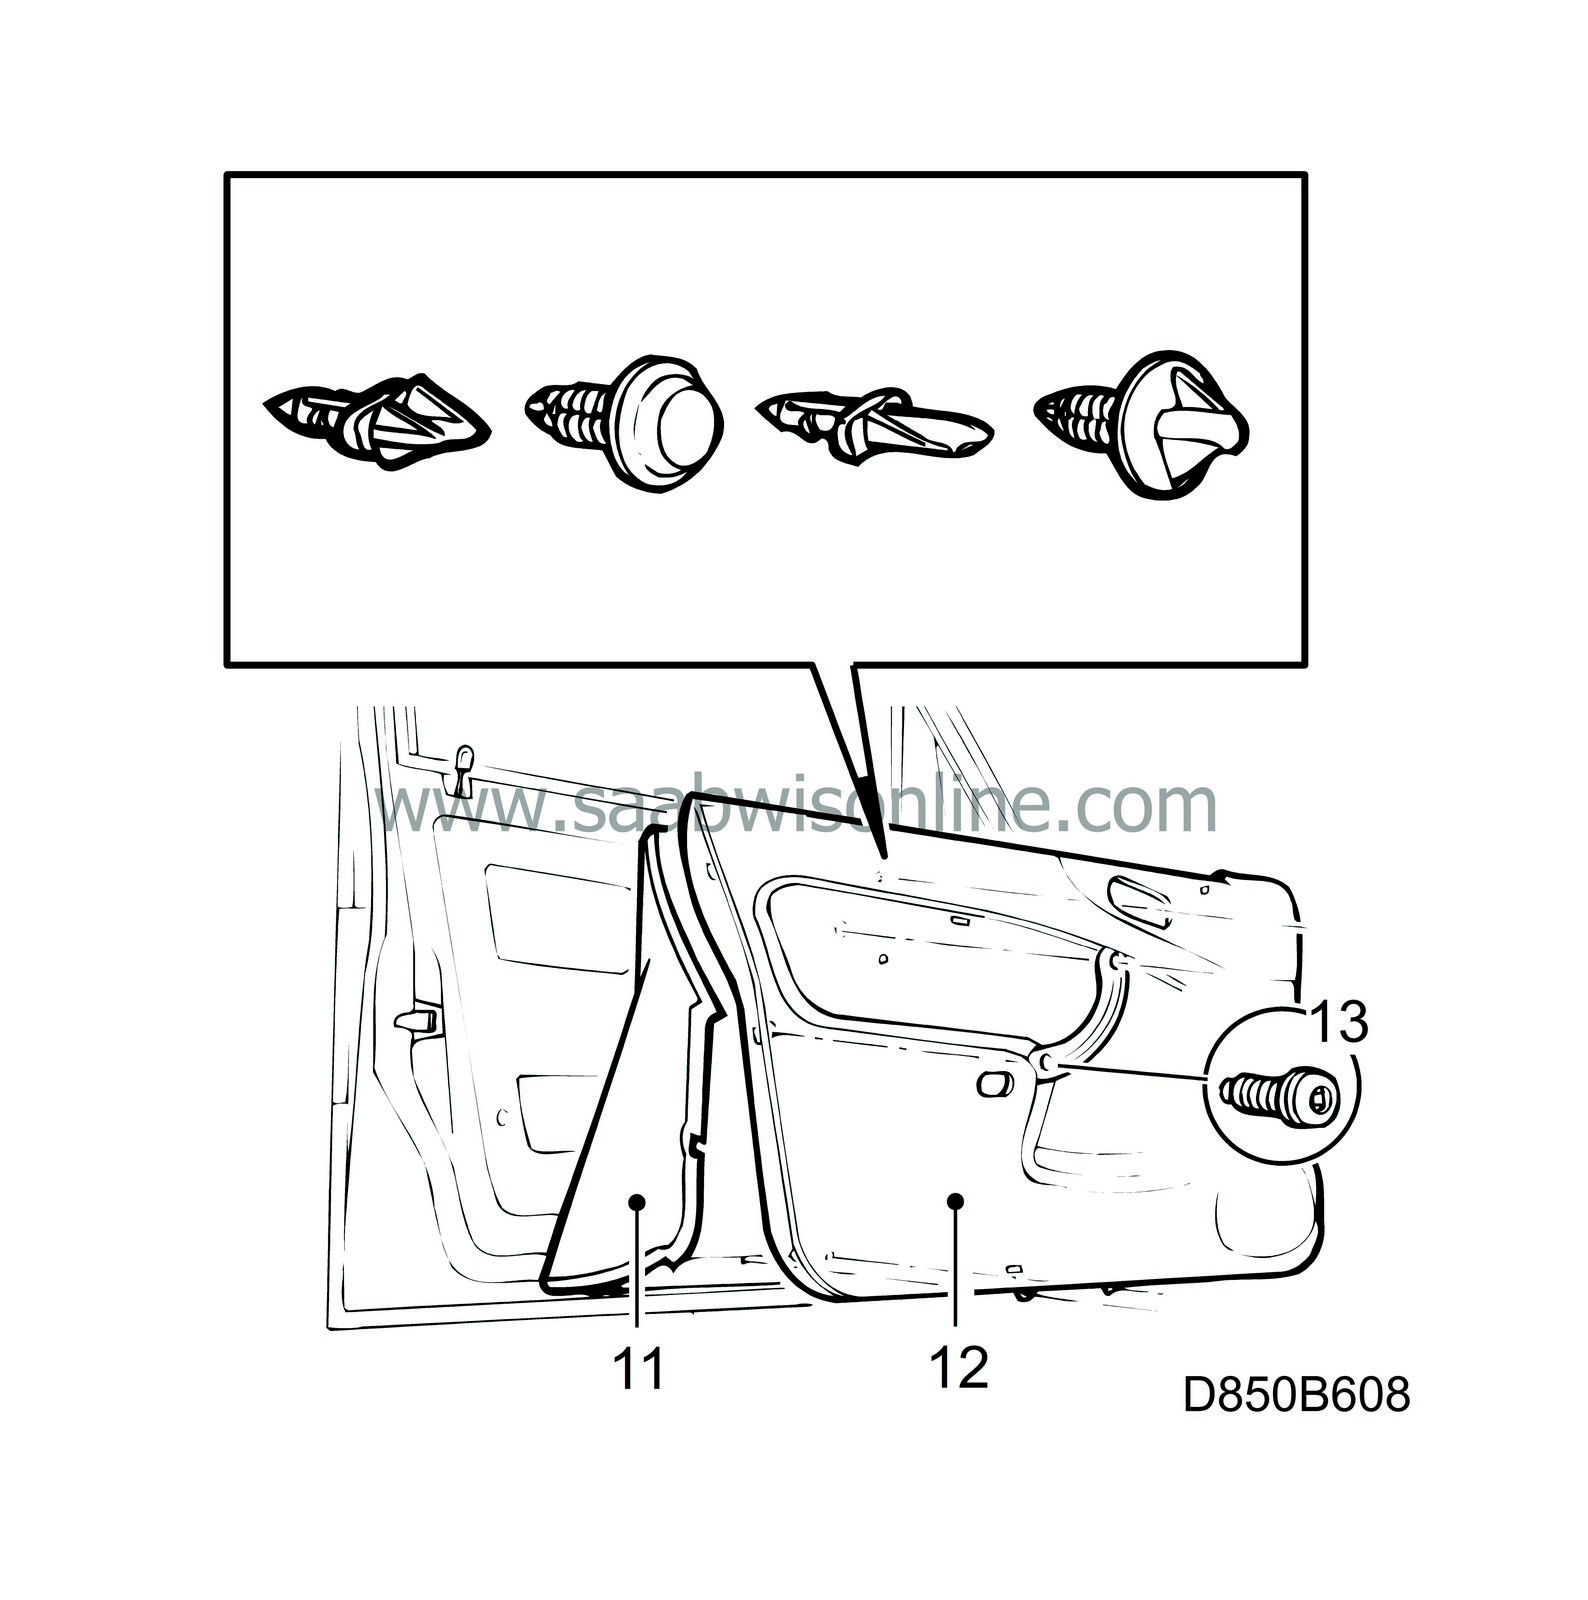
Fit the moisture barrier.
|
Important
|
|
Check that the moisture barrier seals against the door's inner panel and make sure that it is not damaged.
|
|
|
|
|
12.
|
Position the door trim.
|
|
13.
|
Screw on the door trim.
|
|
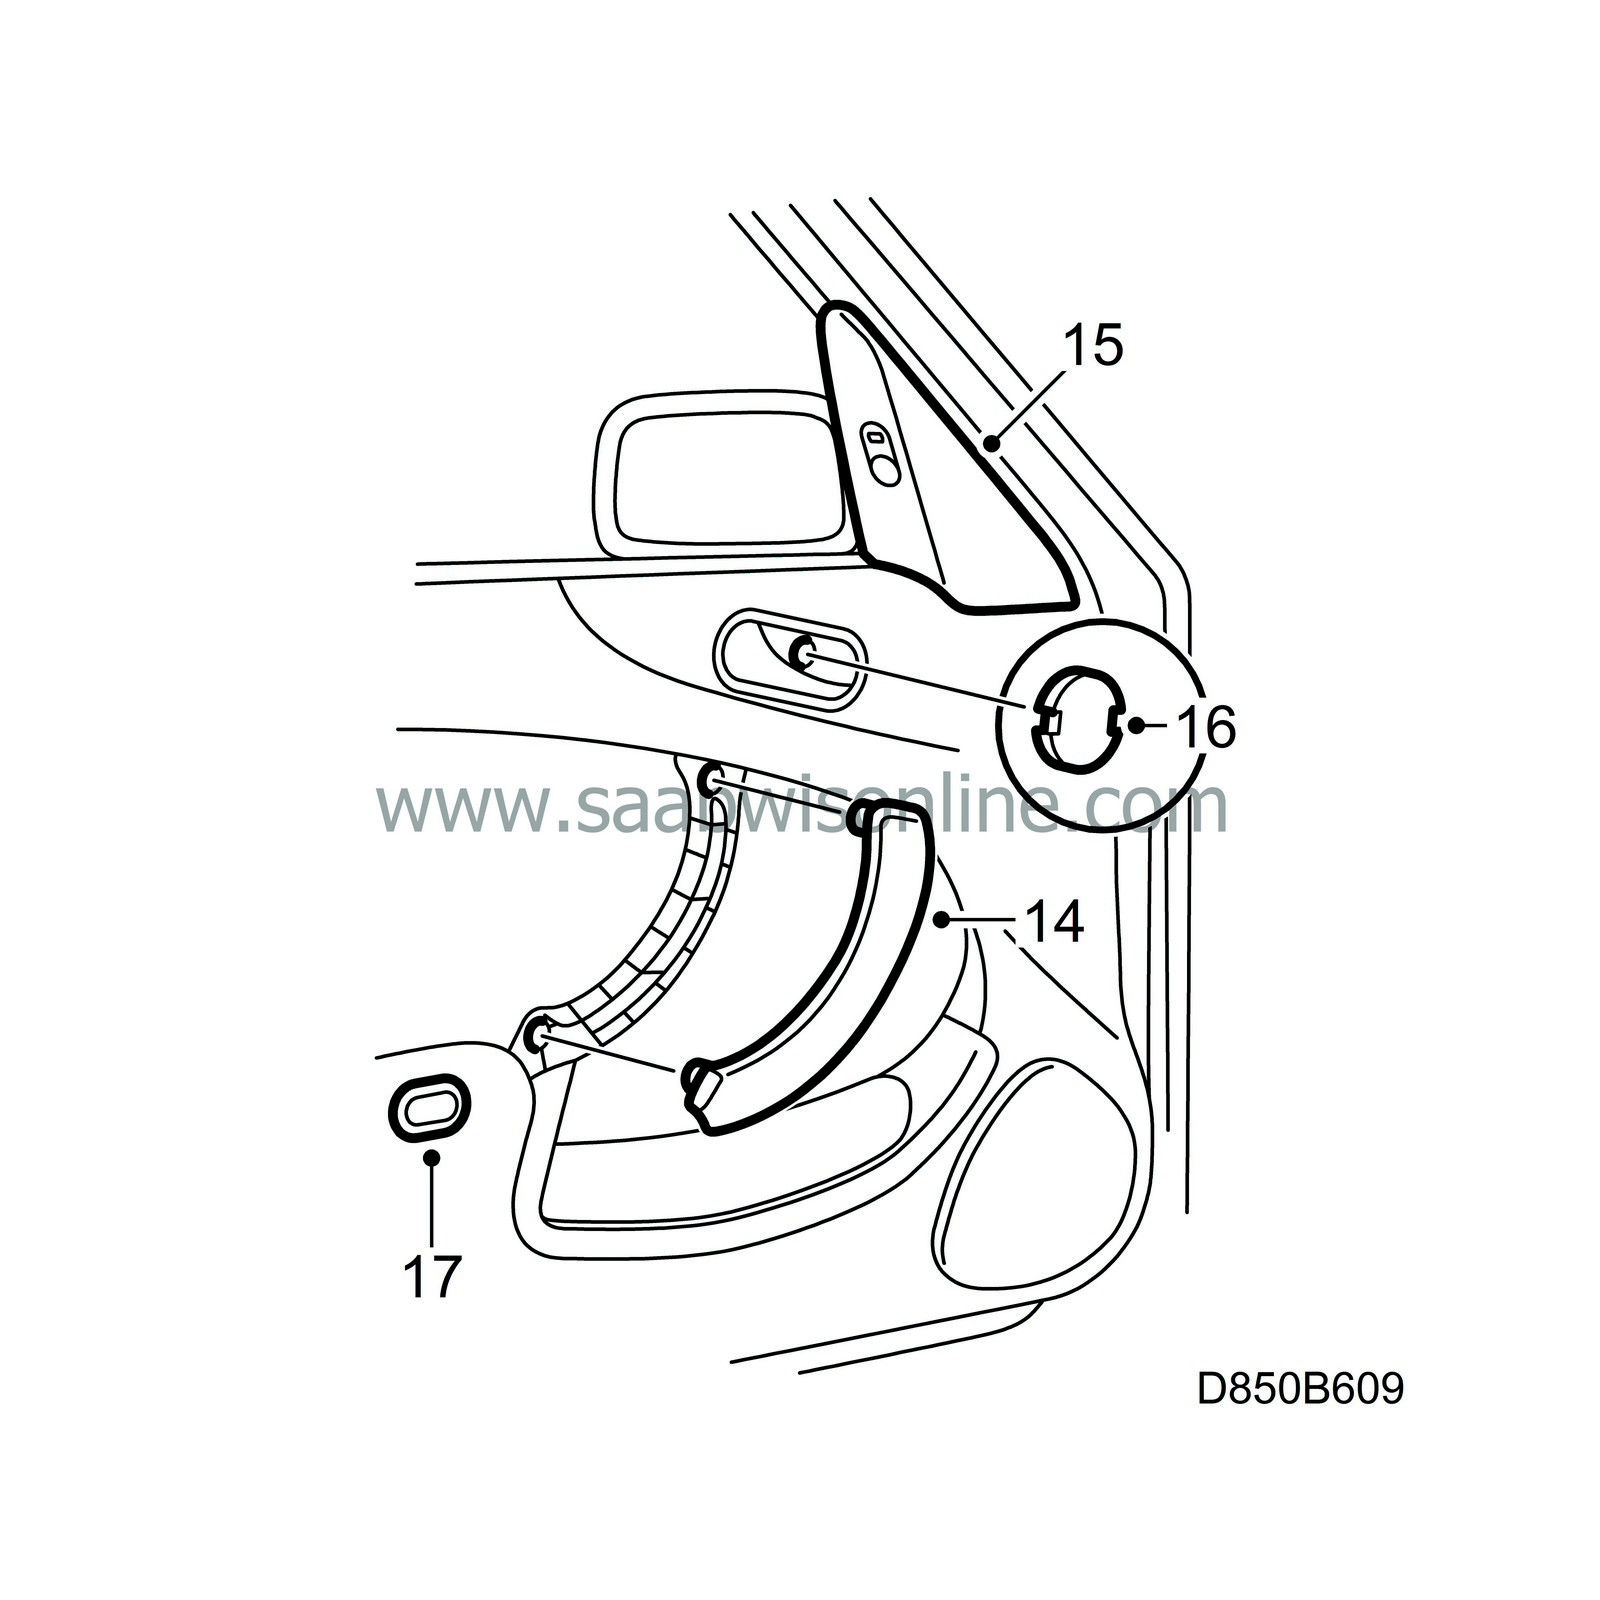
14.
|
Fit the door pull cover.
|
|
15.
|
Fit the cover on the door mirror.
|
|
16.
|
Fit the door handle and replace the cover on the handle mounting.
|
|
17.
|
Refit the tailgate opening button.
|
|
Marking the modification identity plate
|
On completion of the repair, box A1 of the modification identity plate should be marked. Mark it with a “7” if the repair was carried out by the importer or with an “8” if done by a dealer.
|
Warranty/Time information
|
See separate information.


