Tart of rear floor
| Tart of rear floor |
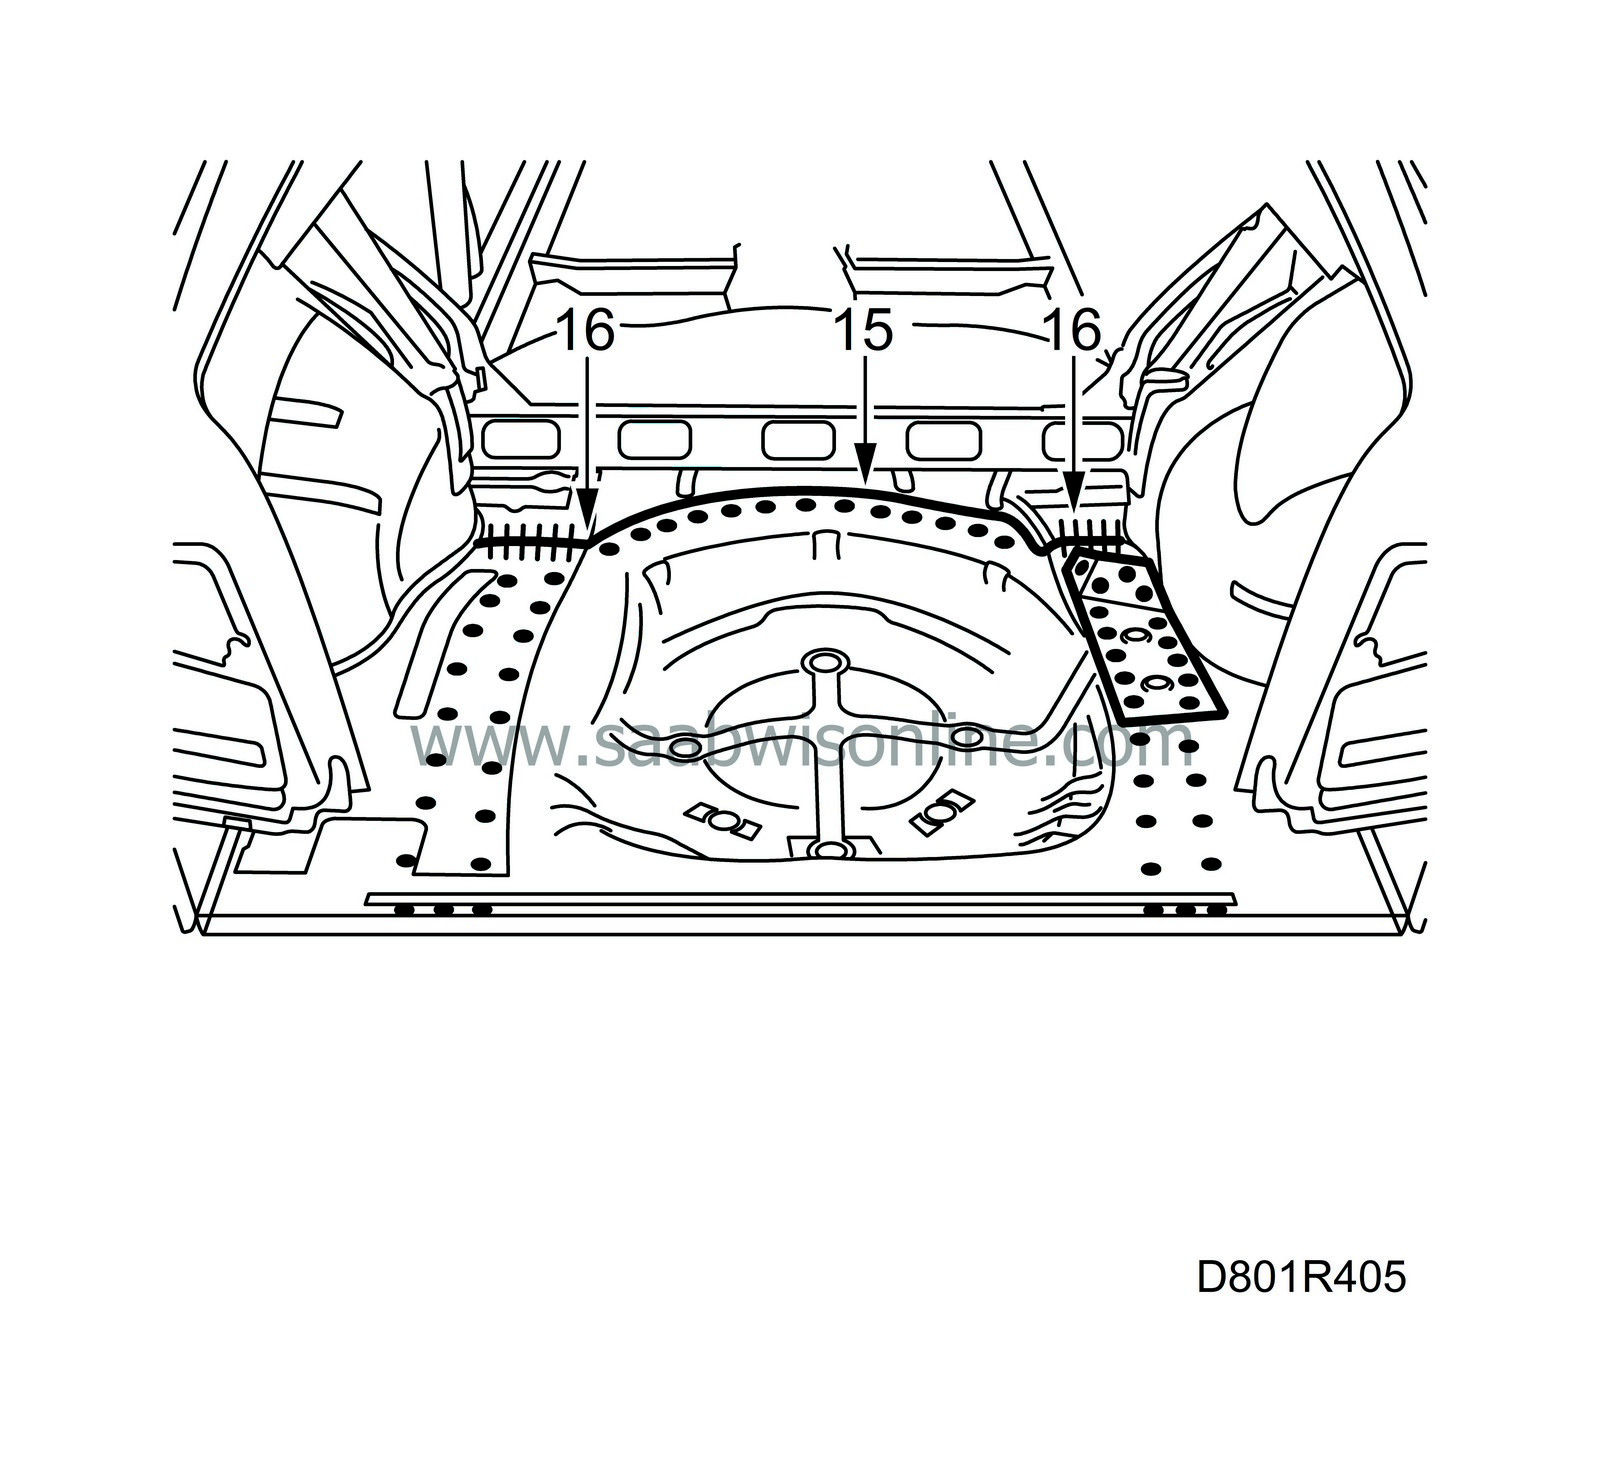
The new floor should be plug-welded at the front edge around the edge towards the spare tire well as well as be all-welded edge-to-edge between the spare tire well and the wheel housing.
| 1. |
Position the car in an aligning bench and cross-measure if necessary.
|
|
| 2. |
Remove the rear bumper abutment, see
Rear bumper abutment
.
|
|
| 3. |
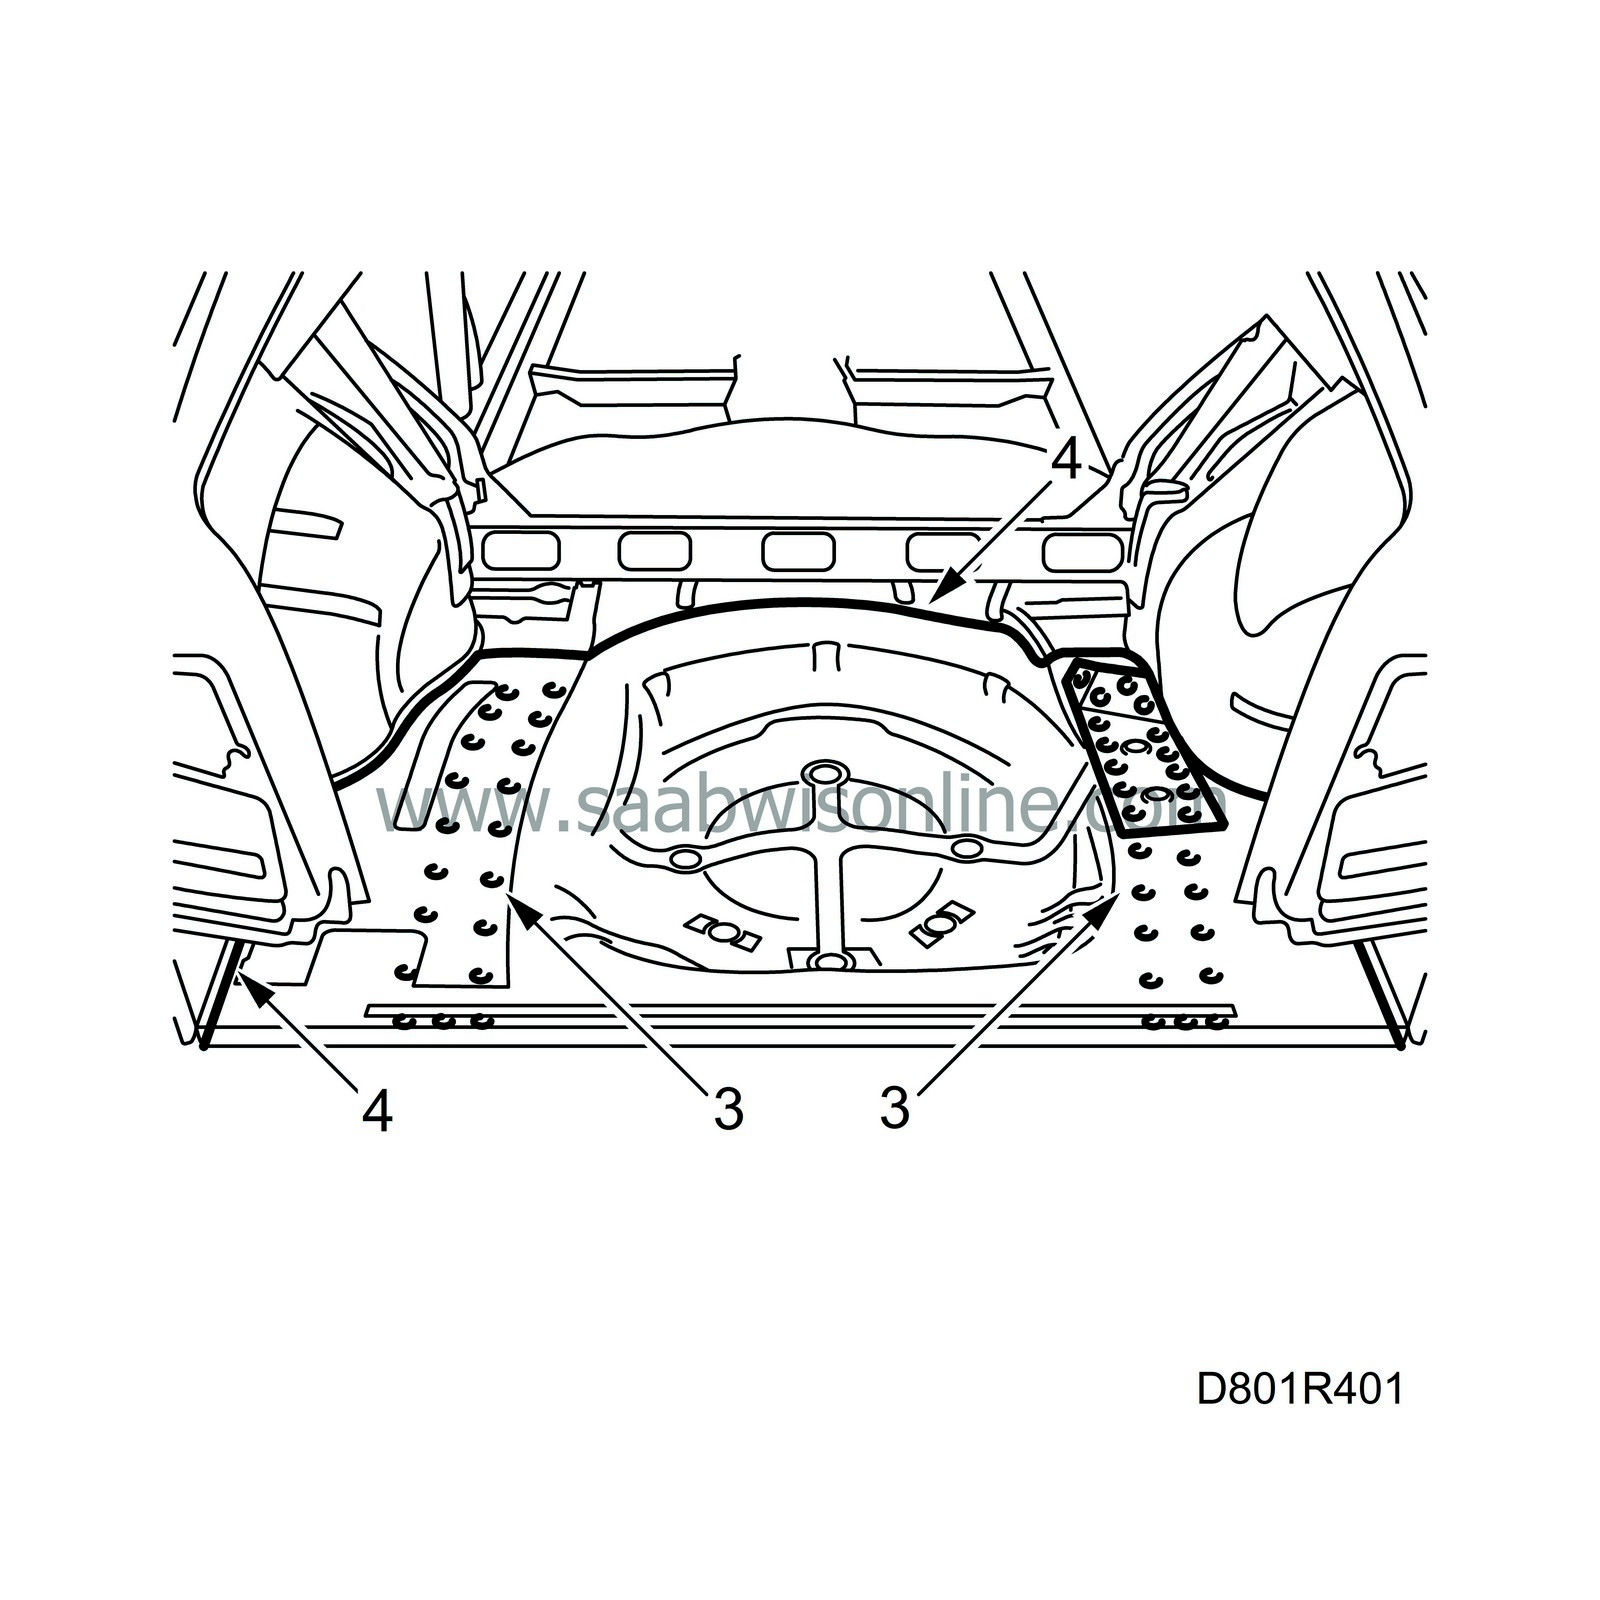
Drill out the spot-welds that secure the floor to the frame members.
|
|
| 4. |
Cut away the rear floor and remove it.
|
|
| 5. |
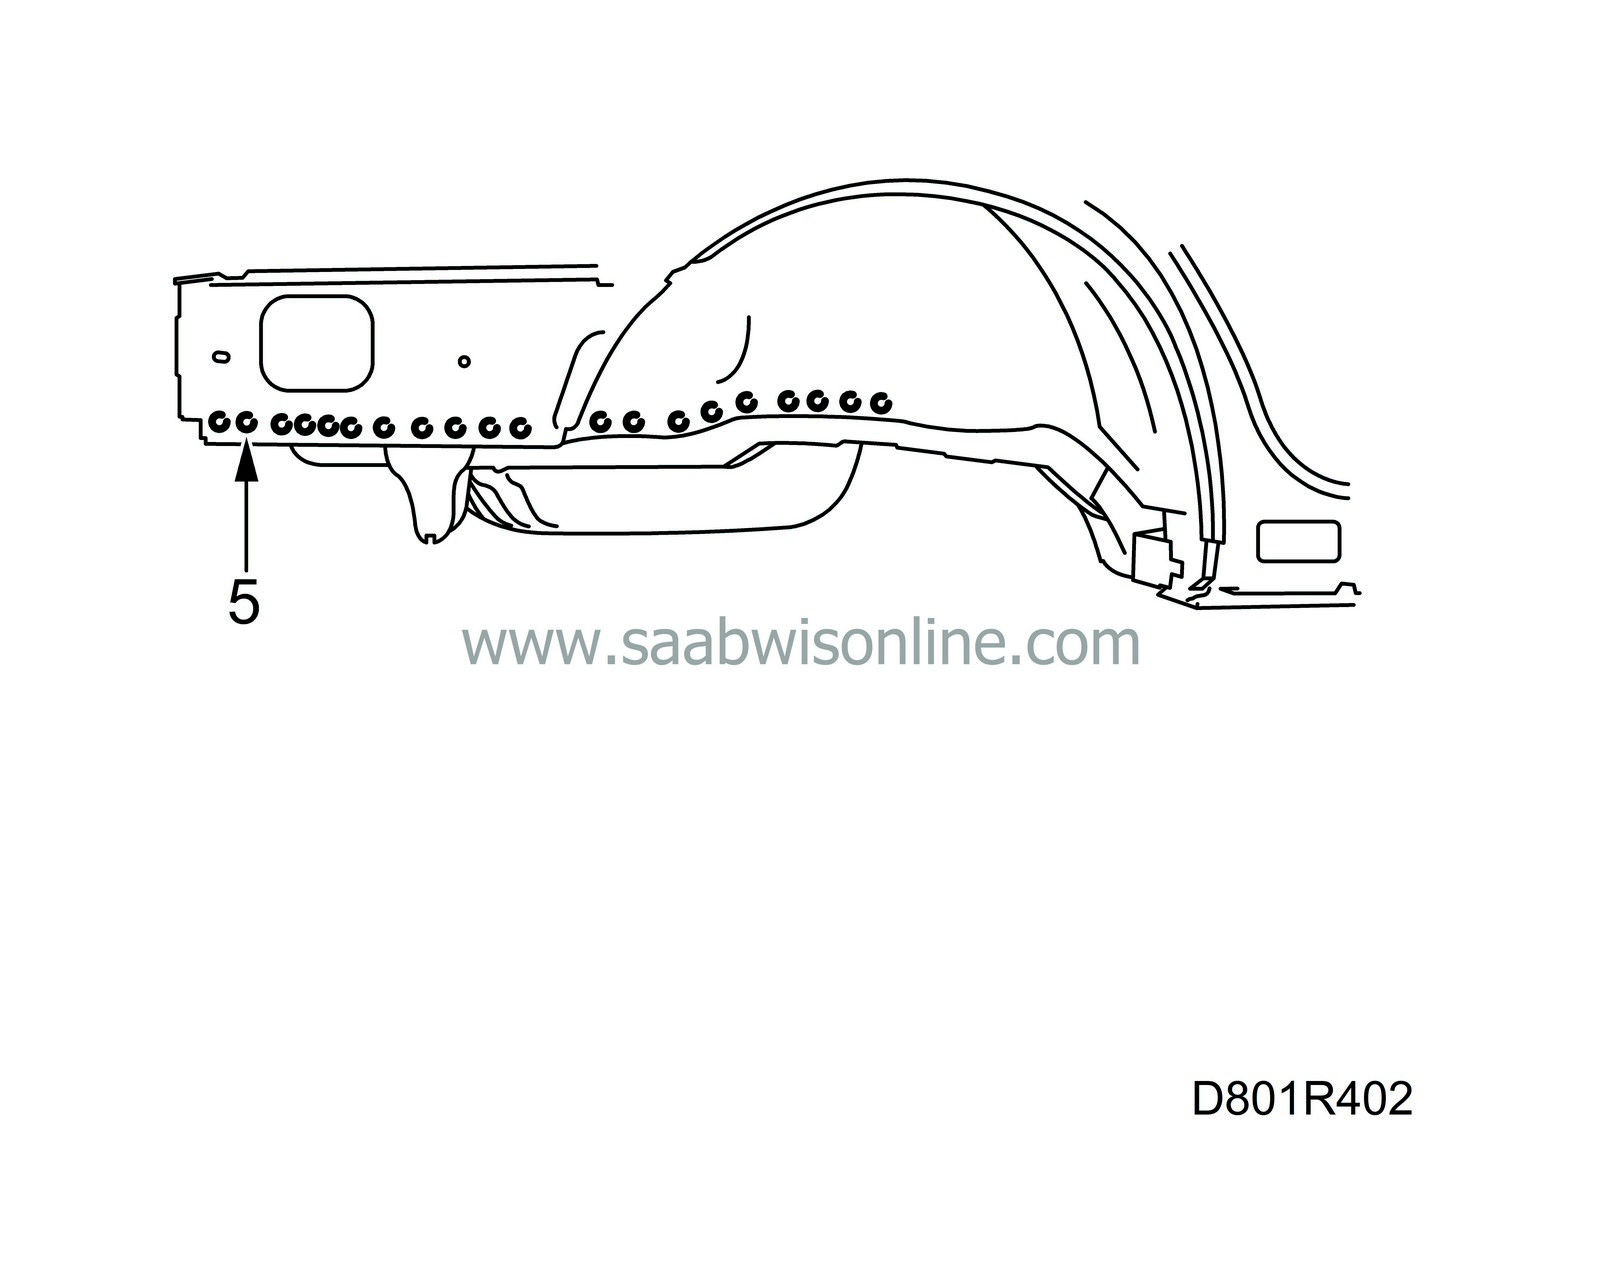
Drill out the spot-welds that secure the sides of the floor to the wheel housings and remove the remaining sheet metal sides.
|
|
| 6. |
Align any deformed sheet metal or panels.
|
|
| 7. |
Grind the surfaces to be welded on the body.
|
|
| 8. |
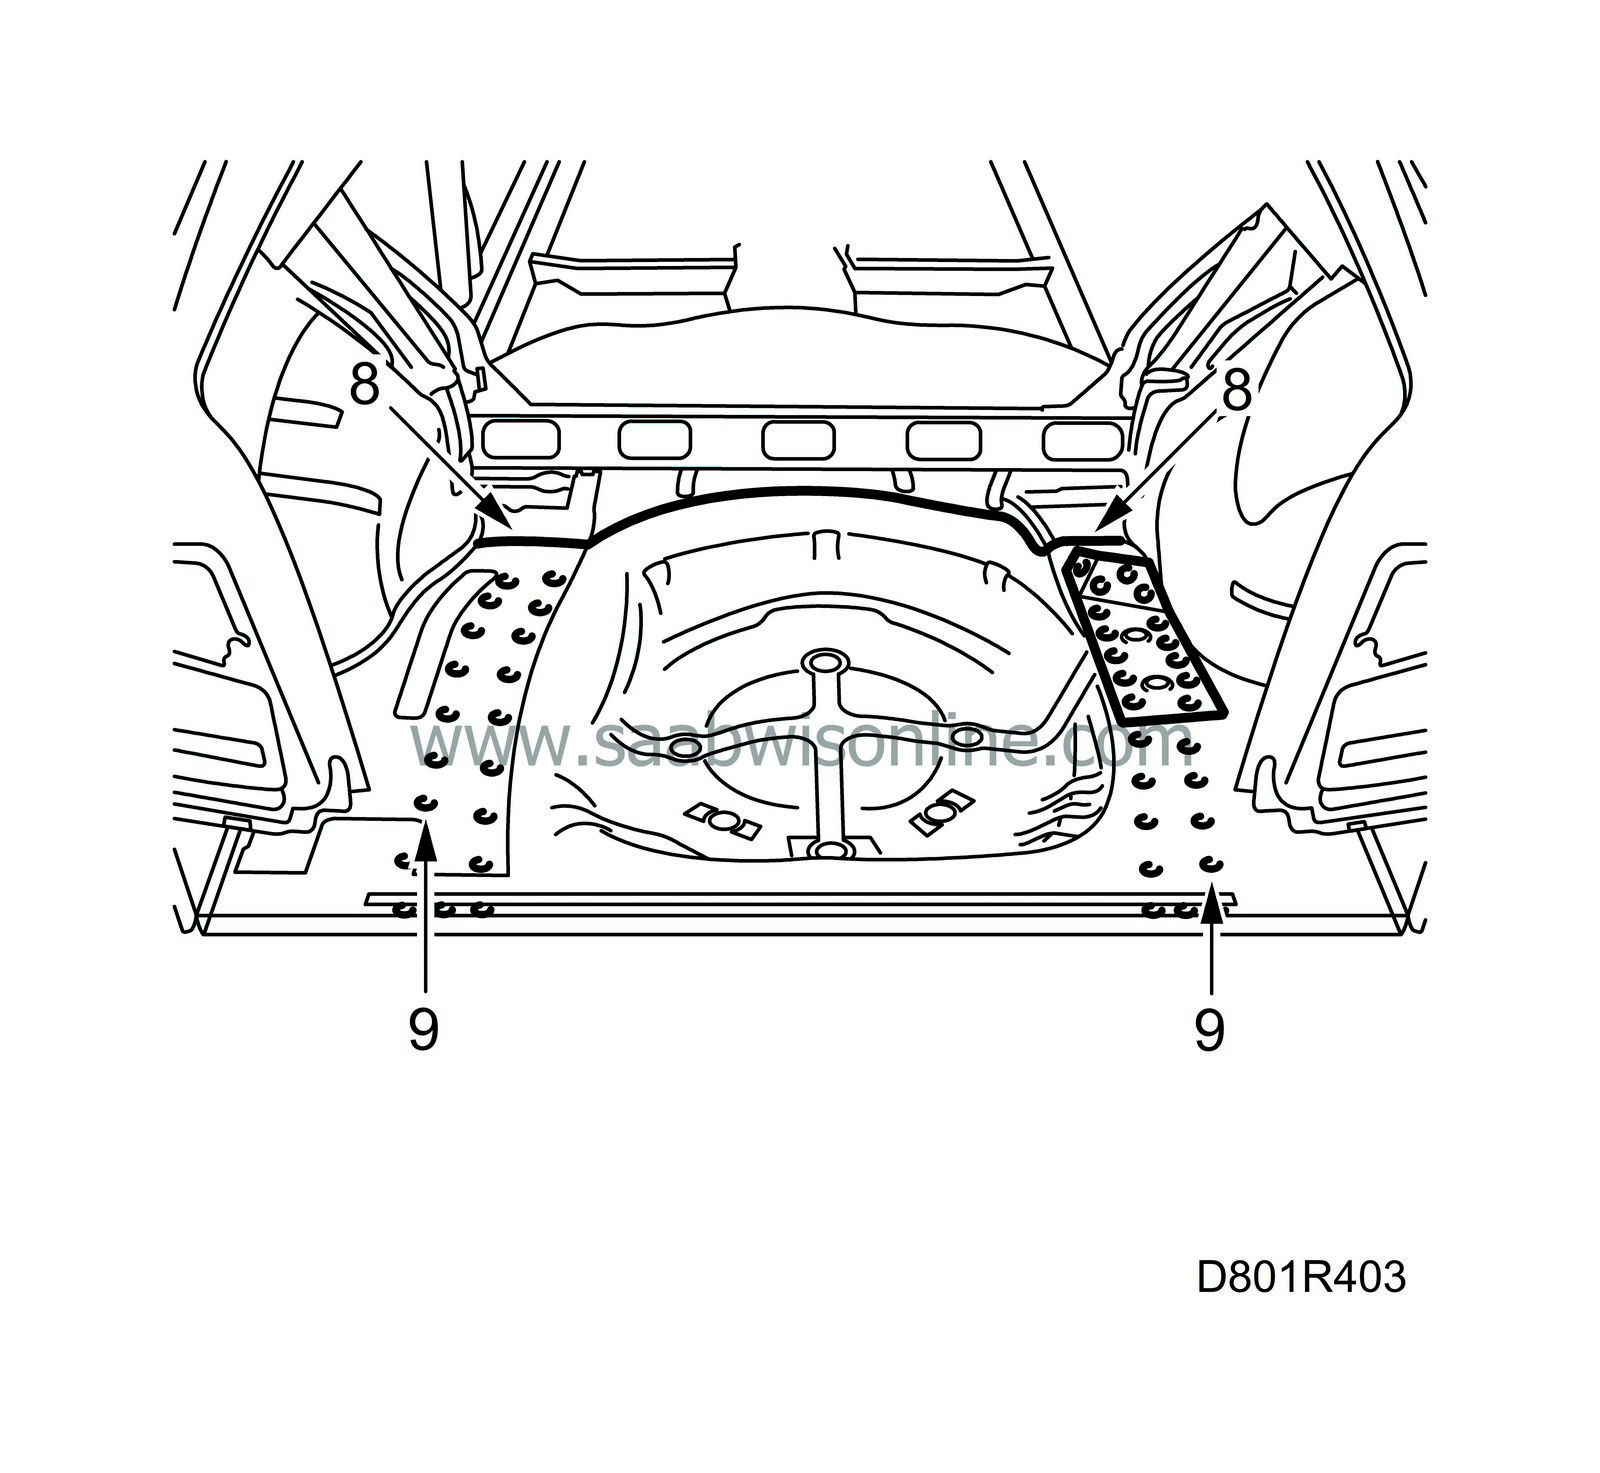
Cut the new floor so that it overlaps the intended joint line by approximately three centimetres.
|
|
| 9. |
Punch holes for plug-welding where possible. Remaining holes are drilled using a 6 mm drill bit.
|
|
| 10. |
Fit the floor and fixate with a few welding clamps.
|
|
| 11. |
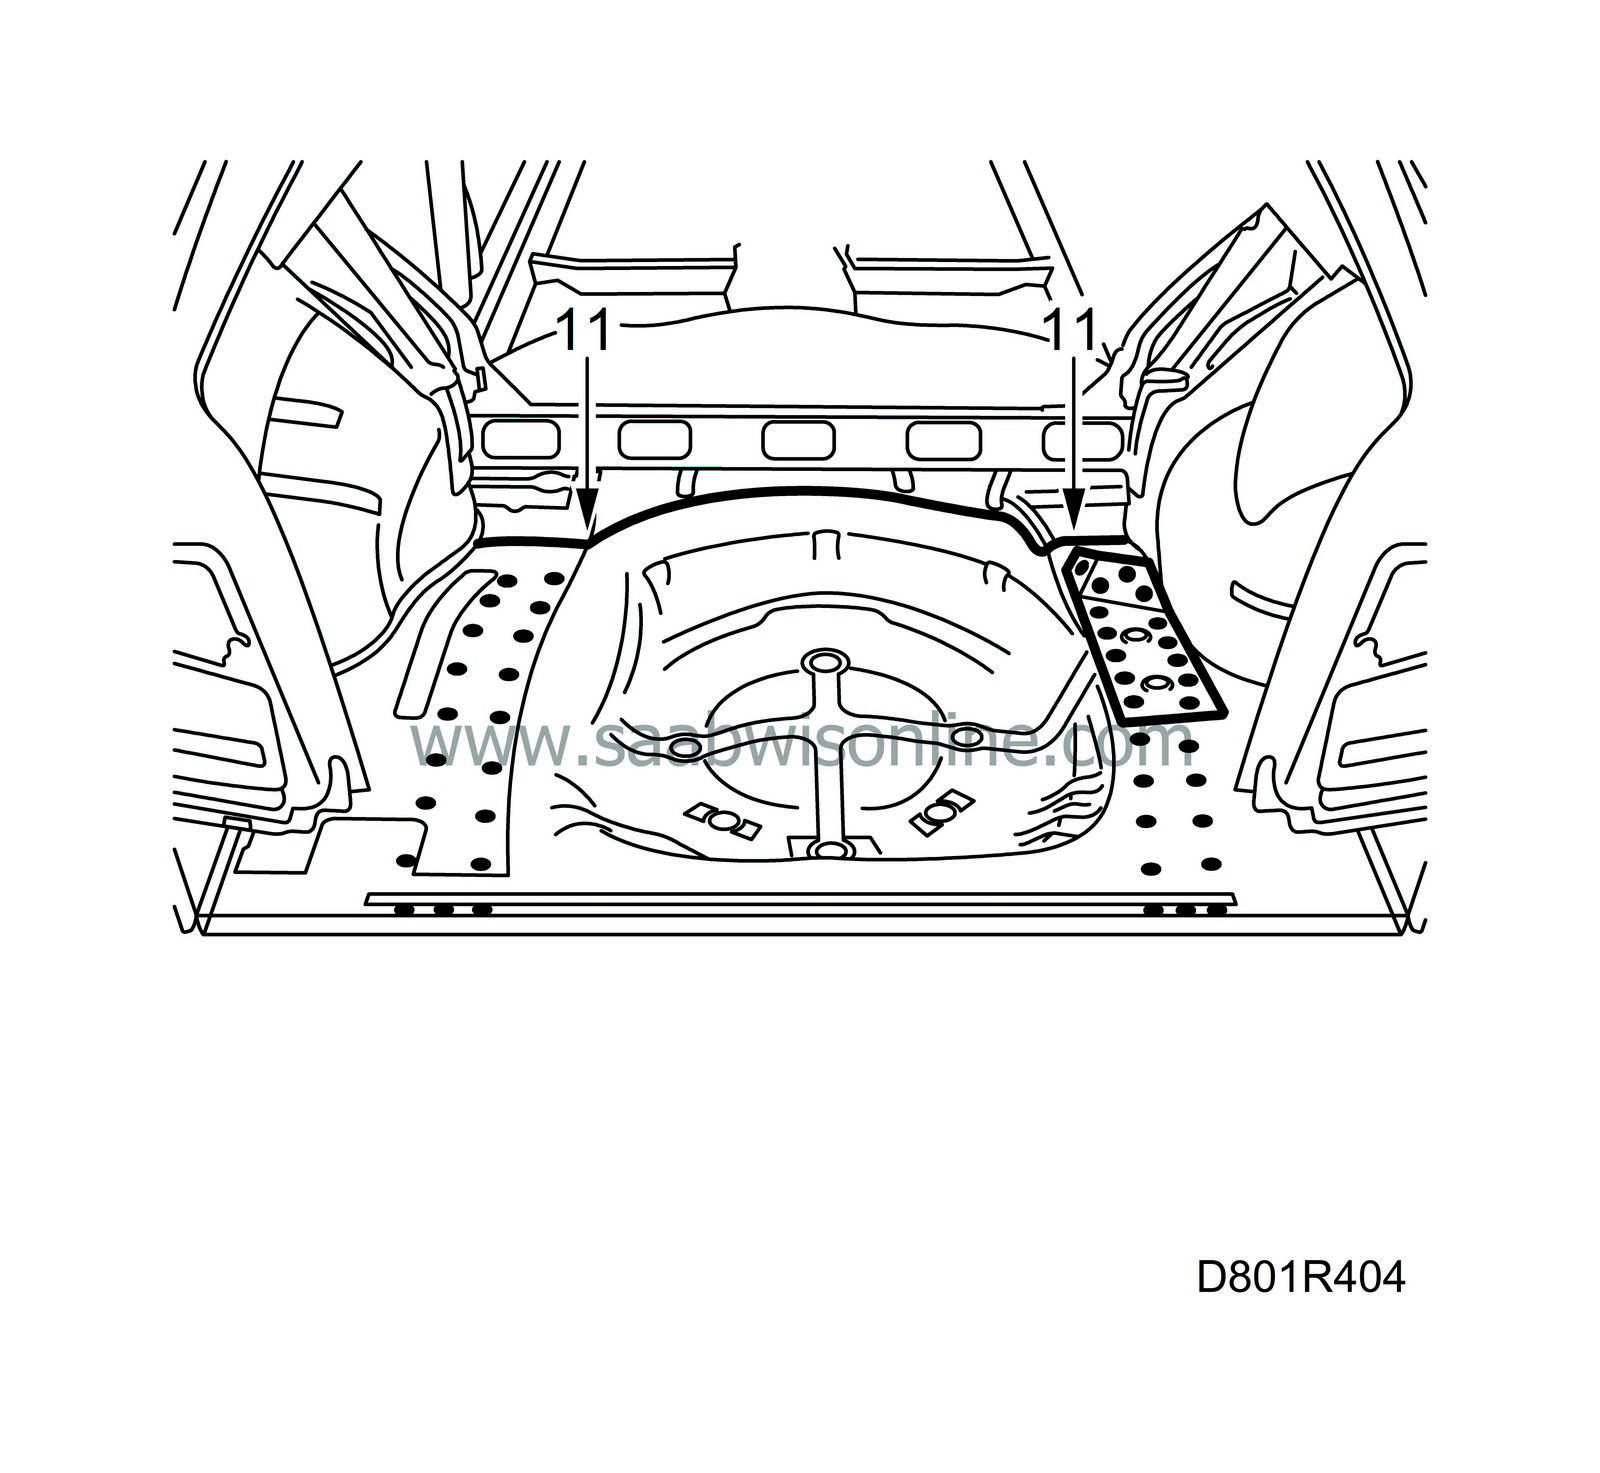
Cut through the new and old floor between the spare tire well and wheel housing at the same time so that the joints can be welded edge-to-edge.
|
|
| 12. |
Remove the floor and grind the surfaces to be welded.
|
|
| 13. |
Apply welding primer on the surfaces to be welded. Use Teroson Zinkspray.
|
|
| 14. |
Fit the floor in the car and fixate with a few welding clamps.
|
|
| 15. |
Plug-weld the new floor along the edge towards the spare tire well.
|
|
| 16. |
All-weld the joints between the spare tire well and the wheel housings.
|
|
| 17. |
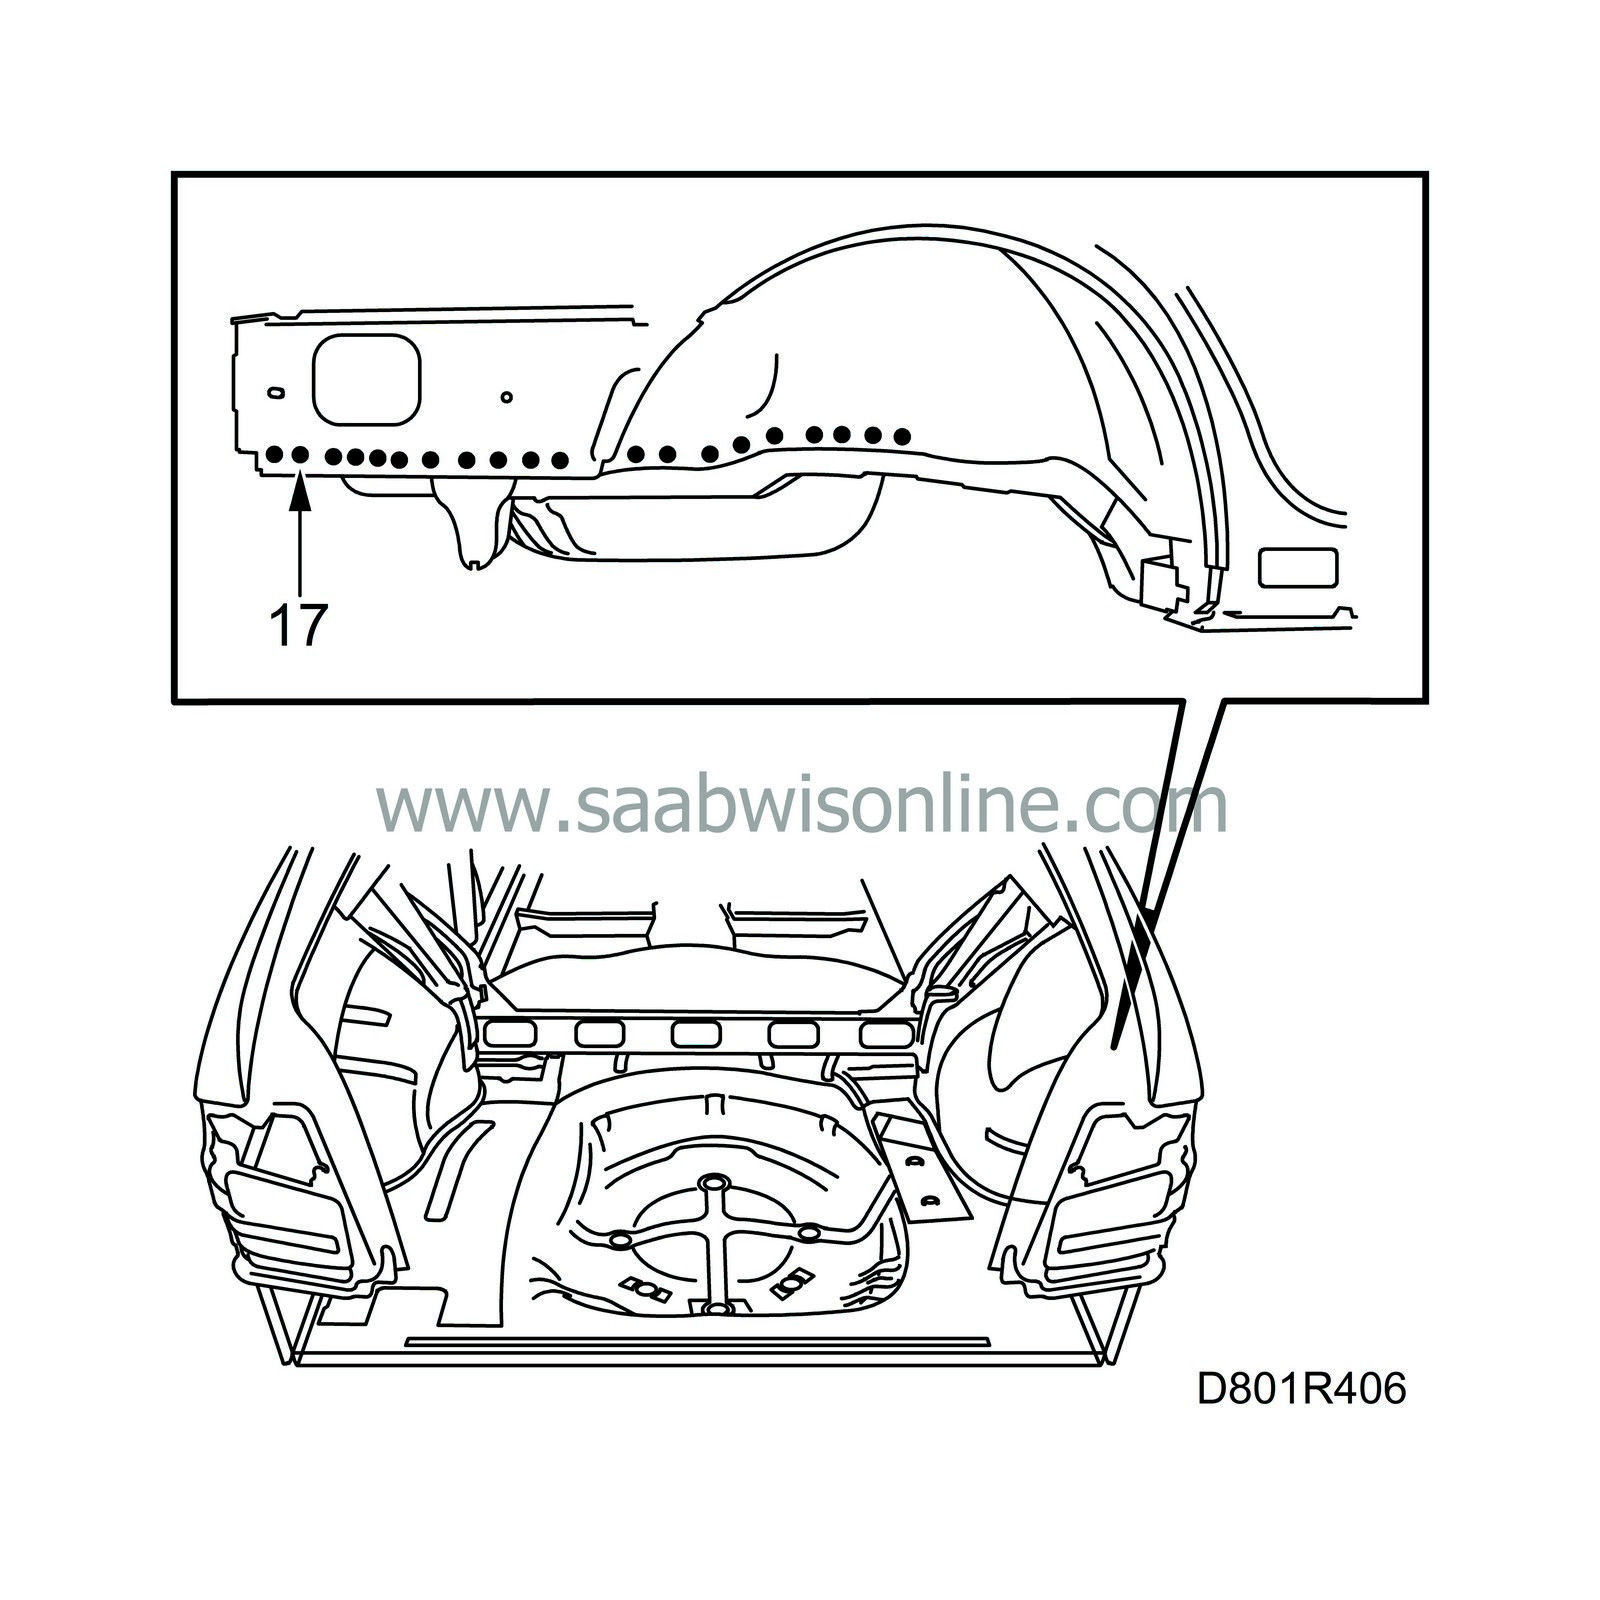
Spot-weld the edges of the new floor.
|
|
| 18. |
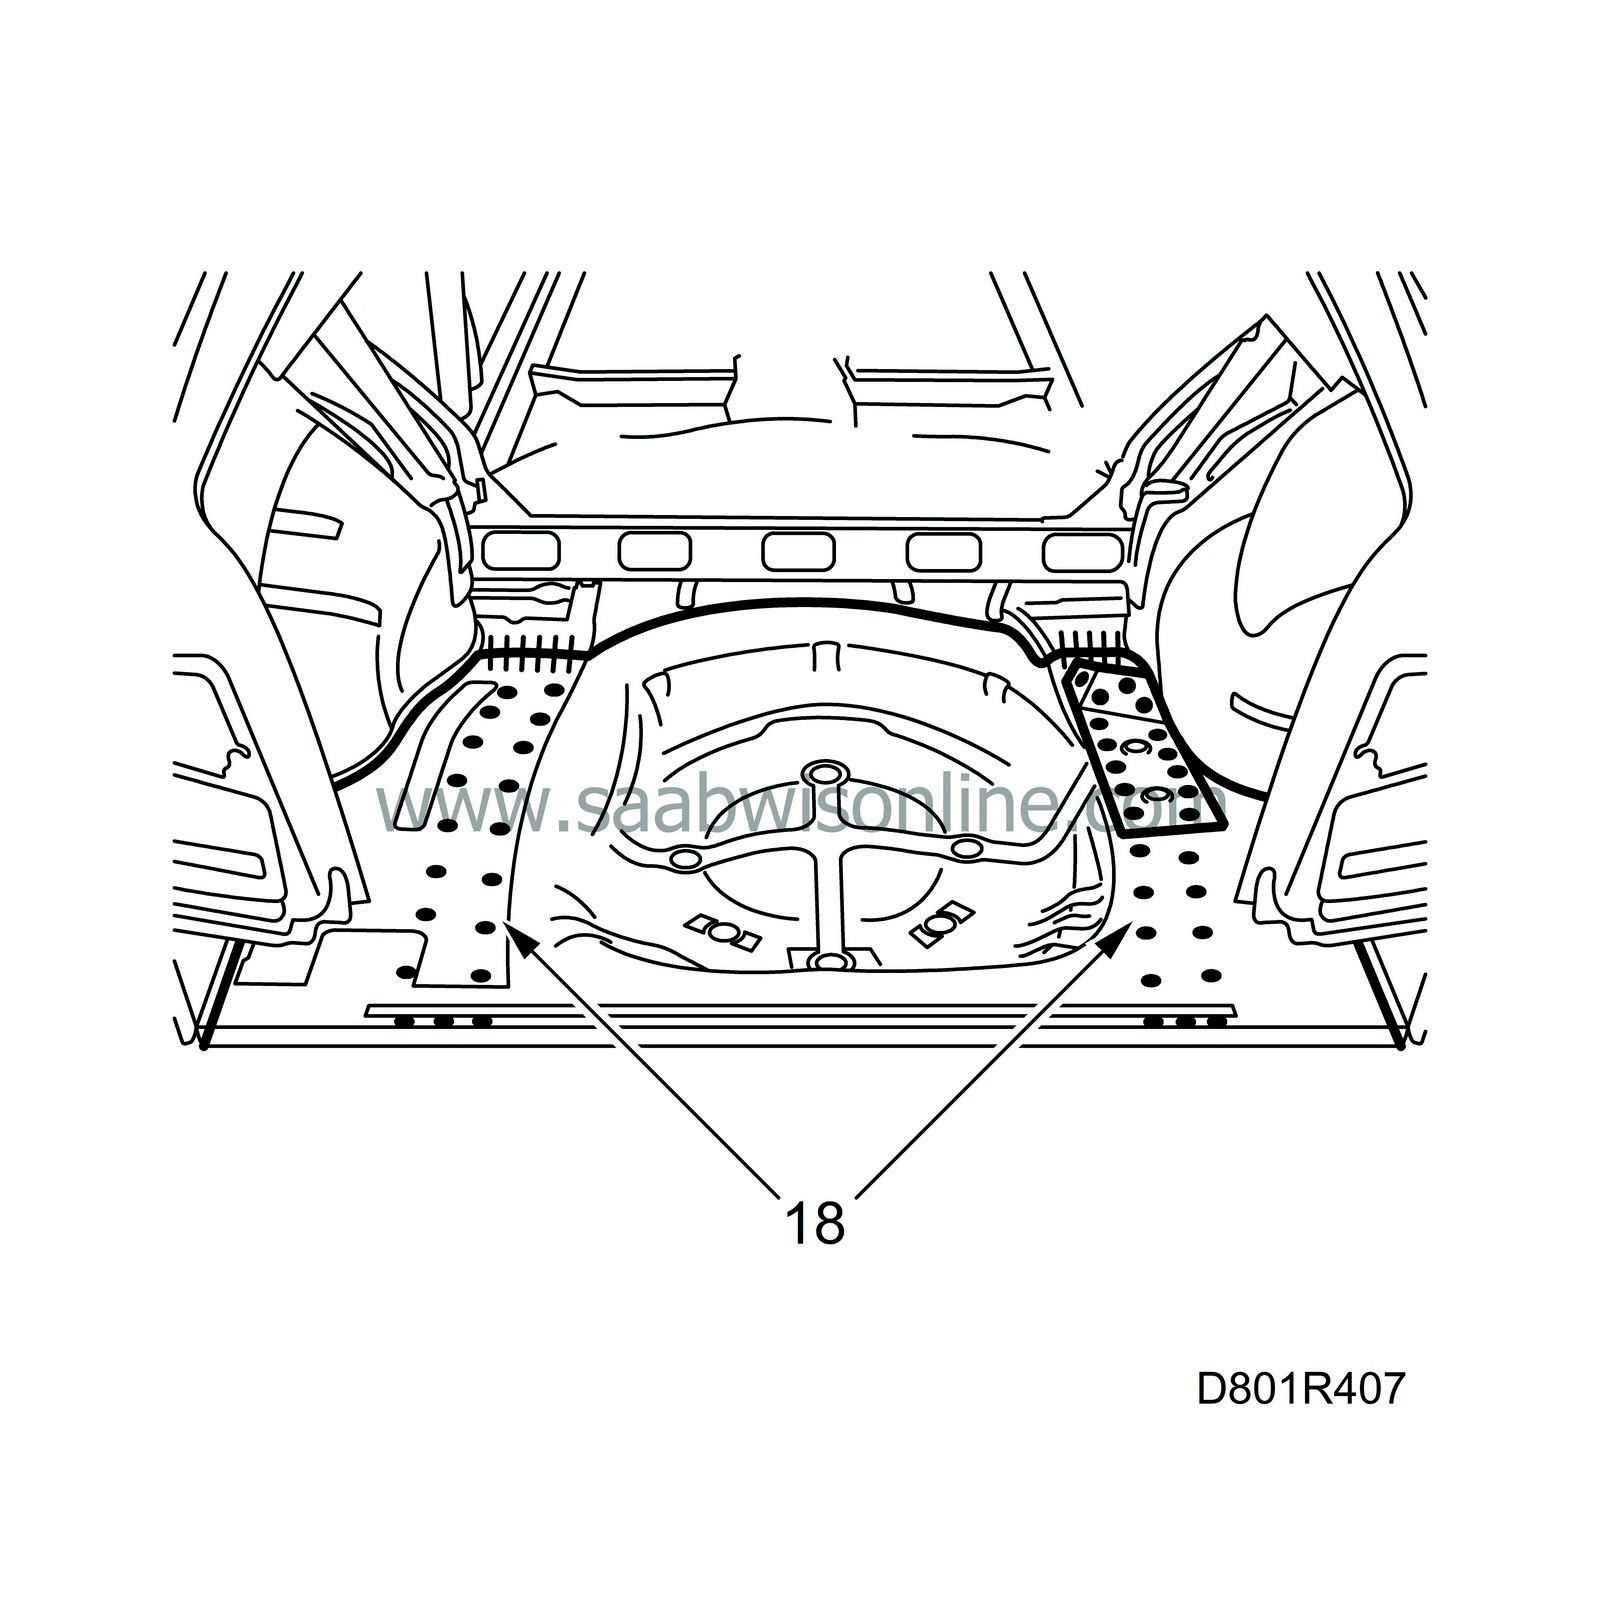
Plug weld the floor to the frame members and a new reinforcement on the right-hand side.
|
|
| 19. |
Fit the rear bumper abutment, see
Rear bumper abutment
.
|
|
| 20. |
Remove remaining welding primer. Welding primer will reduce adhesion for paint, filler and sealant.
|
|
| 21. |
Apply primer to all ground surfaces. Use Standox 1K Primer.
|
|
| 22. |
Seal joints and sheet metal flanges with sealant. Use Terostat 1K-PUR.
|
|
| 23. |
Apply PVC substitute on the underside of the floor. Use Terostat 9320.
|
|


