Door lock, rear doors
| Door lock, rear doors |
| To remove |
| 1. |
Open the door.
|
|
| 2. |
Remove the door trim, see Service Manual 8:2 Interior equipment.
|
|
| 3. |
Remove the plastic water barrier.
Lift out the collision block to increase accessibility. |
|
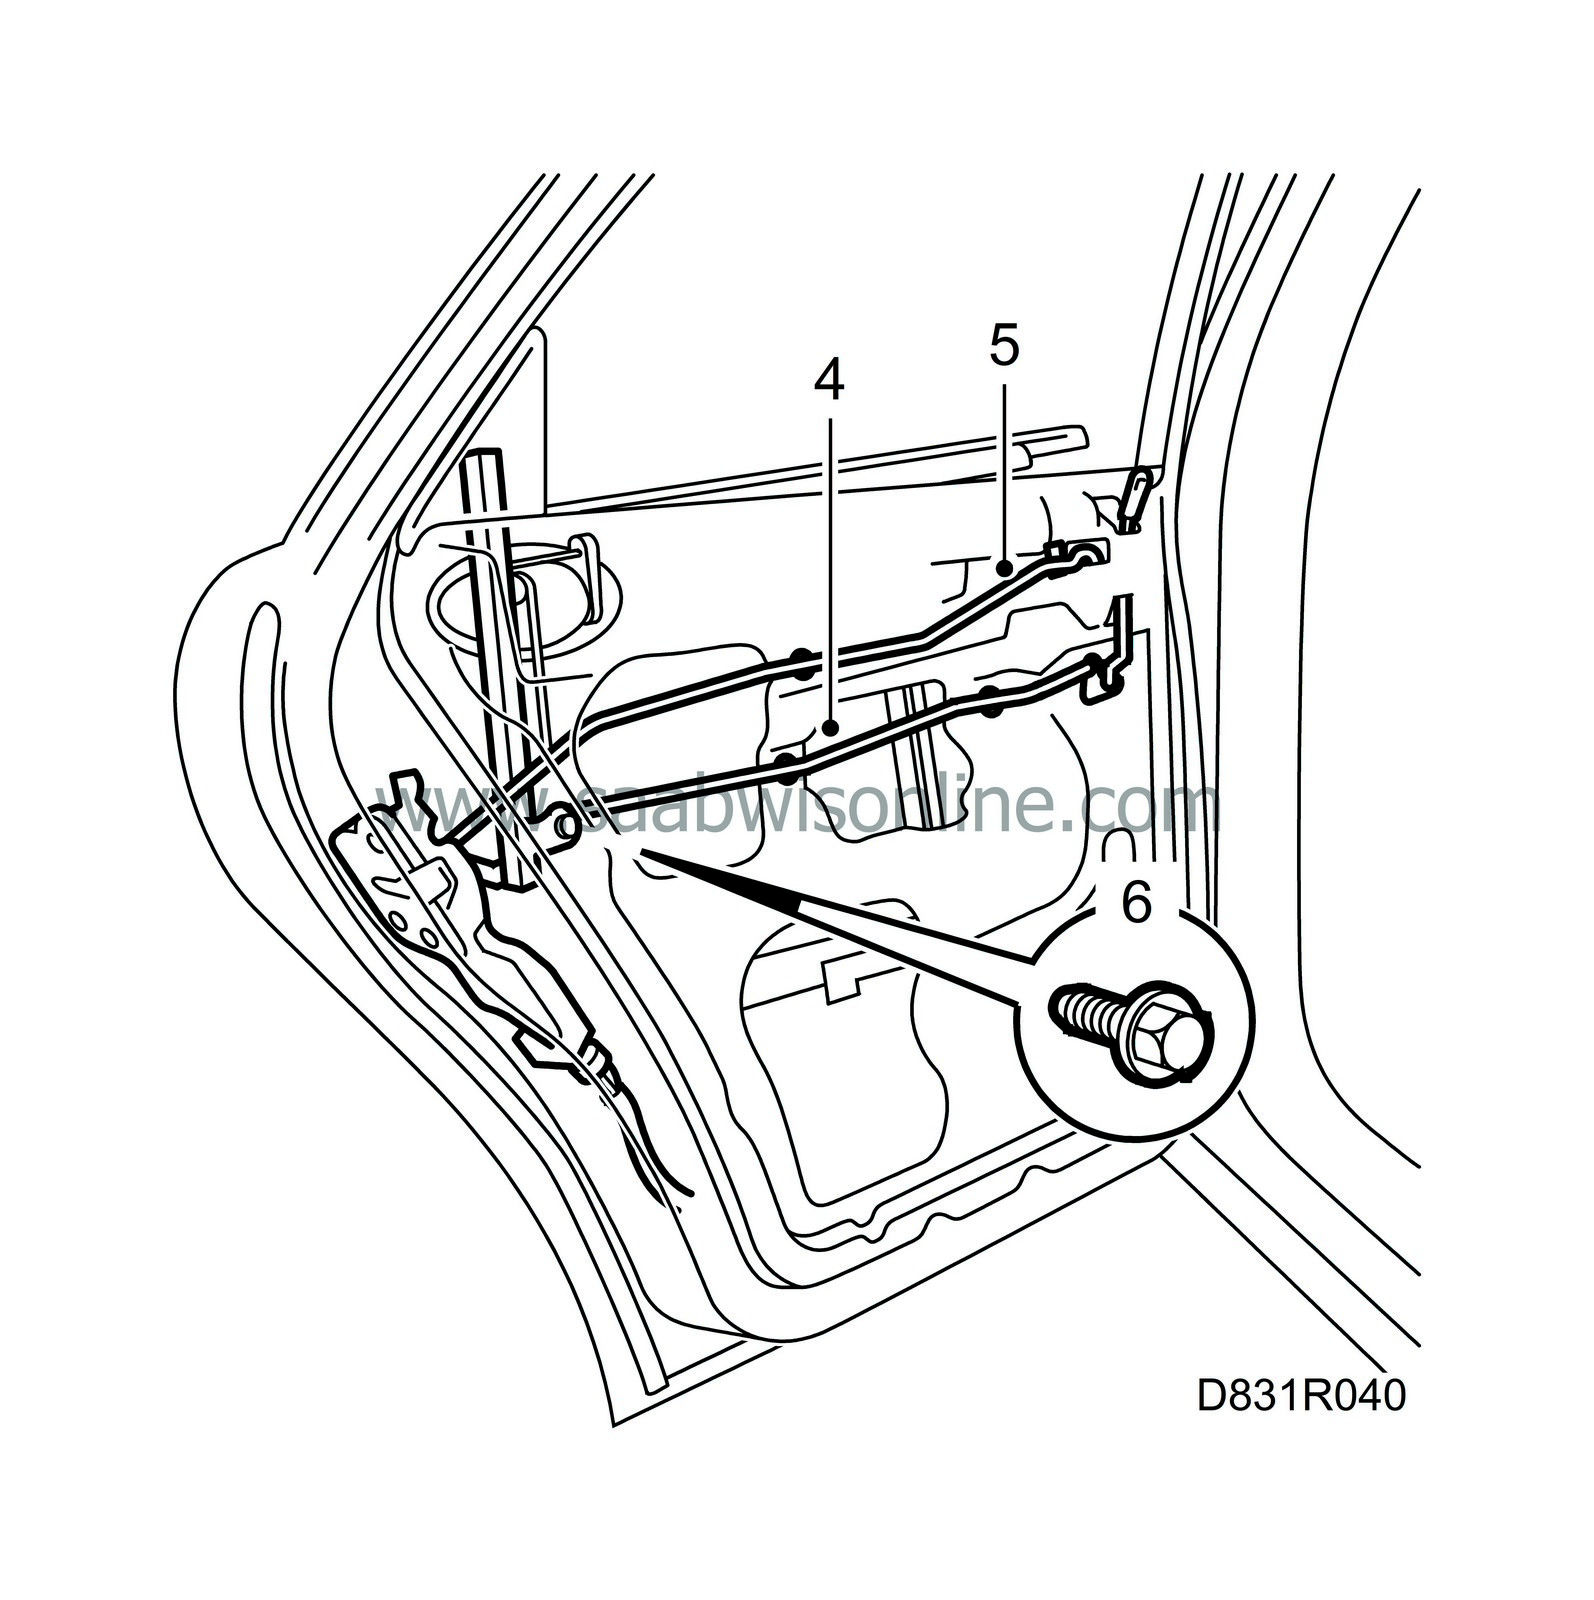
| 4. |
Remove the pull rod, between inside handle and lock, from the lock.

|
|
| 5. |
Remove the pull rod between lock button and lock, from the lock.
|
|
| 6. |
Remove the retaining screw for the rear guide channel.
|
|
| 7. |
Remove the three retainer screws from the lock.

|
|
| 8. |
Remove the complete lock unit.
|
|
| 9. |
Unplug the connector for the central lock motor.
|
|
| 10. |
Remove the central lock motor from the lock.
|
|
| To fit |
Fit in reverse order.
Check the door handle clearance against the lock. Adjust if needed, by adjusting up/down the opening rod adjusting screw until it is up against the lock opening lever.
| Important | ||
|
Make sure the water drainage plastic is tight against the inner panel of the door and that it is not damaged. |
||
| Note | ||
|
It must be possible to feel the clearance in the door handle, the lock opening lever must not be actuated in the resting position. |


