Climate control unit
| Climate control unit |
| Removing |
|
|||||||
| 1. |
Cars with A/C:
Drain refrigerant from the A/C system, see . |
|
| 2. |
Remove the dashboard. See 8:2 Interior equipment.
|
|
| 3. |
Cars with A/C:
Part the A/C pipes by the bulkhead lead-through. |
|
| 4. |
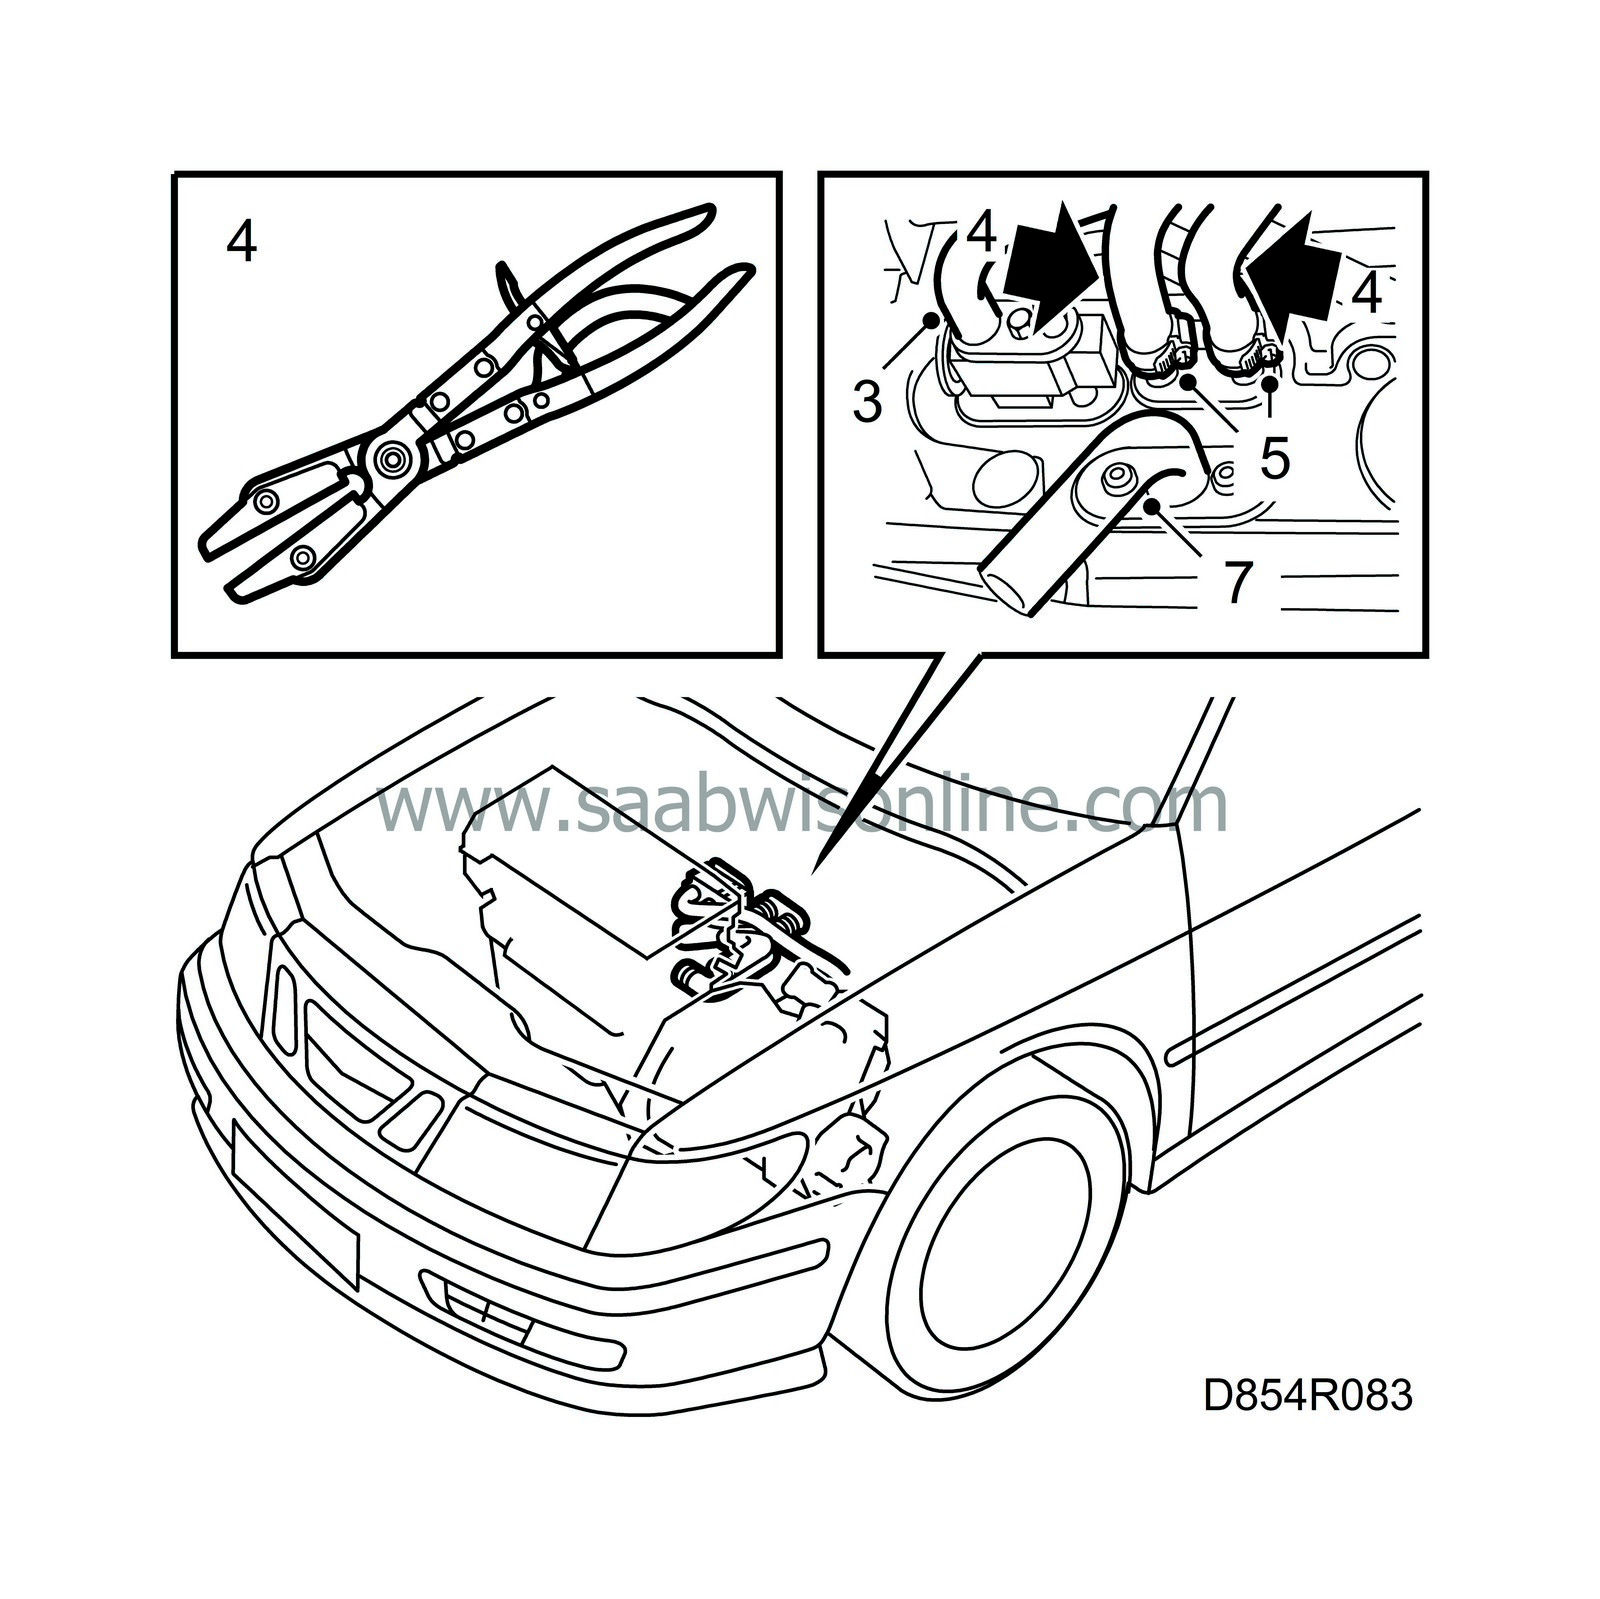
Fit hose clamp pliers part. No. 30 07 739 on the hoses by the heat exchanger.
|
|
| 5. |
Remove the hoses from the heat exchanger.
|
|
| 6. |
Blow with compressed air in one pipe to drain remaining coolant from the heat exchanger.
|
|
| 7. |
Remove the drain hose.
|
|
| 8. |
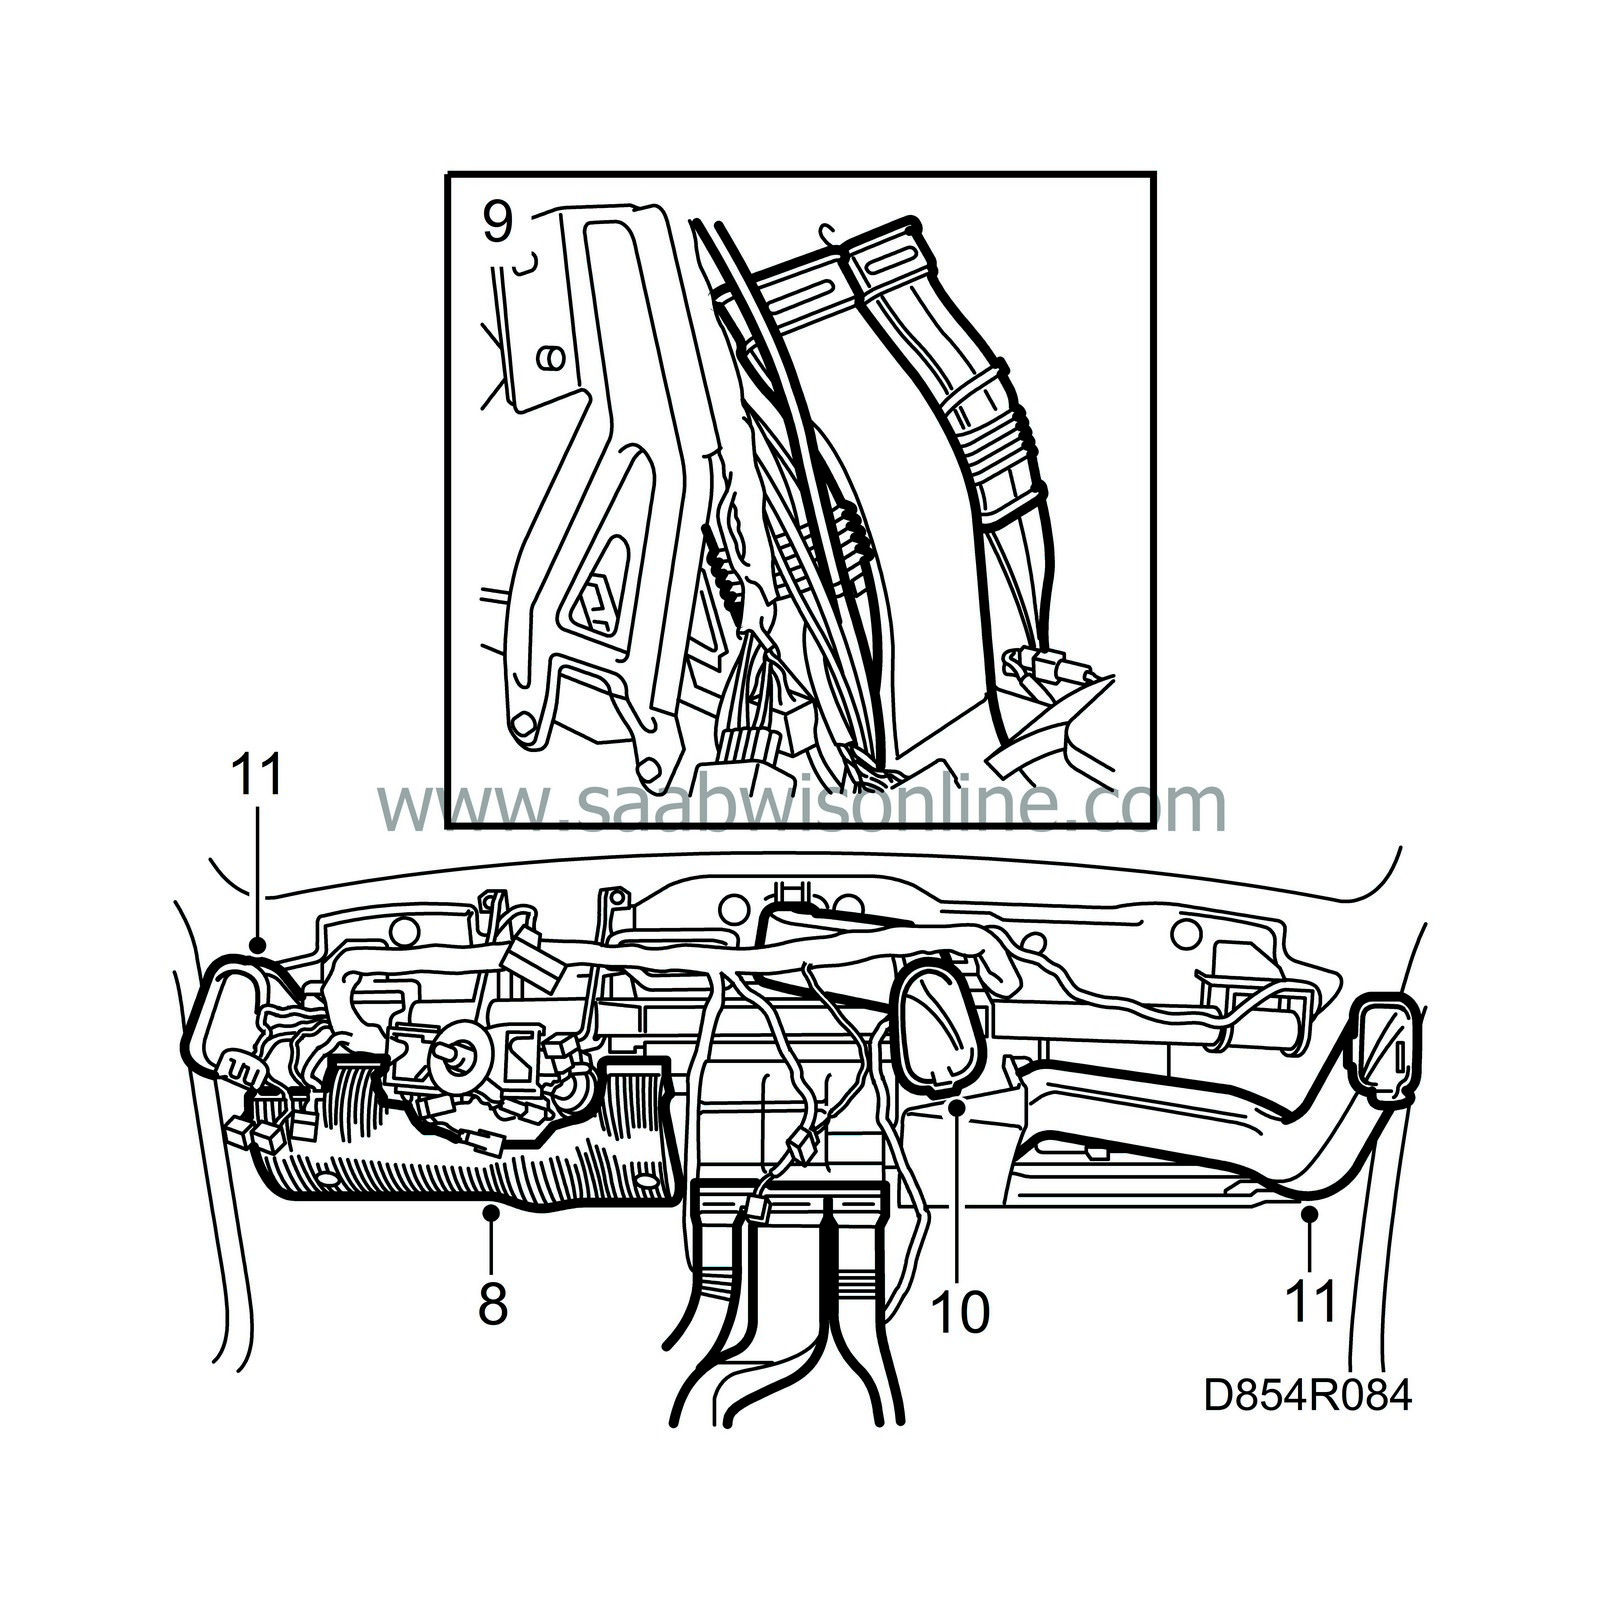
Remove the knee guard on the driver's side.
|
|
| 9. |
Cut the cable ties and remove the rear floor air ducts in front of the heat exchanger.
|
|
| 10. |
Remove the air duct for the dashboard centre vent.
|
|
| 11. |
Remove the air ducts for the dashboard side vents.
|
|
| 12. |
Remove the wiper arms.

|
|
| 13. |
Remove the cover over the bulkhead.
|
|
| 14. |
Remove the water deflector.
|
|
| 15. |
Remove the wiper unit.
|
|
| 16. |
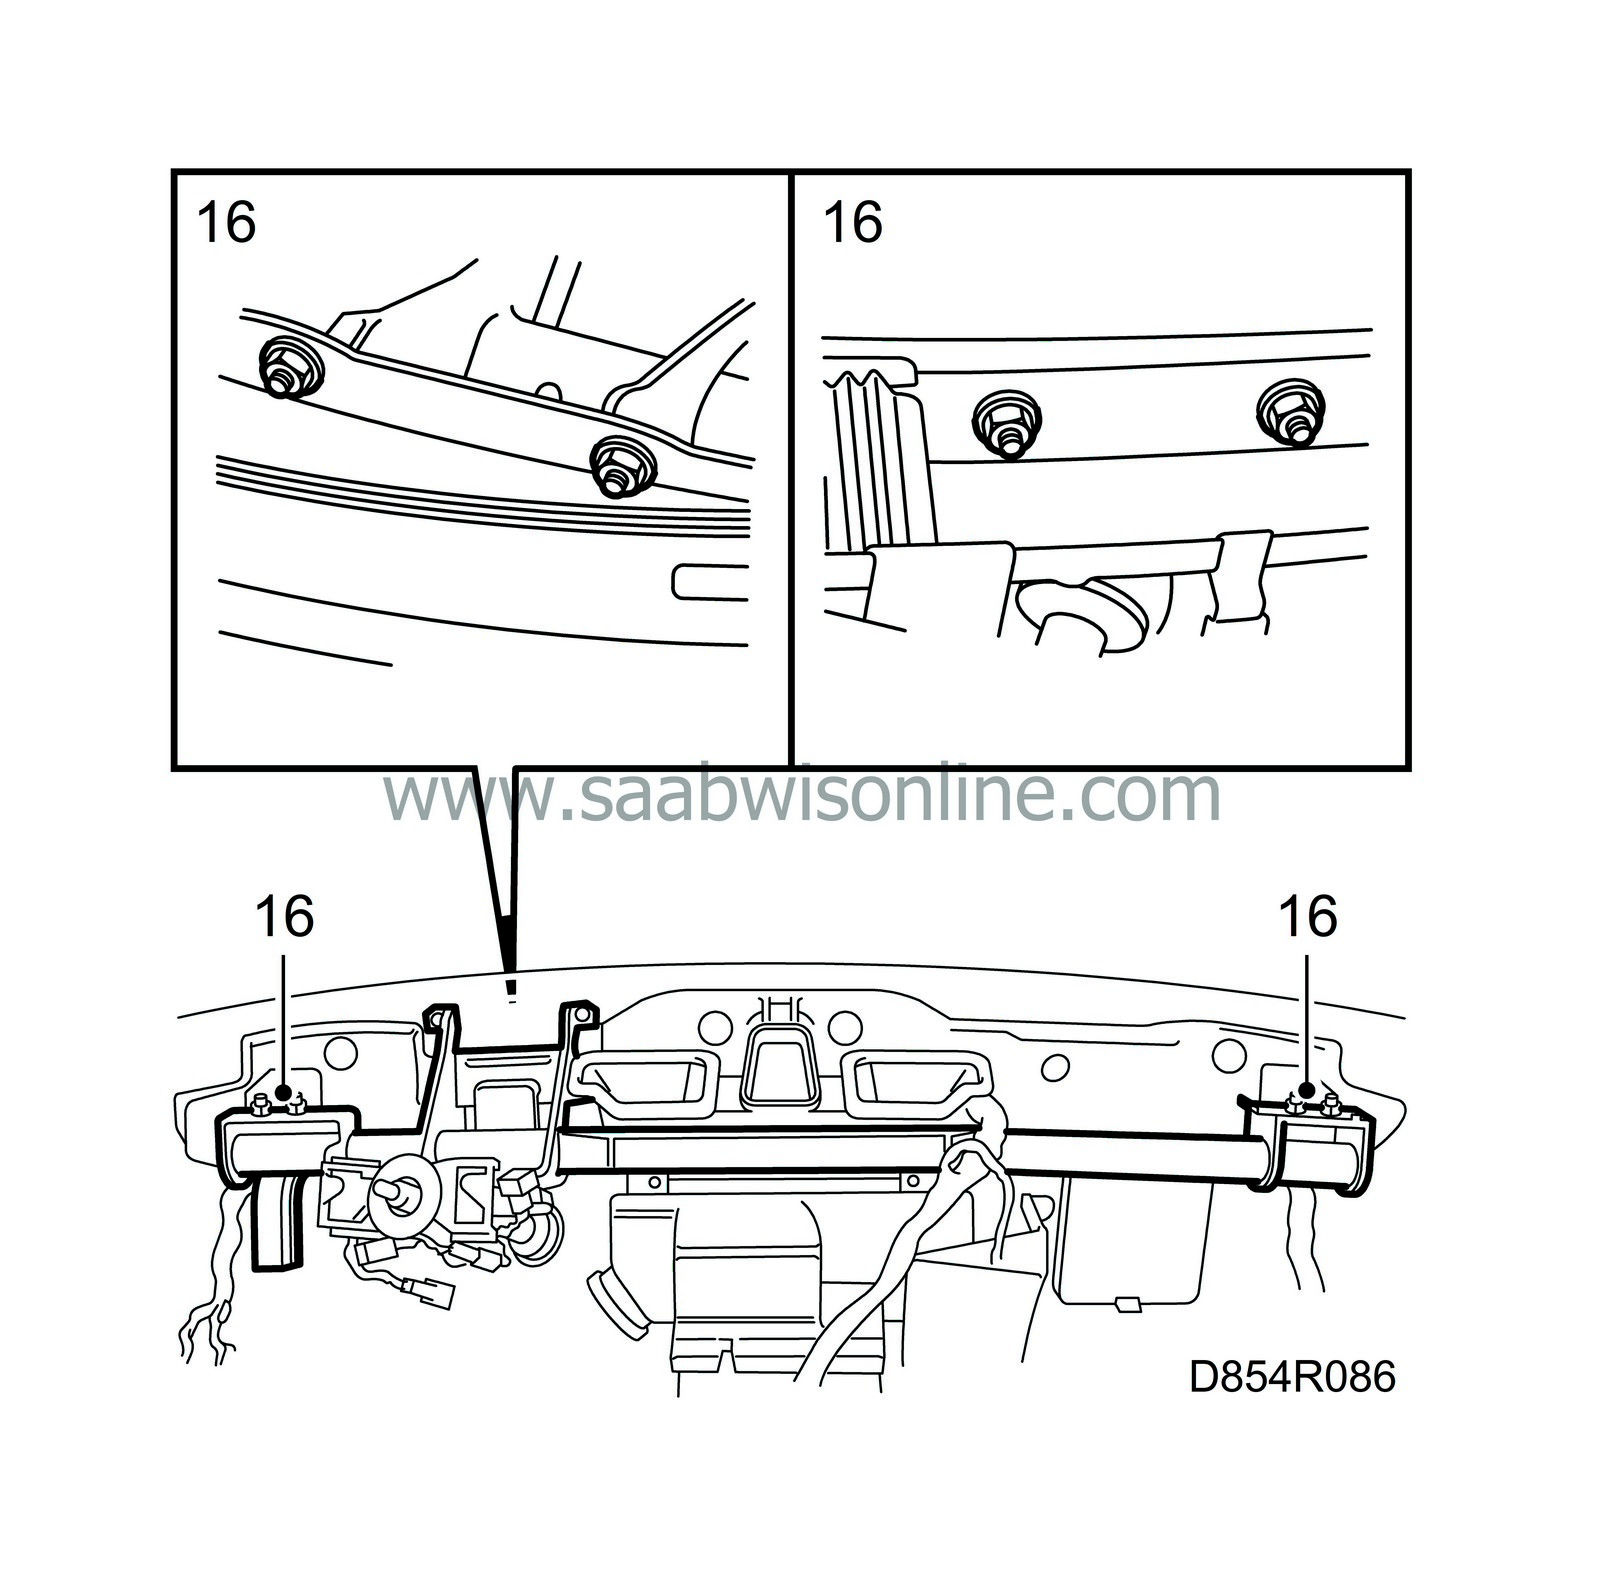
Remove the bolts and nuts securing the dashboard member.
|
|
| 17. |
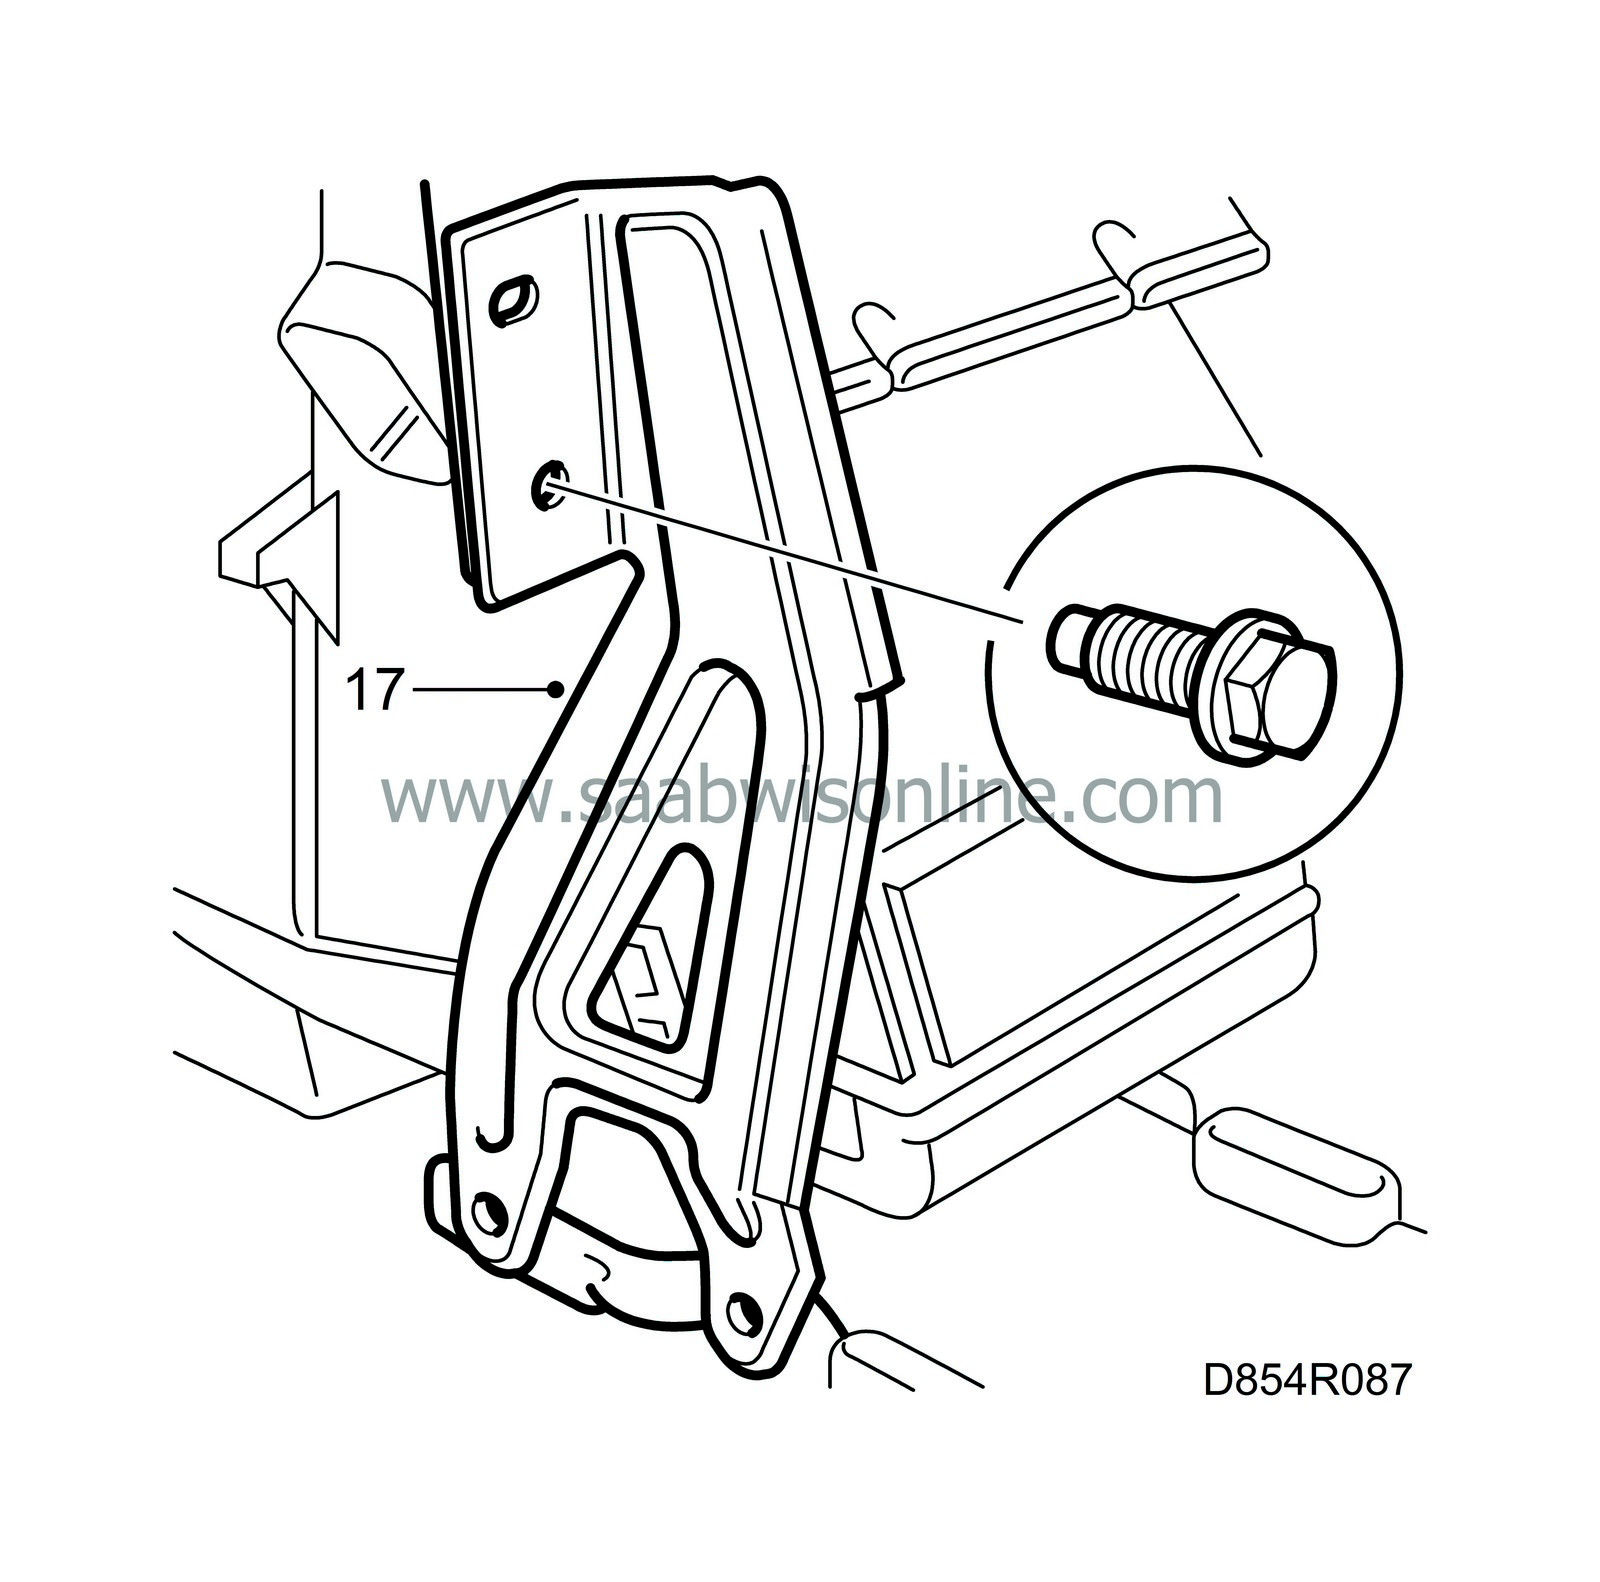
Remove the support by the climate control unit on the driver's side.
|
|
| 18. |
Cars with passenger side airbag: Remove the knee guard on the passenger side.

|
|
| 19. |
Disconnect the steering wheel pad and horn connectors.
|
|
| 20. |
Remove the bolt that secures the intermediate yoke to the steering gear.
|
||||||||||||||||||||||||||
| 21. |
Remove the bolt that secures the support for the steering column to the dashboard member.
|
|
| 22. |
Remove both nuts that secure the steering column to the member and lift it out.
|
|
| 23. |
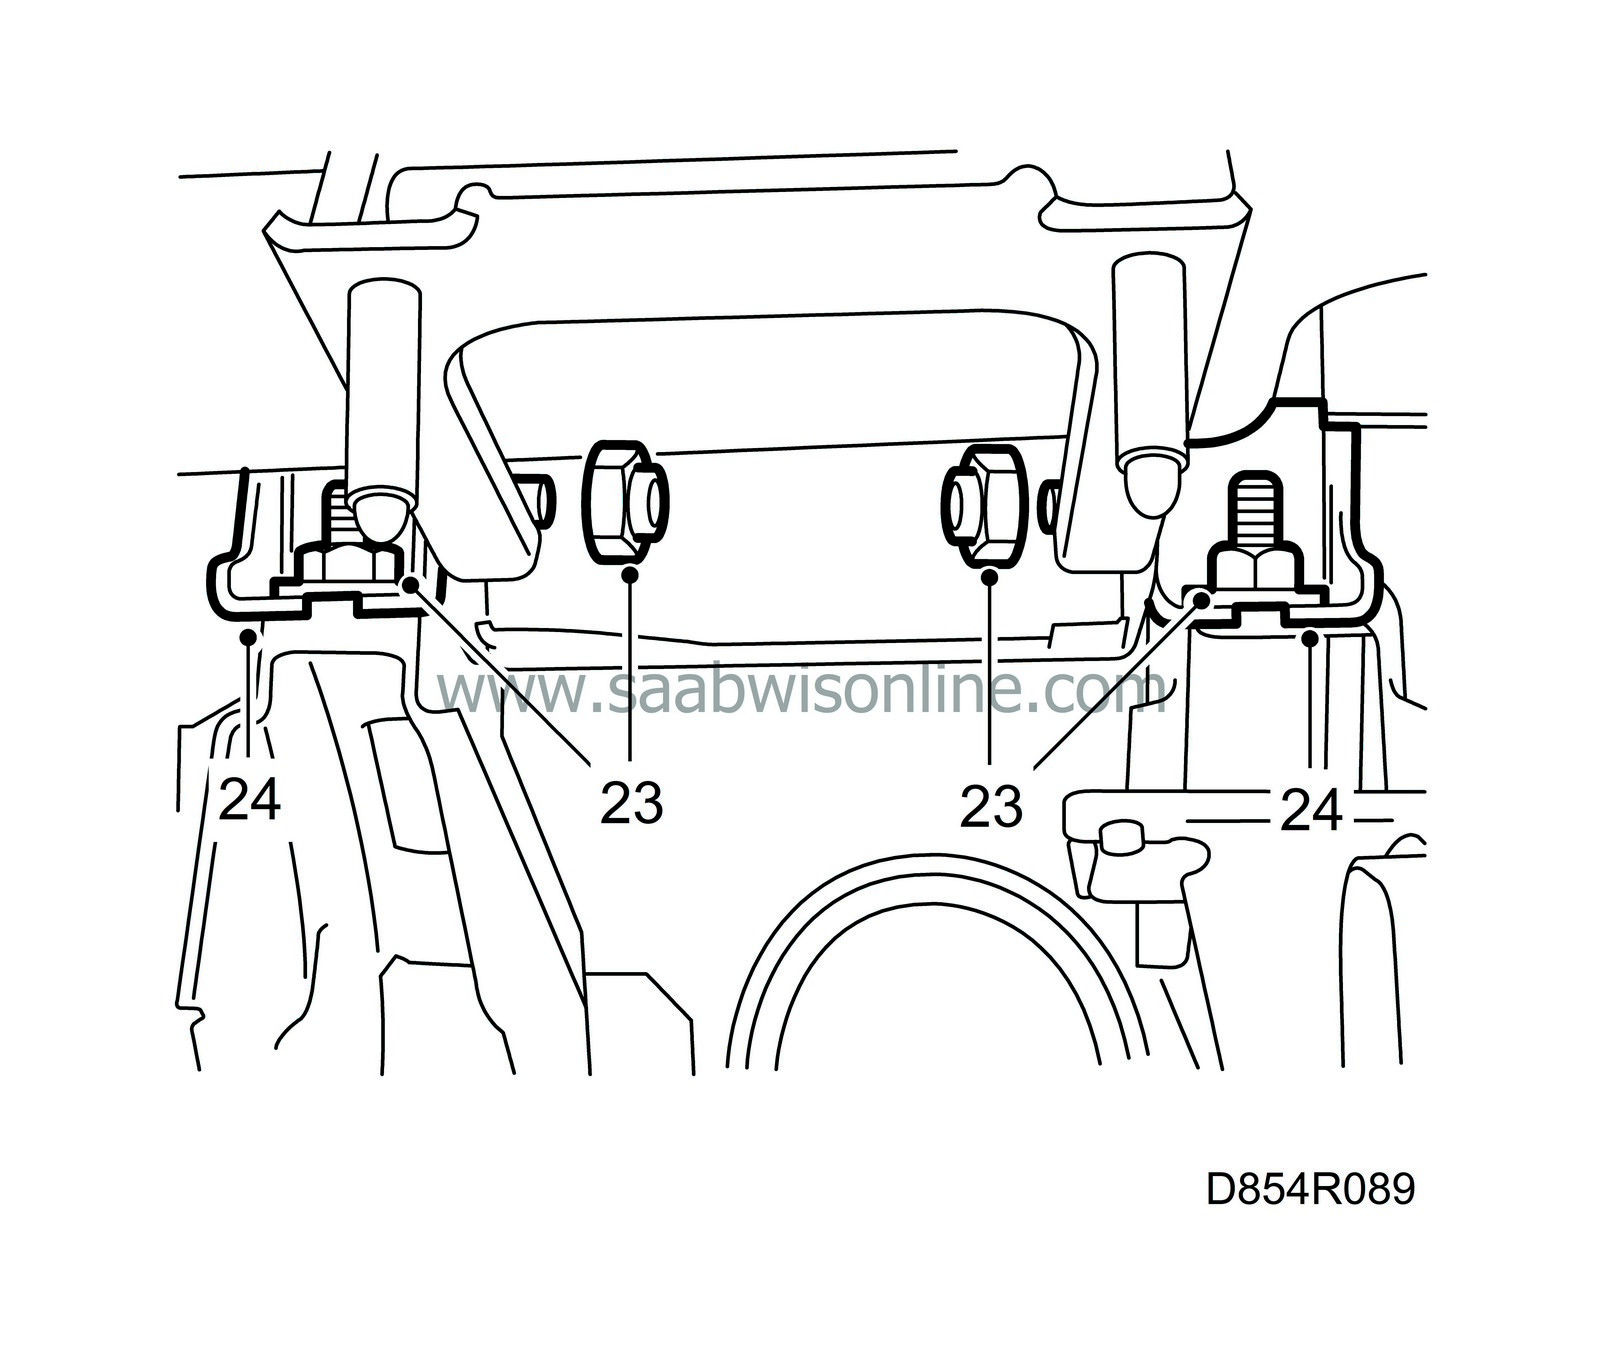
Remove the four nuts that secure the angular supports at the top of the pedal assembly.
|
|
| 24. |
Turn out the angular supports.
|
|
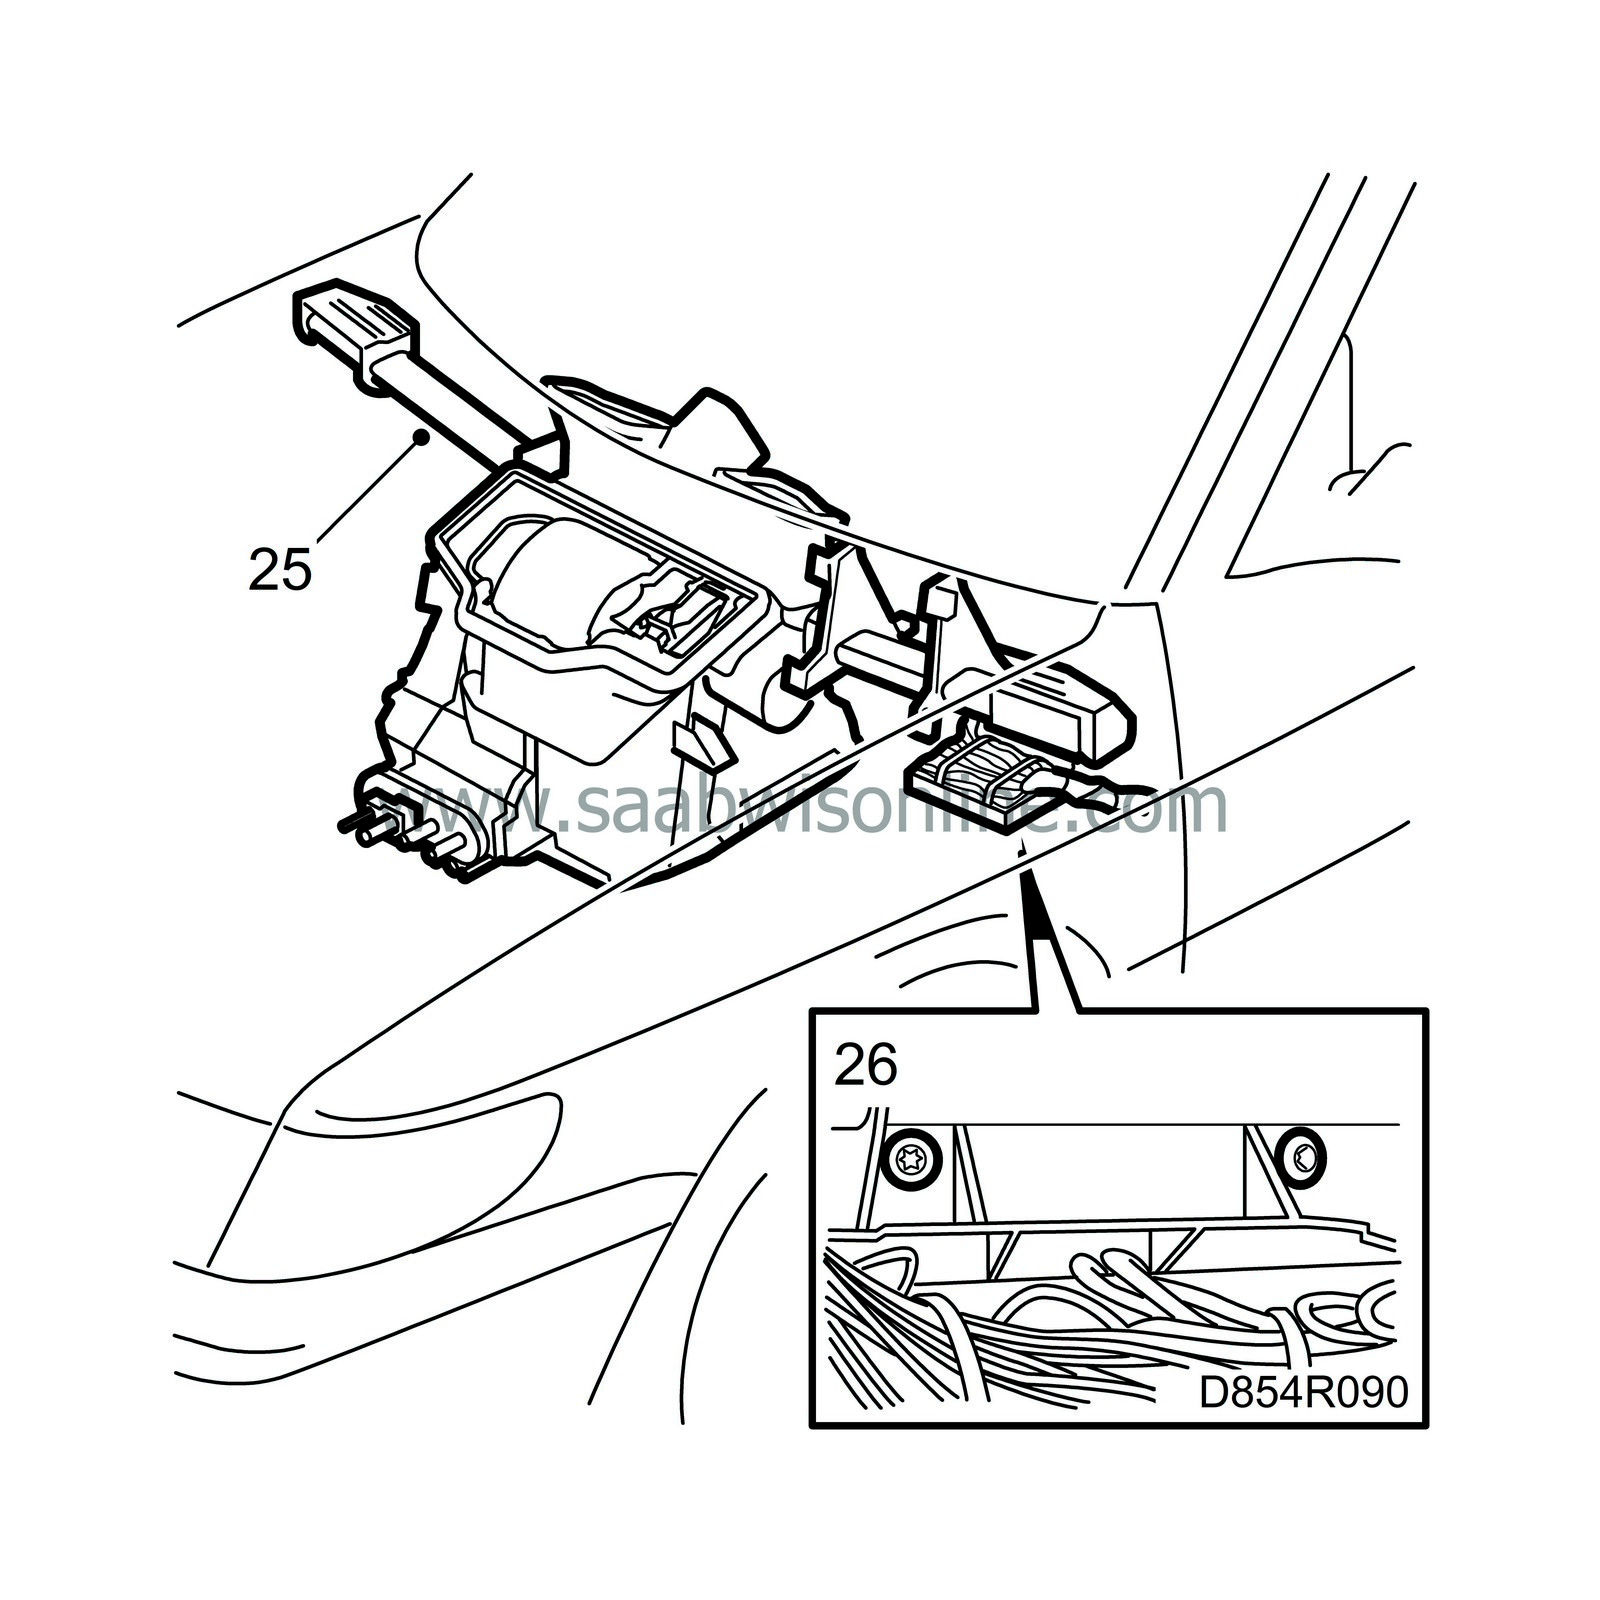
| 25. |
Turn out the dashboard member.
|
|
| 26. |
Remove both bolts that secure the main fuse box to the dashboard member.
|
|
| 27. |
Remove the dashboard member.
|
|||||||
| 28. |
Unplug the electric connectors on the climate control unit.
|
|
| 29. |
Remove the fresh-air filter.

|
|
| 30. |
Unplug the ventilation fan electric connector.
|
|
| 31. |
Remove the four bolts that secure the climate control unit by the ventilation fan.
|
|
| 32. |
Remove the bolt that secures the climate control unit to the lower part of the bulkhead.

|
|
| 33. |
Remove the climate control unit.
|
|
| Fitting |
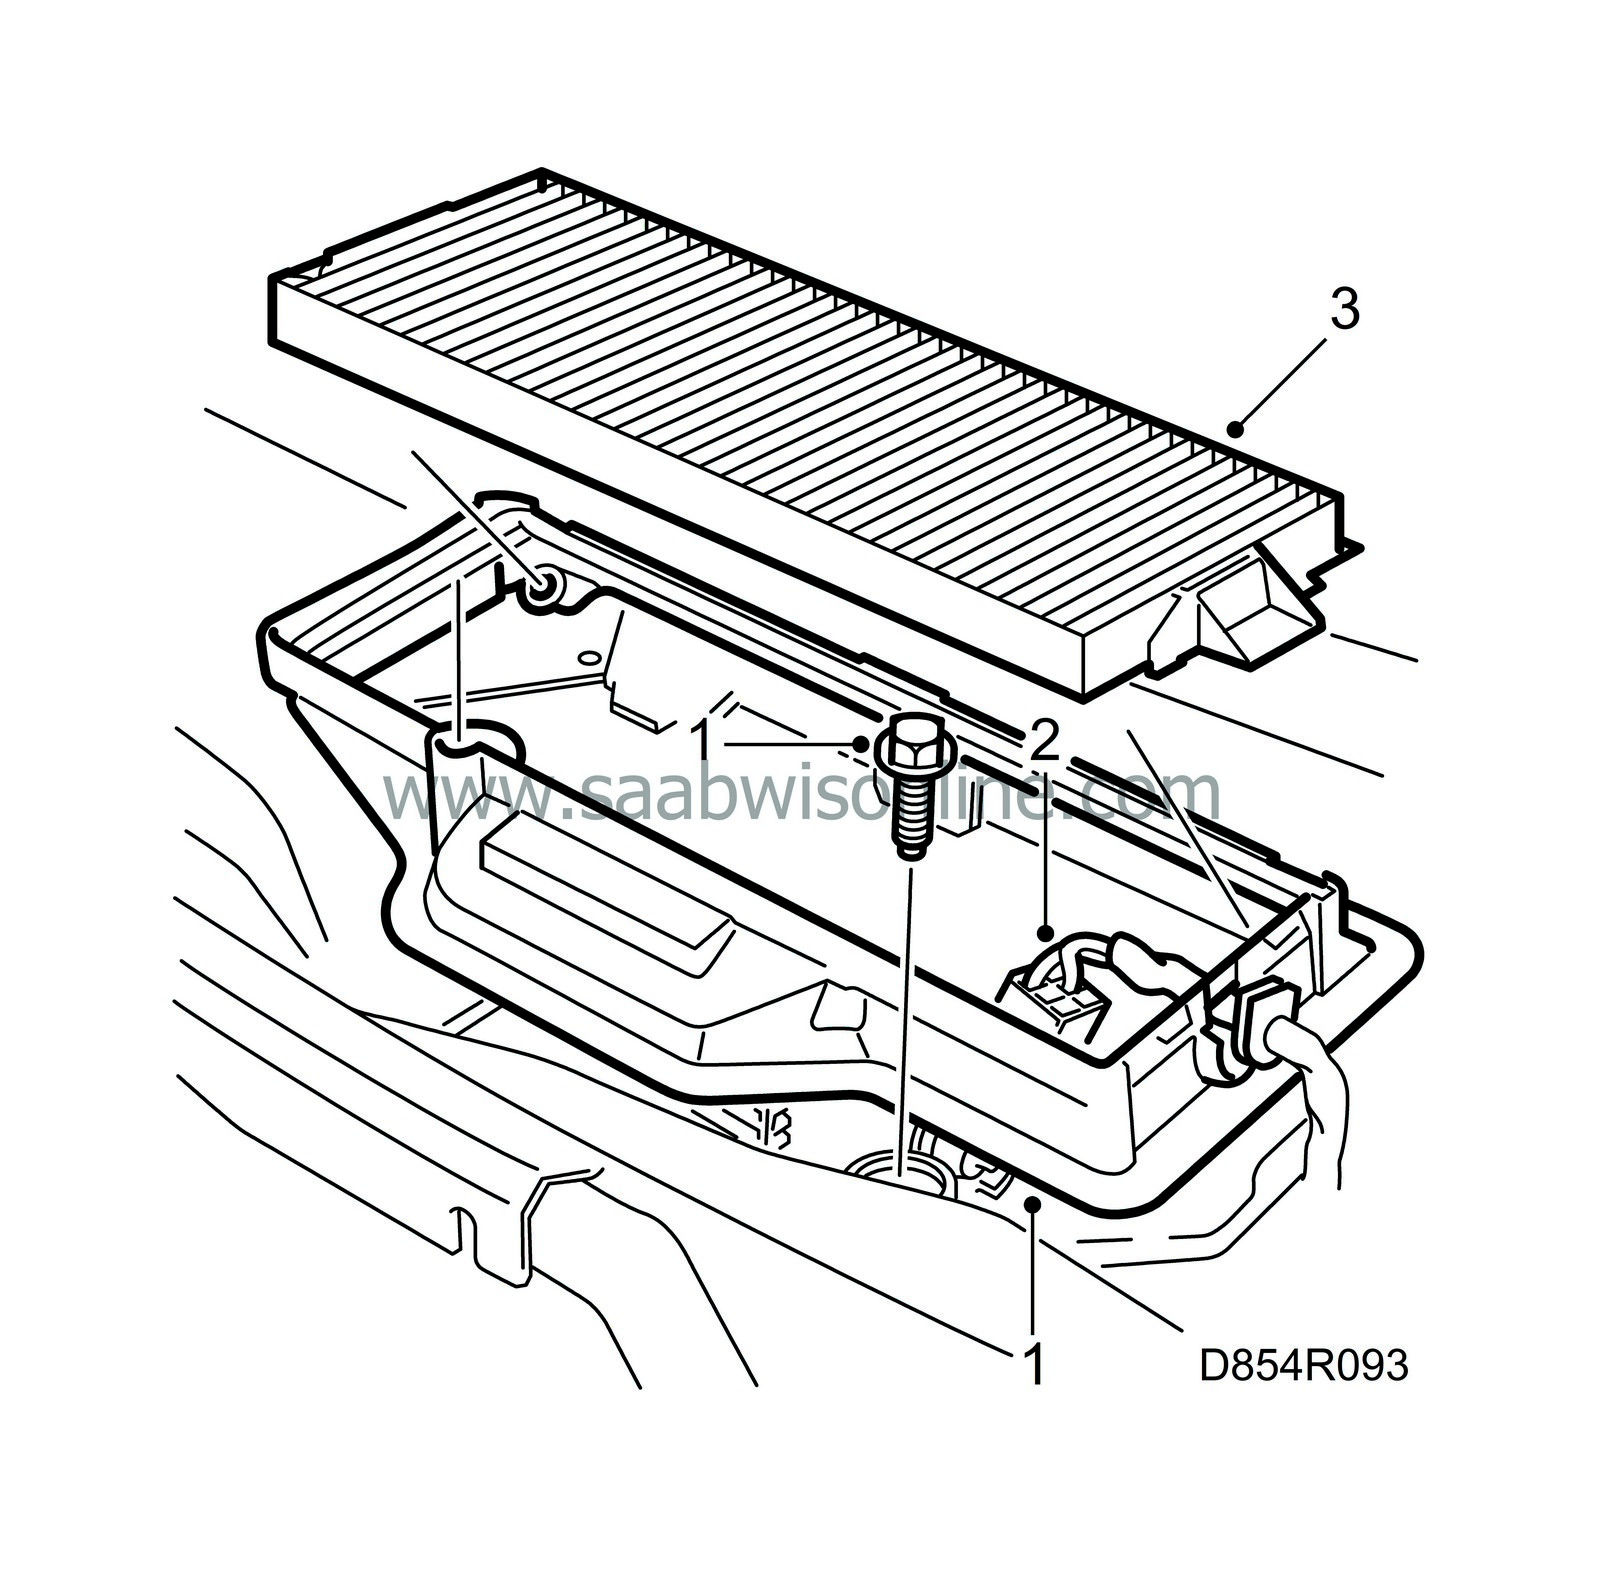
| 1. |
Fit the climate control unit and tighten the four bolts by the ventilation fan.
|
|
| 2. |
Plug in the ventilation fan electric connector.
|
|
| 3. |
Fit the fresh-air filter.
|
|
| 4. |
Tighten the bolt that secures the climate control unit to the lower part of the bulkhead.

|
|
| 5. |
Cars with A/C:
|
|
| 5.a. |
Lubricate the new O-rings with synthetic vaseline and fit them on the A/C pipes.
|
| 5.b. |
Remove the plugs, fit the A/C pipes and tighten the bolt.
|
| 6. |
Fit the coolant hoses on the heat exchanger pipes and tighten the hose clamps.
|
|
| 7. |
Fit the drain hose and tighten the bolts.
|
|
| 8. |
Remove the top section of the climate control unit.

|
|
| 9. |
Fit the cable harness on the dashboard member.
|
|
| 10. |
Fit the main fuse box on the dashboard member and tighten the bolts.
|
|
| 11. |
Fit the dashboard member together with the angular supports.

|
|
| 12. |
Fit the top section of the climate control unit.
|
|
| 13. |
Tighten the nuts and bolts that secure the dashboard member.
|
|
| 14. |
Tighten the nuts that secure the angular supports.
|
|
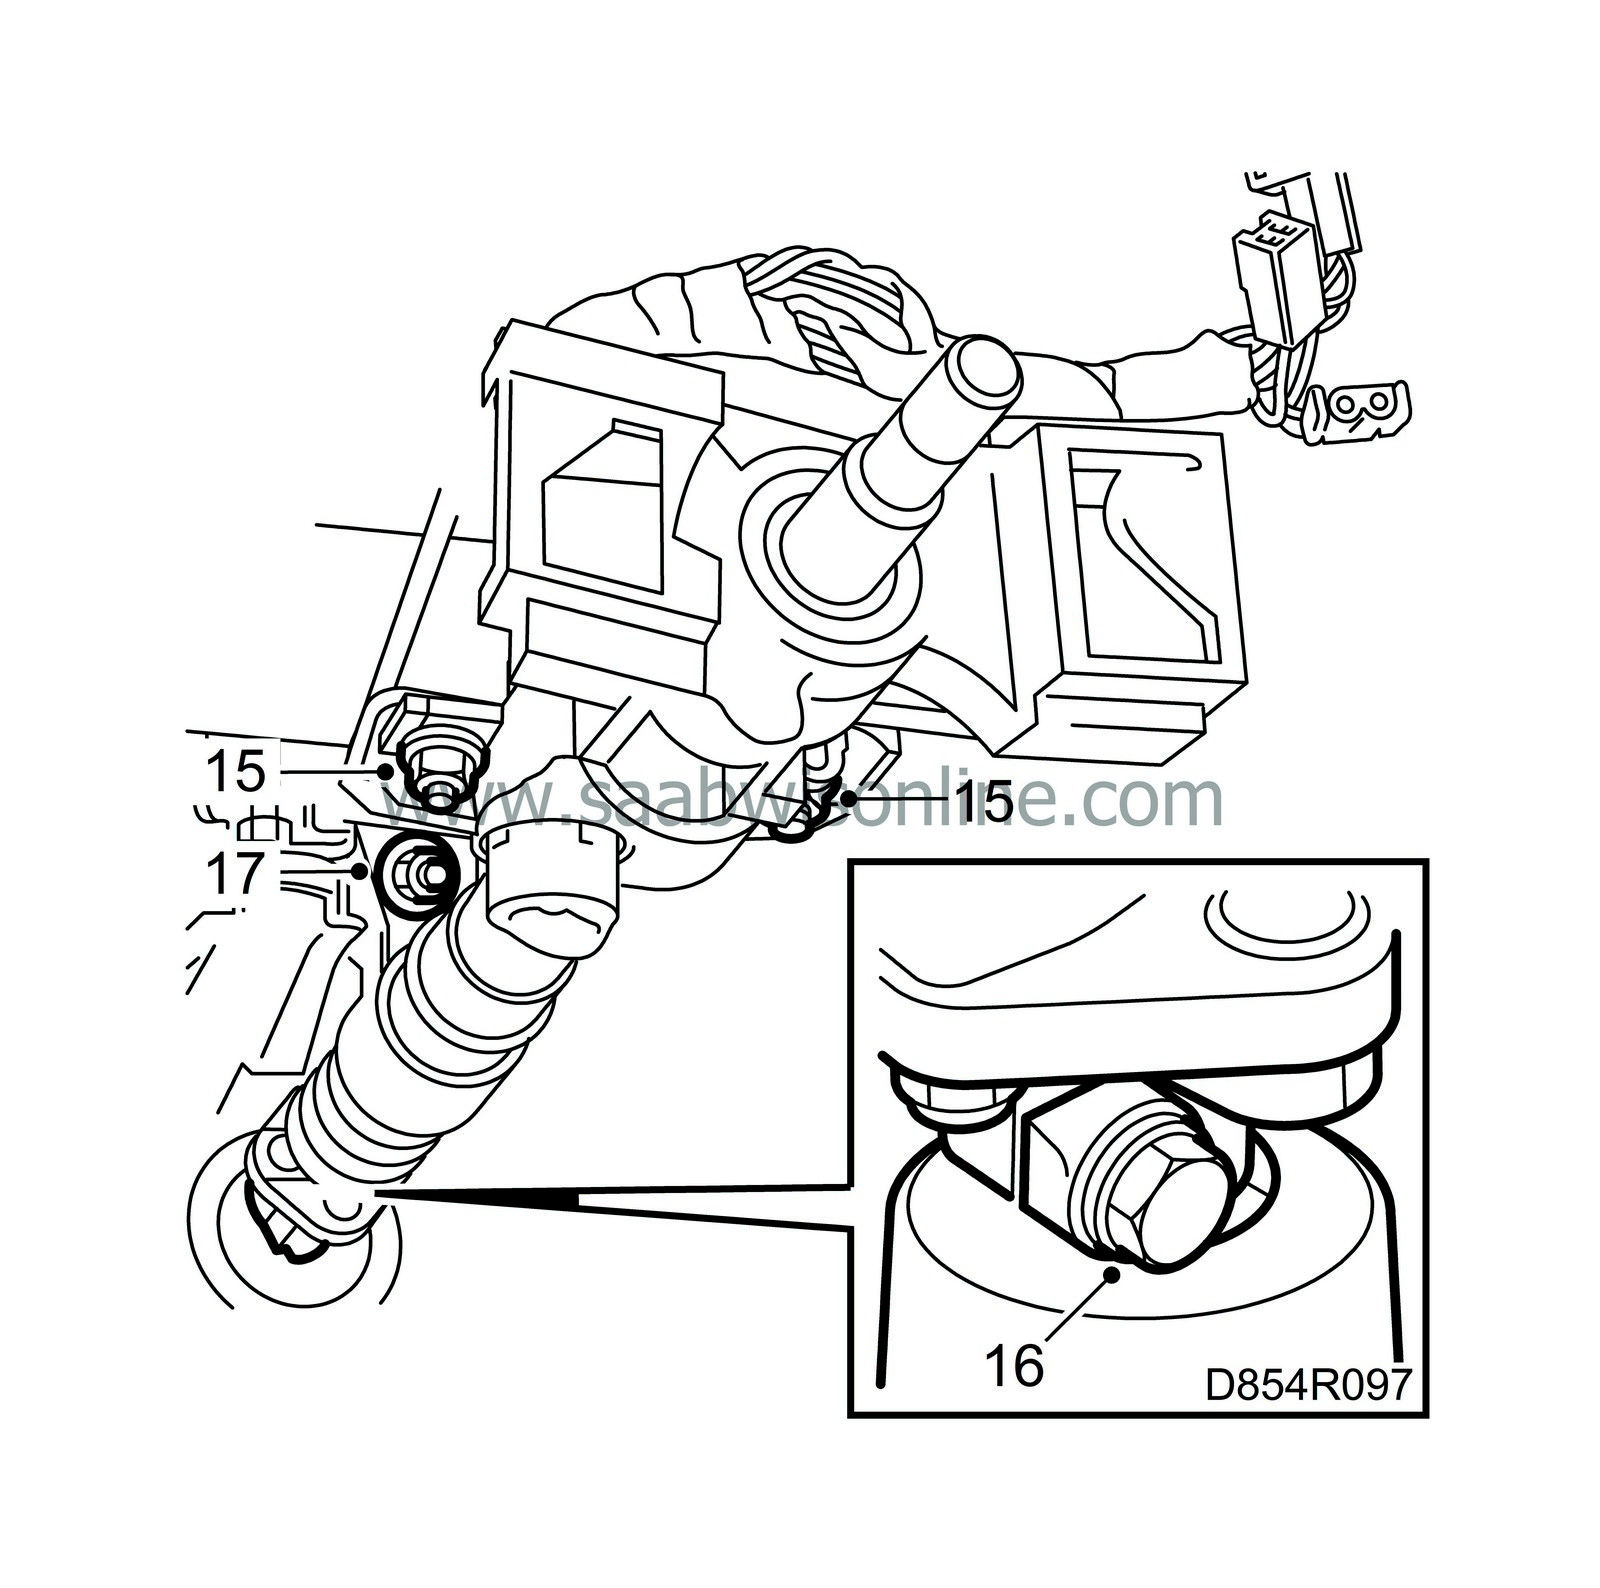
| 15. |
Fit the steering column and fit the nuts that secure the steering column to the dashboard member.
|
|
| 16. |
Tighten the bolt that secures the intermediate yoke to the steering gear.
Tightening torque: 24 Nm (18 lbf ft)
|
||||||||||
| 17. |
Fit the bolt that secures the support on the steering column to the dashboard member.
|
|
| 18. |
Tighten both bolts that secure the steering column to the dashboard member.
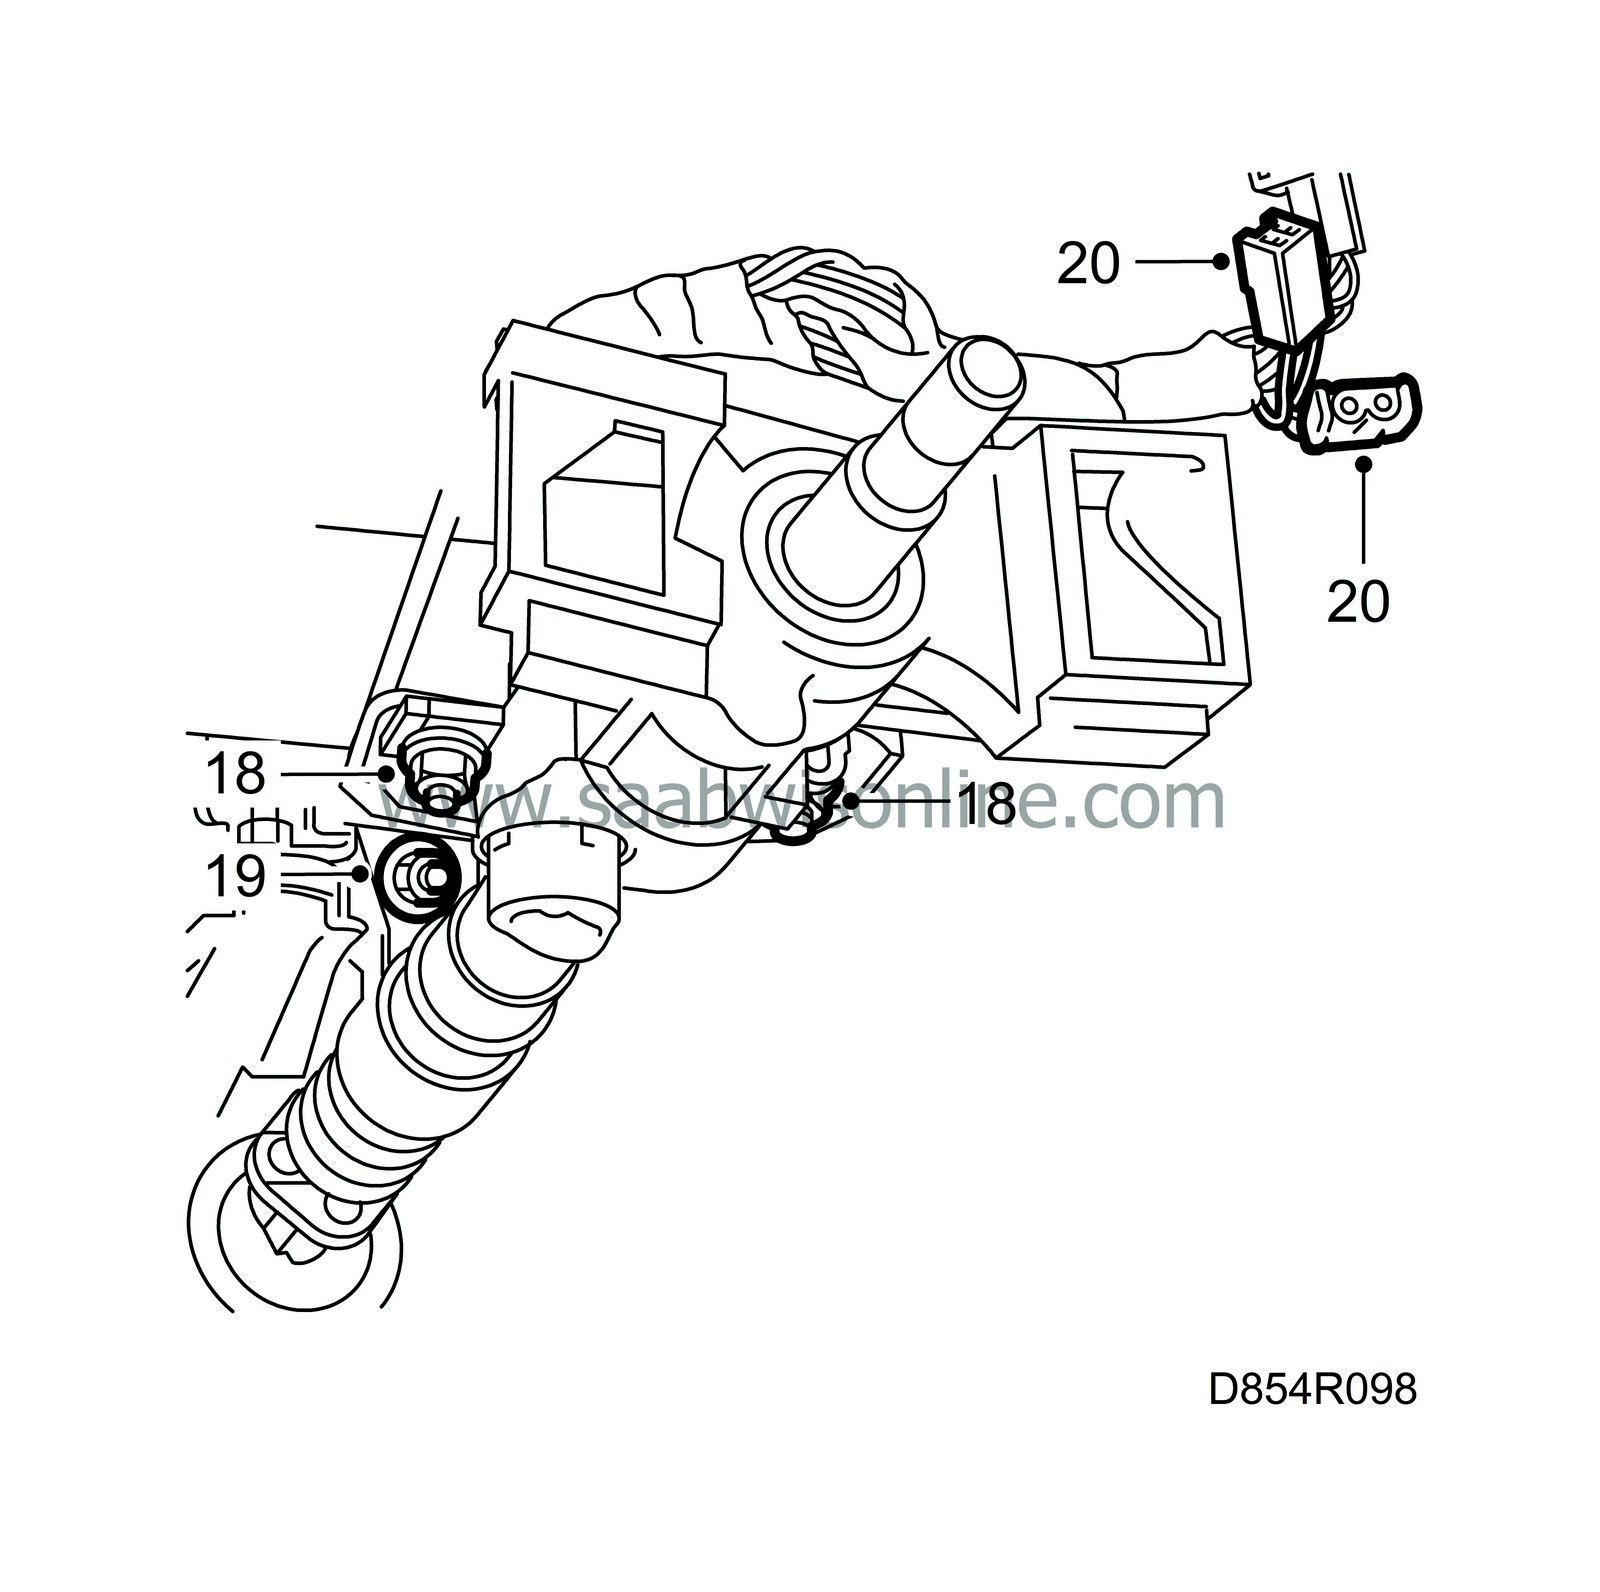
Tightening torque: 24 Nm (18 lbf ft) |
|
| 19. |
Tighten the bolt that secures the steering column support to the dashboard member.
Tightening torque: 24 Nm (18 lbf ft) |
|
| 20. |
Plug in the electric connectors for the steering wheel pad and the horn to the coil spring.
|
|
| 21. |
Cars with passenger side airbag: Refit the knee guard on the passenger side.

|
|
| 22. |
Refit the support by the climate control unit on the driver's side.
|
|
| 23. |
Refit the air ducts.

|
|
| 24. |
Secure the electrical cabling for the rear floor air ducts with cable ties.
|
|
| 25. |
Refit the knee guard on the driver's side.
|
|
| 26. |
Refit the wiper unit.
|
|
| 27. |
Refit the water deflector.
|
|
| 28. |
Refit the cover over the bulkhead.
|
|
| 29. |
Refit the wiper arms.
|
|
| 30. |
Refit the dashboard. See 8:2 Interior equipment.
|
|
| 31. |
Fill coolant.
|
|
| 32. |
Cars with A/C:
Fill refrigerant, see . |
|

 Warning

