Compressor low-pressure and high-pressure pipes
| Compressor low-pressure and high-pressure pipes |
| Removing |
| 1. |
Drain refrigerant from the A/C system, see .
|
||||||||||
| 2. |
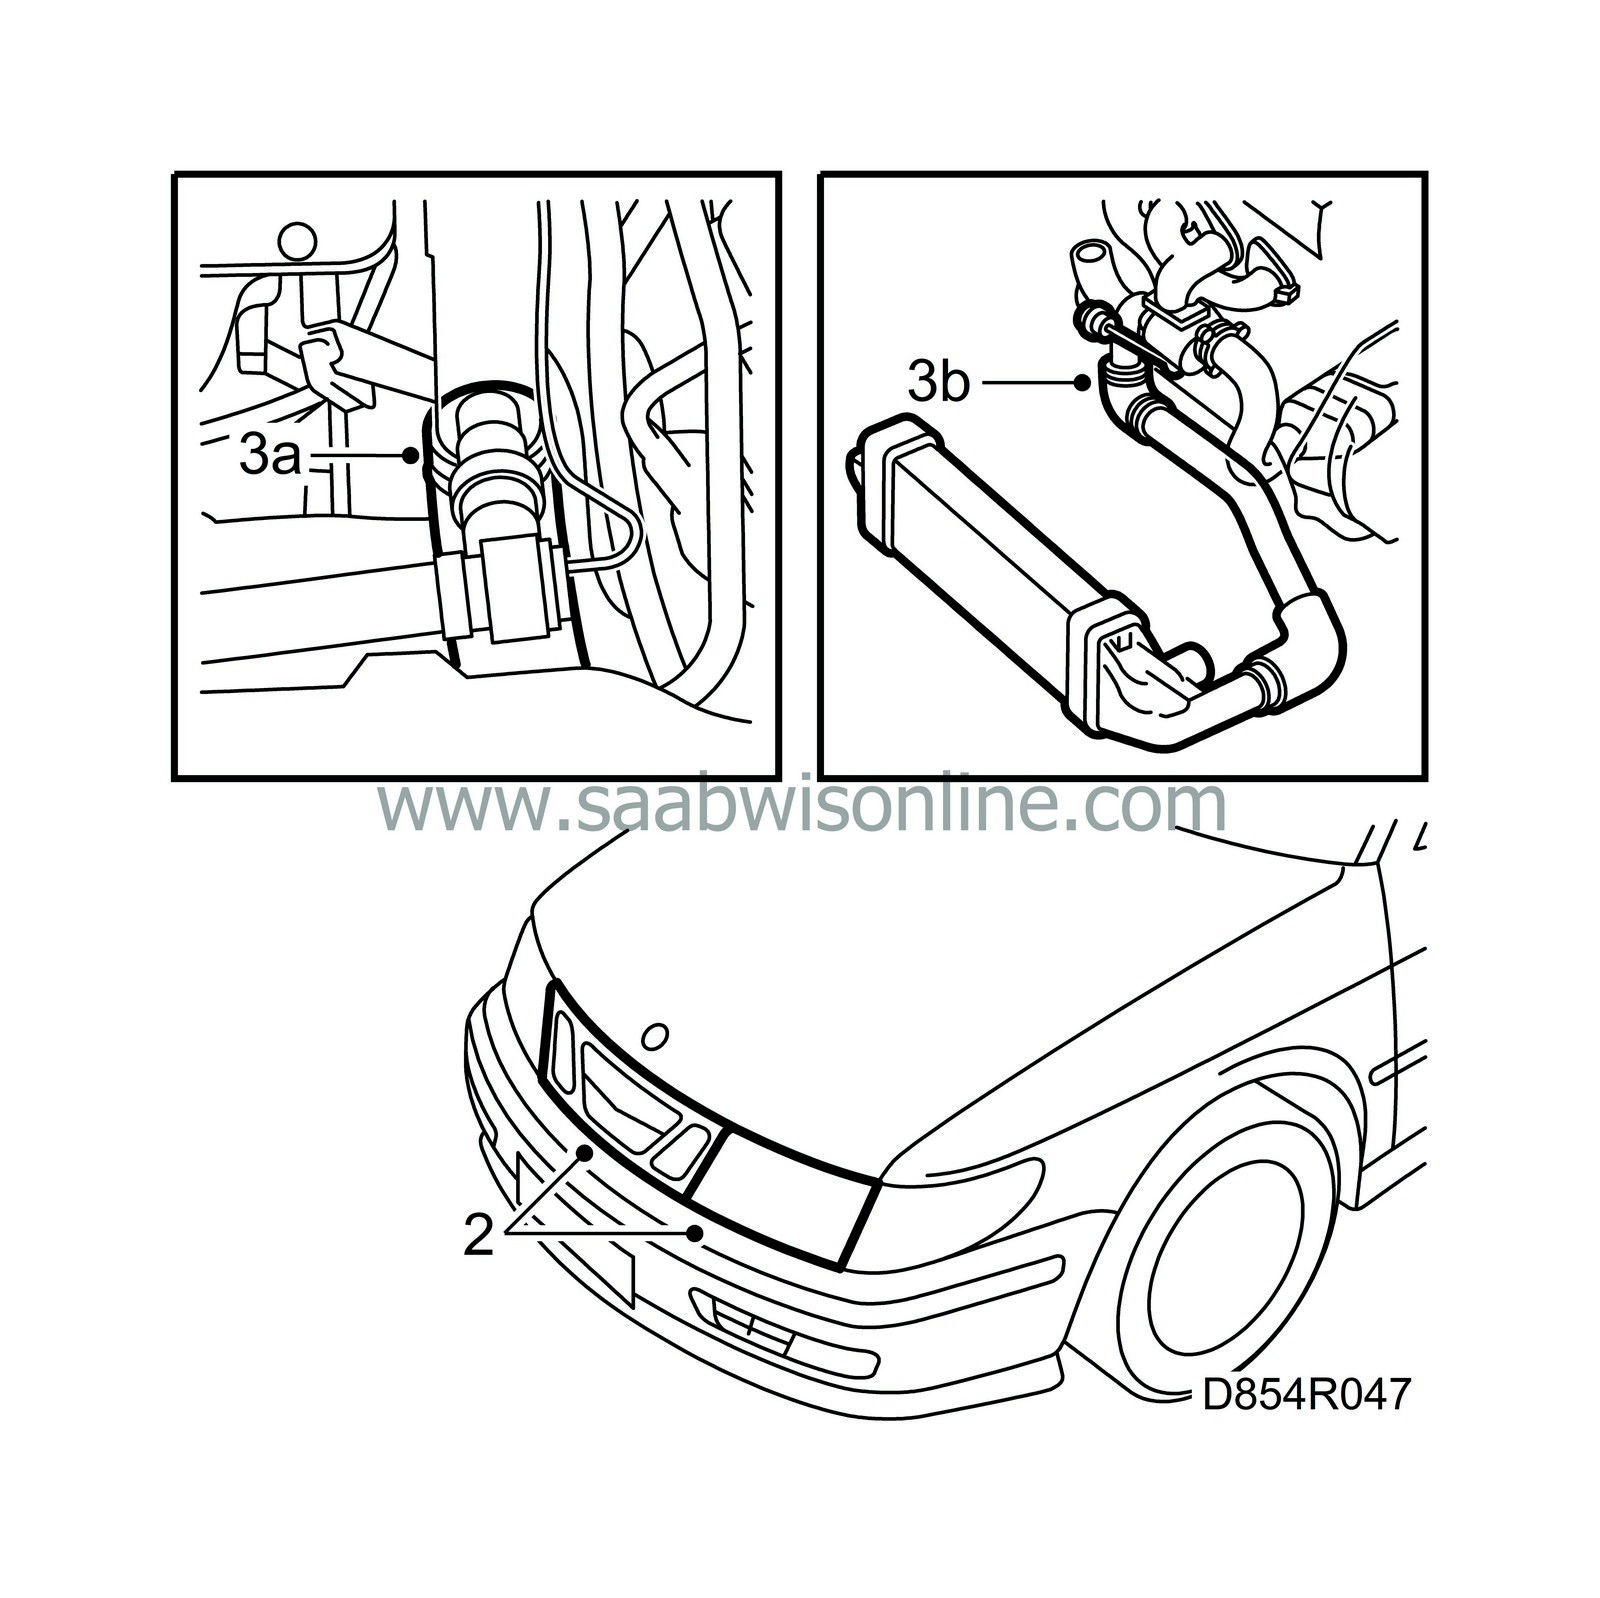
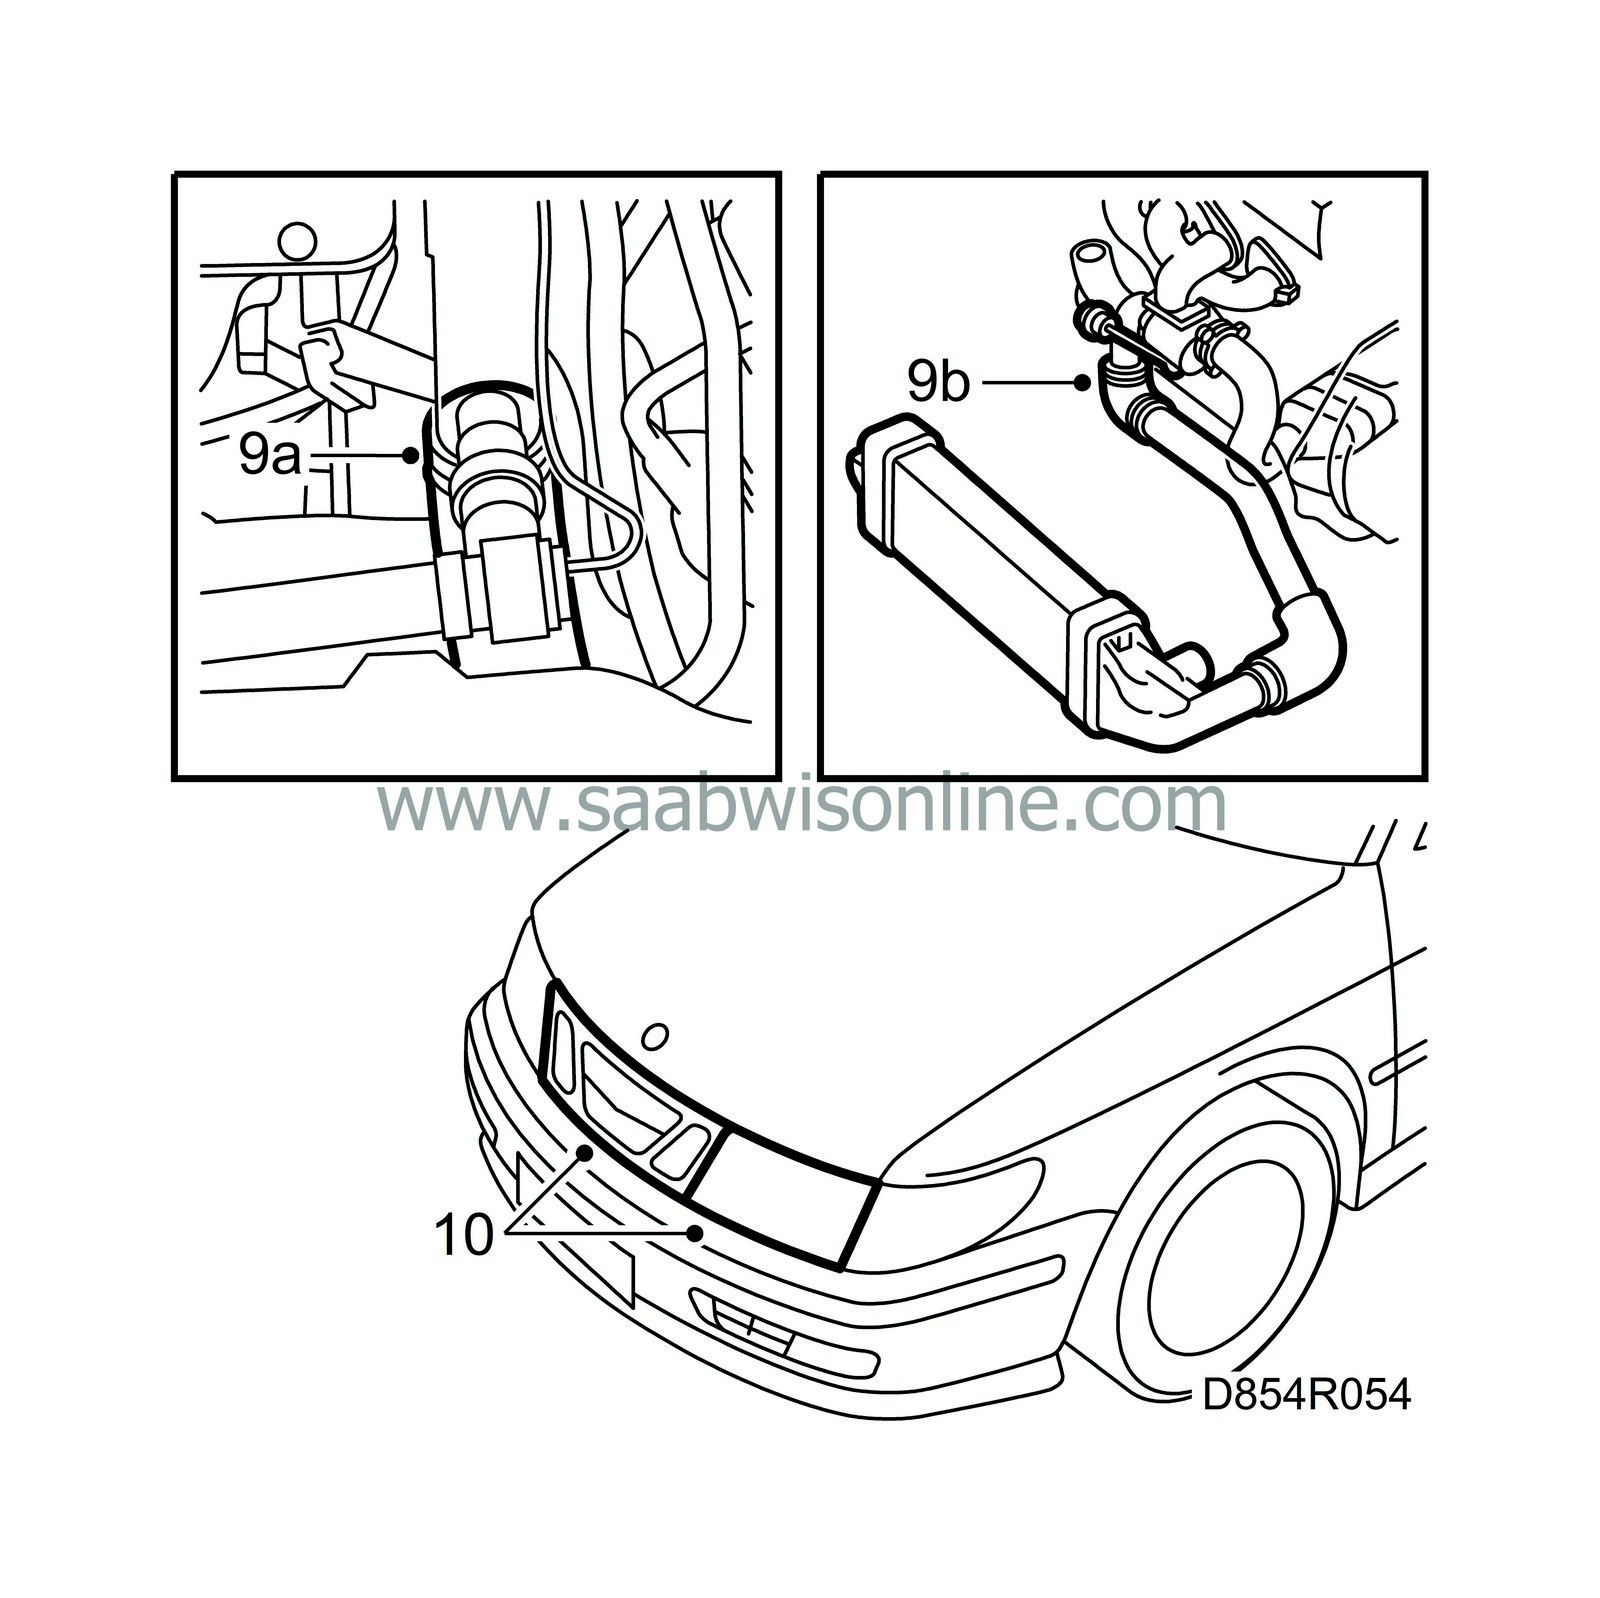
Remove the grille and the left headlamp.
|
|
| 3. |
Cars with turbo:
|
|
| 3.a. |
Remove the hose between the charge air cooler and the throttle body.
|
| 3.b. |
Remove the hose between the charge air cooler and the turbo charger.
|
| 4. |
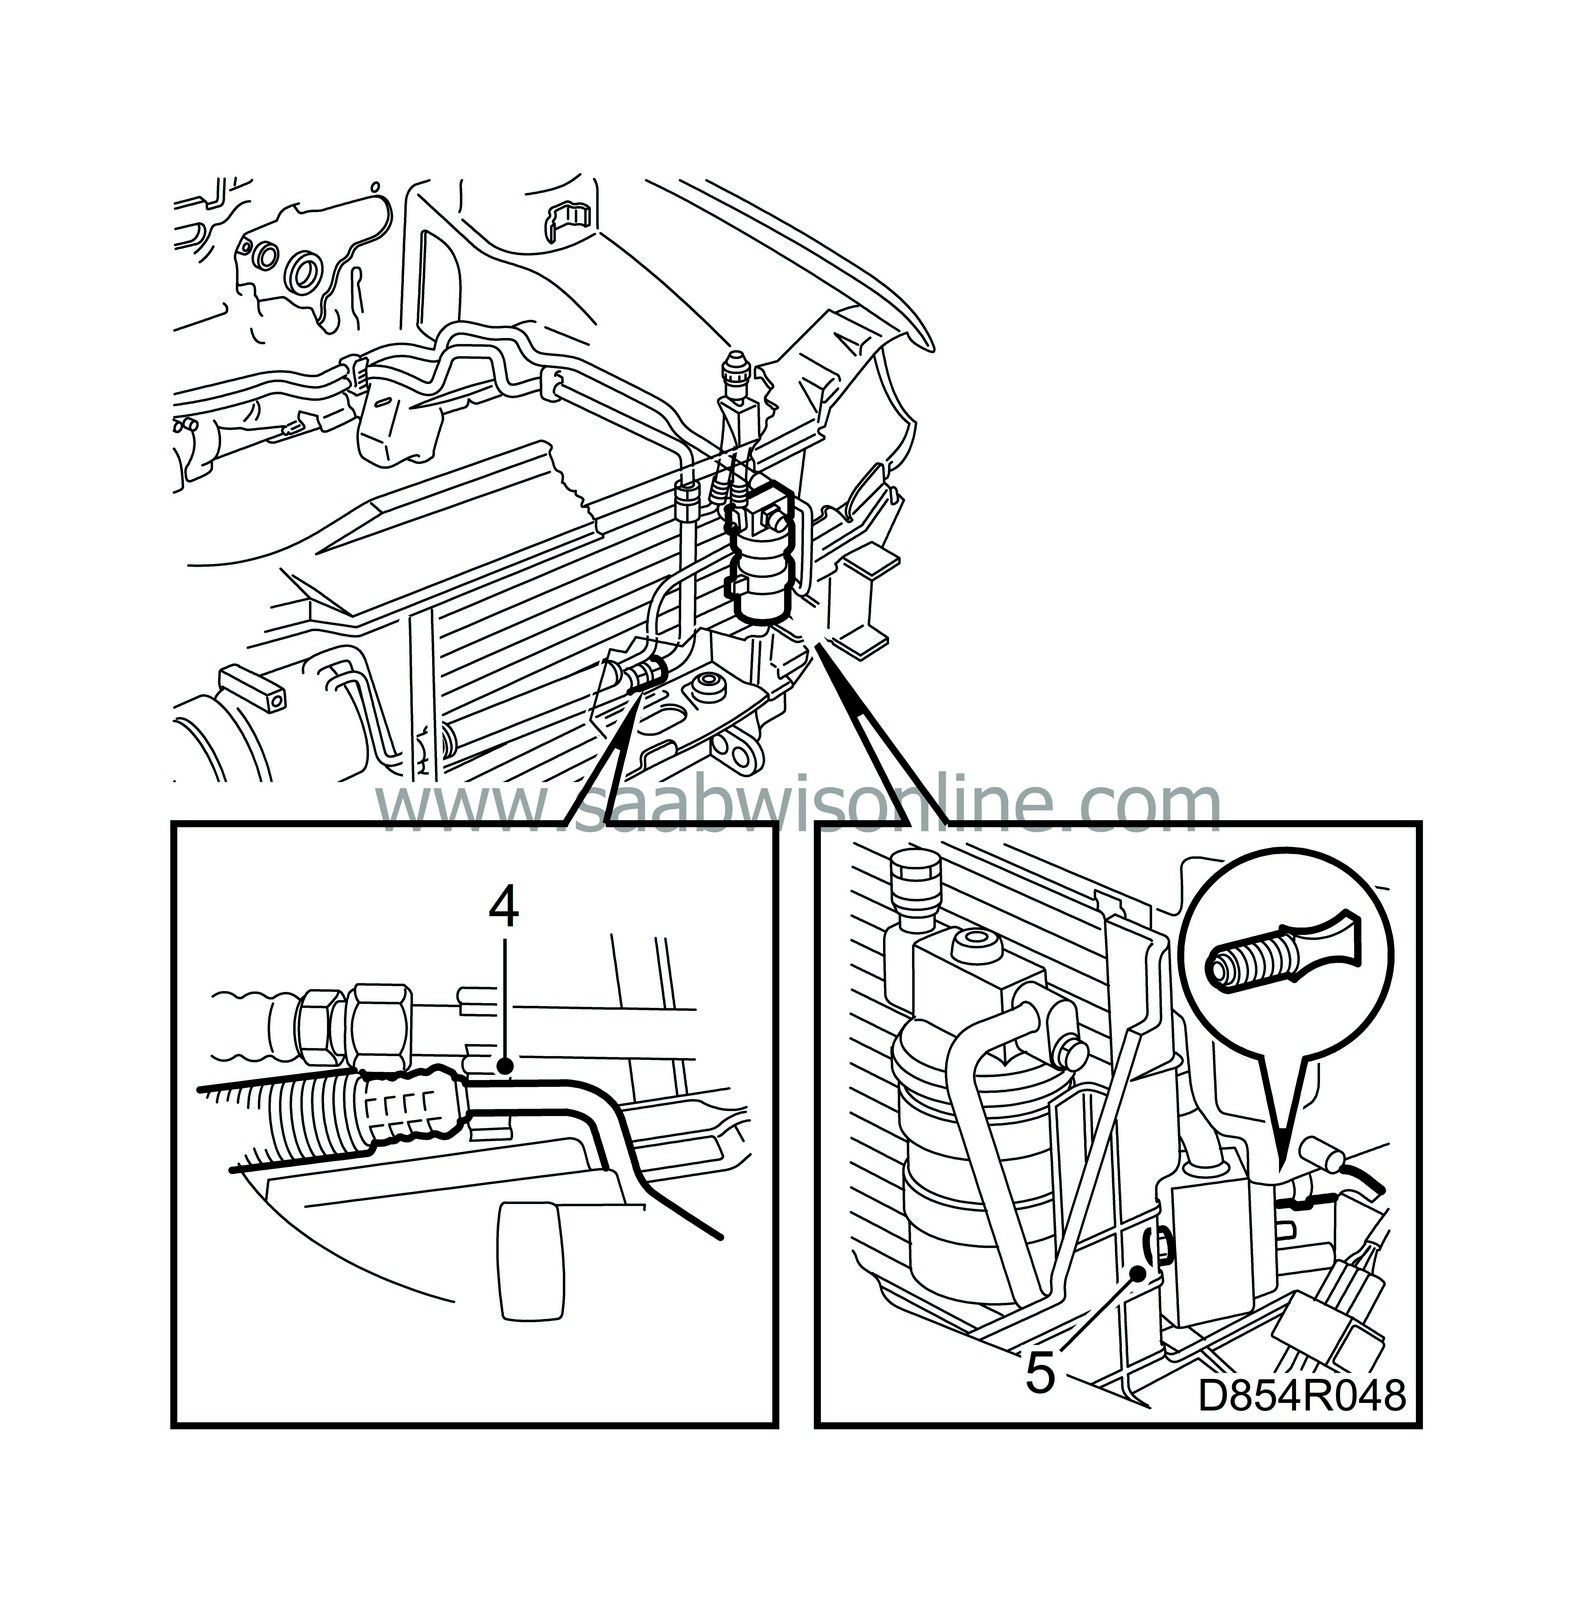
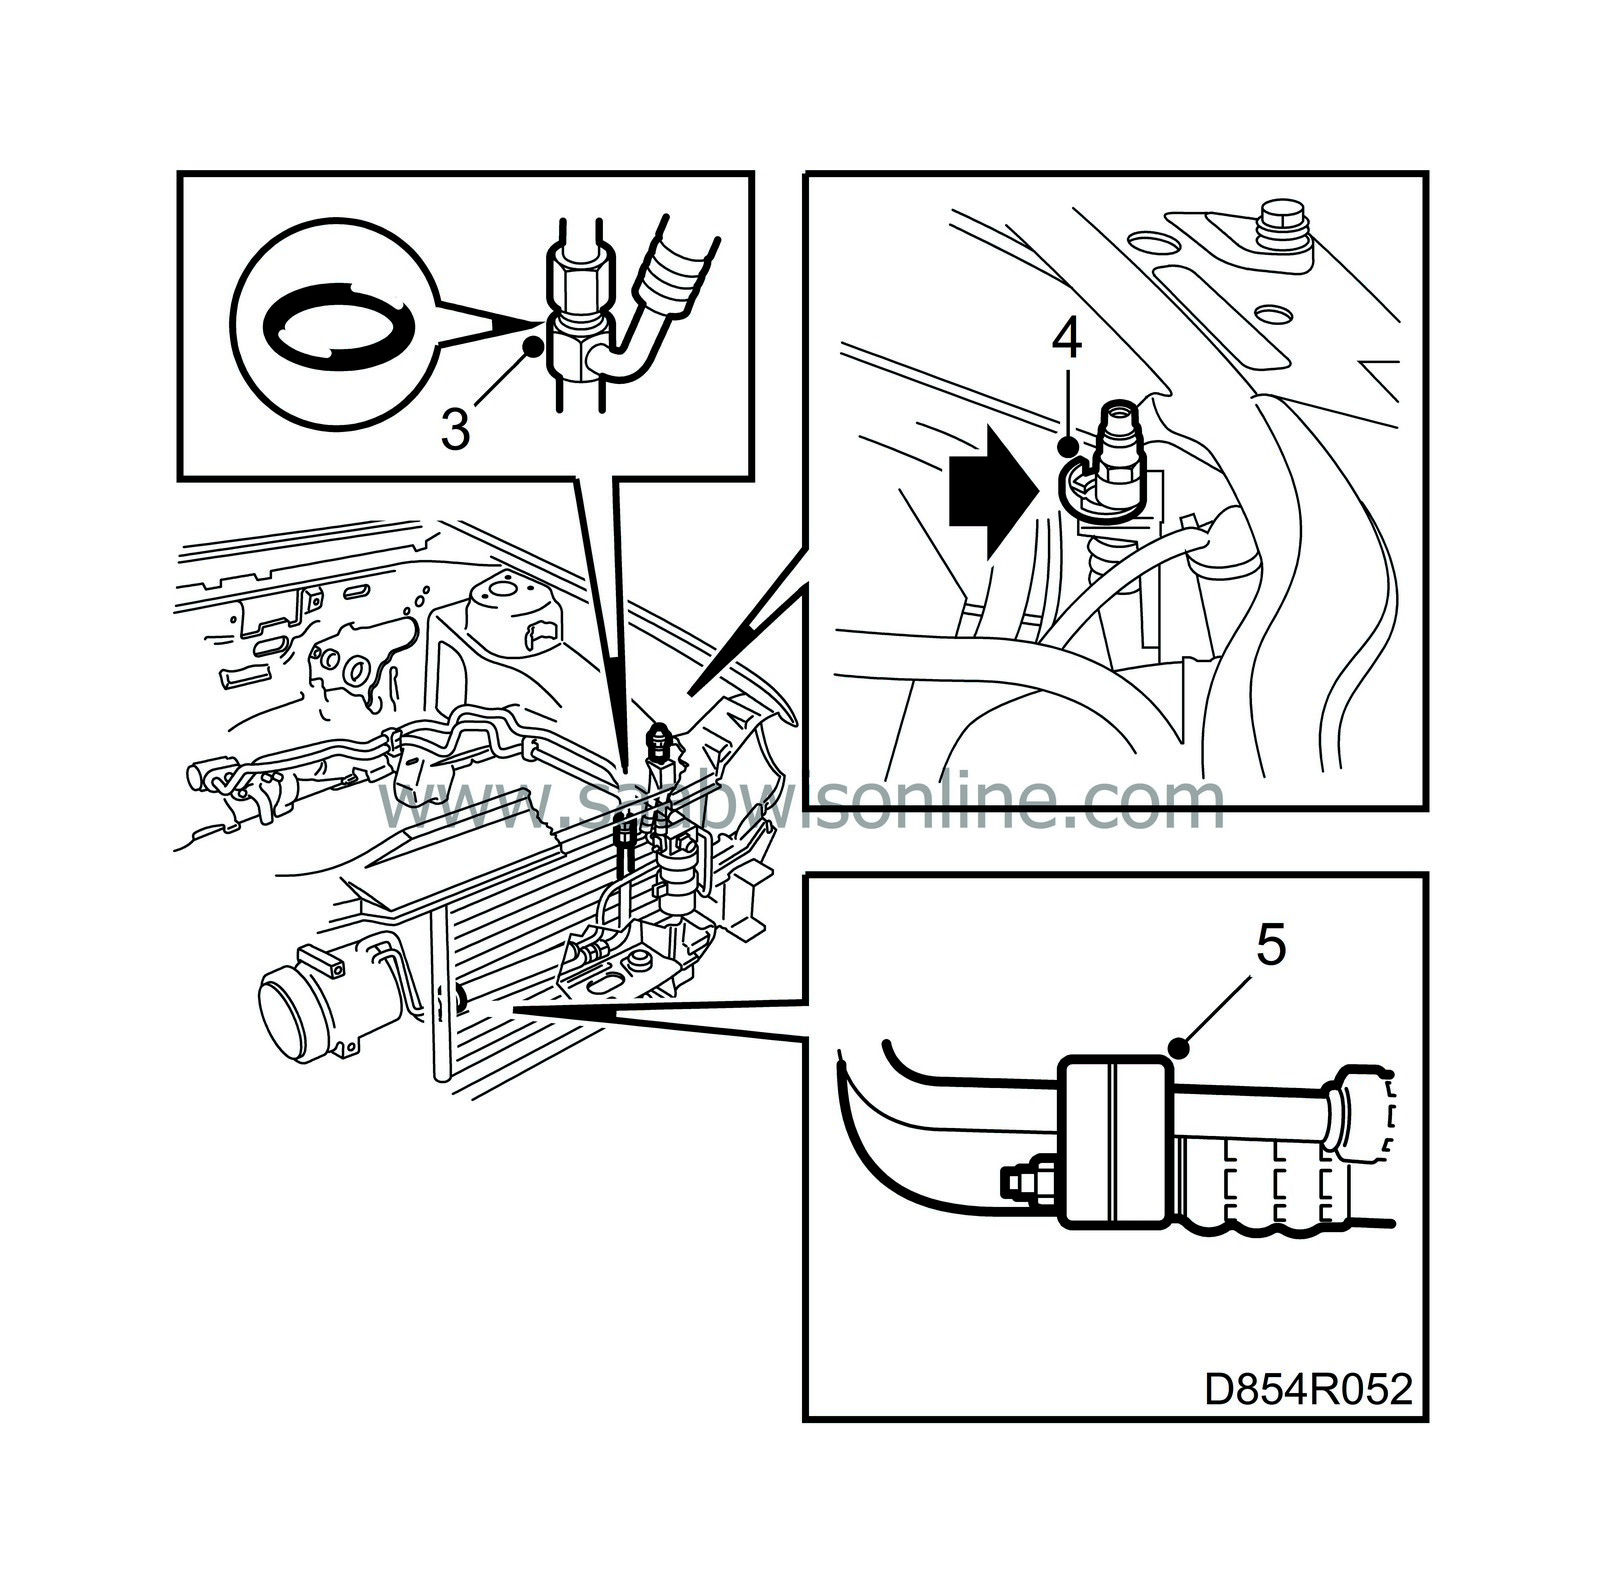
Remove the low-pressure and high-pressure pipes from the clip on the front cross member.
|
|
| 5. |
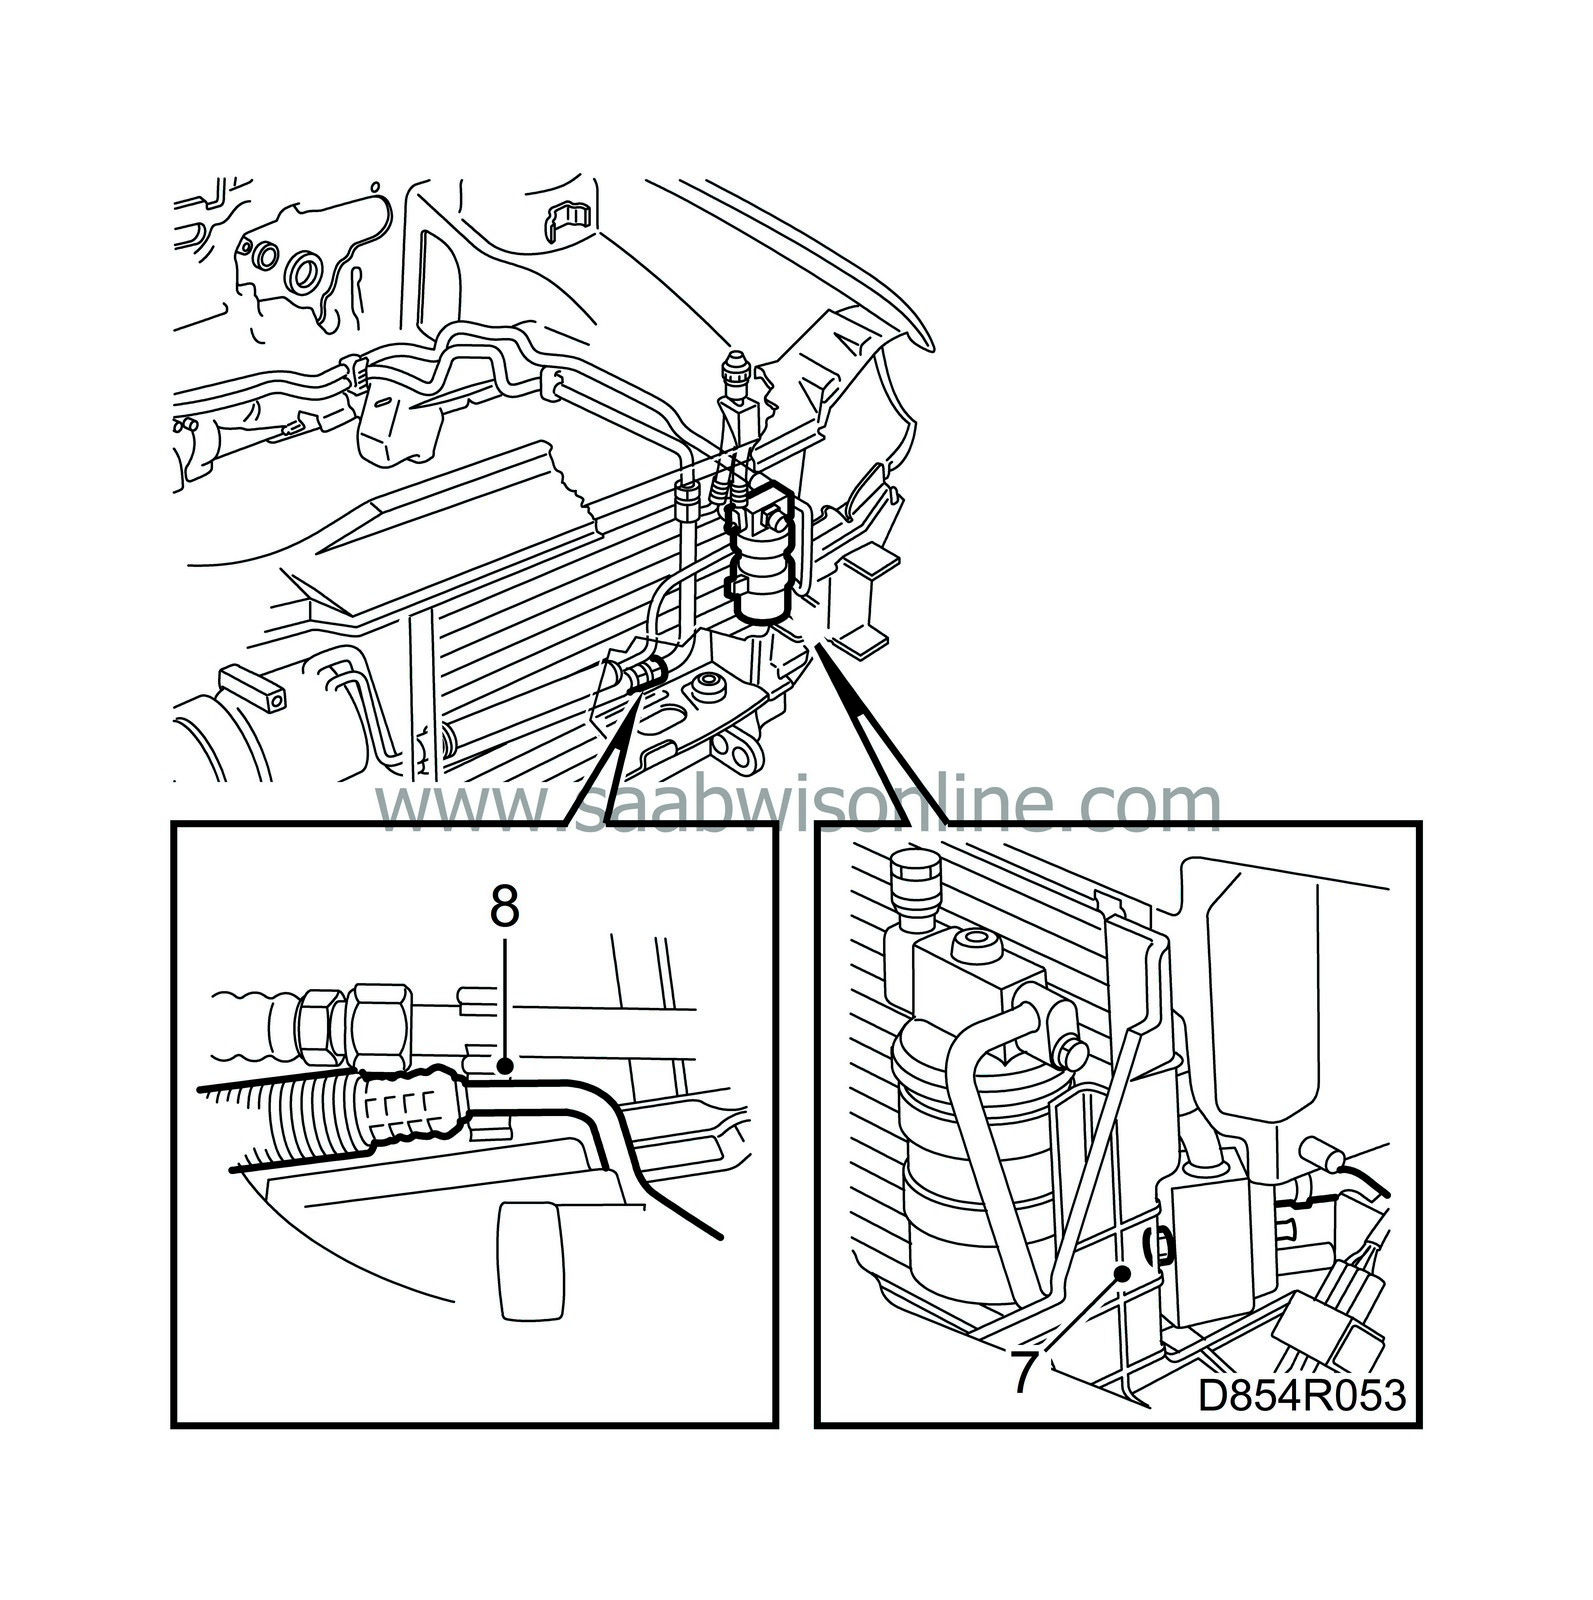
Remove the bolt in the PAD-connection by the receiver dryer. Plug the opening.
|
|
| 6. |
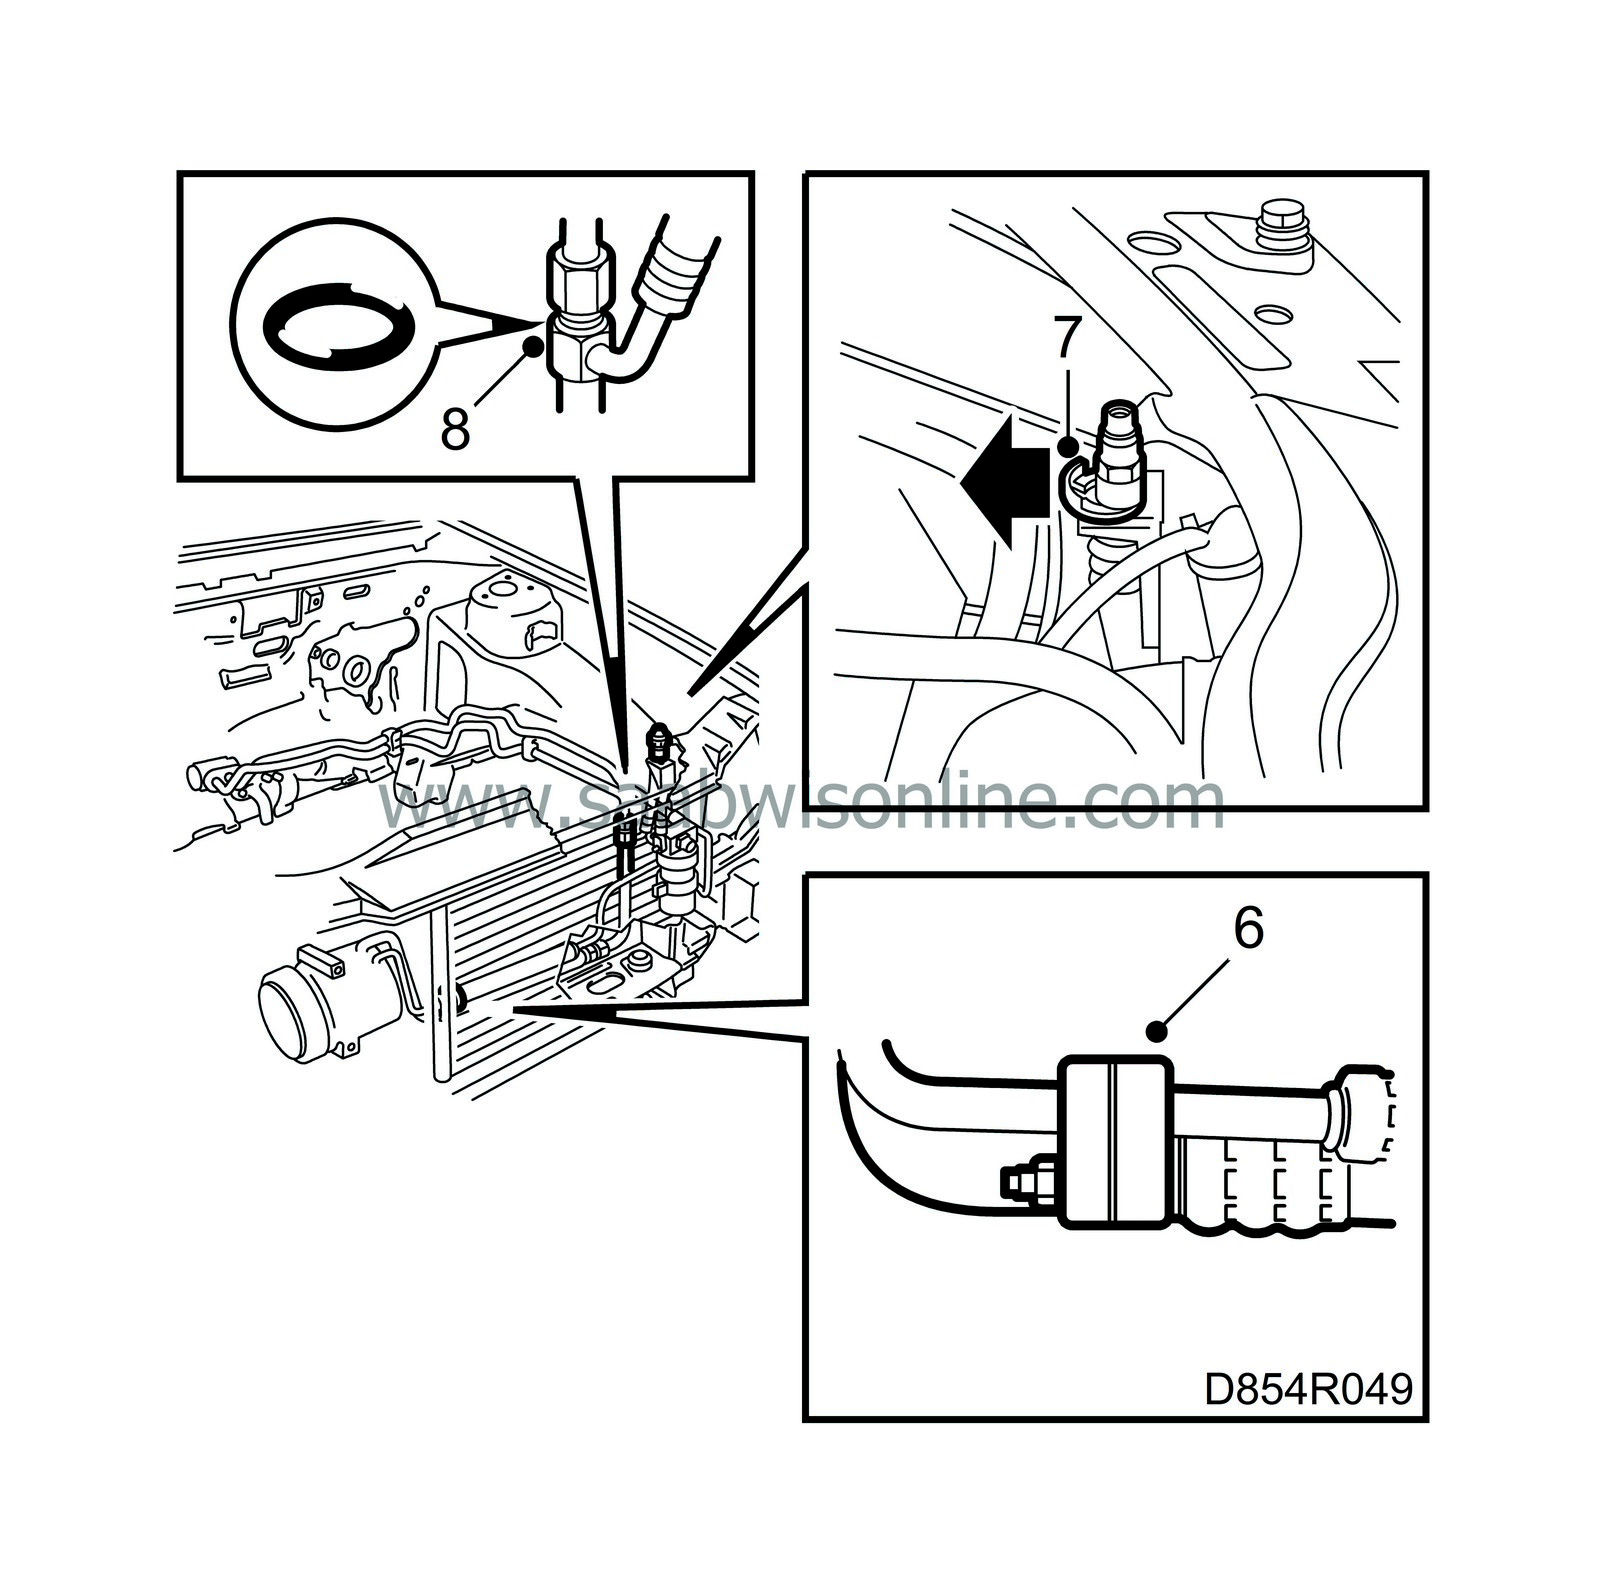
Remove the compressor high-pressure pipe and plug the openings.
|
|
| 7. |
Remove the clip securing the low-pressure side service connection.
|
|
| 8. |
Remove the nut securing the low-pressure pipe to the service connection.
|
|
| 9. |
Plug the openings.
|
|
| 10. |
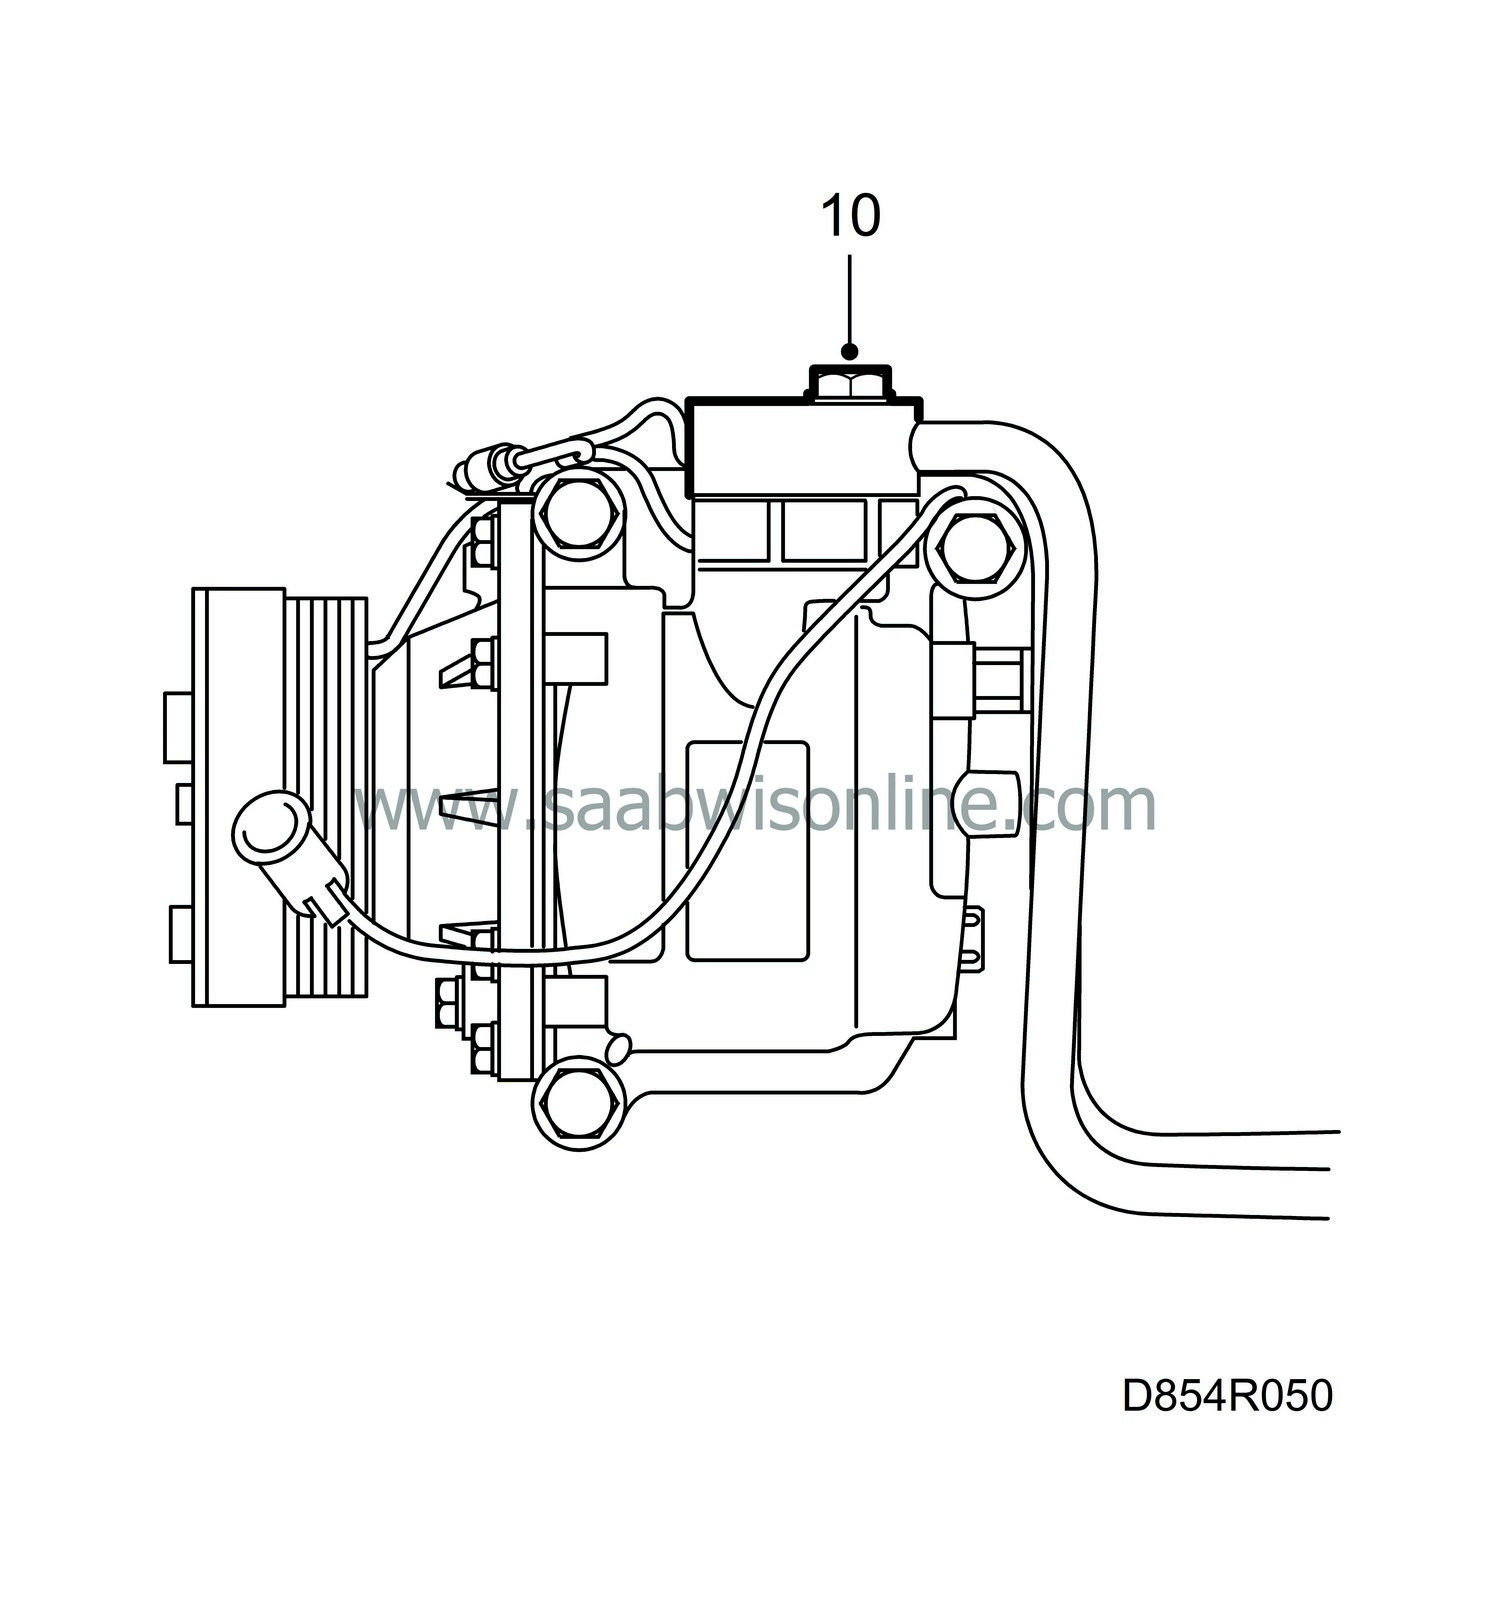
Remove the PAD-connection on the compressor.
|
|
| 11. |
Plug the compressor.
|
|
| Fitting |

| 1. |
Lubricate the new O-rings with synthetic vaseline and fit them on the compressor PAD-connection.
|
|
| 2. |
Tighten the PAD-connection.
Tightening torque: 20 Nm (14.5 lbf ft) (petrol) 39 Nm (29 lbf ft) (diesel) |
|
| 3. |
Tighten the nut securing the low-pressure pipe to the service connection.
Tightening torque 34 Nm (25 lbf ft) |
|
| 4. |
Fit the clip that secures the low-pressure side service connection.
|
|
| 5. |
Fit the compressor high-pressure pipe.
|
|
| 6. |
Fill compressor oil, see .
|
|
| 7. |
Tighten the bolt in the PAD-connection by the receiver dryer.
Tightening torque: 9 Nm (6.6 lbf ft) |
|
| 8. |
Connect the low-pressure and the high-pressure pipes to the clips on the front cross member.
|
|
| 9. |
Cars with turbo:
|
|
| 9.a. |
Fit the hose between the charge air cooler and the turbo charger.
|
| 9.b. |
Fit the hose between the charge air cooler and the throttle body.
|
| 10. |
Refit the left headlamp and the grille.
|
|
| 11. |
Vacuum pump the A/C system and fill refrigerant, see .
|
|

