Front exhaust pipe with catalytic converter (B235R)
|
|
Front exhaust pipe with catalytic converter (B235R)
|
When changing the front exhaust pipe, first remove the oxygen sensor (the rear one also in the case of OBDII) for fitting on the new exhaust pipe. Before fitting the oxygen sensor, apply Molycote 1000, part no. 30 20 971, to its threads.
|
Important
|
|
The leads of the oxygen sensors must not be twisted. Twisted leads are susceptible to vibration and the leads could fracture.
|
|
Since the oxygen sensors are sensitive to impacts and shocks, they must be handled with care.
|
|
|
Tightening torque: 55 Nm (41 lbf ft)

|
1.
|
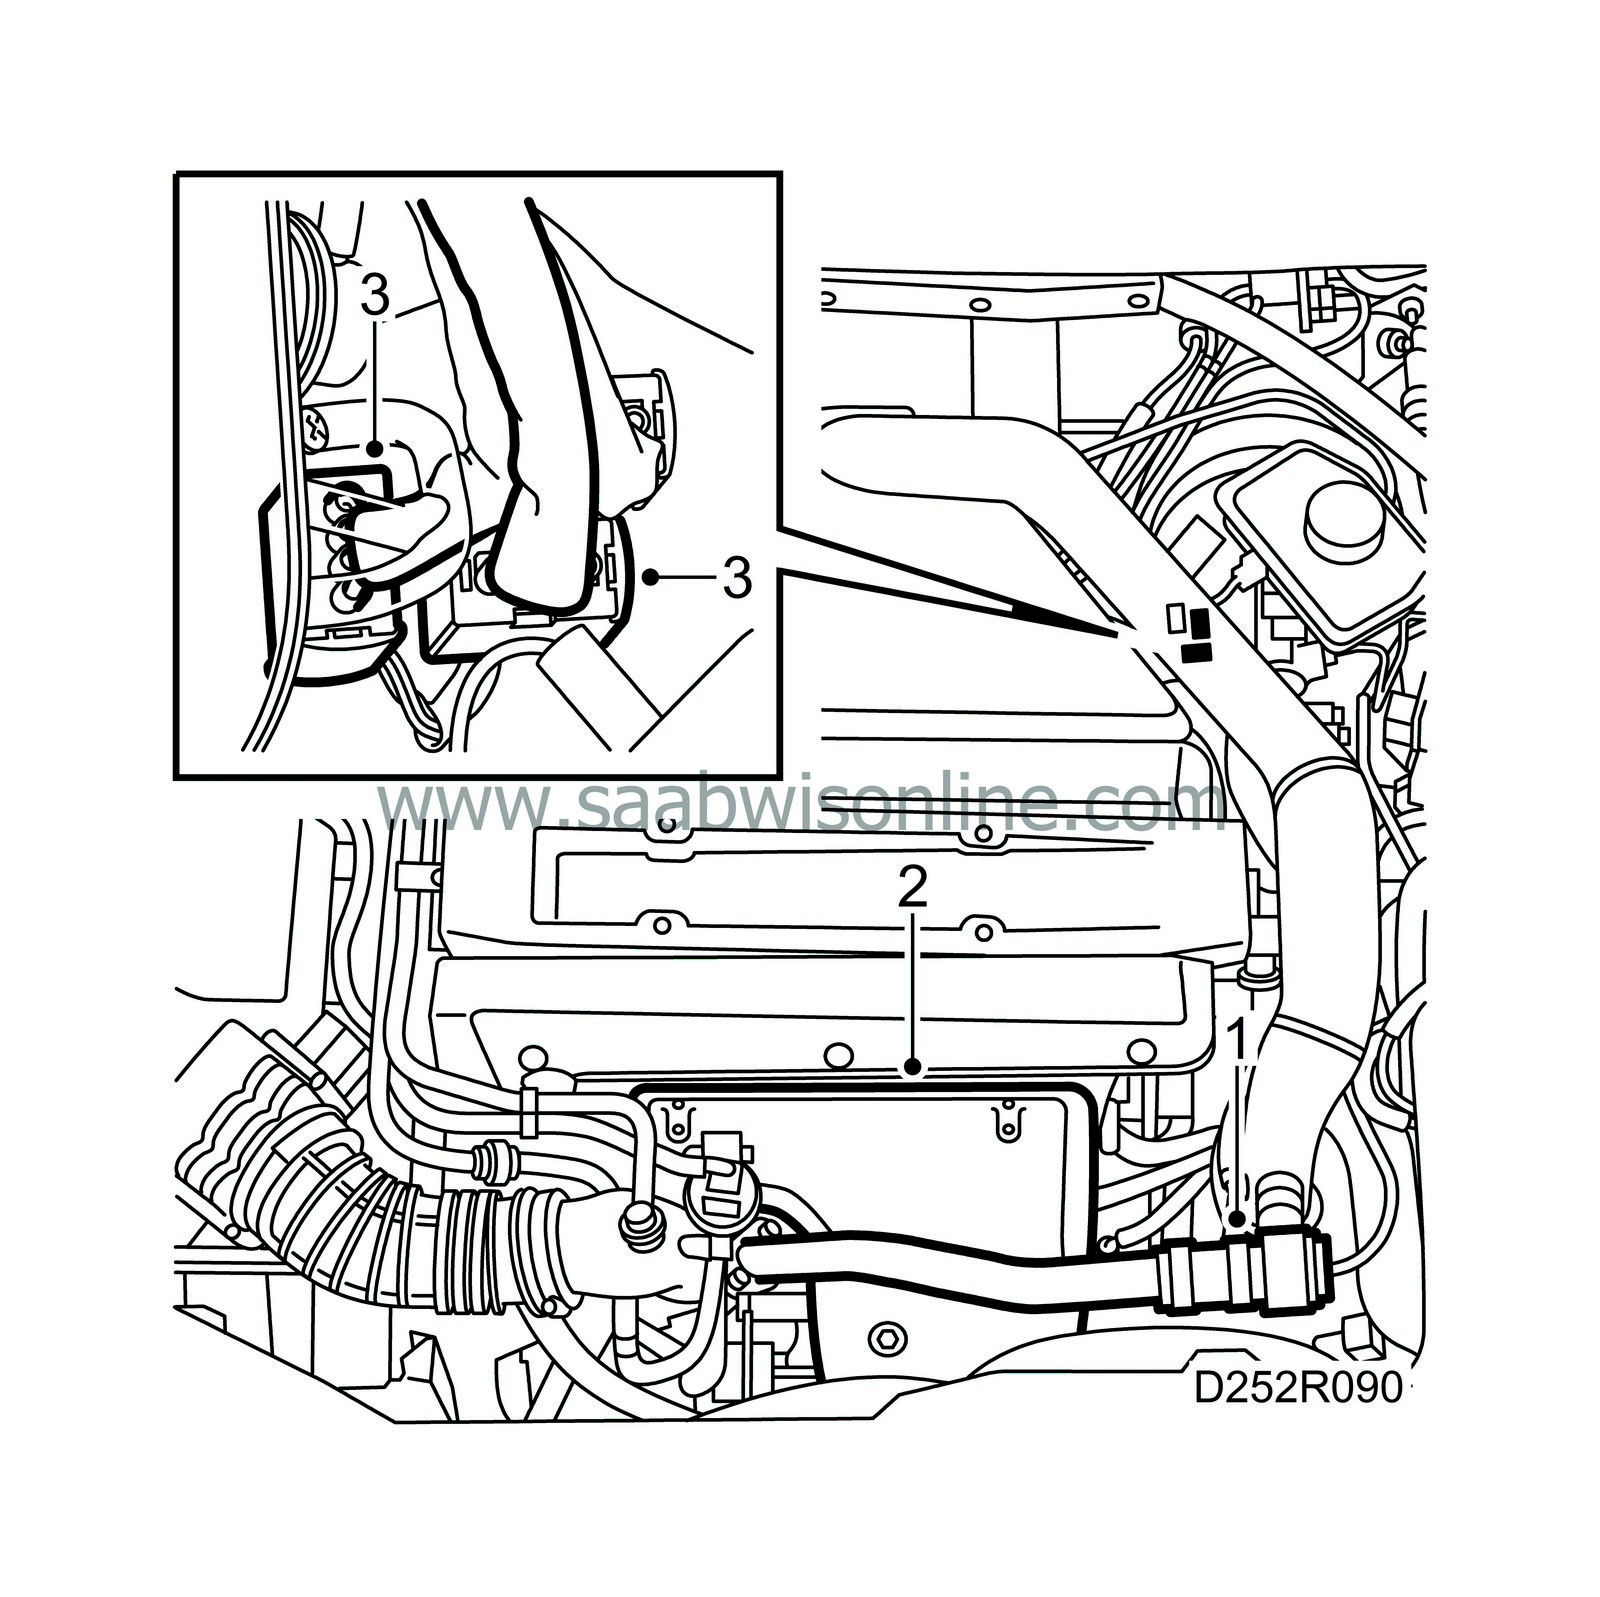
Remove the bypass pipe with valve. Collect the O-ring where the pipe is connected to the turbo's inlet pipe.
|
|
2.
|
Remove the exhaust manifold's heat shield.
|
|
3.
|
Unplug the oxygen sensor's connector.
In the case of OBDII, also unplug the rear oxygen sensor's connector.
Snip the cable tie securing the sensor's lead. Thread the lead through so that it runs freely.
|
|
4.
|
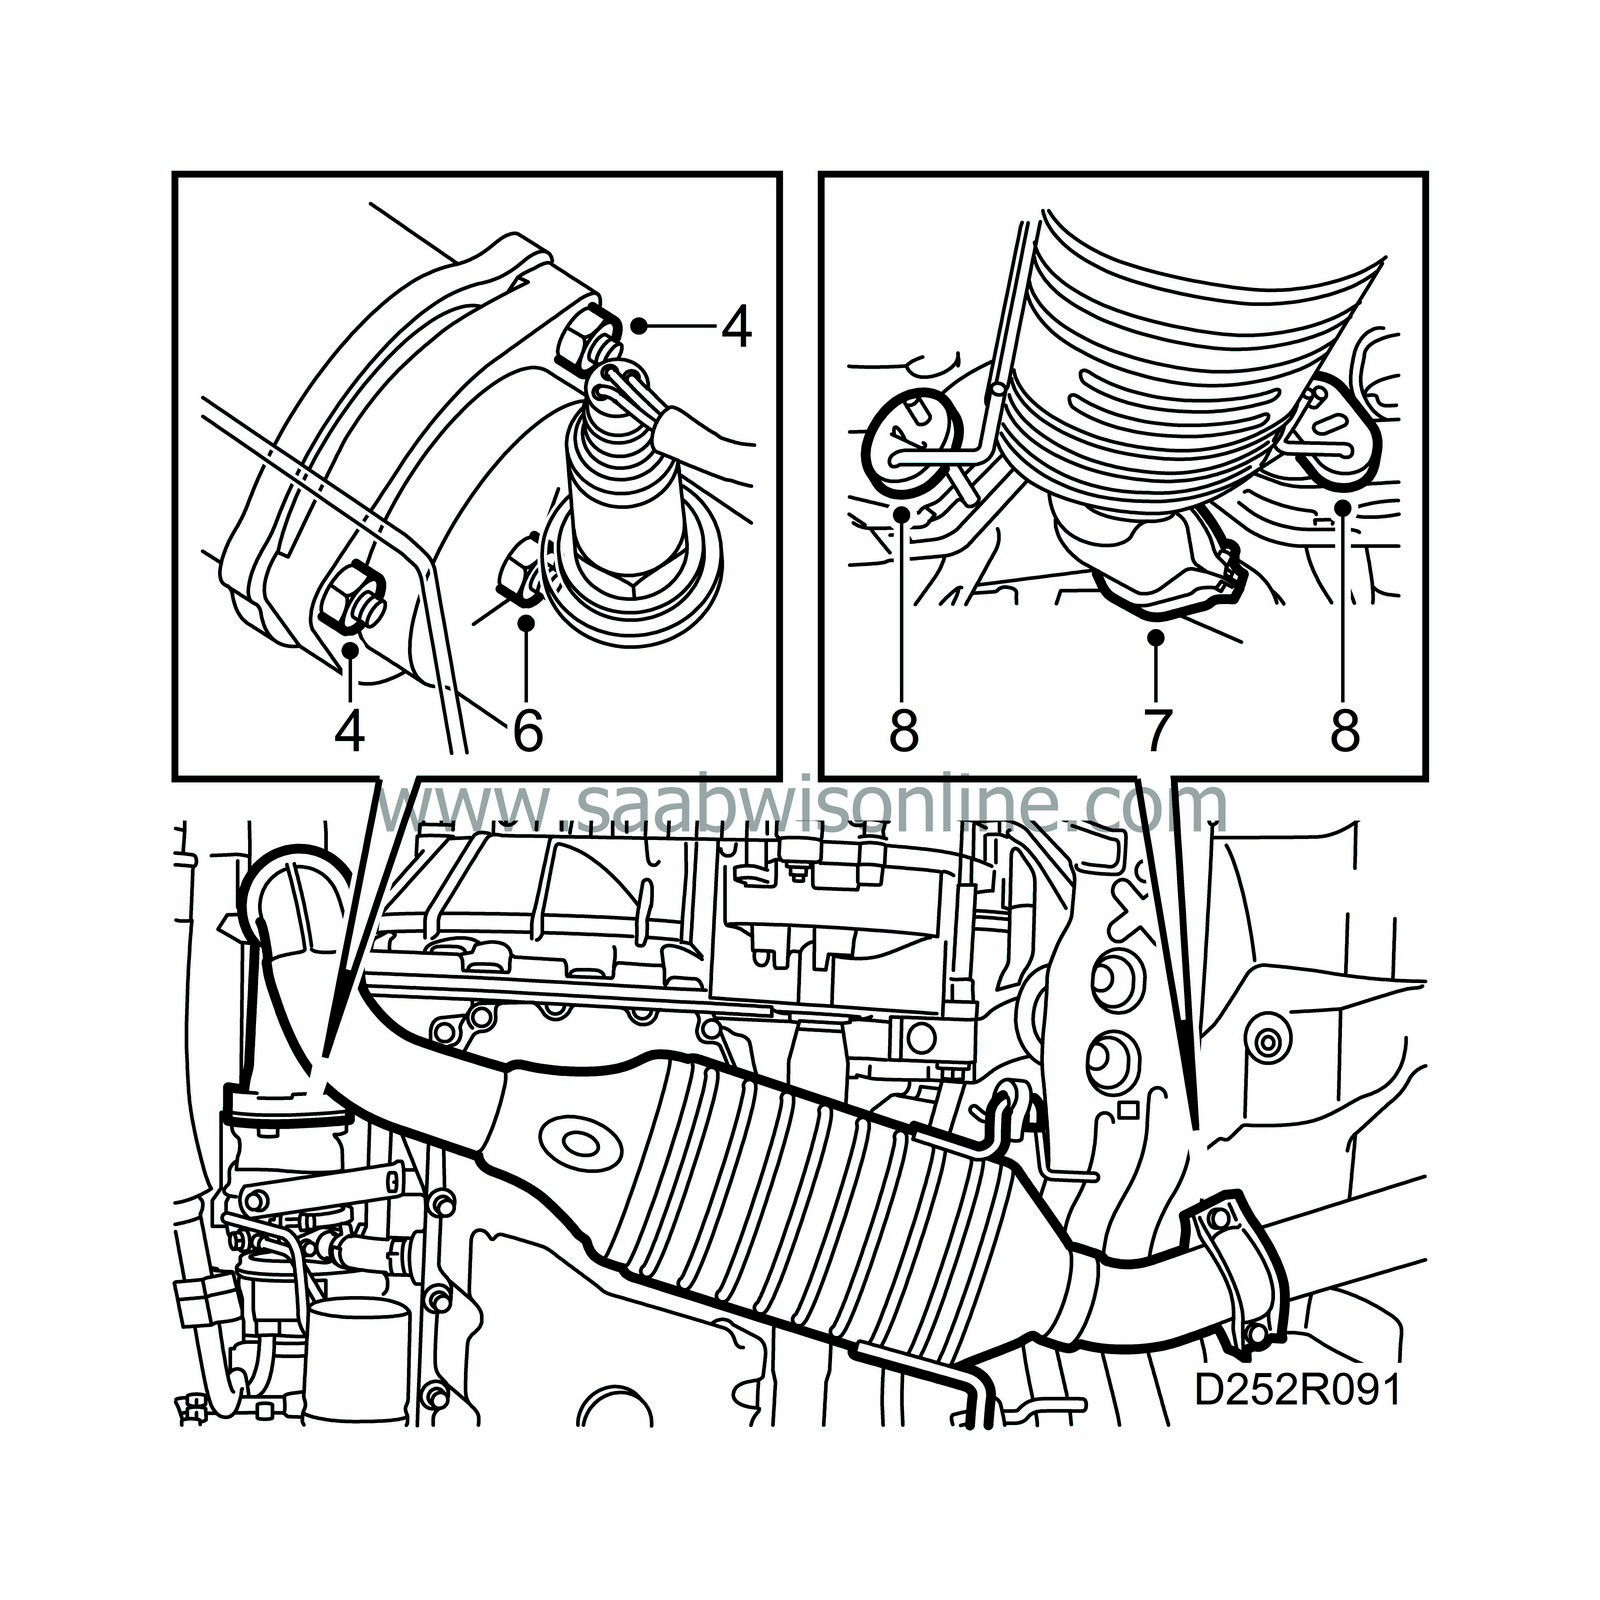
Undo the 2 upper nuts on the joint between the turbocharger and the front exhaust pipe.

|
|
6.
|
Undo the lower nut on the joint between the turbocharger and the front exhaust pipe.
(OBDII: remove the rear oxygen sensor's cable clip.)
|
|
7.
|
Remove the clamp at the joint between the front exhaust pipe and the intermediate pipe.
|
|
8.
|
Unhook the exhaust pipe from its rubber mountings and lower it away. Make sure that the leads of the oxygen sensors are not caught up or damaged when the exhaust pipe is removed.
|
Important
|
|
The flexible section in the front part of the exhaust pipe must not be bent more than 5°.
|
|
|
|

|
Important
|
|
The flexible section of the exhaust pipe is sensitive to bending and must not be angled more than 5° as this could lead to permanent deformation.
|
|
Do
not
allow the catalytic converter to hang from the flexible section.
|
|
|
|
2.
|
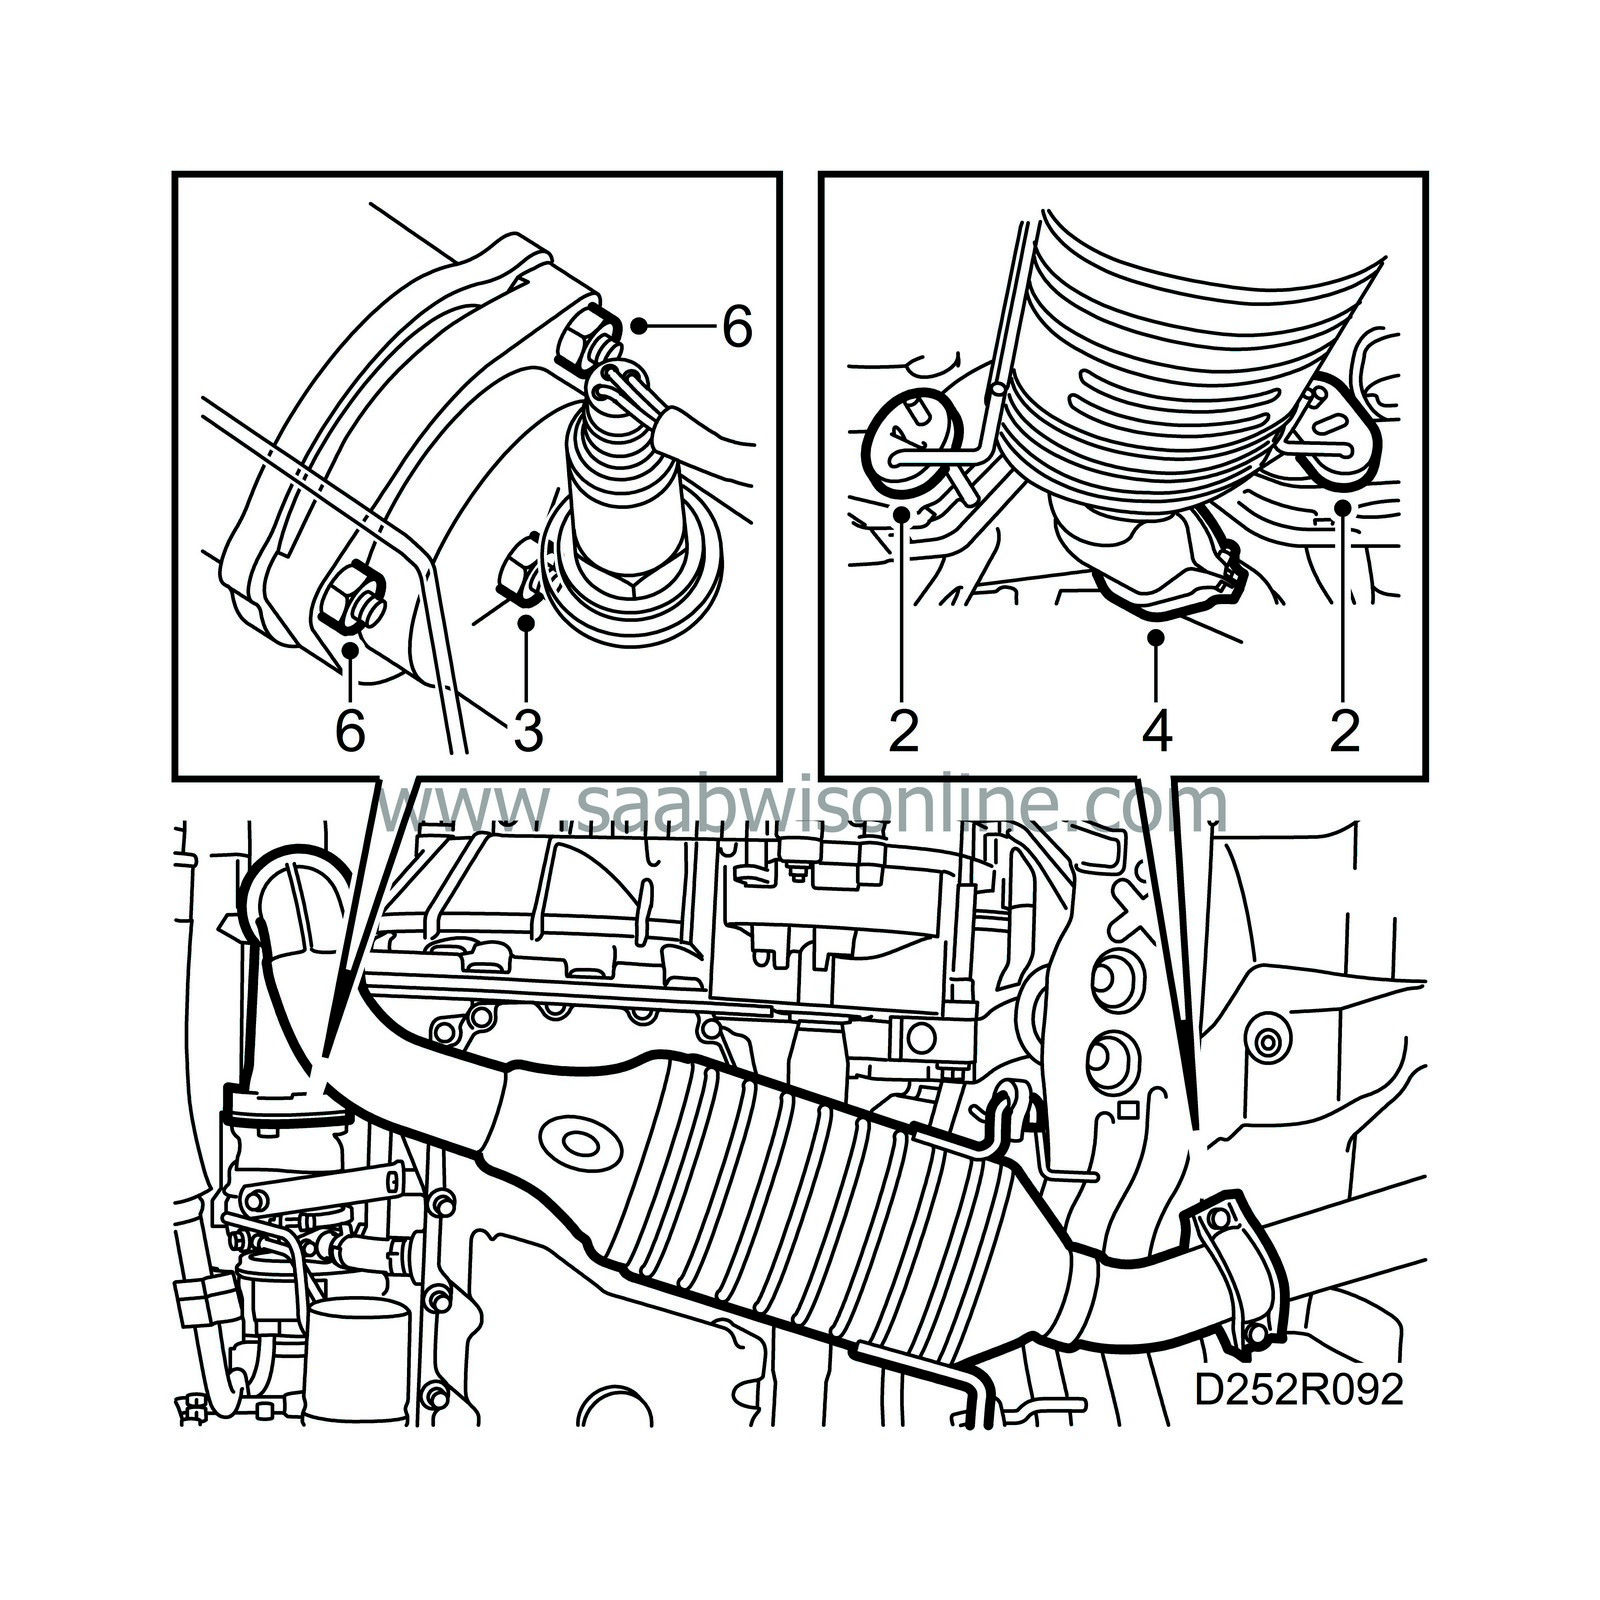
Offer up the exhaust pipe and hook it onto its rubber mountings. If necessary, change the rubber bushes.
|
|
3.
|
Fit the lower nut between the front exhaust pipe and the turbocharger. Smear the threads with Molycote 1000, part no. 30 20 971, or the equivalent.
Tightening torques:
|
|
4.
|
Bolt the front exhaust pipe and intermediate pipe together, using a new clamp.
Tightening torques:
|
Important
|
|
To avoid leakage, use new clamps when tightening the joints.
|
|
|
Make sure that there is adequate clearance to parts next to the exhaust system.
Check that the tailpipe is positioned symmetrically in the space cut out for it in the rear bumper.
|
|
5.
|
Position the oxygen sensor's lead and lower the car (OBDII: position the lead and secure it with cable ties).
|
|
6.
|
Fit the upper nuts between the front exhaust pipe and the turbocharger. Coat the threads with Molycote 1000, part no. 30 20 971, or the equivalent.
Tightening torques:
|
Important
|
|
Tighten the nuts alternately to avoid misalignment of the flange. The exhaust pipe's flange must not abut against the turbocharger's flange.
|
|
|
|
|
7.
|
Bring up the oxygen sensor's lead and plug in the connector. Secure the lead with cable ties.

|
Important
|
|
The oxygen sensor's leads must not be twisted.
|
|
Make sure that the lead does not rest against hot surfaces or sharp edges.
|
|
|
|
|
8.
|
Fit the exhaust manifold's heat shield.
|
|
9.
|
Fit the bypass pipe with valve. Lubricate the O-ring at the connection to the turbo's inlet pipe with non-acidic vaseline, part no. 30 06 665, or the equivalent.
|


