Fuel level sensor
| Fuel level sensor |
|
|||||||
| • |
Make provision for good ventilation! If approved ventilation for extracting fuel fumes is available then it must be used.
|
|
| • |
Use protective gloves! Prolonged contact with fuel may irritate the skin.
|
|
| • |
Keep a class BE fire extinguisher close at hand! Watch out for sparks, e.g. in connection with breaking electric circuits, short-circuits, etc.
|
|
| • |
Smoking is absolutely forbidden.
|
|
| To remove |
| 1. |
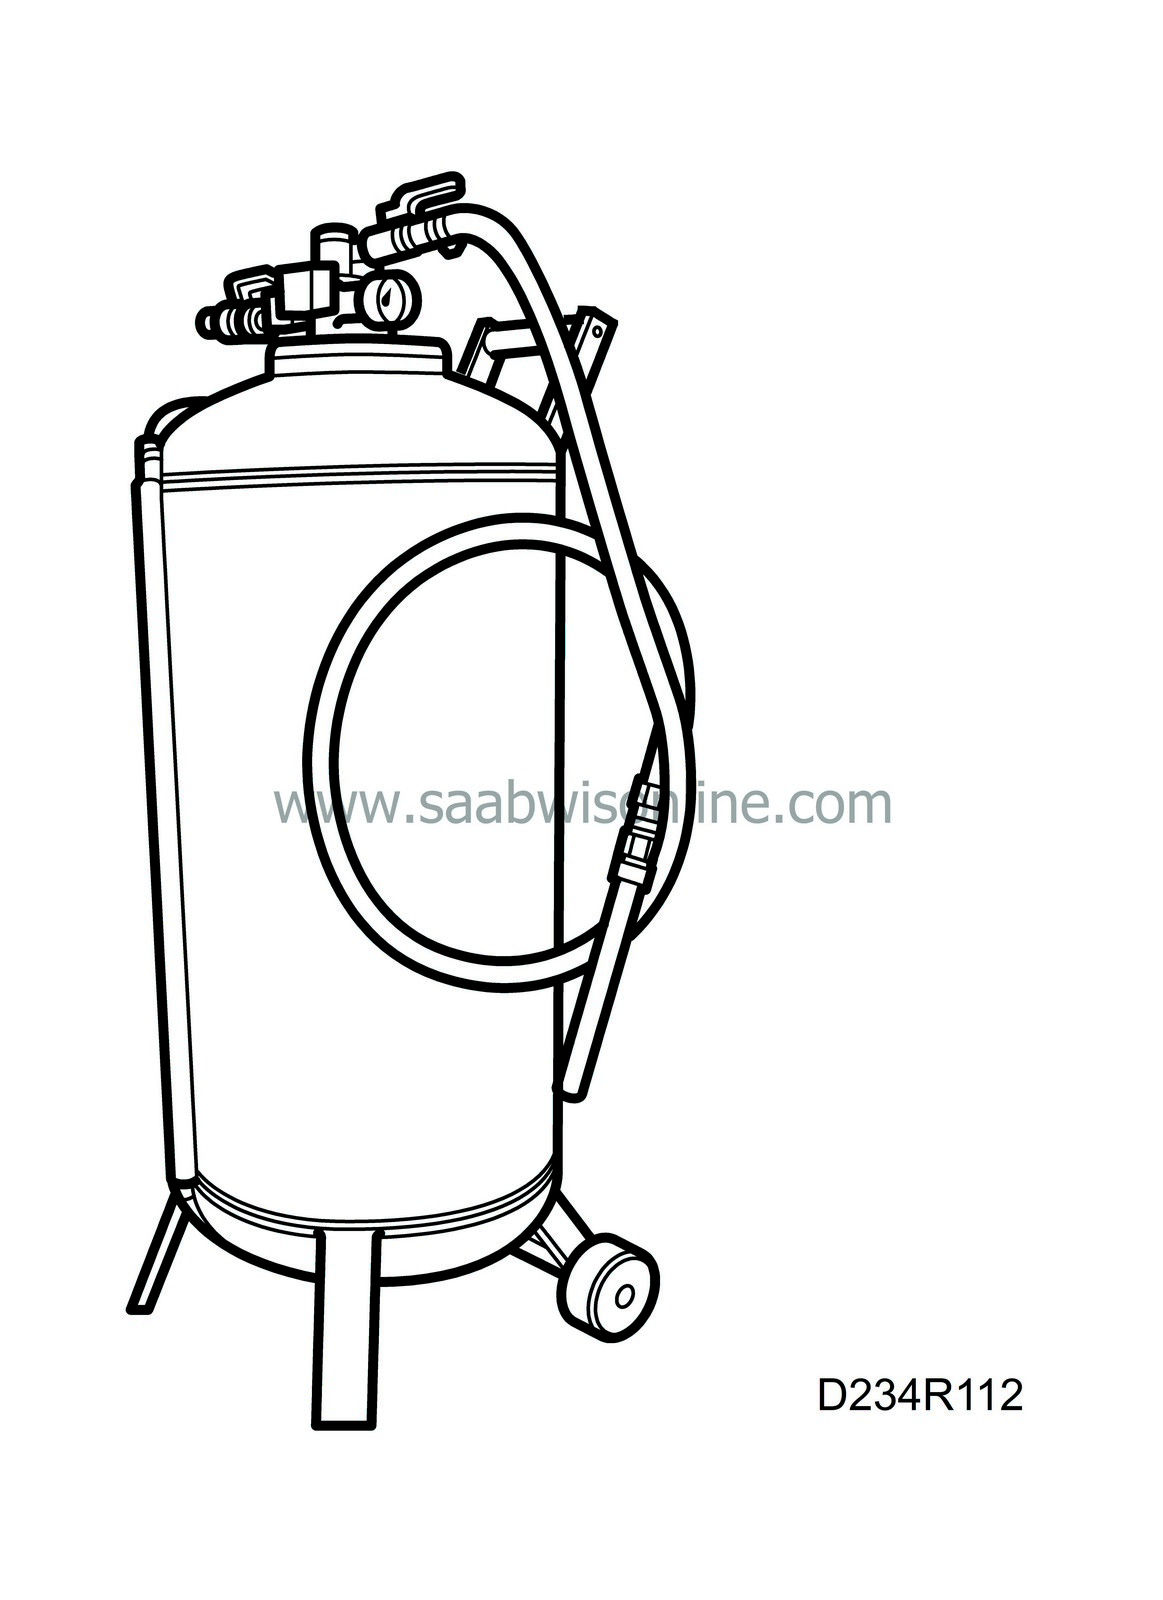
Empty the fuel from the tank through the fuel filler pipe using the appropriate equipment.
|
|
| 2. |
Place the car on a lift. Make sure the rear right-hand lift-arm pad is placed as far out as possible to facilitate the work.
|
|
| 3. |
Raise the car.
|
|
| 4. |
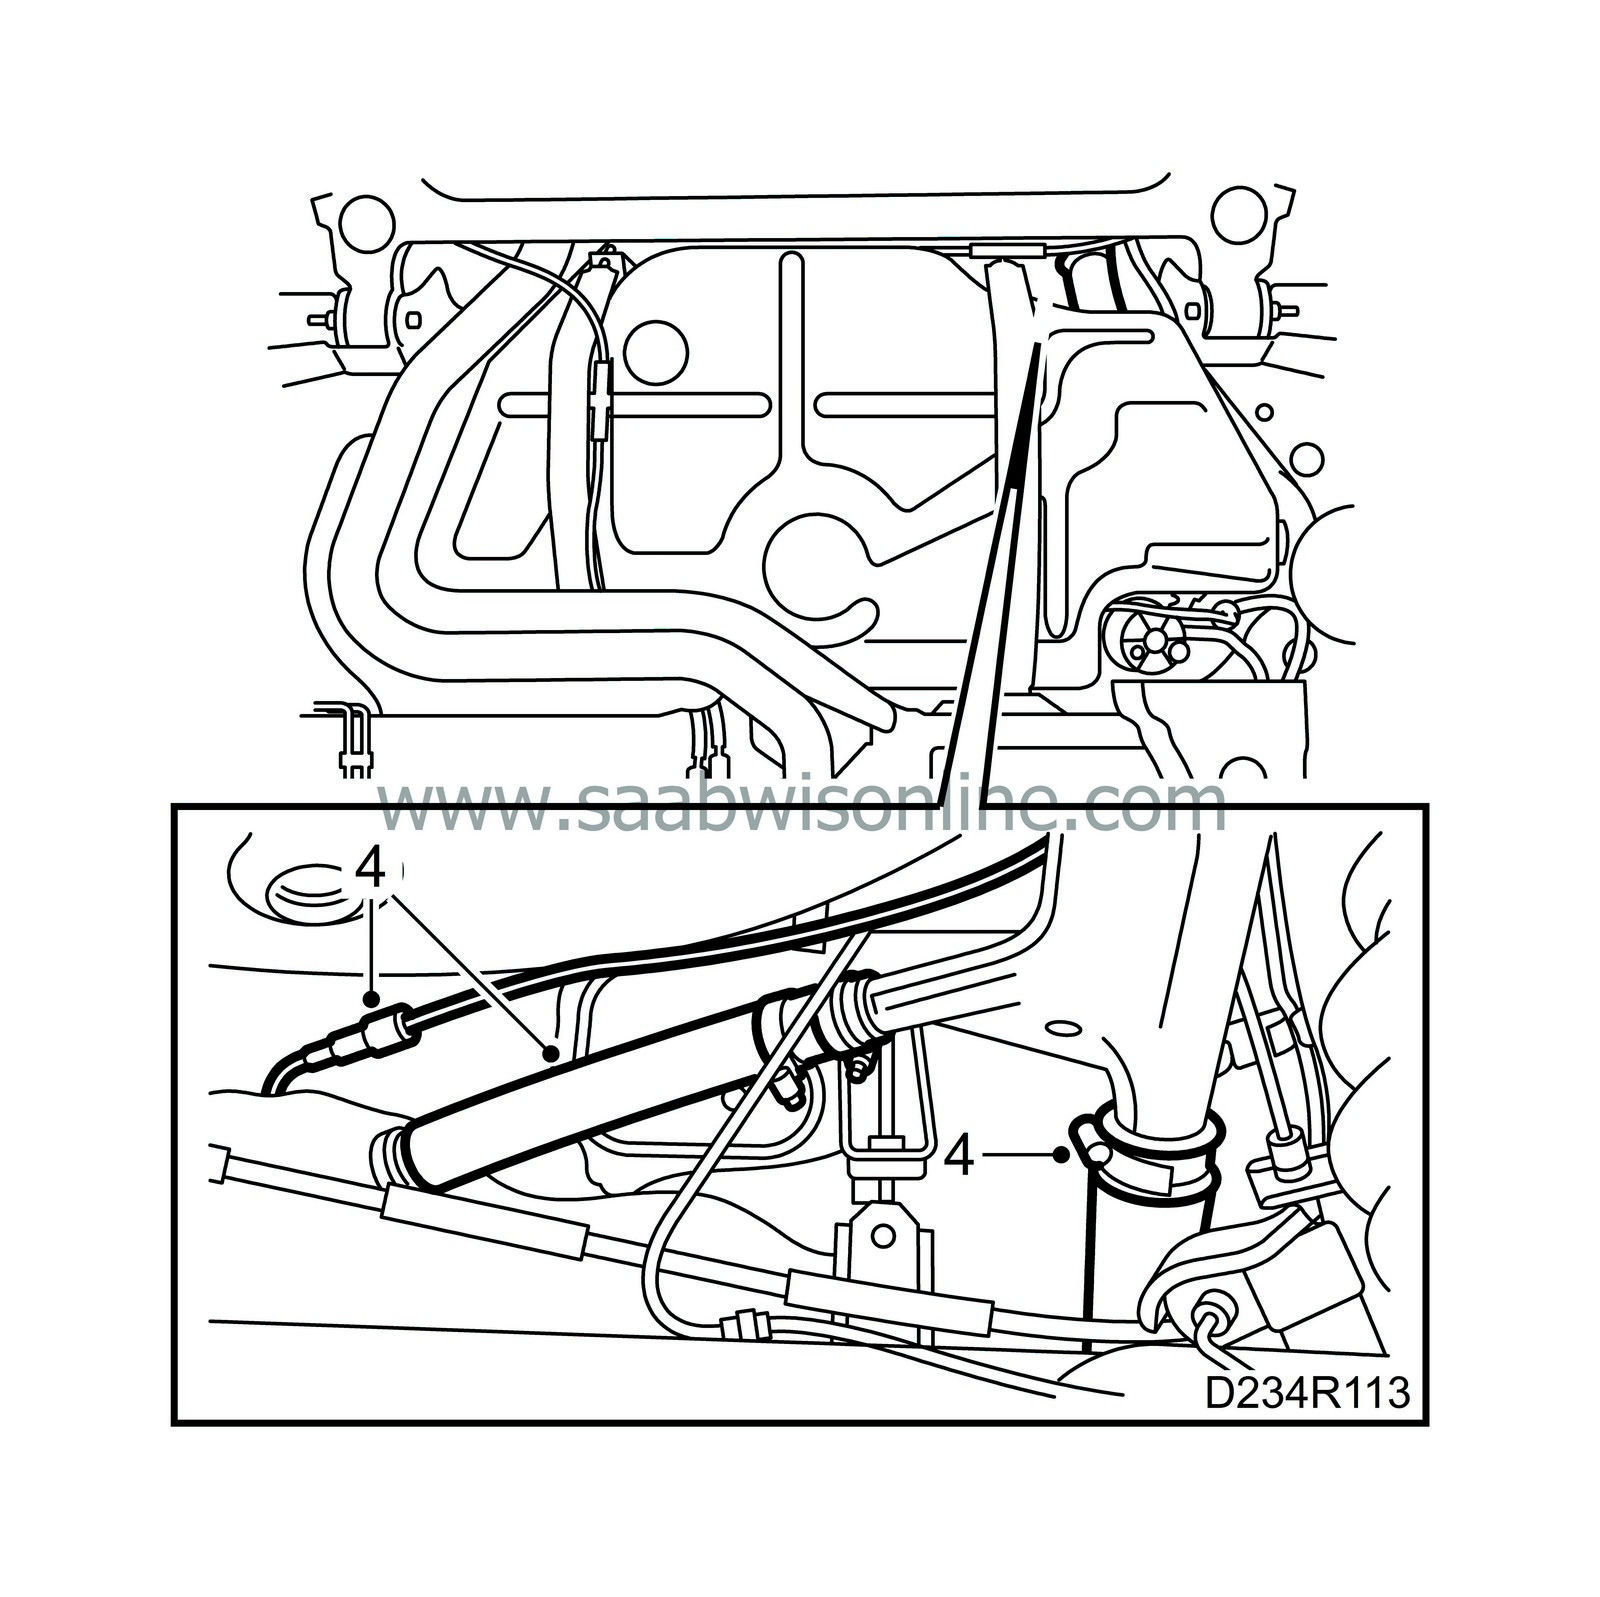
Detach the rubber hoses from the tank, using
83 95 261 Fuel line tool
to disconnect the thin bleeder hose, and plug the tank with
83 94 777 Plug, fuel tank
.
|
|
| 5. |
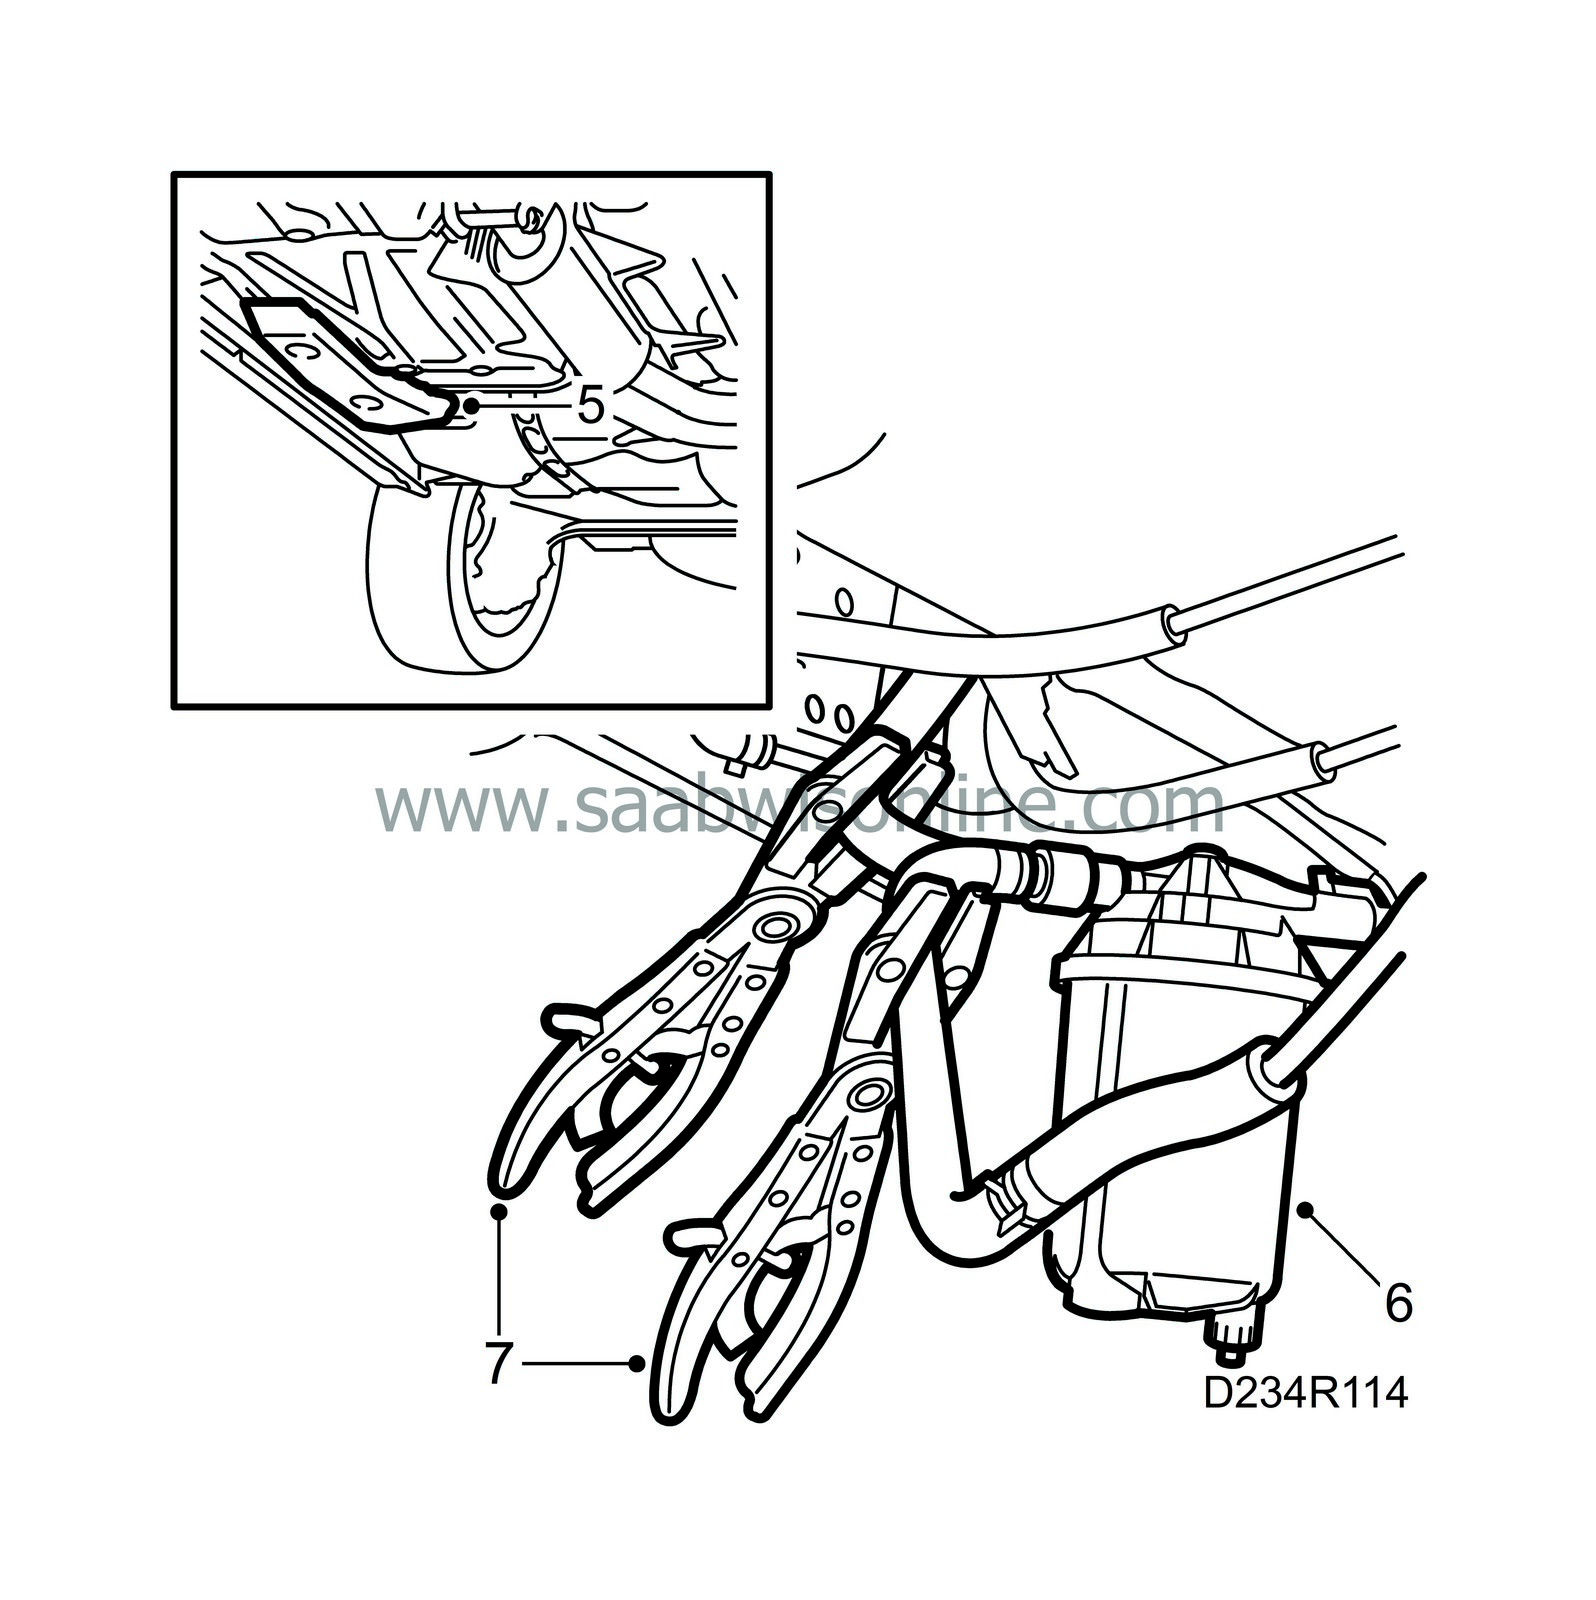
Remove the protective cover in front of the fuel filter and carefully tap the filter container away from its mounting. Use a drift.
|
|
| 6. |
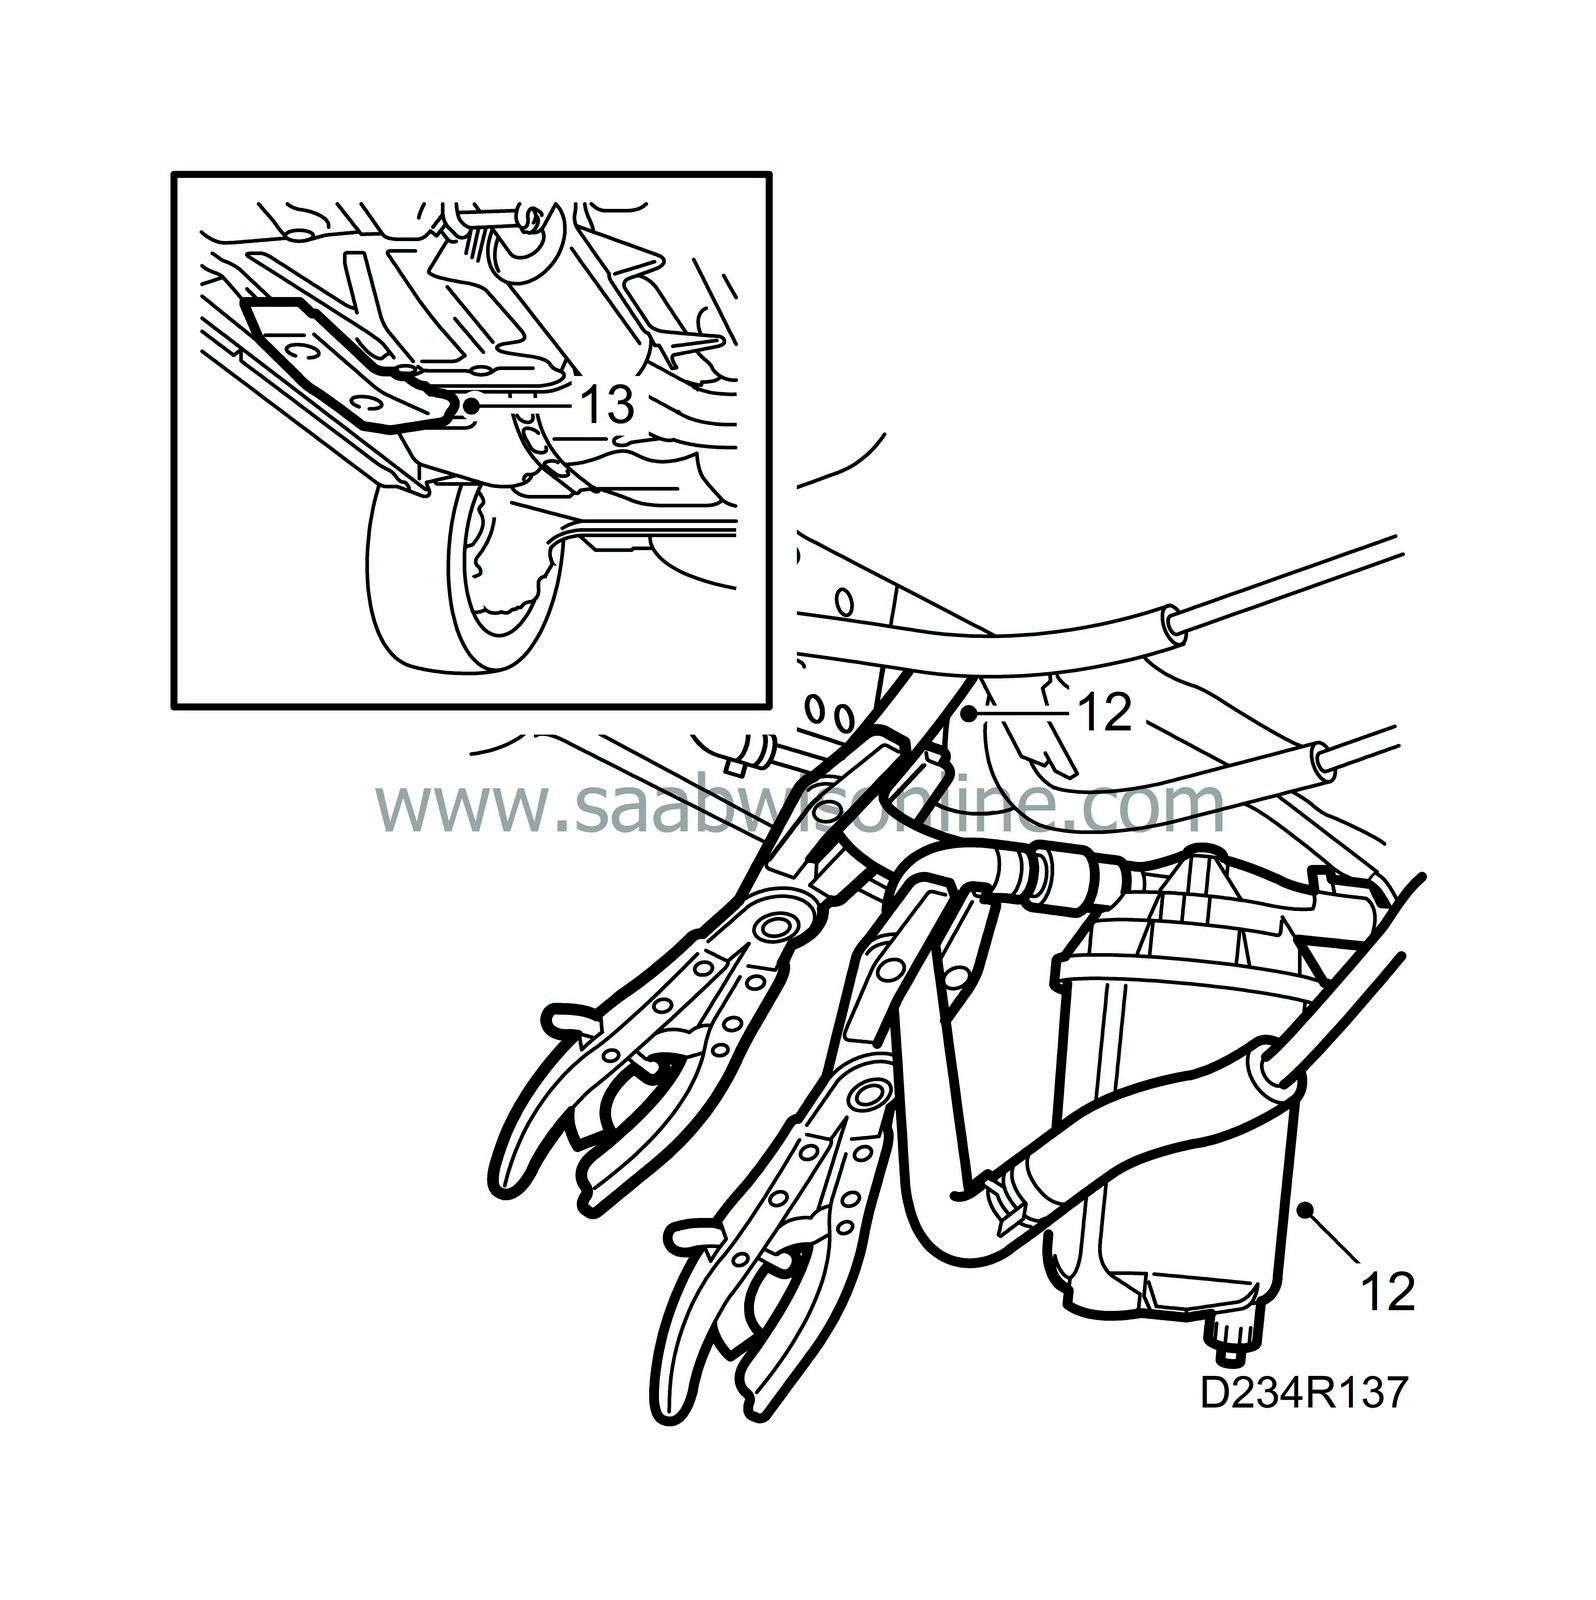
Lift down the filter container.
|
||||||||||
| 7. |
Carefully clamp the soft section of the fuel hoses with
30 07 739 Pinch-off pliers
and disconnect the hose between the tank and filter.
|
|
| 8. |
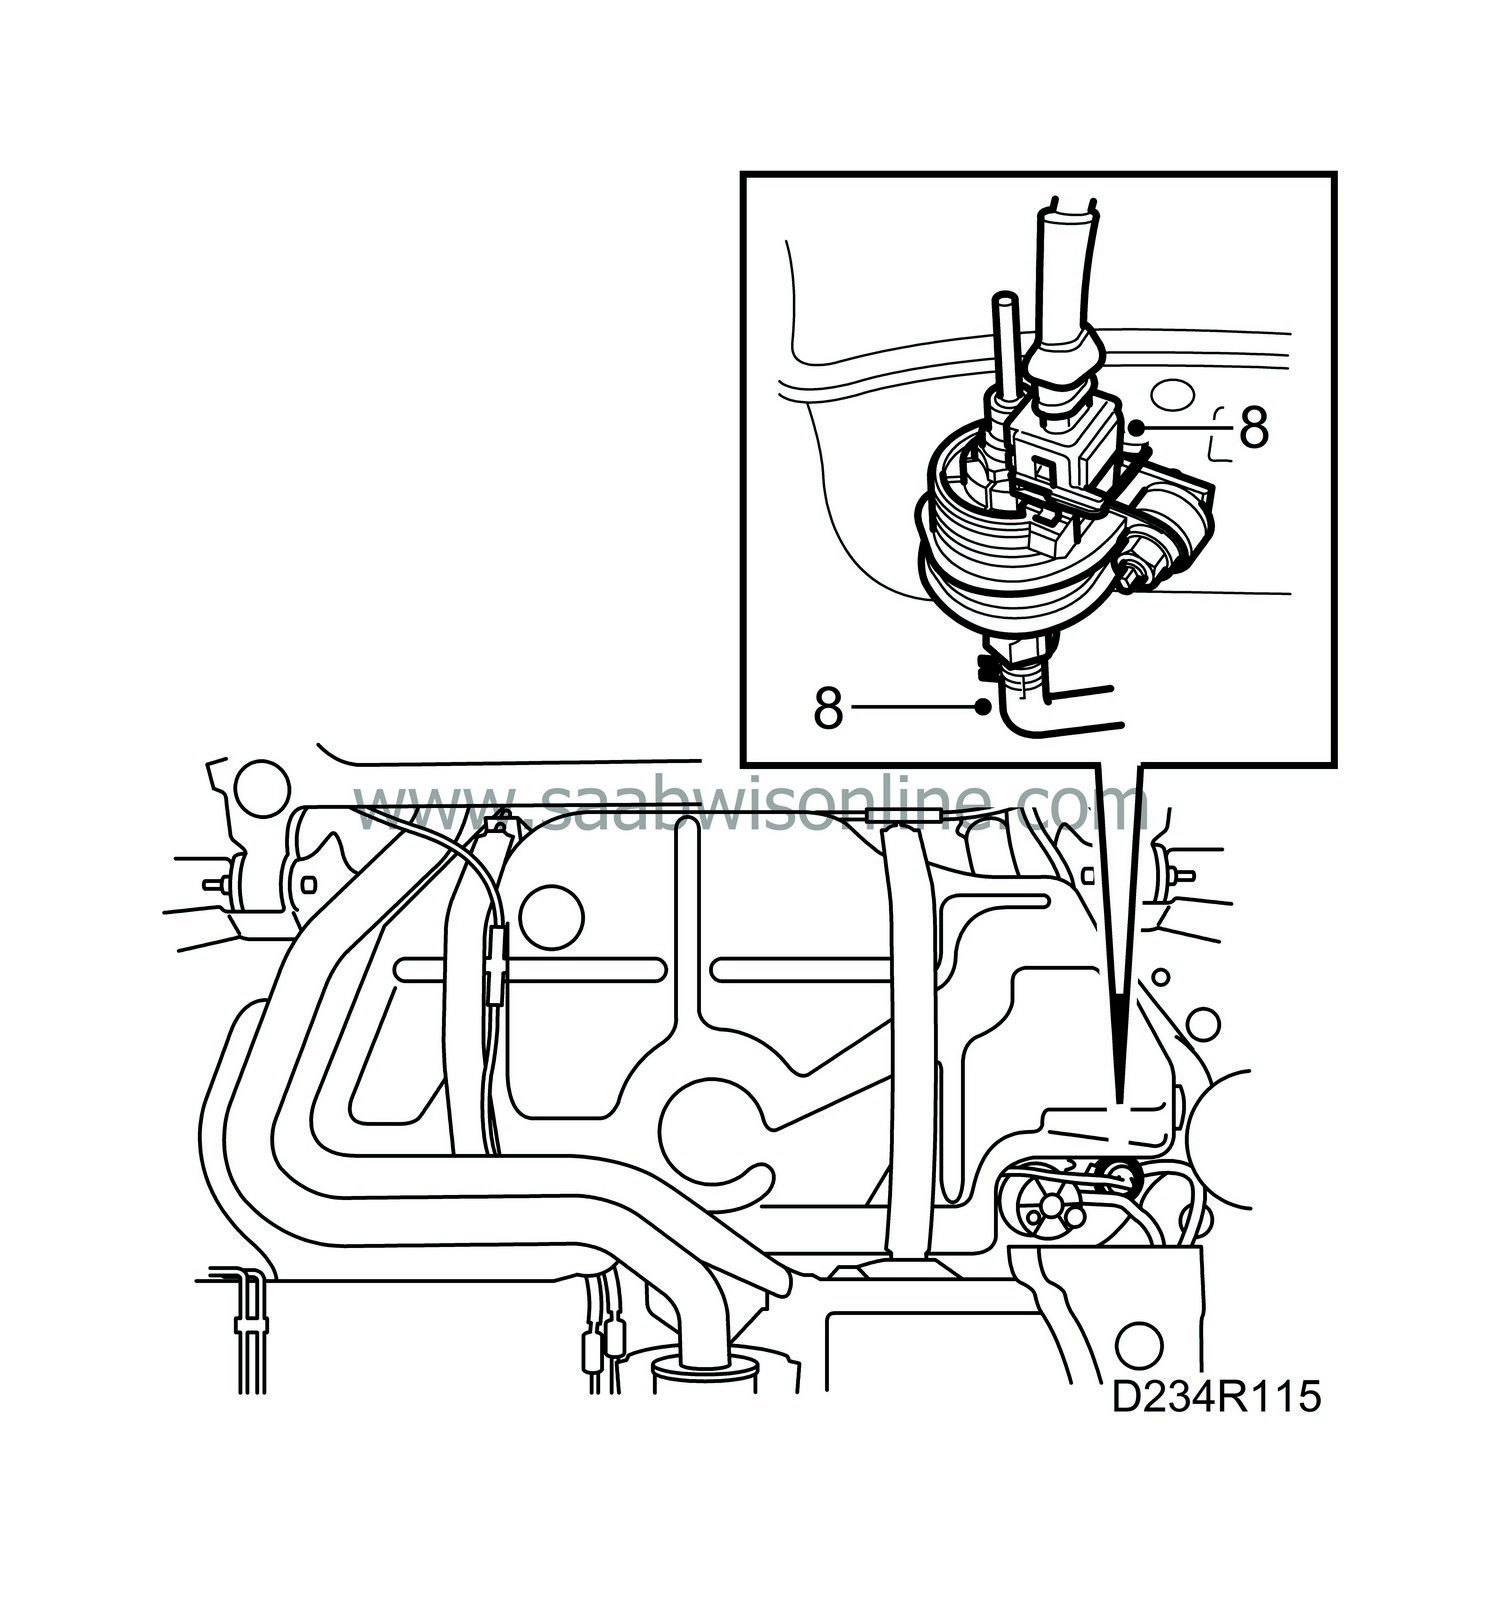
Disconnect the delivery hose and connector from the auxiliary heater fuel pump.
|
|
| 9. |
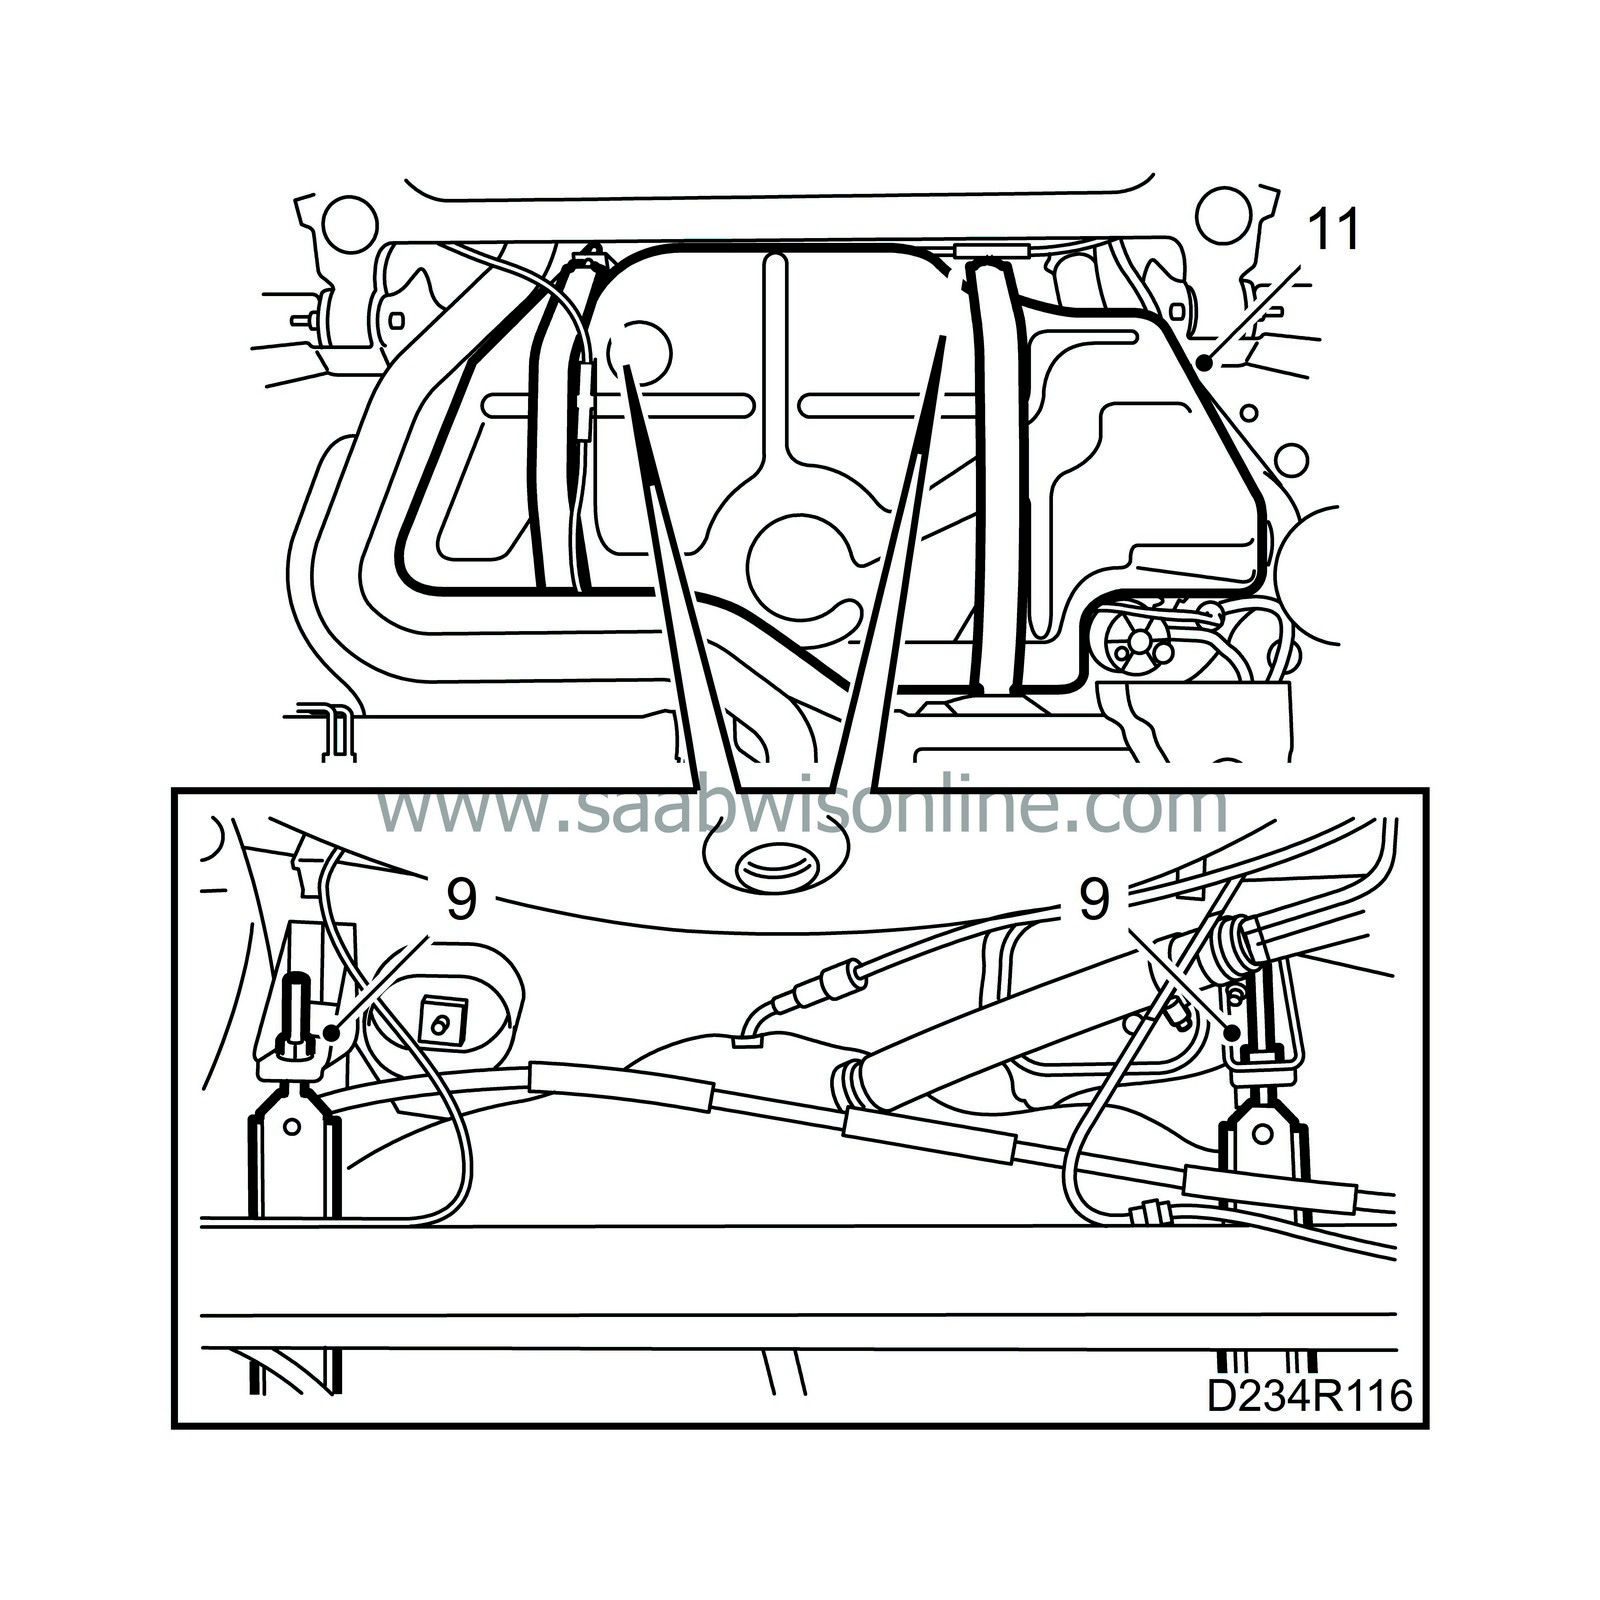
Support the tank on a column lift and then undo the nuts on the straps securing the fuel tank without completely unscrewing them. Unhook the straps.
|
|
| 10. |
Move the left-hand handbrake cable out of the way.
|
|
| 11. |
Carefully lower the tank, right-hand side first, until the top becomes visible.
|
||||||||||
| 12. |
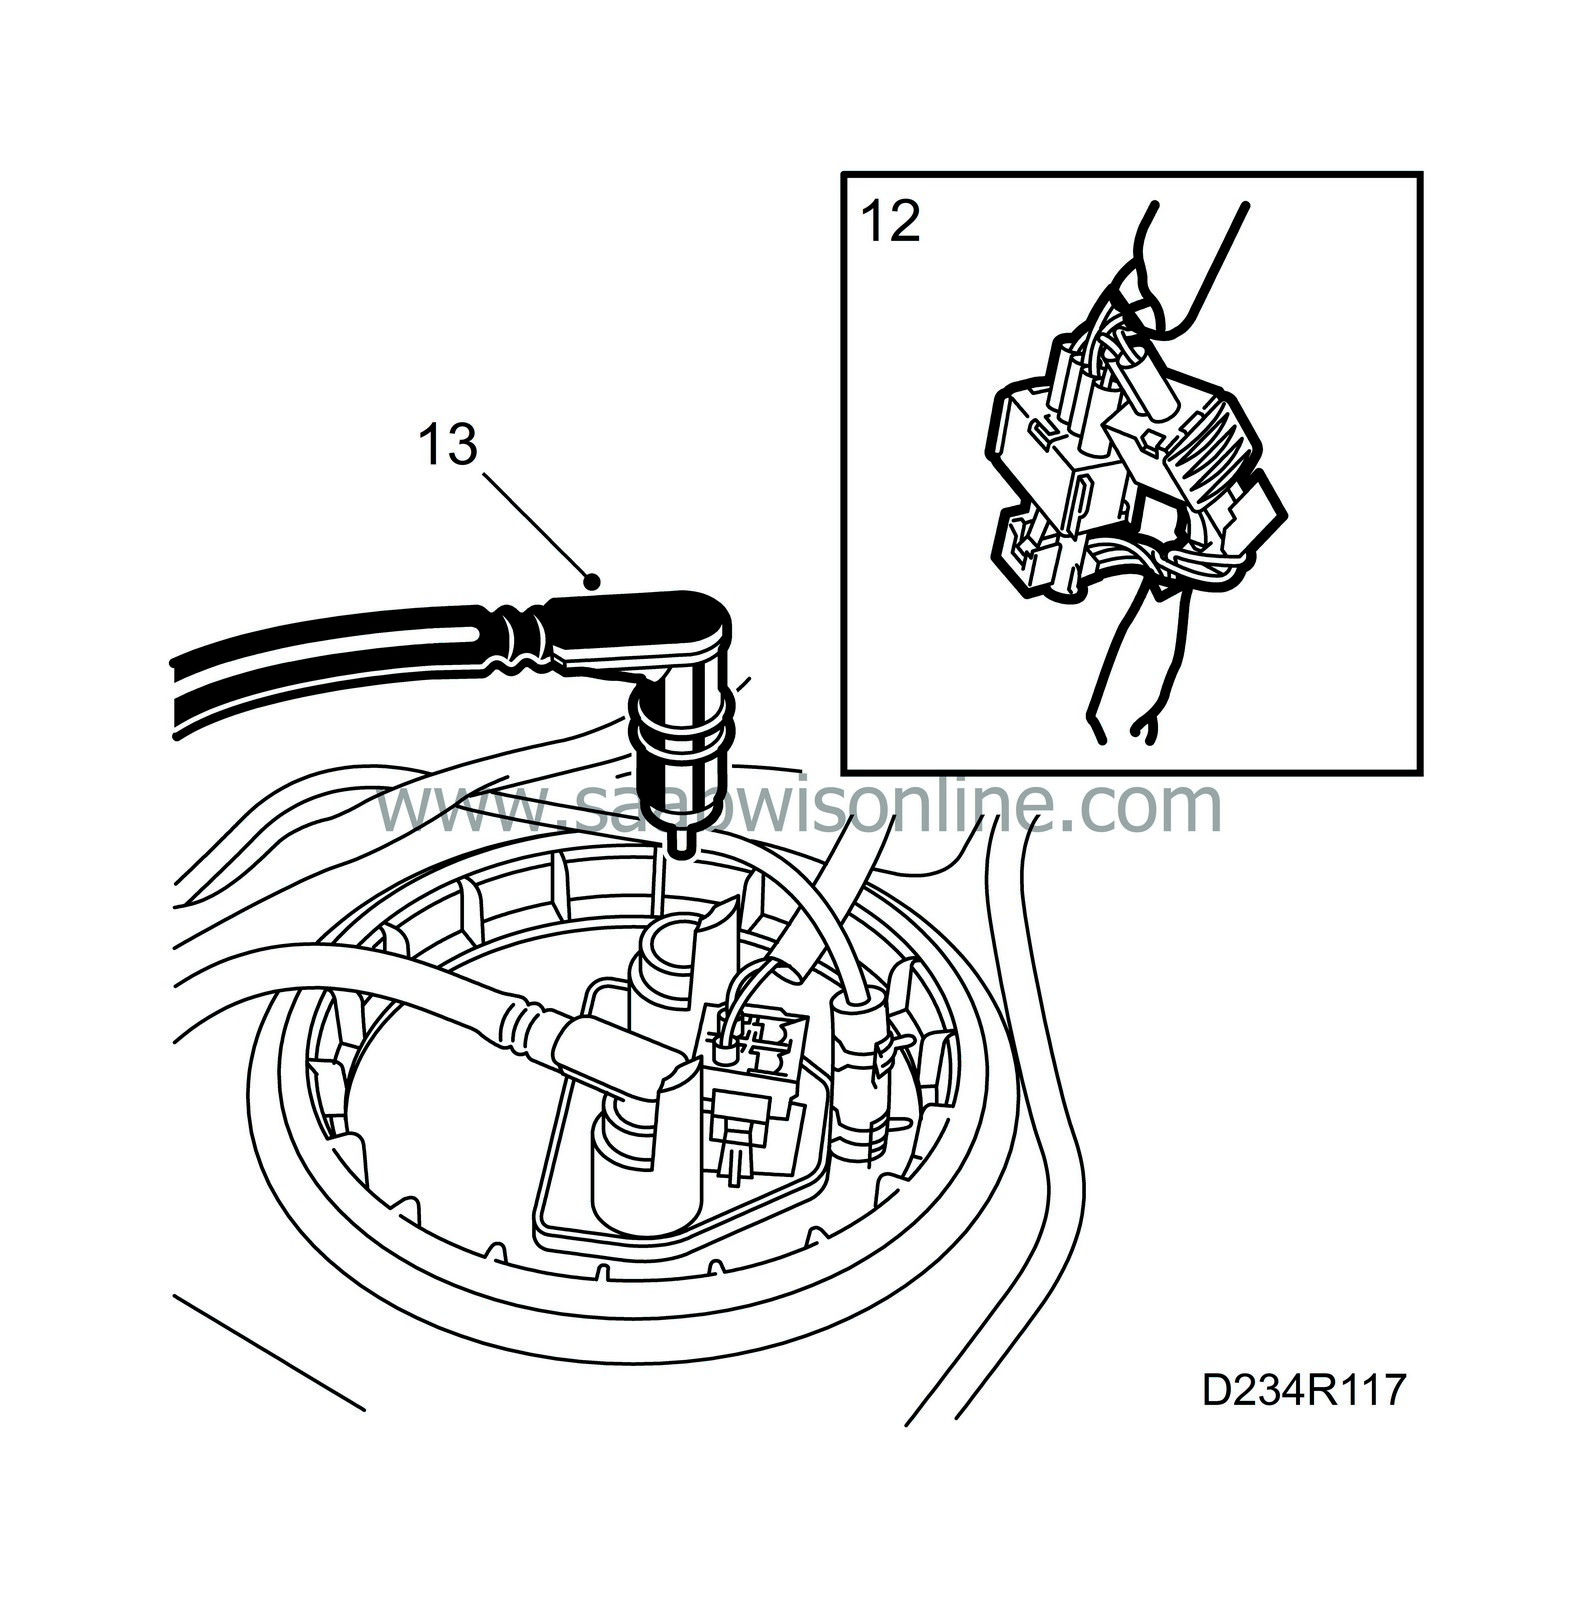
Unplug the connectors on the wiring harness,
not
on the tank.
|
|
| 13. |
Detach the return line from the fuel tank.
|
|
| 14. |
Lower the tank to working height.
|
|
| 15. |
Clean the area around the fuel level sensor mounting in the tank.
|
|
| 16. |
Detach the fuel lines.
|
|
| 17. |
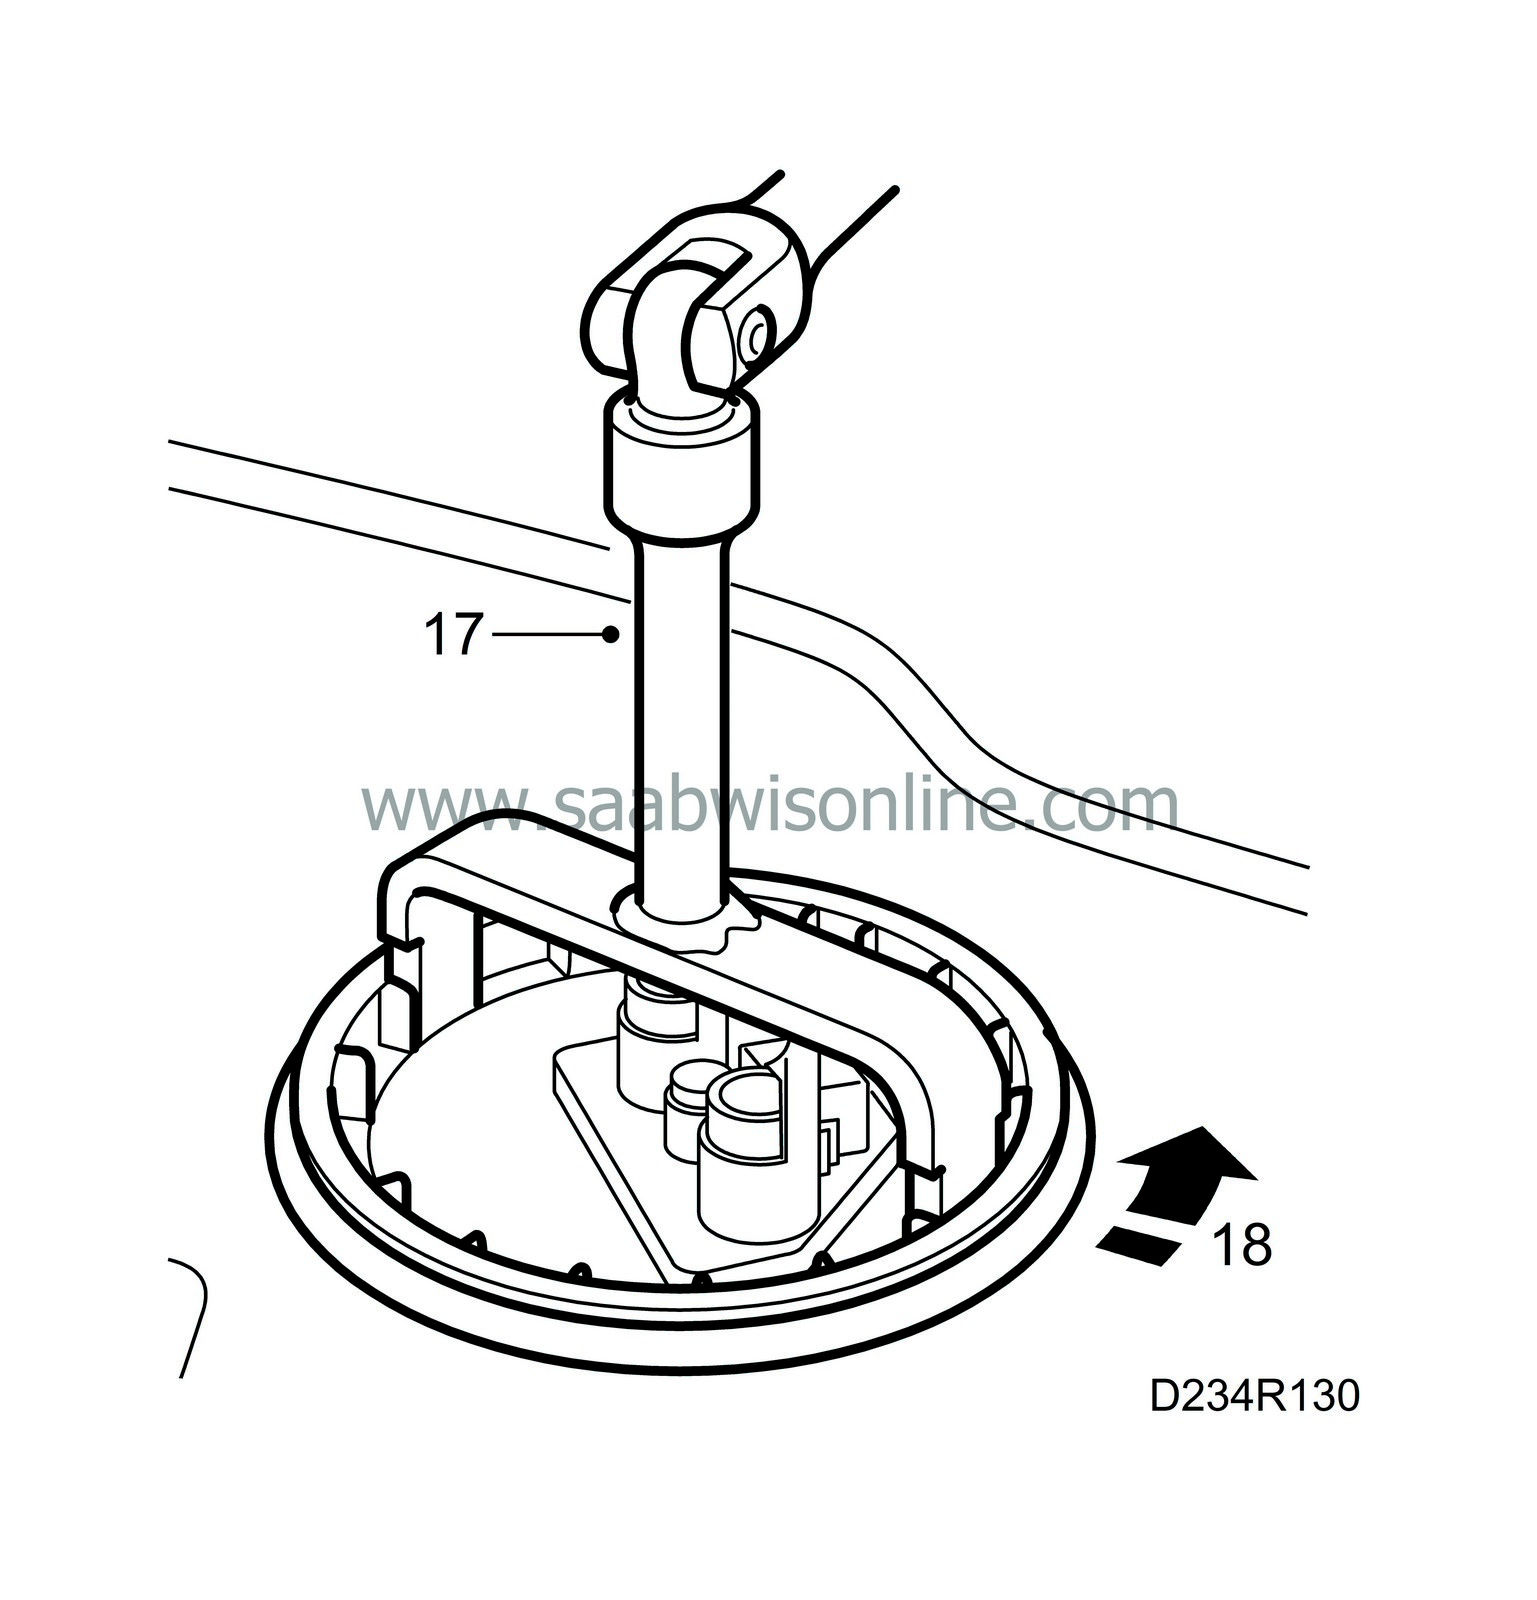
Unscrew the ring locking the level sensor using
83 94 462 Wrench, fuel pump
.
|
|
| 18. |
Turn the fuel level sensor clockwise 180° and carefully lift it up.
|
||||||||||
| To fit |
| 1. |
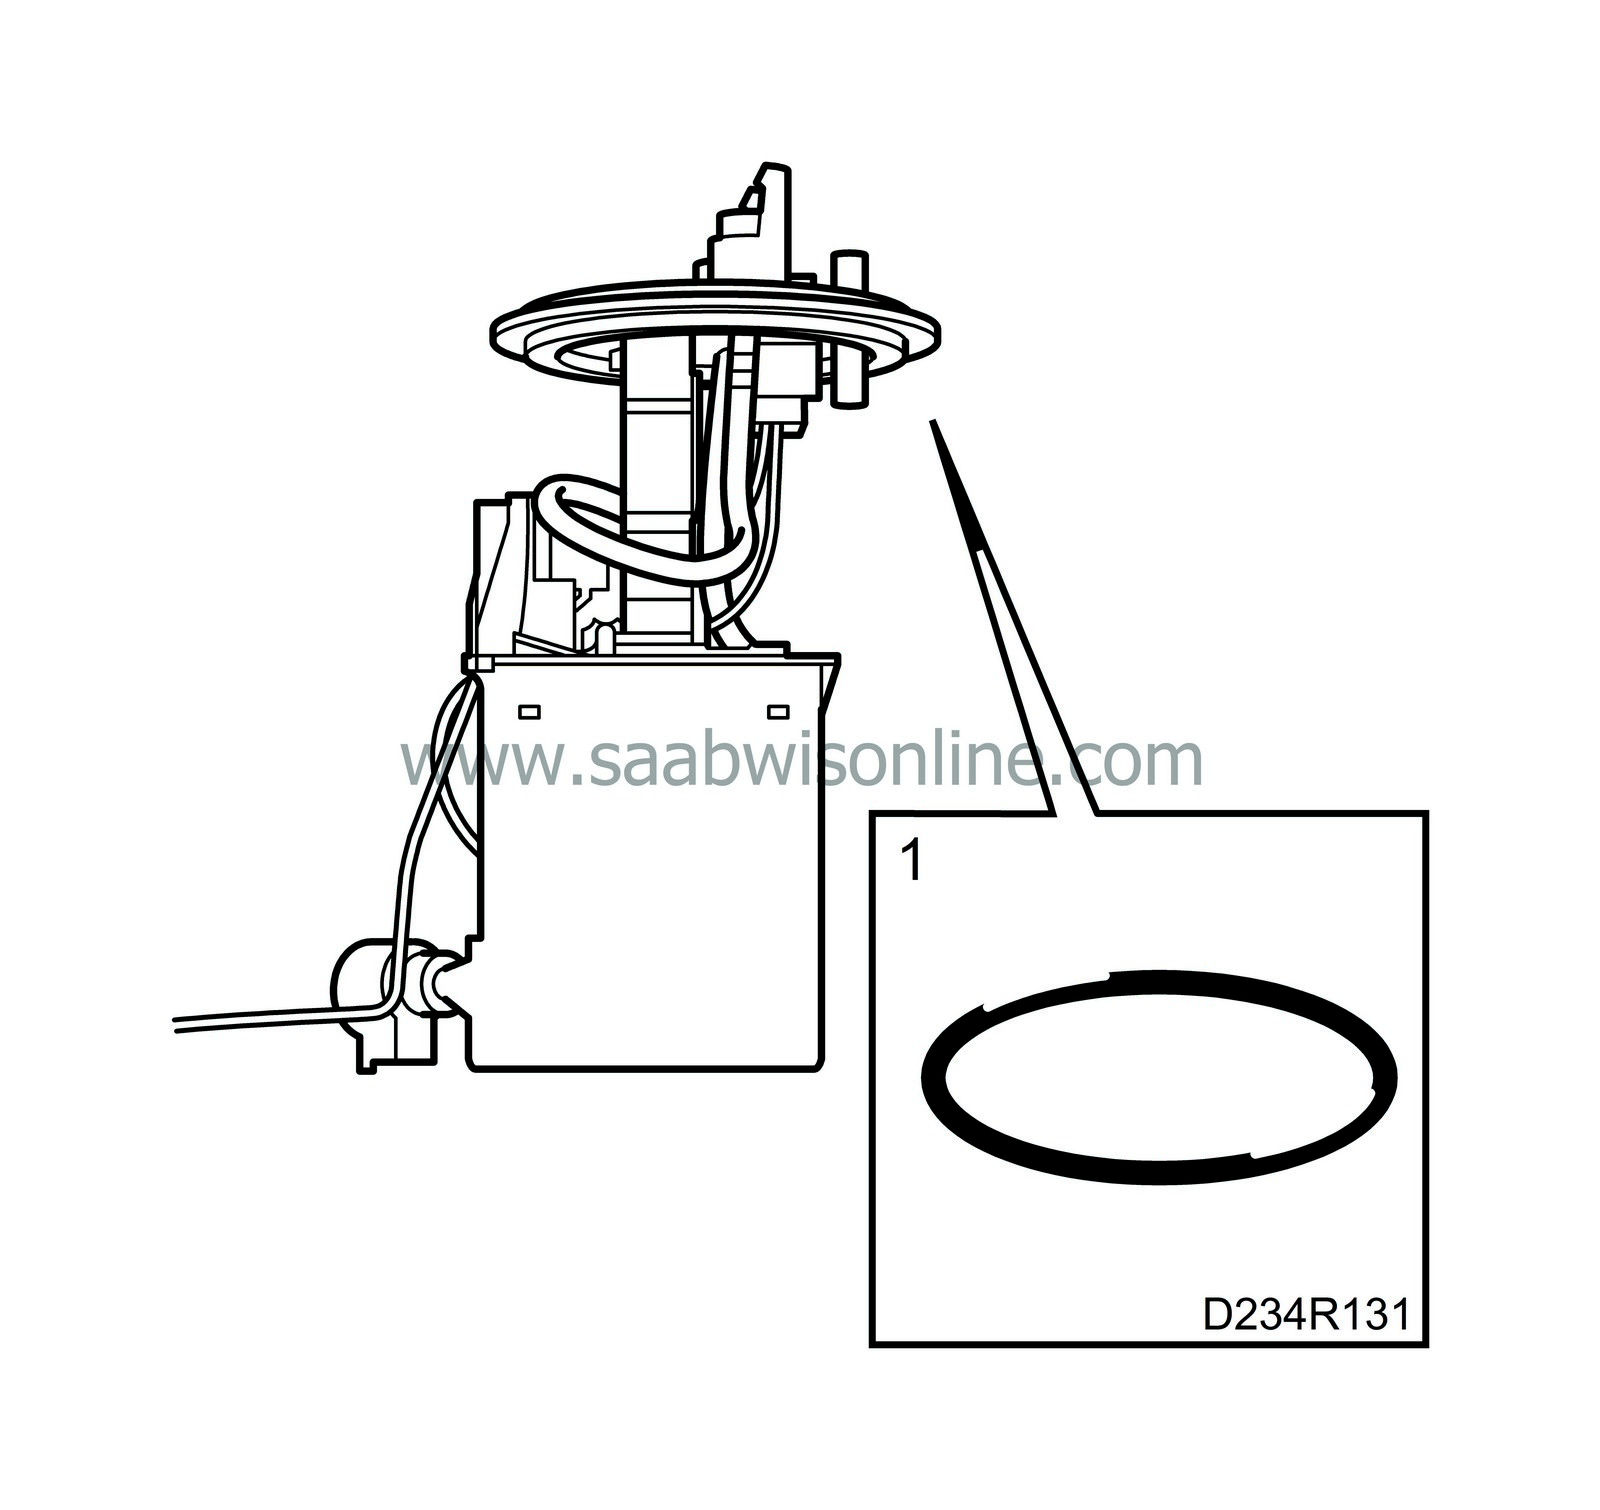
Inspect all the O-rings and replace them if necessary. Carefully insert the fuel level sensor into the fuel tank.
|
||||||||||
| 2. |
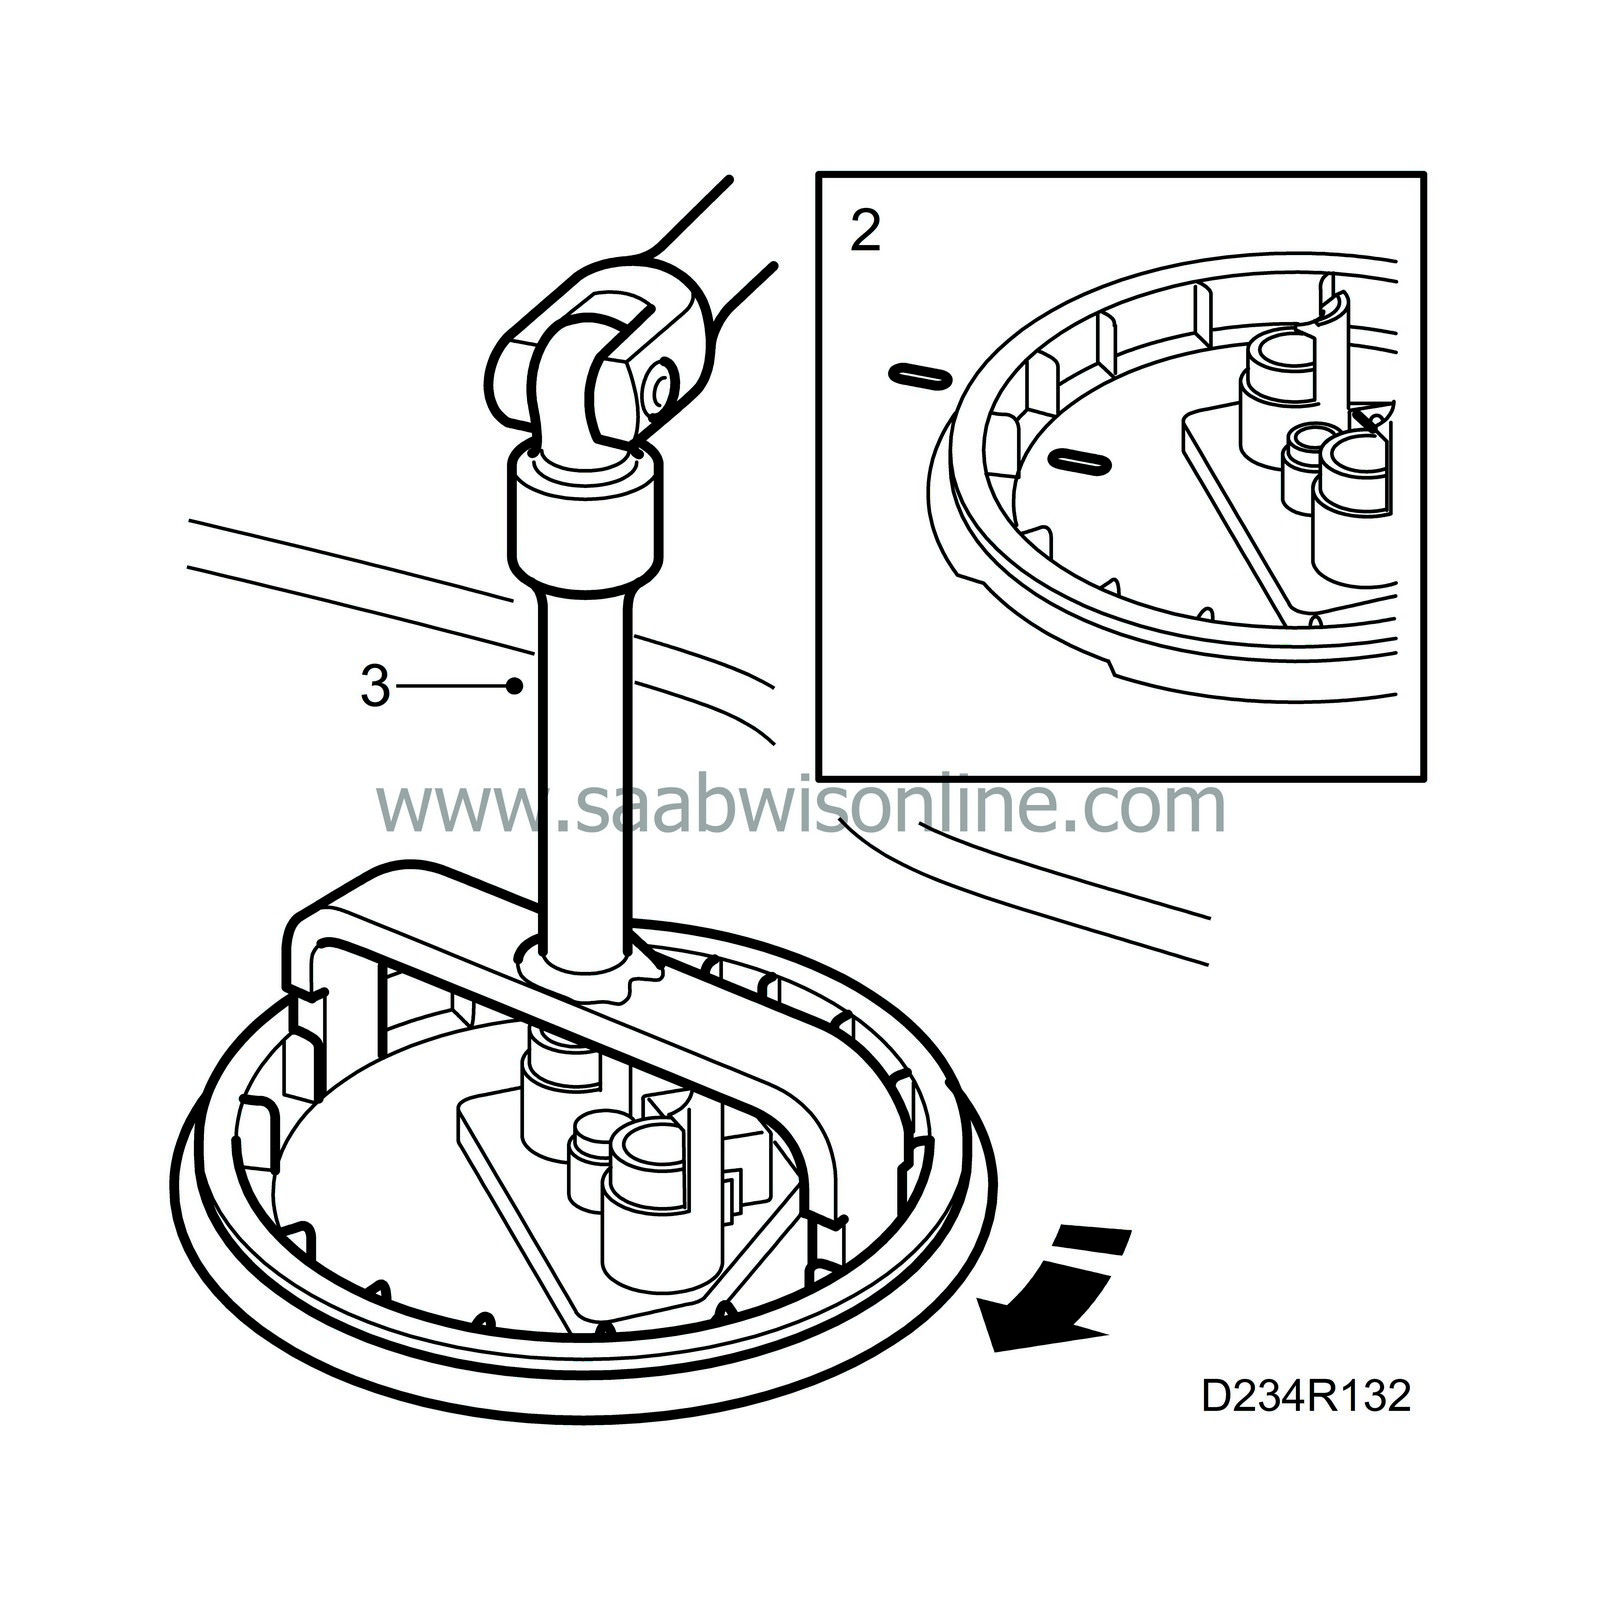
Turn the sensor so that the marks are aligned.
|
|
| 3. |
Fit the ring locking the fuel level sensor. Tighten with
83 94 462 Wrench, fuel pump
.
Tightening torque 75 Nm (55 lbf ft). |
|
| 4. |
Connect the fuel line.
|
|
| 5. |
Raise the tank.
|
|
| 6. |
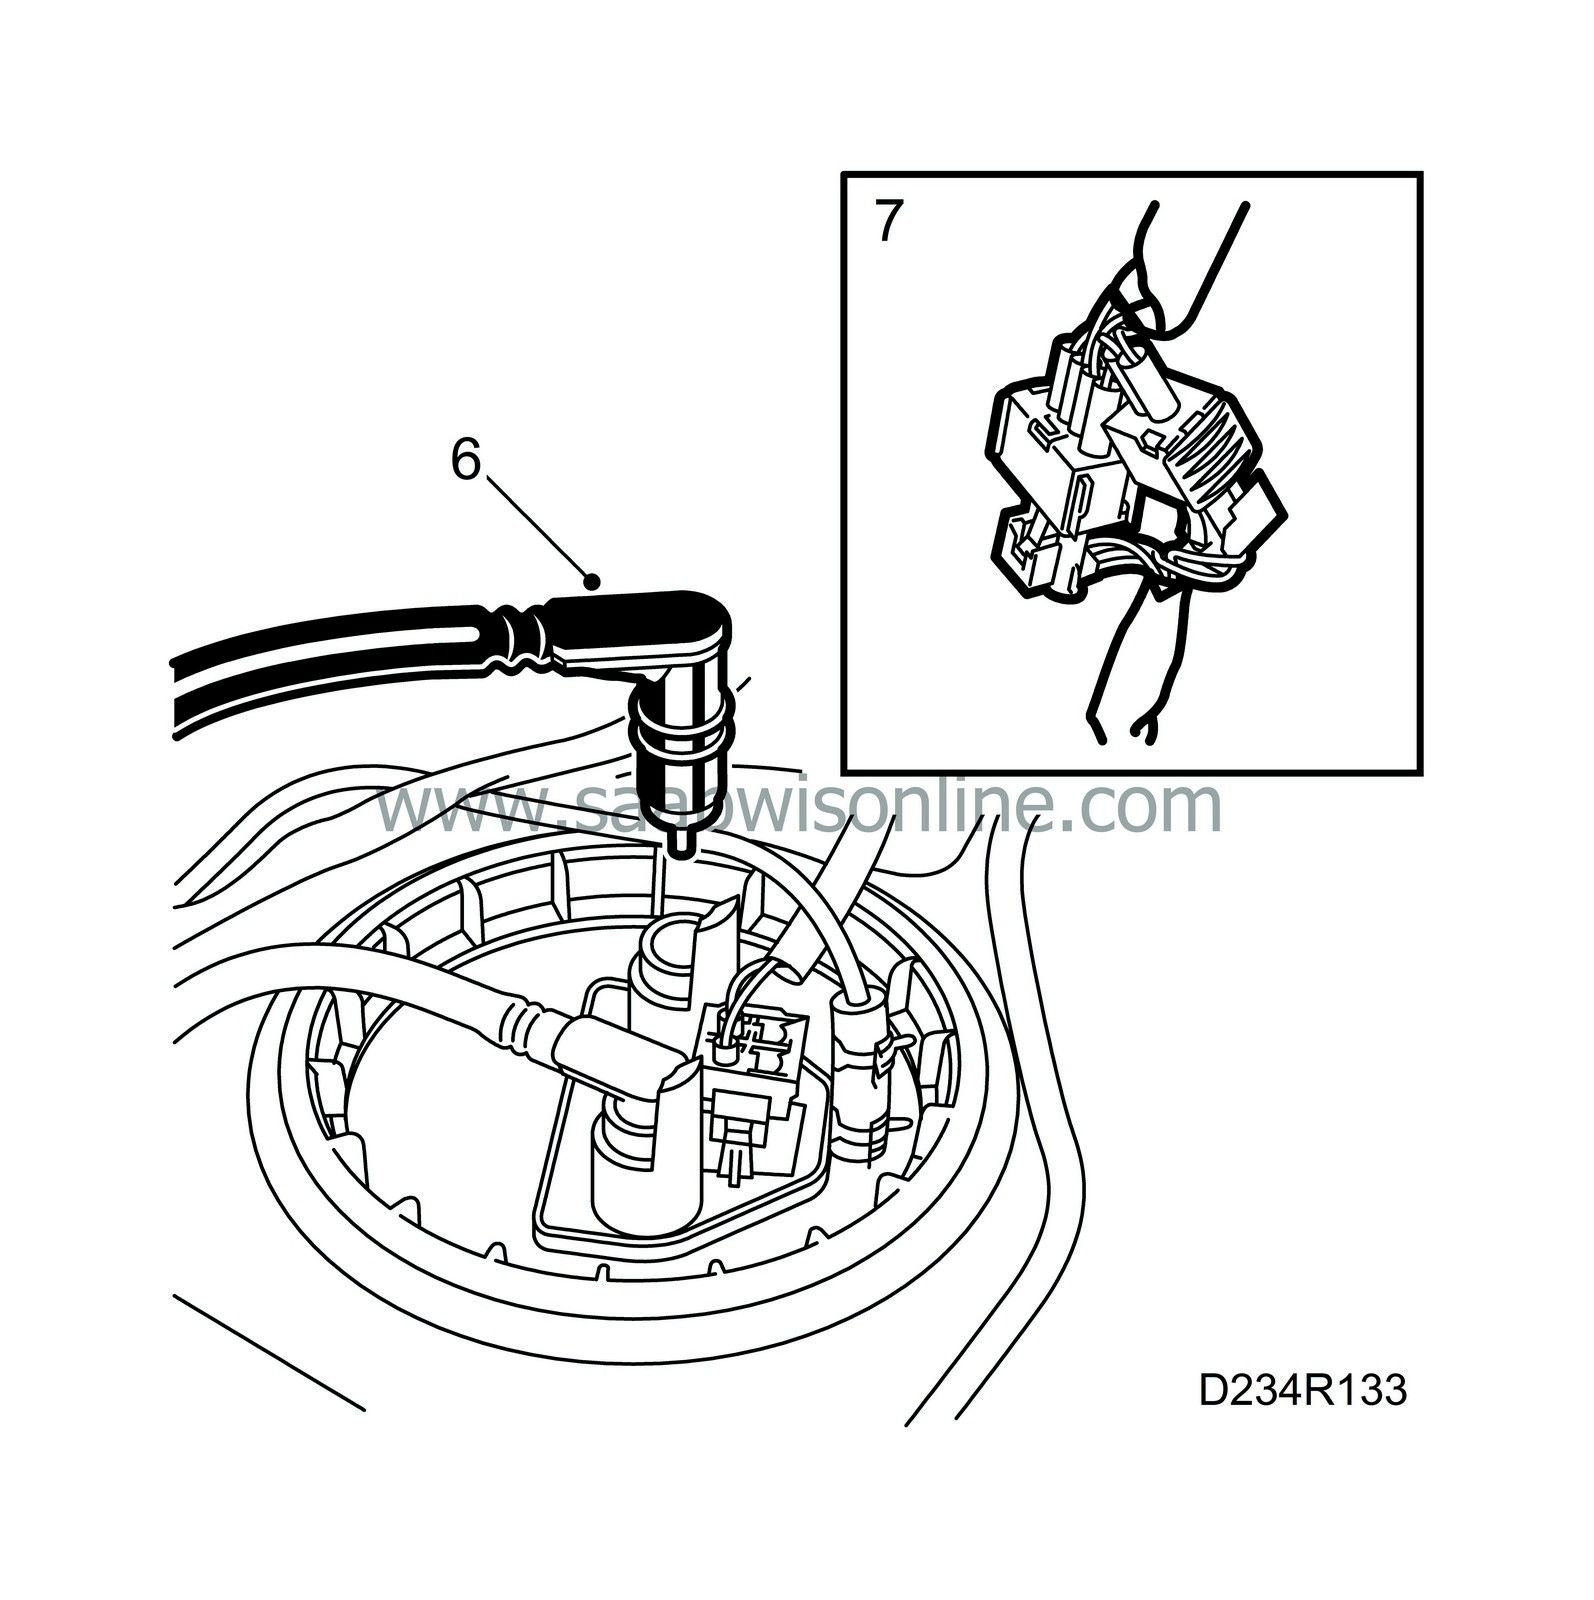
Connect the return line to the fuel tank.
|
|
| 7. |
Plug in the connectors.
|
|
| 8. |
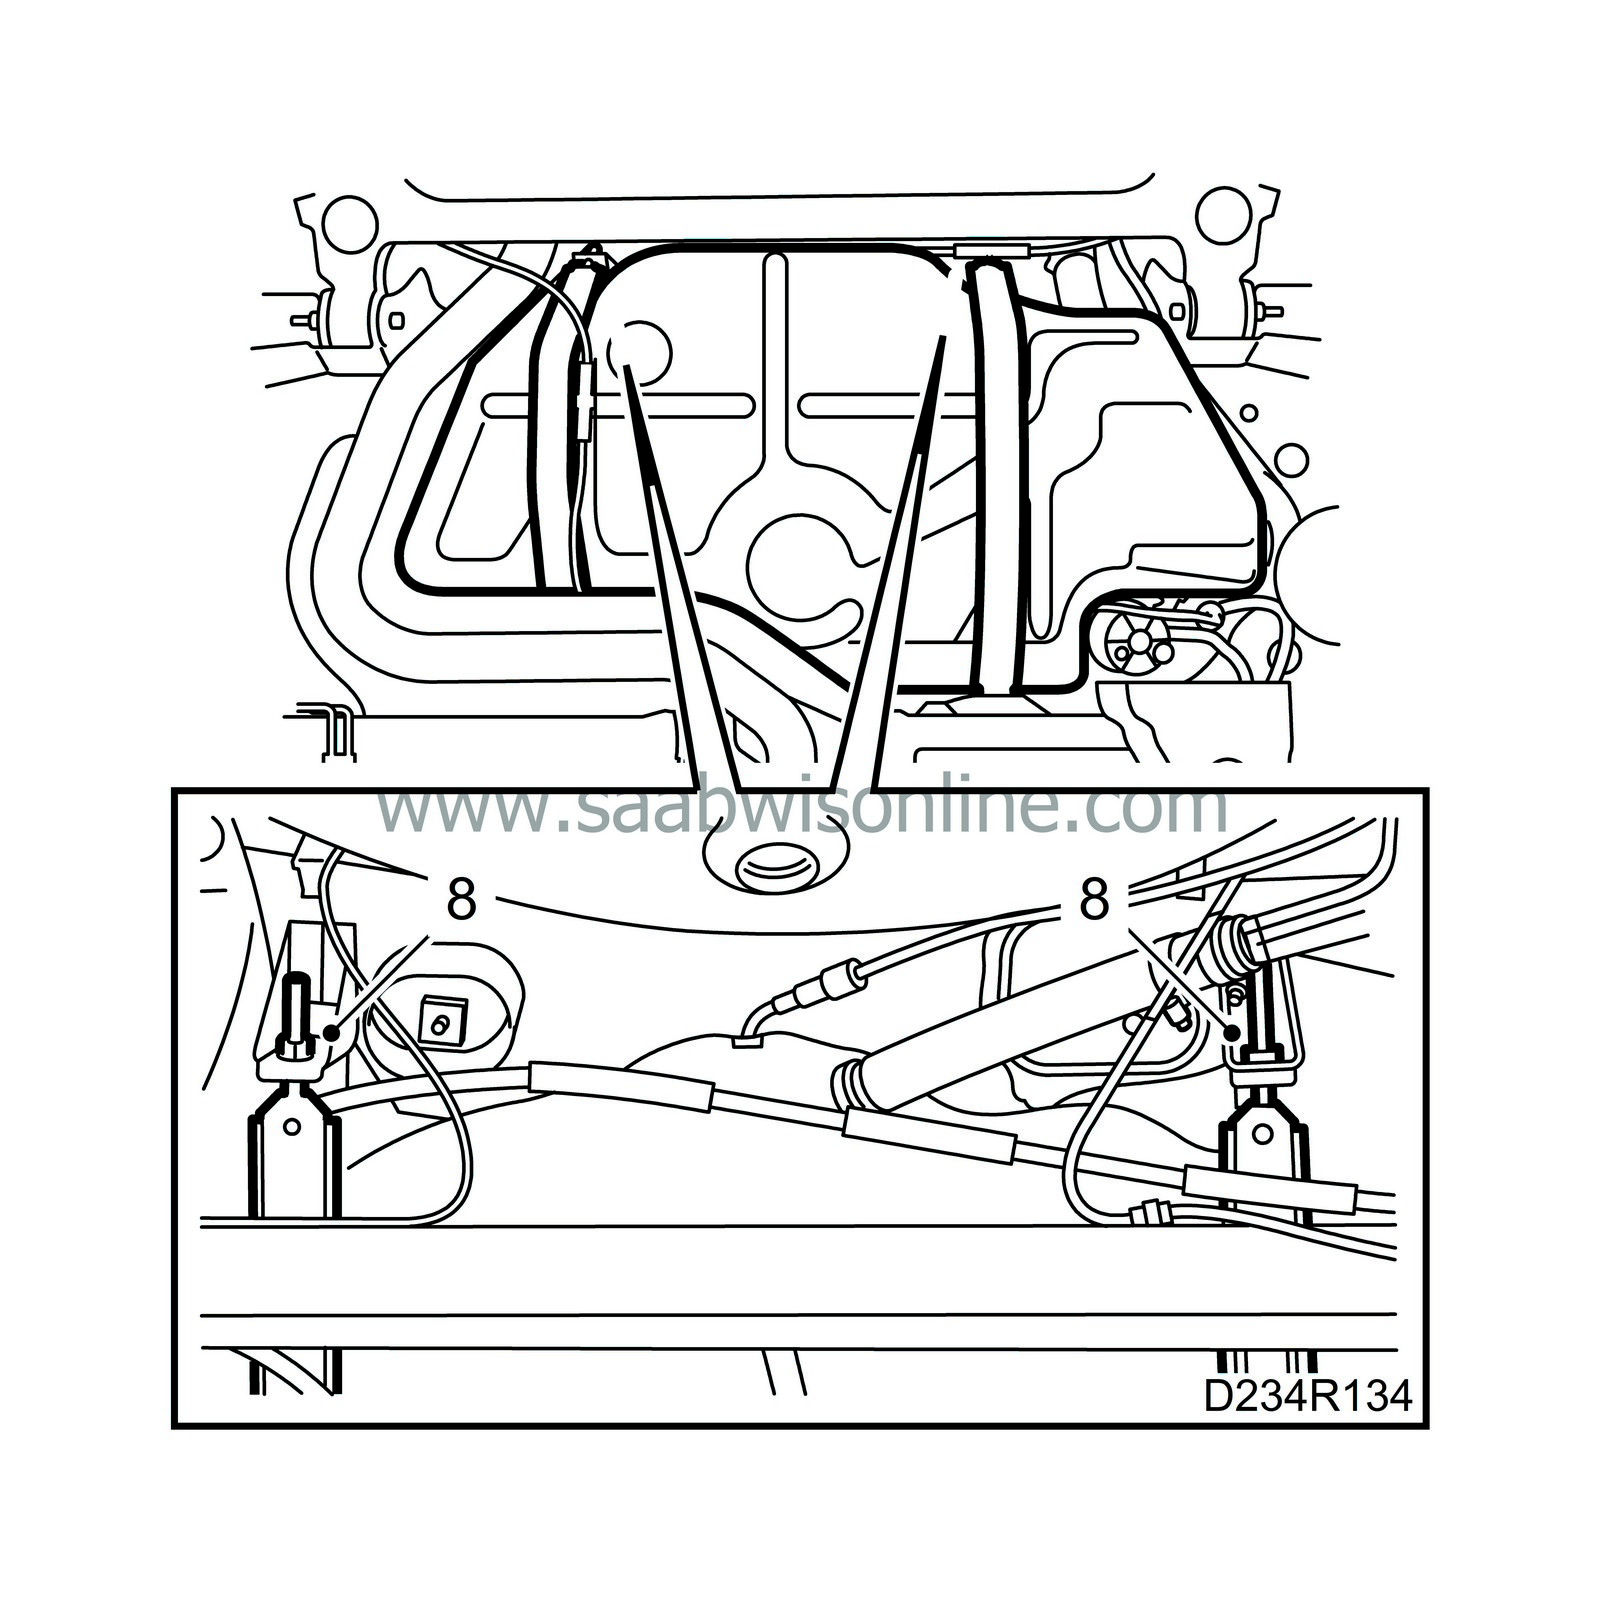
Support the tank on a column lift and hook the tank straps to the body.
|
|
| 9. |
Press the fuel lines into their snap fasteners on the tank and the body. Lift the tank, making sure not to pinch the electrical wiring between the tank and the body, and tighten the nuts on the straps.
|
||||||||||
| 10. |
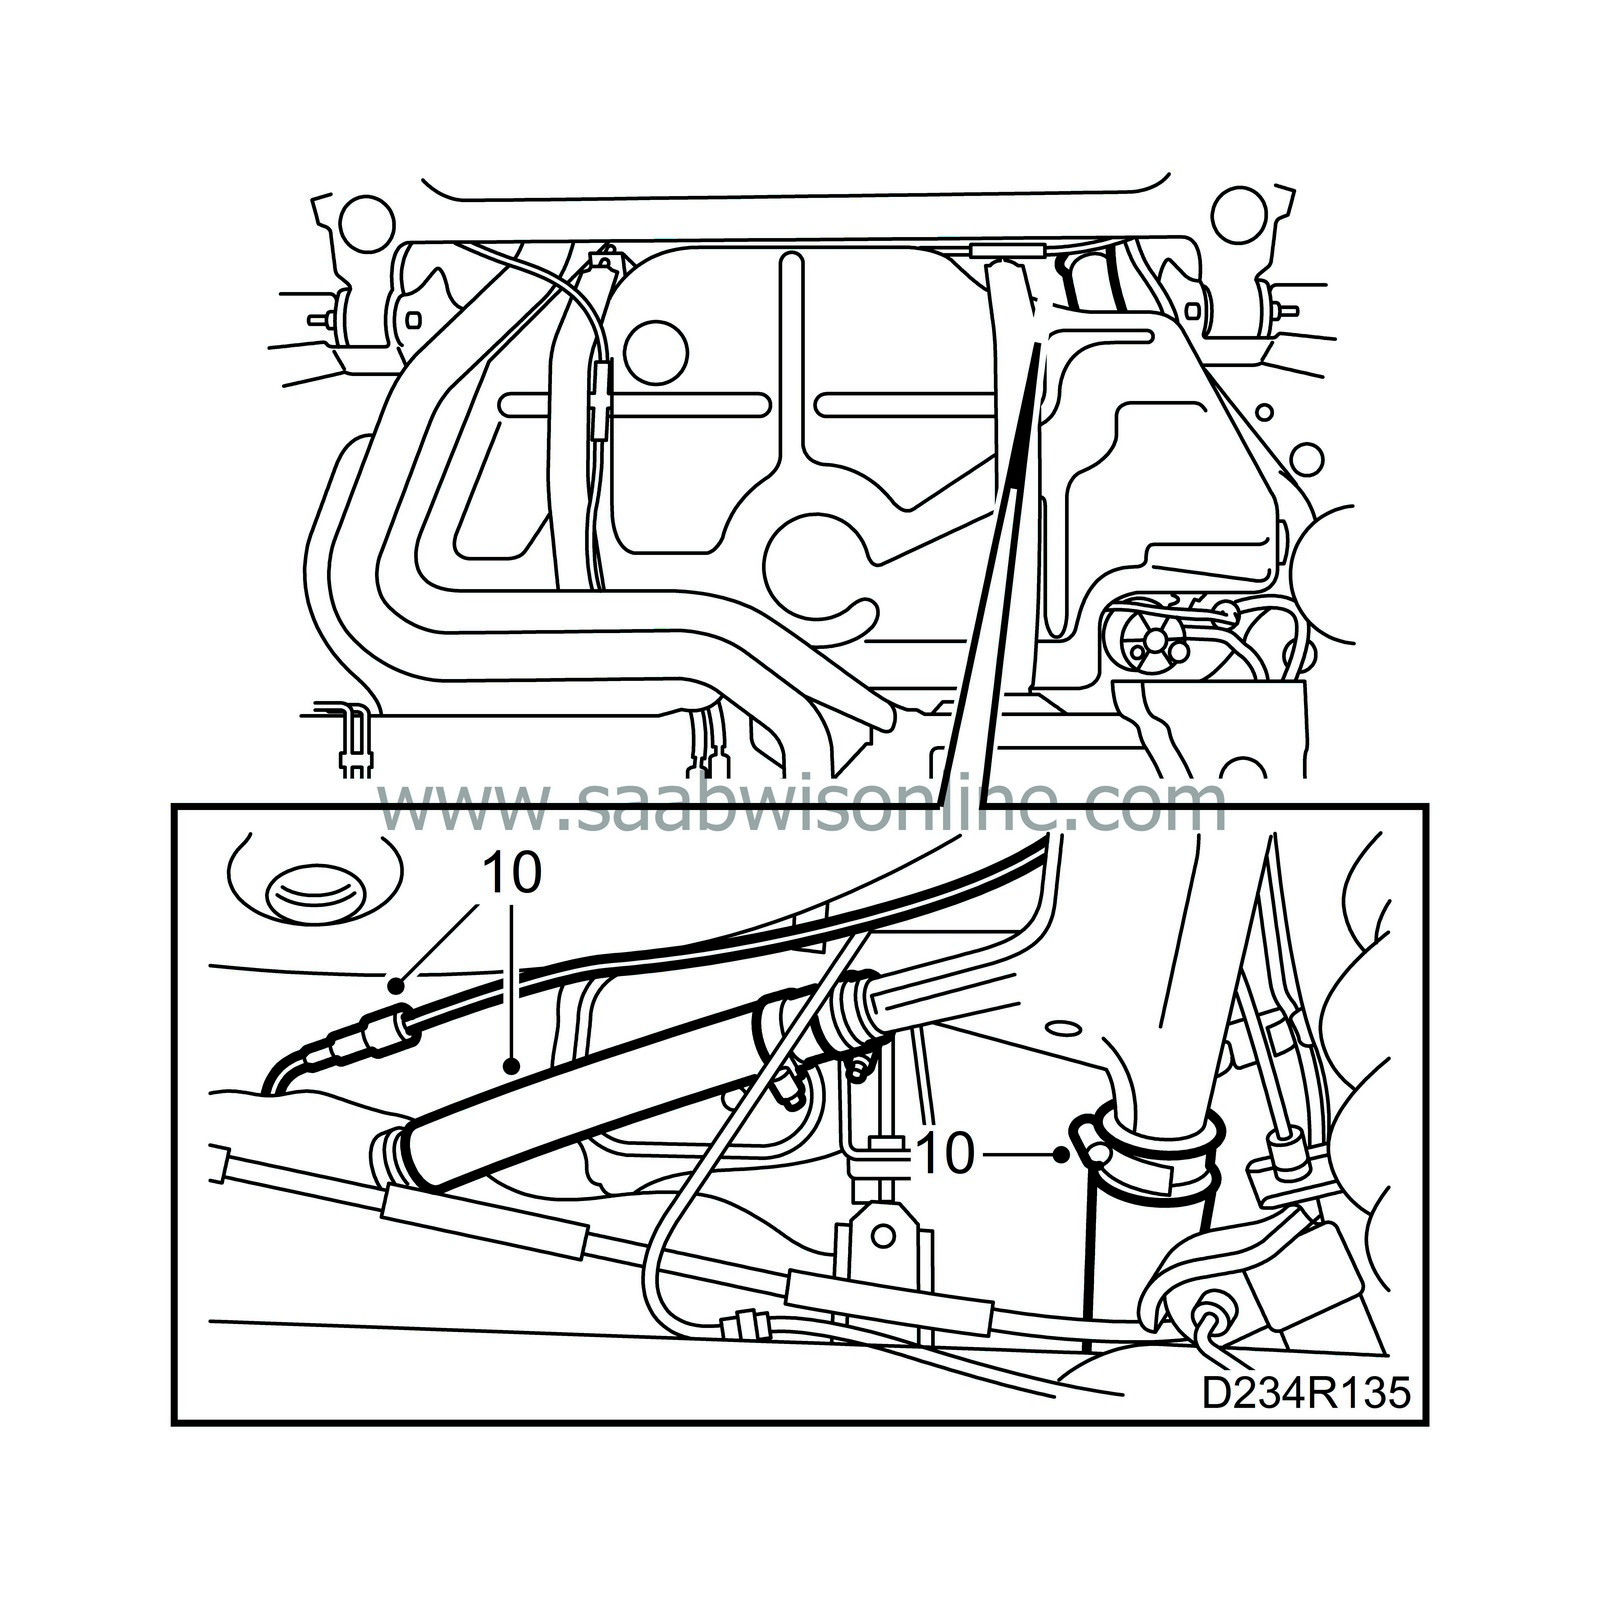
Remove the plug from the tank and connect the rubber hoses.
|
|
| 11. |
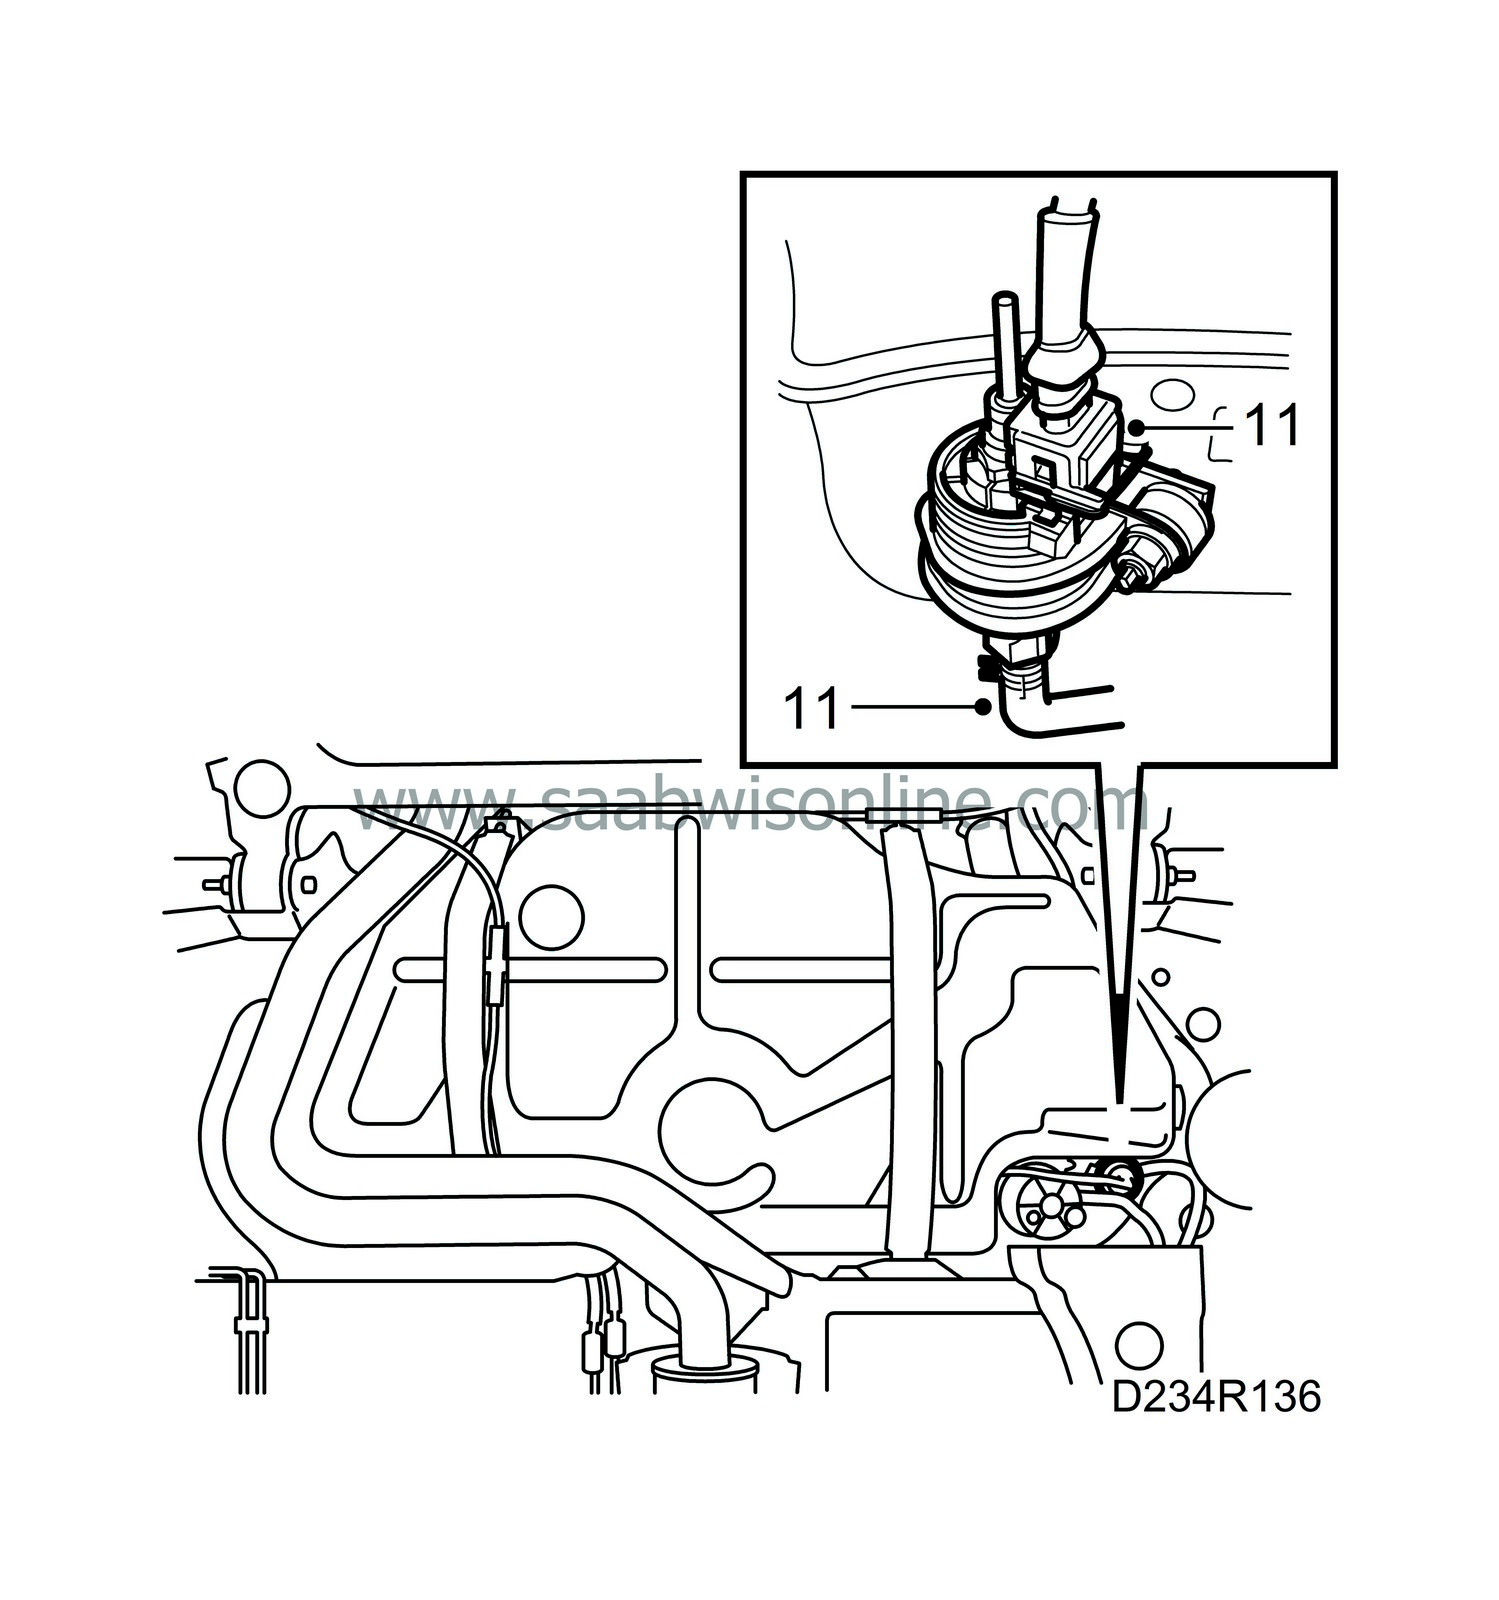
Connect the delivery hose and the connector to the auxiliary heater fuel pump.
|
|
| 13. |
Fit the protective cover in front of the fuel filter and lower the car.
|
|
| 14. |
Start the engine and check the integrity of the system.
If the engine stalls due to air in the fuel system, the system must be bled. |
|

 Warning
