Main instrument display
| Main instrument display |
| 1. |
Remove upper and lower steering column covers, 3 screws.
|
|||||||
| 2. |
Remove the direction indicator and windscreen wiper switch.
|
|
| 3. |
Remove the radio.
|
|||||||
| 4. |
Remove the SID unit.
|
|
| 5. |
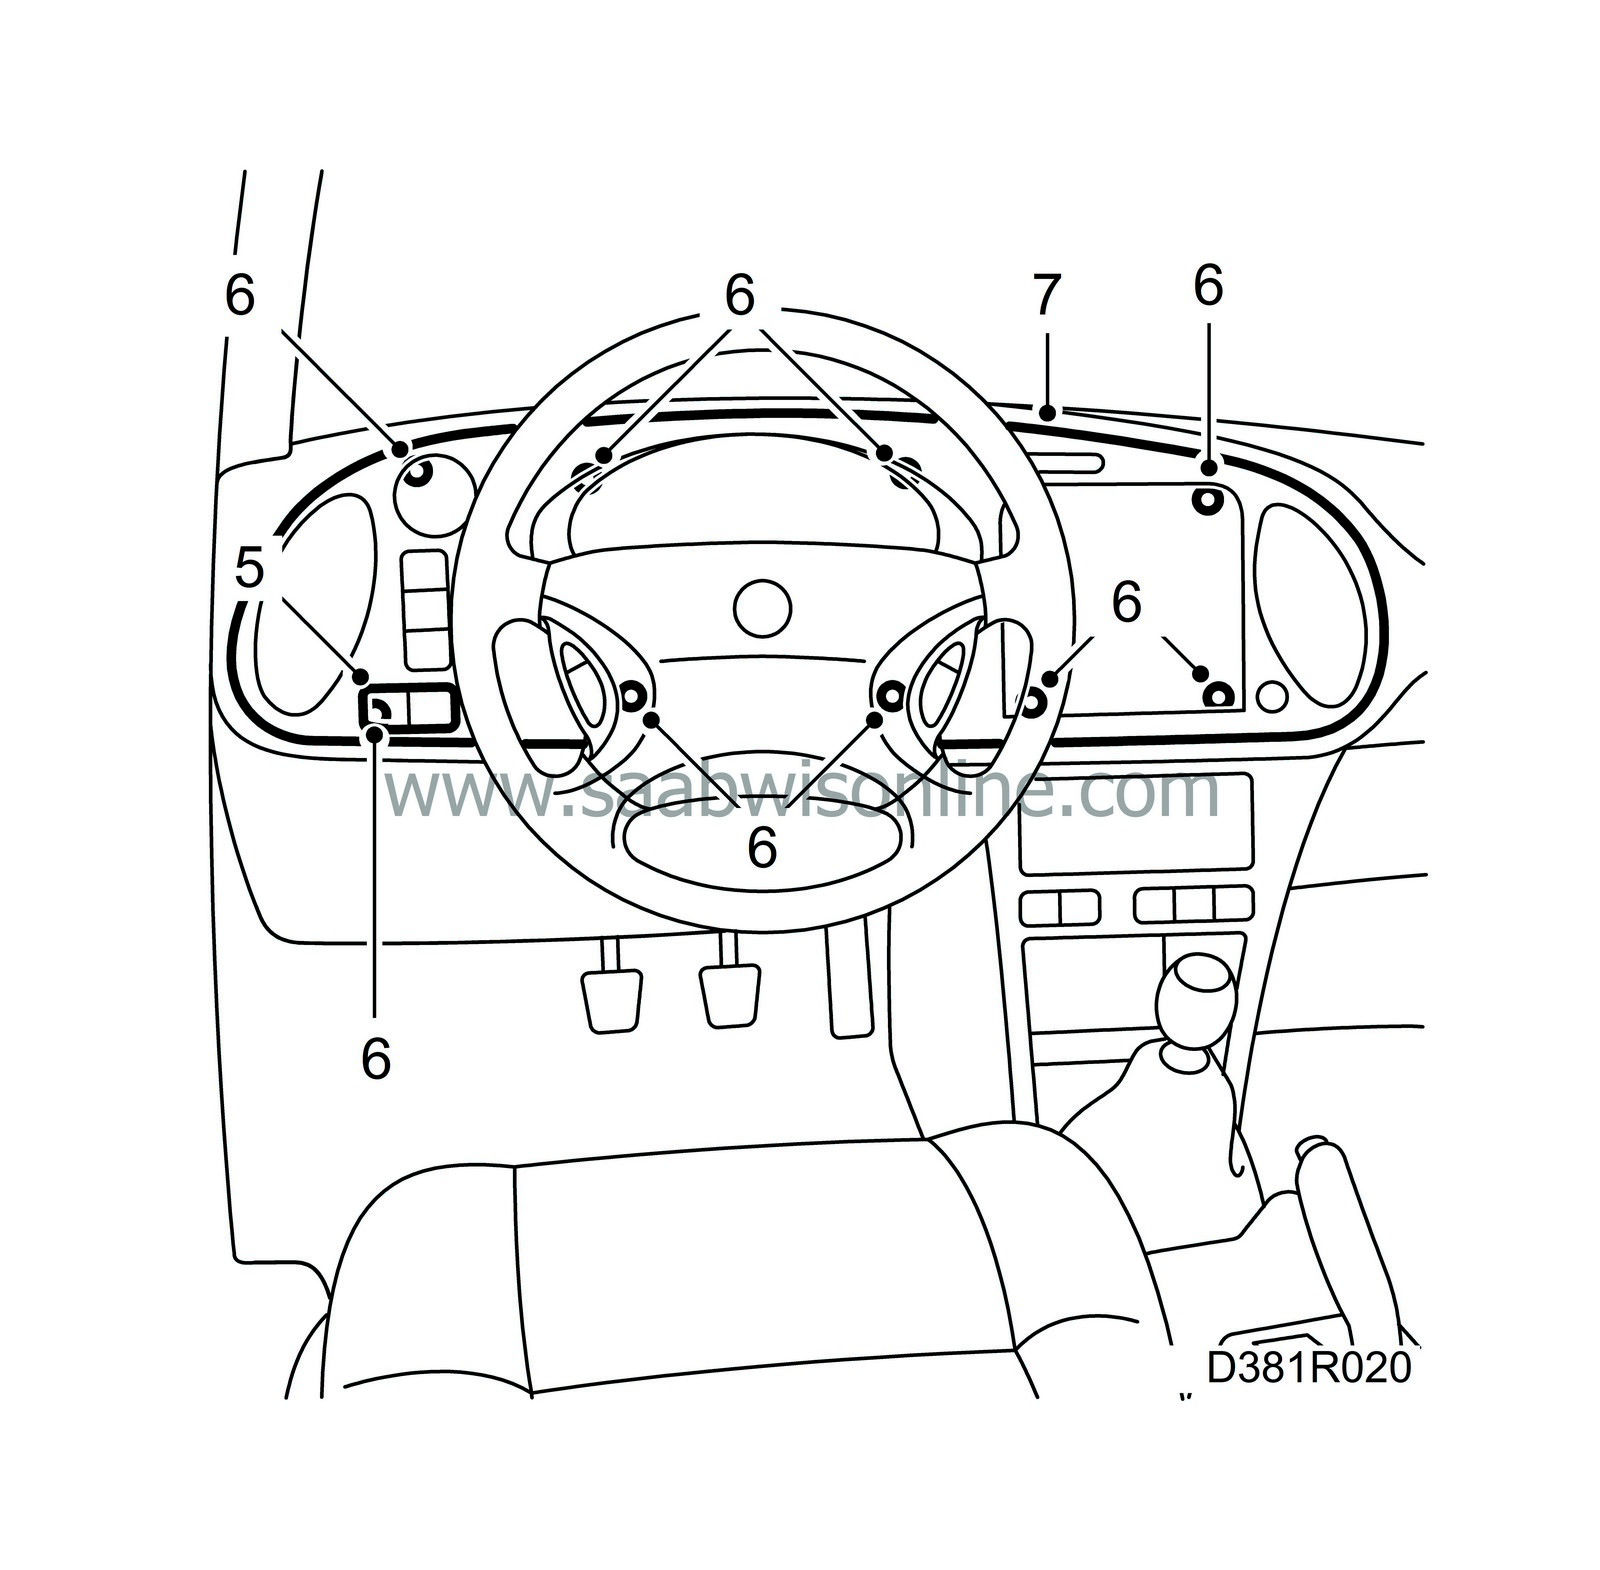
Remove all the switches, button blanks and the seat-belt warning lamp.

|
|
| 6. |
Remove the instrument plate, 9 screws.
|
|
| 7. |
Tilt the instrument plate towards the compartment.
|
|
| 8. |
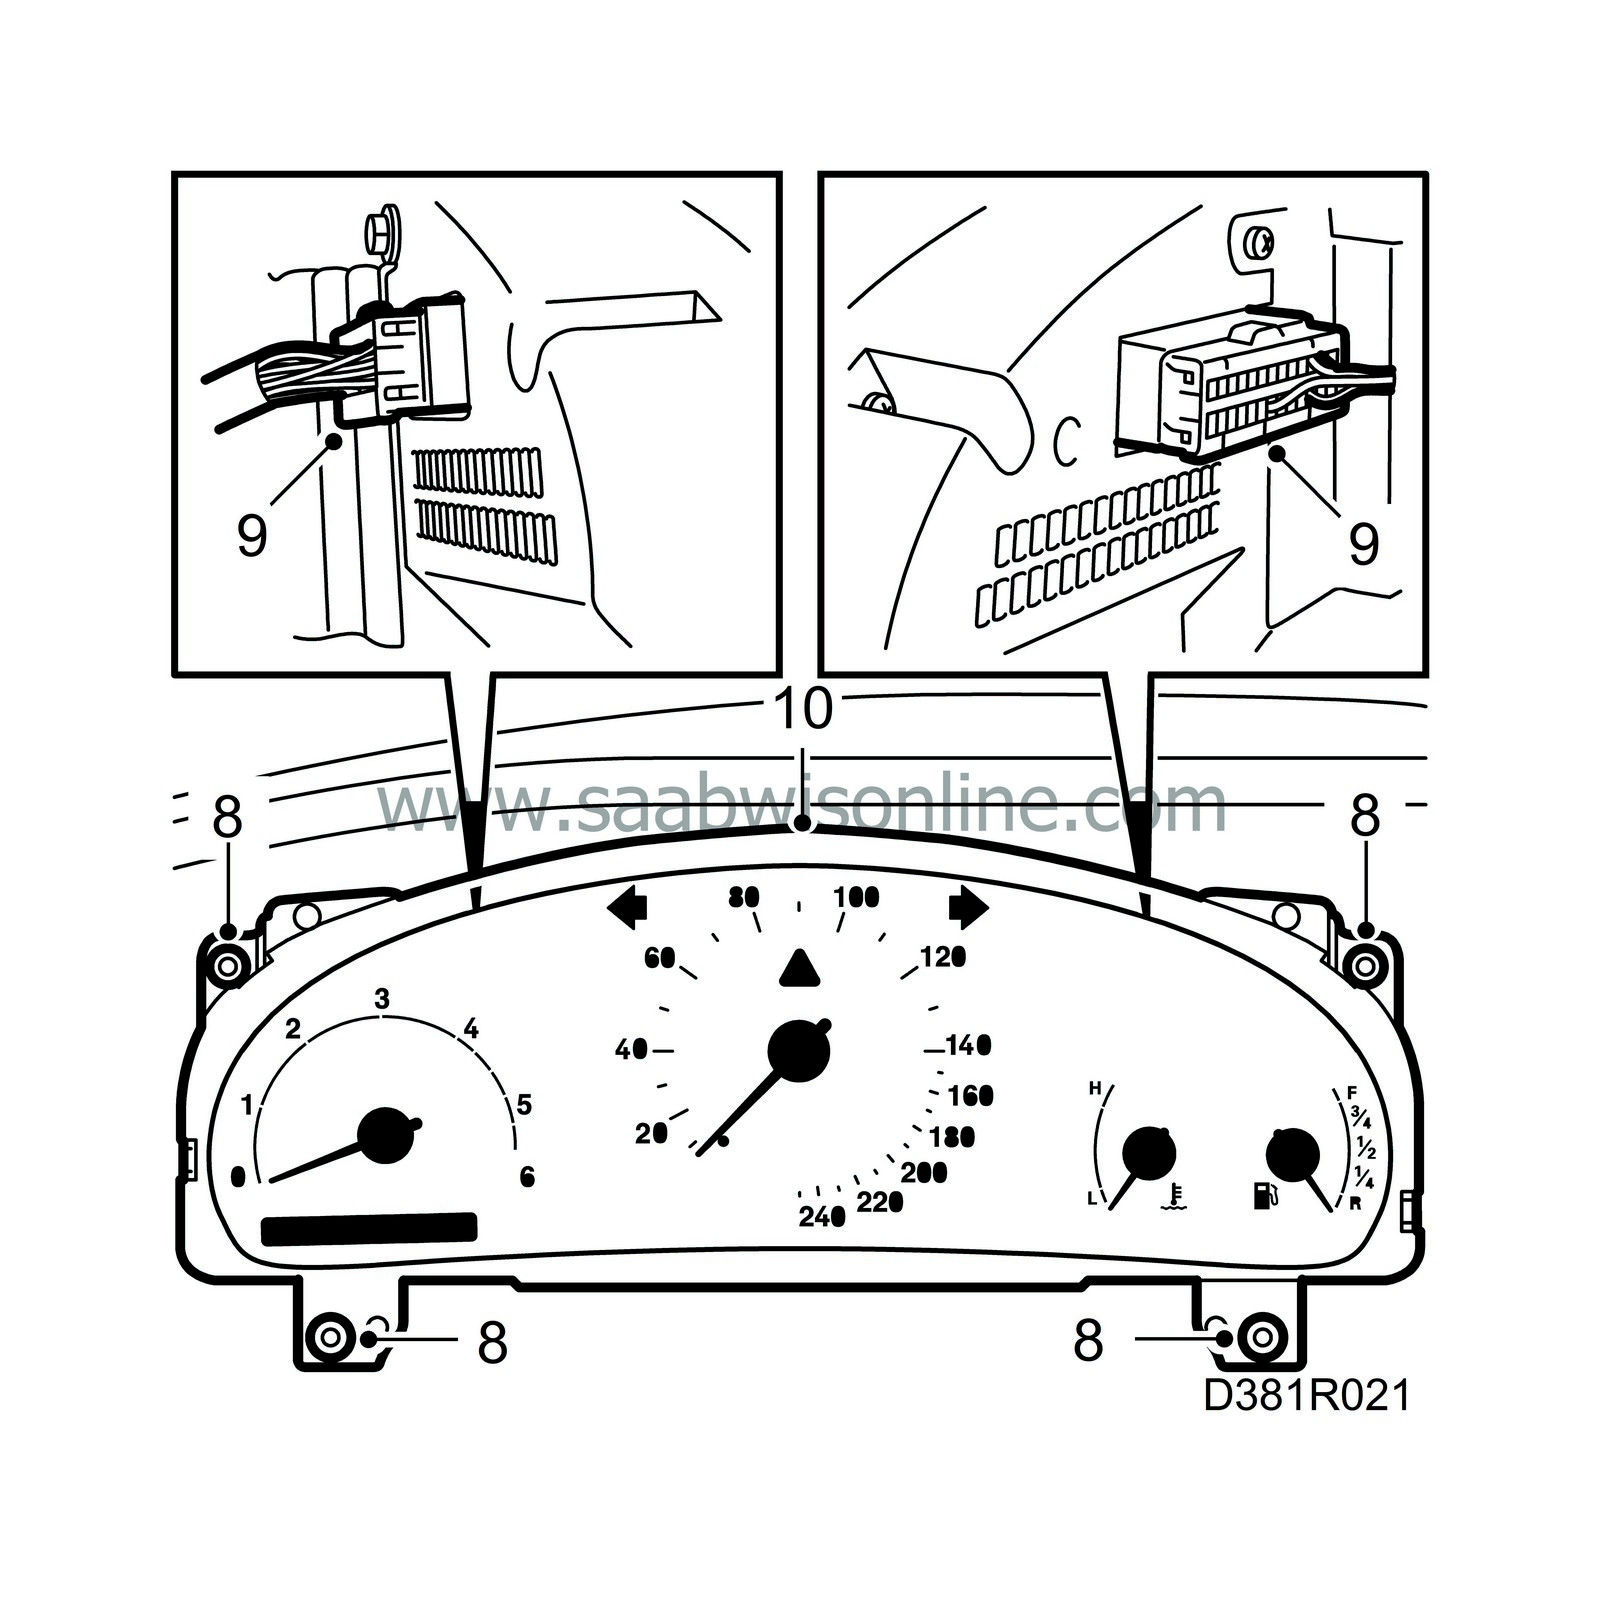
Remove the four screws securing the main instrument unit.

|
|
| 9. |
Unplug the connectors on the back of the main instrument unit.
|
|
| 10. |
Lift out the main instrument unit.
|
|
| To fit |

| 1. |
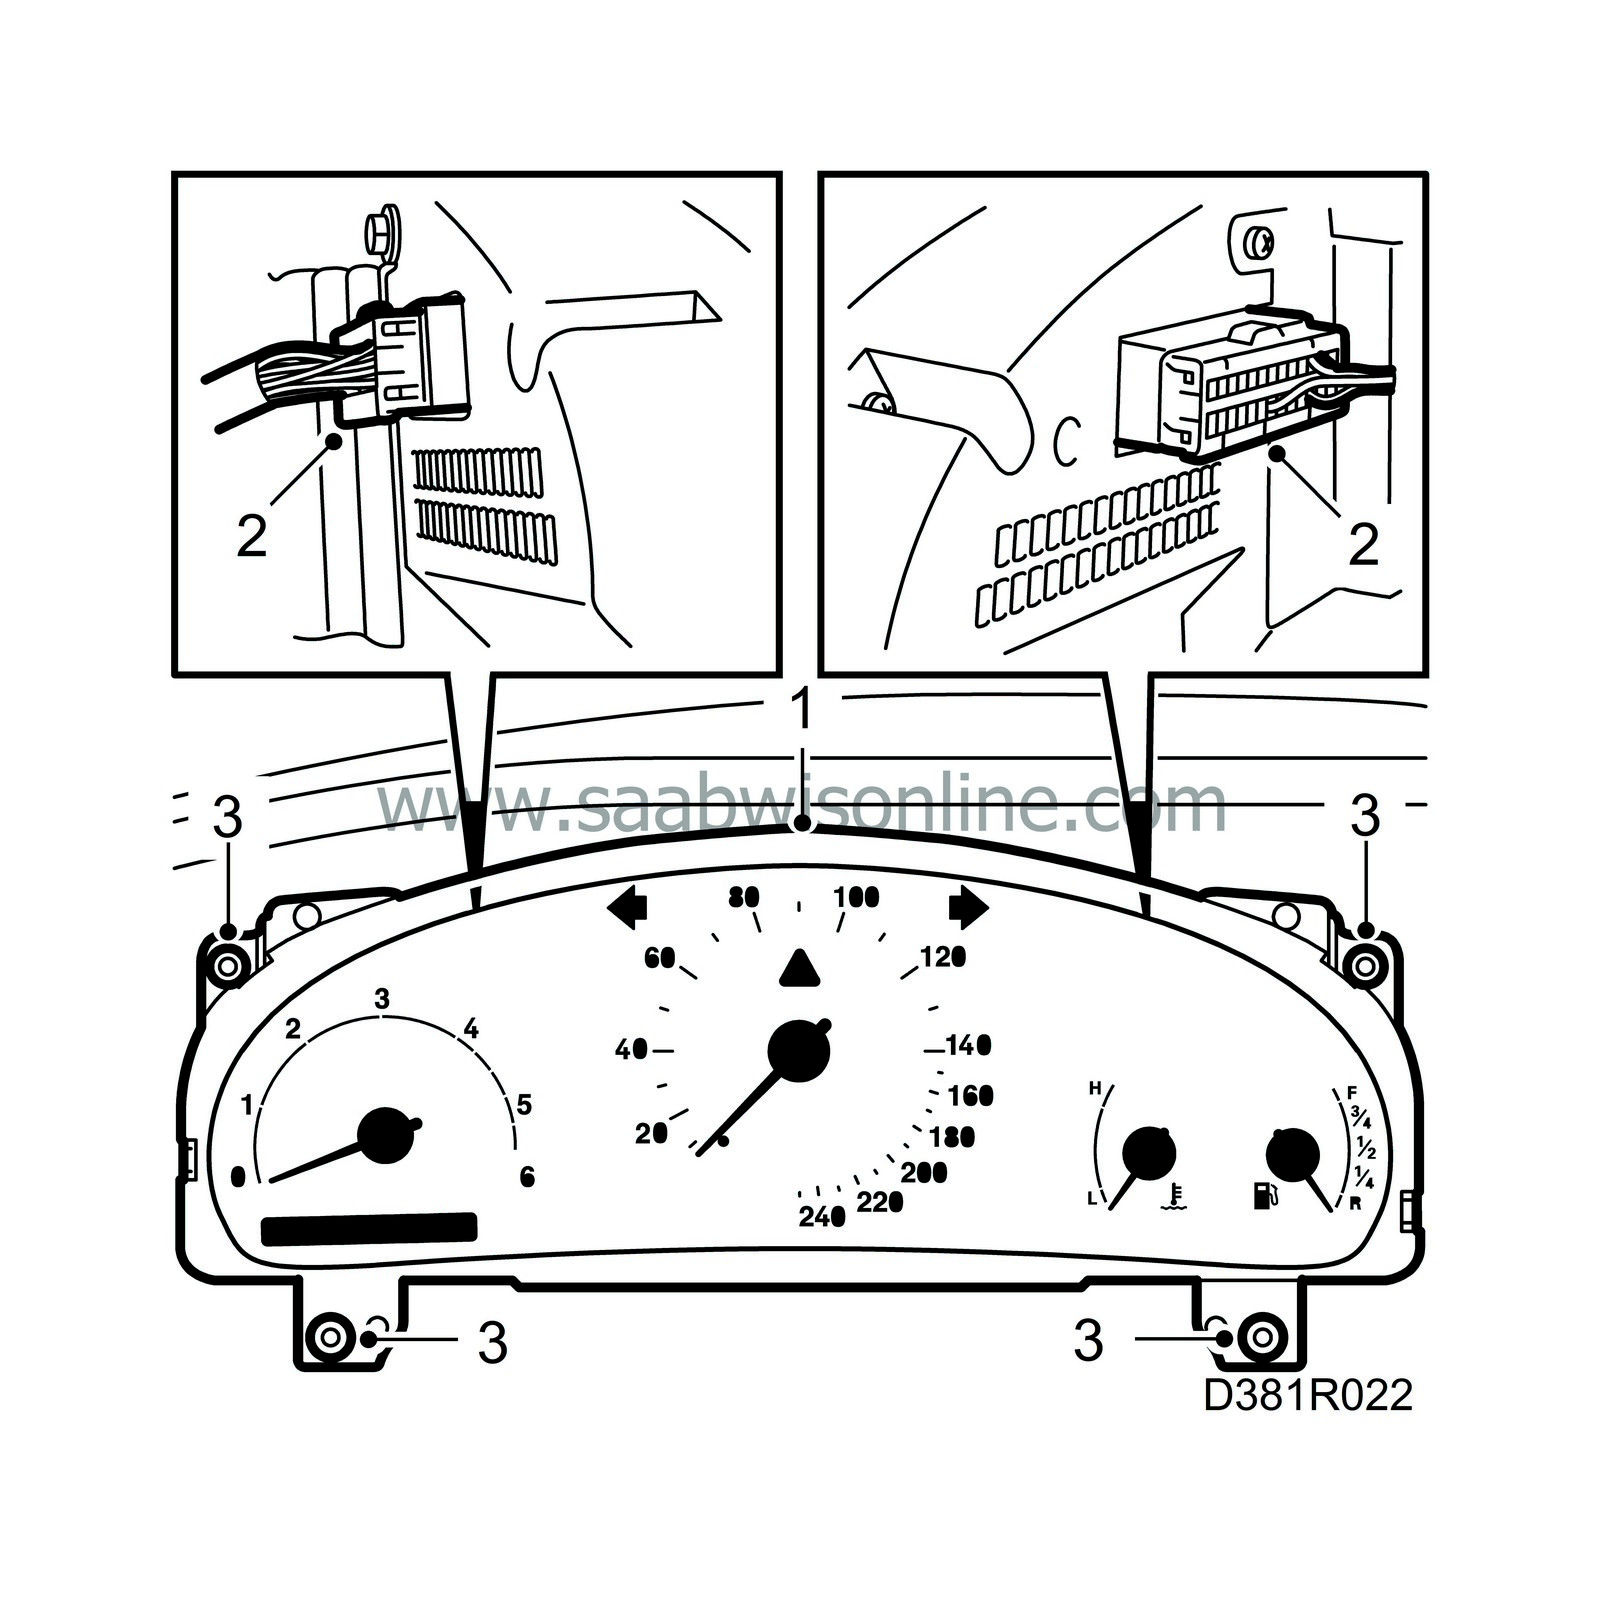
Put the main instrument unit into position.
|
|
| 2. |
Plug in the connectors on the back of the main instrument unit.
|
|
| 3. |
Screw in the four screws securing the main instrument unit.
|
|
| 4. |
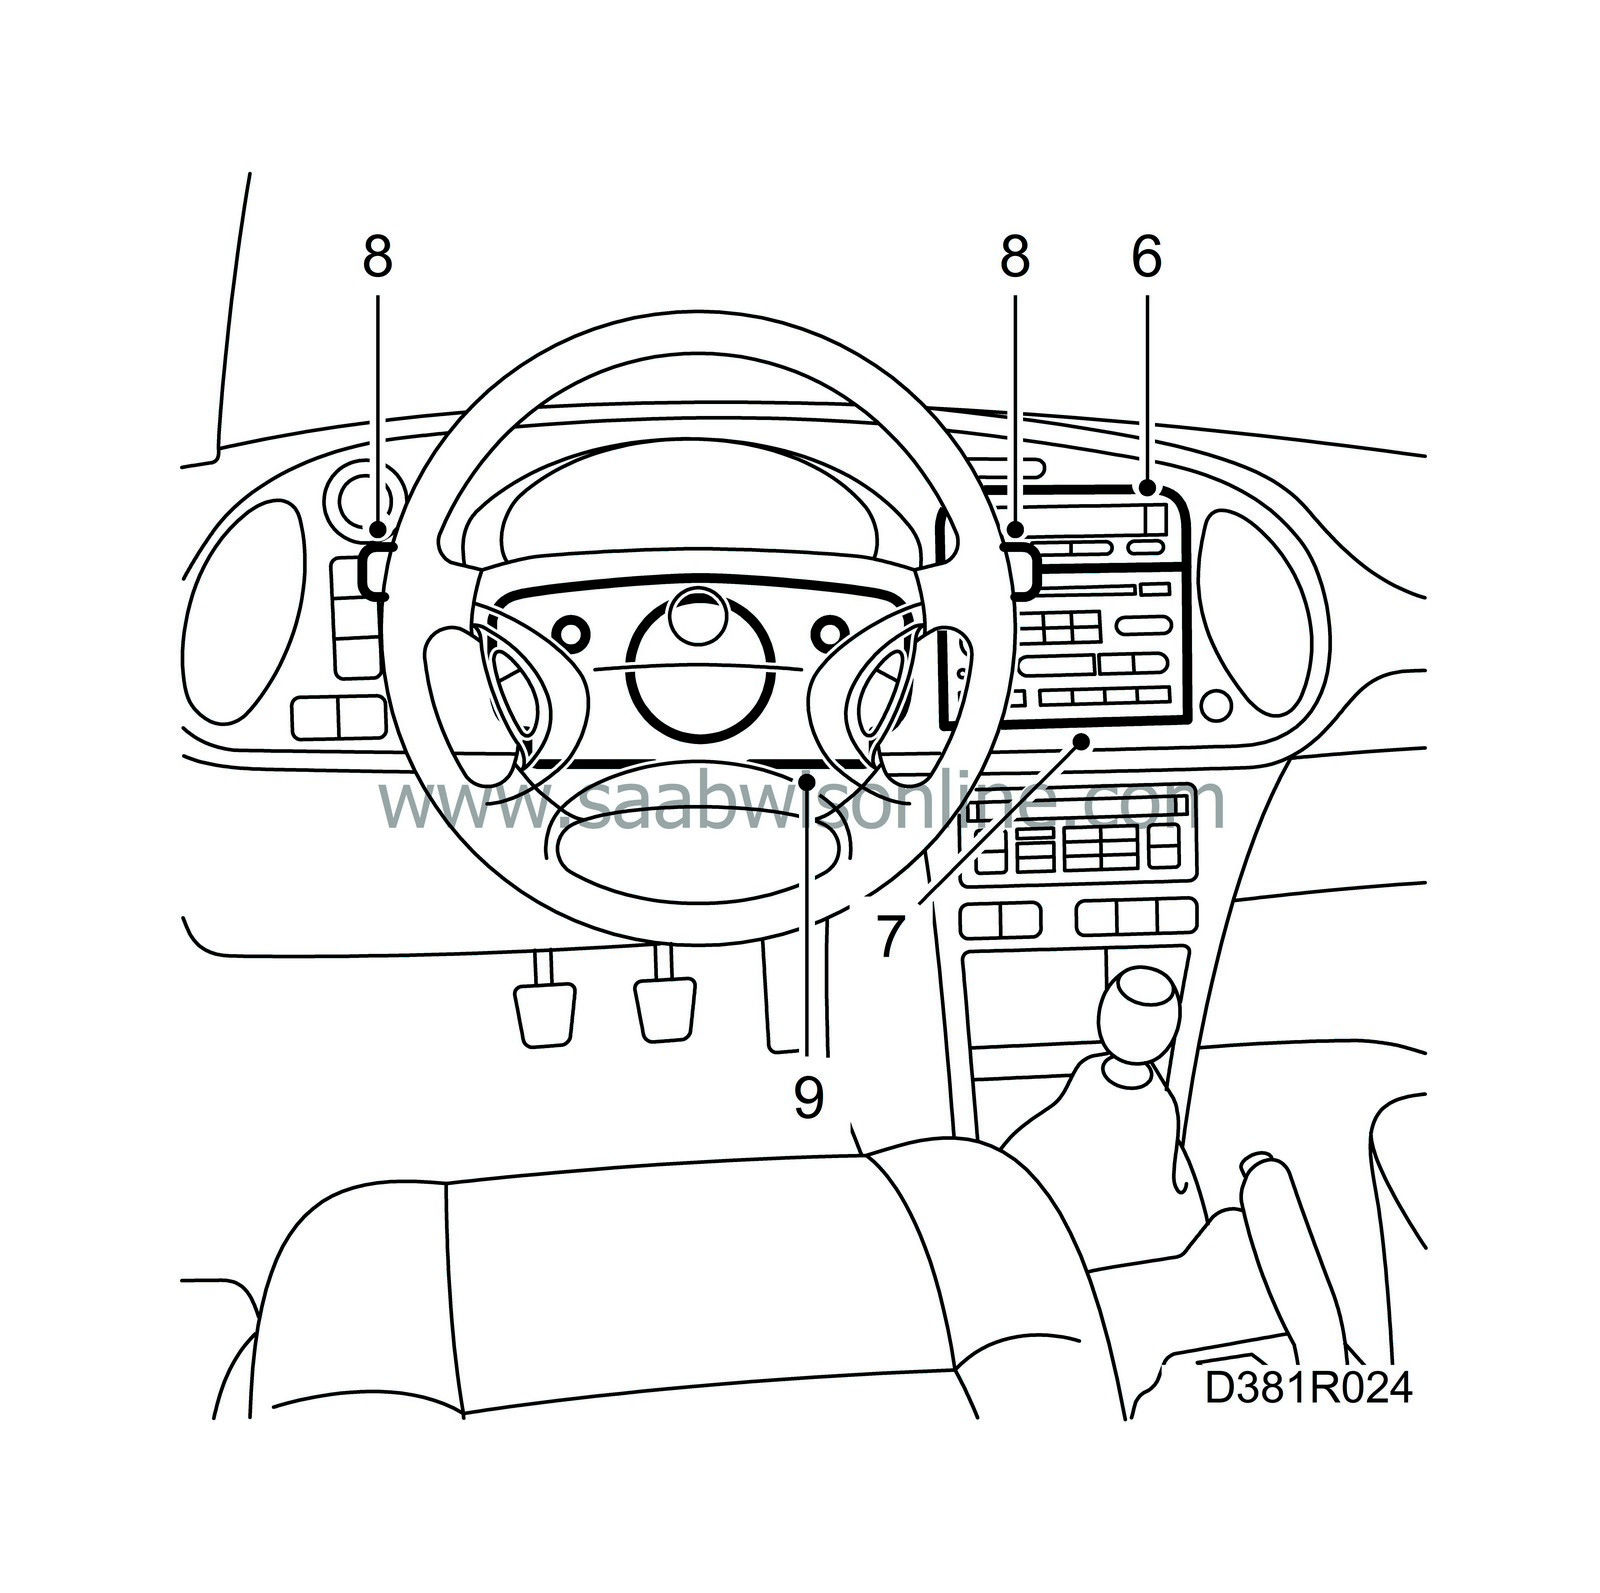
Fit the instrument plate, 9 screws.

|
|||||||
| 5. |
Fit the switches, button blanks and the seat-belt warning lamp.
|
|
| 6. |
Fit the SID unit.

|
|
| 7. |
Fit the radio.
|
|
| 8. |
Plug in the direction indicator and windscreen wiper connectors and fit the stalk switches.
|
|
| 9. |
Fit the upper and lower steering column covers.
|
|||||||
| 10. |
Once the main instrument unit has been changed, spare parts programming must be performed. Follow the instructions on the "Programming" menu in the diagnostic tool.
|
|


