(644-2194) Noise from the power steering system
|
MODIFICATION INSTRUCTION
|
|
Bulletin Nbr:
|
644-2194
|
|
Date:
...........
|
December 1999
|
|
Market:
|
SE SEPARAT LISTA, Ej JP, US, CA
|
|
|
Noise from the power steering system
|
Cars in stock must be rectified before delivery.
Cars already delivered must be rectified in connection with a scheduled visit to the garage for service or repairs.
Saab 9-3
M1998, VIN W2060968-W2069663
M1999, VIN X2020001-X2025640
Saab 9-3 CV
M1998, VIN W7053848-W7056549
M1999, VIN X7020001-X7021480
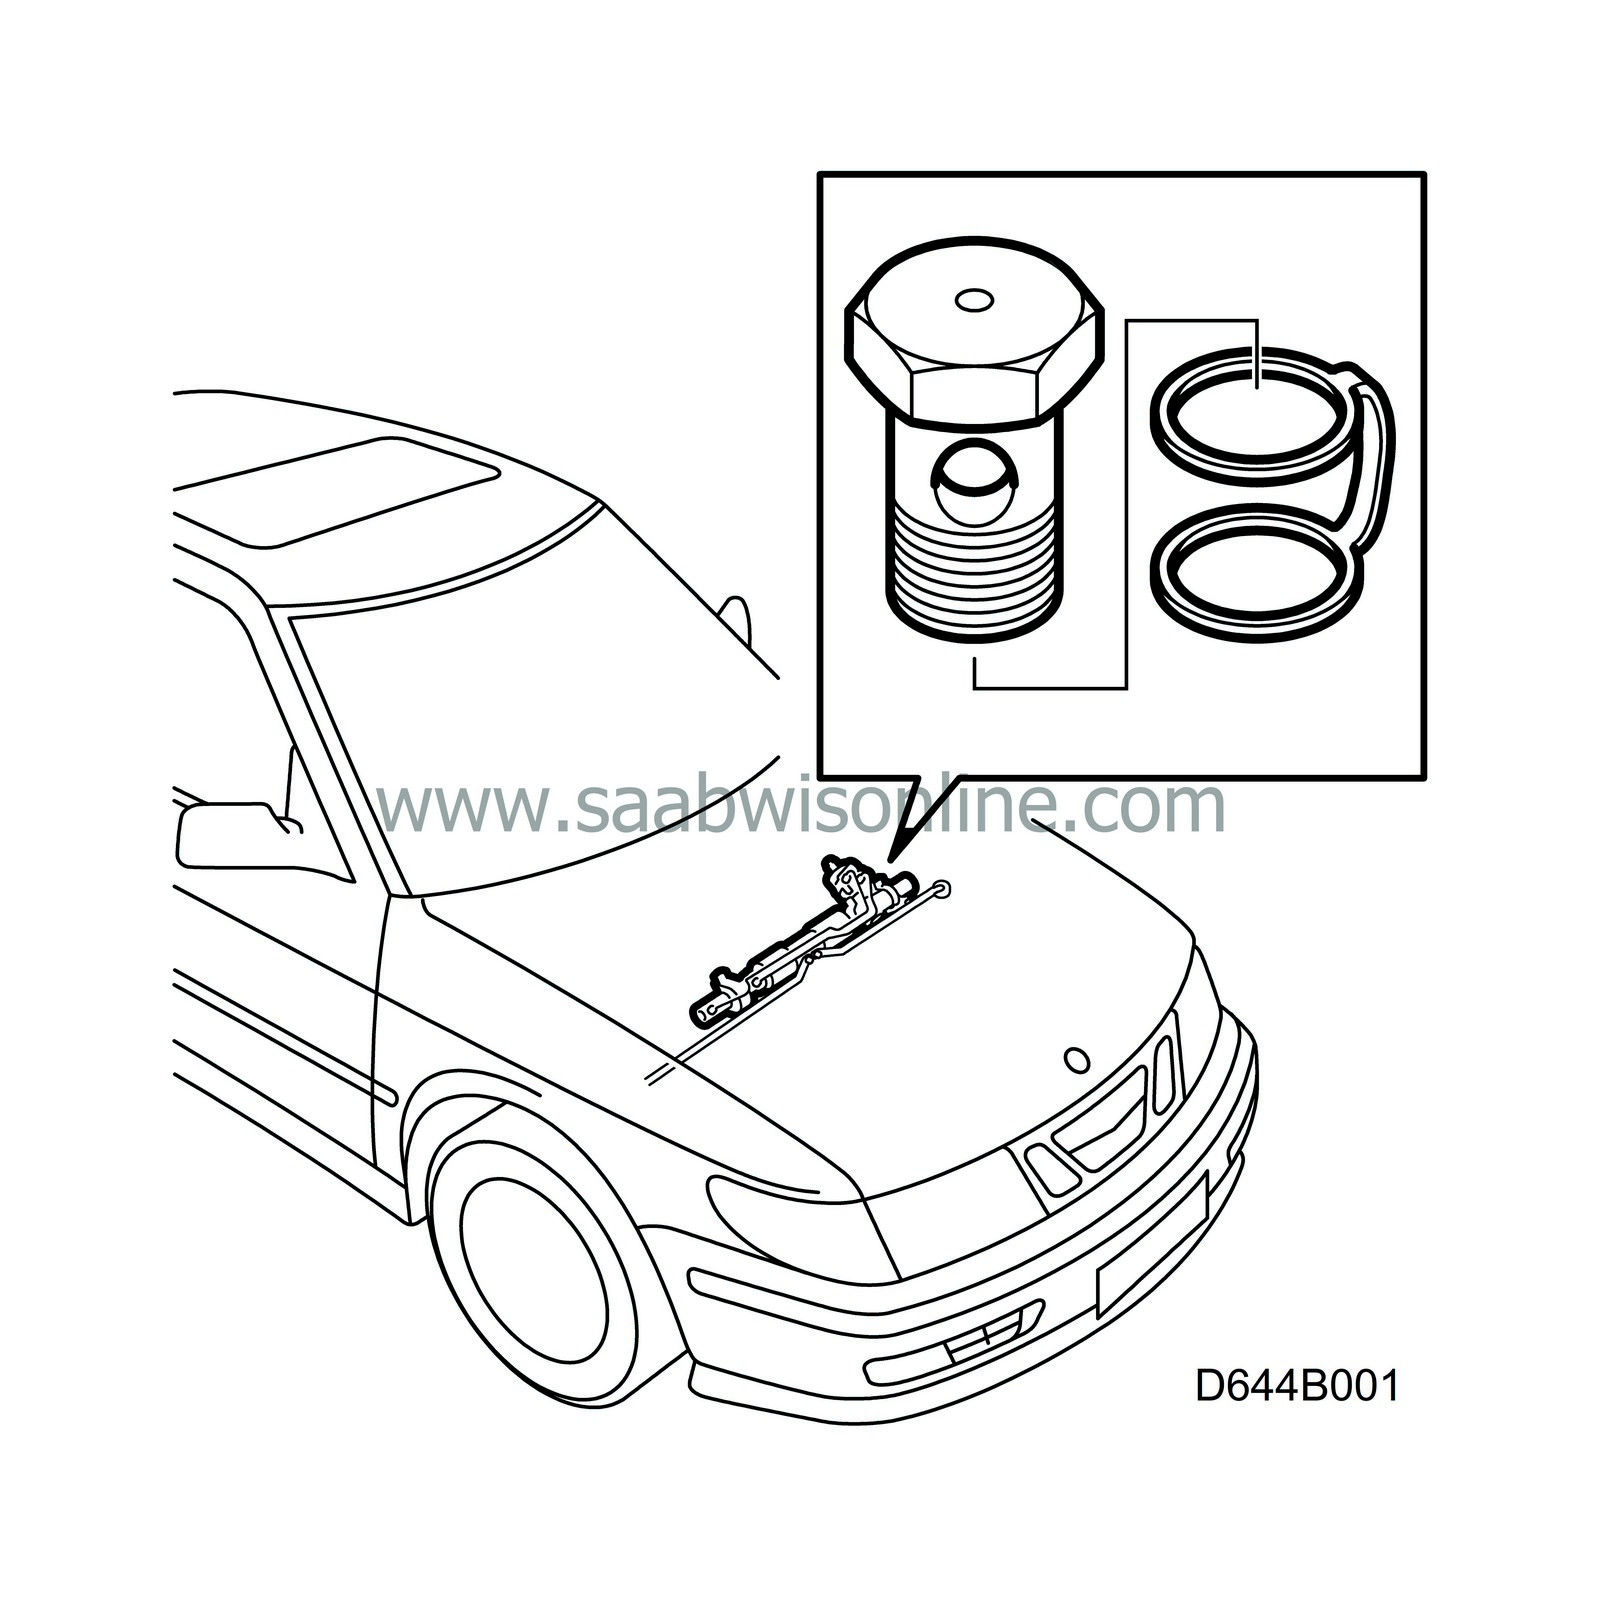
The check valve fitted on the delivery pipe nipple can come loose.
If the check valve comes, the power steering system may become noisy. Other possible symptoms are high fluid level in the fluid reservoir, or that the fluid gets abnormally warm.
49 09 073 Nipple
50 57 724 Seal
16-89 96 852 Ring sleeve (new special tool)
Check box A2 of the modification identity plate before preceding. Continue as follows if the box has
not
been marked.
LHD
|
1.
|
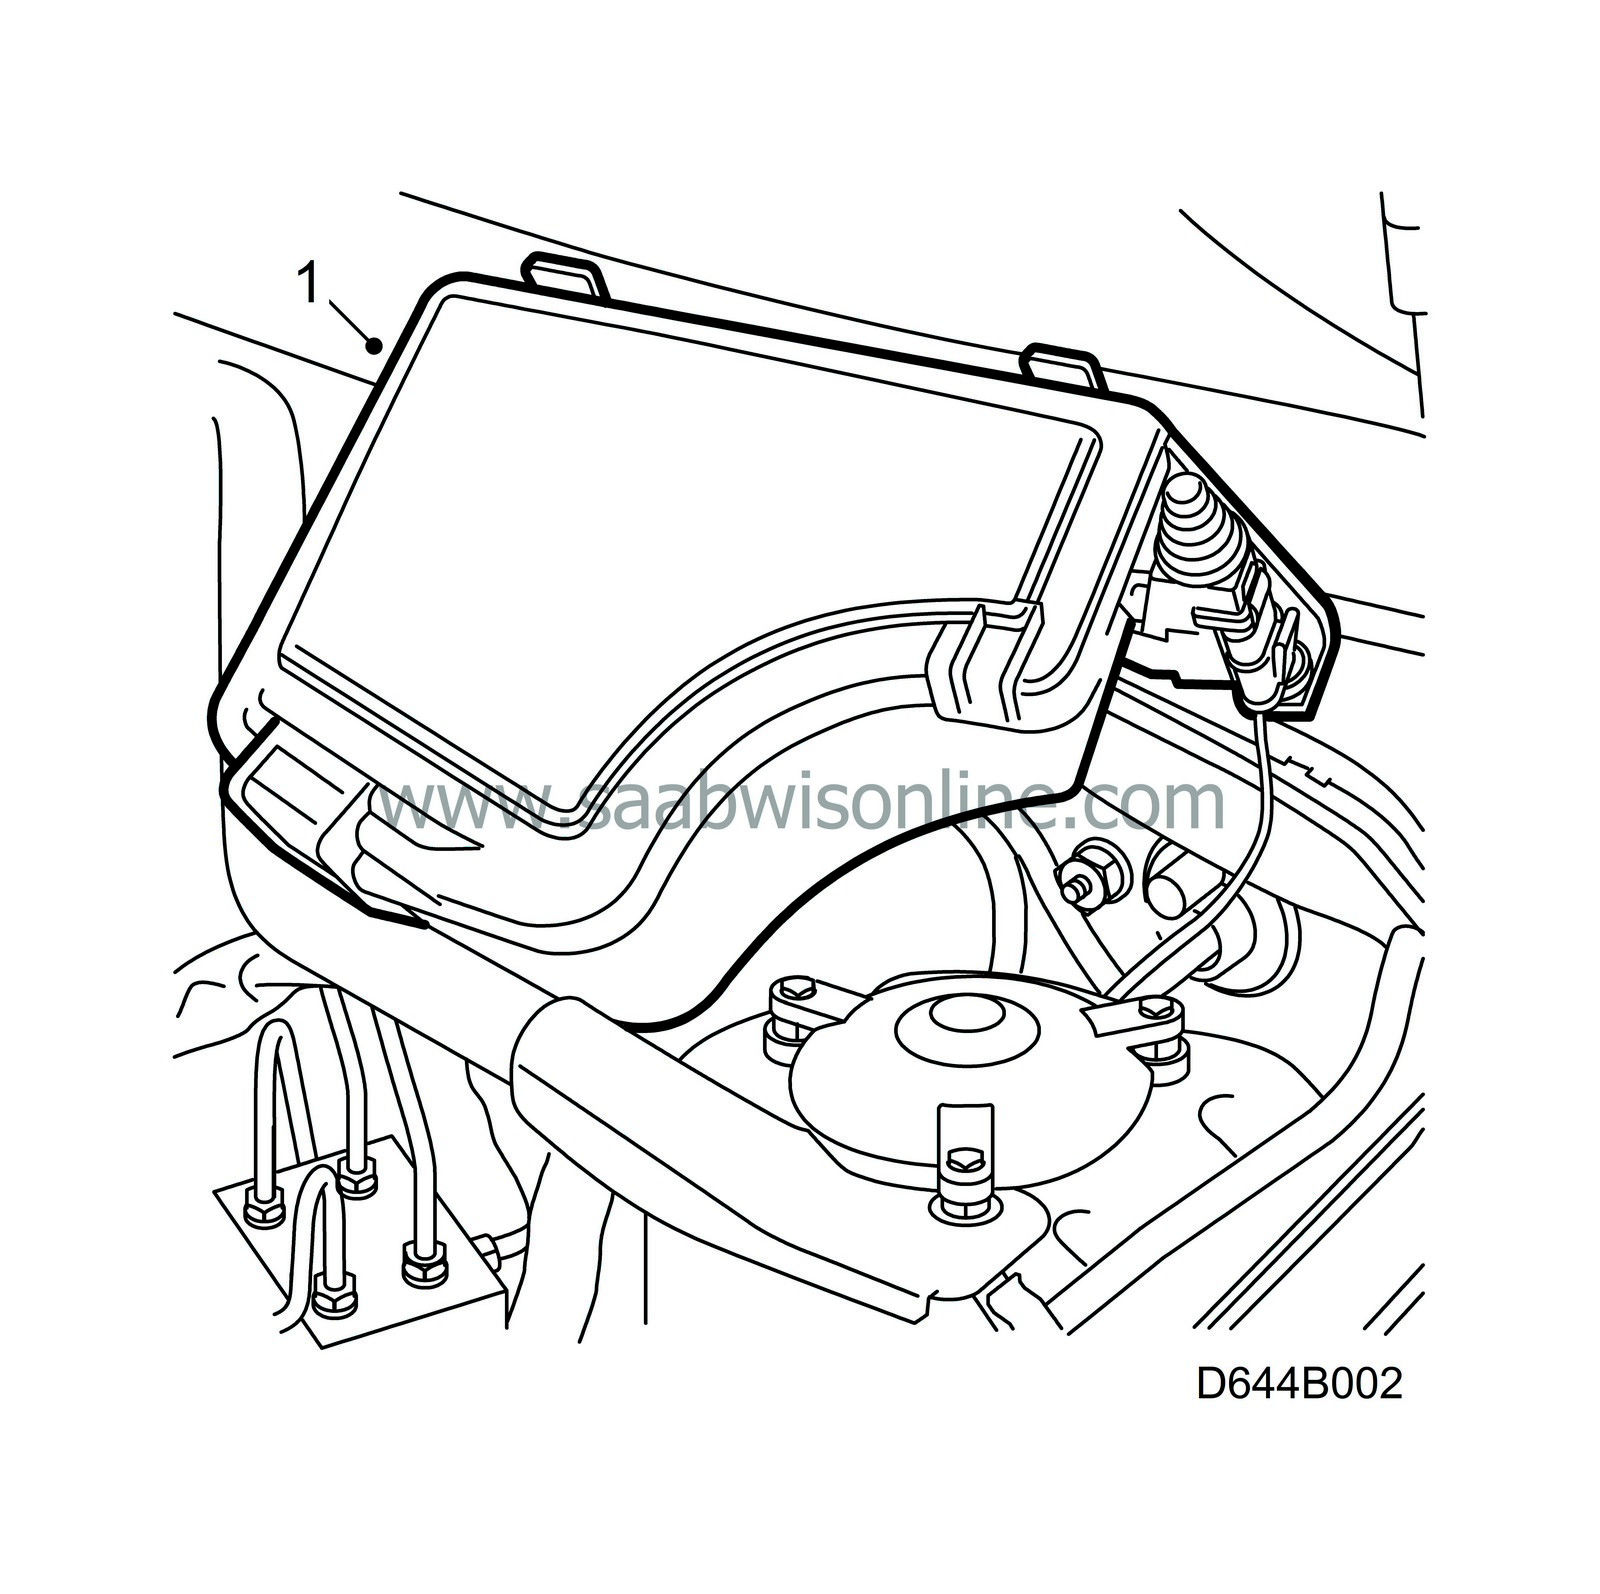
Undo and bend aside the main fuse box, and fasten using strap 83 95 212.
|
|
2.
|
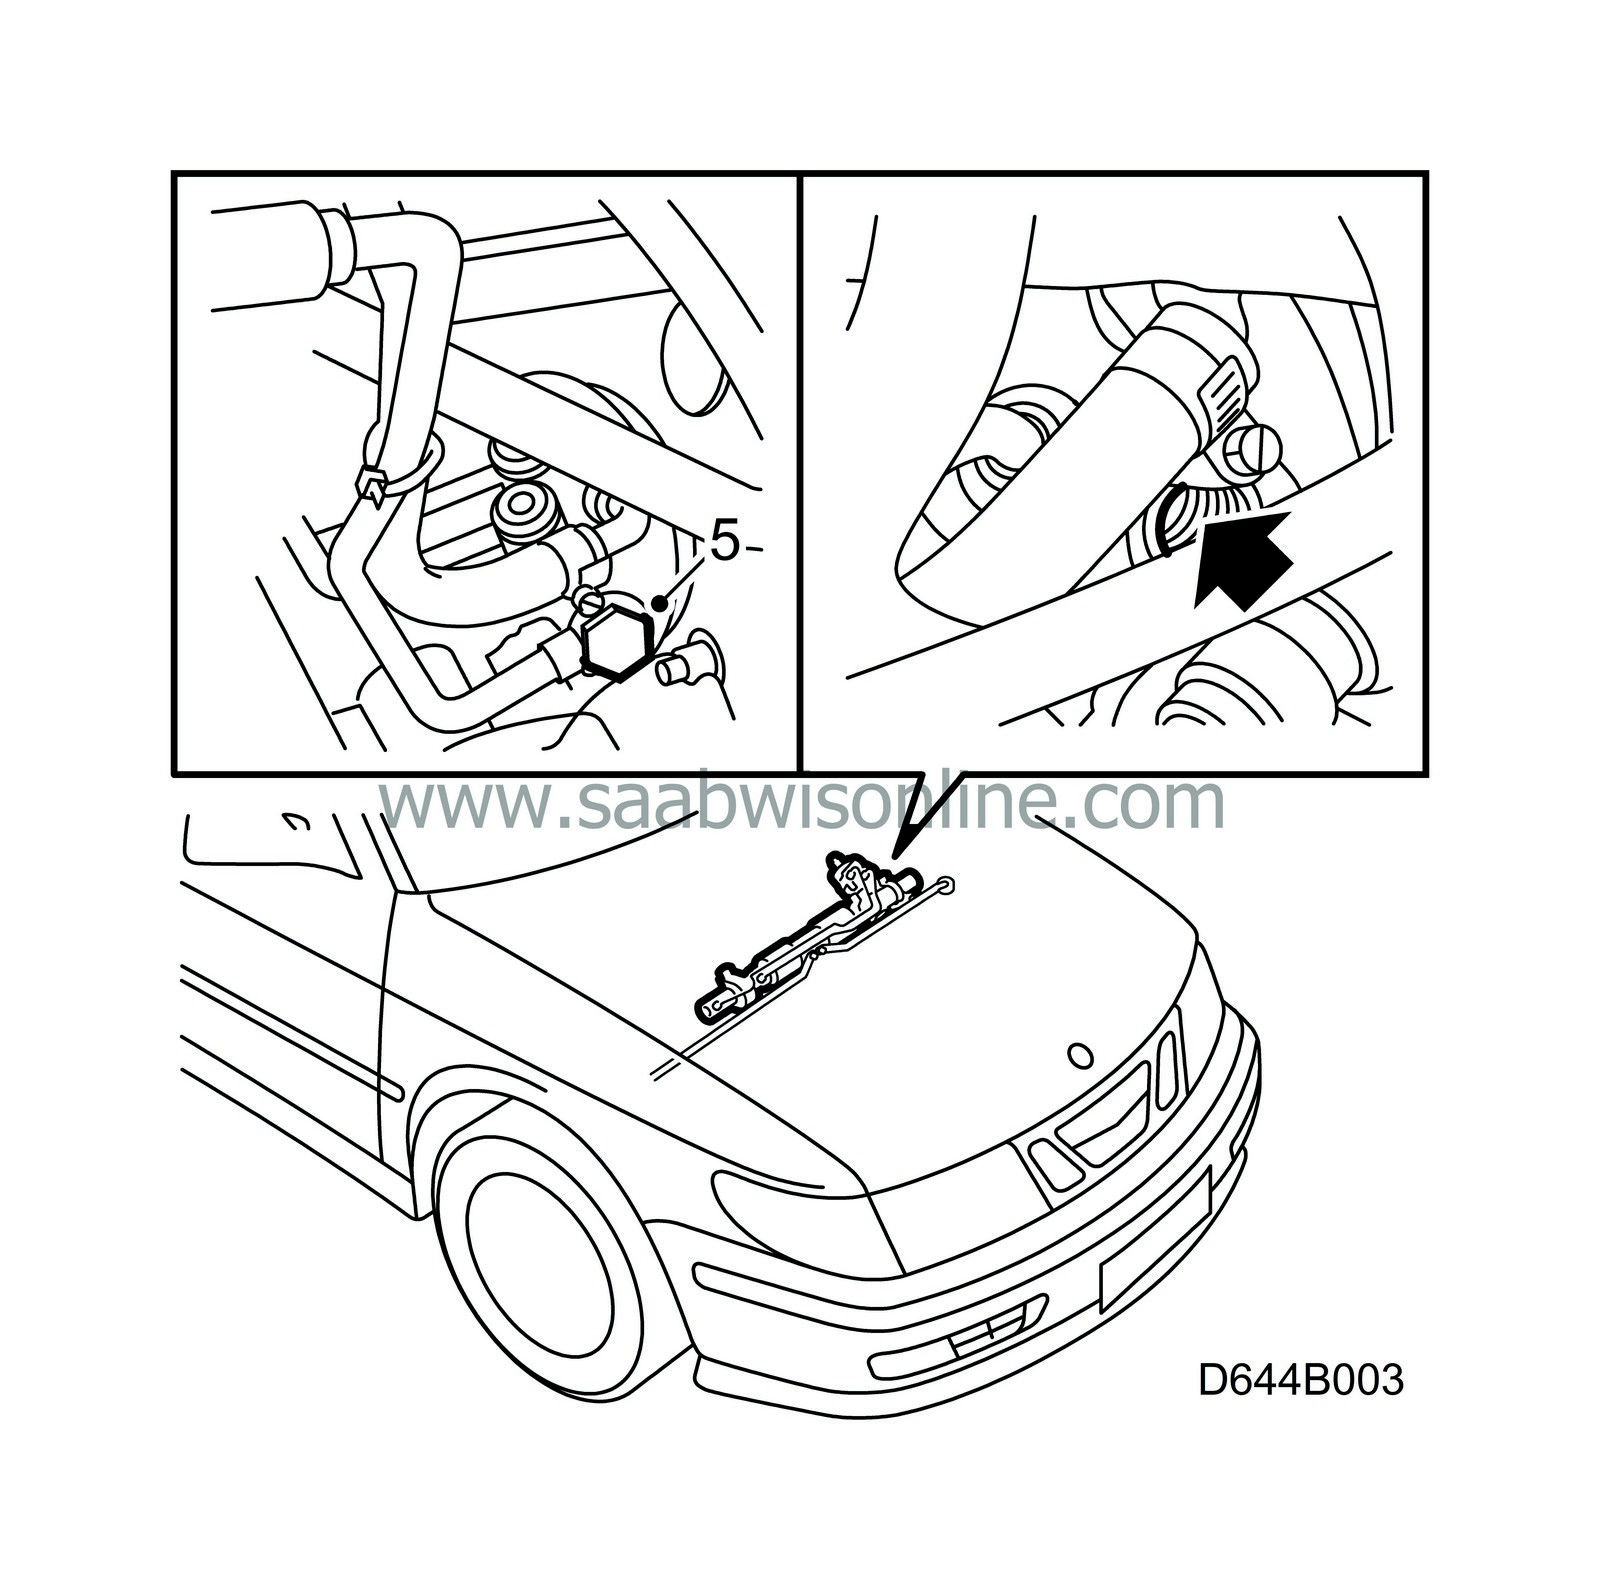
Pinch off the power steering return hose with hose clip pliers 30 07 739.
|
|
3.
|
Clean around the banjo nipple.
|
|
4.
|
Place a rag under the connection, to collect any fluid.
|
Note
|
|
Cars with manual gearbox:
Take care not to damage the master clutch cylinder.
|
|
|
5.
|
Undo the delivery pipe banjo nipple using special tool 89 96 852.
|
|
6.
|
Remove the banjo nipple and seal from the delivery pipe.
|
Note
|
|
Make sure the check valve is not still connected to the steering gear. If necessary, remove the check valve before the new banjo nipple is fitted.
|
|
|
7.
|
Fit the new banjo nipple and new seal to the delivery pipe.
|
|
8.
|
Tighten the banjo nipple to the steering gear.
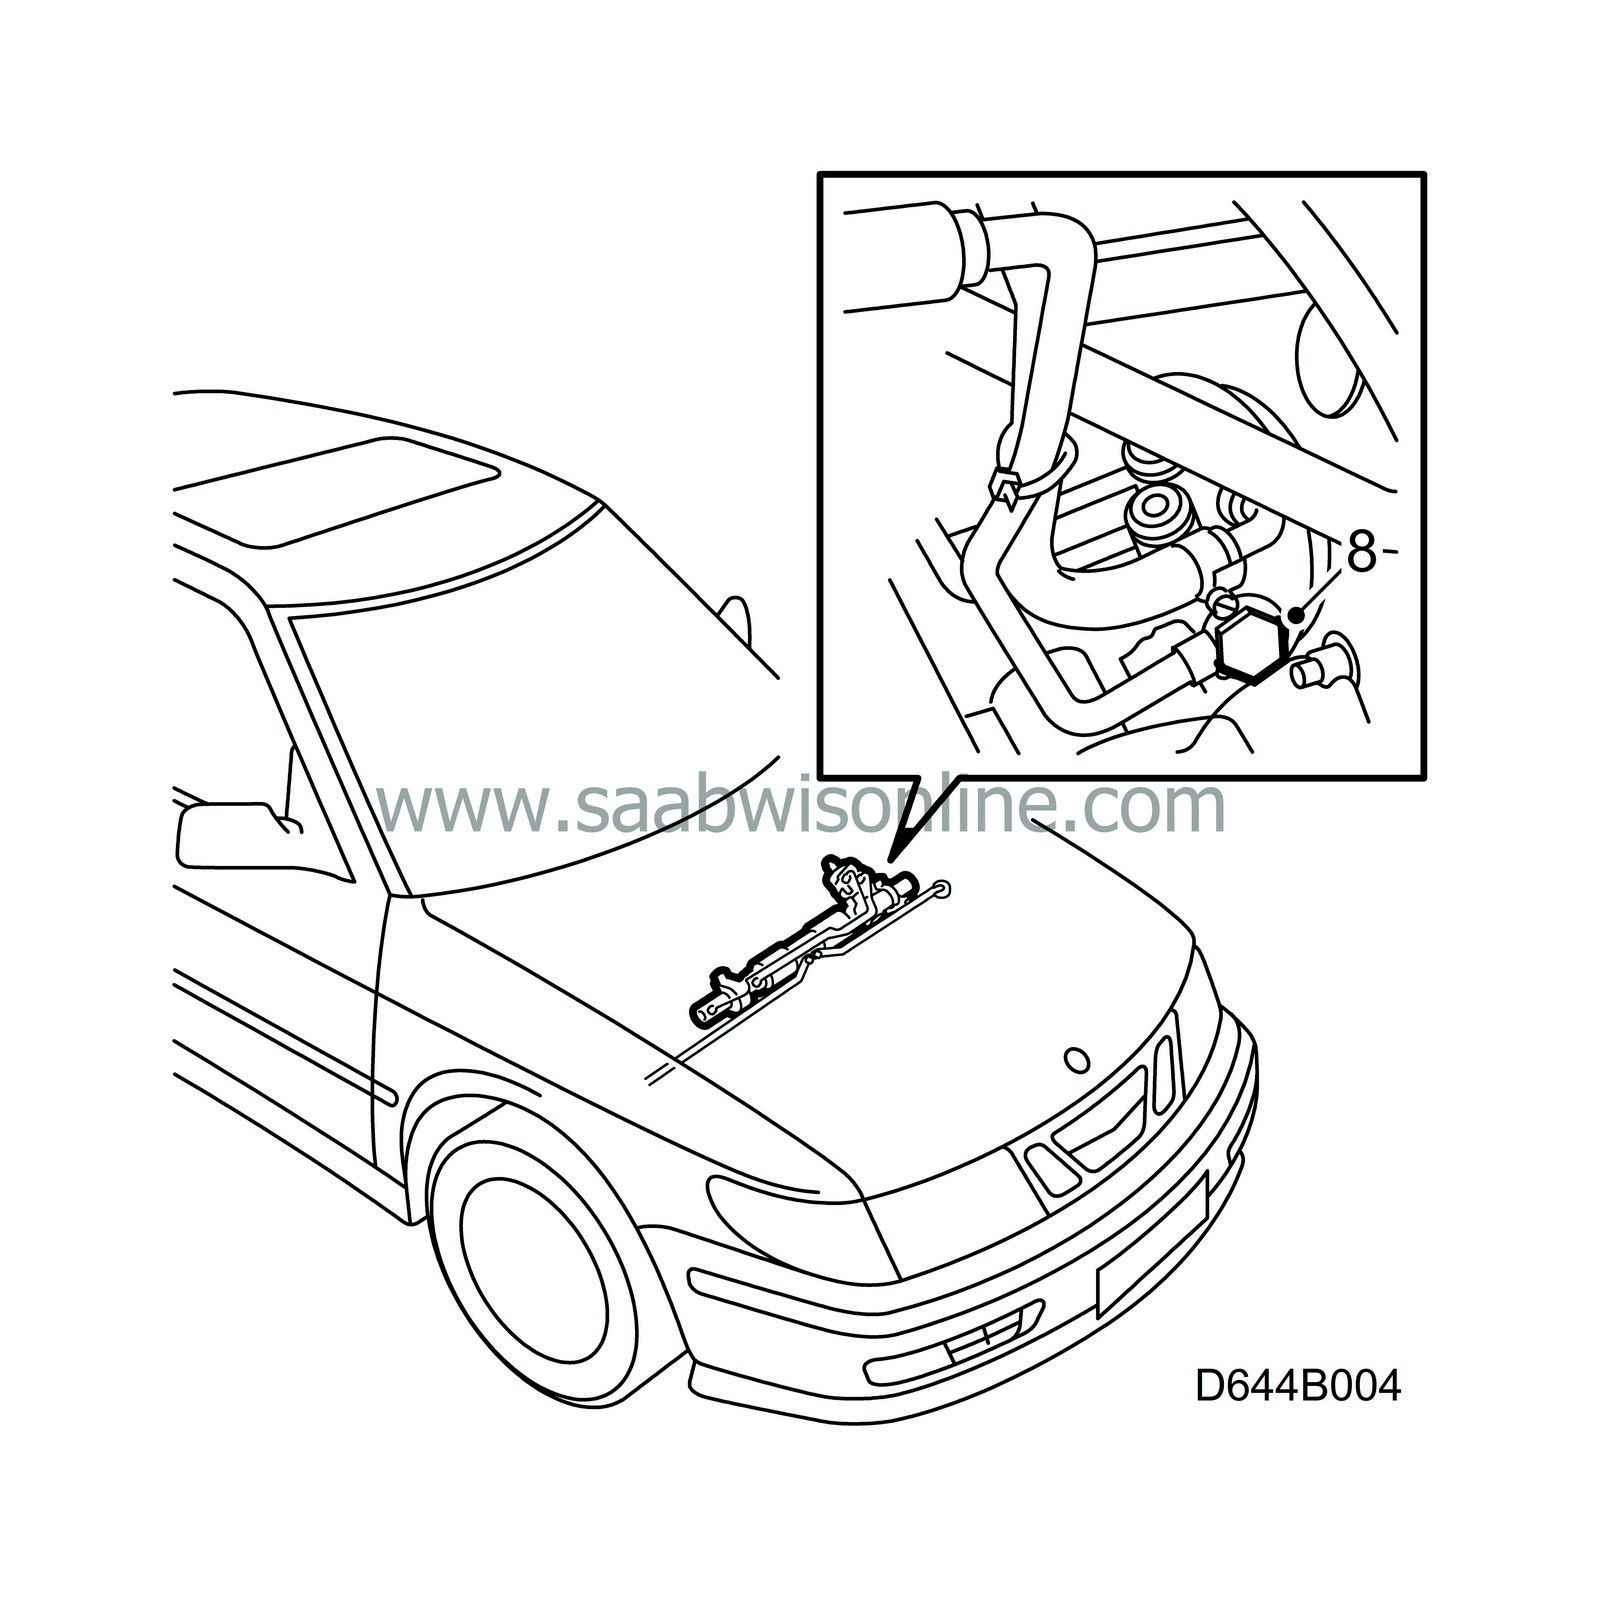
Tightening torque: 24 Nm (18 lbf ft).
|
|
9.
|
Fit the main fuse box.
|
|
10.
|
Refill the system with new hydraulic fluid, in accordance with specifications.
|
Note
|
|
Always use new fluid.
|
|
Do not turn the steering wheel, as air can enter the steering gear requiring longer to purge.
|
|
|
11.
|
Run the engine for 5 seconds.
|
|
12.
|
Check the fluid level in the reservoir, and top up if necessary. At 20°C, the fluid level should be half way between the MAX and MIN marks.
|
|
13.
|
Start the engine and let it run until no more bubbles appear in the fluid reservoir. Use a torch to be able to see properly.
Abnormal noise from the pump is an indication that there is still air in the system.
|
|
14.
|
Switch of the engine and check the fluid level. Top up if necessary.
|
|
15.
|
Check for leakage around the connectors on the steering gear.
|
|
16.
|
Wipe up any spilt fluid.
|
RHD:
|
1.
|
2.0i:
Undo the connector from the mass air flow sensor. Remove the resonator and mass air flow sensor.
Turbo engine:
Remove the plastic cover from the inlet manifold.
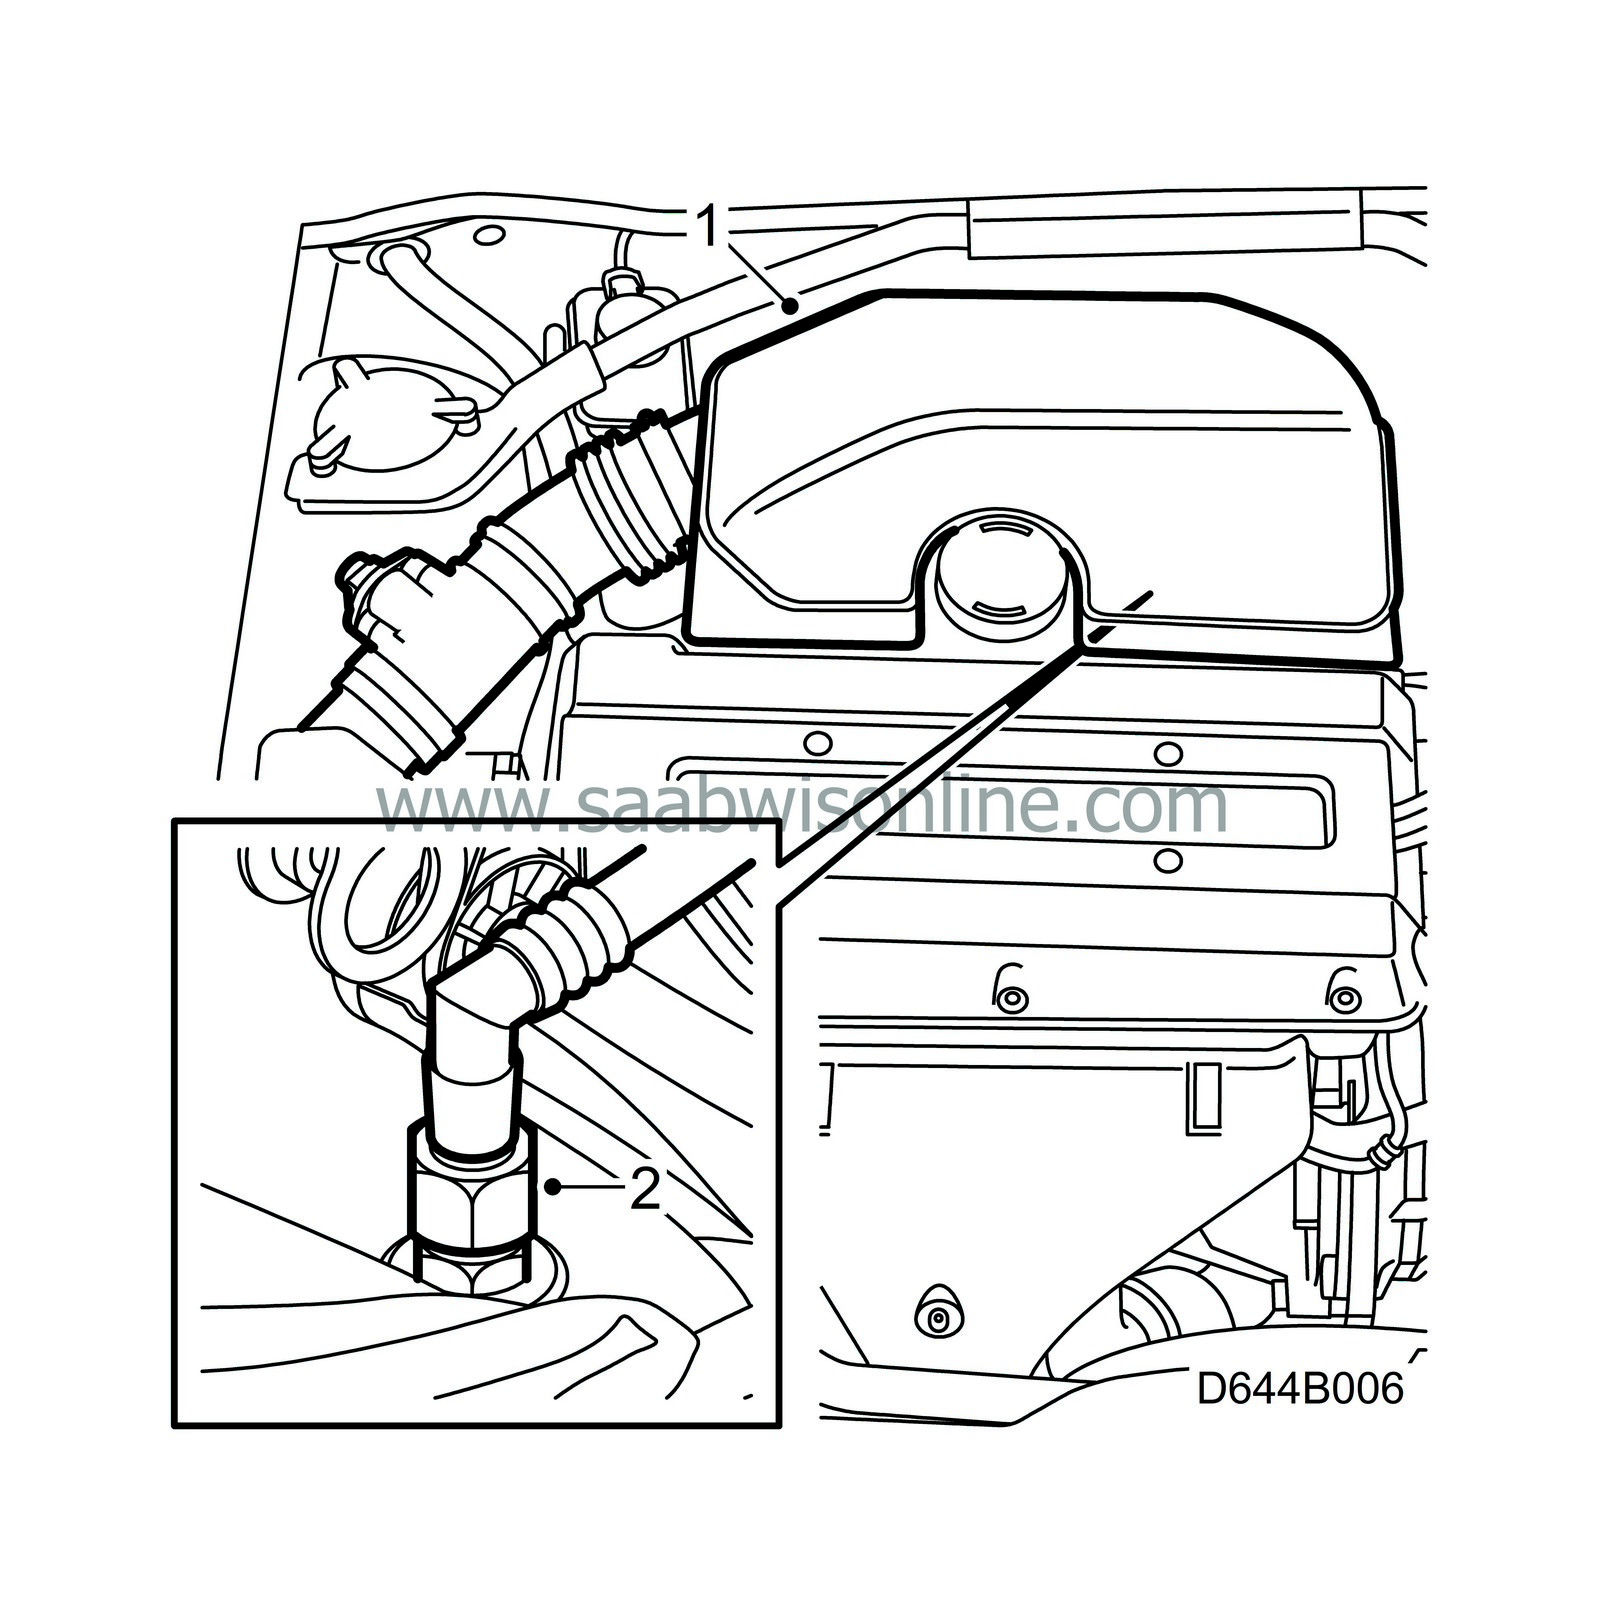
|
|
2.
|
Disconnect and bend aside the vacuum pipe from the intake manifold so as not to damage the nipple.
|
|
3.
|
Clean around the banjo nipple.
|
|
4.
|
Place a rag under the connection, to collect any fluid.
|
|
5.
|
Pinch off the return hose with hose clip pliers 30 07 739. Remove the return hose from the steering gear.
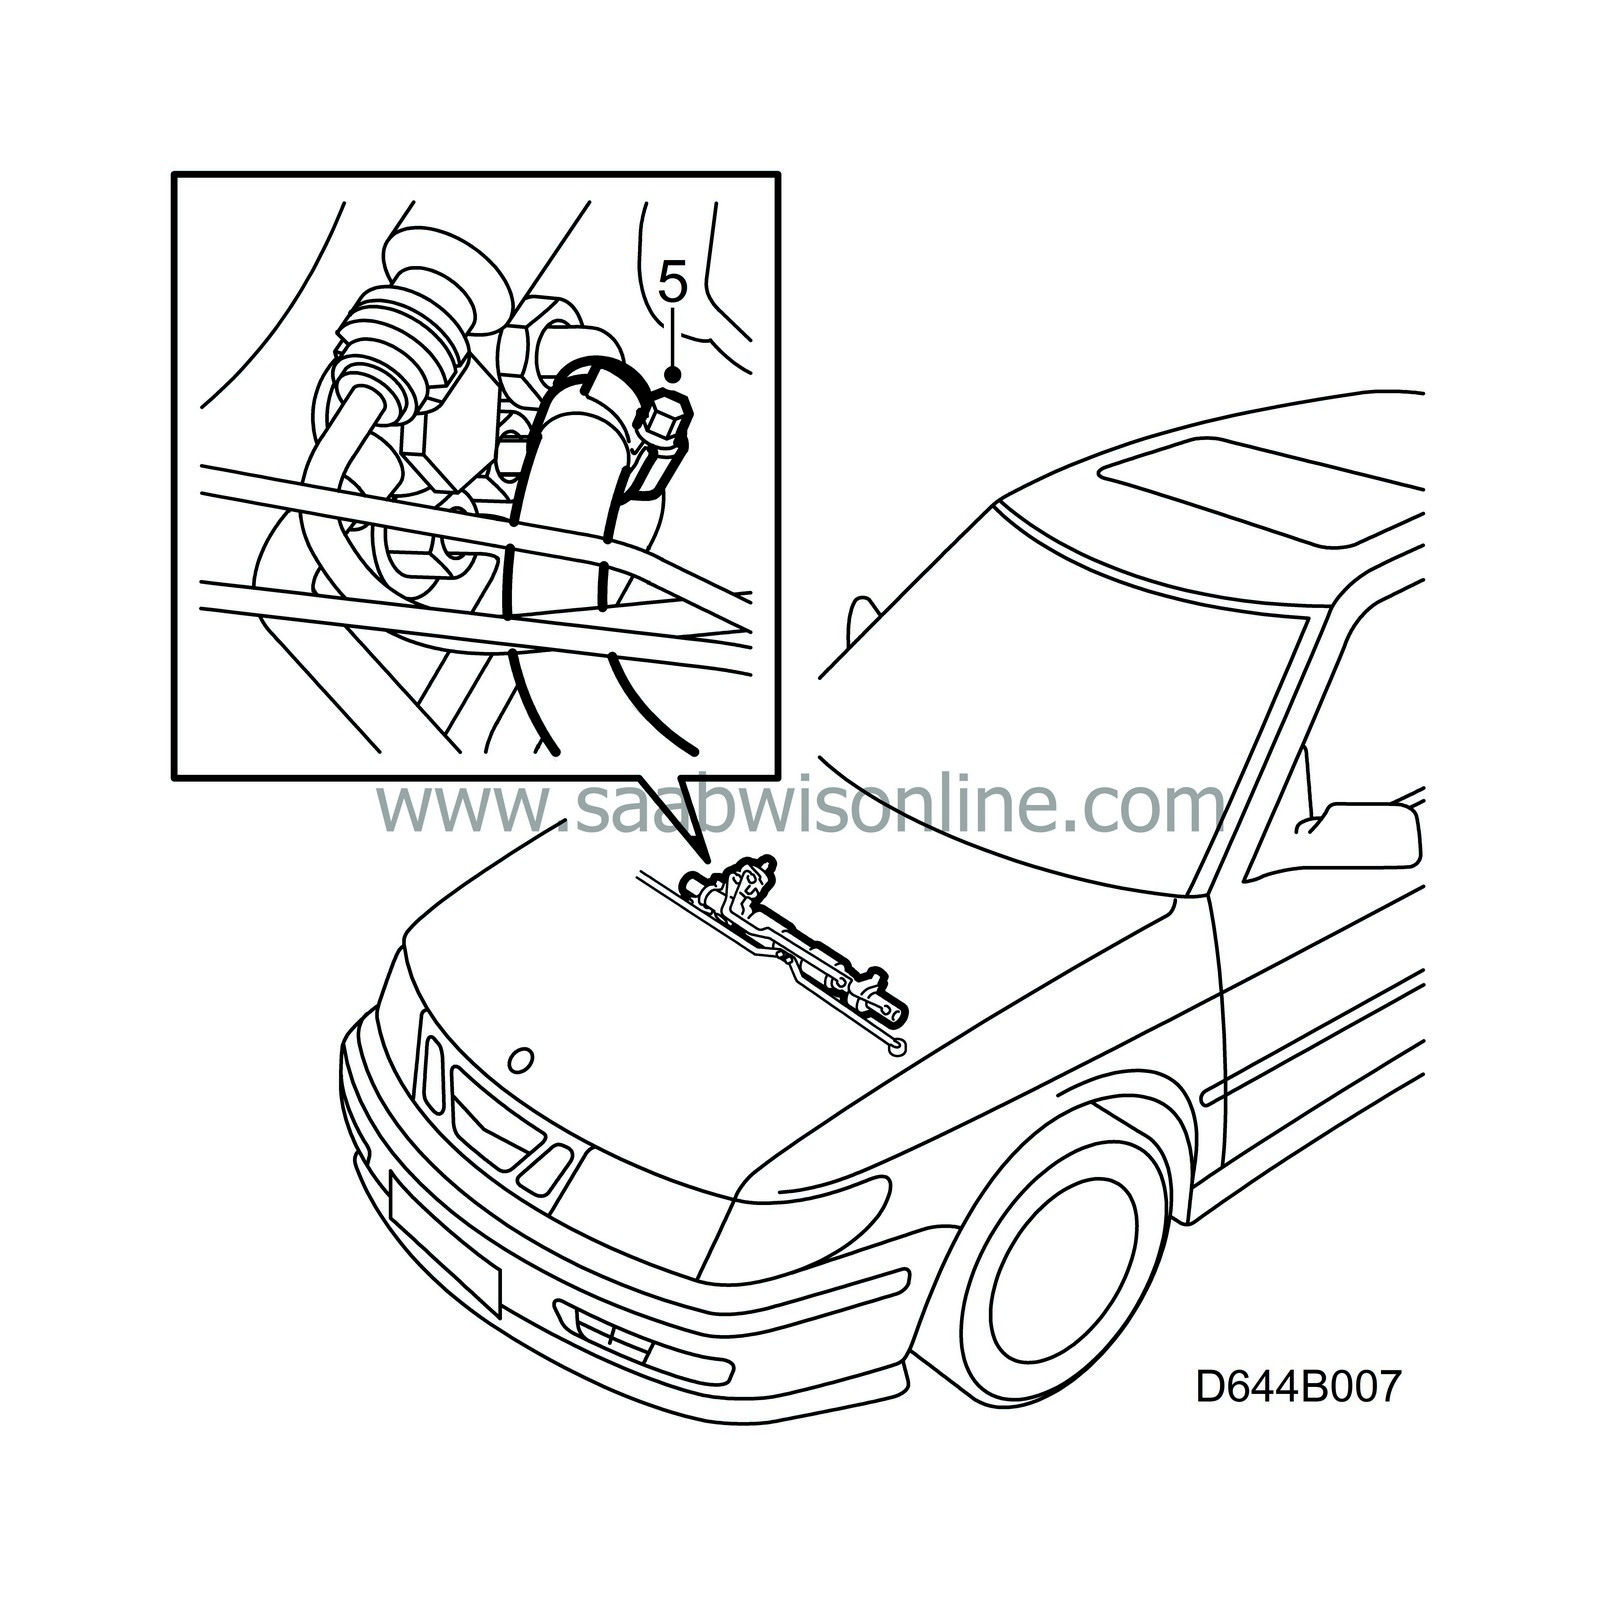
Bend the hose aside.
|
Note
|
|
Cars with manual gearbox:
Take care not to damage the master clutch cylinder.
|
|
|
6.
|
Undo the delivery pipe banjo nipple using special tool 89 96 852.
|
|
7.
|
Remove the banjo nipple and seal from the delivery pipe.
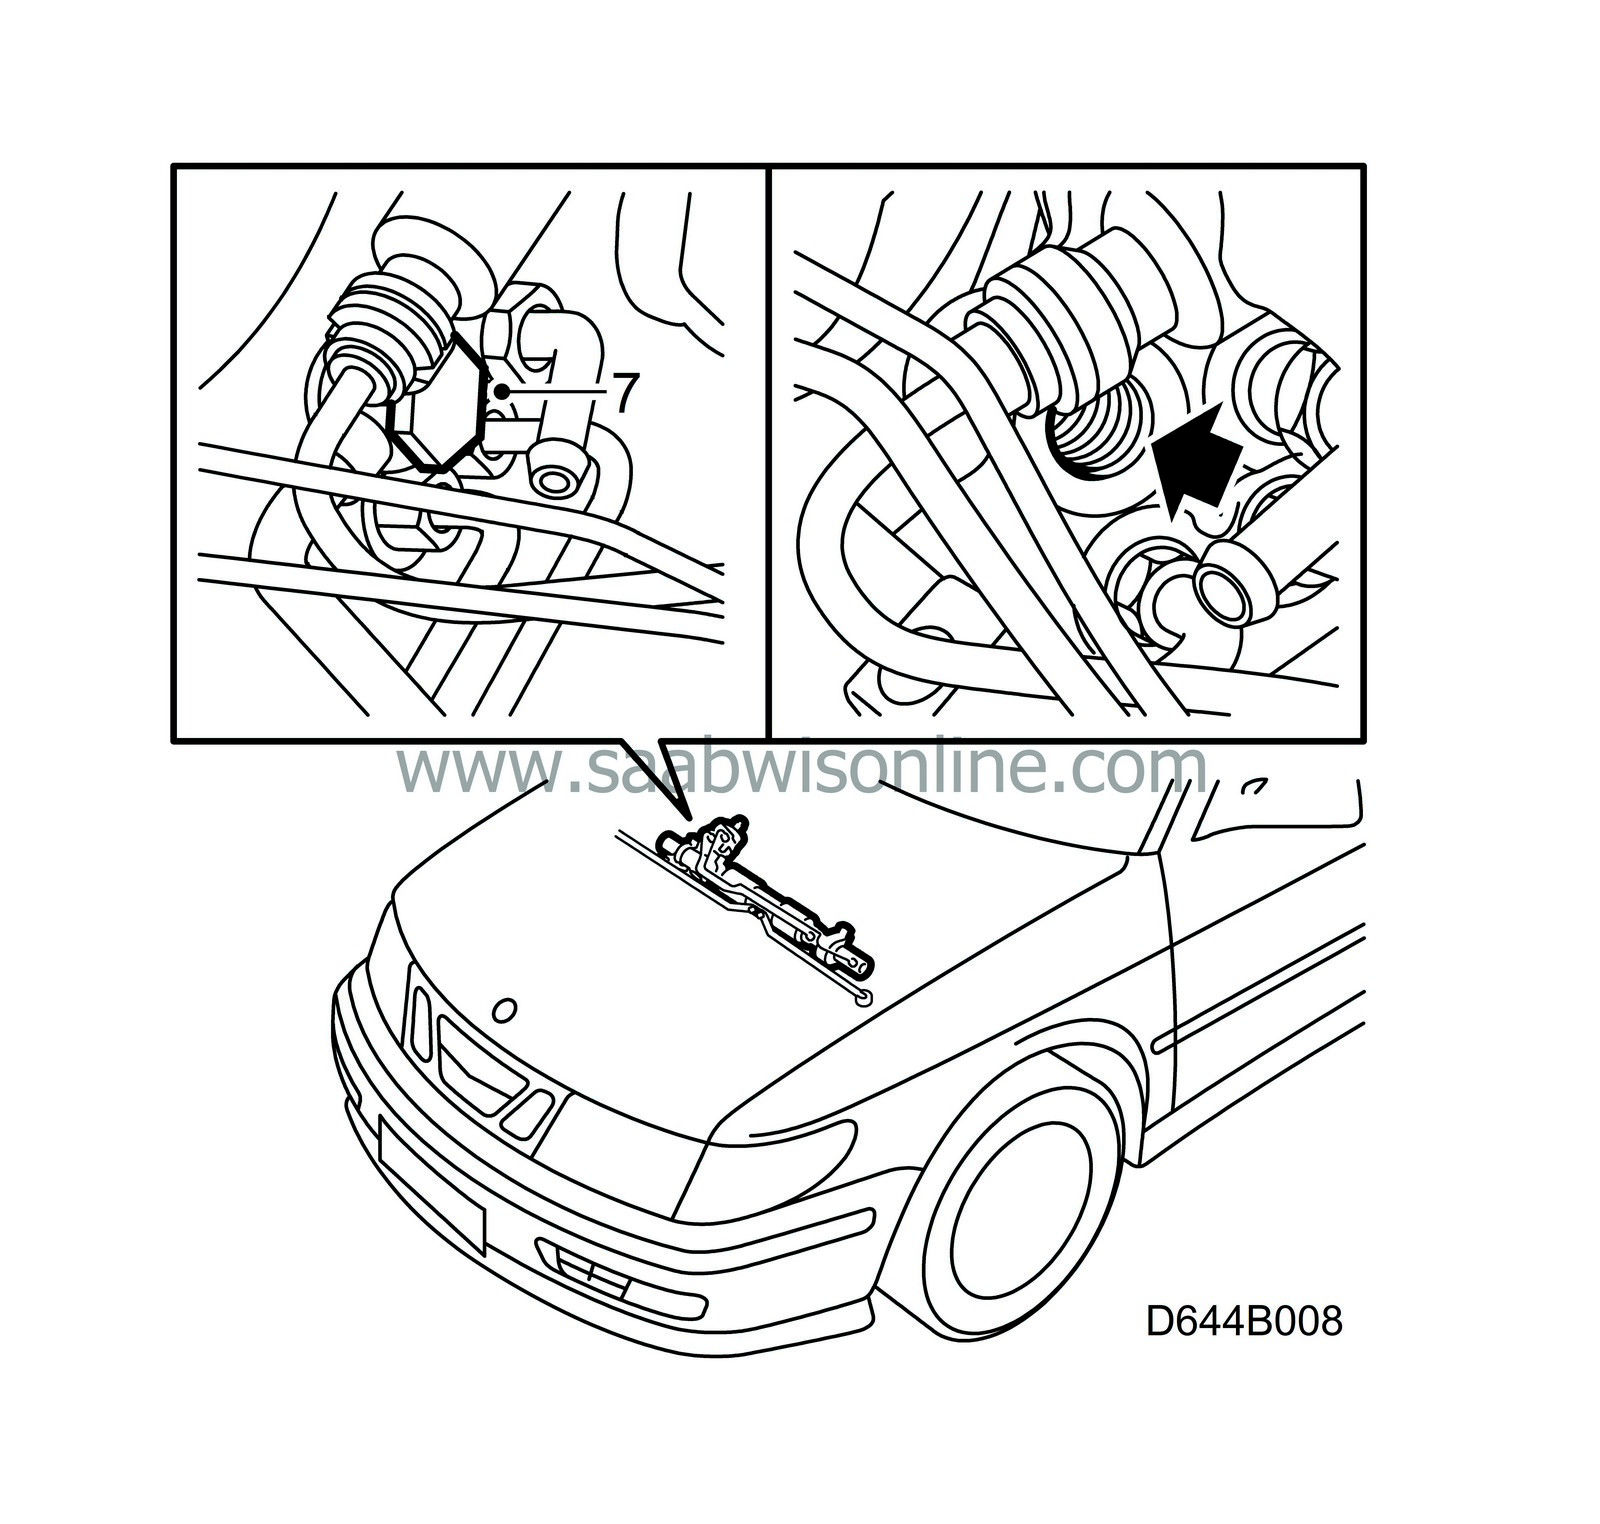
|
Note
|
|
Make sure the check valve is not still connected to the steering gear. If necessary, remove the check valve before the new banjo nipple is fitted.
|
|
|
8.
|
Fit the new banjo nipple and new seal to the delivery pipe.
|
|
9.
|
Tighten the banjo nipple to the steering gear.
Tightening torque: 24 Nm (18 lbf ft).
|
|
10.
|
Fit the return hose to the return pipe and tighten the hose clamp.
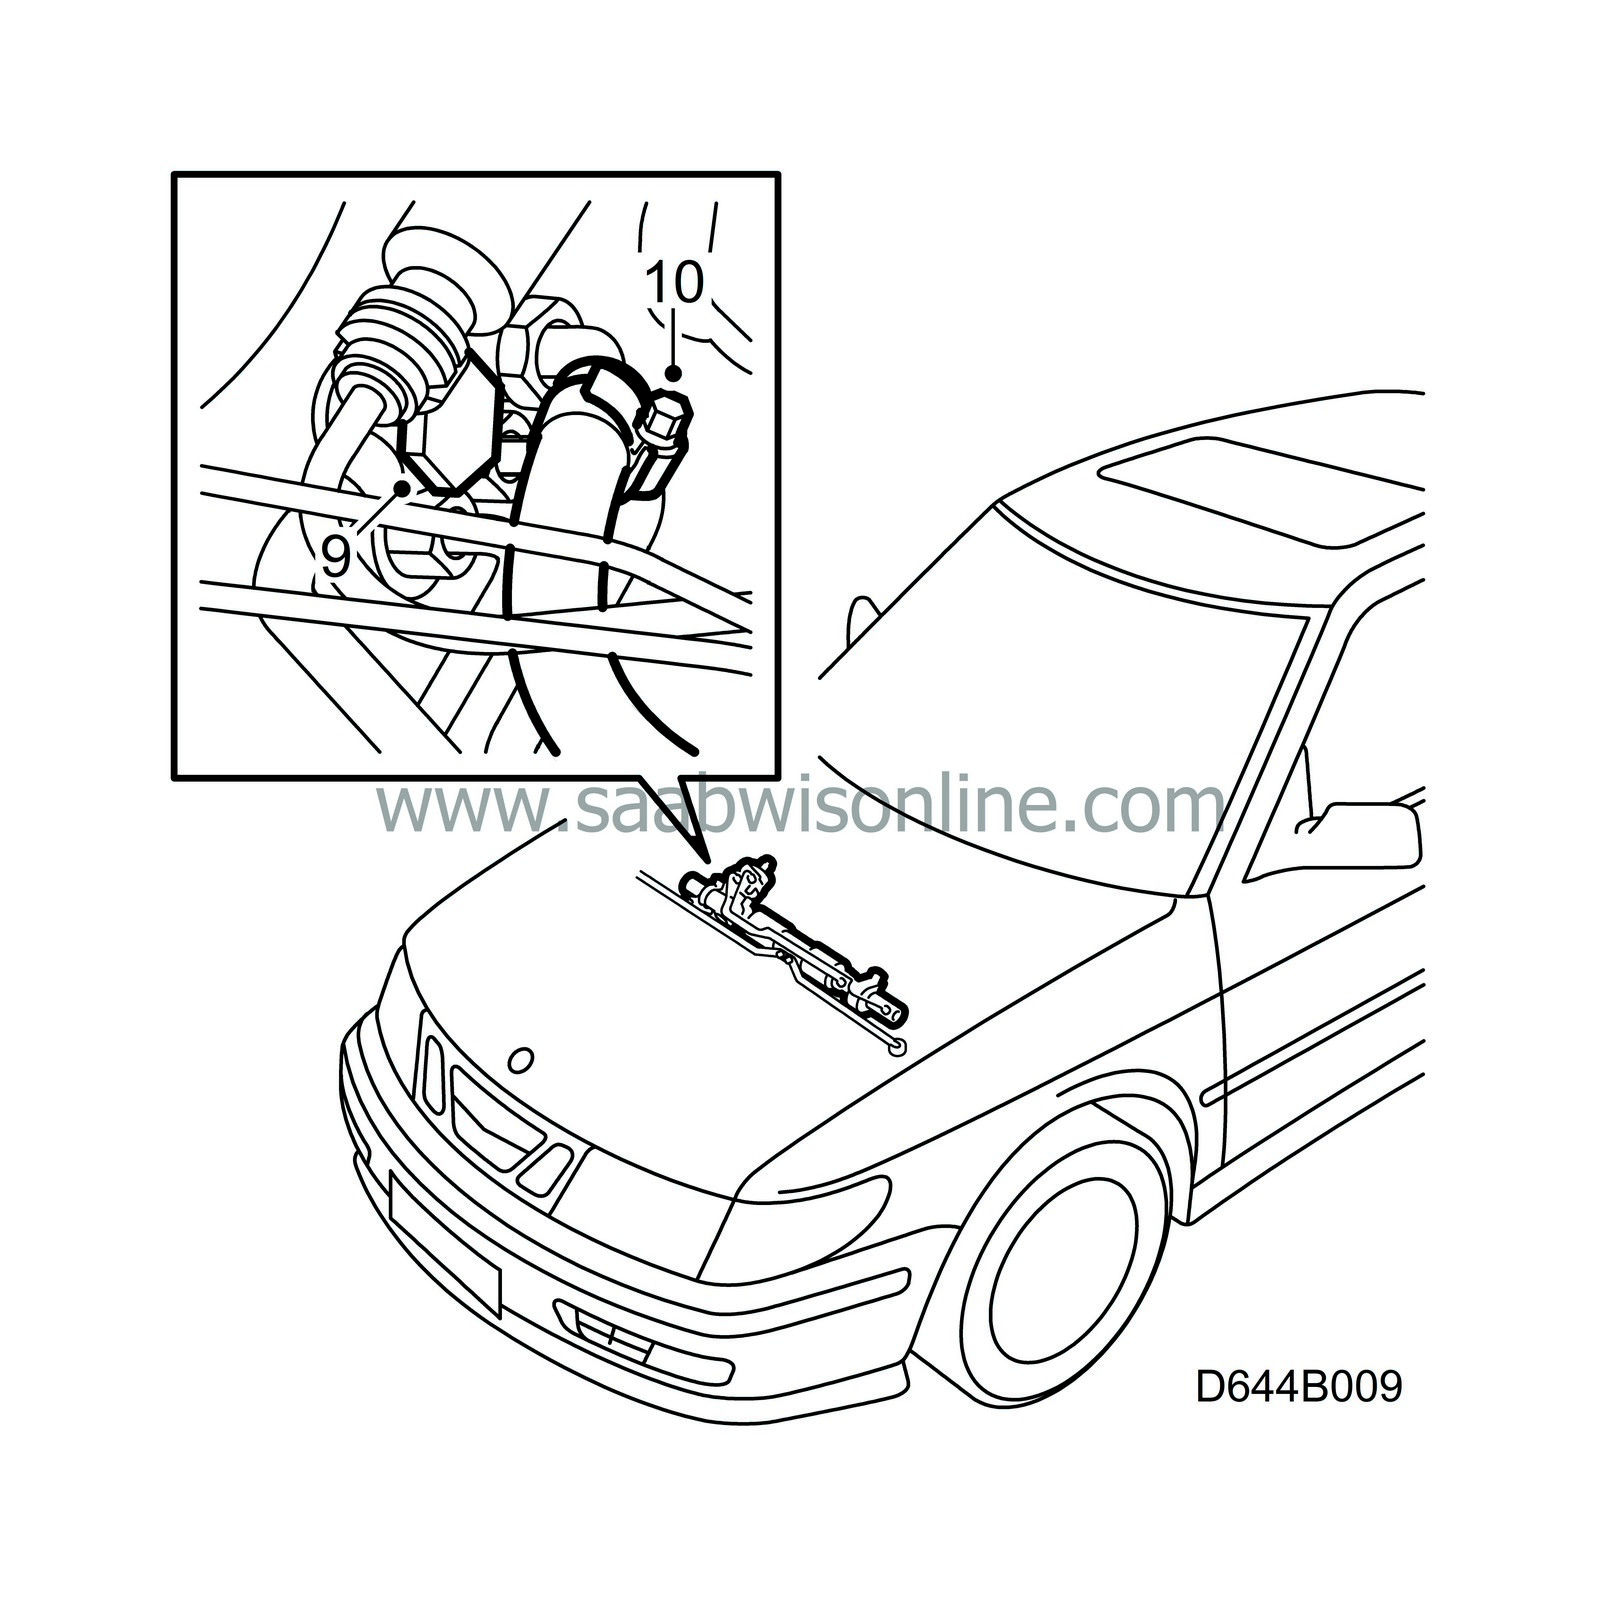
|
|
11.
|
Fit the vacuum pipe to the inlet manifold.
Tightening torque: 20 Nm (15 lbf ft).
|
|
12.
|
2.0i:
Fit the resonator and mass air flow sensor. Plug in the mass air flow sensor connector.
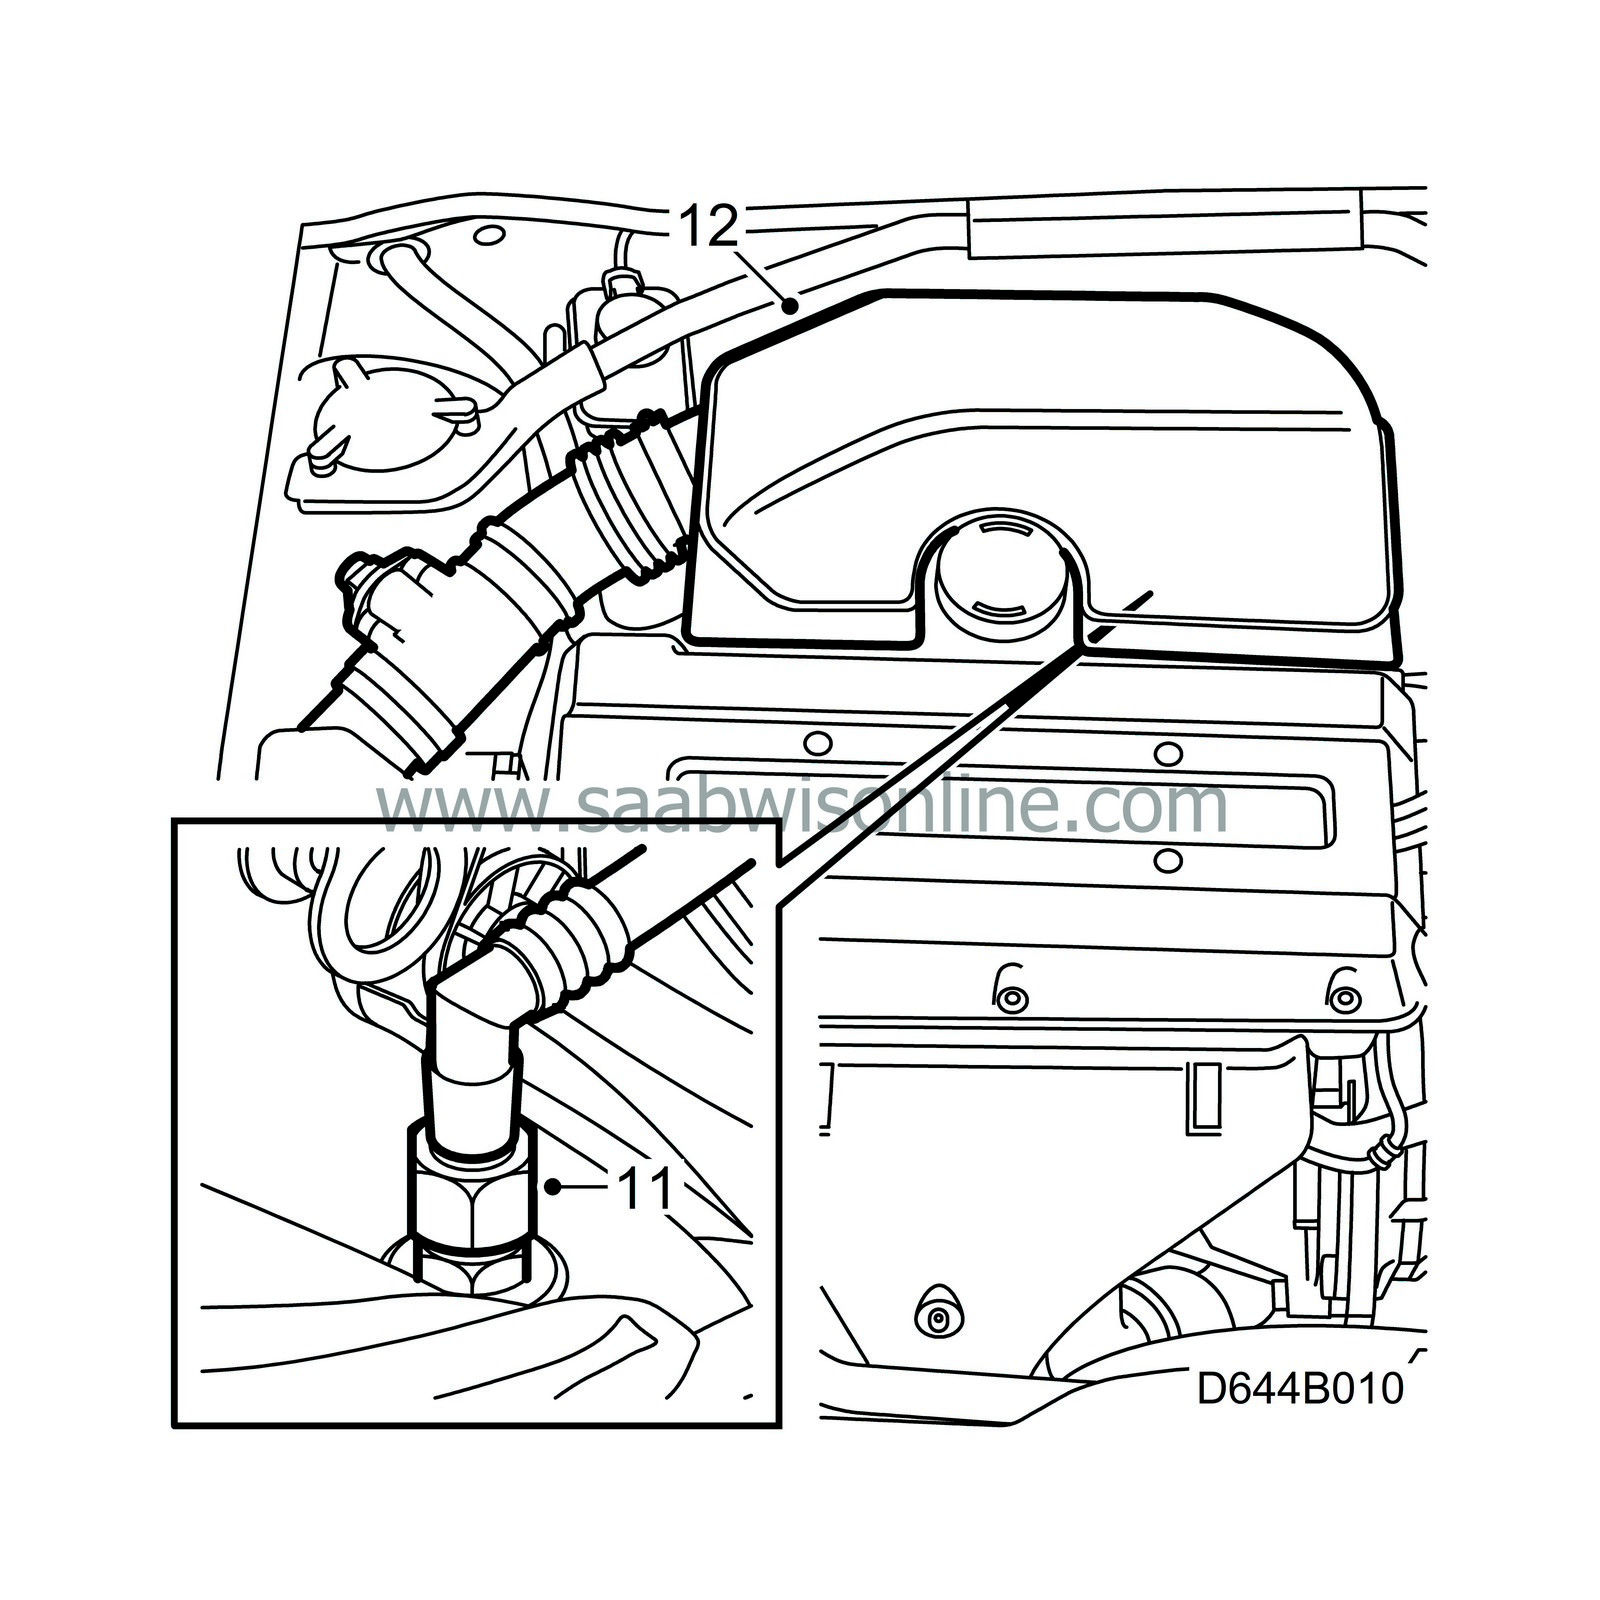
Turbo engine:
Fit the plastic cover to the inlet manifold.
|
|
13.
|
Refill the system with new hydraulic fluid, in accordance with specifications.
|
Note
|
|
Always use new fluid.
|
|
Do not turn the steering wheel, as air can enter the steering gear requiring longer to purge.
|
|
|
14.
|
Run the engine for 5 seconds.
|
|
15.
|
Check the fluid level in the reservoir, and top up if necessary. At 20°C, the fluid level should be half way between the MAX and MIN marks.
|
|
16.
|
Start the engine and let it run until no more bubbles appear in the fluid reservoir. Use a torch to be able to see properly.
Abnormal noise from the pump is an indication that there is still air in the system.
|
|
17.
|
Switch of the engine and check the fluid level. Top up if necessary.
|
|
18.
|
Check for leakage around the connectors on the steering gear.
|
|
19.
|
Wipe up any spilt fluid.
|
|
Marking the modification identity plate
|
On completion of the necessary rectification, box A2 on the modification identity plate must be marked. If the work is carried out by the importer, mark the box with a “7”. If done by the dealer, mark it with an “8”.
|
Warranty/Time information
|
See separate information.


