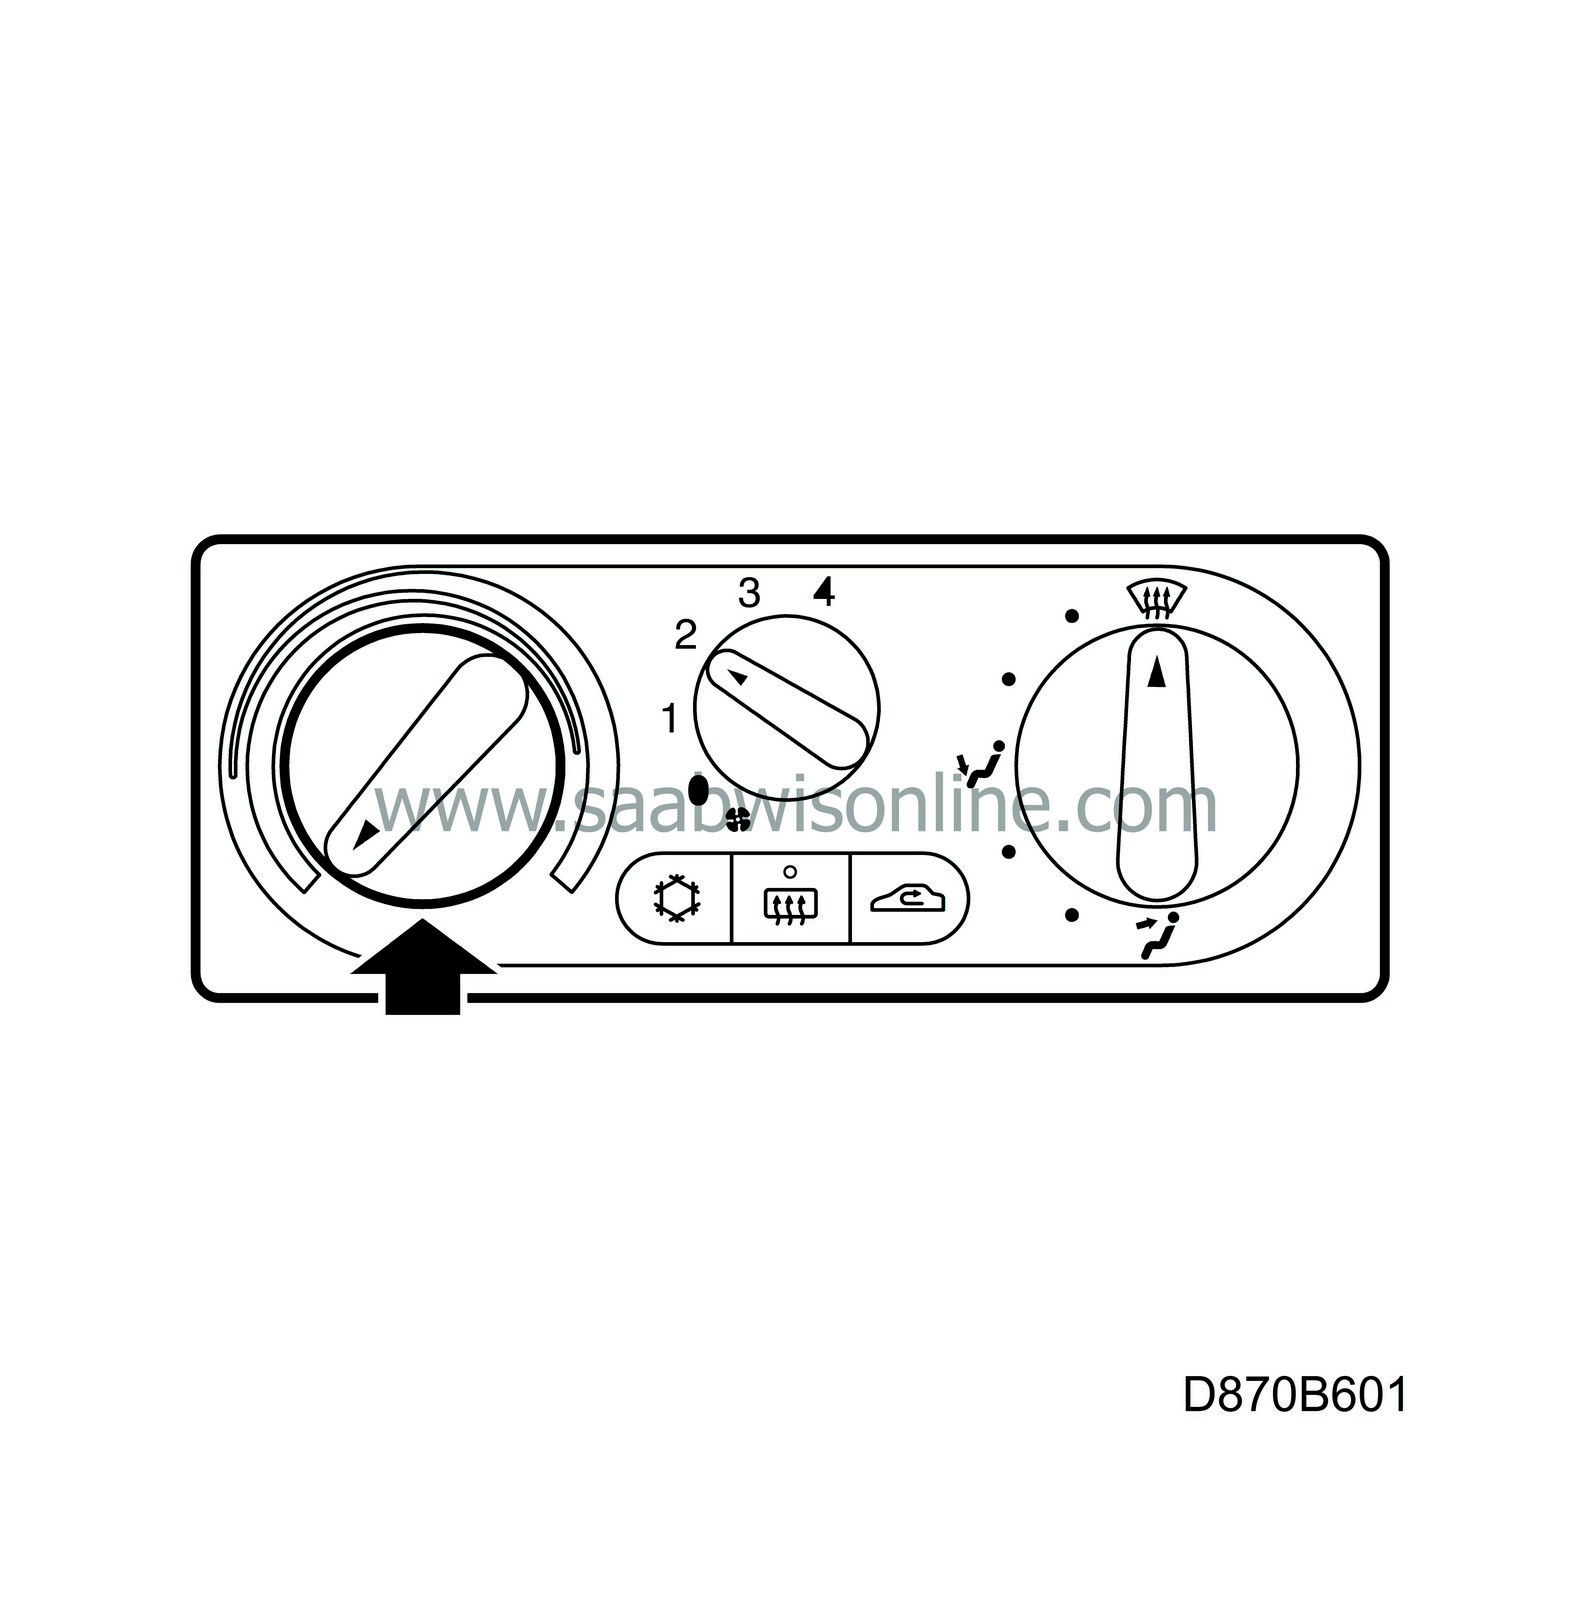
(870-2020) Problems adjusting heating
| SERVICE INFORMATION | |
| Bulletin Nbr: | 870-2020 |
| Date: ........... | SEPTEMBER 1998 |
| Market: | ALL |
| Problems adjusting heating |
| Cars affected |
All cars without ACC within VIN intervals:
W2050001 - W2053455
and
X2000001 - X2002512
| Background |
The heater temperature control cable on certain cars within the above VIN intervals could be bent or broken. This may be caused by a stiff air blending flap (heater shutter), insufficient clearance between the cable loop at the end of the cable and the pin on the lever, low safety margin (materials too close in tolerance) or a restriction in the cable sheath.
Various measures have been taken in production to solve this problem, which means that cars with VIN from W2053456 and X2002513 respectively are correct.
| Parts required |
50 45 752 Adjuster cable (CA: 306577263)
| Procedure |
| 1. |
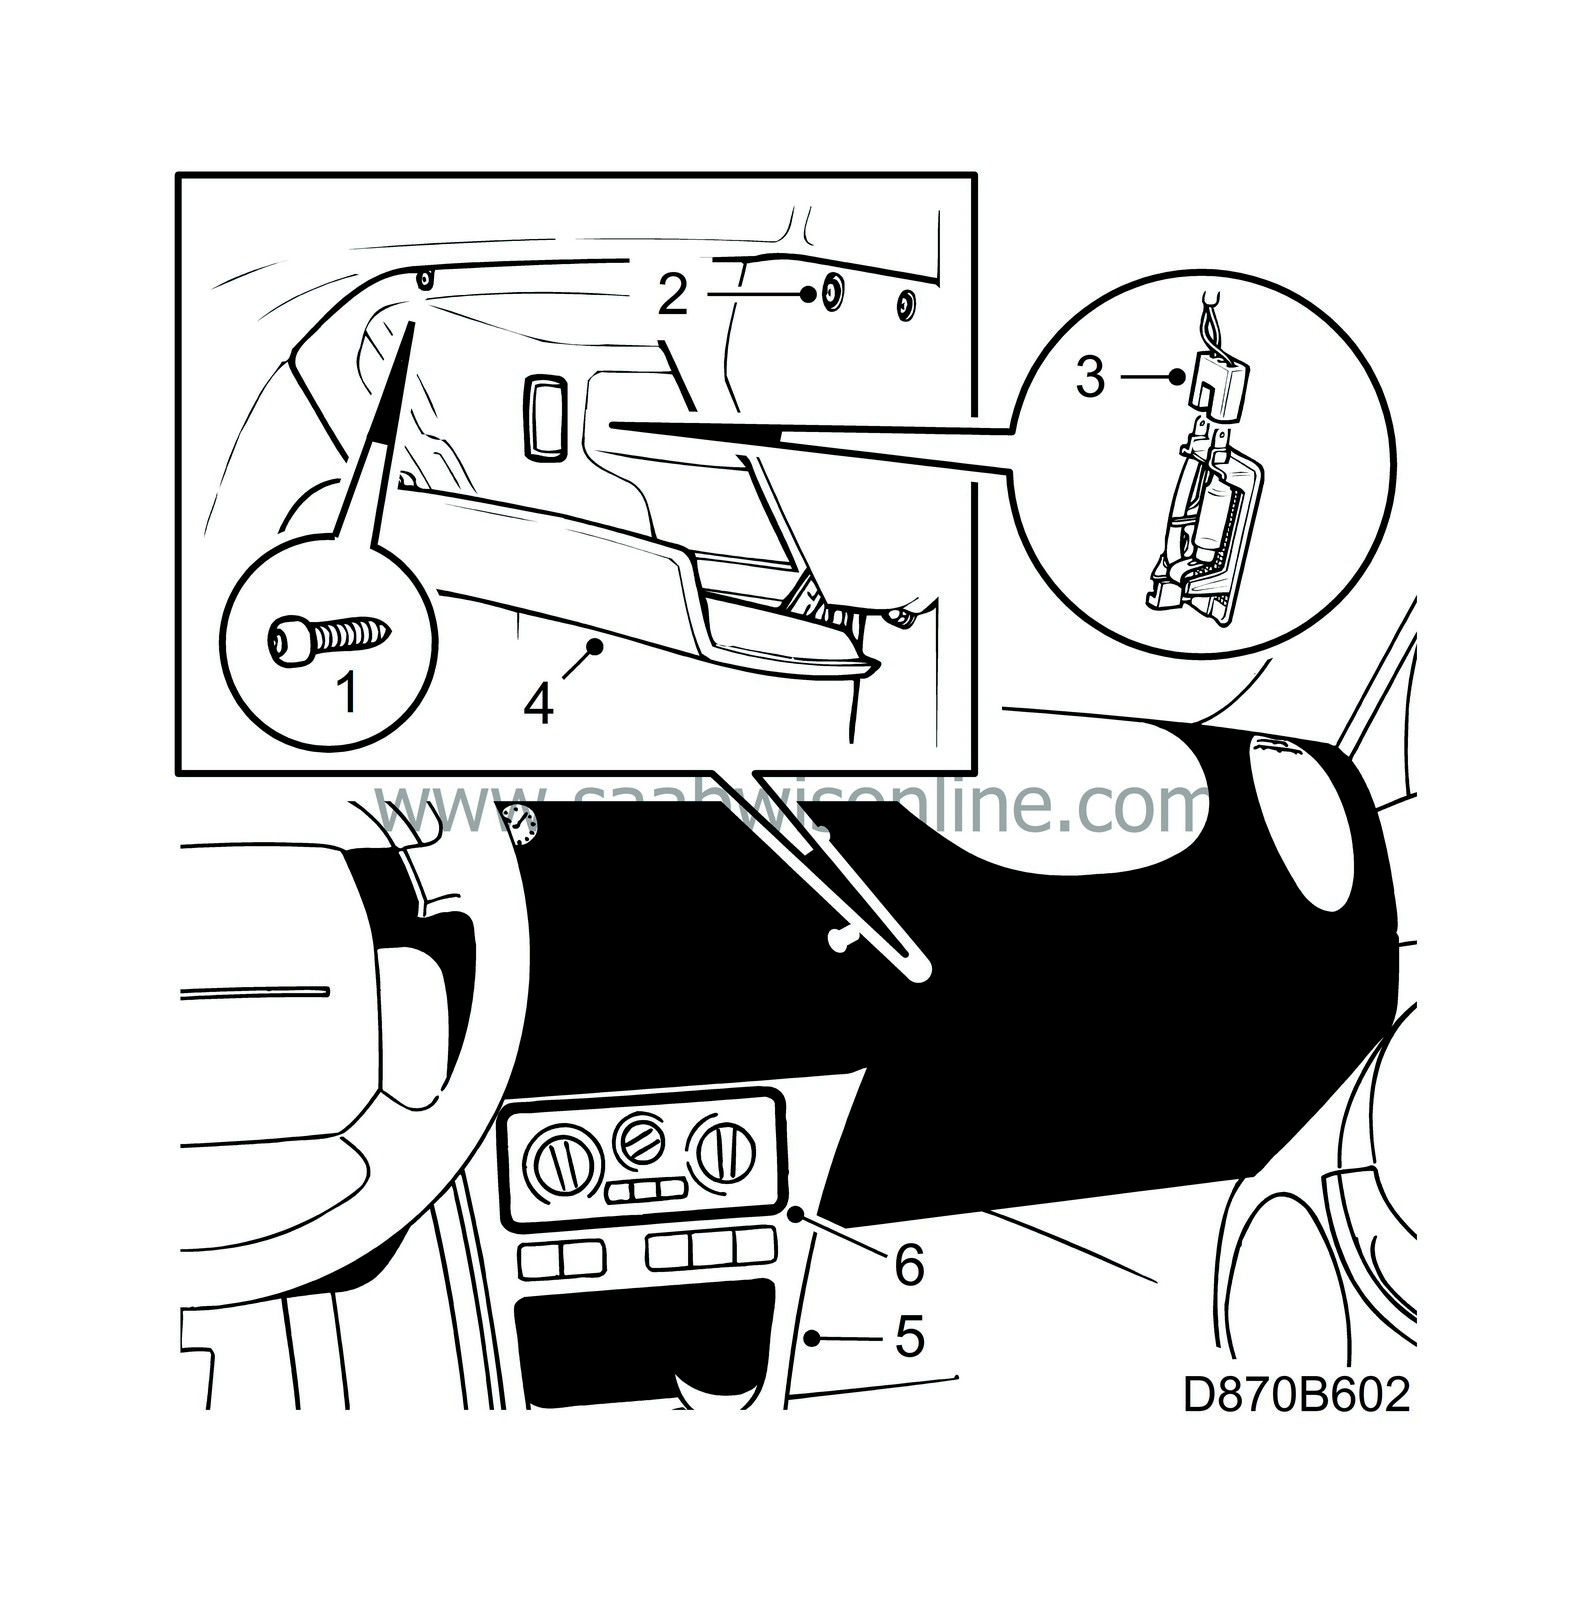
Open the glove box, open the screw covers and remove the retaining screws.
|
|
| 2. |
Remove the remaining retaining screws and the bolt as well as the expanding rivet at the front. Then, release the plastic snap fastener on the bulkhead bracket.
|
|
| 3. |
Pull out the glove box and unplug the glove box light connector.
|
|
| 4. |
Remove the glove box.
|
|
| 5. |
Remove the side panel on the right-hand side of the centre console.
|
|
| 6. |
Push out the control panel from behind and release it from the distribution control shaft.
|
|
| 7. |
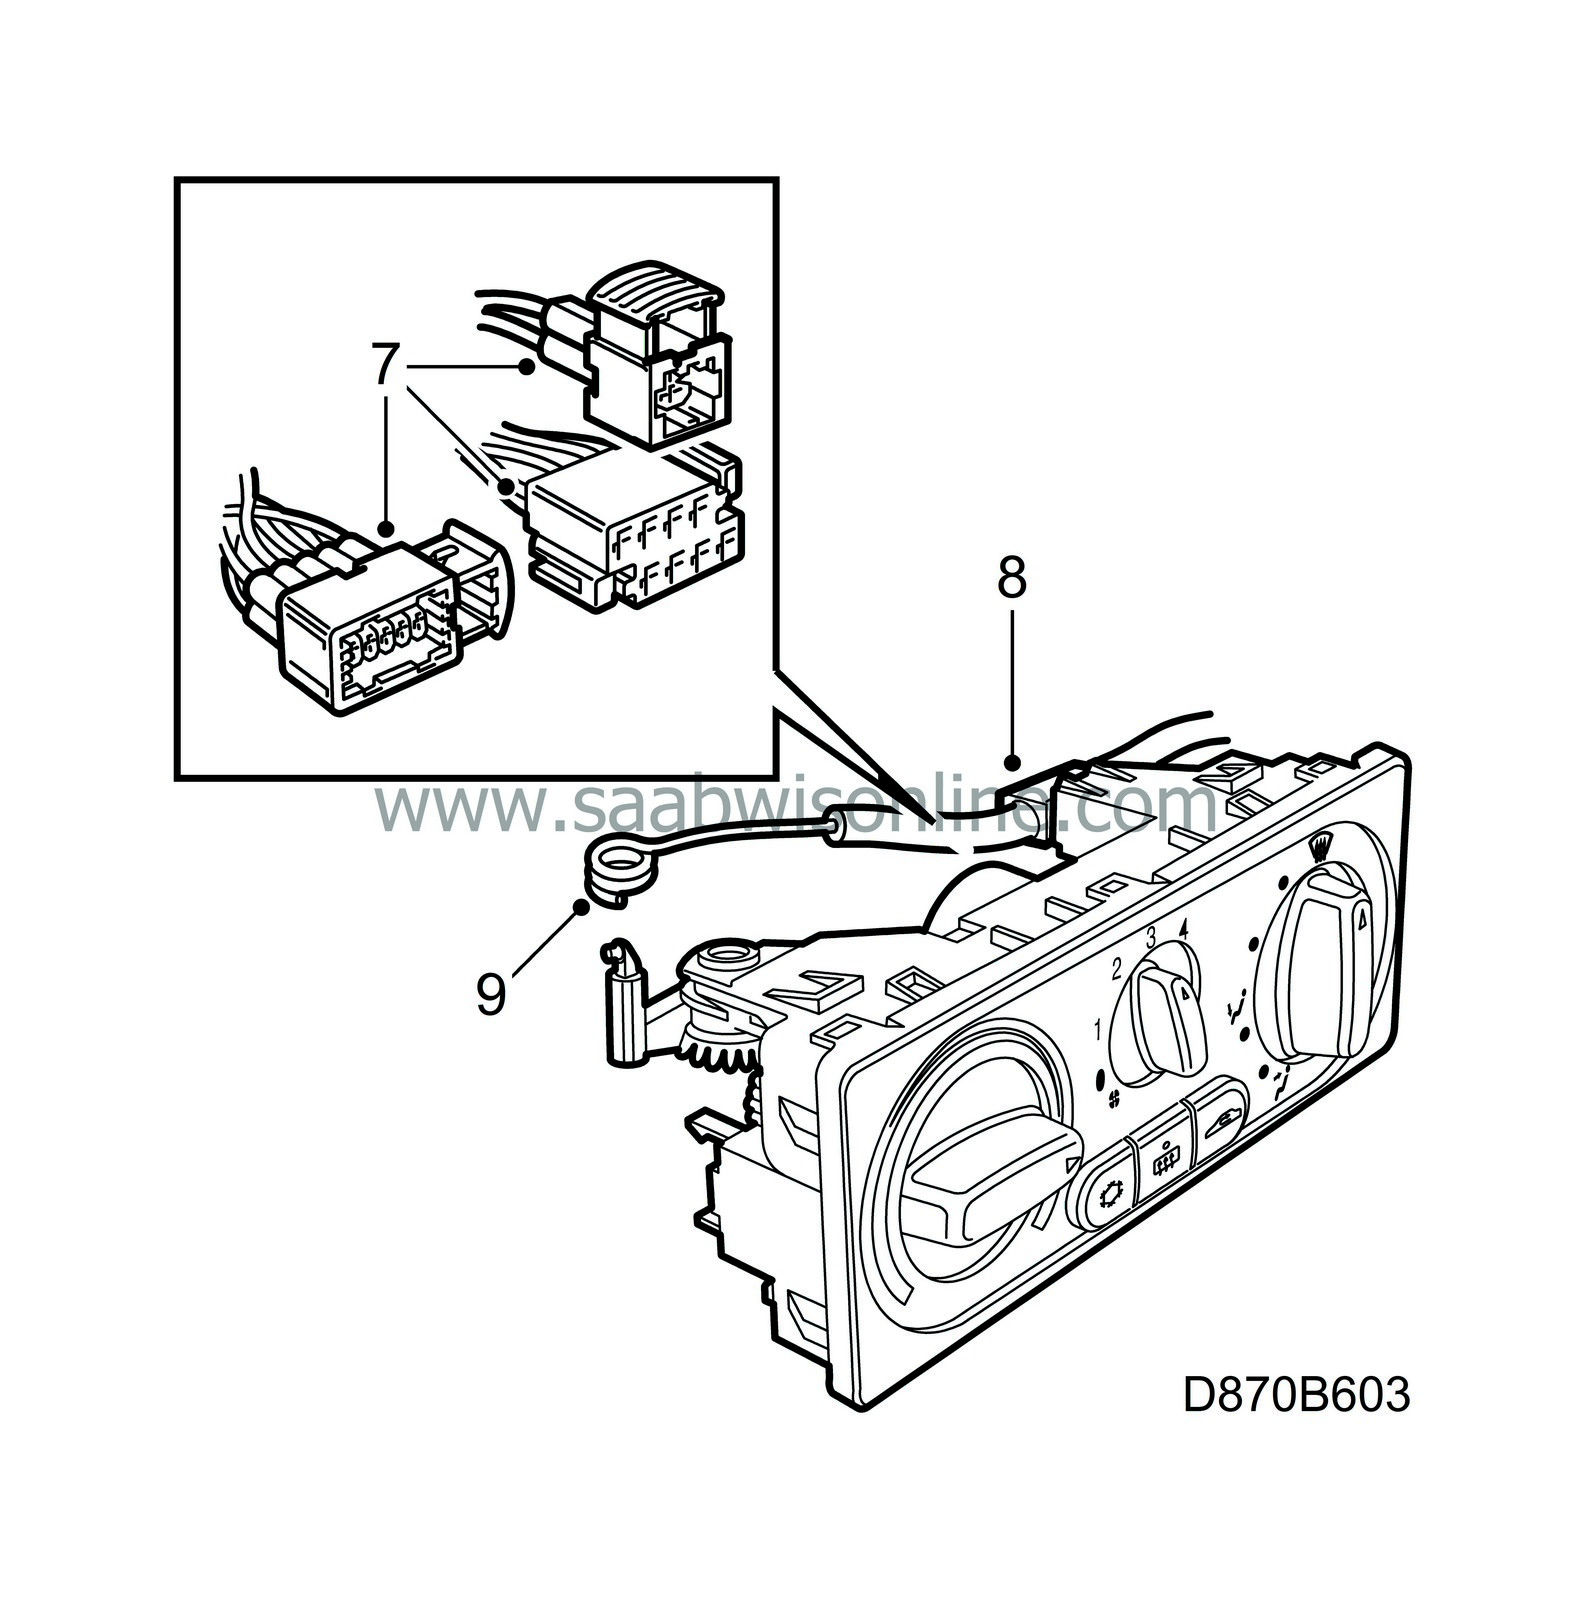
Unplug the connectors.
|
|
| 8. |
Undo the clip securing the cable to the control panel.
|
|
| 9. |
Unhook the cable loop.
|
|
| 10. |
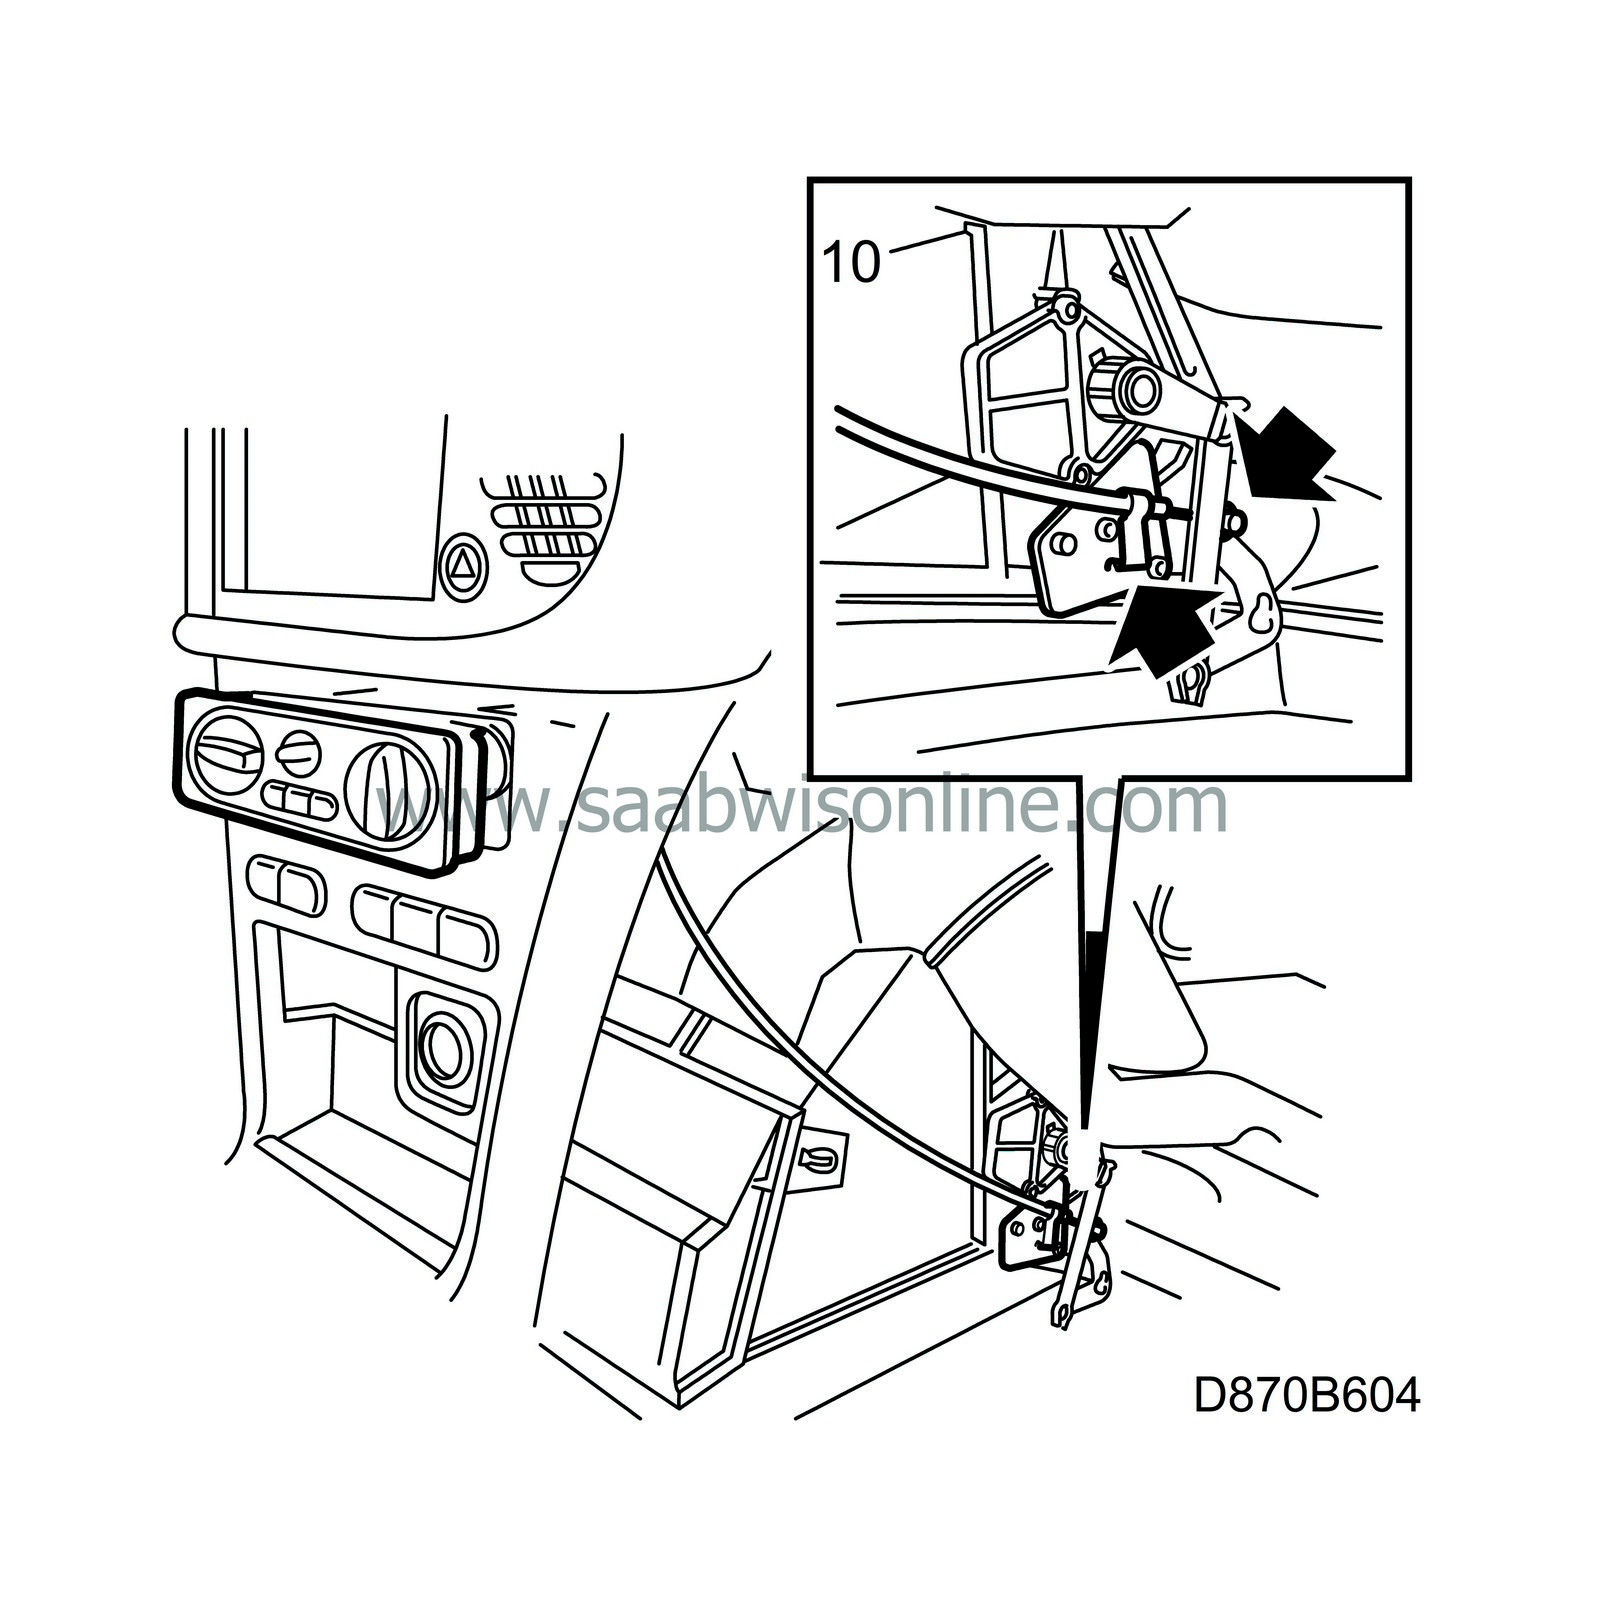
Remove both clips securing the cable to the heating and ventilation unit and remove the cable from the pin on the lever.
|
|
| 11. |
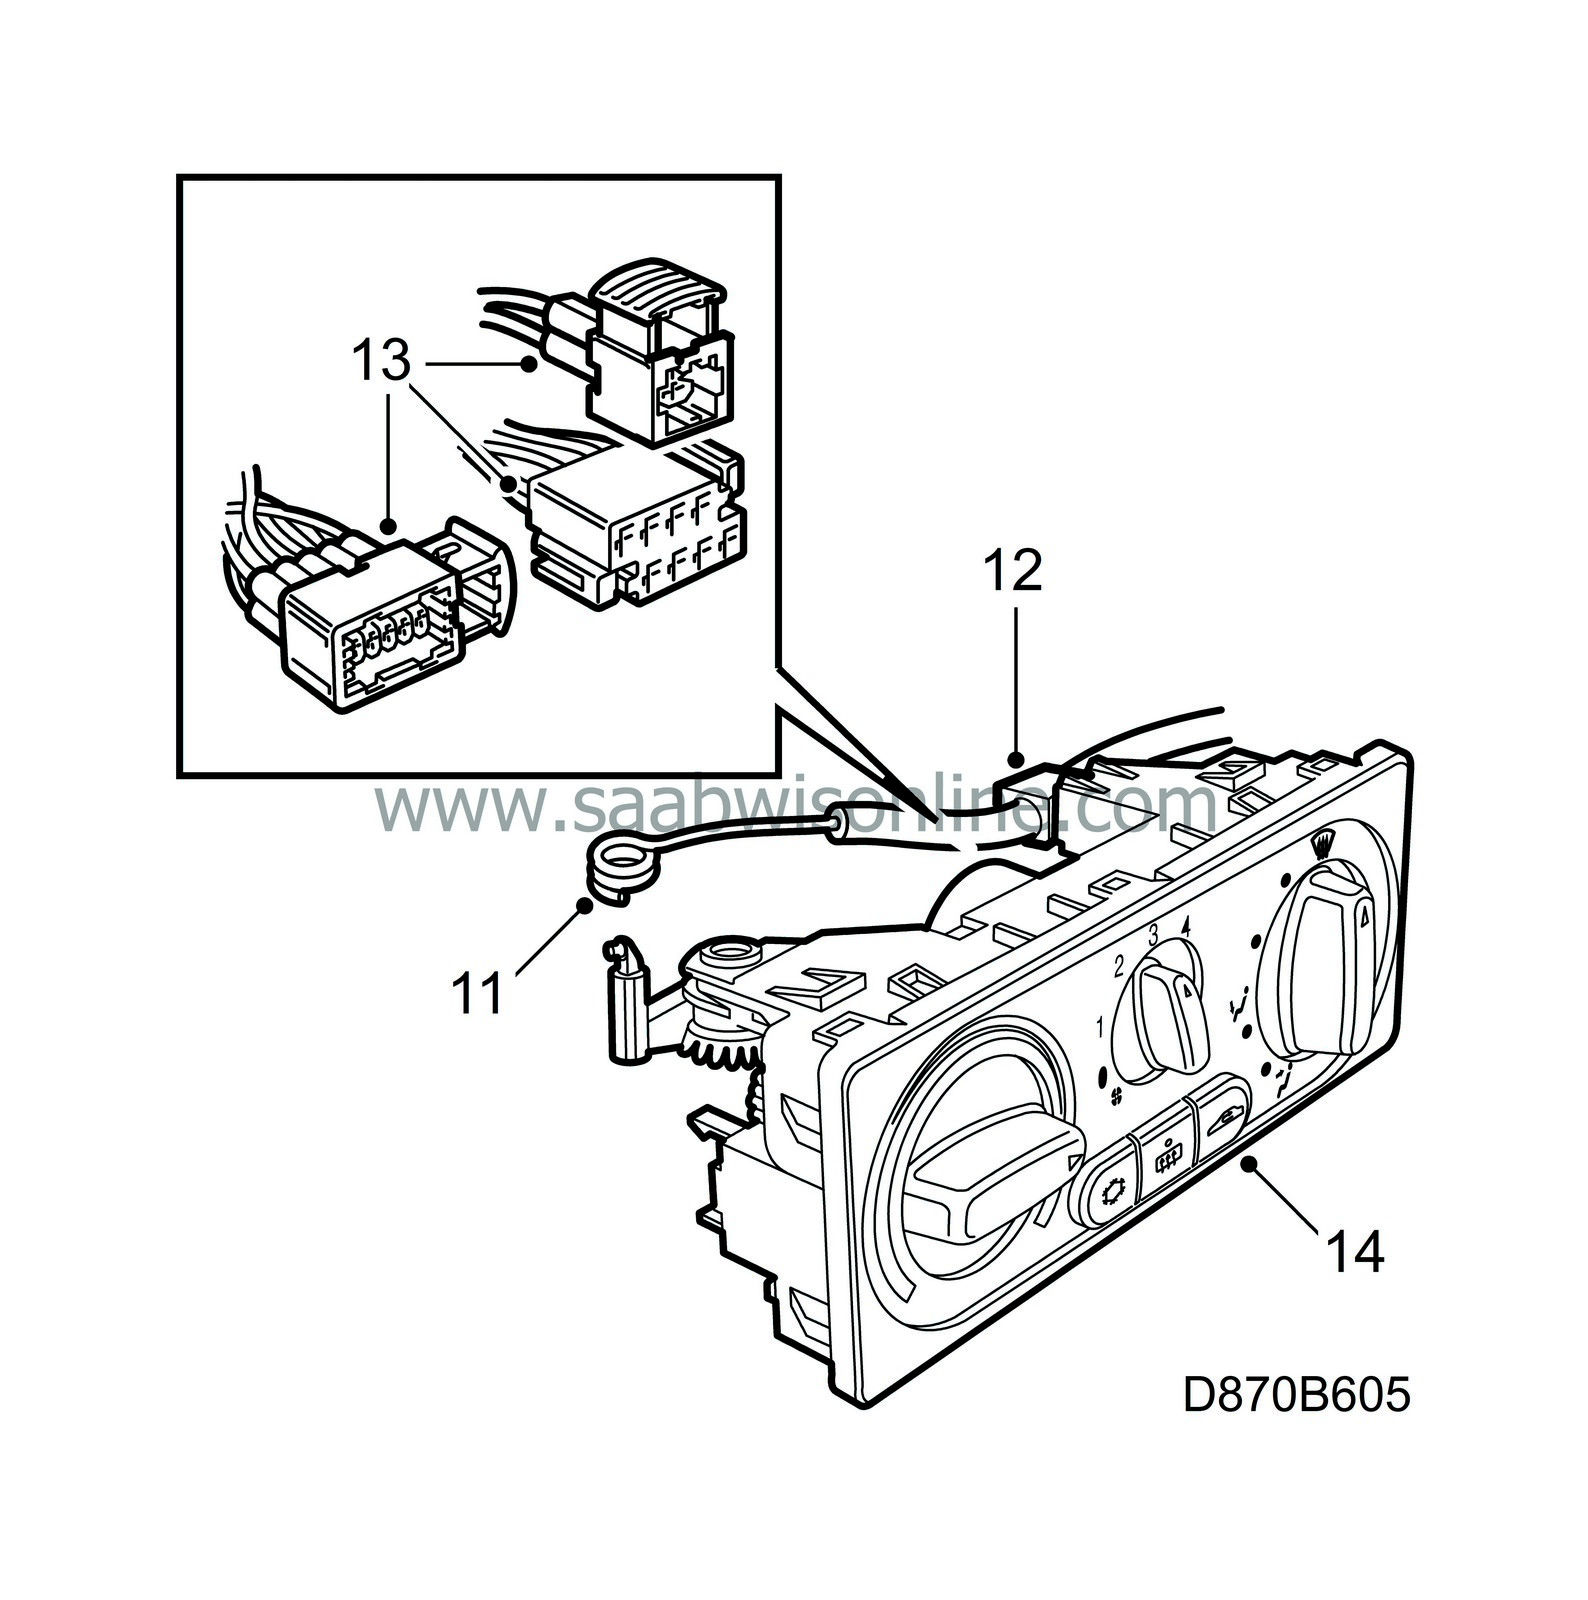
Install the new control cable in place on the back of the control panel. The cable should be on top of the distribution control shaft.
|
|
| 12. |
Fit the clip securing the cable to the control panel.
|
|
| 13. |
Plug in the connectors.
|
|
| 14. |
Put the control panel into position and fit the distribution control shaft.
|
||||||||||
| 15. |
Put the cable in place on the air-blending flap lever.
|
|
| 16. |
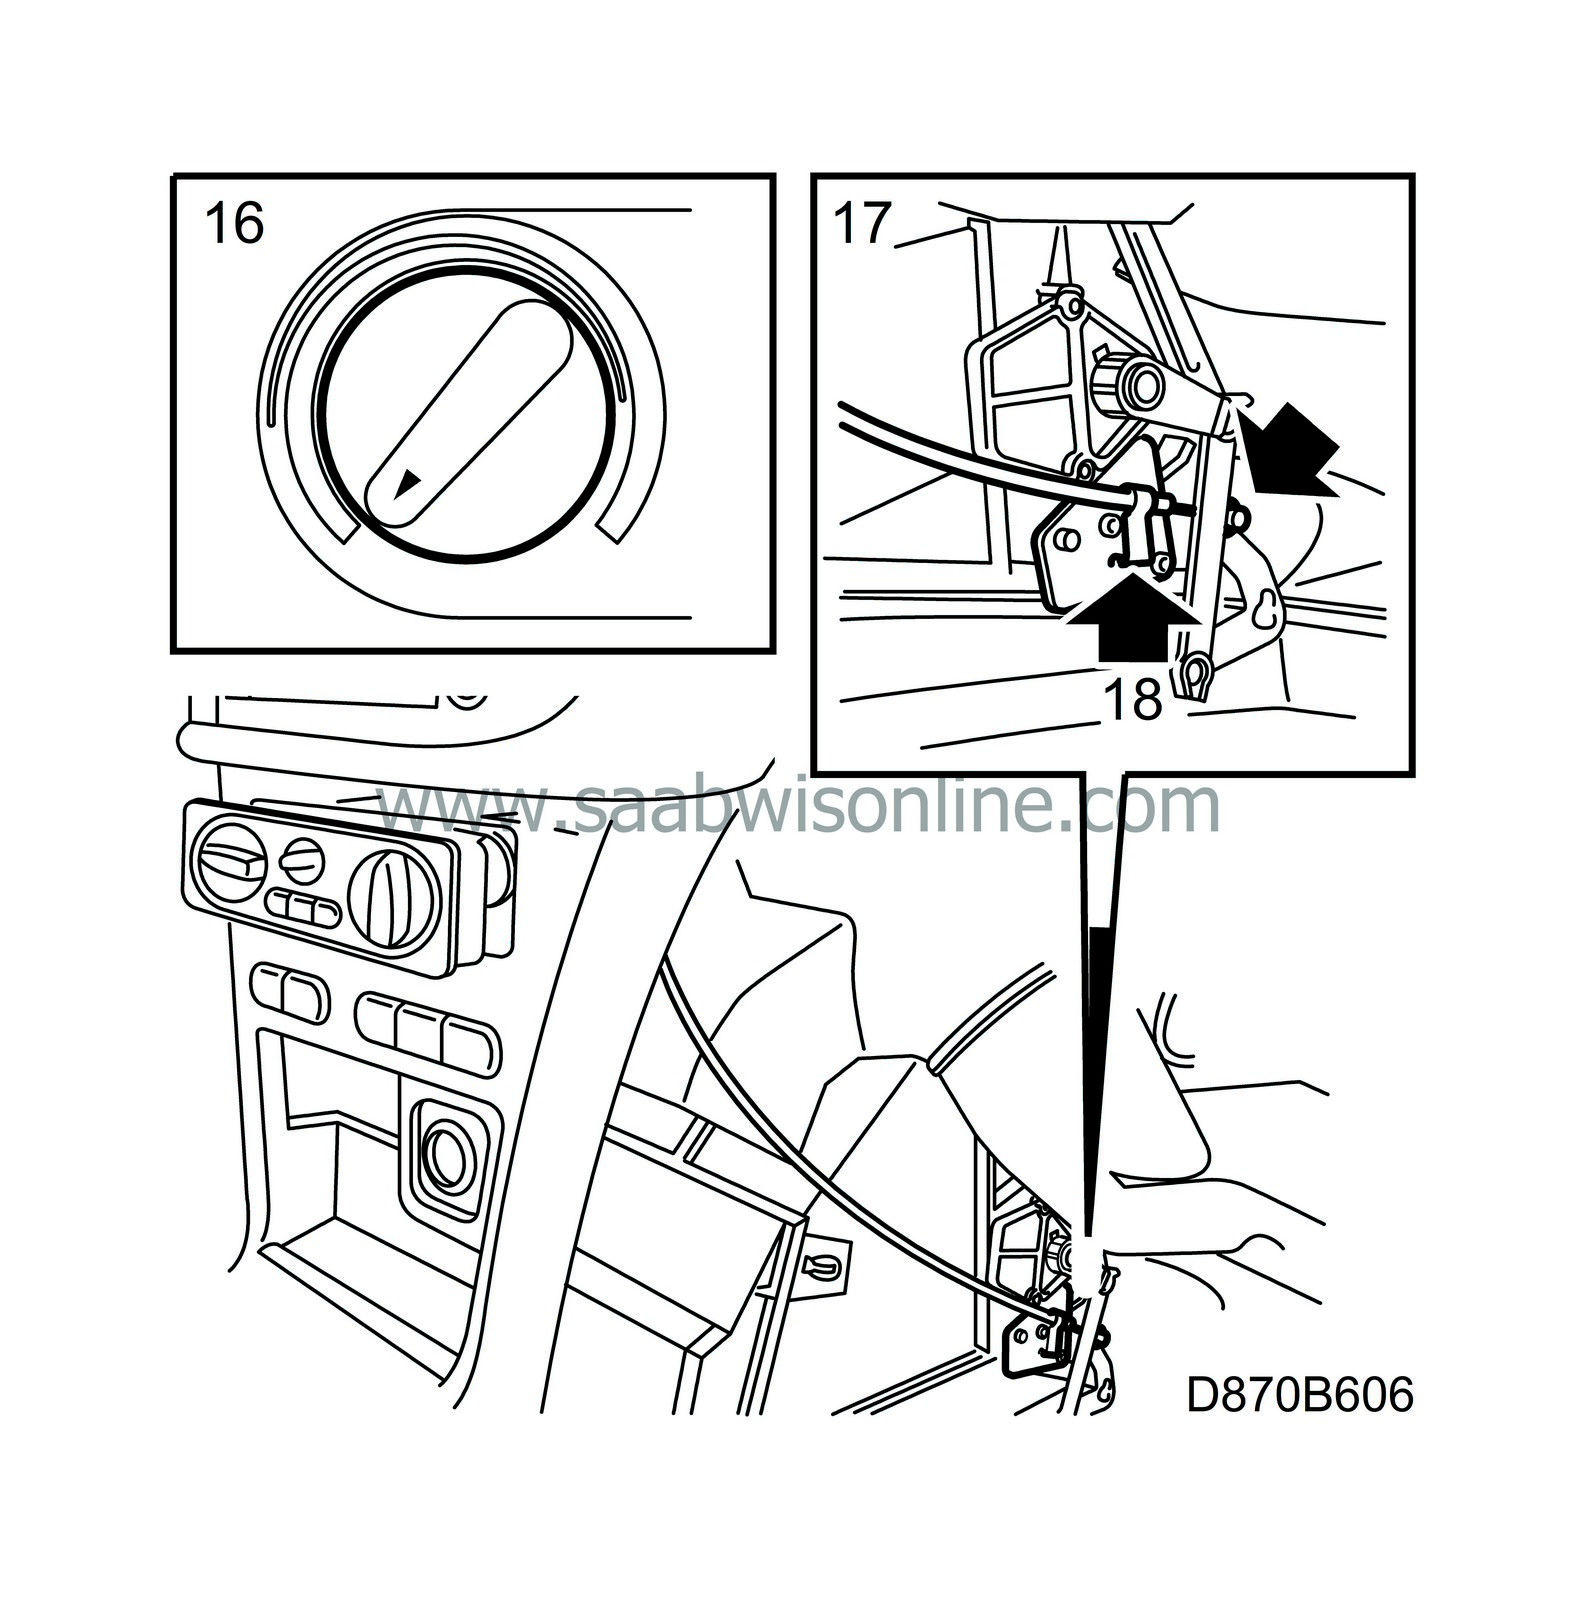
Turn the temperature knob to maximum cold.
|
|
| 17. |
Push the air-blending flap lever as far forward as it will go.
|
|
| 18. |
Secure on the attaching plate to the heating and ventilation unit and fit the clip securing the cable sheath to the heating and ventilation unit.
|
|
| 19. |
Turn the heater knob alternately to both end positions to make sure the air-blending flap closes properly in both positions.
|
|
| 20. |
Refit the side panel on the center console.
|
|
| 21. |
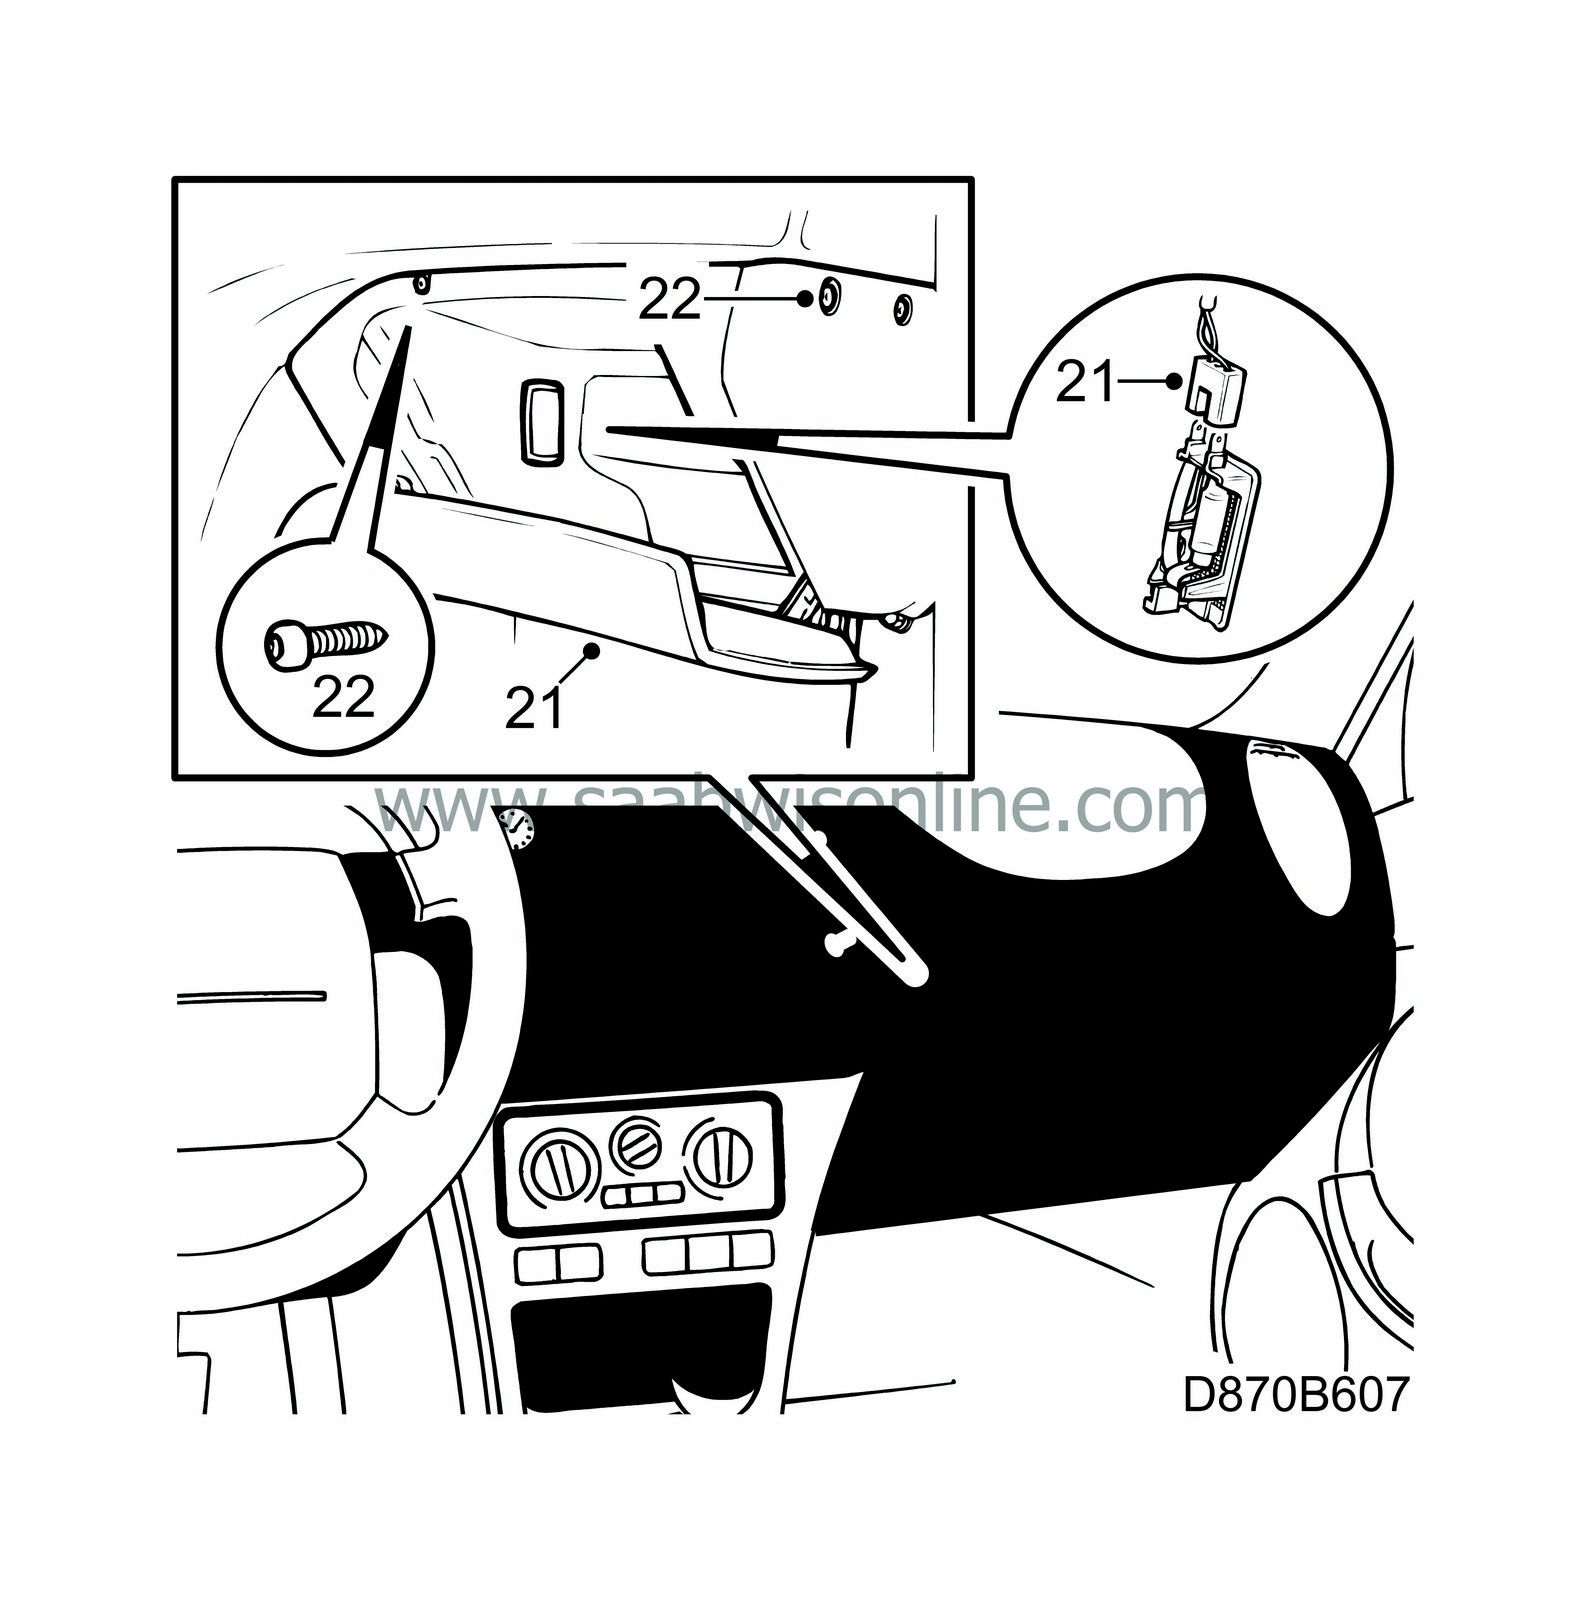
Position the glove box and plug in the glove box light connector.
|
|
| 22. |
Guide the glove box into the snap fastener on the bulkhead bracket and fit the retaining screws and the retaining bolt as well as the expanding rivet at the front edge.
|
|
| 23. |
Close the screw covers and close the glove box.
|
|
| Warranty/Time Information |
Failed Object: 85485
Fault/Reason code: 71
Location code: 09
Warranty Type (US): 01
Repair/Action code: 01
Labour Operation (US): N/A (CA: D0450)
Time: 0.2 hrs

