(852-2133) Noise from front seat
|
SERVICE INFORMATION
|
|
Bulletin Nbr:
|
852-2133
|
|
Date:
...........
|
oktober 1999
|
|
Market:
|
all
|
Saab 9-3 model year 1998 and 1999 3D and 5D up to and including VIN W2069663/X2089099
Saab 9-3 model year 1998 and 1999 CV up to and including VIN X7063257
Occasionally, different types of noises can emanate from the seats. The noises can be of varying types, squeaking, rattling and clicking. This is because different parts in the seat come into contact with each other in an undesirable way. The presence of undesirable noises is also due to temperature, air humidity and the weight of the person sitting in the seat.
It is therefore important to question the customer as regards the character of the noise, in which situation it occurs and if it comes from the backrest or the seat.
The diagnostic procedure below should be carried out after customer complaint. The cause of the seat noises has been rectified on a running basis in production, which is why each procedure has its own VIN definition that is noted for each measure respectively.
The procedure list is divided into two parts, backrest and seat respectively. Procedure 2 for the seat should always be carried out, even if no noise has been reported there. This procedure can also be carried out as a precautionary measure in connection with other work on the seat.
51 74 206 Felt tape, 2 pcs/seat (CA: 30584871)
79 71 872 Cable tie, 4 pcs/seat (CA: 30509026)
79 72 573 clip nut, 3 pcs/seat (CA: 30509070)
30 32 497 Lubricant (spray) (CA: 30585145)
30 32 364 Lubricant (Optimol) (CA: 30581810)
51 71 897 Cable, driver's seat (CA: 30584556)
51 71 905 Cable, passenger seat (CA: 30584557)
51 71 913 Cover, 1 pc/driver's seat, 2 pcs/passenger seat (CA: 30584982)
LHD
|
Driver's seat
|
Passenger seat
|
51 71 921 Release mechanism left
|
1
|
1
|
51 71 939 Release mechanism right
|
0
|
1
|
RHD
|
|
|
51 71 921 Release mechanism left
|
0
|
1
|
51 71 939 Release mechanism right
|
1
|
1
|
Establish if the noise comes from the backrest and/or seat. Decide with the aid of the test and interviewing the customer if the backrest and/or seat should be attended to.
Procedure step 2 under “Seat” is of precautionary nature and should
always
be performed as soon as any work is done on the seat. It can be performed with the seat still in the car.
|
1.
|
If noise occurs in the seat or backrest the entire seat should now be dismantled. Otherwise, step 2 should be performed with the seat still in the car.
|
|
2.
|
Seat upholstery comes undone on front edge.
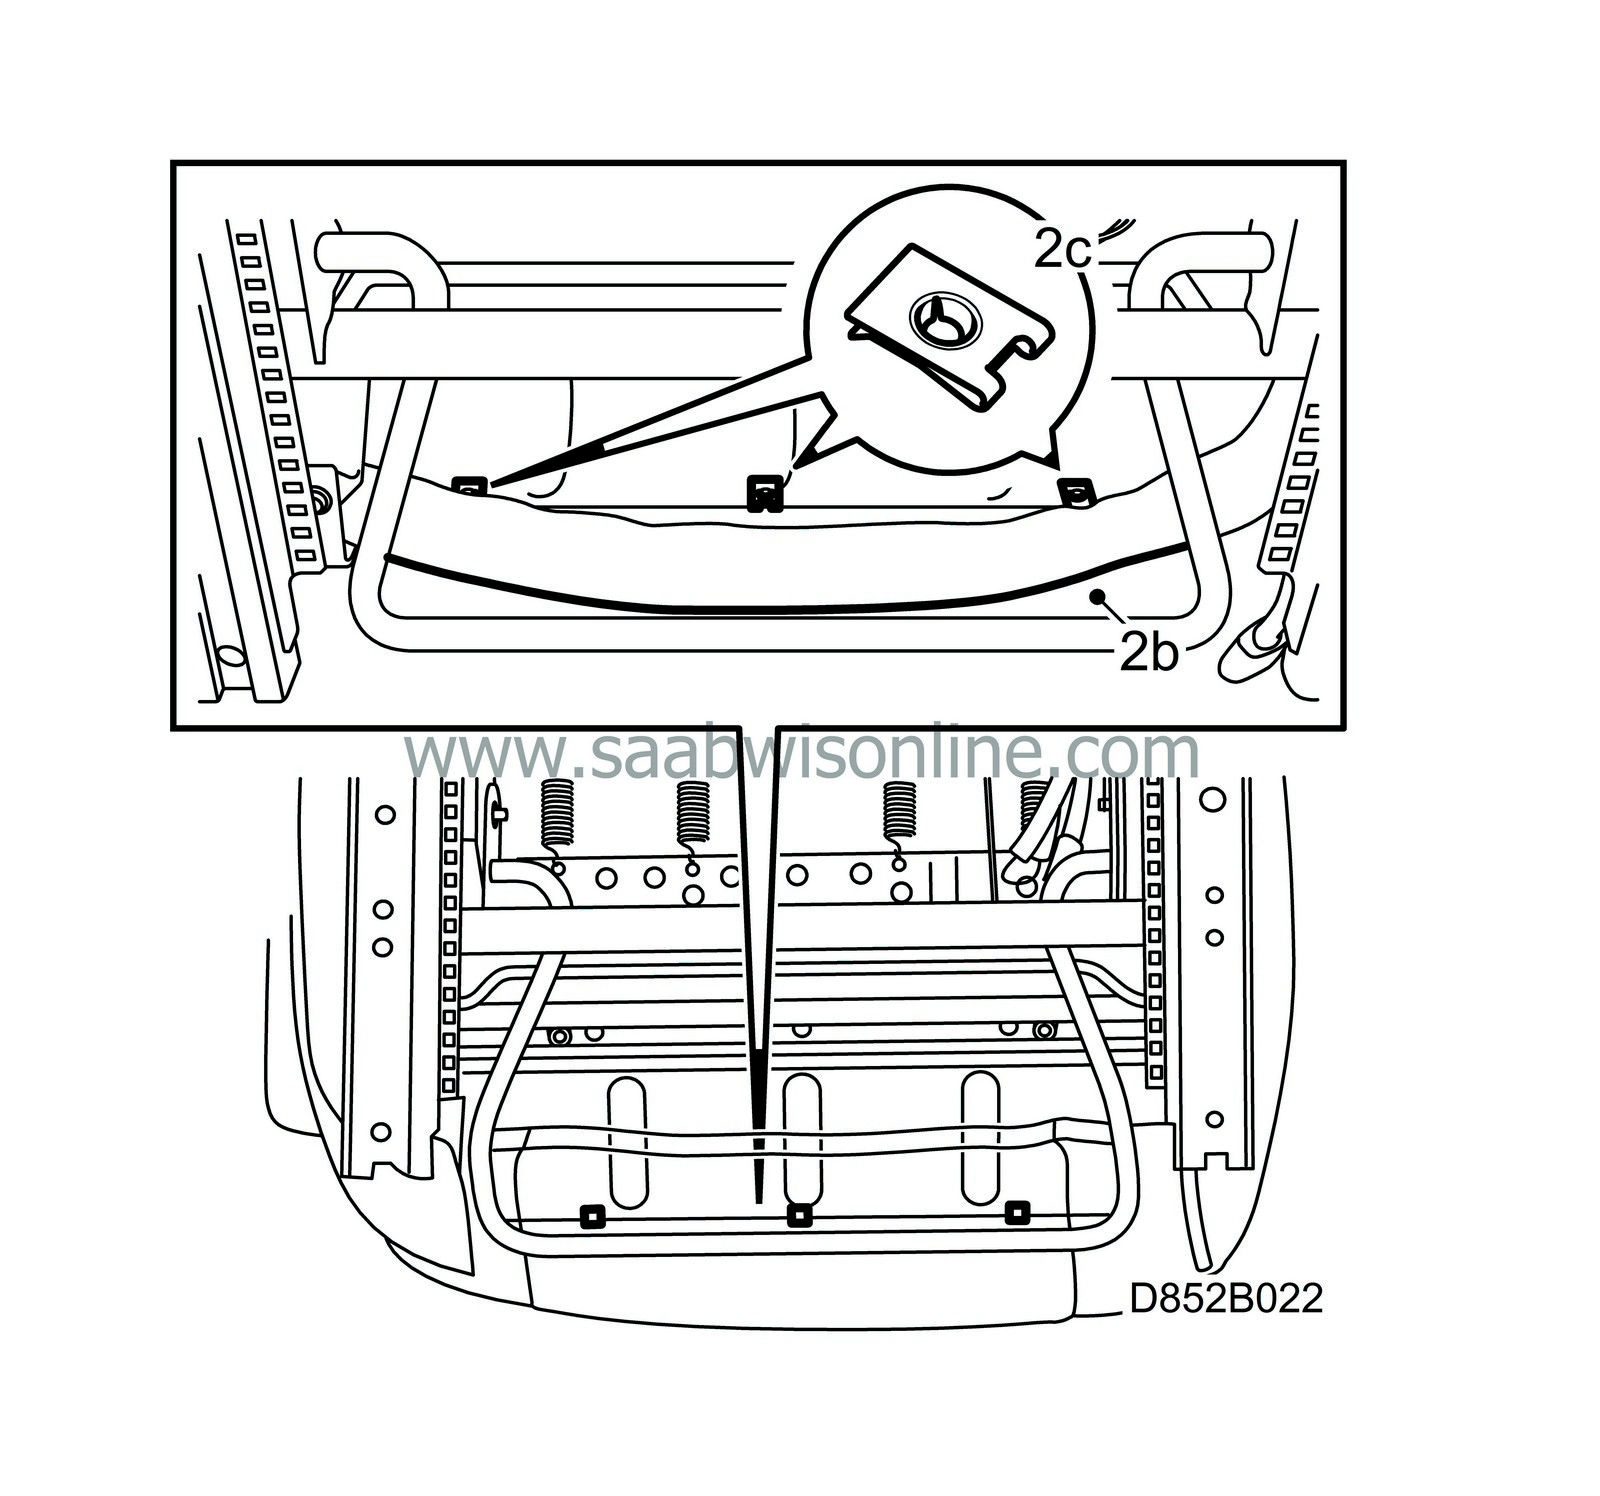
Up to and including X2089099 (3/5D) and X7063257 (CV) respectively
|
|
|
2.a.
|
Raise seat to its highest position in both the front and back edge.
|
|
|
2.b.
|
Undo the seat upholstery in the front edge of the seat pan.
|
|
|
2.c.
|
Fit the 3 clip nuts, part no. 79 72 573, with the flat side to the rear. It is important that the clip nuts are secured properly. The two outer clips are fitted as far to each side as possible.
|
|
|
2.d.
|
Press the strip securely over the clip nuts.
|
|
3.
|
Snapping noise from the seat pan's front springs
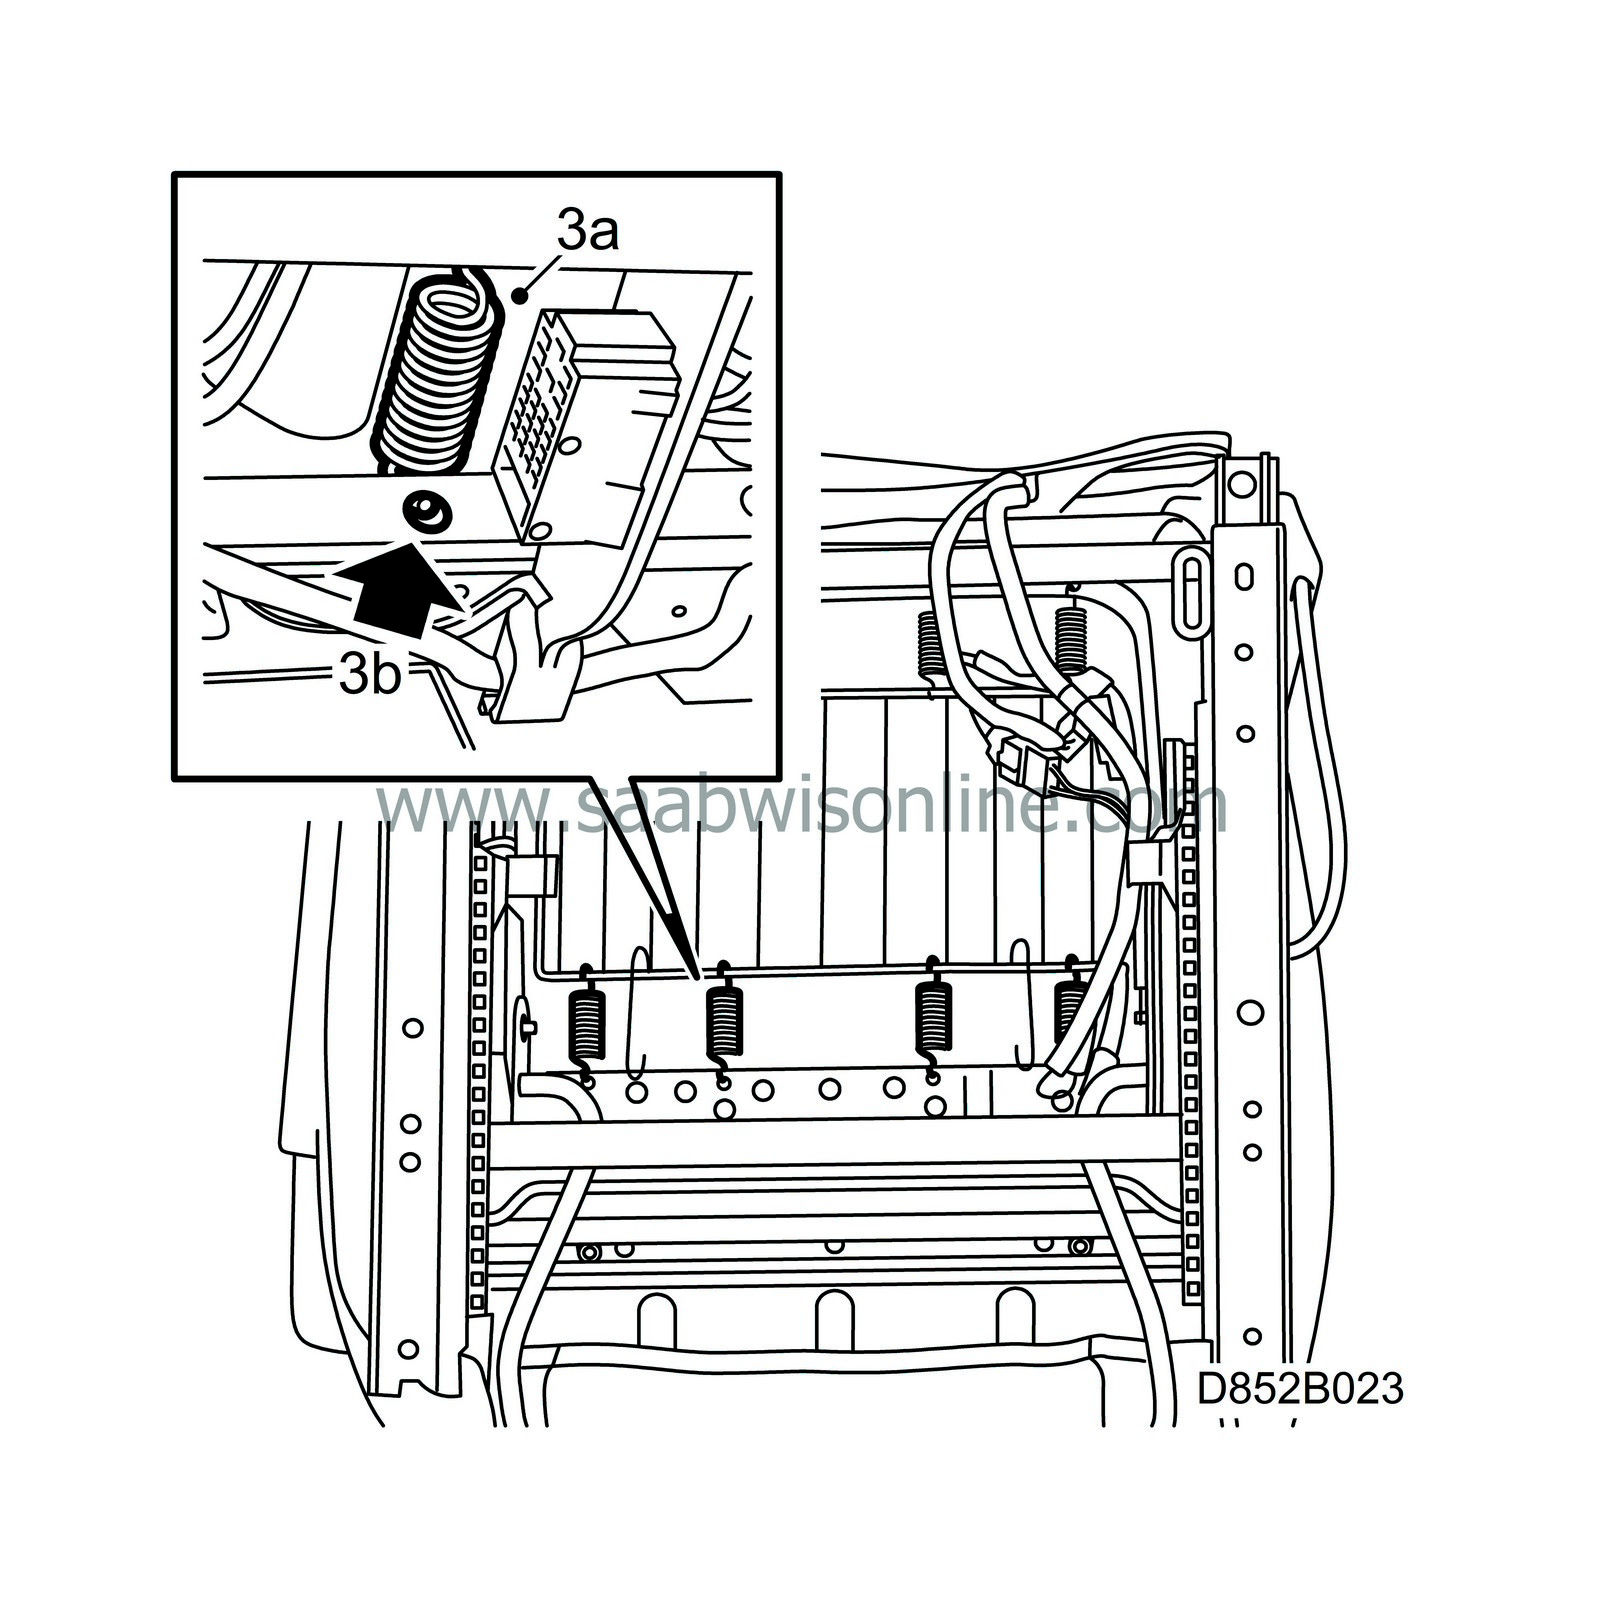
Up to and including X2008735 (3/5D) and X7004278 (CV) respectively
|
|
|
3.a.
|
Dismantle one spring at a time.
|
|
|
3.b.
|
Drill out the lower holes in the reinforcement plate so that there is clearance for the ends of the spring.
|
|
|
3.c.
|
Assemble the spring before the next spring attachment is attended to.
|
|
4.
|
If the noise has been established from the backrest, continue with the procedures under the heading “Backrest”. Otherwise, fit and test the seat.
|
 Warning
|
|
Torn backrest upholstery must
not
be repaired and refitted. The resistance of the upholstery is very carefully calculated as regards the side airbag and must not be changed.
|
|
|
|
|
|
|
1.
|
Dismantle the seat if it is not already done, see WIS.
|
|
2.
|
Undo the straps holding the bottom of the backrest upholstery.
|
|
3.
|
Unplug the cables under the seat and unclip the cable tie. Loosen the upholstery at the bottom.
|
|
4.
|
Extract the cables. Remove the board from the backrest upholstery.
|
|
5.
|
Loosen the back of the backrest upholstery by undoing the upholstery strip along the sides and folding up the upholstery.
|
|
6.
|
Creaking between the foam in the backrest and the backrest frame by the side airbag.
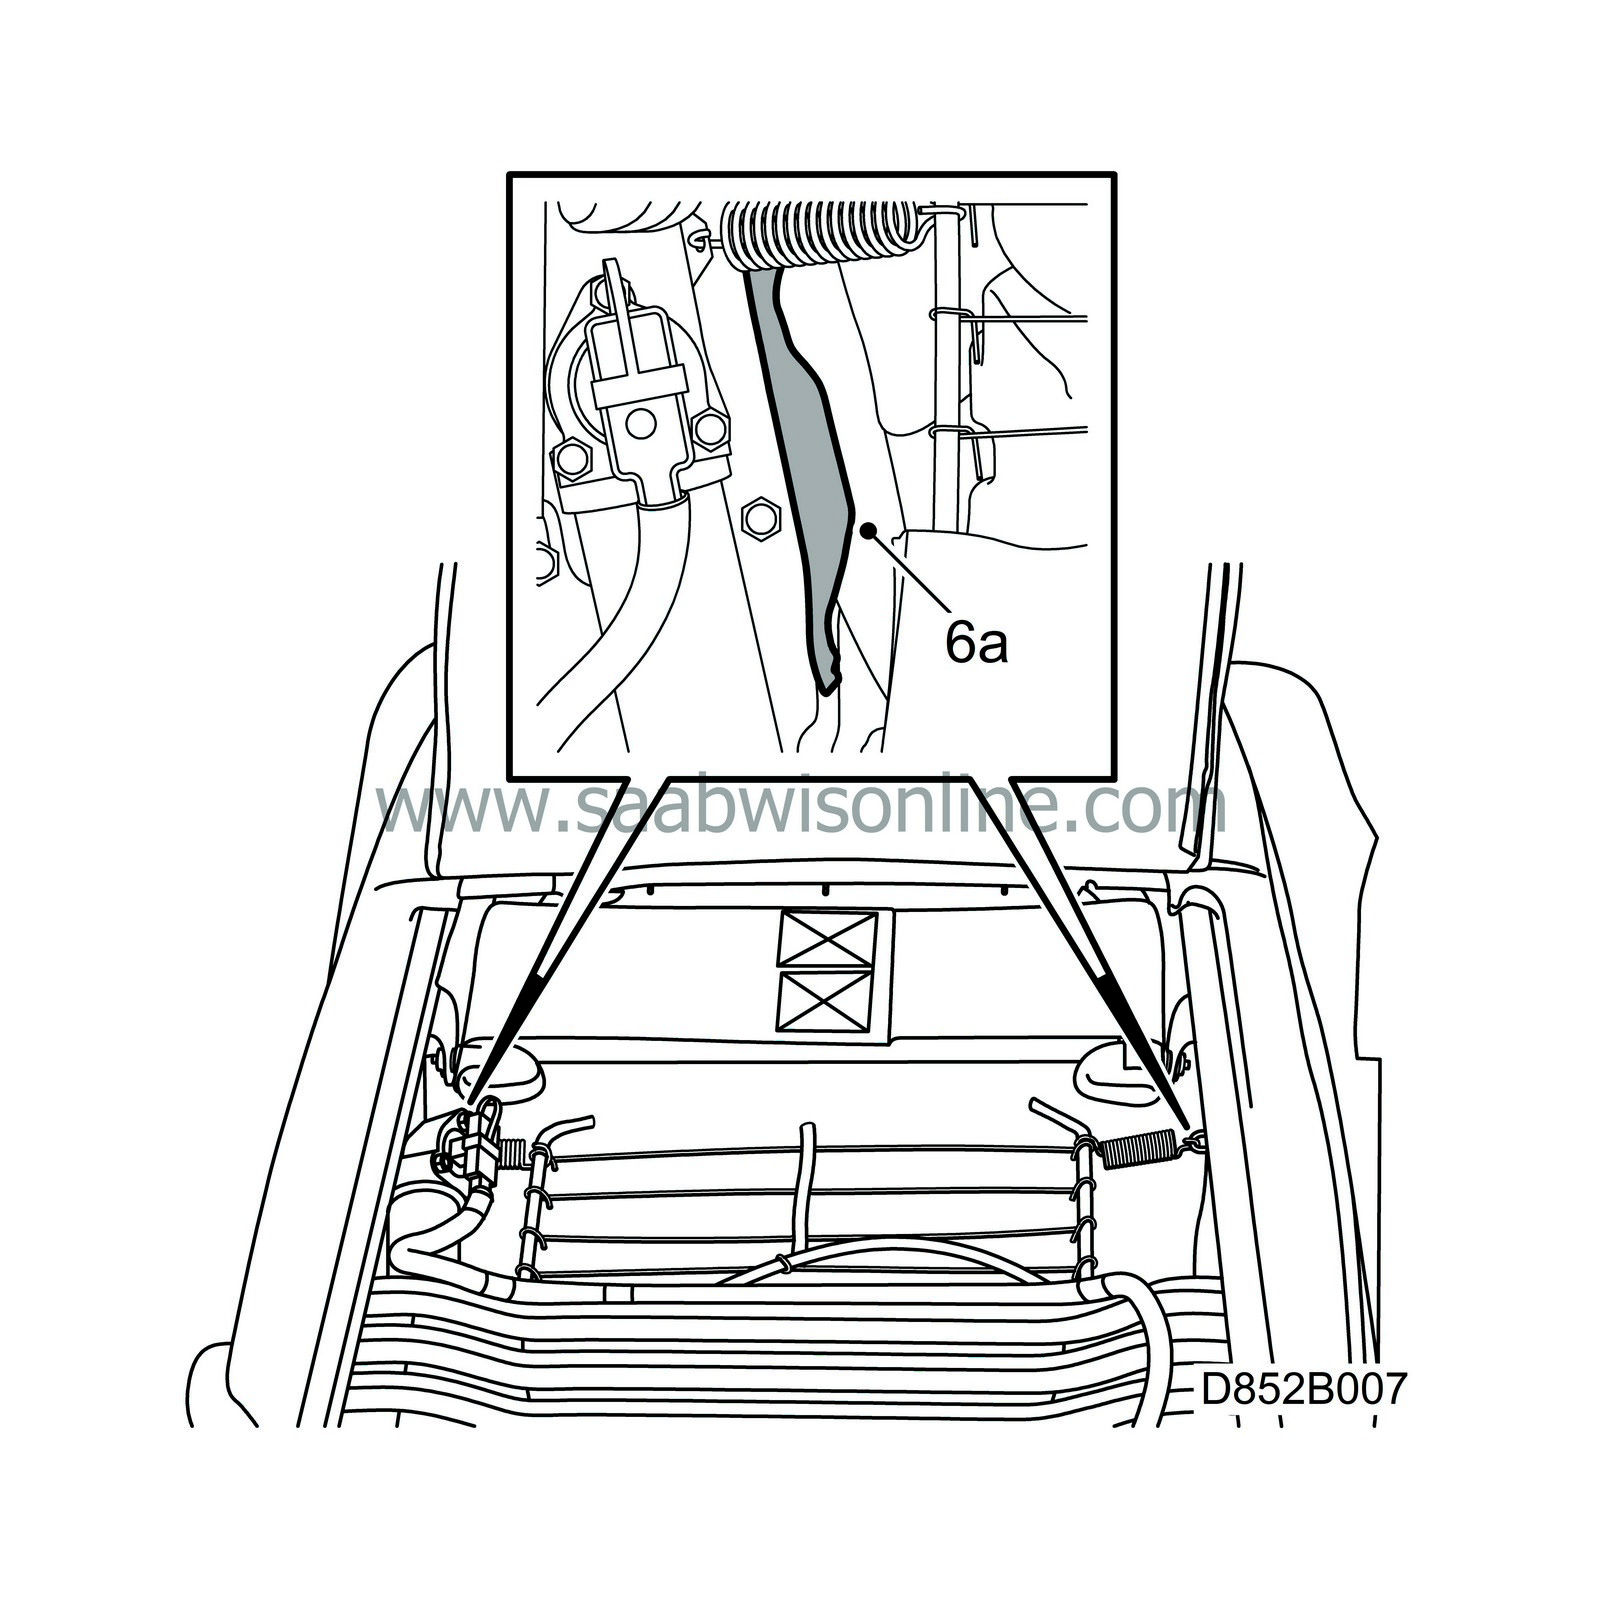
Up to and including VIN X2081811 (3/5D) and X7060710 (CV) respectively
|
|
|
6.a.
|
Apply the felt tape, part no. 51 74 206, on both the backrest frame bumps for the airbag.
|
Note
|
|
The tape should be applied as smoothly as possible without wrinkles.
|
|
|
7.
|
Rattling in backrest release button on 2 and 3 door cars.
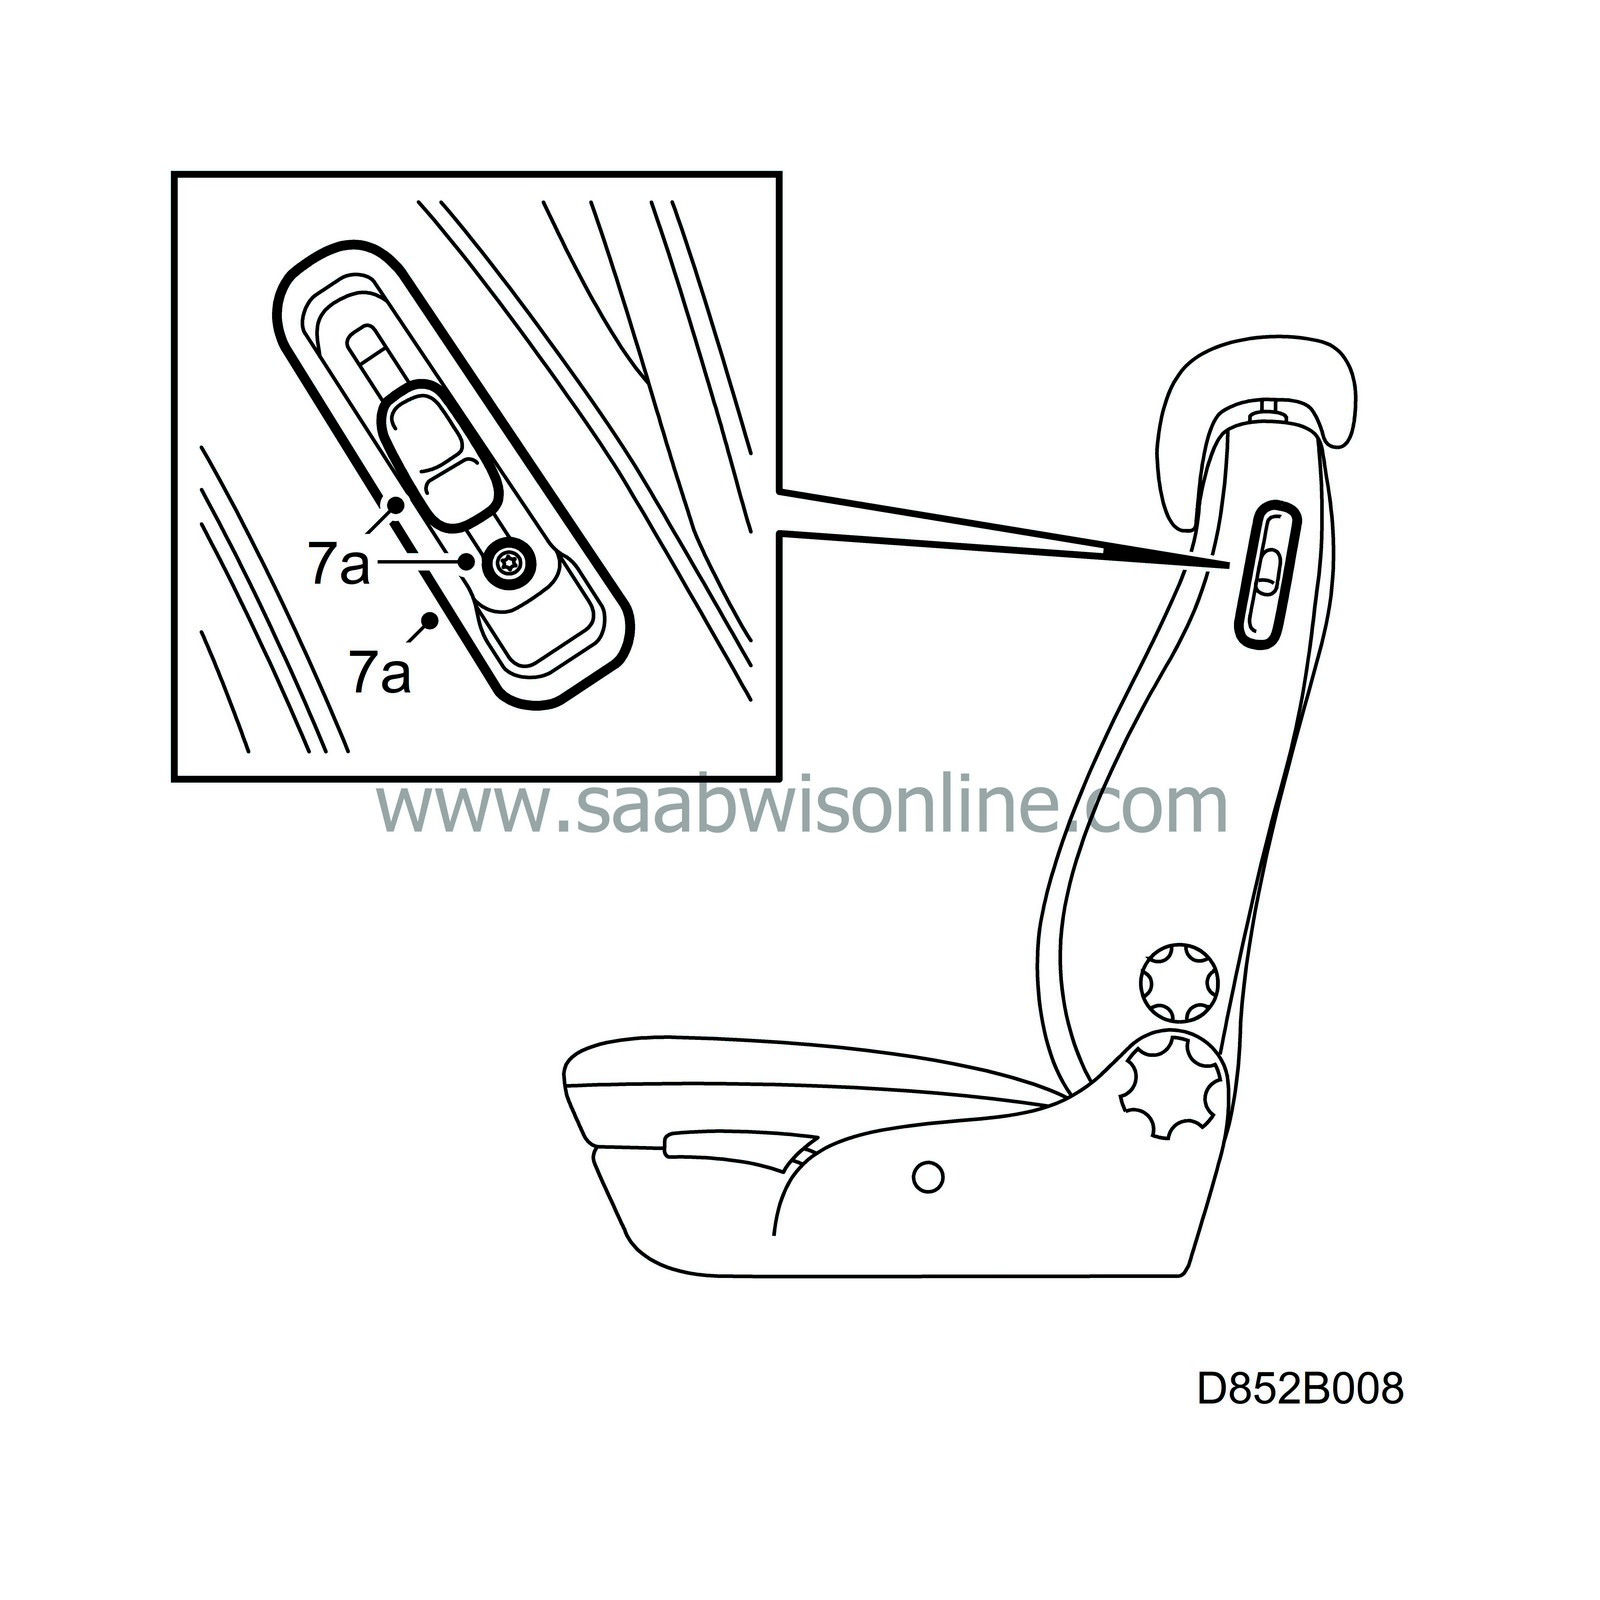
Up to and including VIN X2089099 (3/5D) and X7063257 (CV) respectively
|
|
|
7.a.
|
Remove the button and cover for the backrest release mechanism.
|
|
|
7.b.
|
Remove the backrest upholstery, see WIS.
|
|
|
7.c.
|
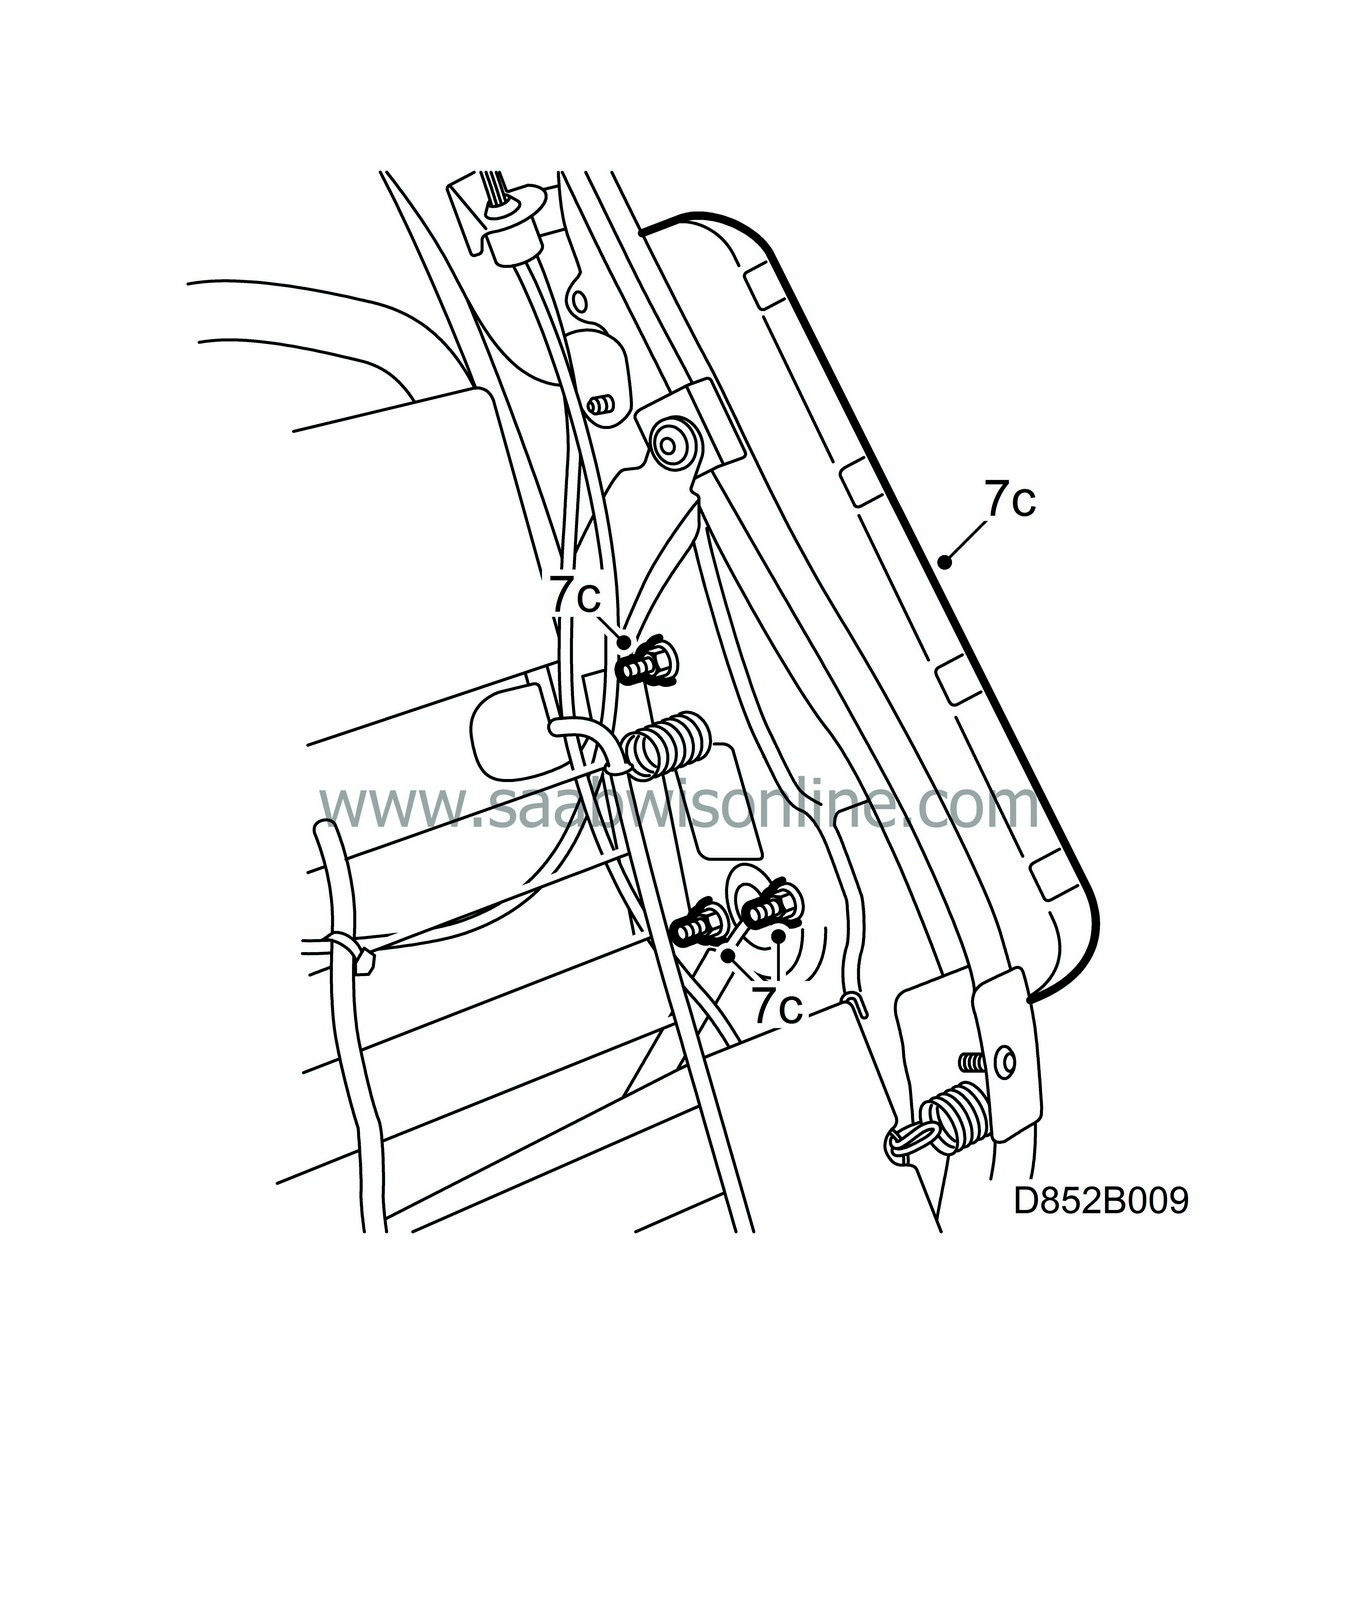
Dismantle the airbag module, 3 nuts, and place to one side. Activate the SAHR frame for easier access to the upper nut.
|
|
|
7.d.
|
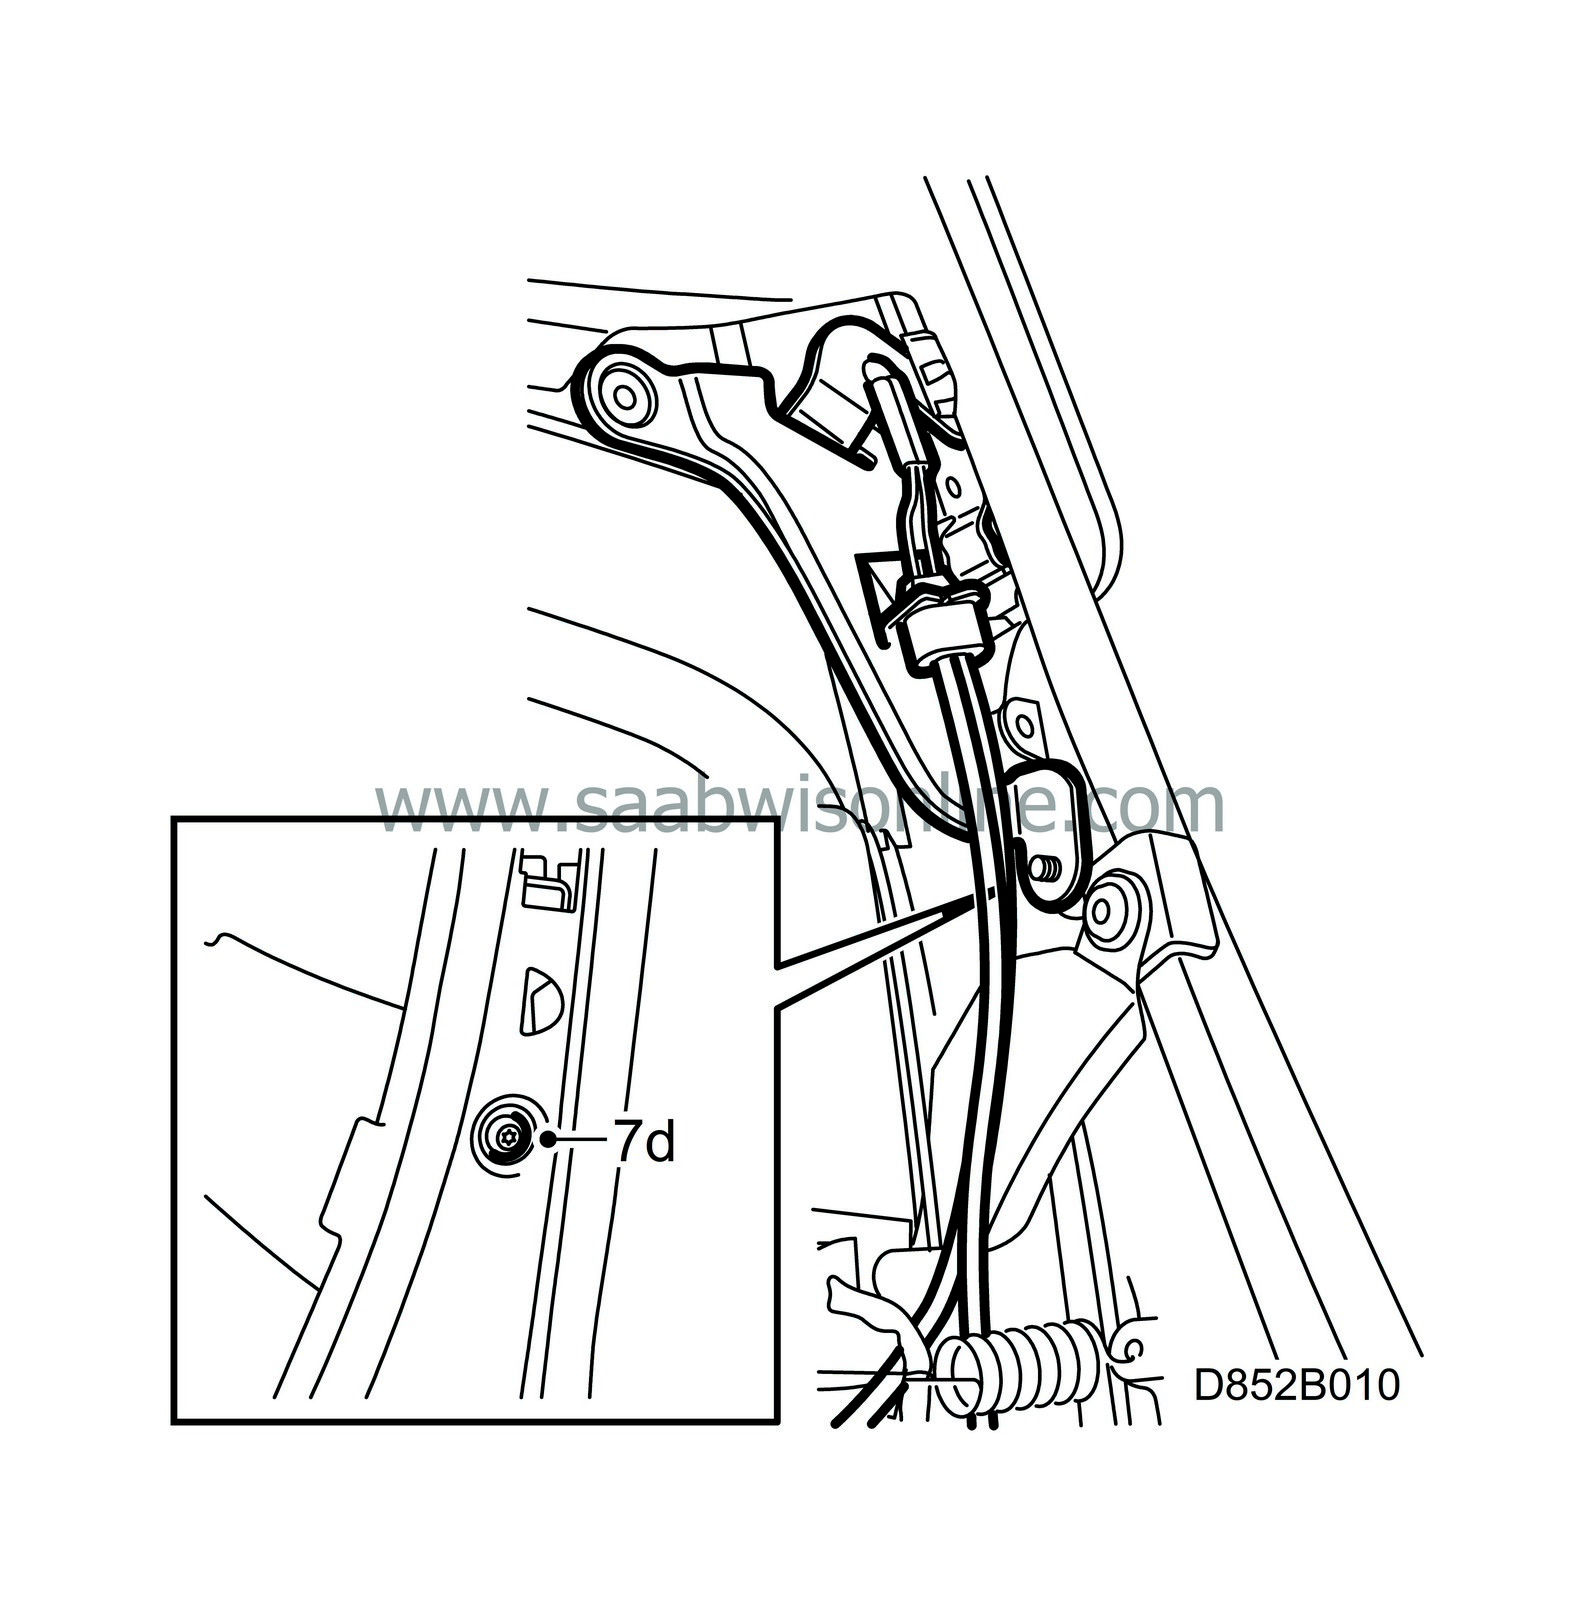
Dismantle the lever mechanism.
The passenger seat has two mechanisms, both should be changed.
|
|
|
7.e.
|
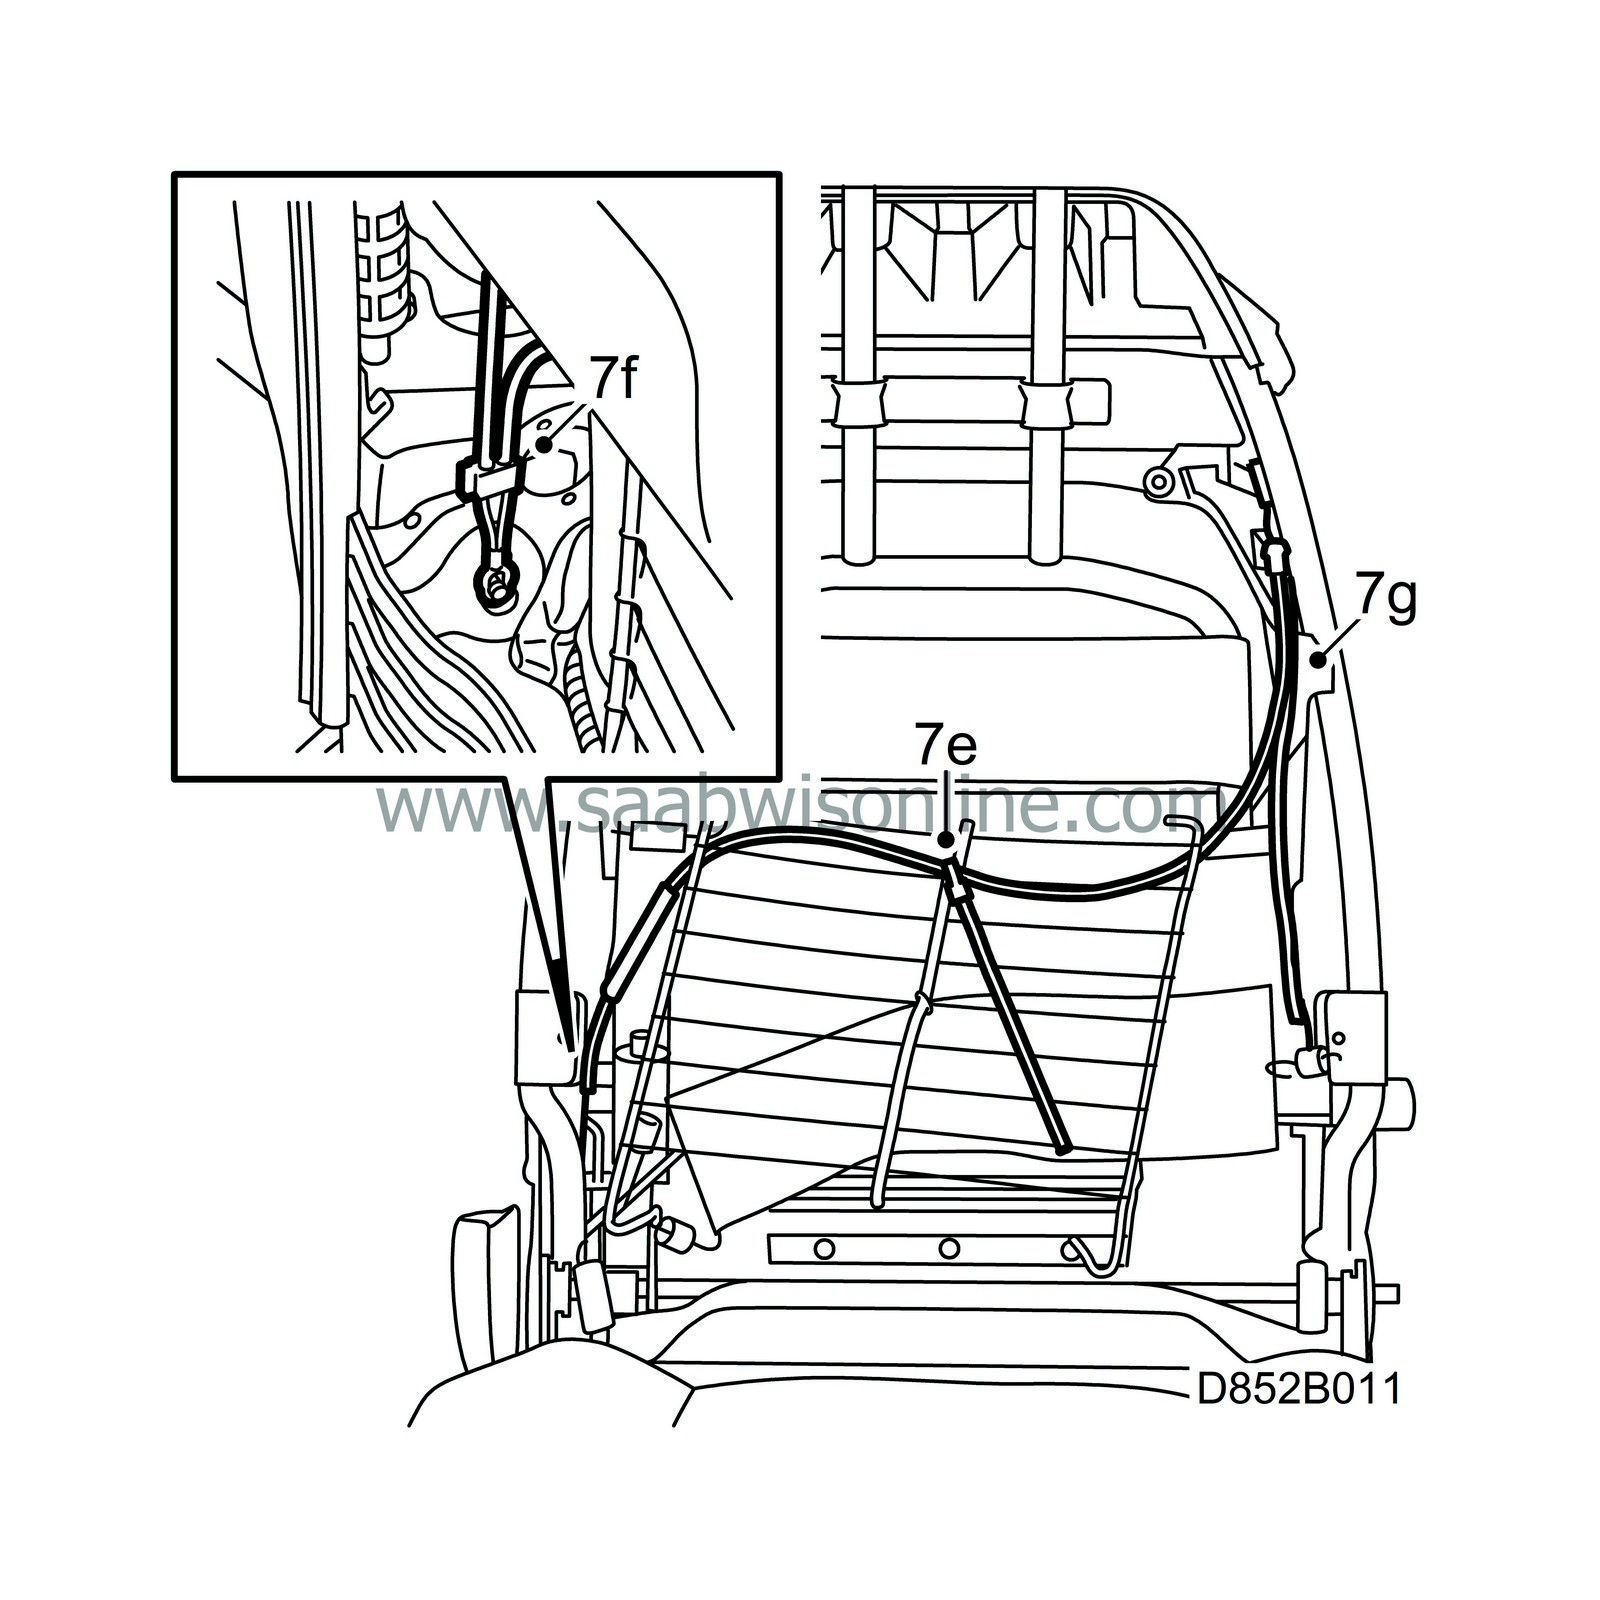
Cut the cable tie that secures the wire to the pullmaflex net.
|
|
|
7.f.
|
Remove the counter clip from the chassis and unhook the wires on both sides.
|
|
|
7.g.
|
Remove the wire package.
|
|
|
7.h.
|
Place the new wires in the same way as the old.
|
|
|
7.i.
|
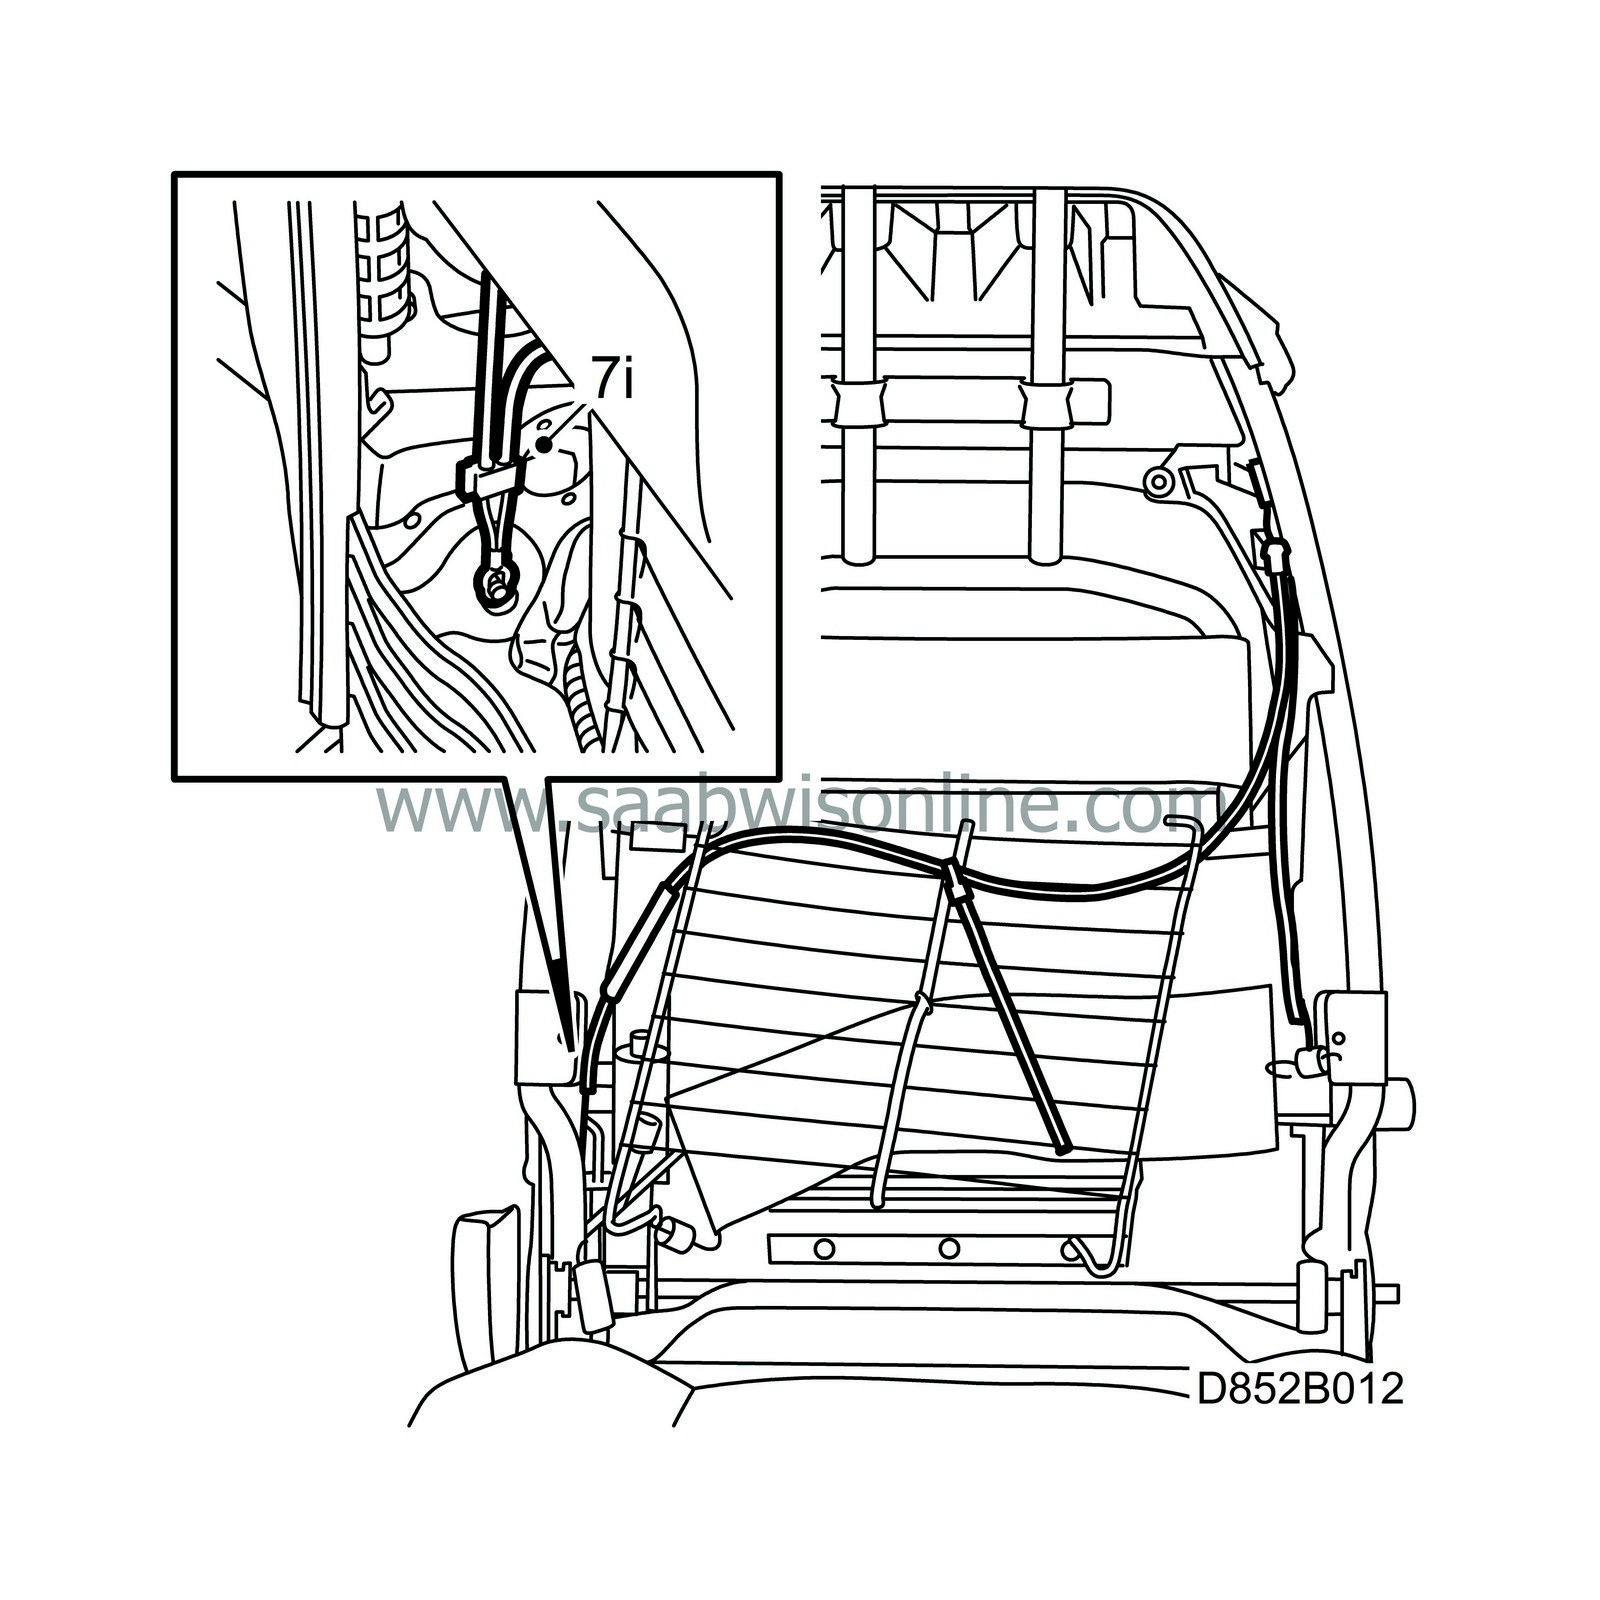
Hook up the wires and press on the counter clip on both sides.
|
|
|
7.j.
|
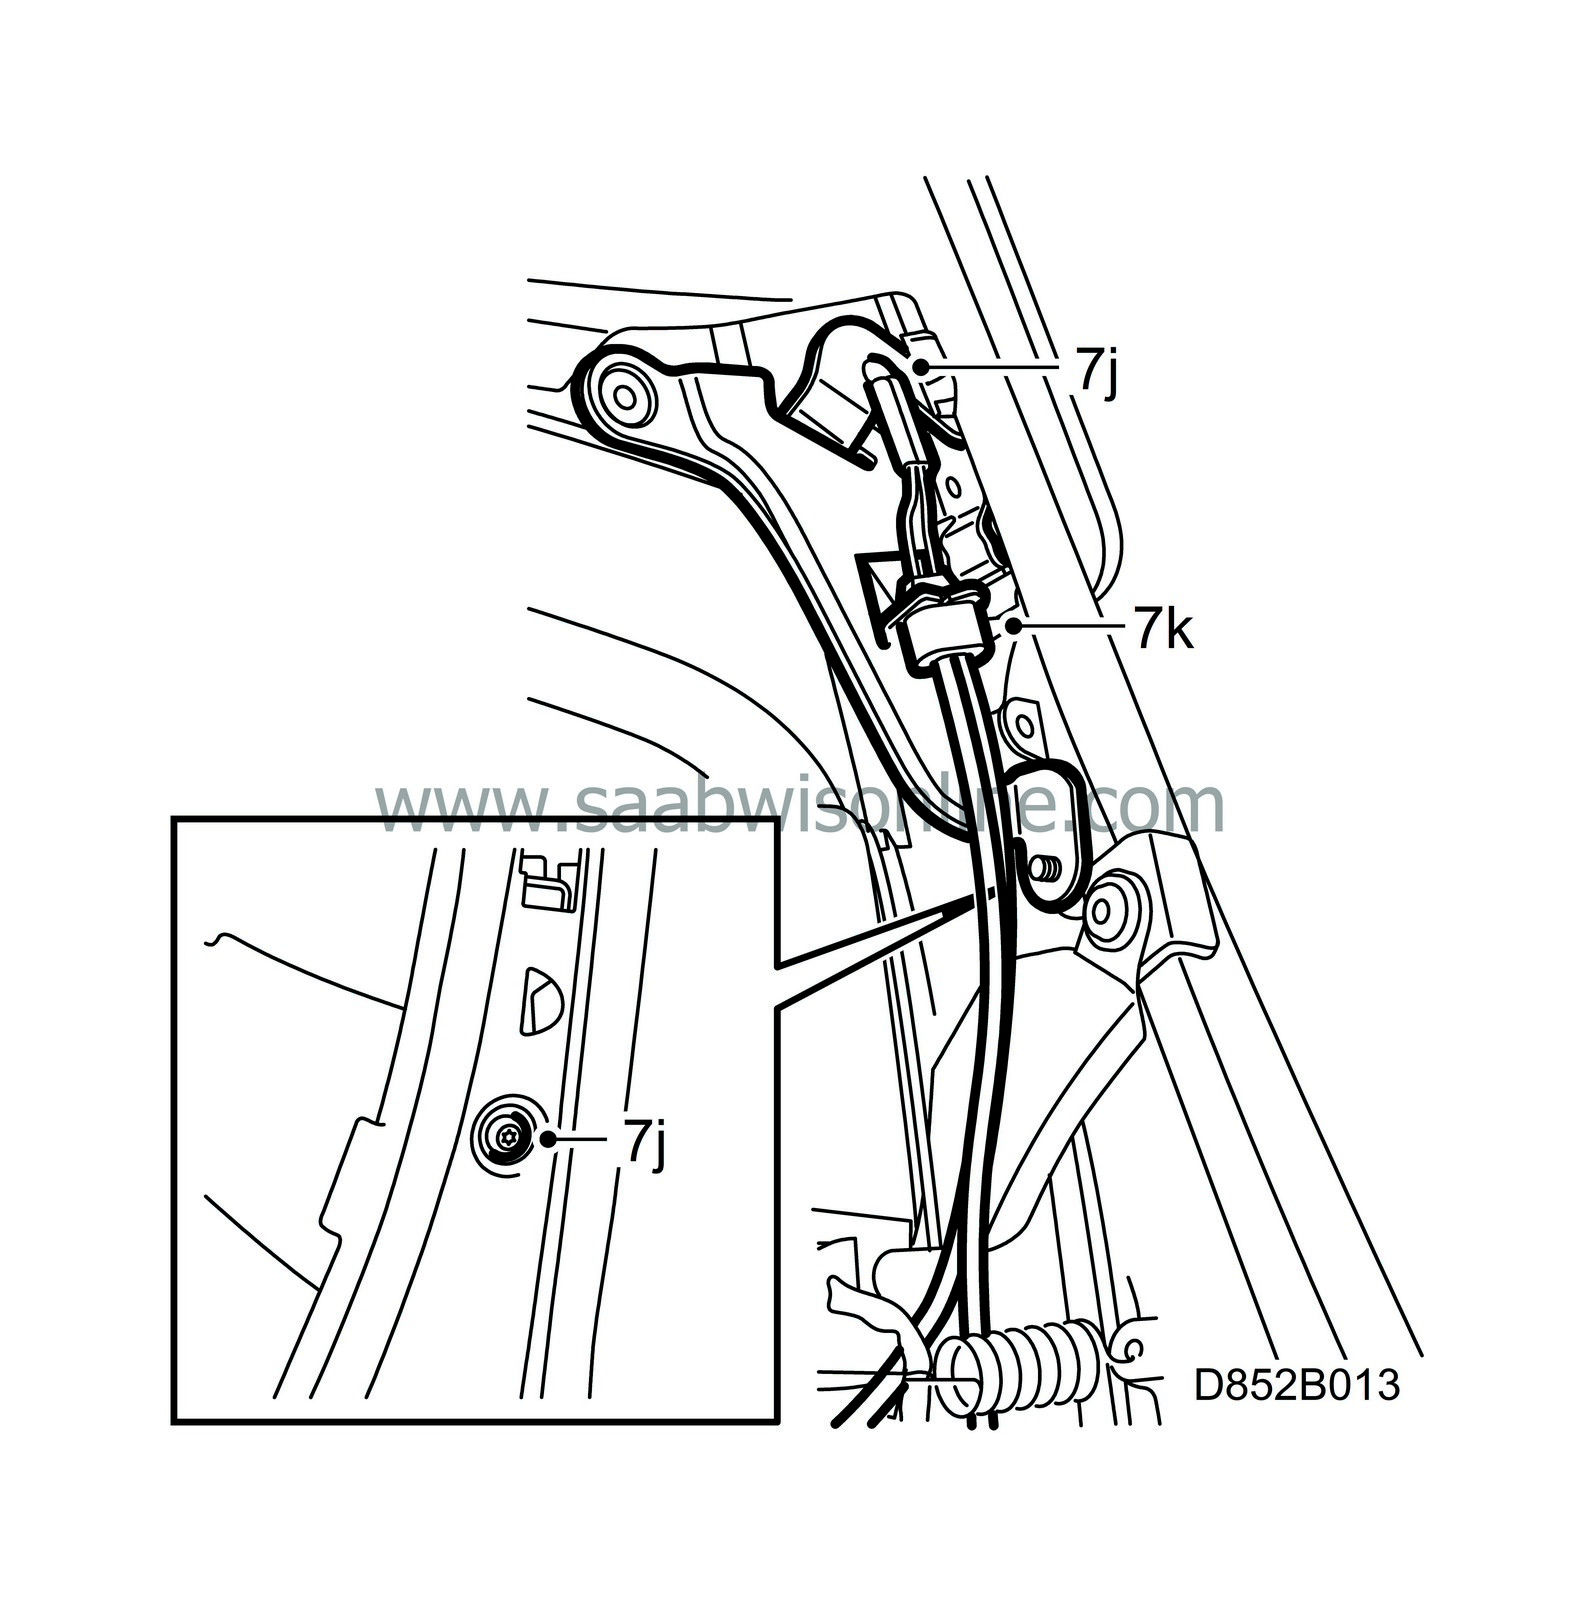
Hook on the Z-link in the lever mechanism. The passenger seat has two mechanisms.
|
|
|
7.k.
|
Fit the counter clip.
|
|
|
7.l.
|
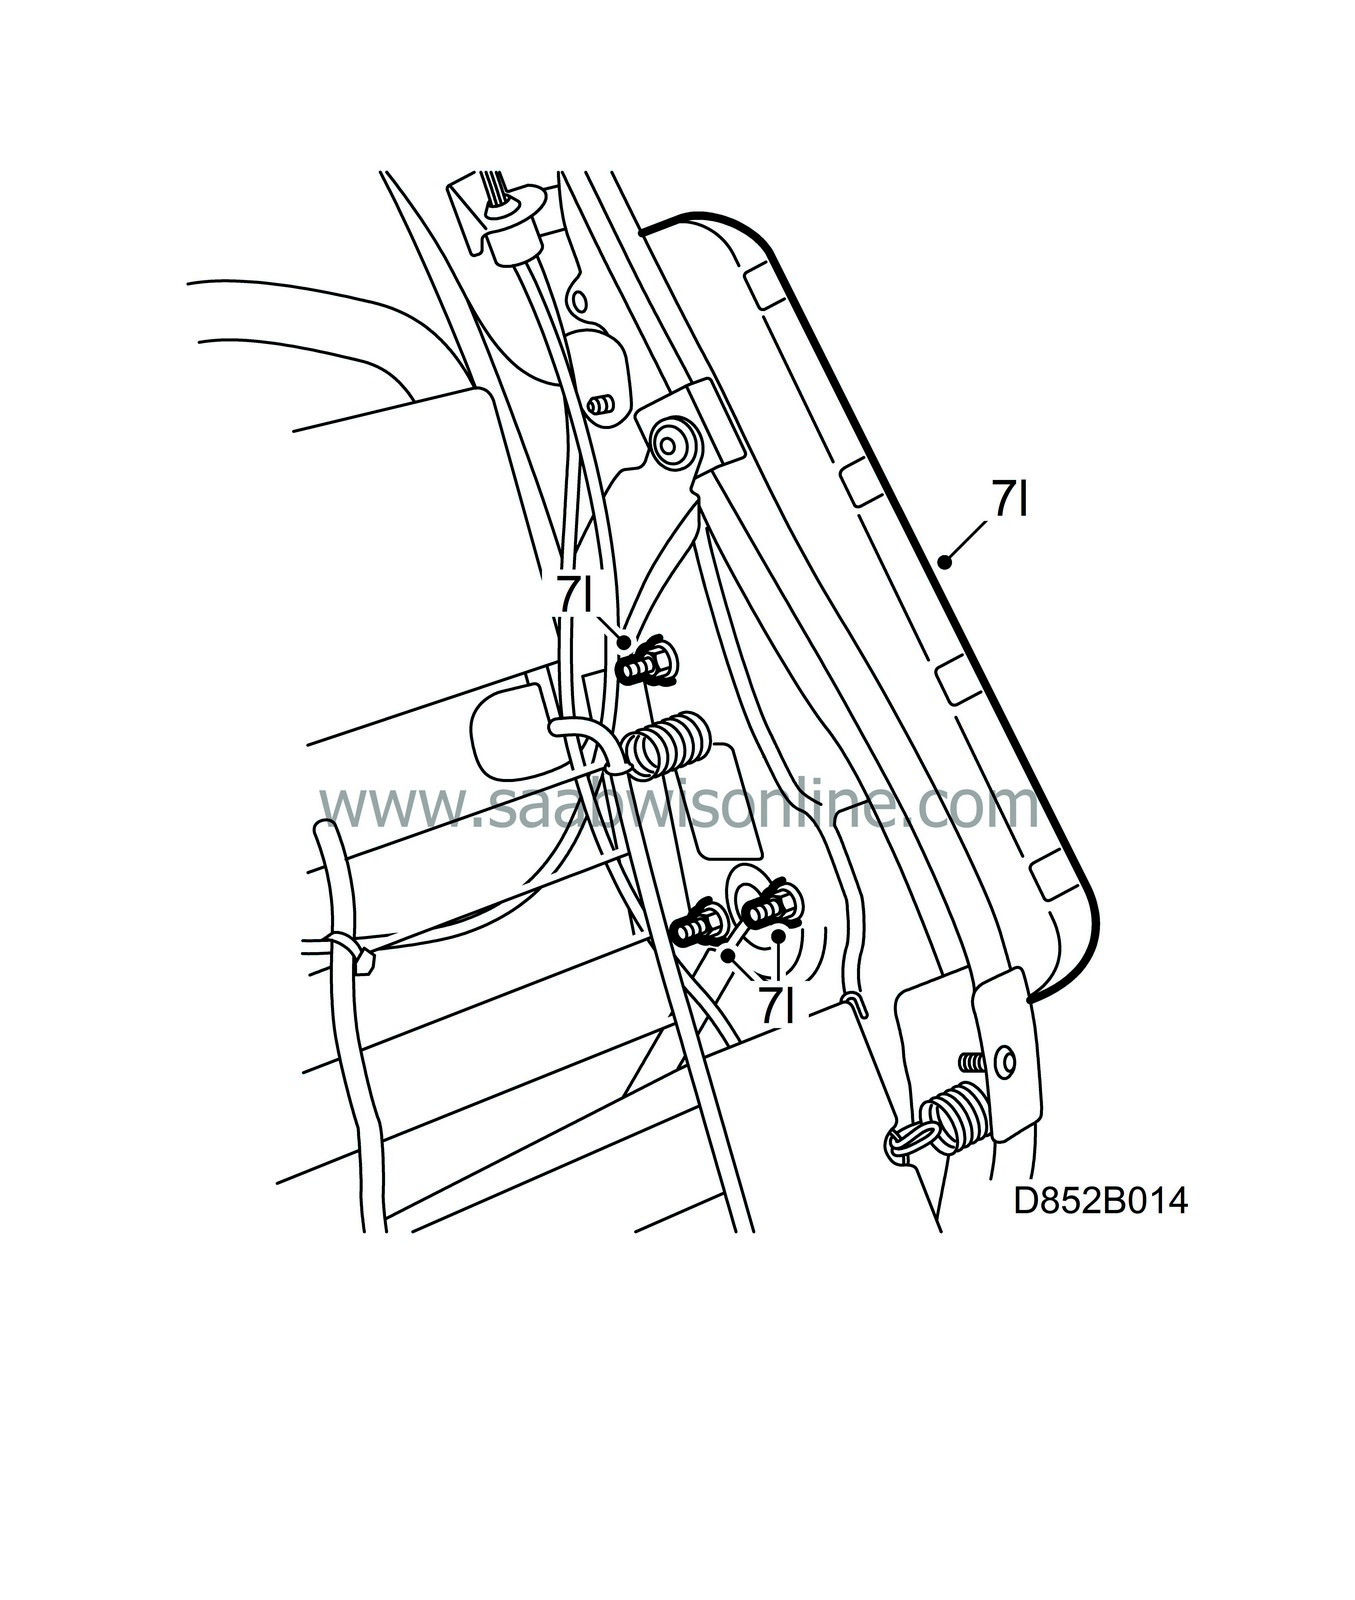
Fit the airbag module. Activate the SAHR frame for easier access to the upper nut.
|
|
|
7.m.
|
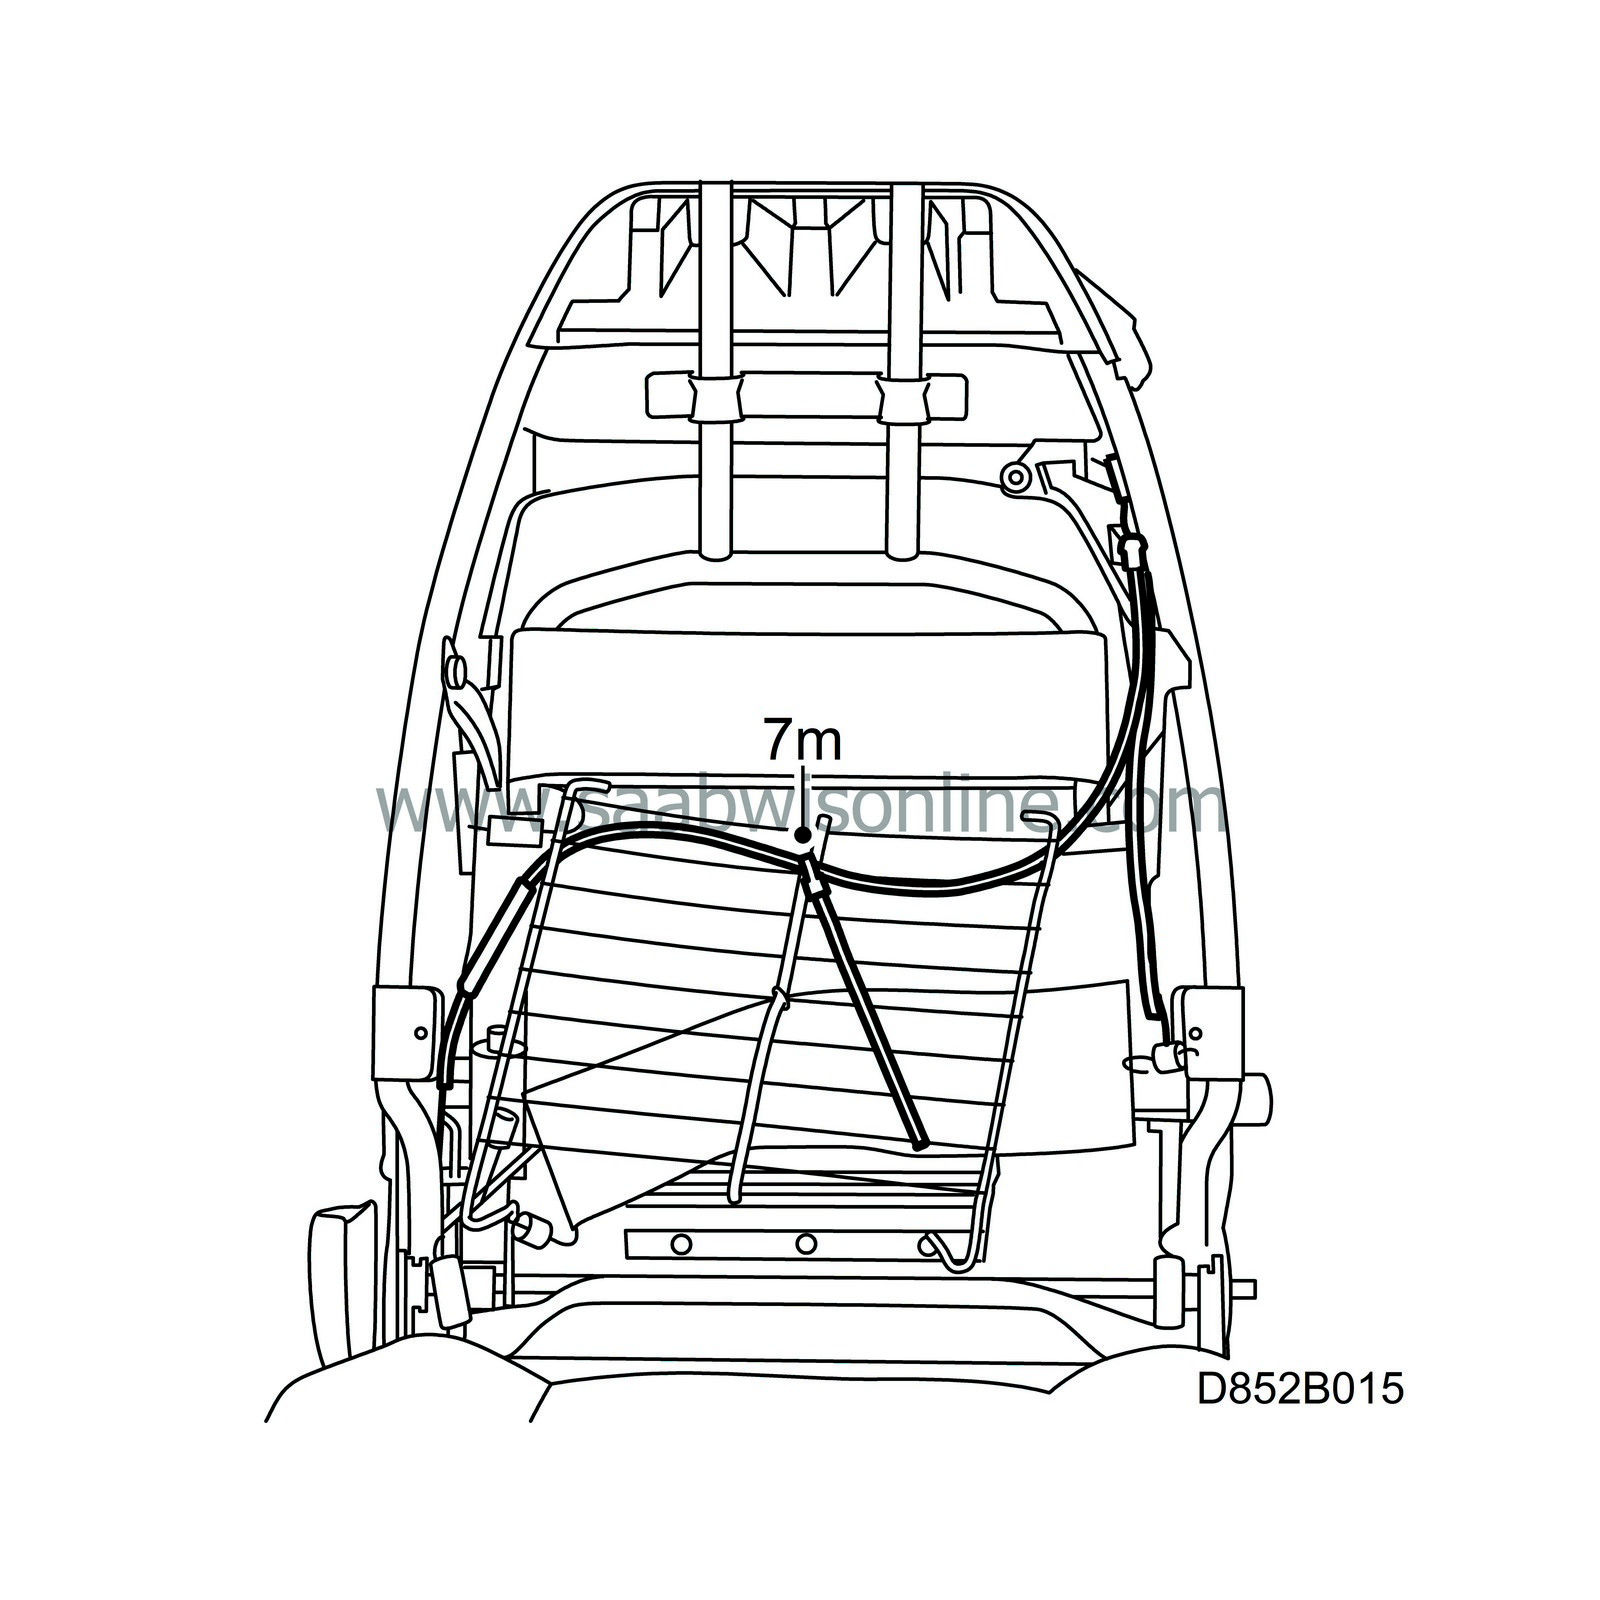
Secure the cable with a cable tie to the pullmaflex net.
|
|
|
7.n.
|
Adjust the cable so that the locking mechanism is not affected until the release button is activated.
|
|
|
7.o.
|
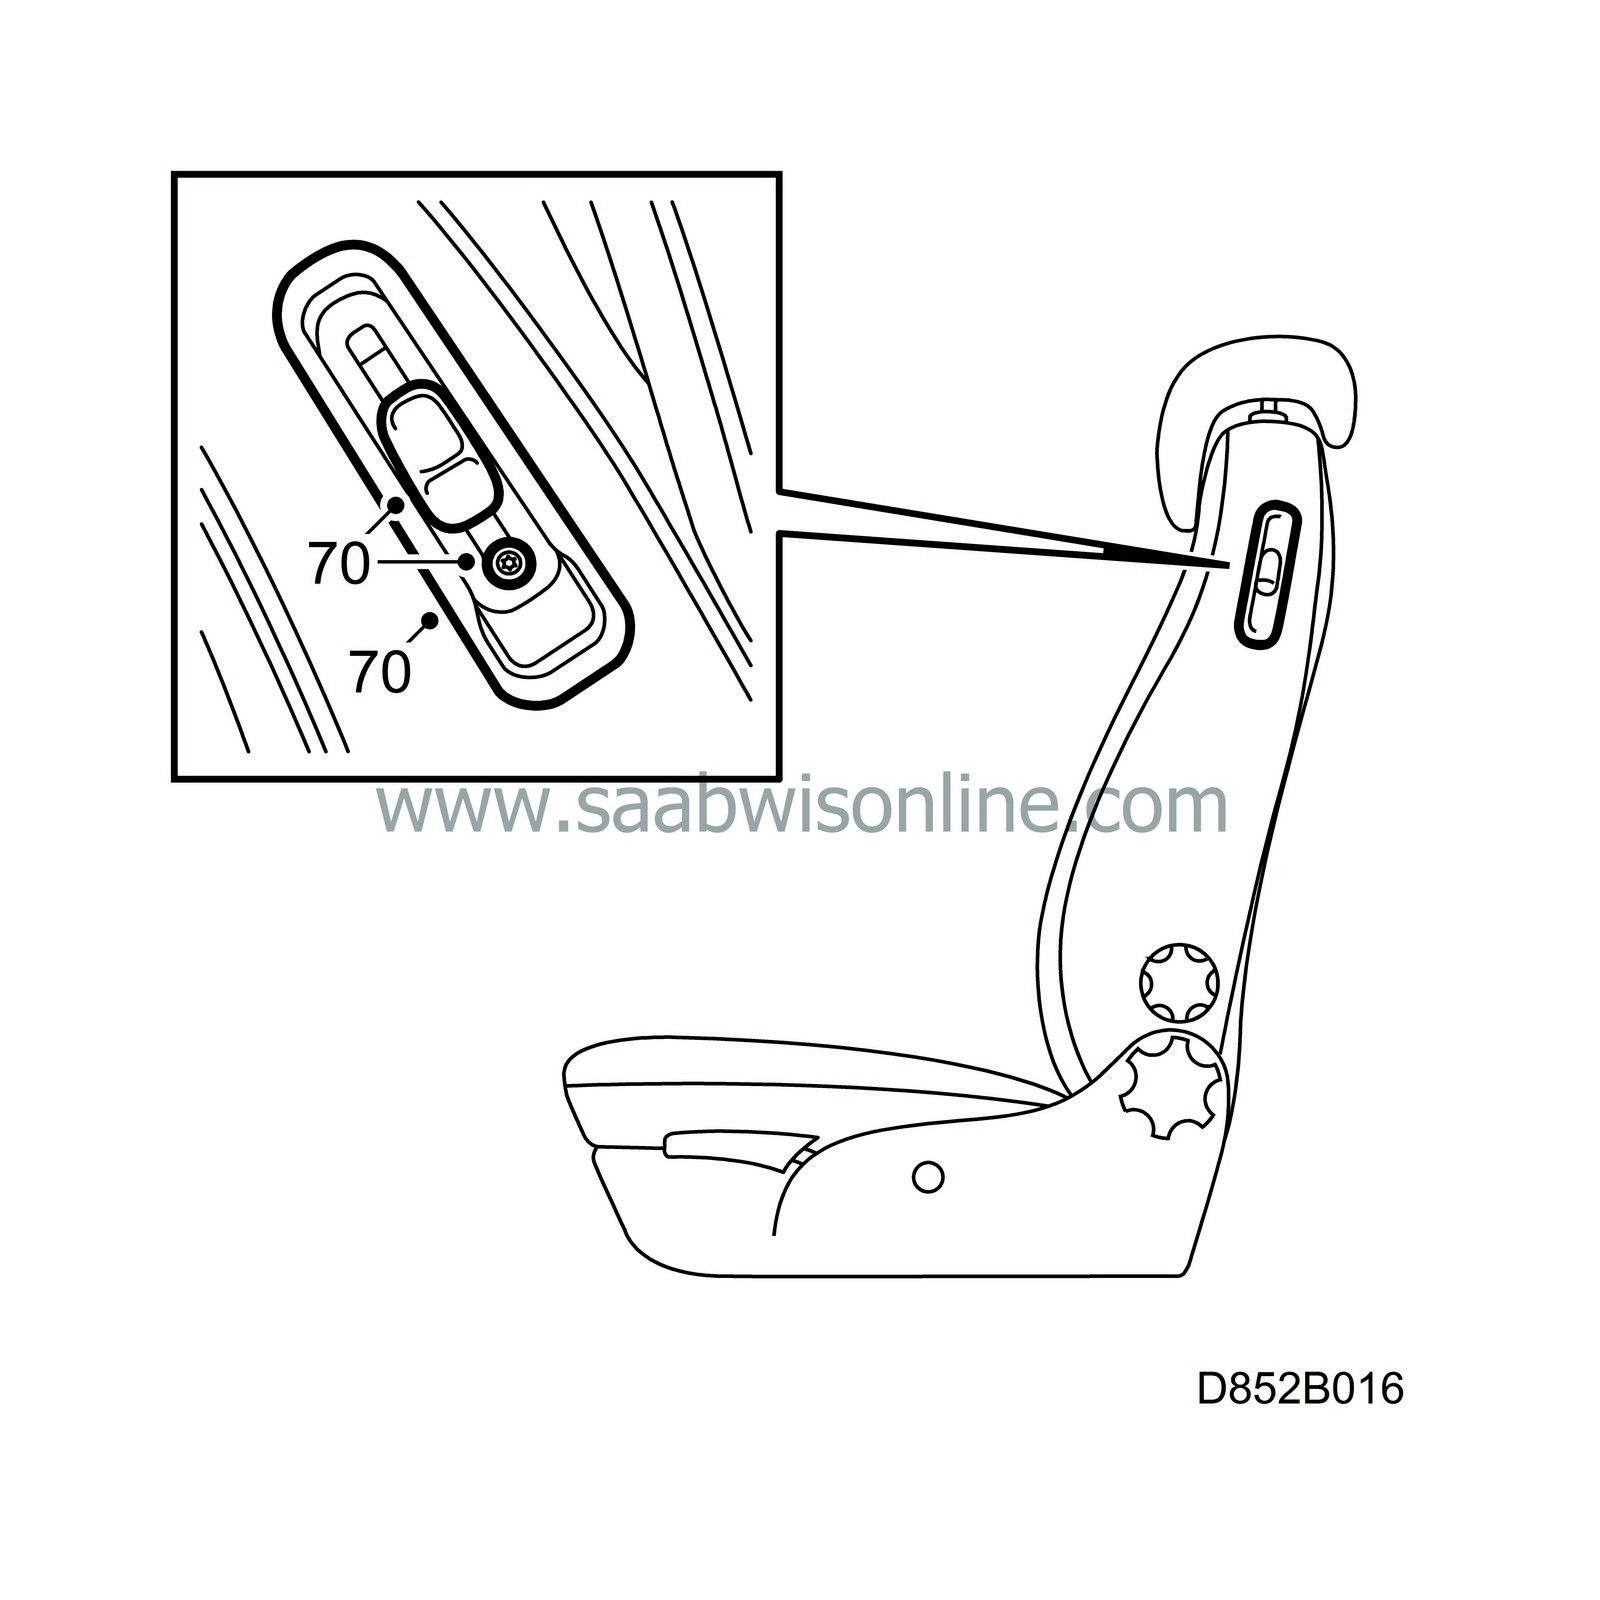
Fit the upholstery, see WIS, and the new frame and button to the backrest release lever.
|
|
8.
|
Creaking from the clamping ring for the lumbar support cable/lumbar support strip.
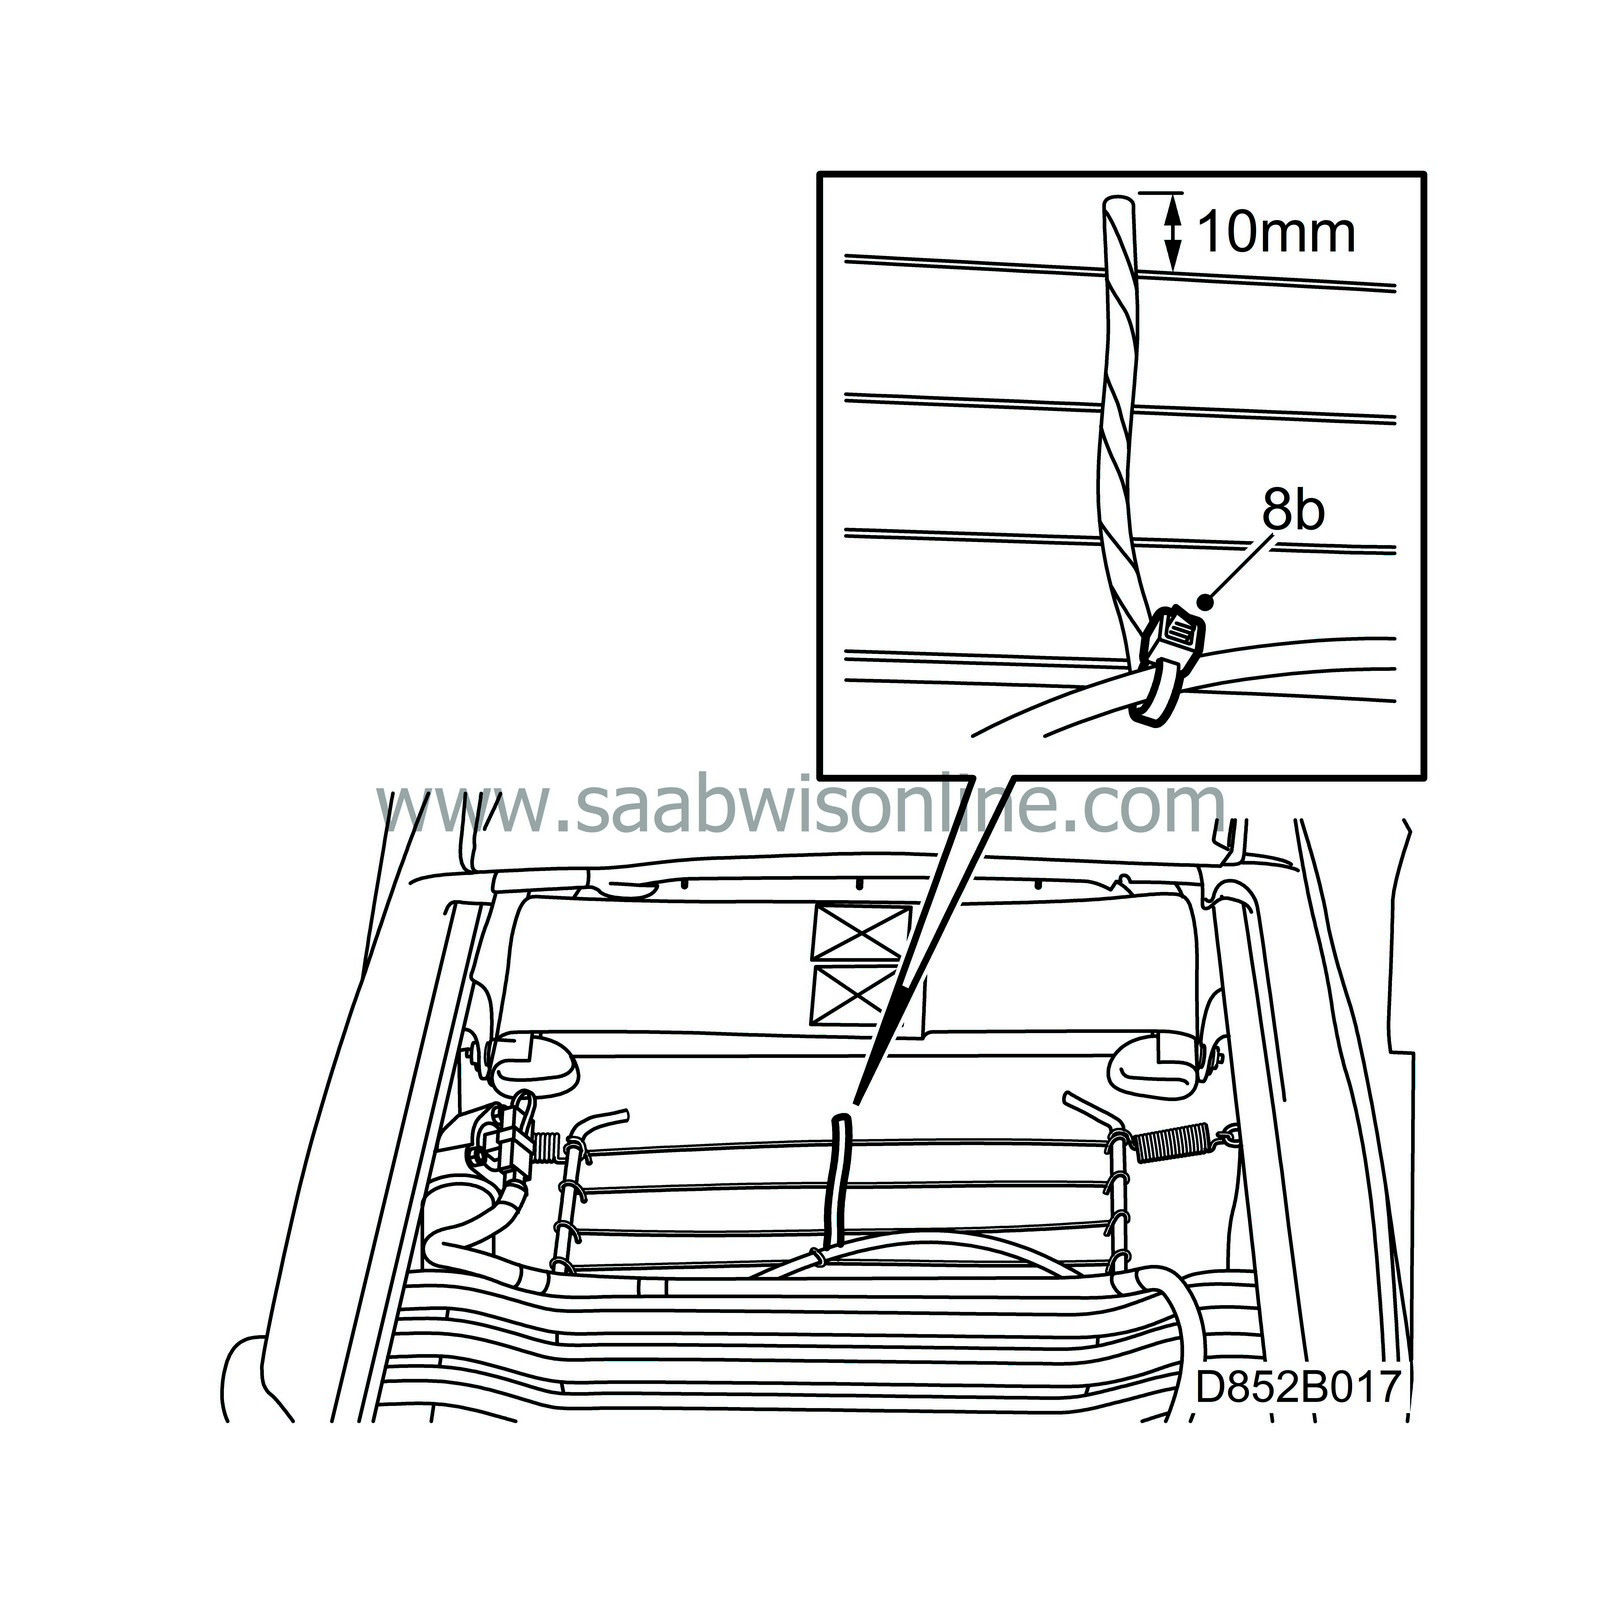
Up to and including VIN X2068252 (3/5D) and X7055607 (CV) respectively
|
|
|
8.a.
|
Remove the clamping ring.
|
|
|
8.b.
|
Fit a cable tie in the same way as the ring was fitted. Do not tighten the cable tie too hard.
|
|
9.
|
Clicking noise caused by the collision between the bottom of the SAHR strip and the centre string of the pullmaflex mat.
Up to and including VIN X2053769 (3/5D) and X7050700 (CV) respectively
|
|
|
9.a.
|
Cut the centre string. The end facing the SAHR strip should be 10 mm above the last net wire.
|
|
10.
|
Creaking between the SAHR frame and its plastic bushings.
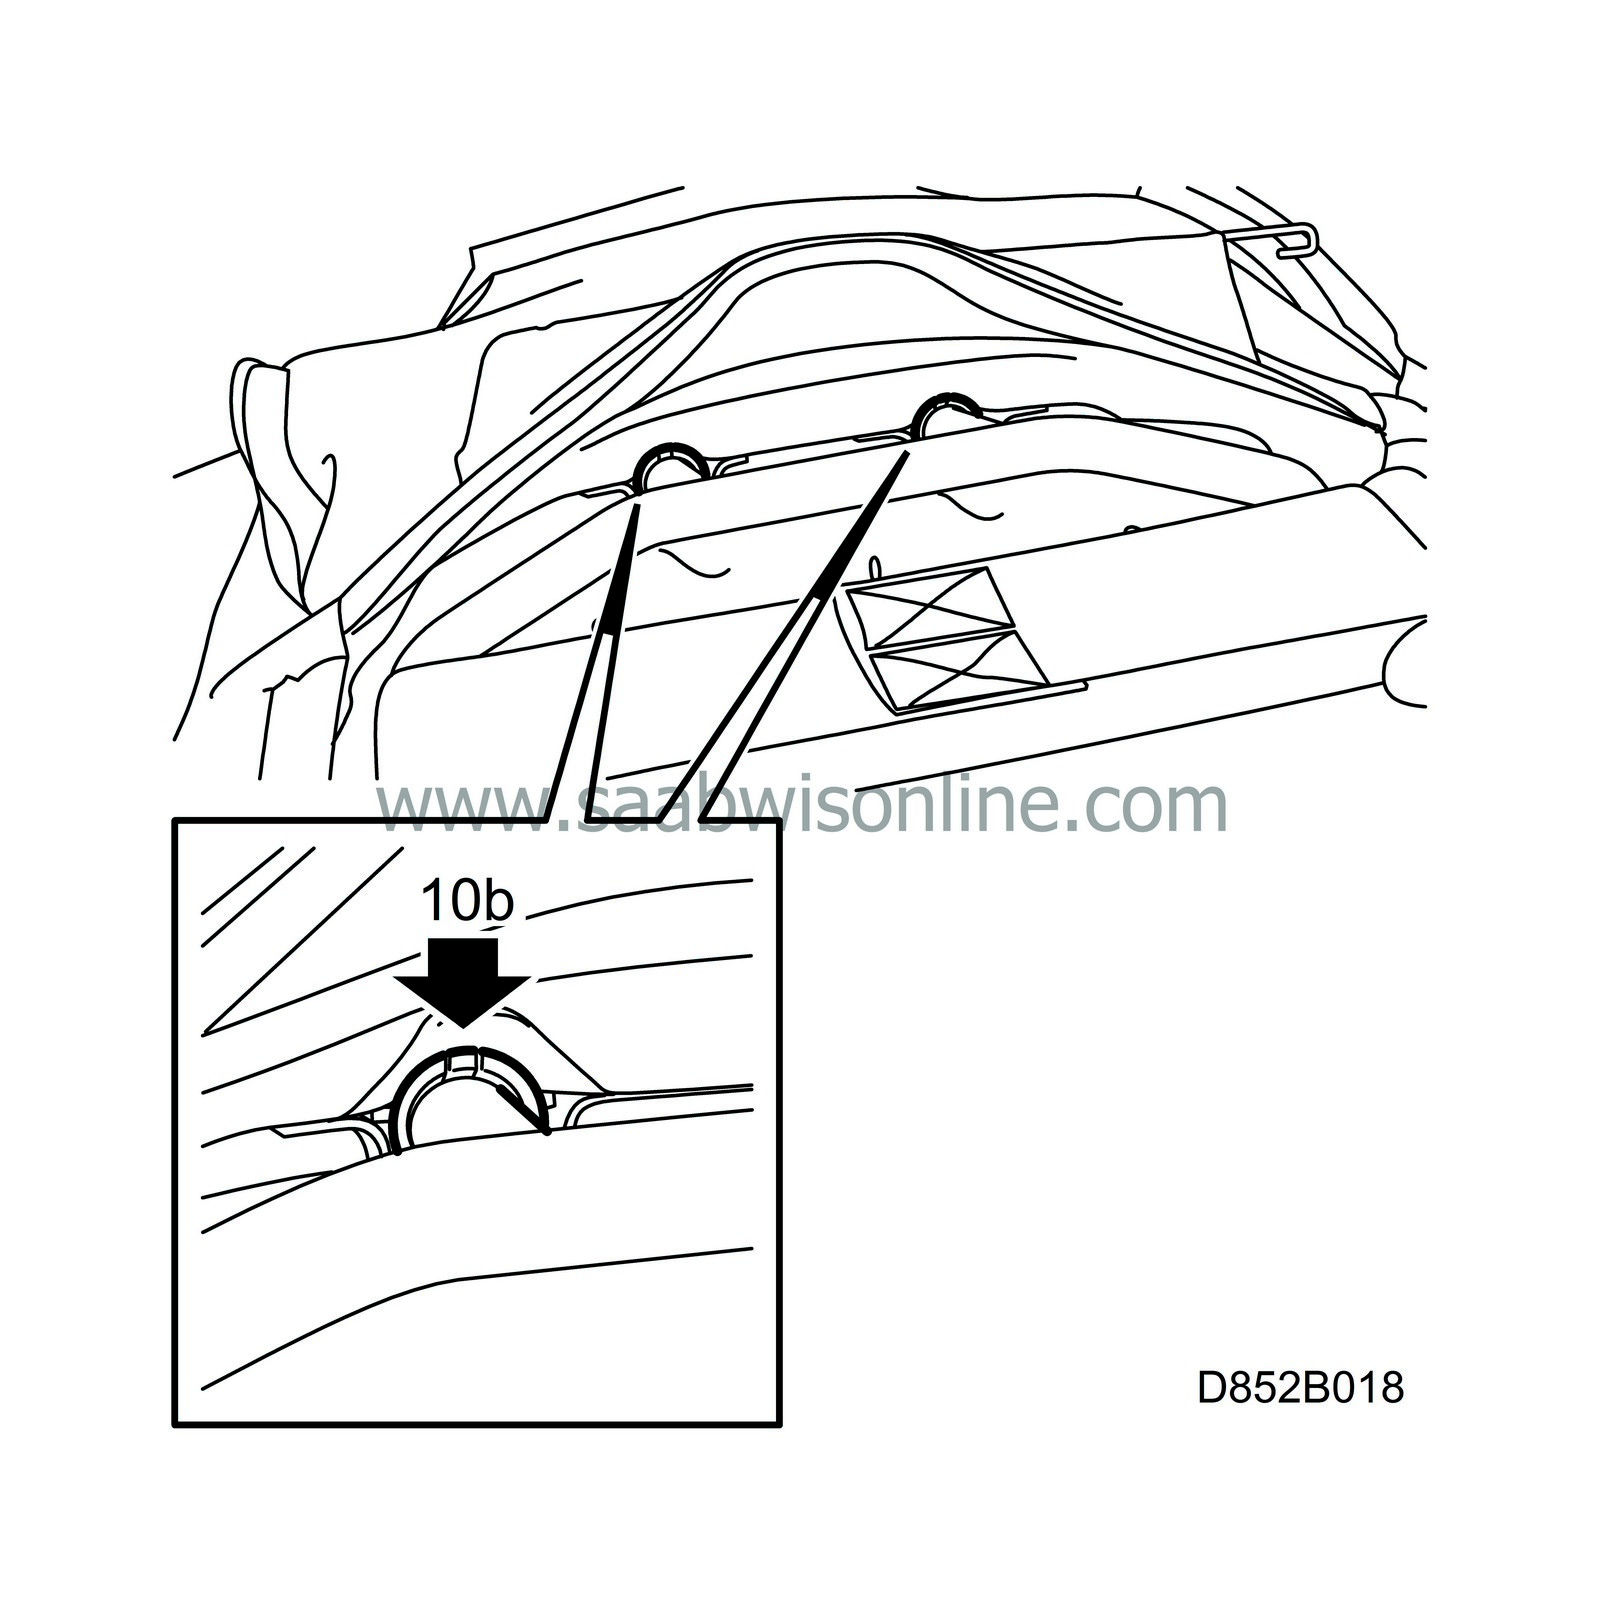
Up to and including VIN W2069316/X2008691 (3/5D) and X7020086 (CV) respectively
|
|
|
10.a.
|
Unhook the three upholstery hooks and fold up the rear upholstery.
|
|
|
10.b.
|
Apply lubricant, part no. 30 32 364, in the bushings while as the head restraint is moved back and forth.
|
|
|
10.c.
|
Fold down the rear upholstery and fit the upholstery hooks.
|
|
11.
|
Creaking between the SAHR strip and the tubular frame.
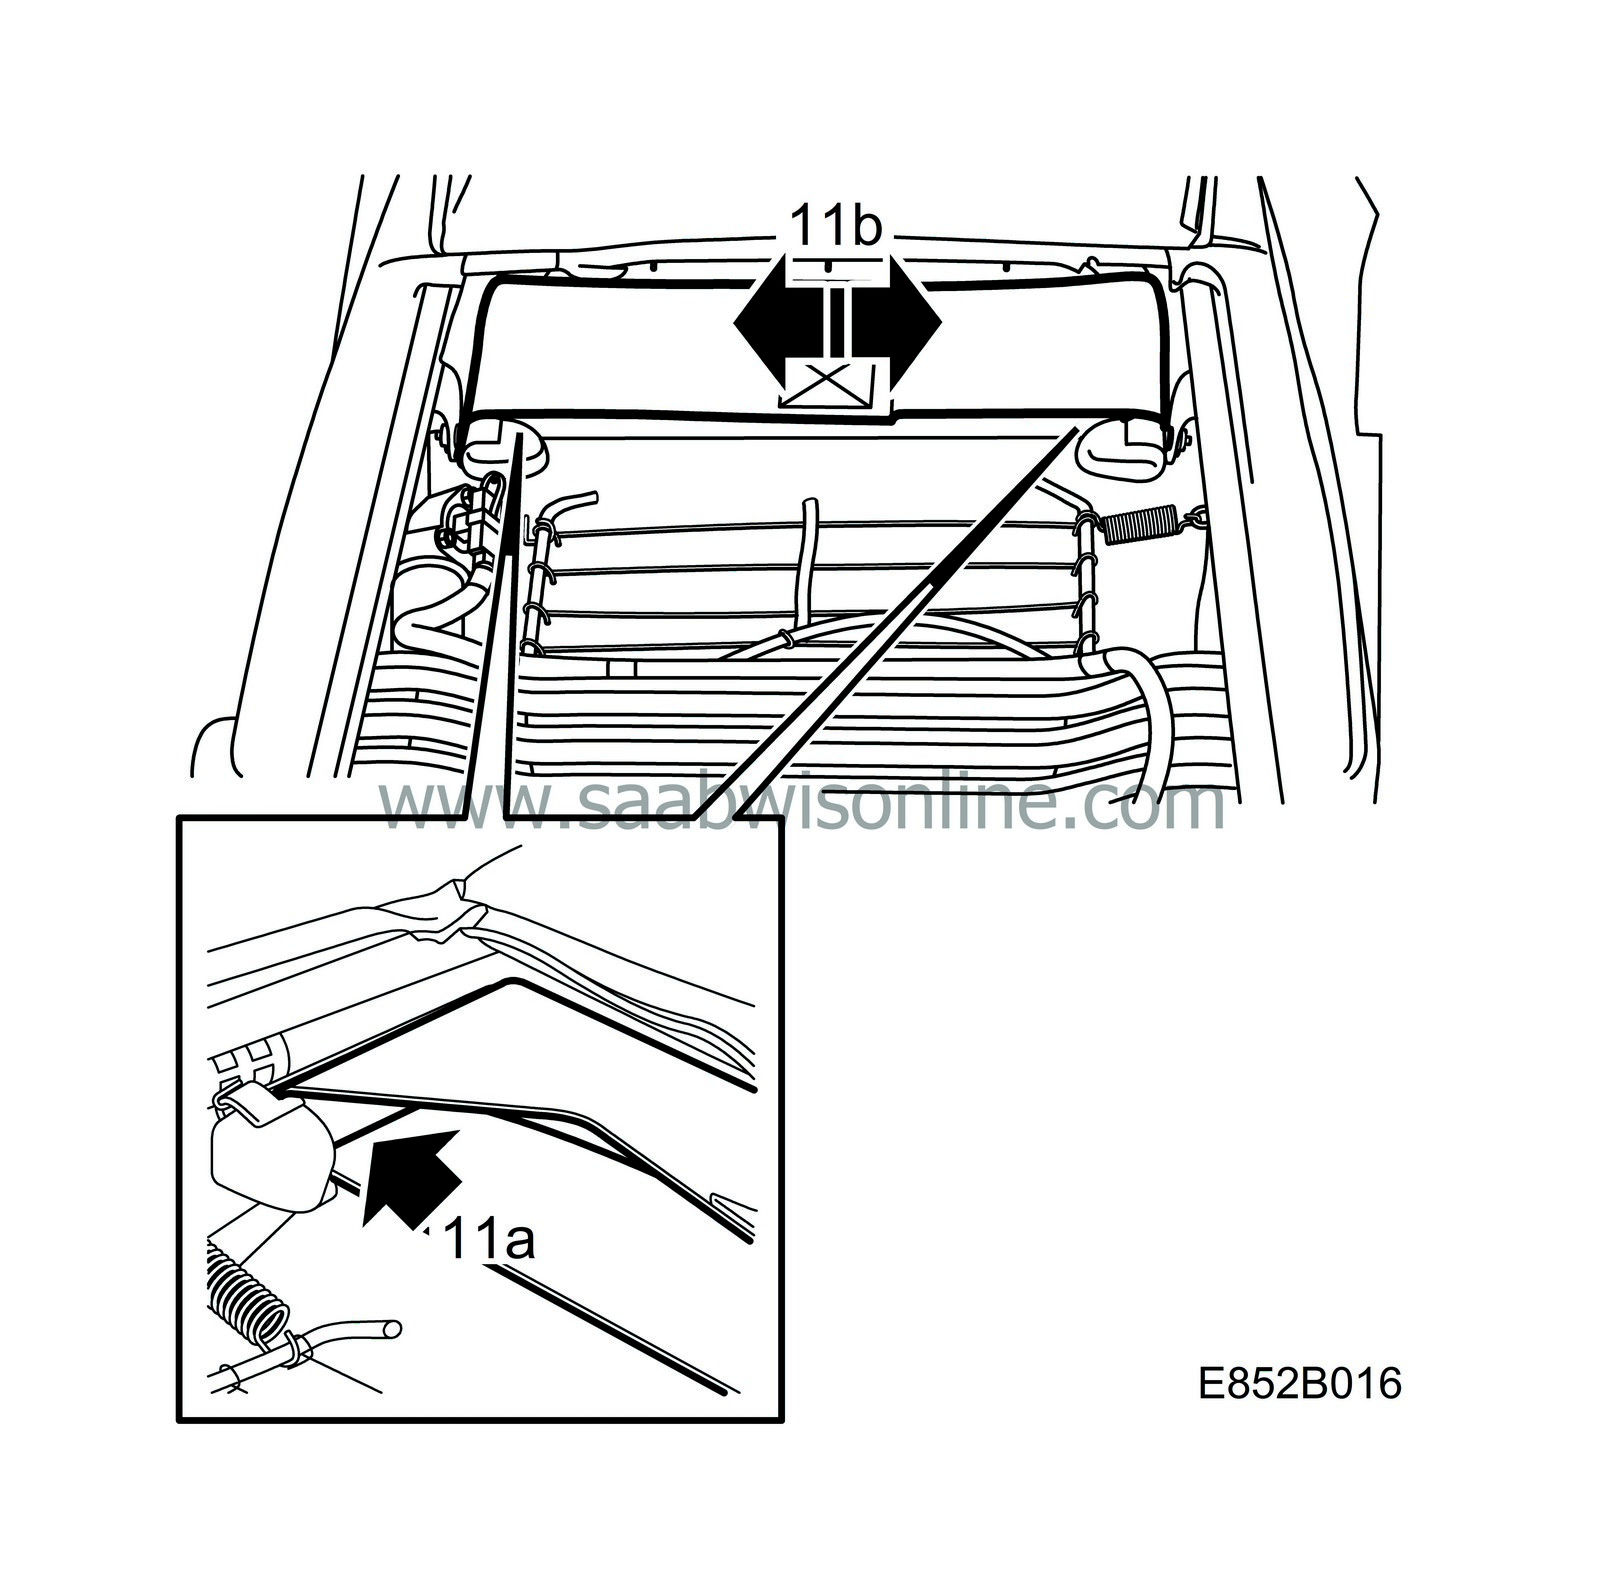
Up to and including VIN W2069316/X2008691 (3/5D) and X7020086 (CV) respectively
|
|
|
11.a.
|
Apply grease, part no. 30 32 364, between the strip and the tube.
|
|
|
11.b.
|
Turn the strip back and forth so that the grease permeates well.
|
|
12.
|
Creaking in the pullmaflex mat in the backrest.
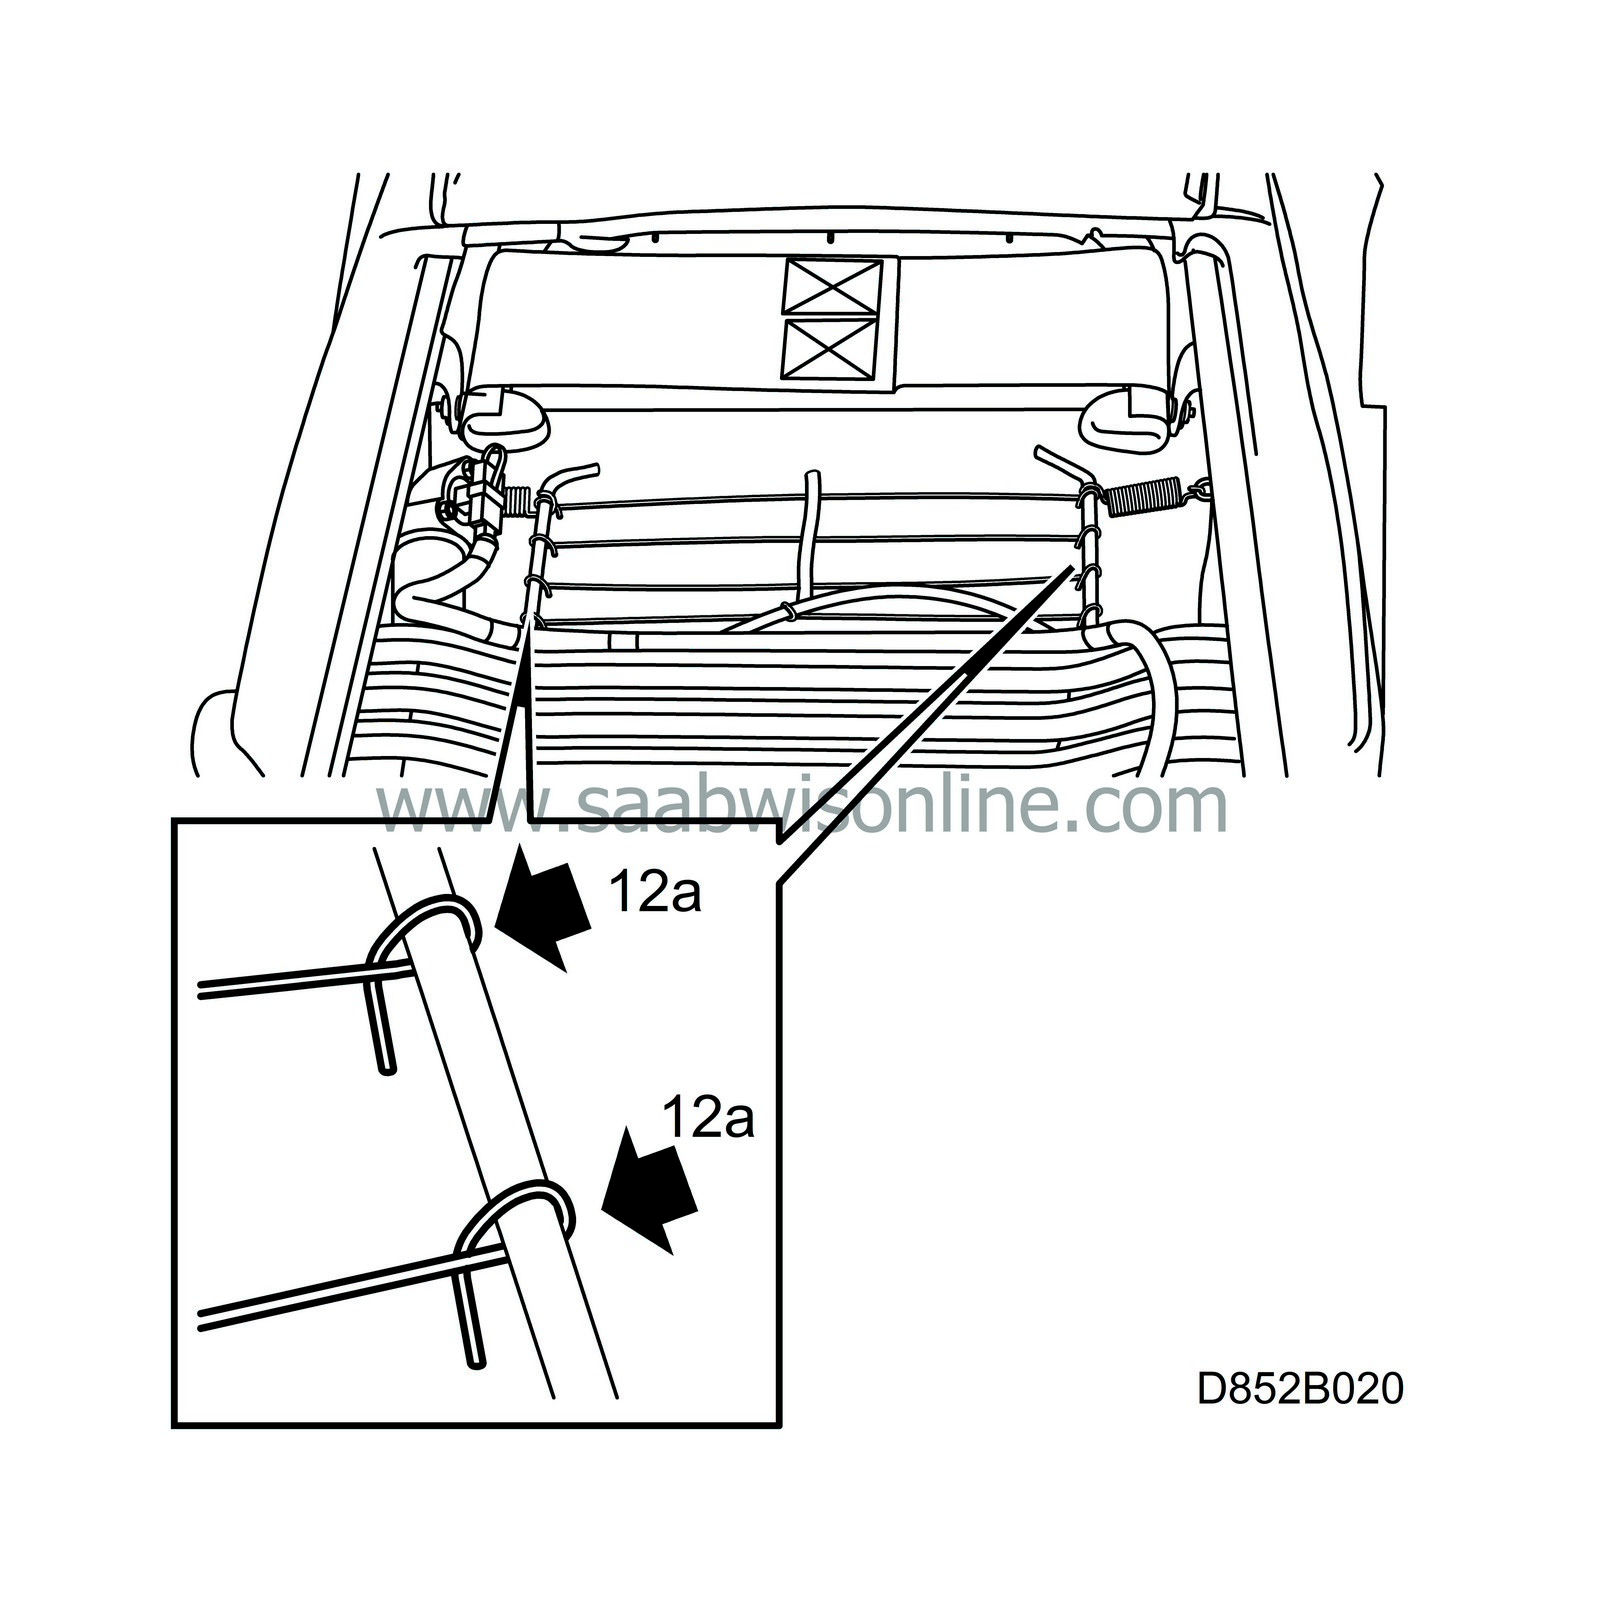
Up to and including VIN X2064923 (3/5D) and X7054520 (CV) respectively
|
|
|
12.a.
|
Apply lubricant, part no. 30 32 364, on the wire "ties" to the frame on the pullmaflex net.
|
|
13.
|
Put back the rear of the backrest upholstery by replacing the upholstery strip along the sides.
|
|
14.
|
Insert the board in the backrest upholstery.
|
|
15.
|
Lead the cables through the hole and replace the upholstery strip on the bottom edge. Connect the cables and fit the new cable tie.
|
|
16.
|
Fasten the straps on the bottom of the backrest upholstery under the seat cushion.
|
|
17.
|
Fit and try out the seat.
|
|
Warranty/Time Information
|
Failed Object: 85210
Fault/Reason code: 40
Location code: 09 (US: 3, 4)
Repair/Action code: 10
Labour Operation (US): straight time (CA: C6732)
Time: 5D: 0.9h/seat, 3D/CV: 1.6h/seat


 Warning

