(852-2152) Change of easy entry cable
| MODIFICATION INSTRUCTION | |
| Bulletin Nbr: | 852-2152 |
| Date: ........... | September 1999 |
| Market: | see list |
| Change of easy entry cable |
| Safety-related campaign 107 10 |
Cars in stock must be remedied before delivery.
A personal communication must be sent to the owners of cars already delivered requesting them to get in touch with their nearest Saab workshop as soon as possible to have the fault rectified.
| Cars concerned |
Saab 9-3 3D M98-M99 with manual seats and VIN W2050001-W2069663 as well as VIN X2000001-X2031170
Saab 9-3 CV M98-M99 with manual seats and VIN W7050001-W7056549 as well as VIN X7000001-X7024338
| Background |
There is a risk that seats with the easy entry sleeve can jump out of the locked position due to wear and slide forwards in the event of heavy braking.
| Materials |
51 72 143 Kit containing easy entry cable and screw
| Procedure |
Before any procedures are carried out, check box B2 on the modification identity plate. If there is no marking in the box, continue as follows below.
|
|||||||
All illustrations show right-hand front seats but the same applies even to left-hand front seats.
| 1. |
Remove the seat from the car, see 8 Body, Seats in WIS.
|
|
| 3. |
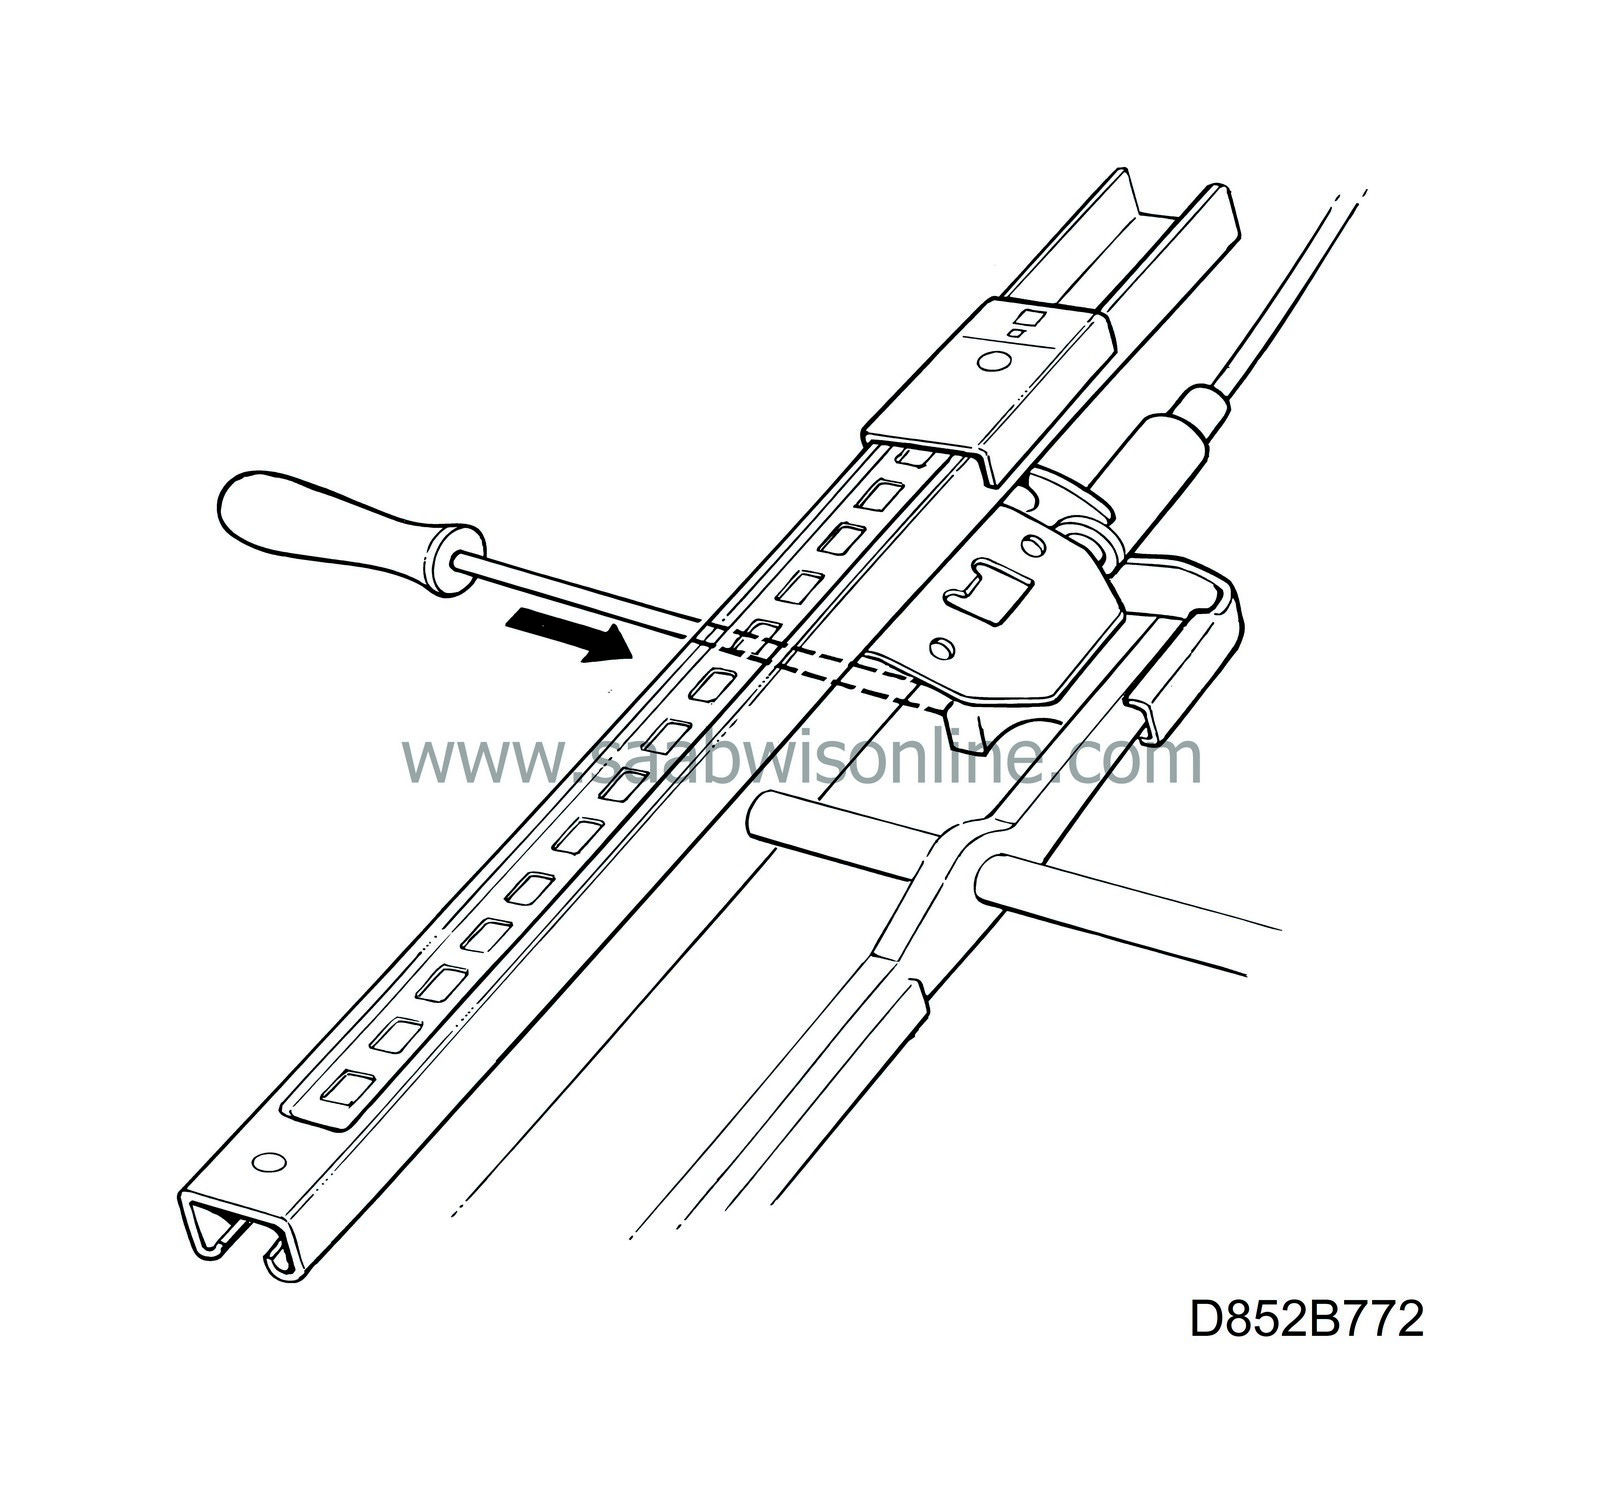
Remove the bolt that holds the bracket with the easy entry sleeve in place. Use a narrow screwdriver (Torx T30).
|
|
| 4. |
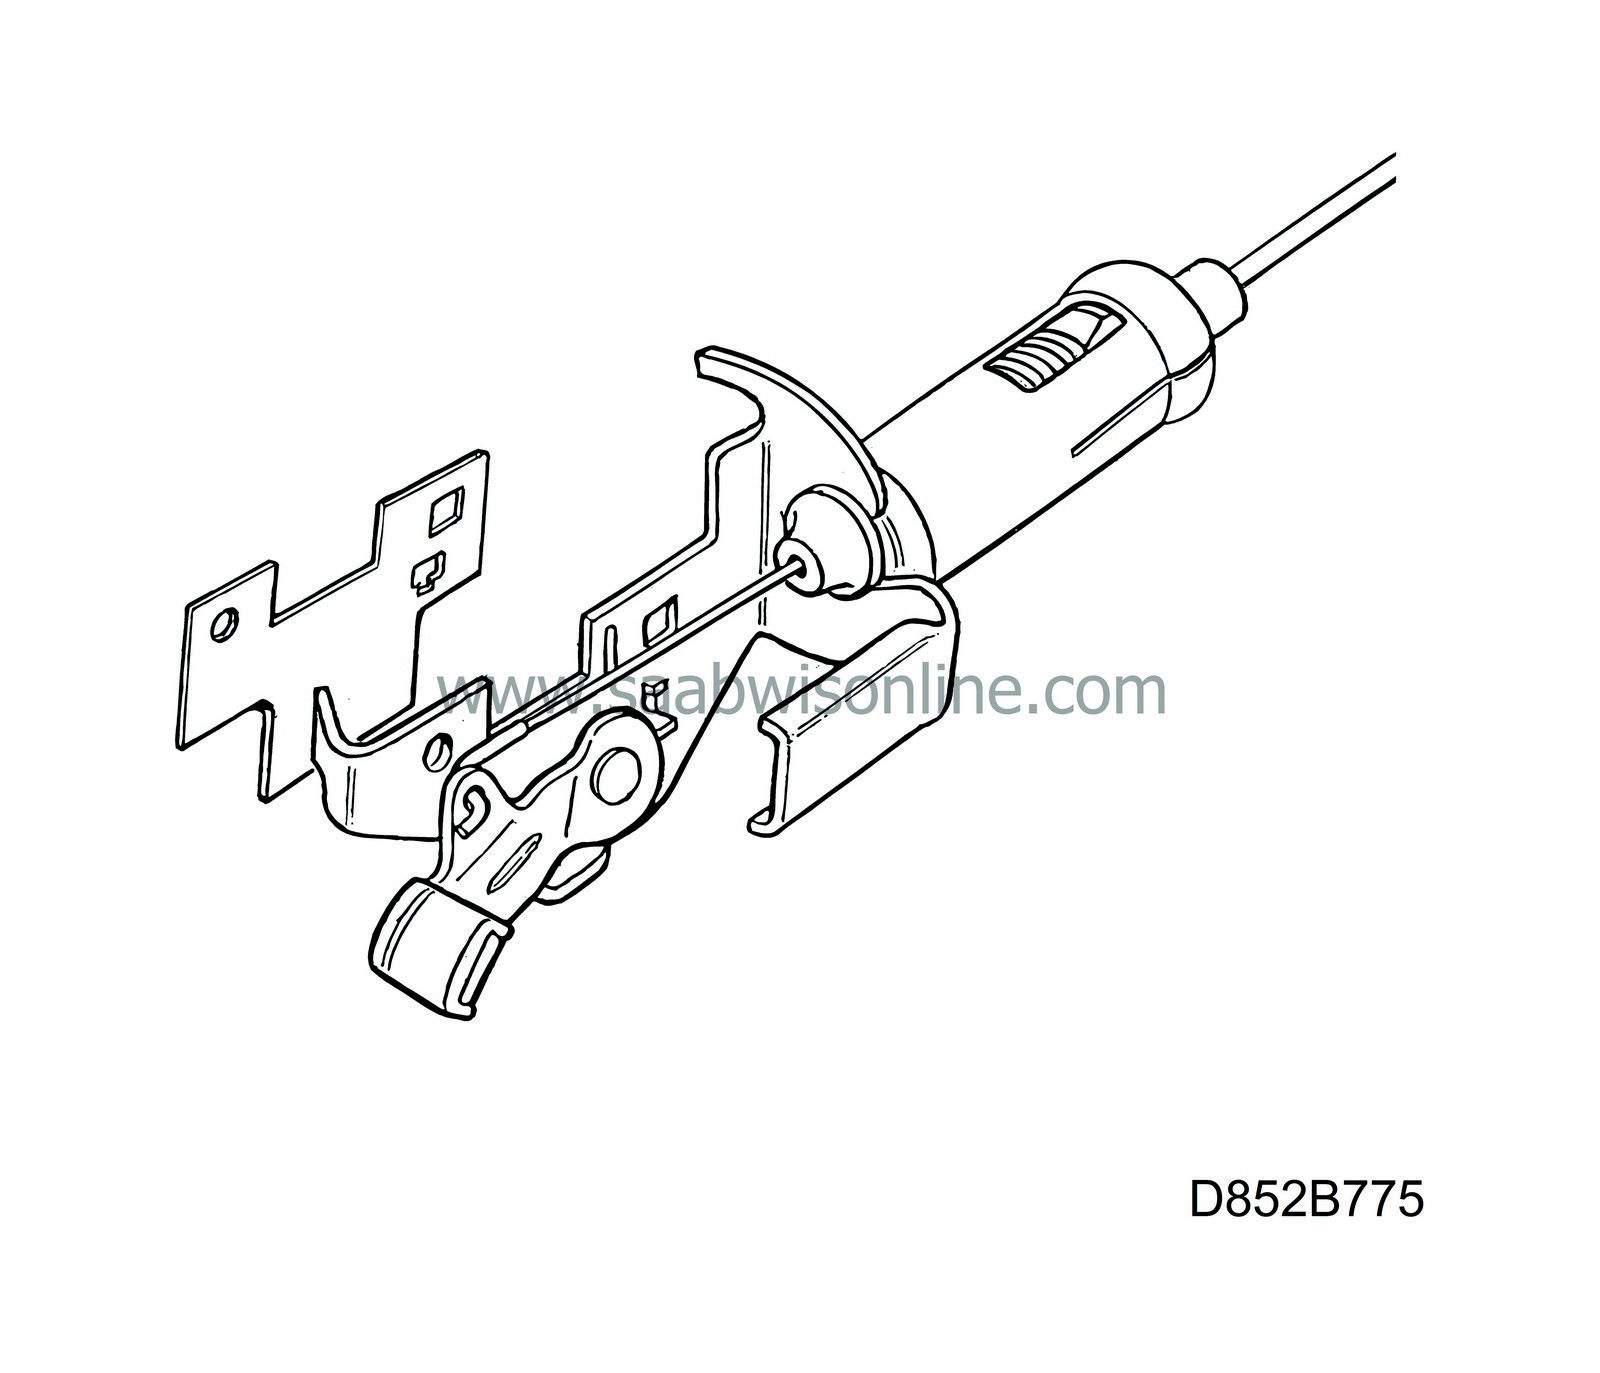
Remove the bracket with the easy entry sleeve and adherent spacers. Depress the locking pin for legroom adjustment to make removal of the cable easier.
|
|
| 5. |
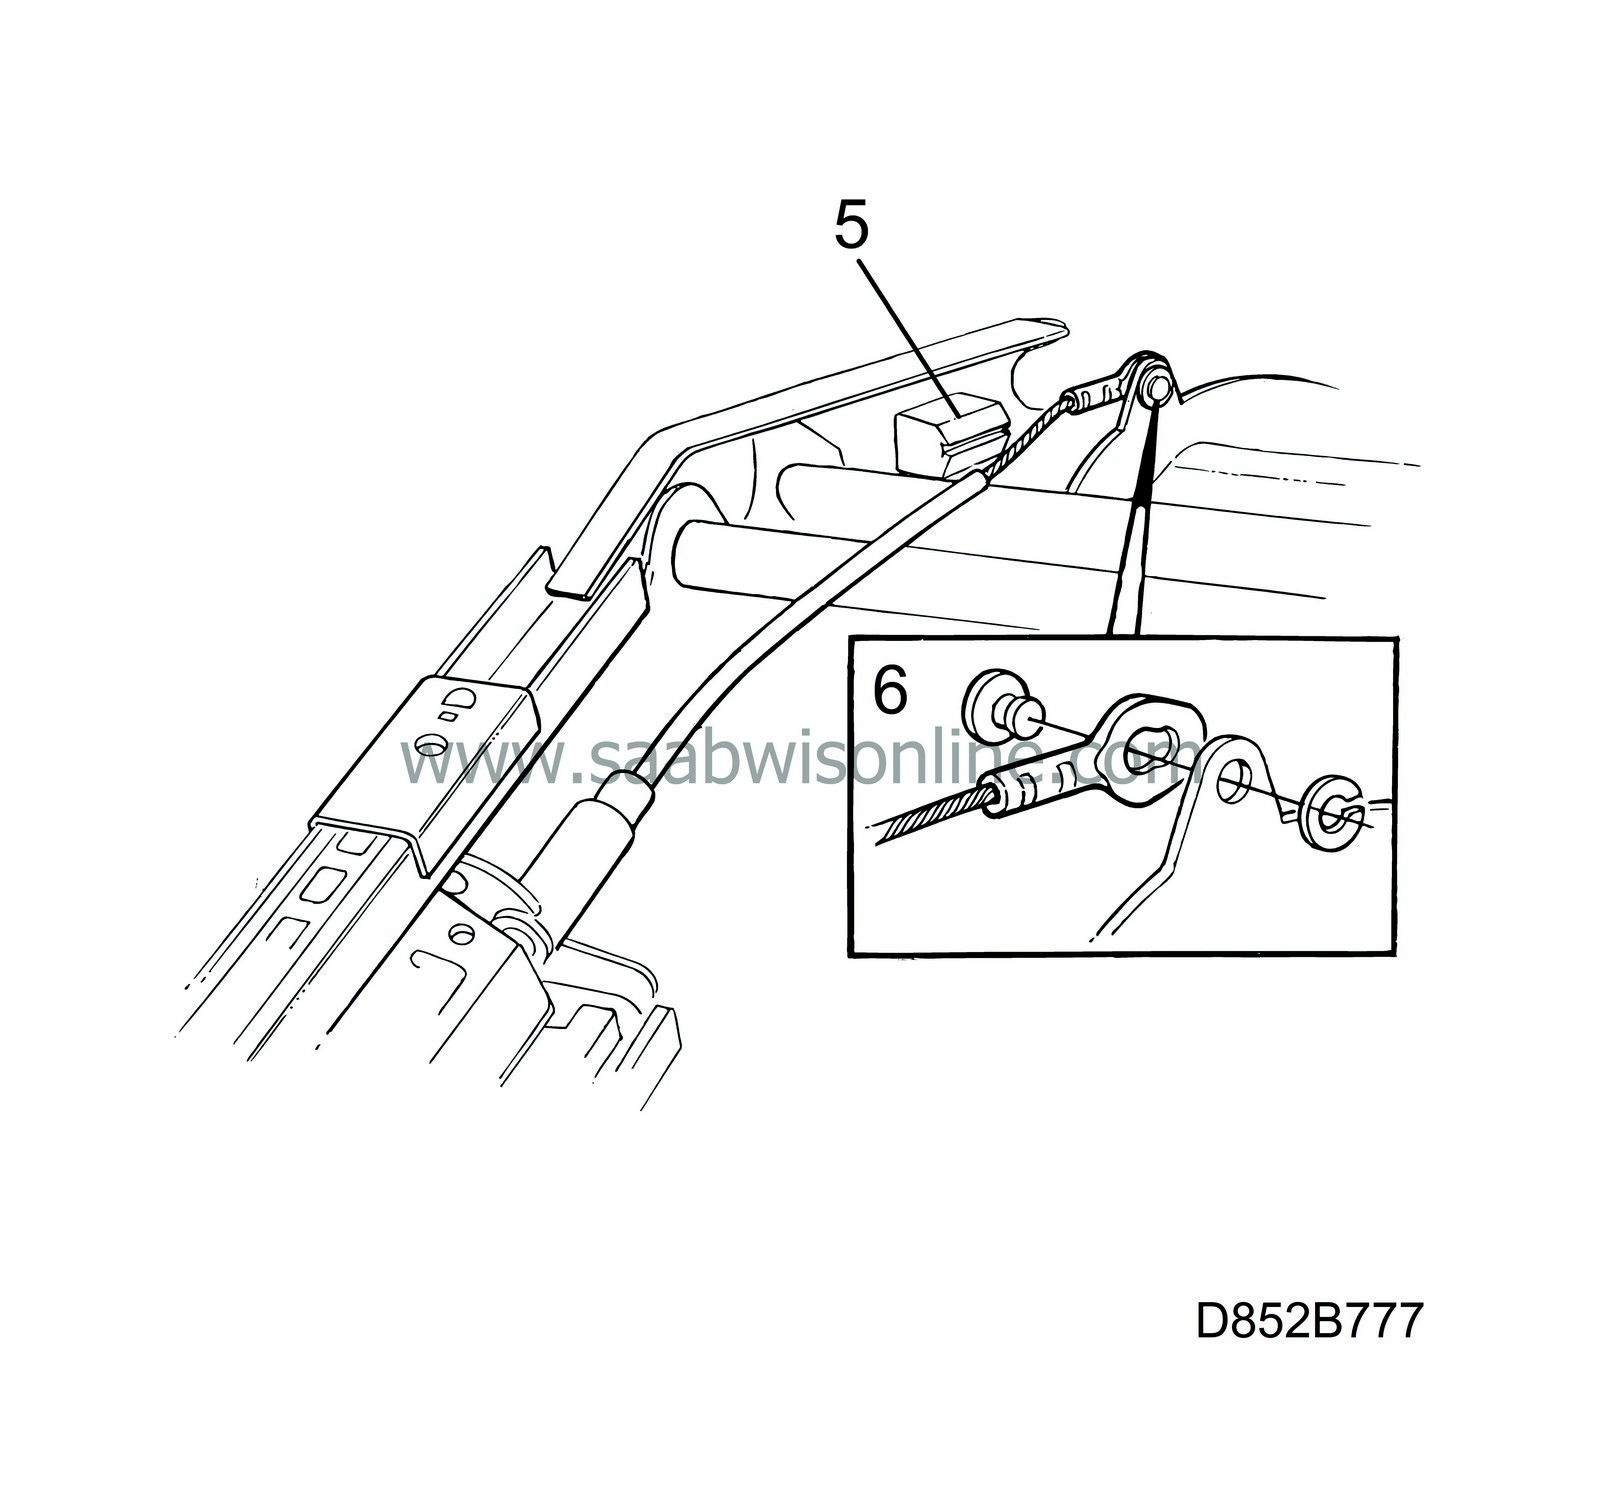
Remove the cable's outer casing from its rear attachment.
|
|
| 6. |
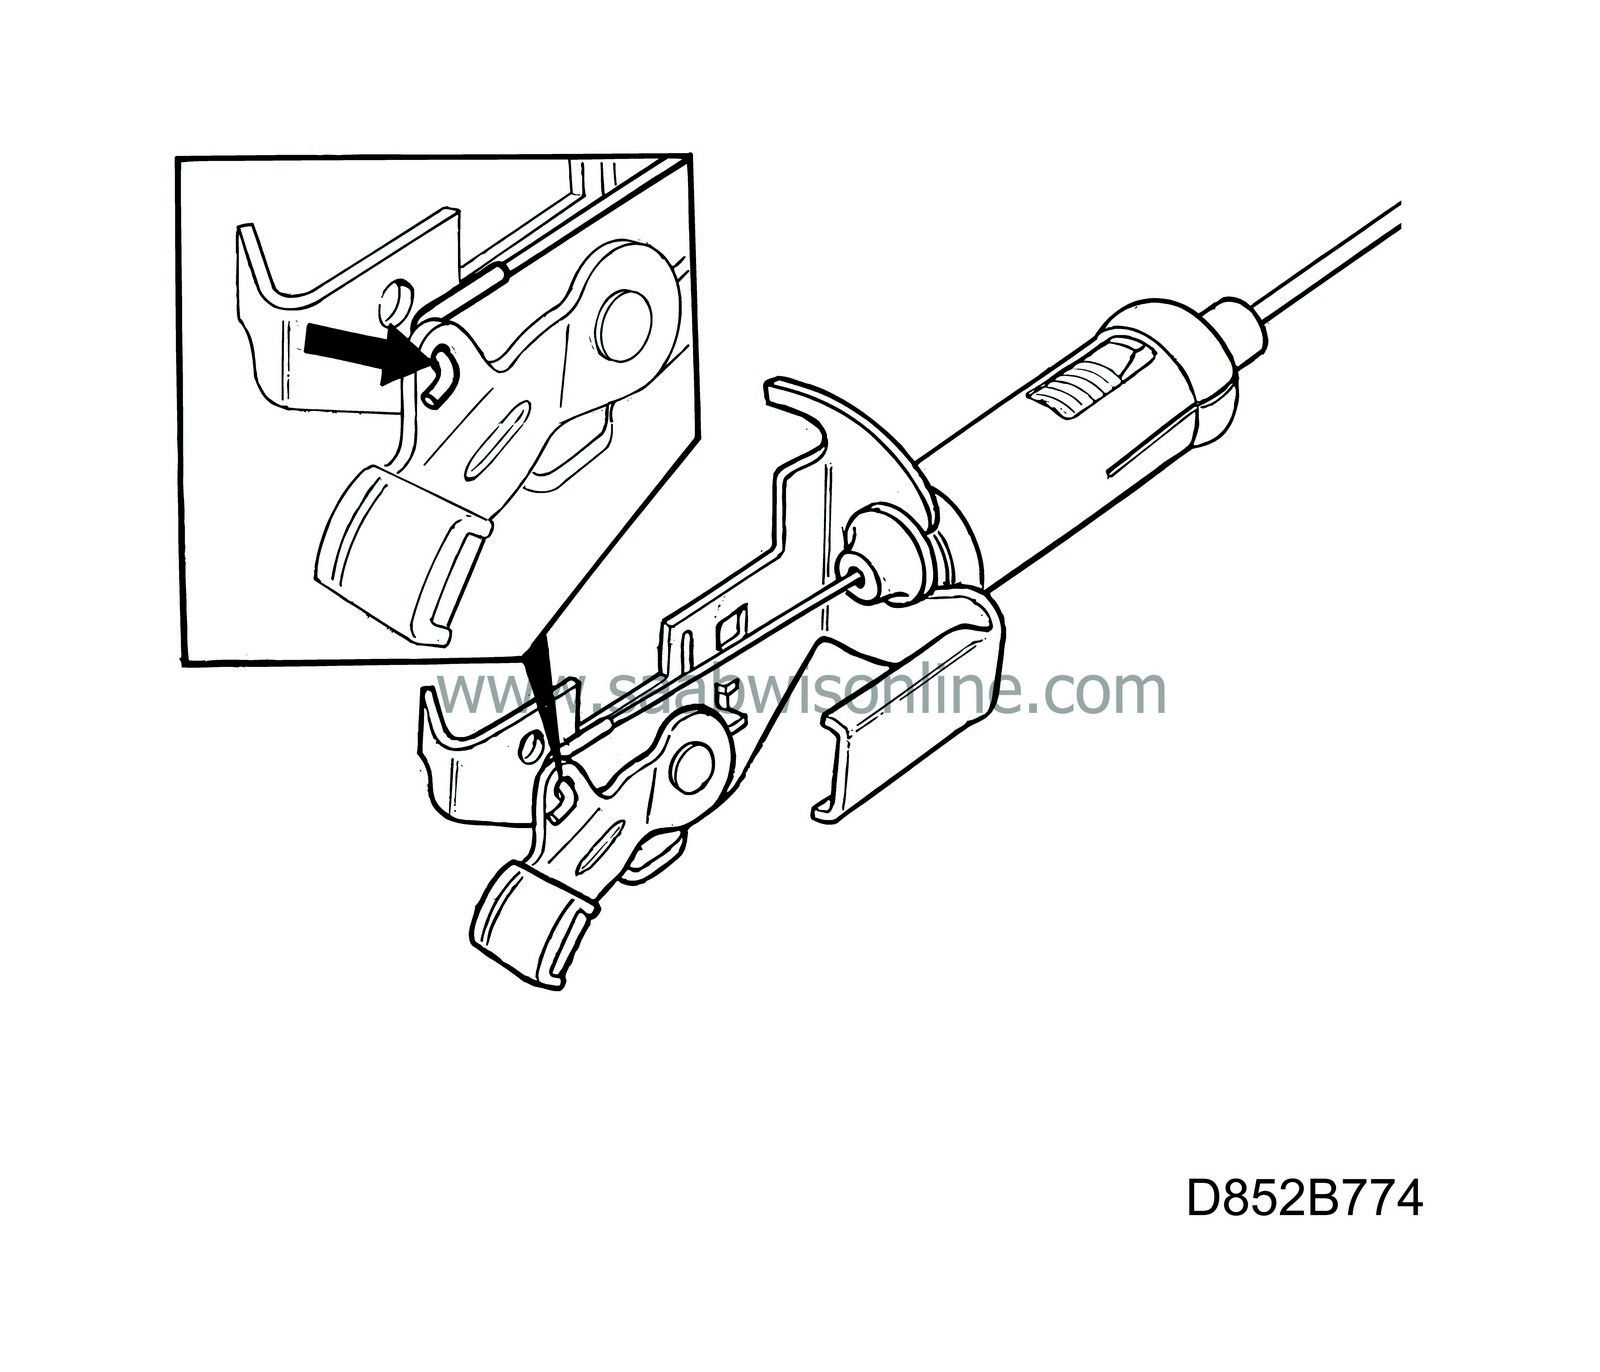
Remove the cable from its rear attachment.
Use a pair of pliers to remove the eye on the end of the cable from the recliner mechanism. |
|
| 7. |
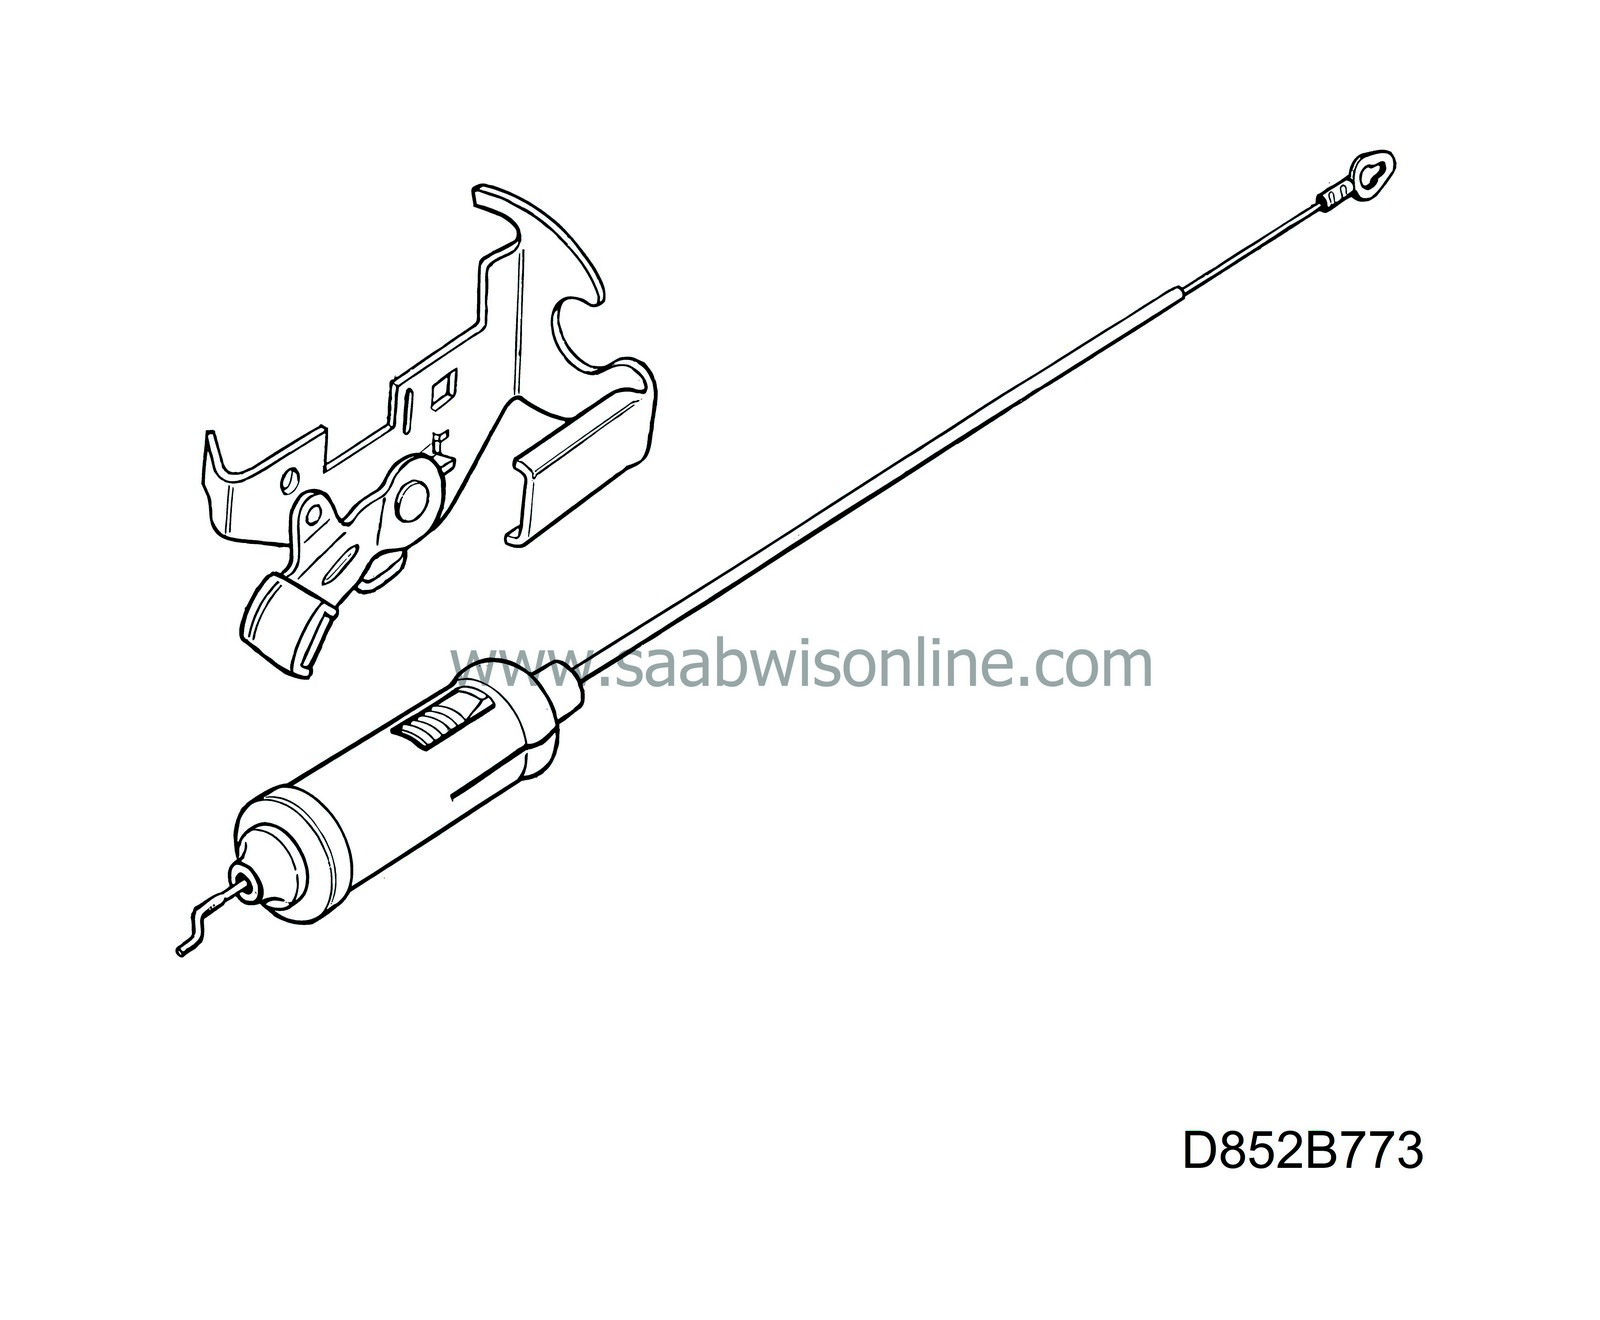
Remove the old easy entry sleeve from the bracket.
|
|
| 8. |
Fit the new easy entry sleeve in the bracket.
|
|||||||
| 9. |
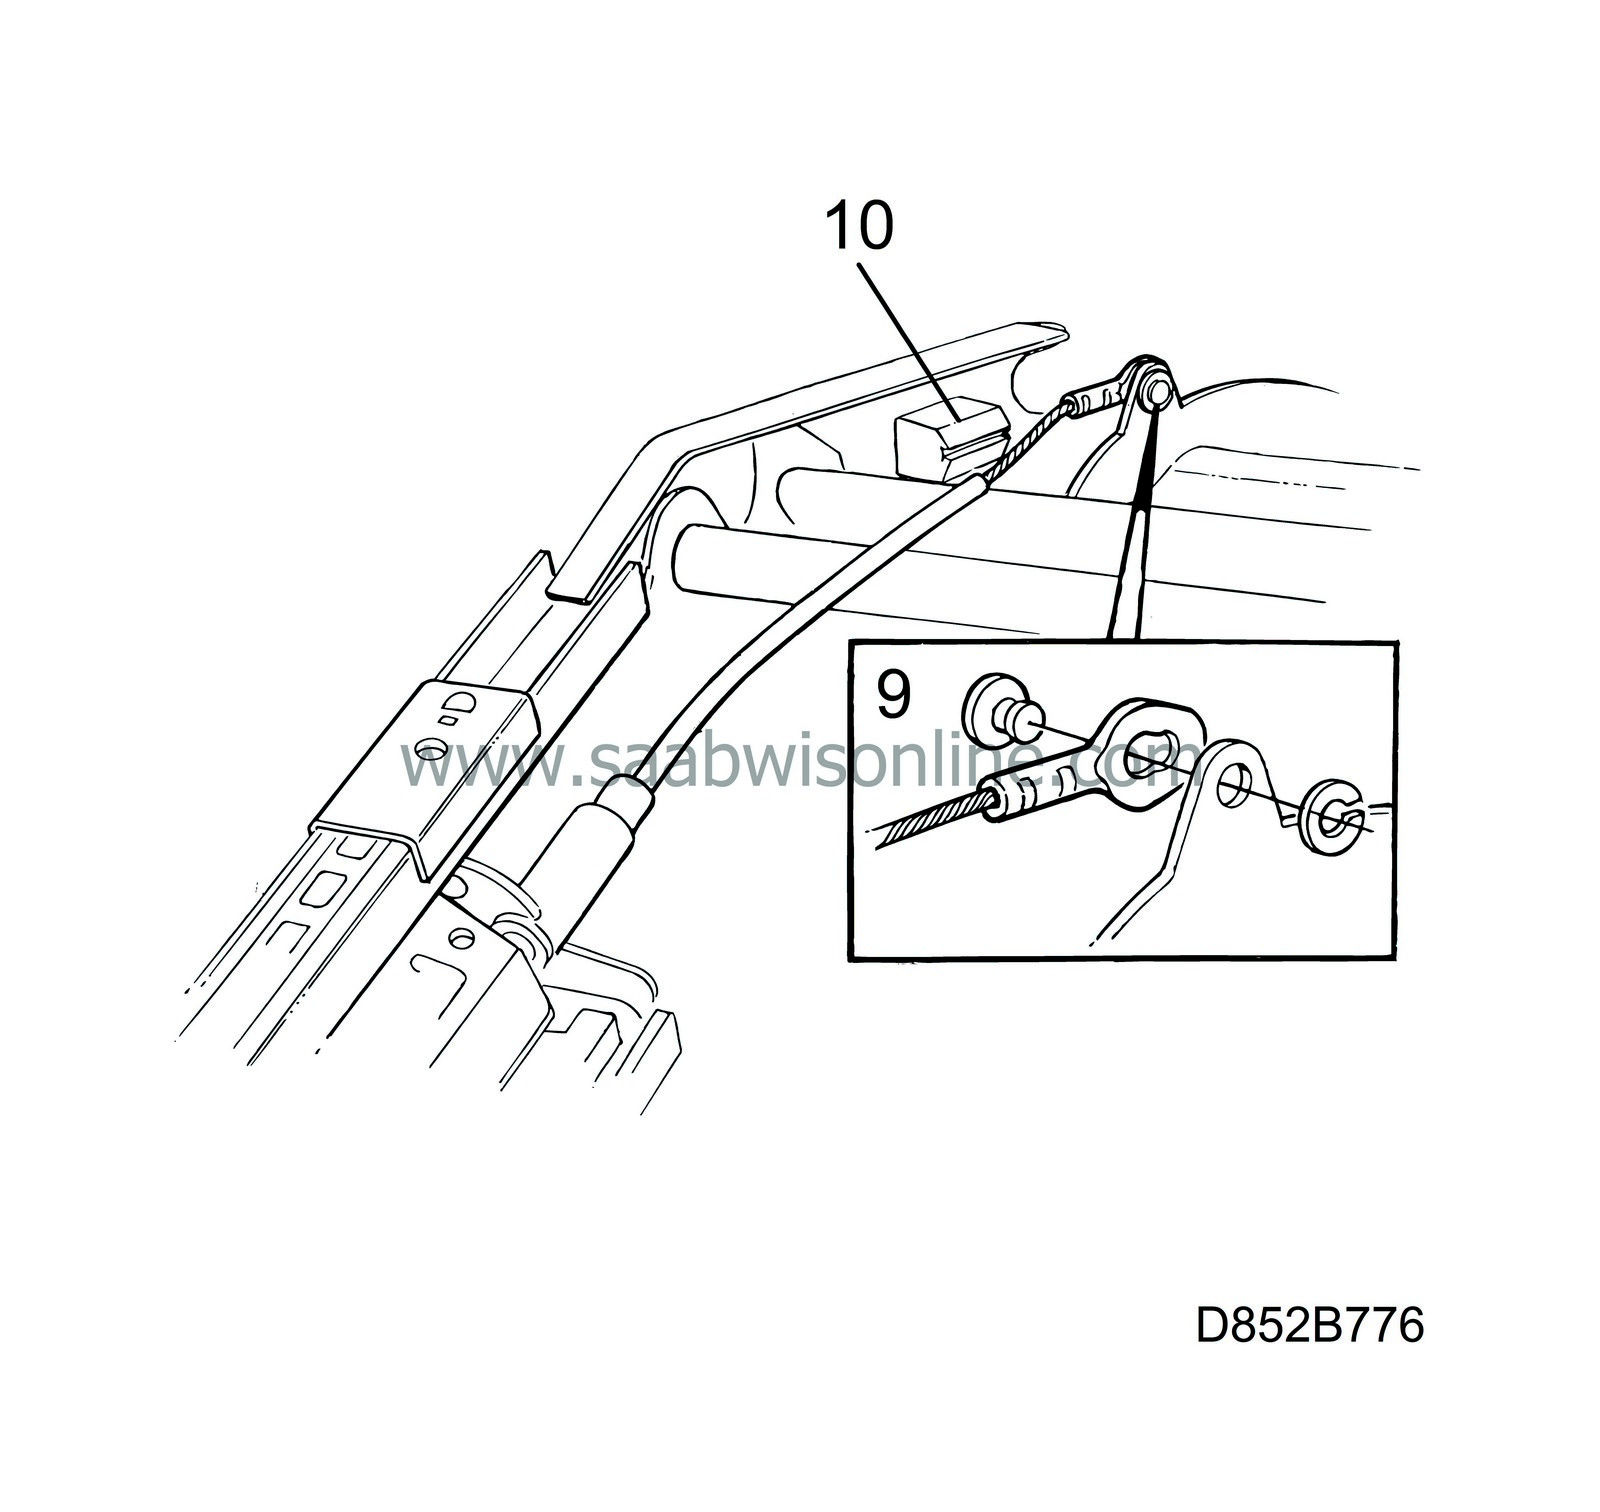
Fit the eye on the end of the cable using a pair of pliers.
|
|||||||
| 10. |
Fit the cable's outer casing to its rear attachment.
|
|
| 11. |
Fit the bracket together with the easy entry sleeve to the chassis with the new screw (Torx T30). Do not forget the spacer. Depress the locking pin for legroom adjustment to make fitting of the bracket easier.

|
|
| 12. |
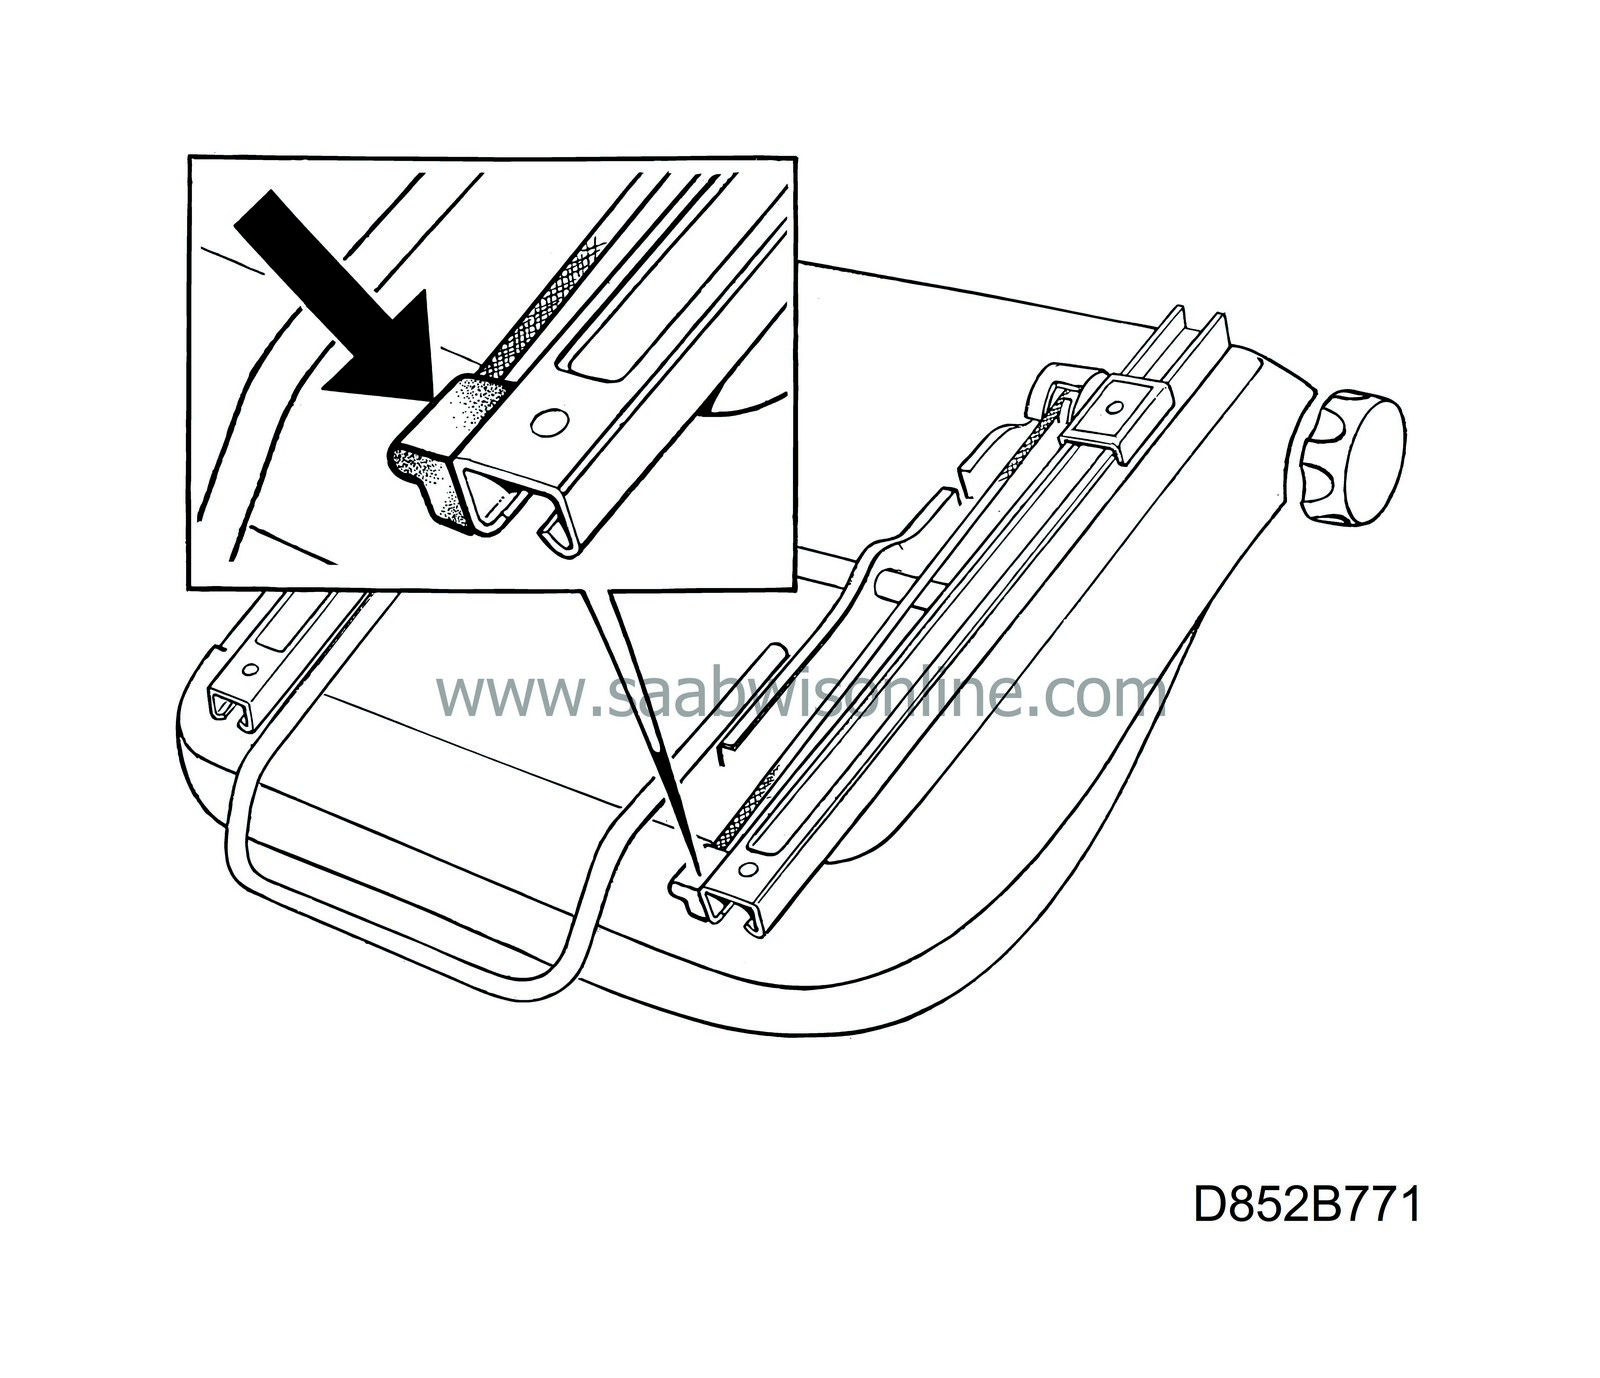
Move the seat rail so that the seat is in its rearmost position.
|
|
| 13. |
Fit the torsion spring in the seat rail. Tighten the spring very carefully.
|
|||||||||
| 14. |
Fit the seat in the car, see 8 Body, Seats in WIS.
|
|
| 15. |
Check that the fitted easy entry system works correctly.
|
|
| Marking the modification identity plate |
After completing the procedure, box B2 of the modification identity plate must be marked. If the procedure was performed by the importer, mark the box with the number “7” and if it was performed by the dealer with the number “8”.
| Warranty/Time information |
See separate information.

 Warning

