Oil sump B235R, B205L/R
| Oil sump B235R, B205L/R |
| To remove (in car) |
| 1. |
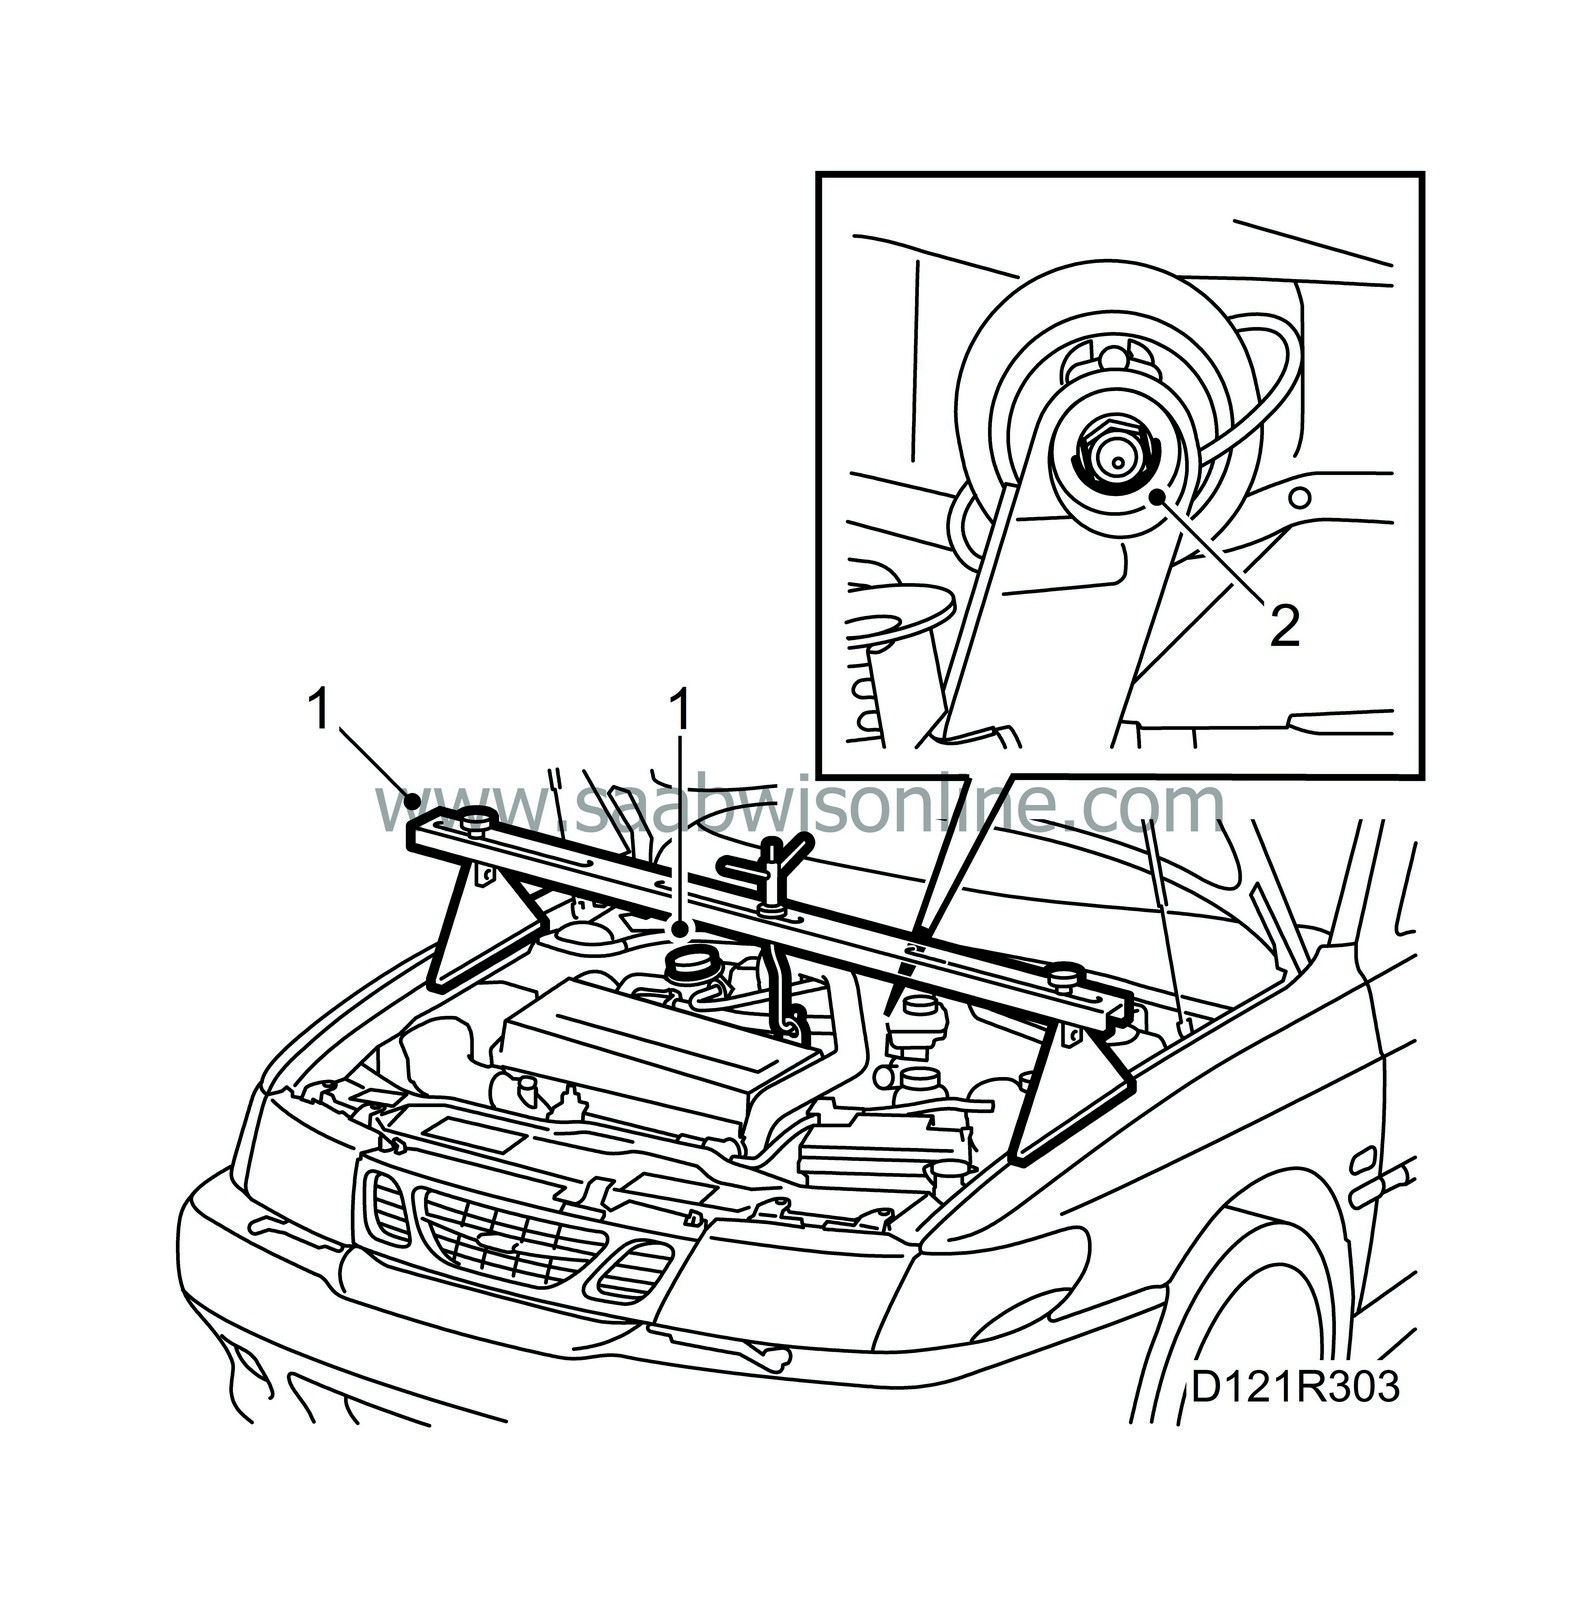
Remove the engine cover. Take out the dipstick and put a rag in the pipe. Fit the lifting beam, part no. 83 94 850
 and take up the weight of the engine.
|
|
| 2. |
Remove the centre bolt in the rear engine mounting.
|
|||||||||||||
| 3. |
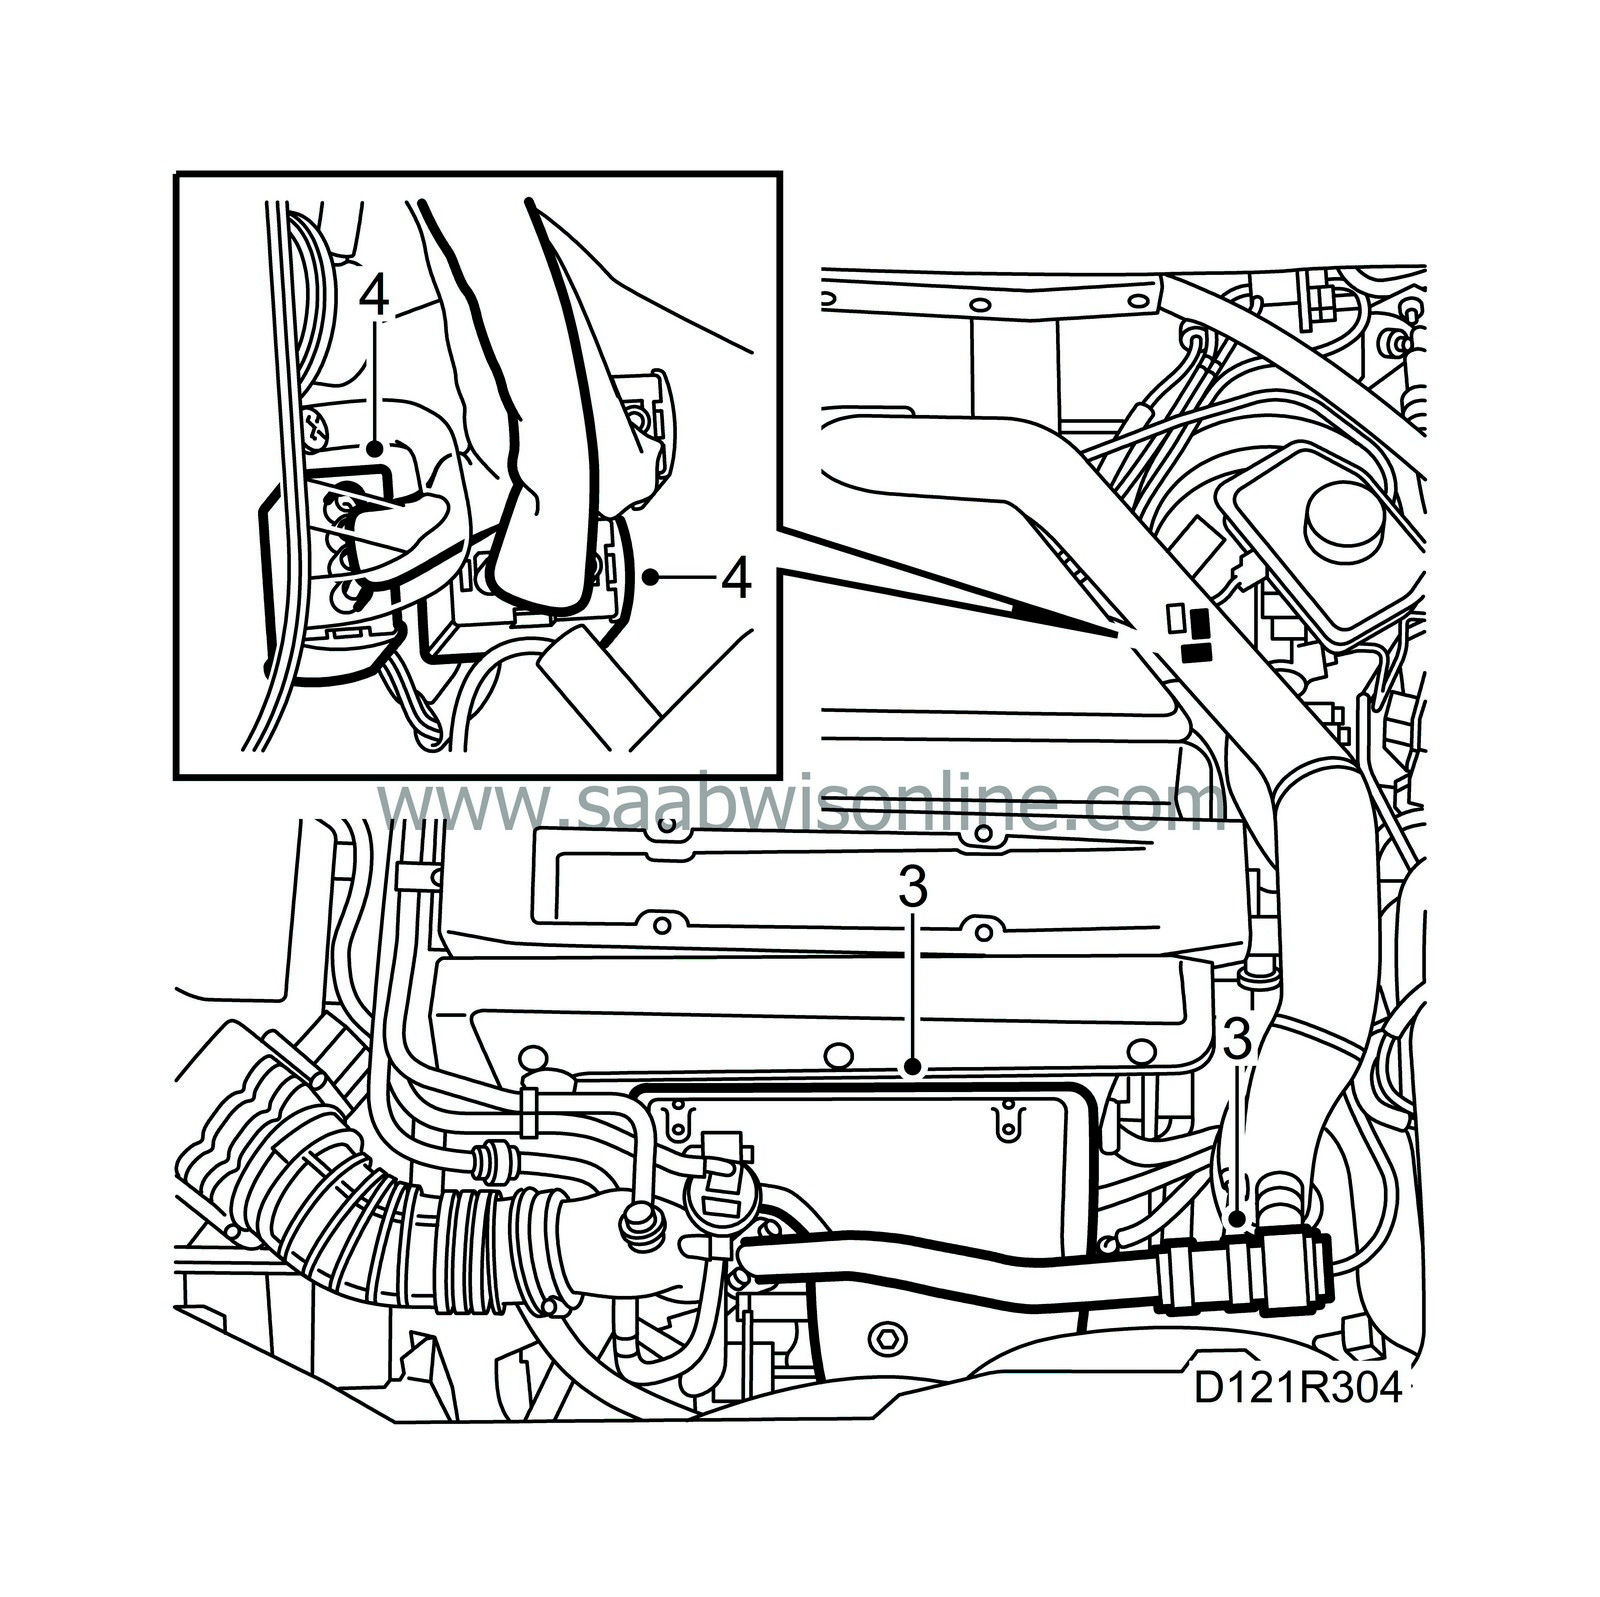
Remove the bypass pipe and heat shield over the exhaust manifold.
|
|
| 4. |
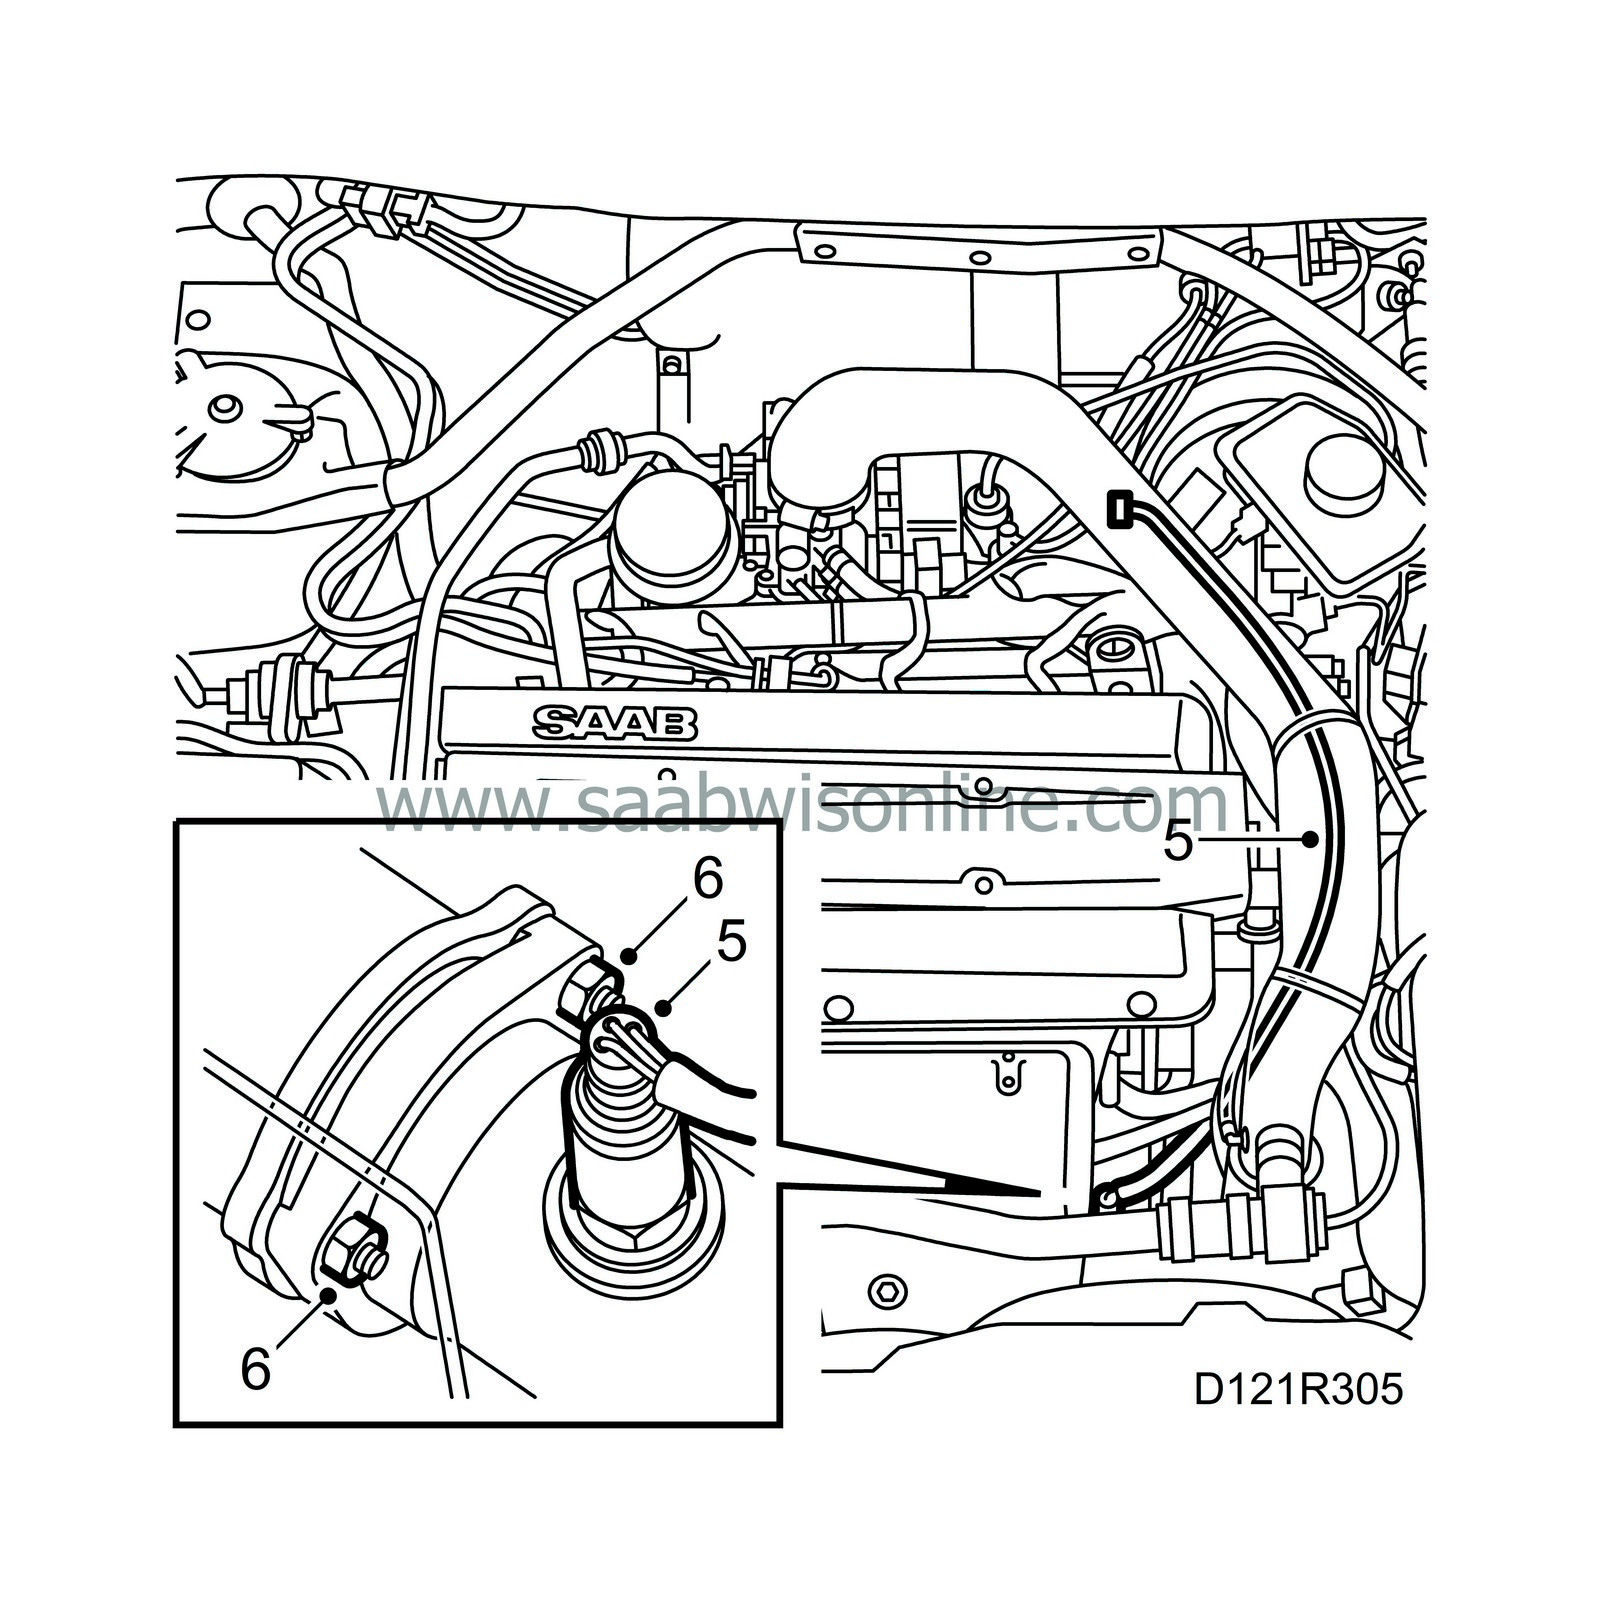
Disconnect the oxygen sensor cables, undo the clip and the top cable clamp.
|
||||||||||
| 5. |
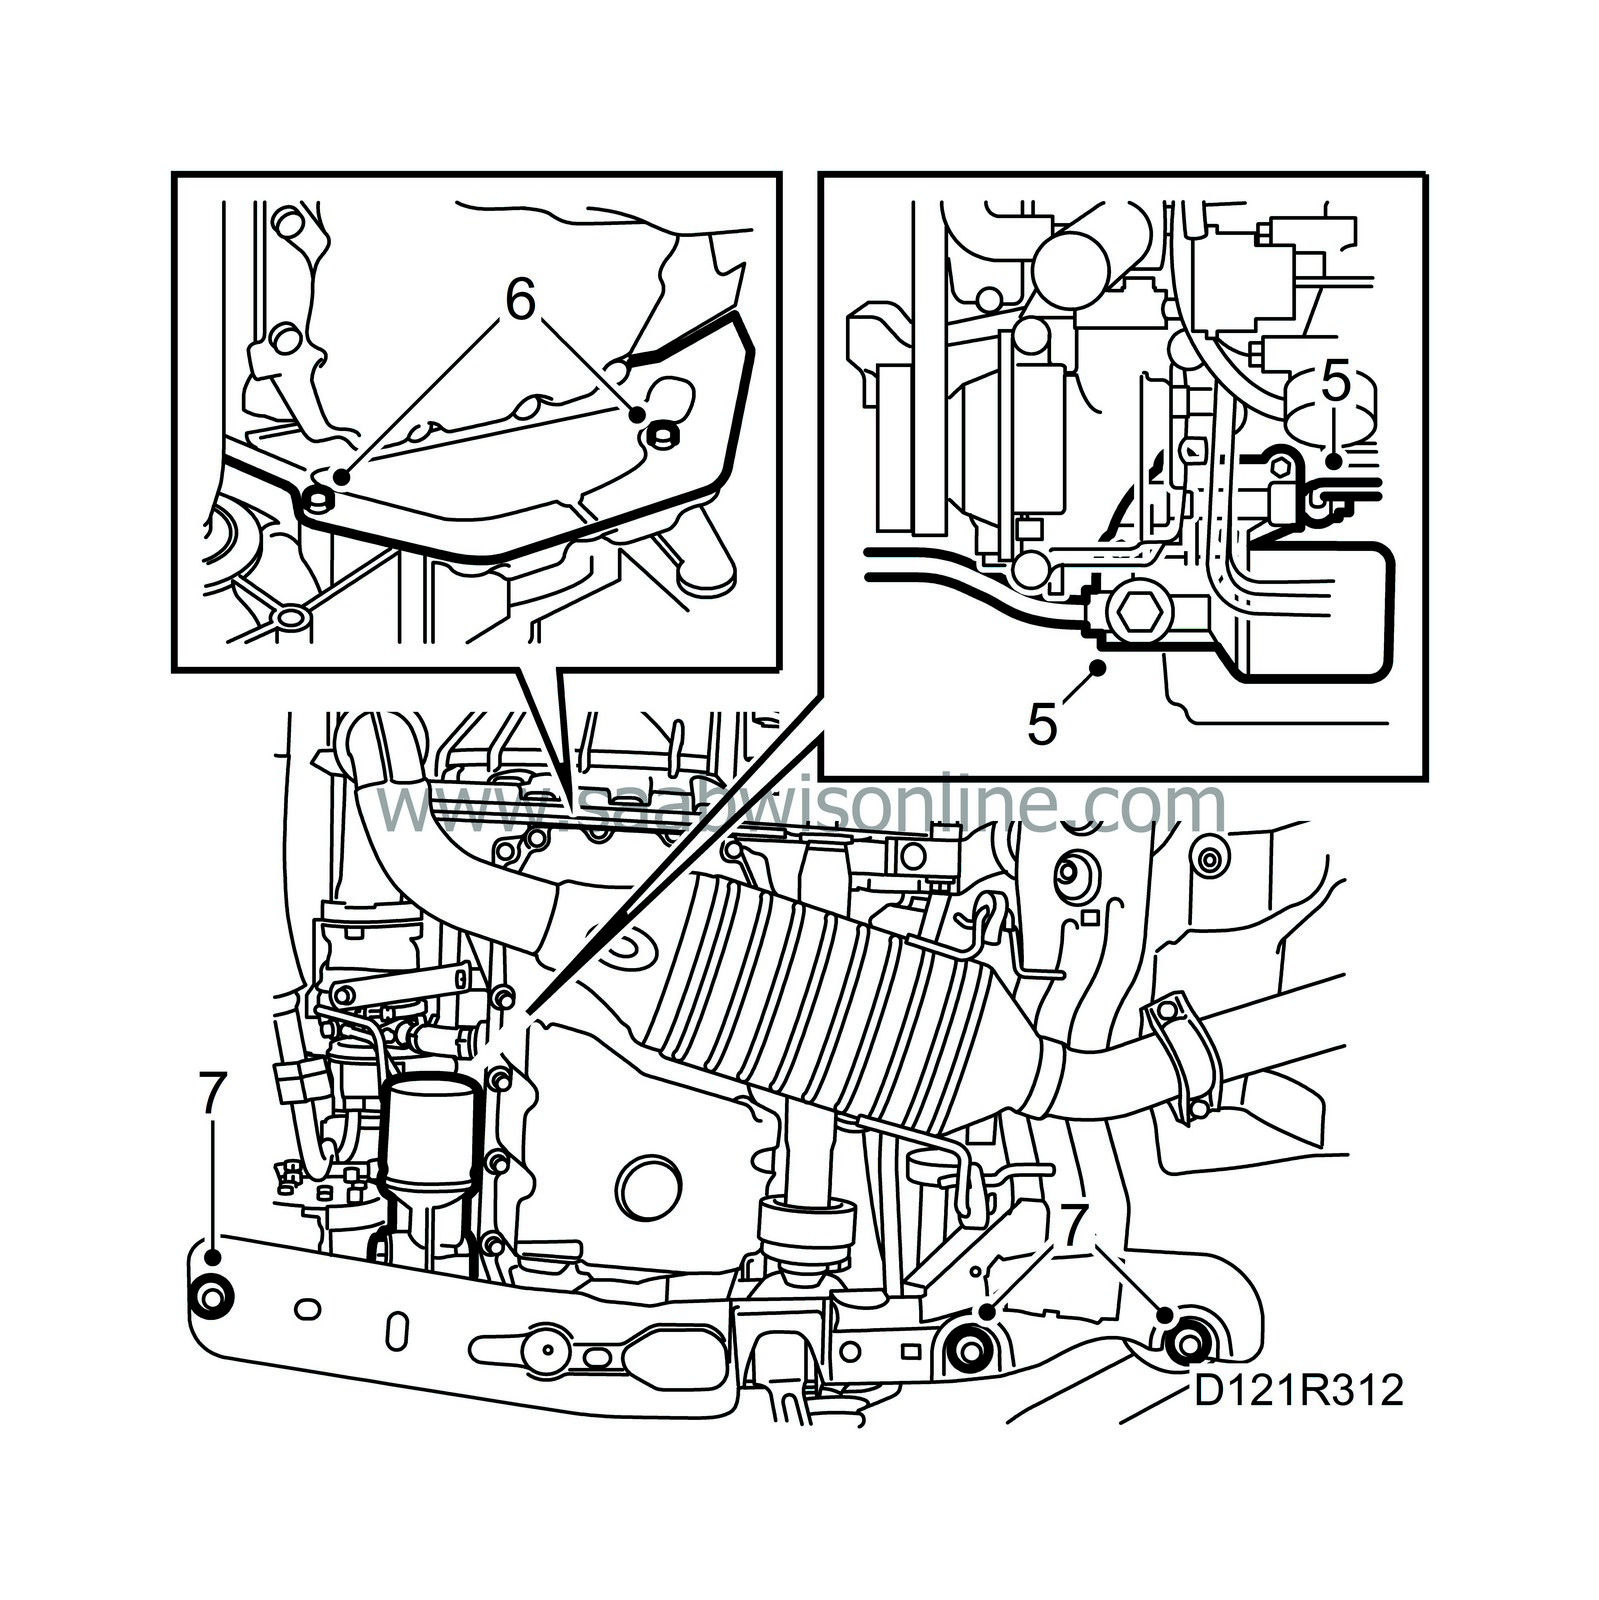
Remove the bottom cable clamp and the oxygen sensor.
|
|
| 6. |
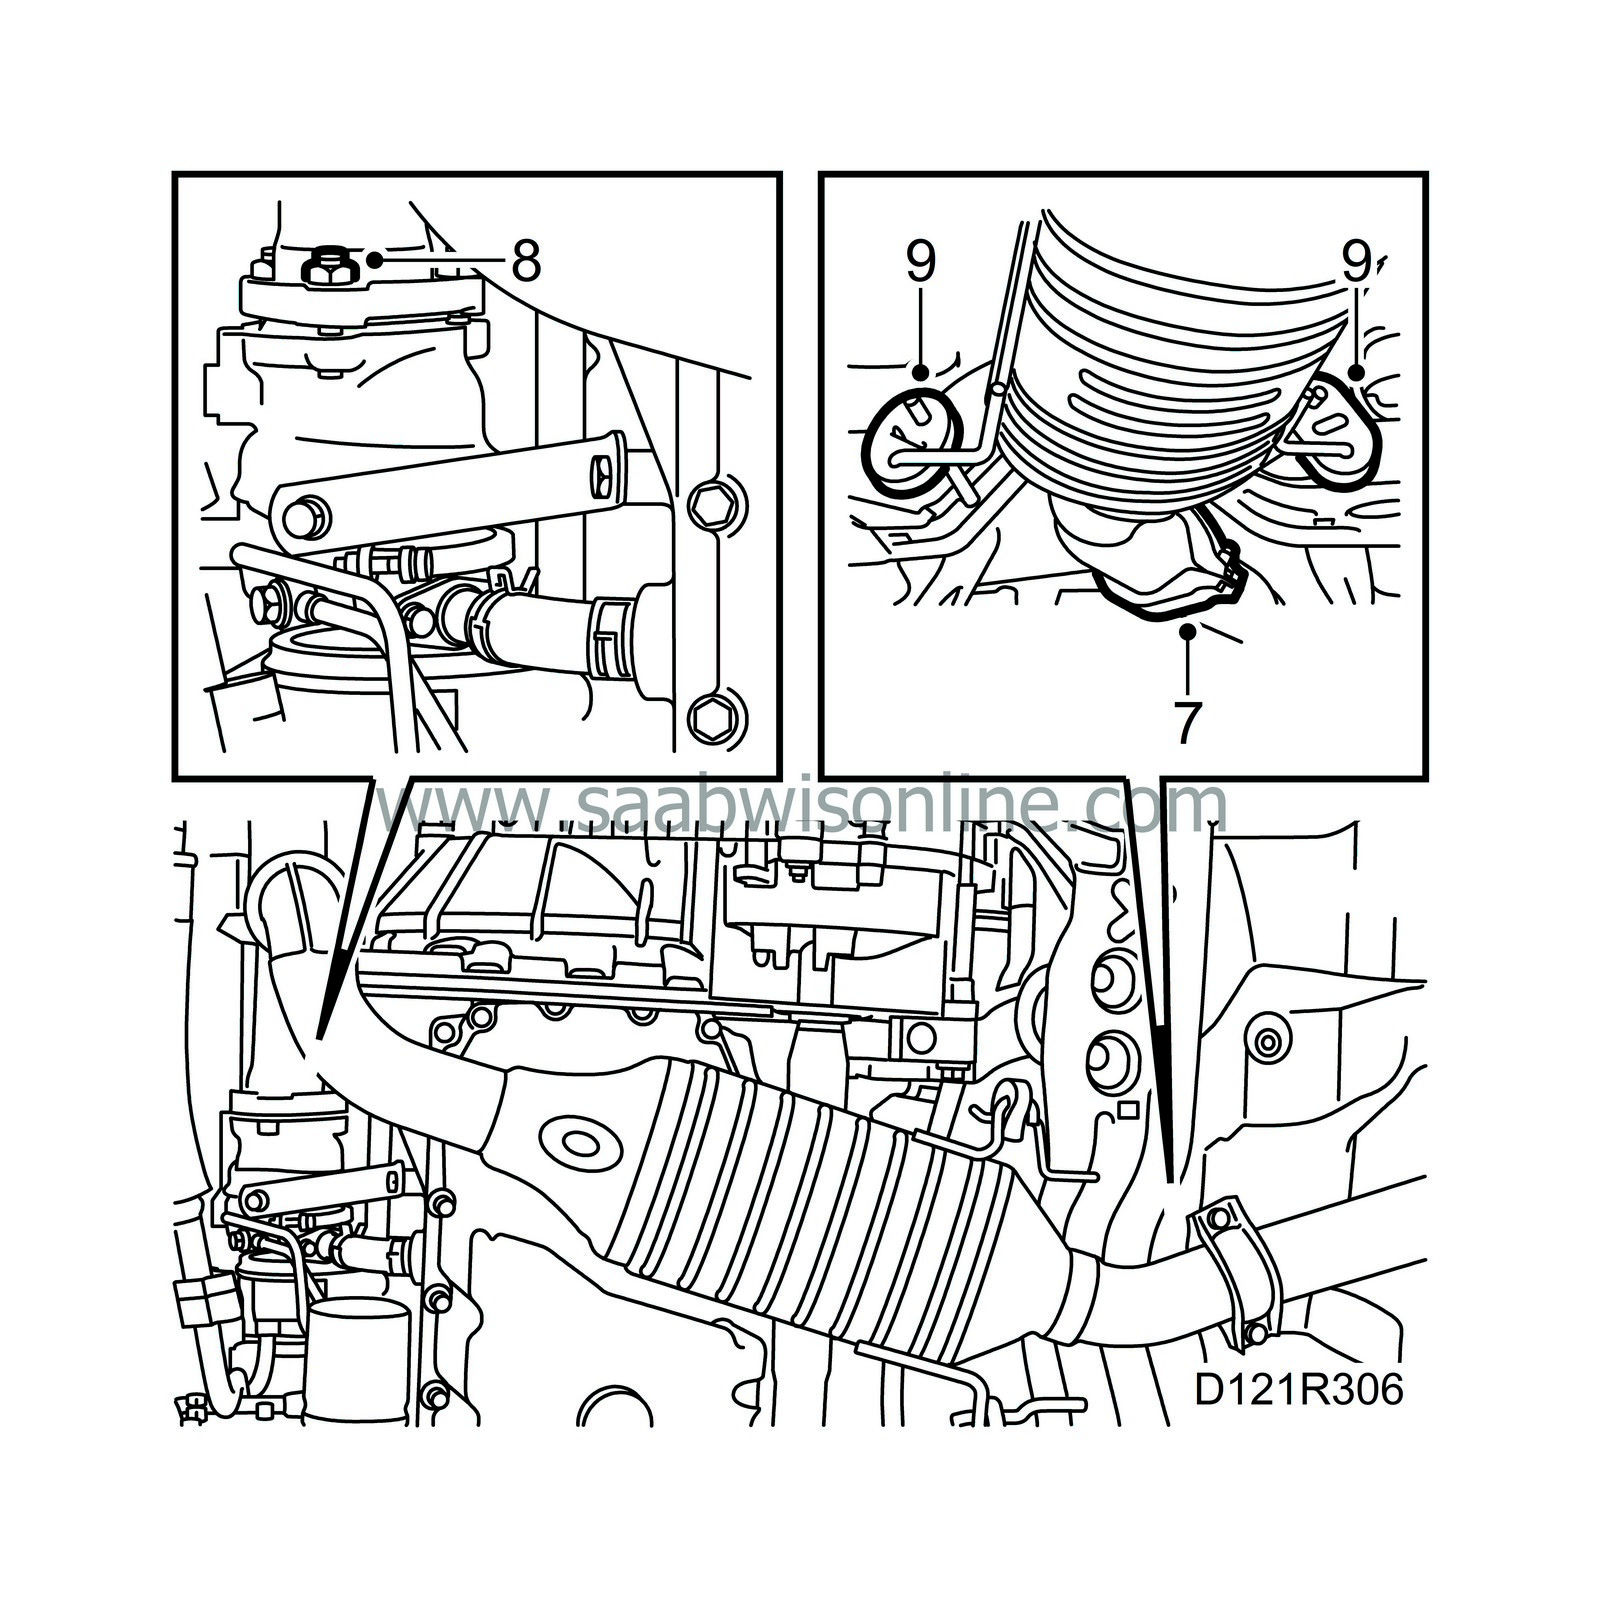
Undo the tow top nuts on the exhaust pipe joint. Raise the car.
|
|
| 7. |
Loosen the joint between the front exhaust pipe and the intermediate pipe.
|
|
| 8. |
Unscrew the front exhaust pipe from the turbocharger.
|
|
| 9. |
Detach the exhaust pipe from the rubber mountings on the subframe and lift down the exhaust pipe.
|
|
| 10. |
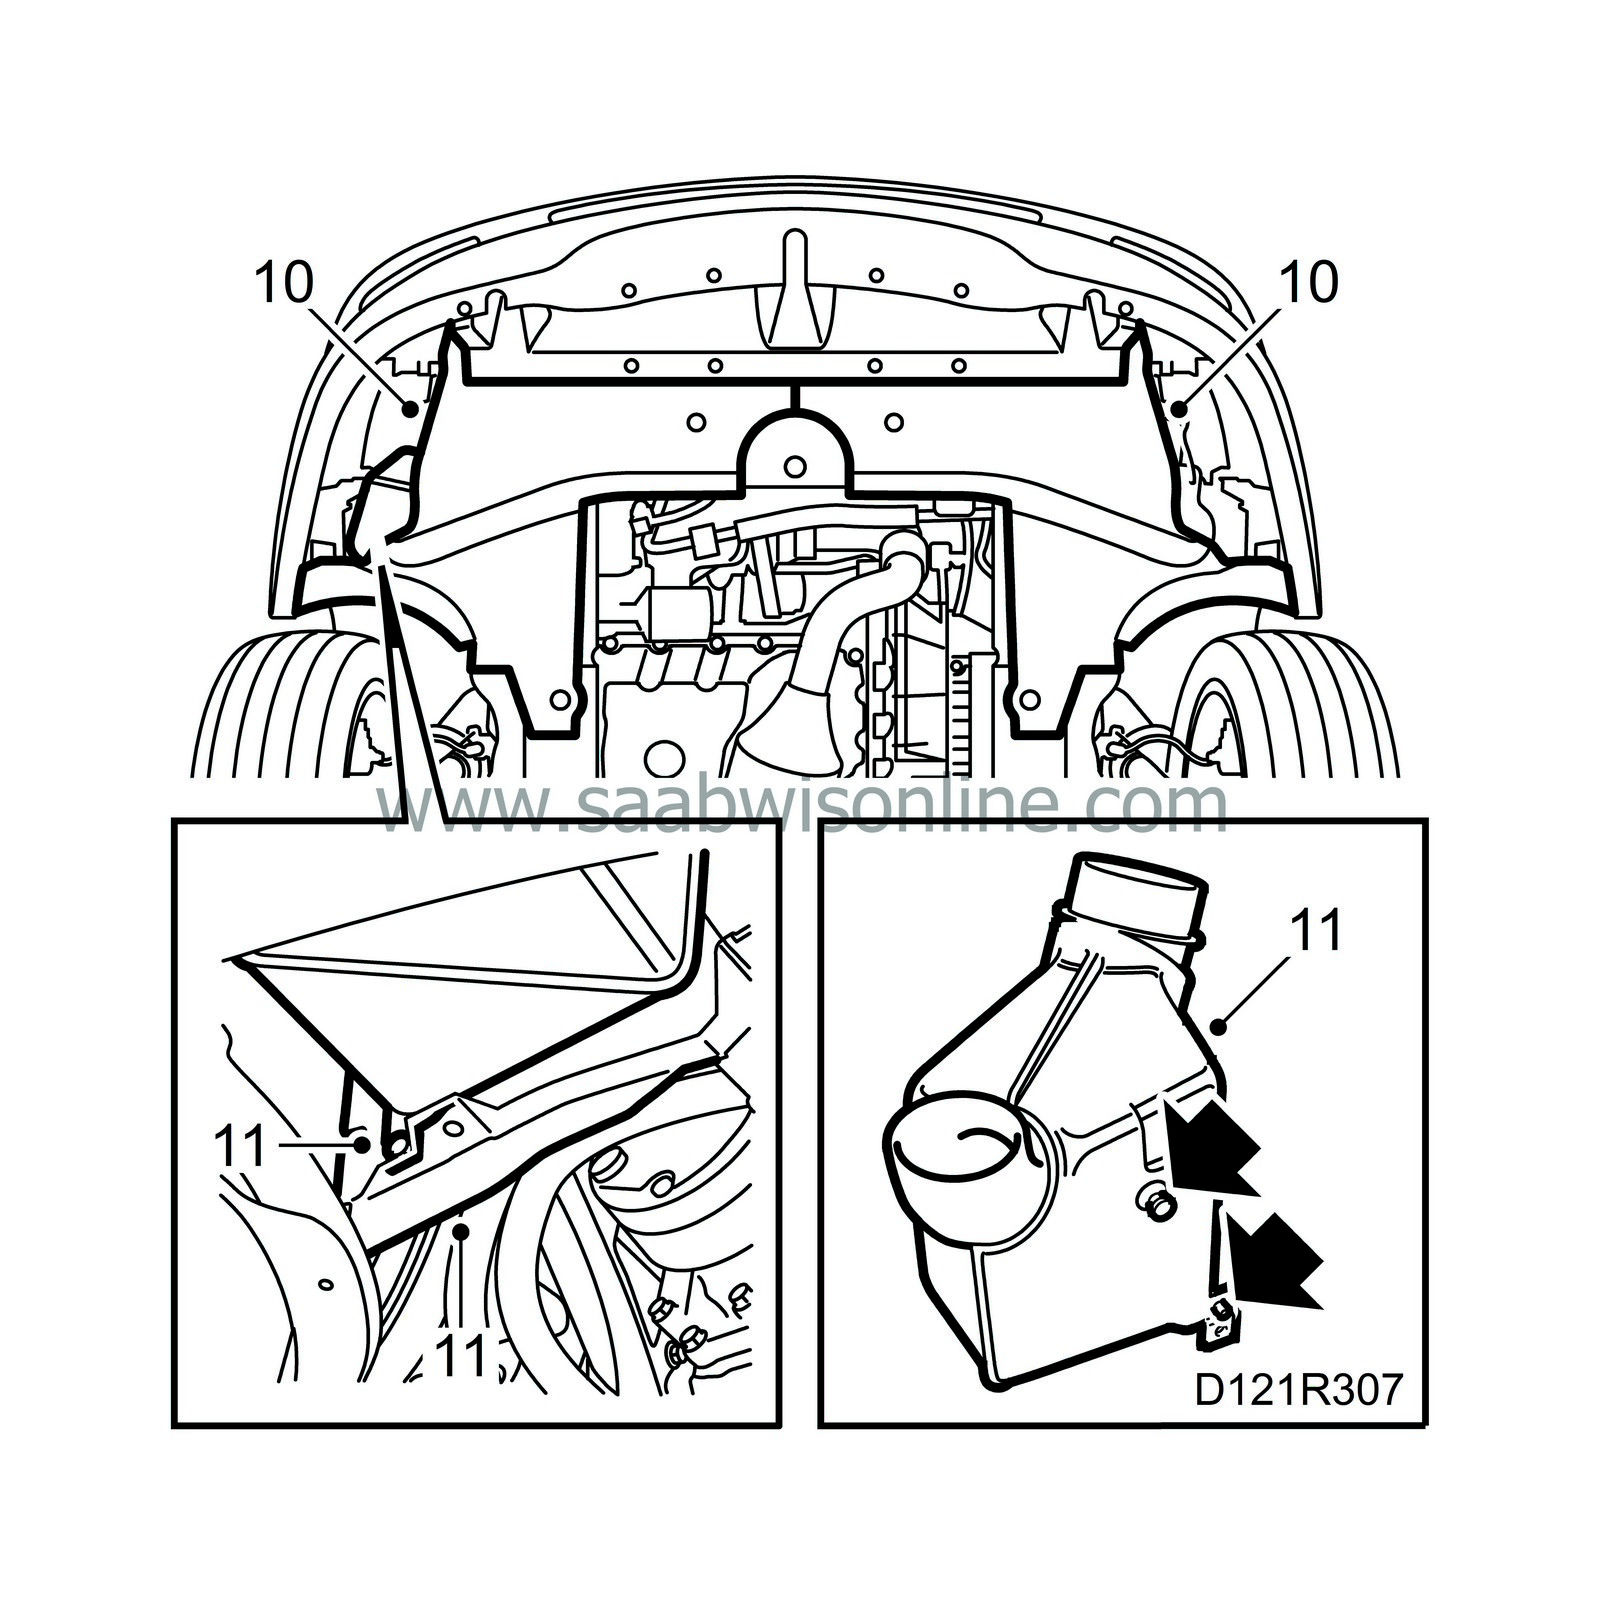
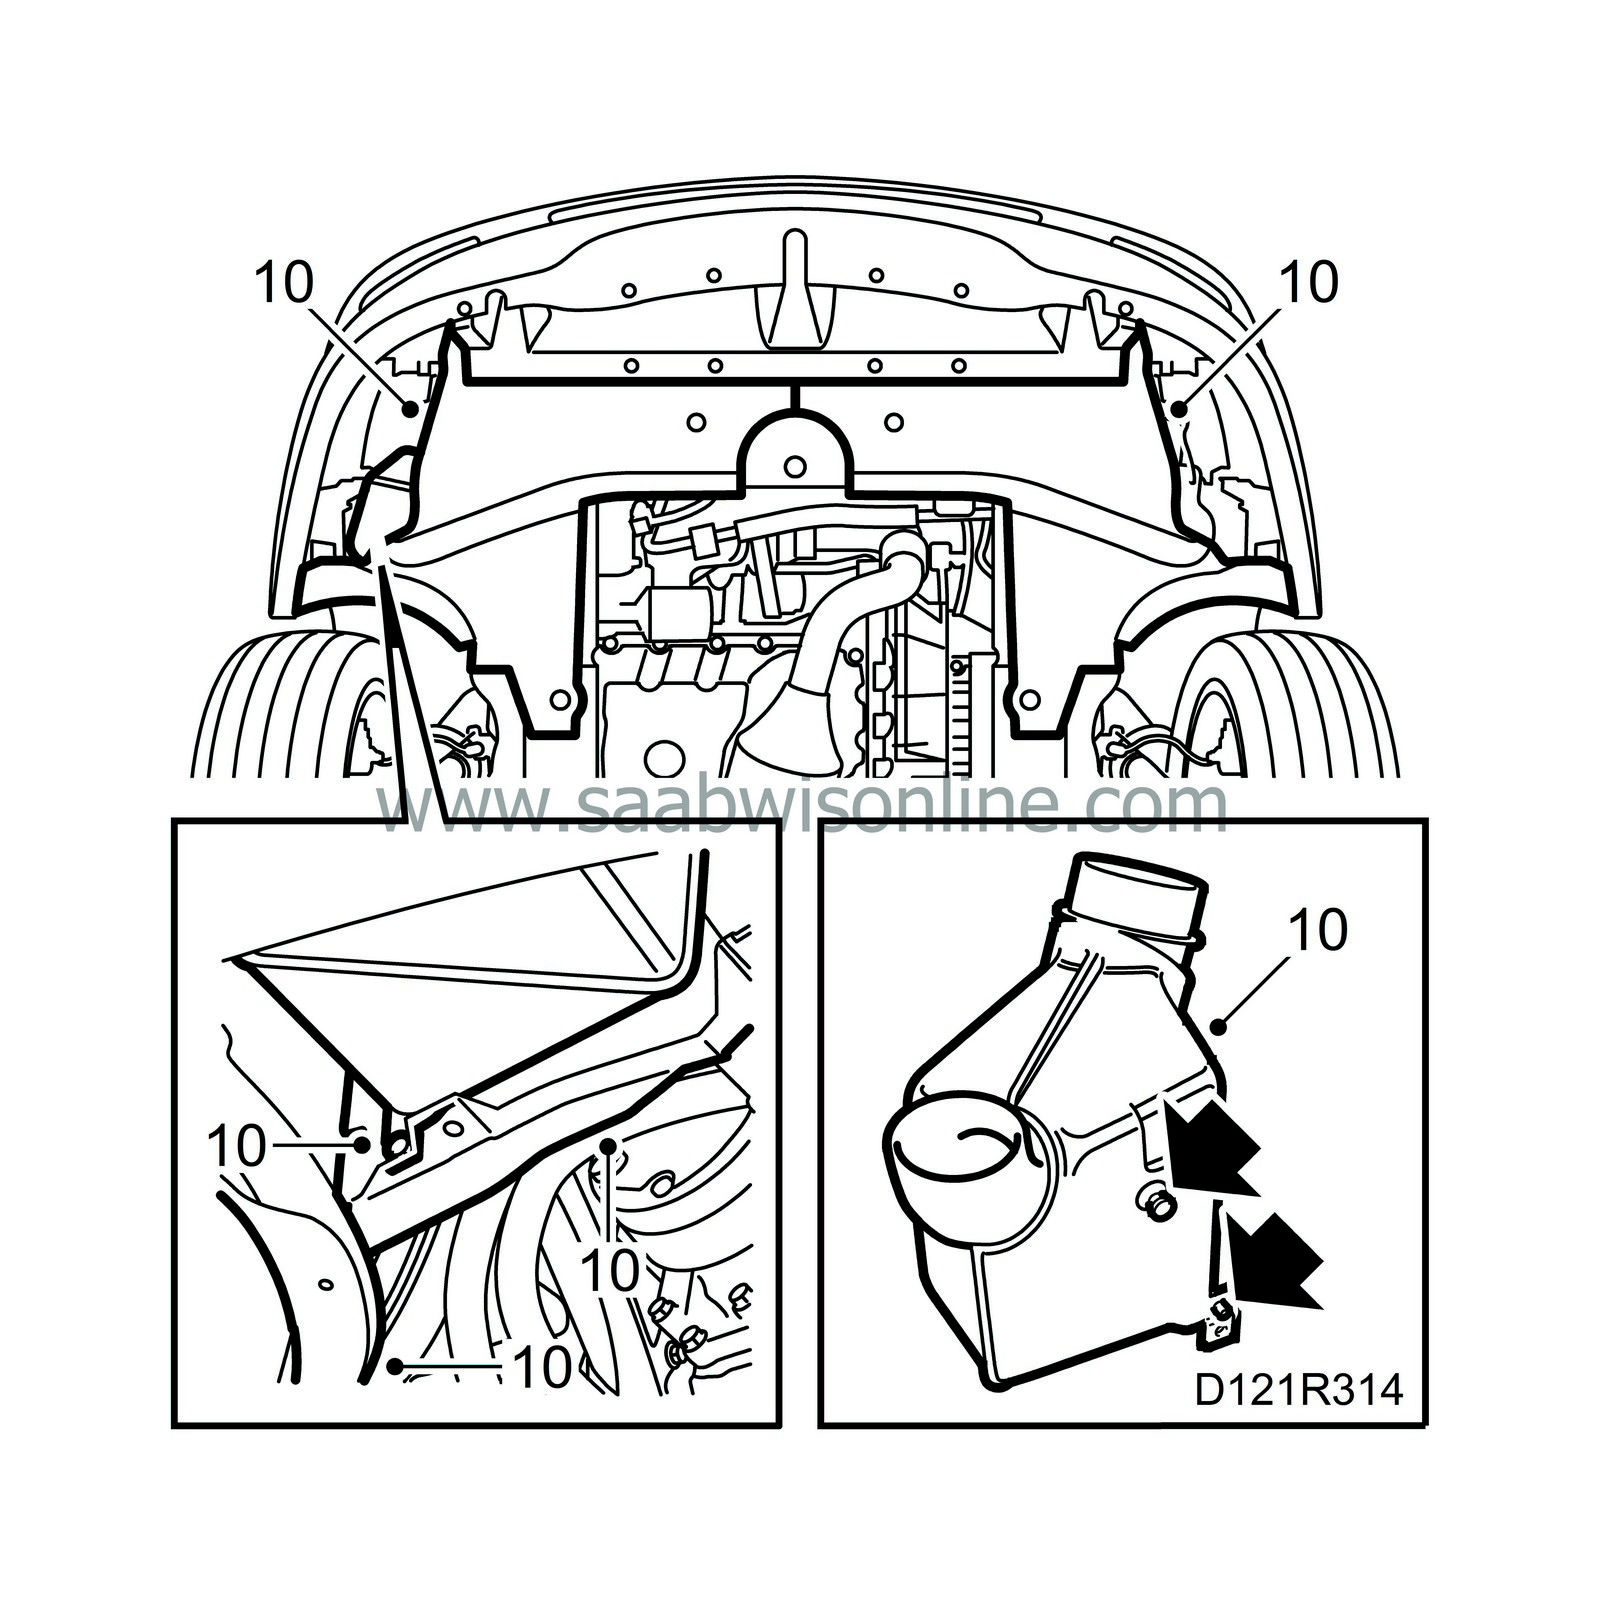
Raise the car and remove the air shields. Drain the engine oil.
|
|
| 11. |
Remove the resonator and air shield behind it. Remove the clips on the wheel arch liner, right-hand side.
|
|
| 12. |
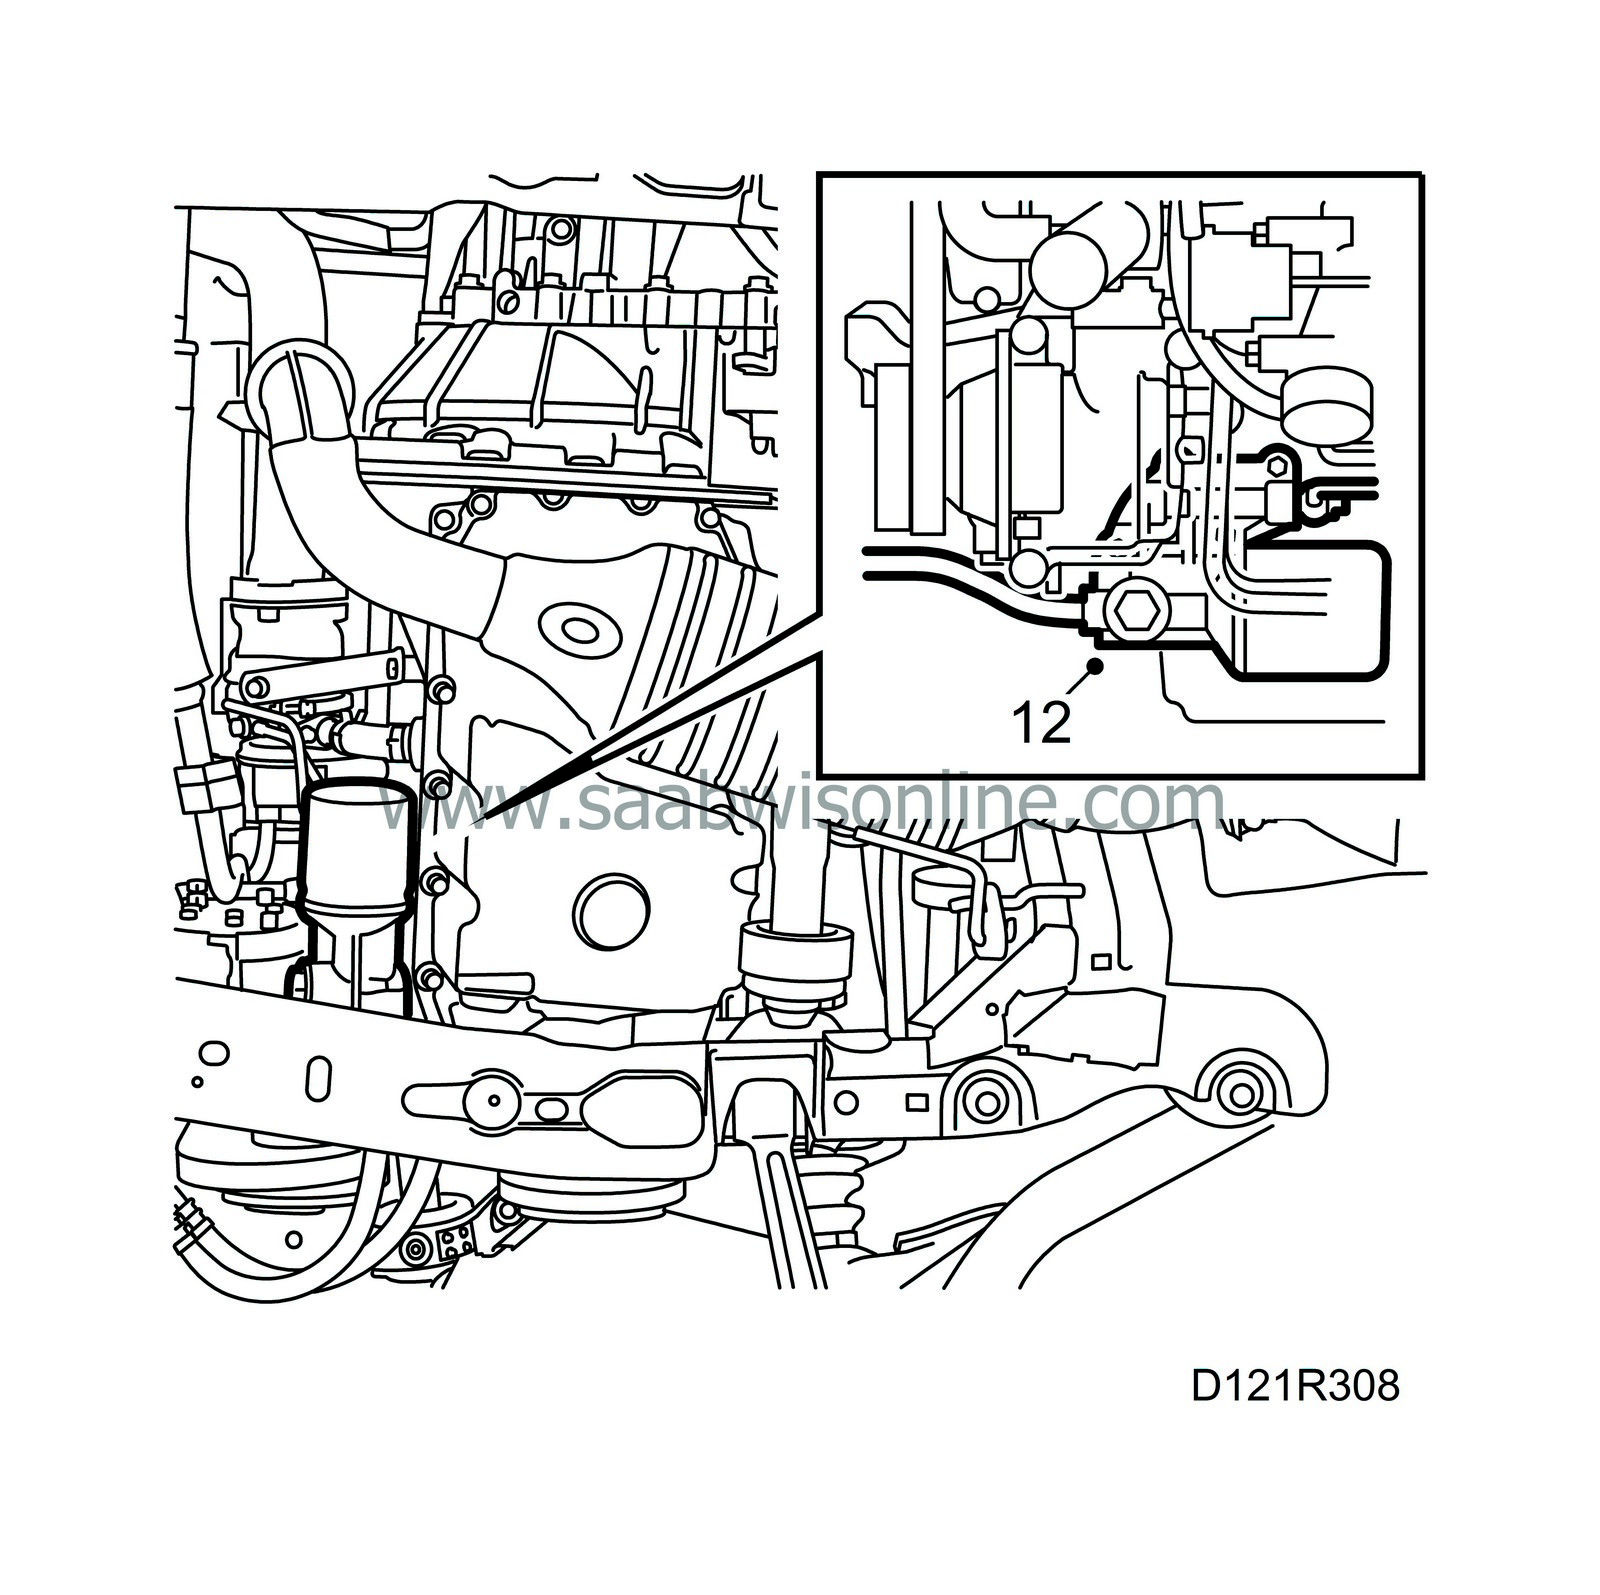
Remove the oil filter adapter housing. Move the adapter out of the way and secure it with a cable tie.
|
|
| 13. |
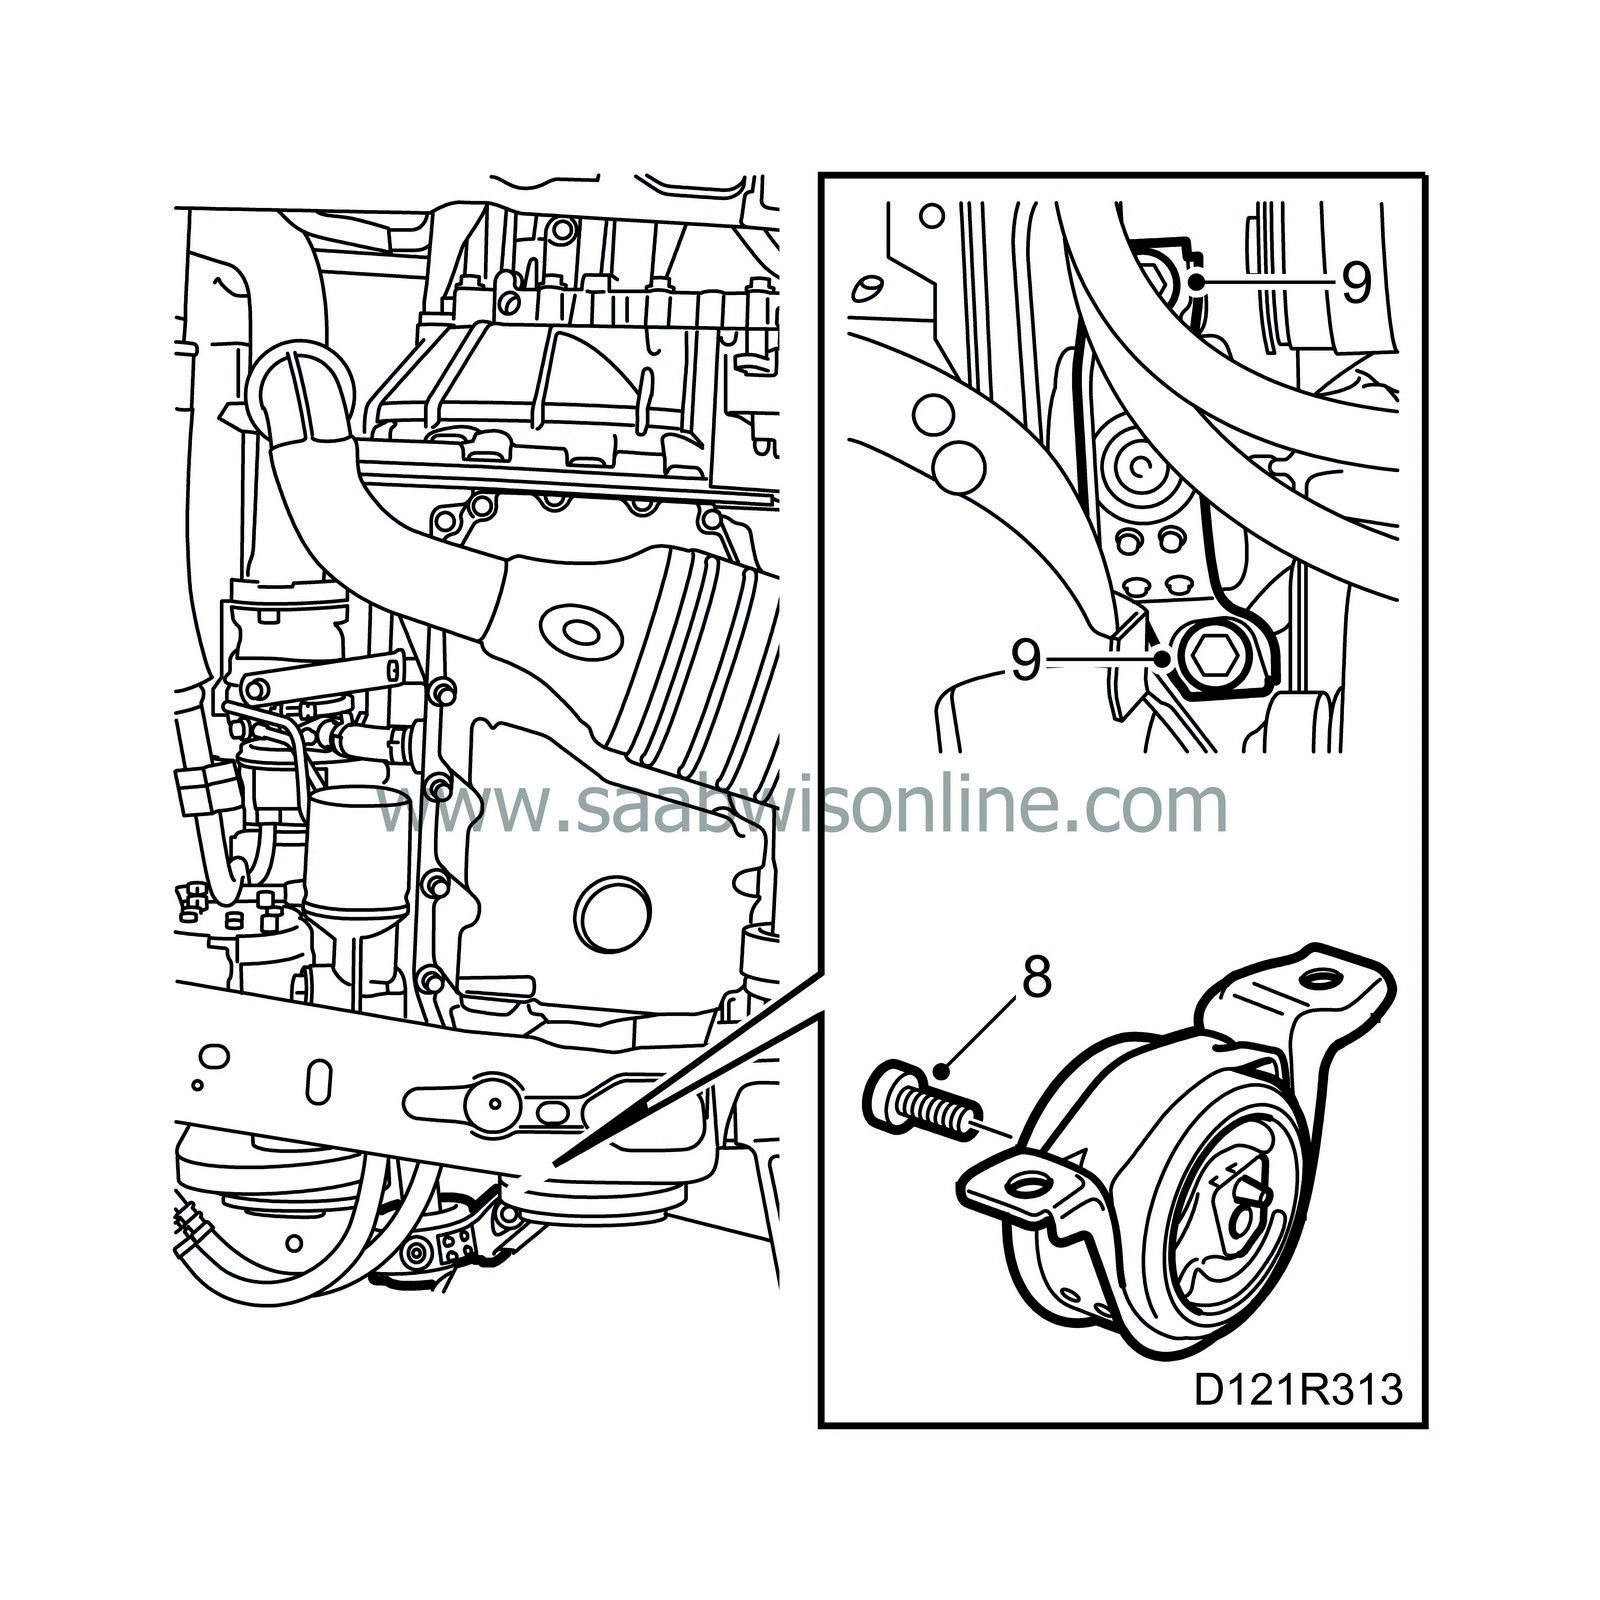
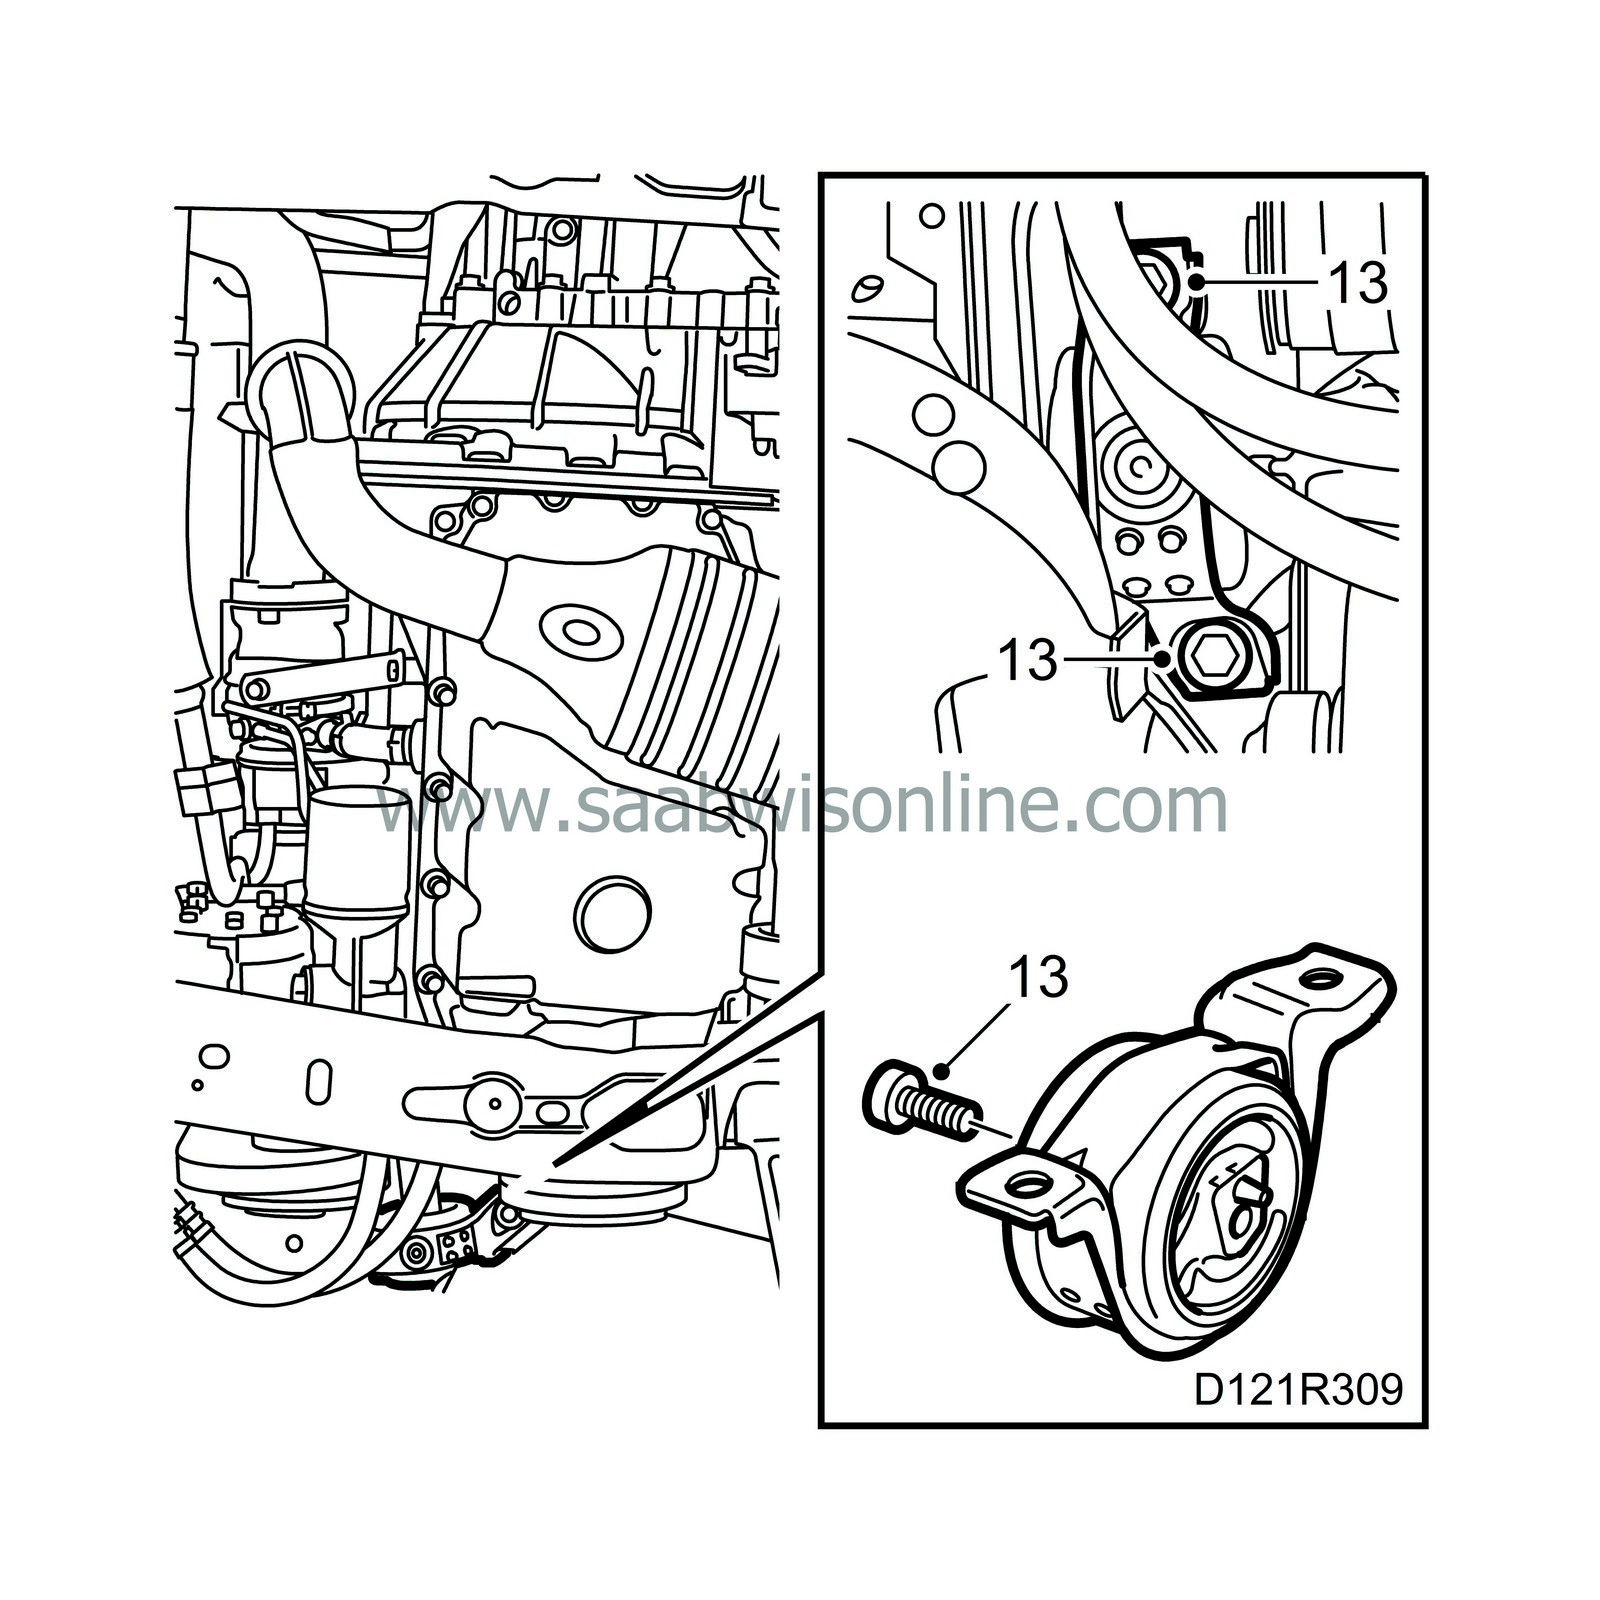
Lower the car to a comfortable working height and lower the engine slightly with the lifting beam. Undo the right-hand engine mounting.
|
|
| 14. |
Lift the engine with the lifting beam as much as possible. (Make sure it does not touch the engine mounting bracket and that the belt pulley goes free.)
|
|
| 15. |
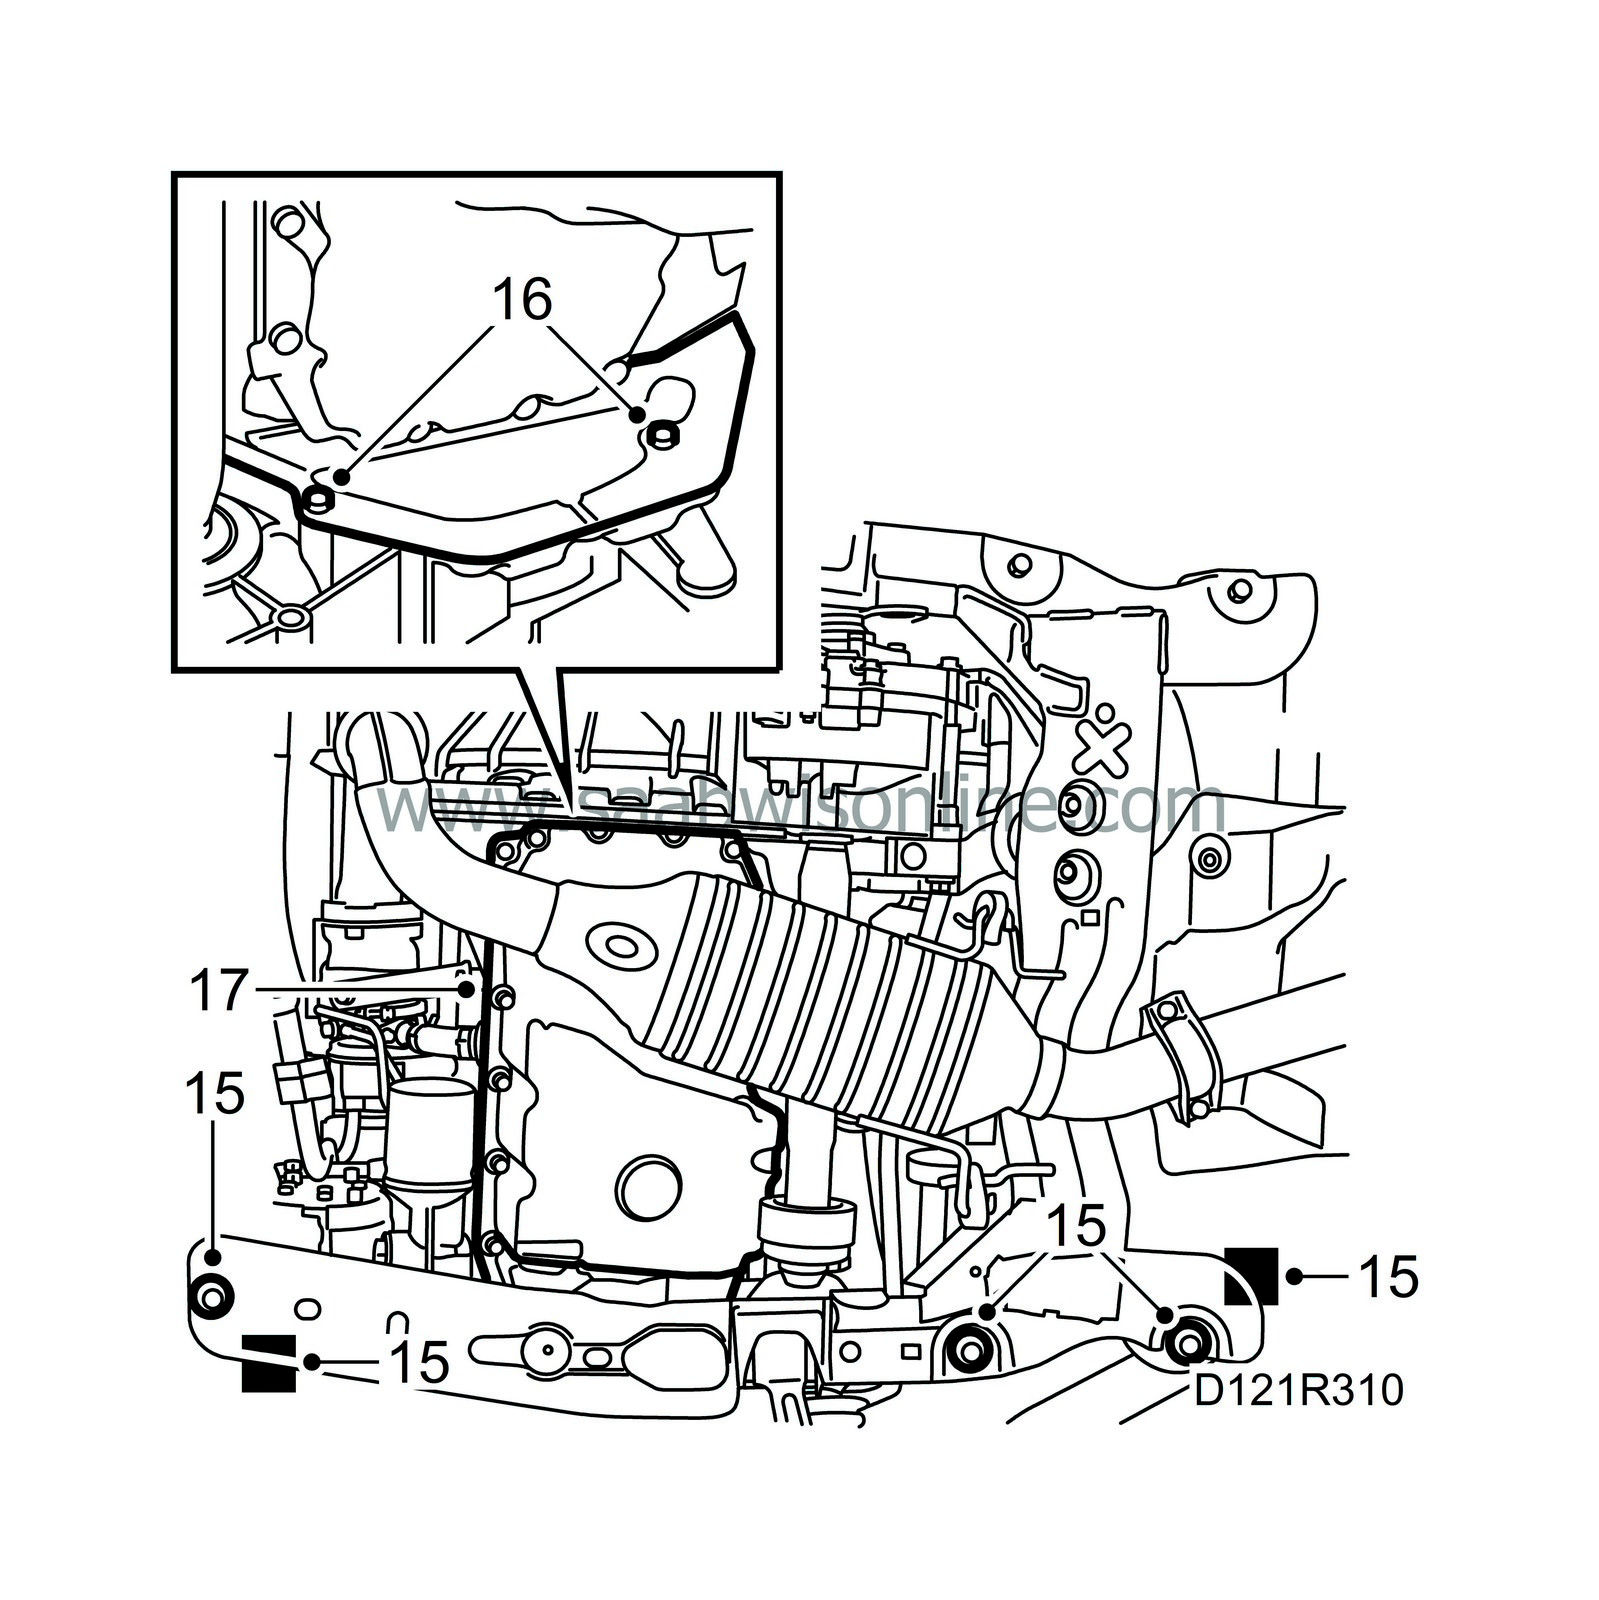
Raise the car and remove the bolts on the right-hand side of the subframe. Place wedges between the chassis and the subframe.
|
|
| 16. |
Remove the access panel for the flywheel and the oil trap return hose.
|
|
| 17. |
Unscrew the oil sump bolts and remove the sump.
|
|
| To fit (in car) |
| 1. |
Make sure there are no impurities in the oil sump and clean the sealing surfaces on the oil sump, oil filter adapter and engine block. Use benzene. Check the O-rings on the oil pipe to the oil filter adapter and replace with new ones if necessary.
|
|
| 2. |
Apply an even bead of flange sealant, part no. 93 21 795, to the sealing surface of the oil sump. Make sure the pipe to the filter adapter is positioned correctly. Carefully lift up the oil sump at a slightly anti-clockwise angle. Make sure the sealant does not scrape off. Carefully turn the sump clockwise and place it in the correct position.
|
|
| 3. |
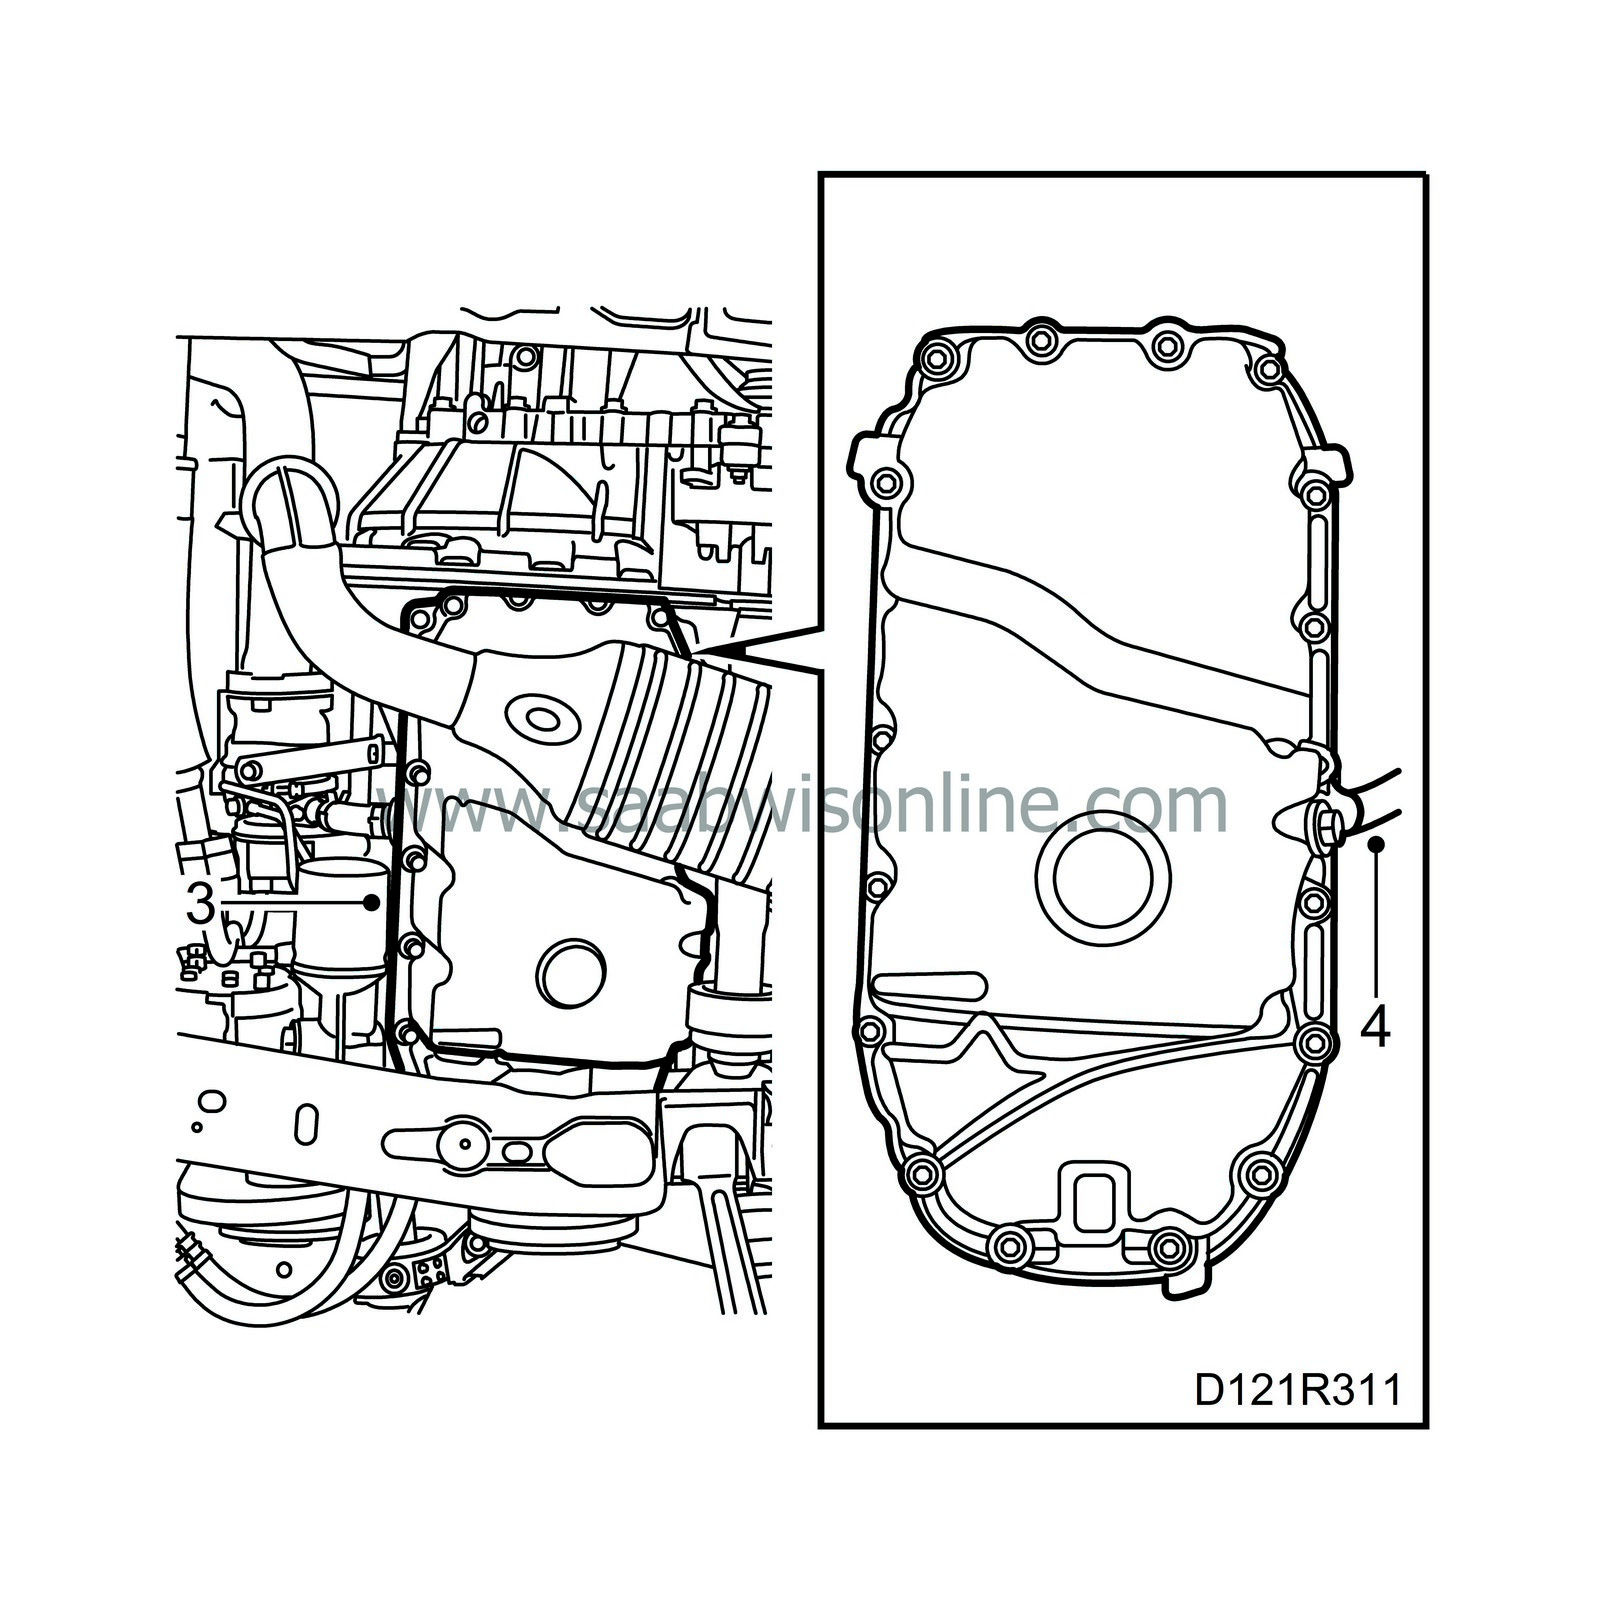
Fit all the bolts, making sure the oil sump goes free from the flywheel and belt pulley. Tighten the bolts.
Tightening torque: 22 Nm (16 lbf ft) |
|
| 4. |
Fit the return hose from the oil trap.
|
|
| 6. |
Fit the access panel for the flywheel.
|
|
| 7. |
Remove the wedges and screw in the bolts to the subframe.
Tightening torques: Front: 115 Nm (85 lbf ft) Centre: 190 Nm (141 lbf ft) Rear: 110 Nm + 75° (81 lbf ft + 75°) |
|
| 9. |
Lower the car and lift the engine slightly into the subframe. Raise the car again and tighten the bolts on the engine bracket.
Tightening torque: 73 Nm (54 lbf ft) |
|
| 10. |
Fit the air shield and resonator. Fit the clip on the wheel arch liner.
|
|
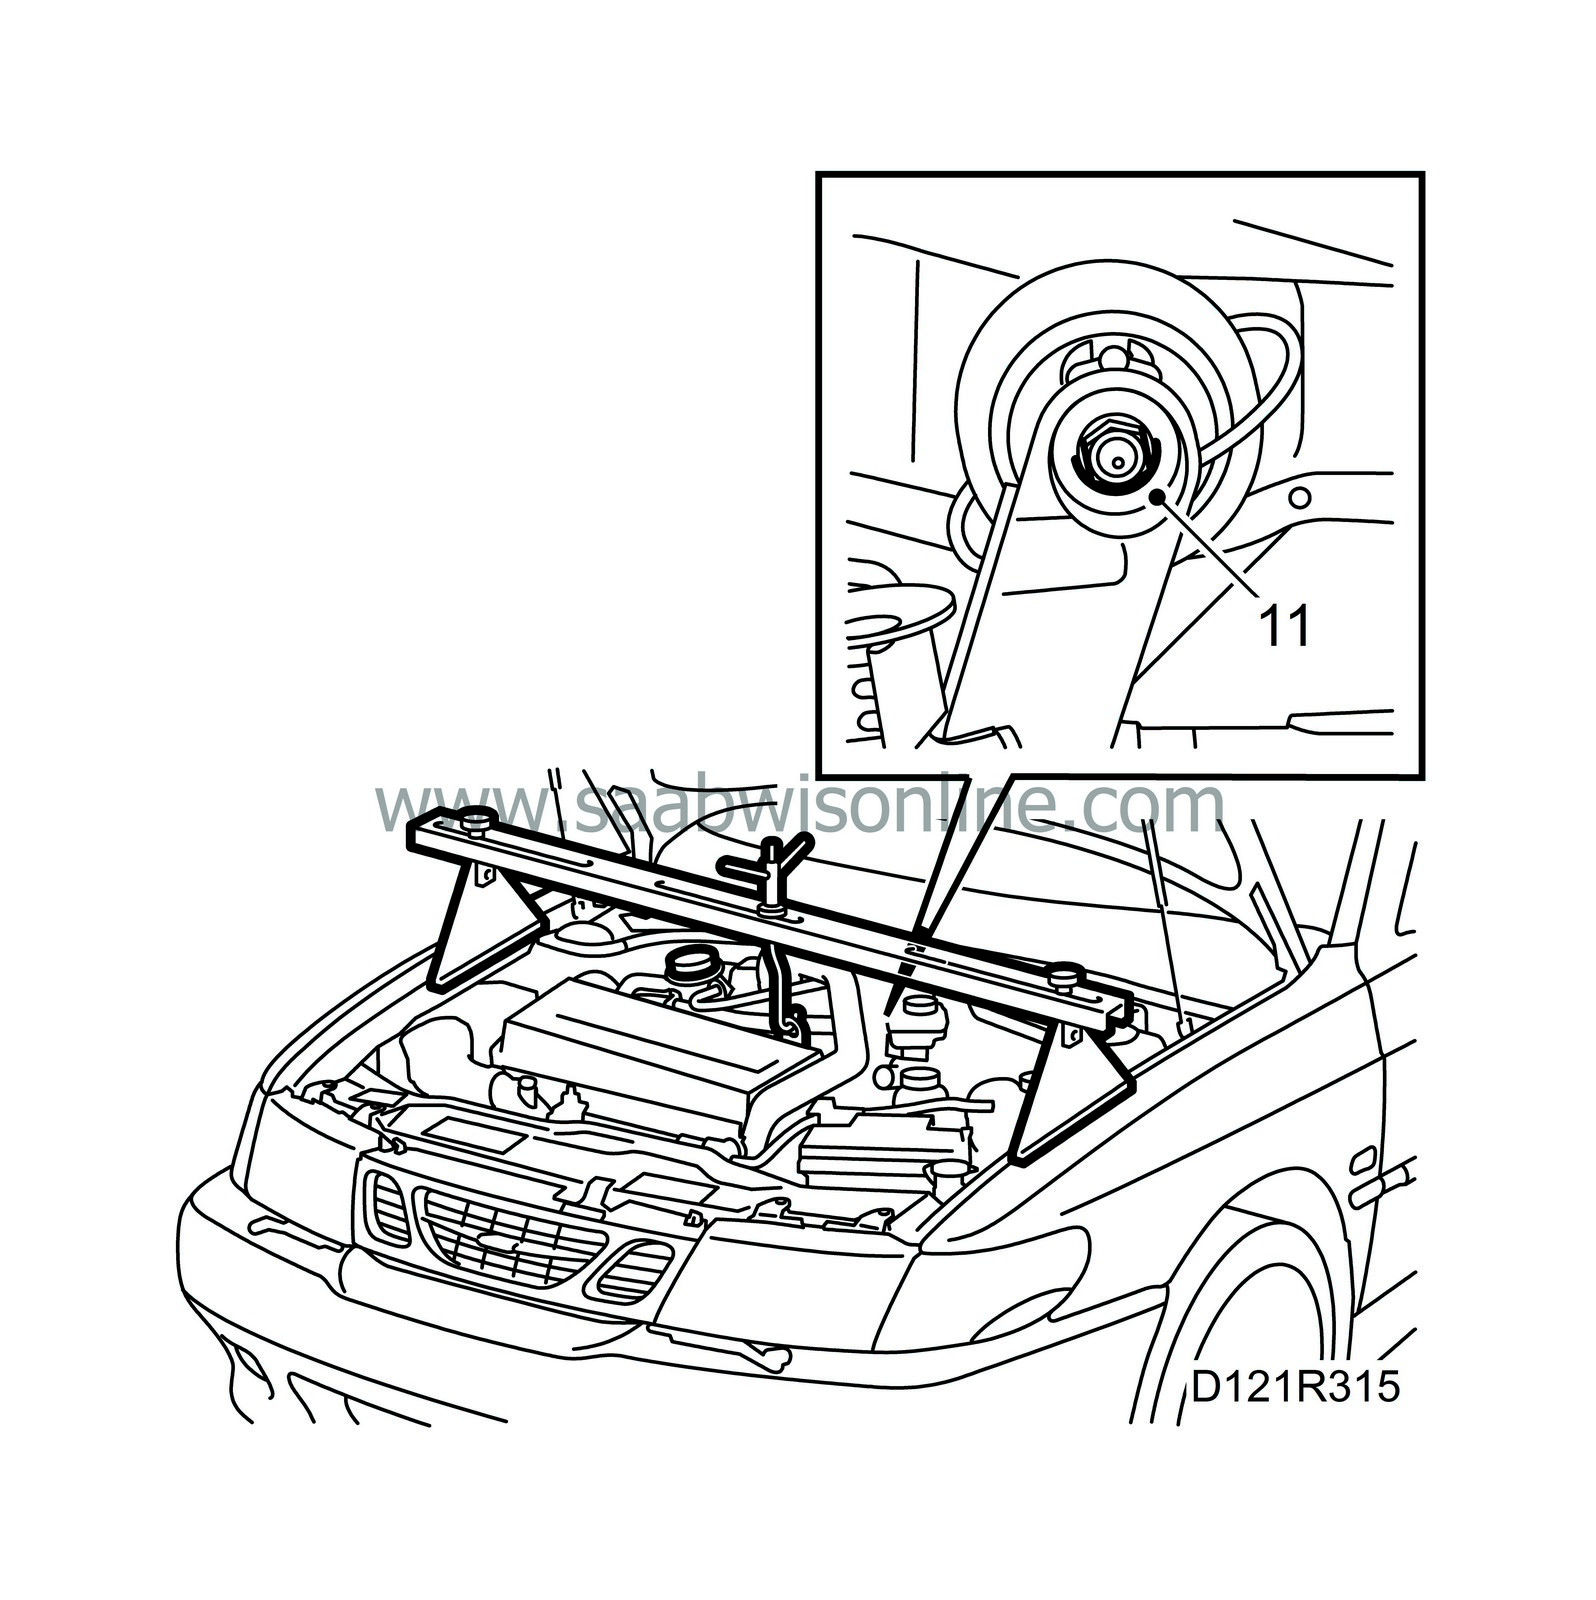
| 11. |
Fit the nut on the rear engine mounting without tightening it.
|
|
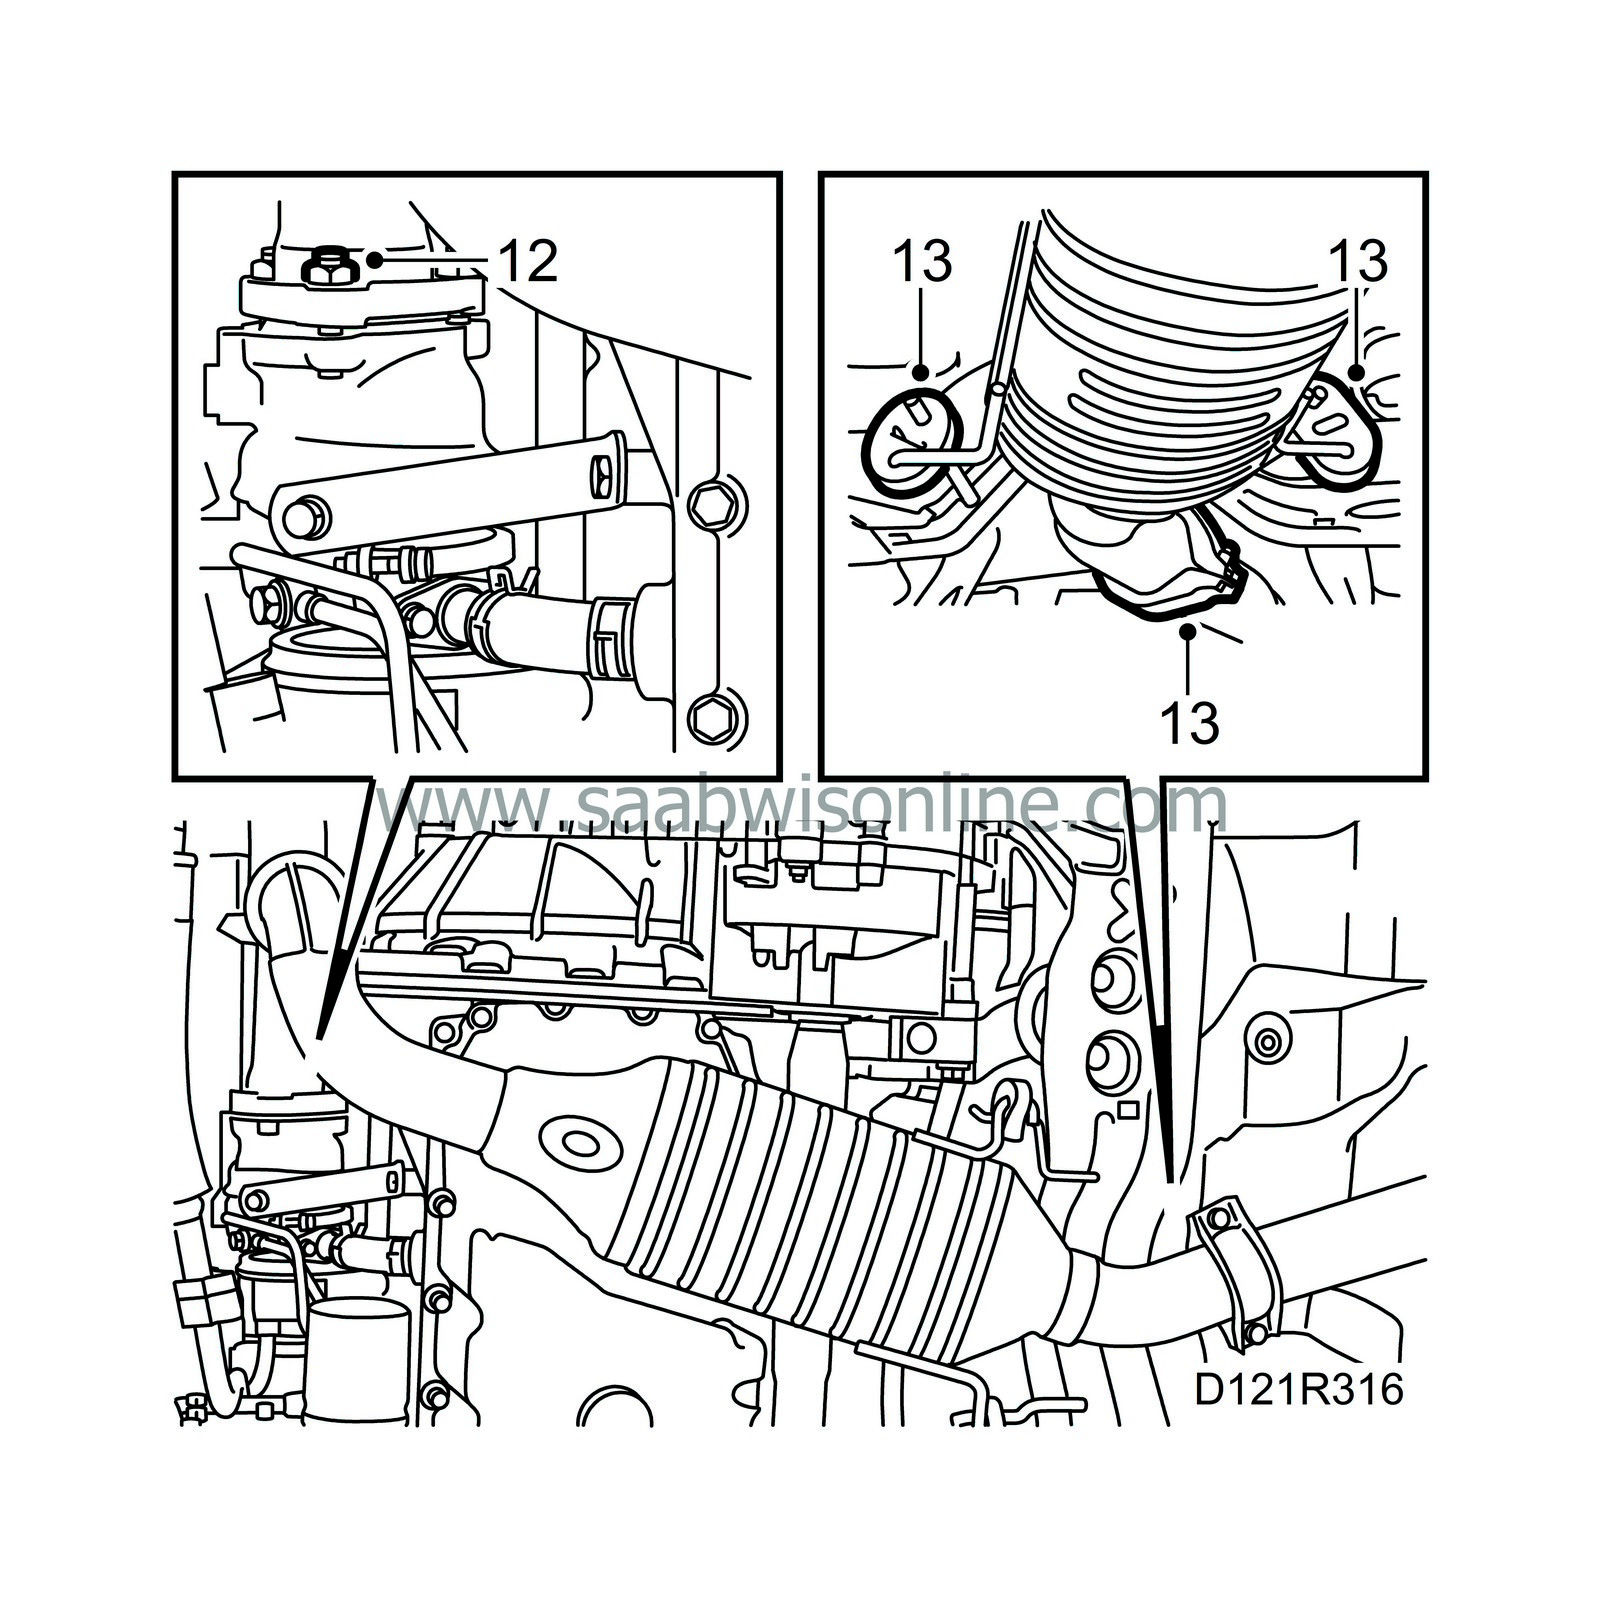
| 12. |
Fit the front exhaust pipe to the turbocharger. Lubricate the studs on the turbocharger with Molycote 1000 before fitting.
|
|
| 13. |
Suspend the three way catalytic converter and screw together the joint between the front exhaust pipe and the intermediate pipe.
|
|
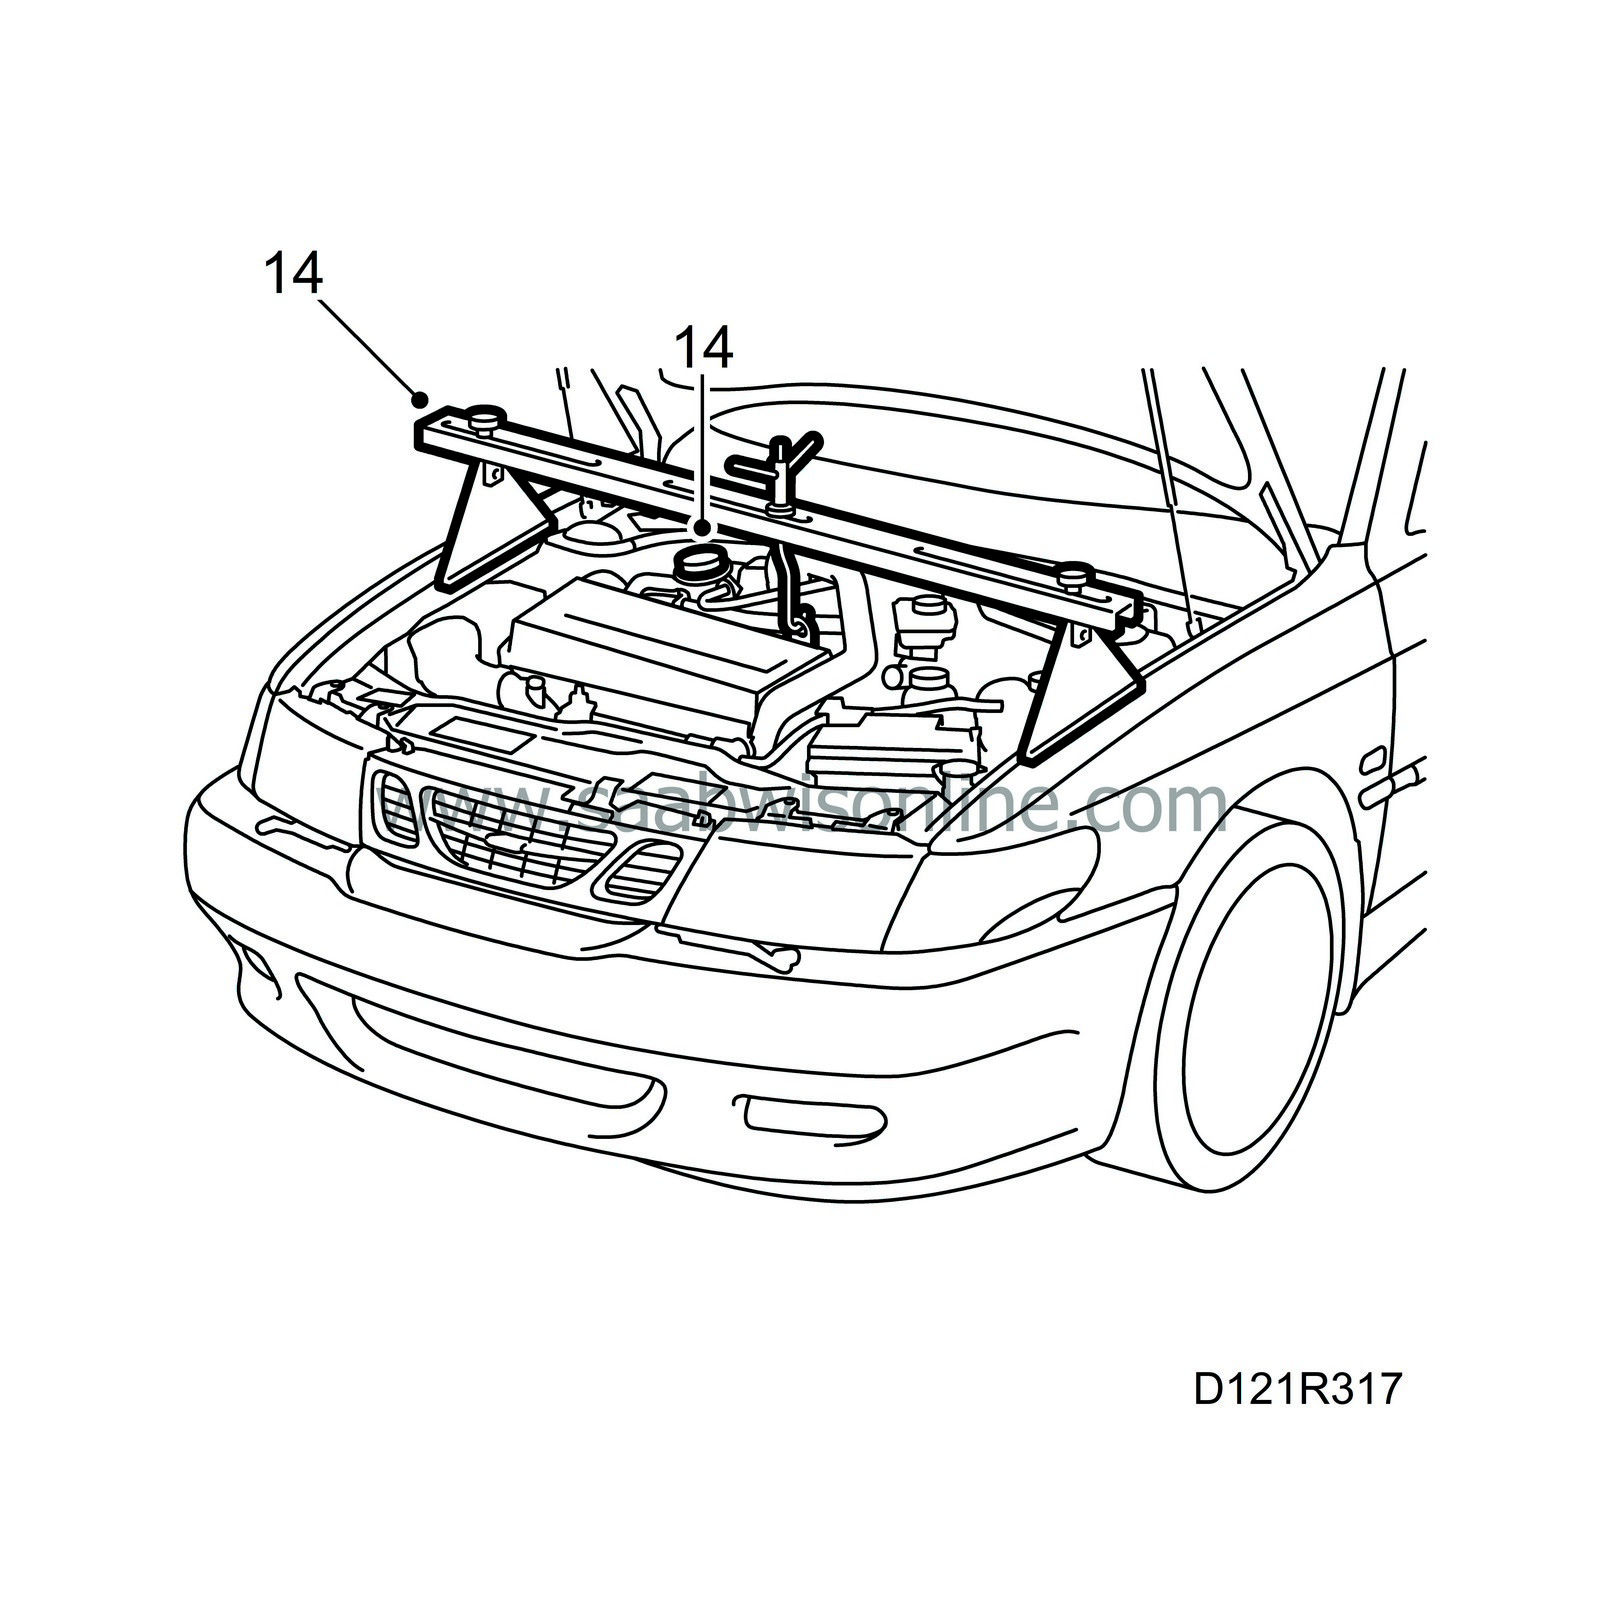
| 14. |
Lower the car. Remove the cloth from the oil filler pipe and put in the dipstick. Remove the lifting beam. Tighten the nut on the rear engine mounting.
|
|
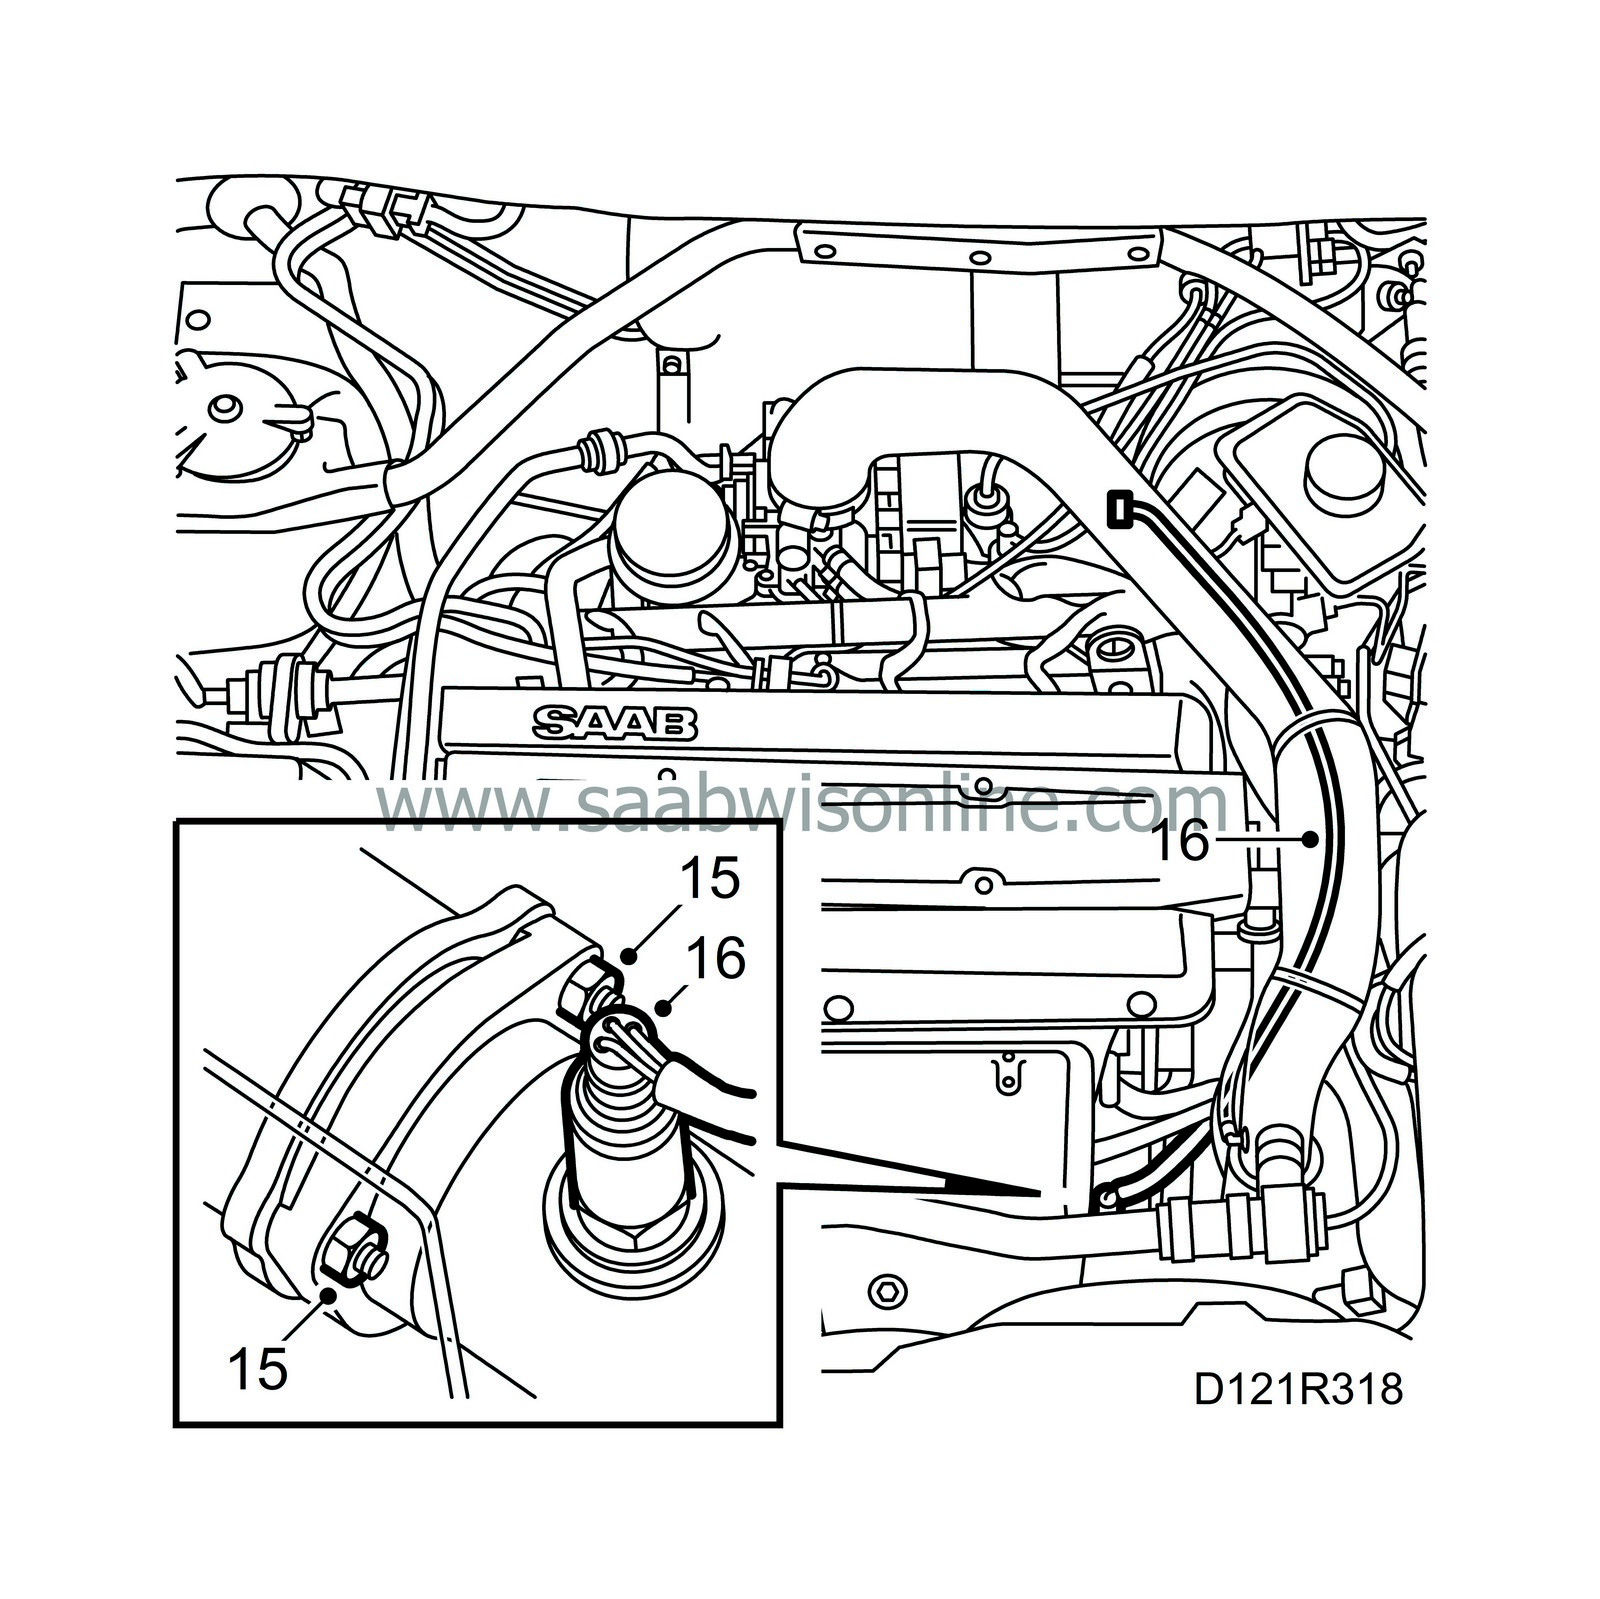
| 15. |
Fit the two top nuts on the exhaust pipe.
|
|
| 16. |
Fit oxygen sensor 1. Plug in the connector.
|
|
| 17. |
Plug in the oxygen sensor connectors.
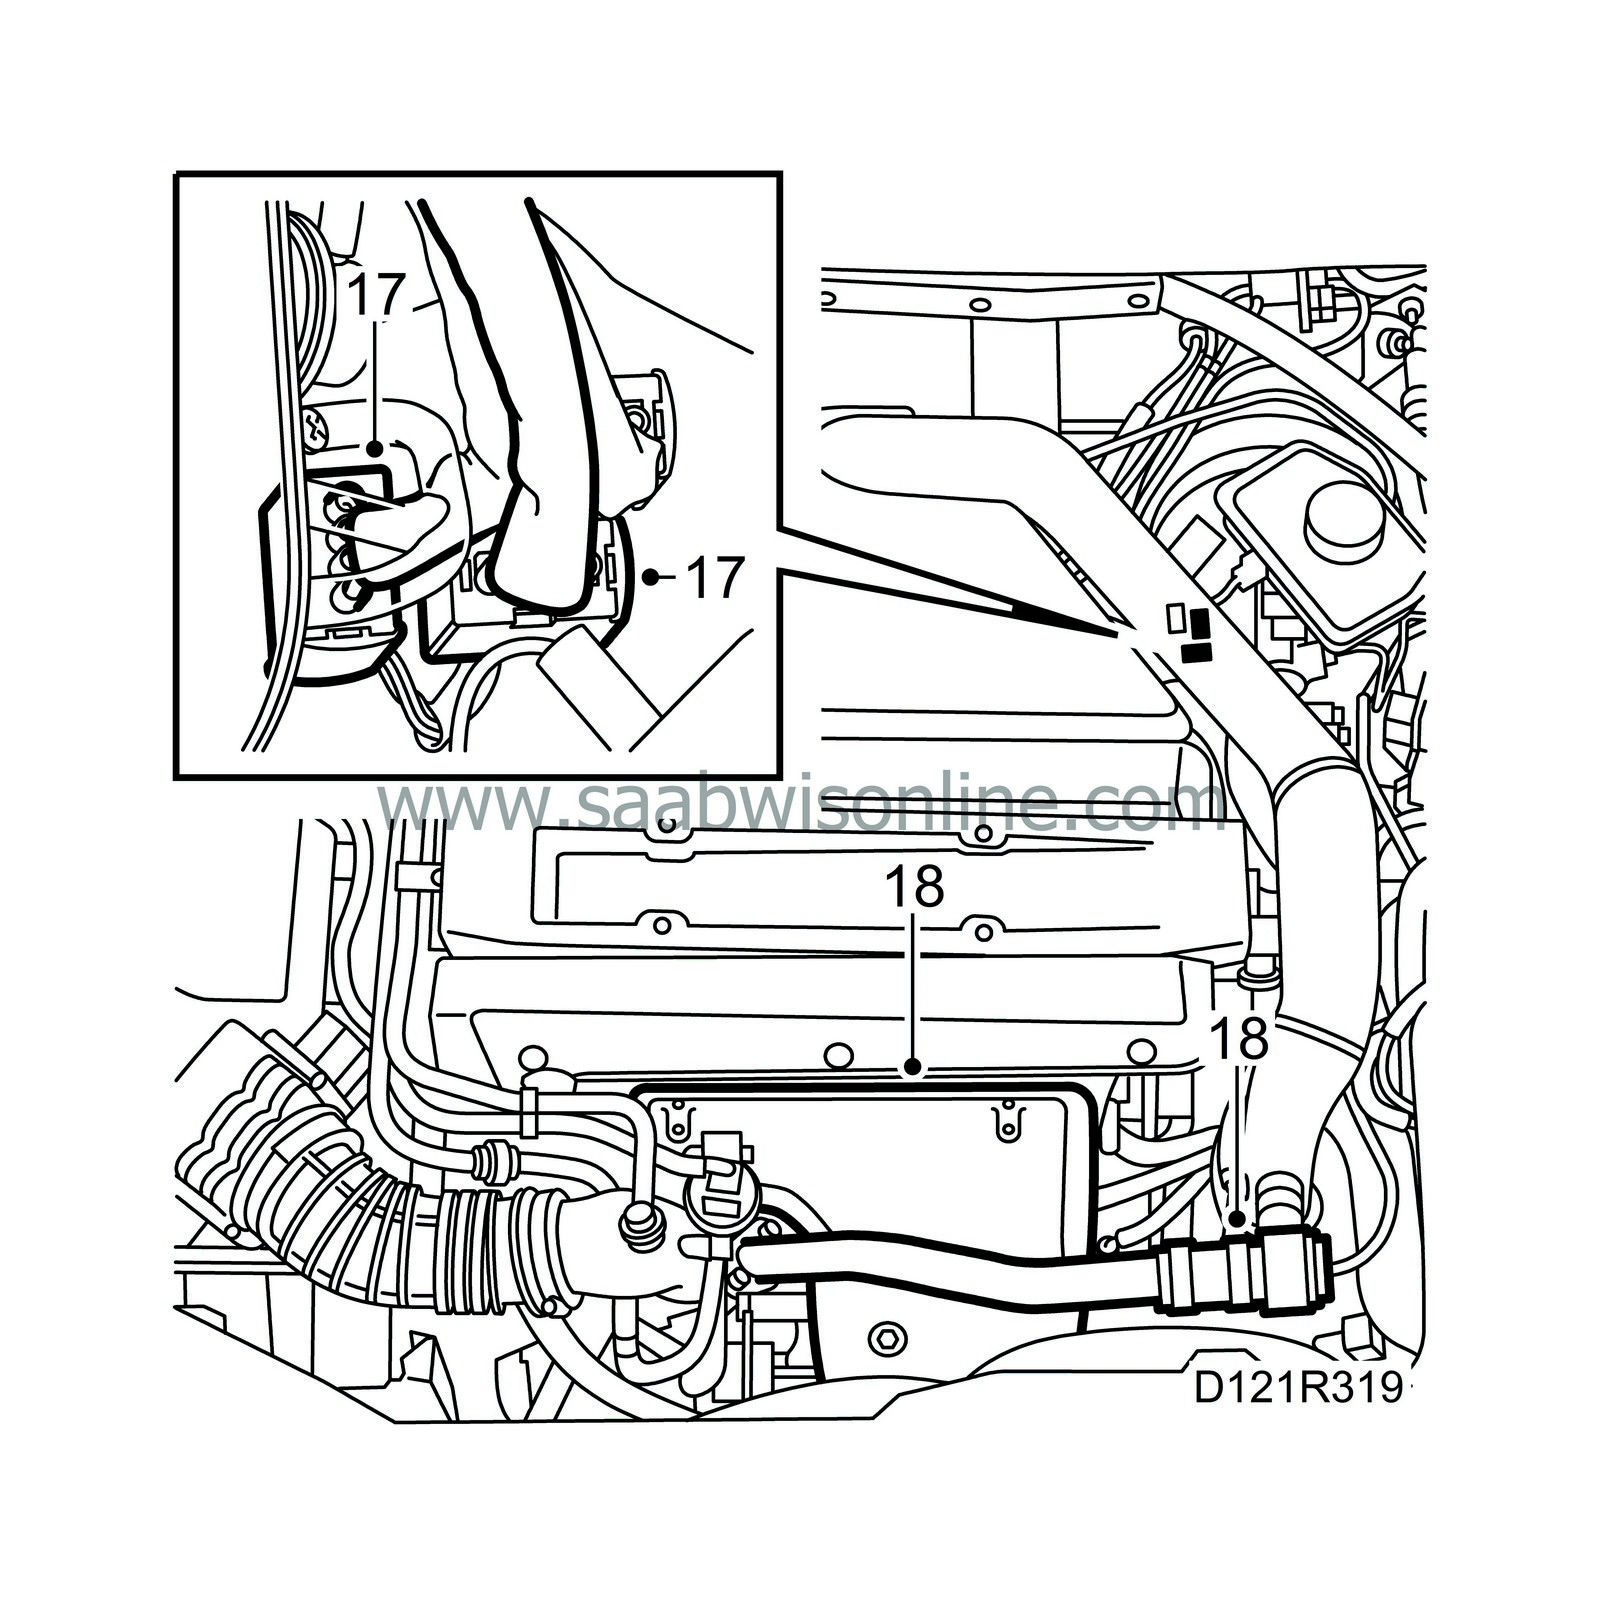
|
|
| 18. |
Fit the bypass pipe and heat shield.
|
|

