Filler pipe
| Filler pipe |
|
|||||||
| • |
Make provision for good ventilation! If approved ventilation for extracting fuel fumes is available then it must be used.
|
|
| • |
Use protective gloves! Prolonged contact with fuel may irritate the skin.
|
|
| • |
Keep a class BE fire extinguisher close at hand! Watch out for sparks, e.g. in connection with breaking electric circuits, short-circuits, etc.
|
|
| • |
Smoking is absolutely forbidden.
|
|
| To remove |

| 1. |
Place the car on a lift.
|
|
| 2. |
Raise the car and remove the rear right wheel.
|
|
| 3. |
Clean around the filler pipe to avoid getting dirt into the pipe or into the tank.
|
|
| 4. |
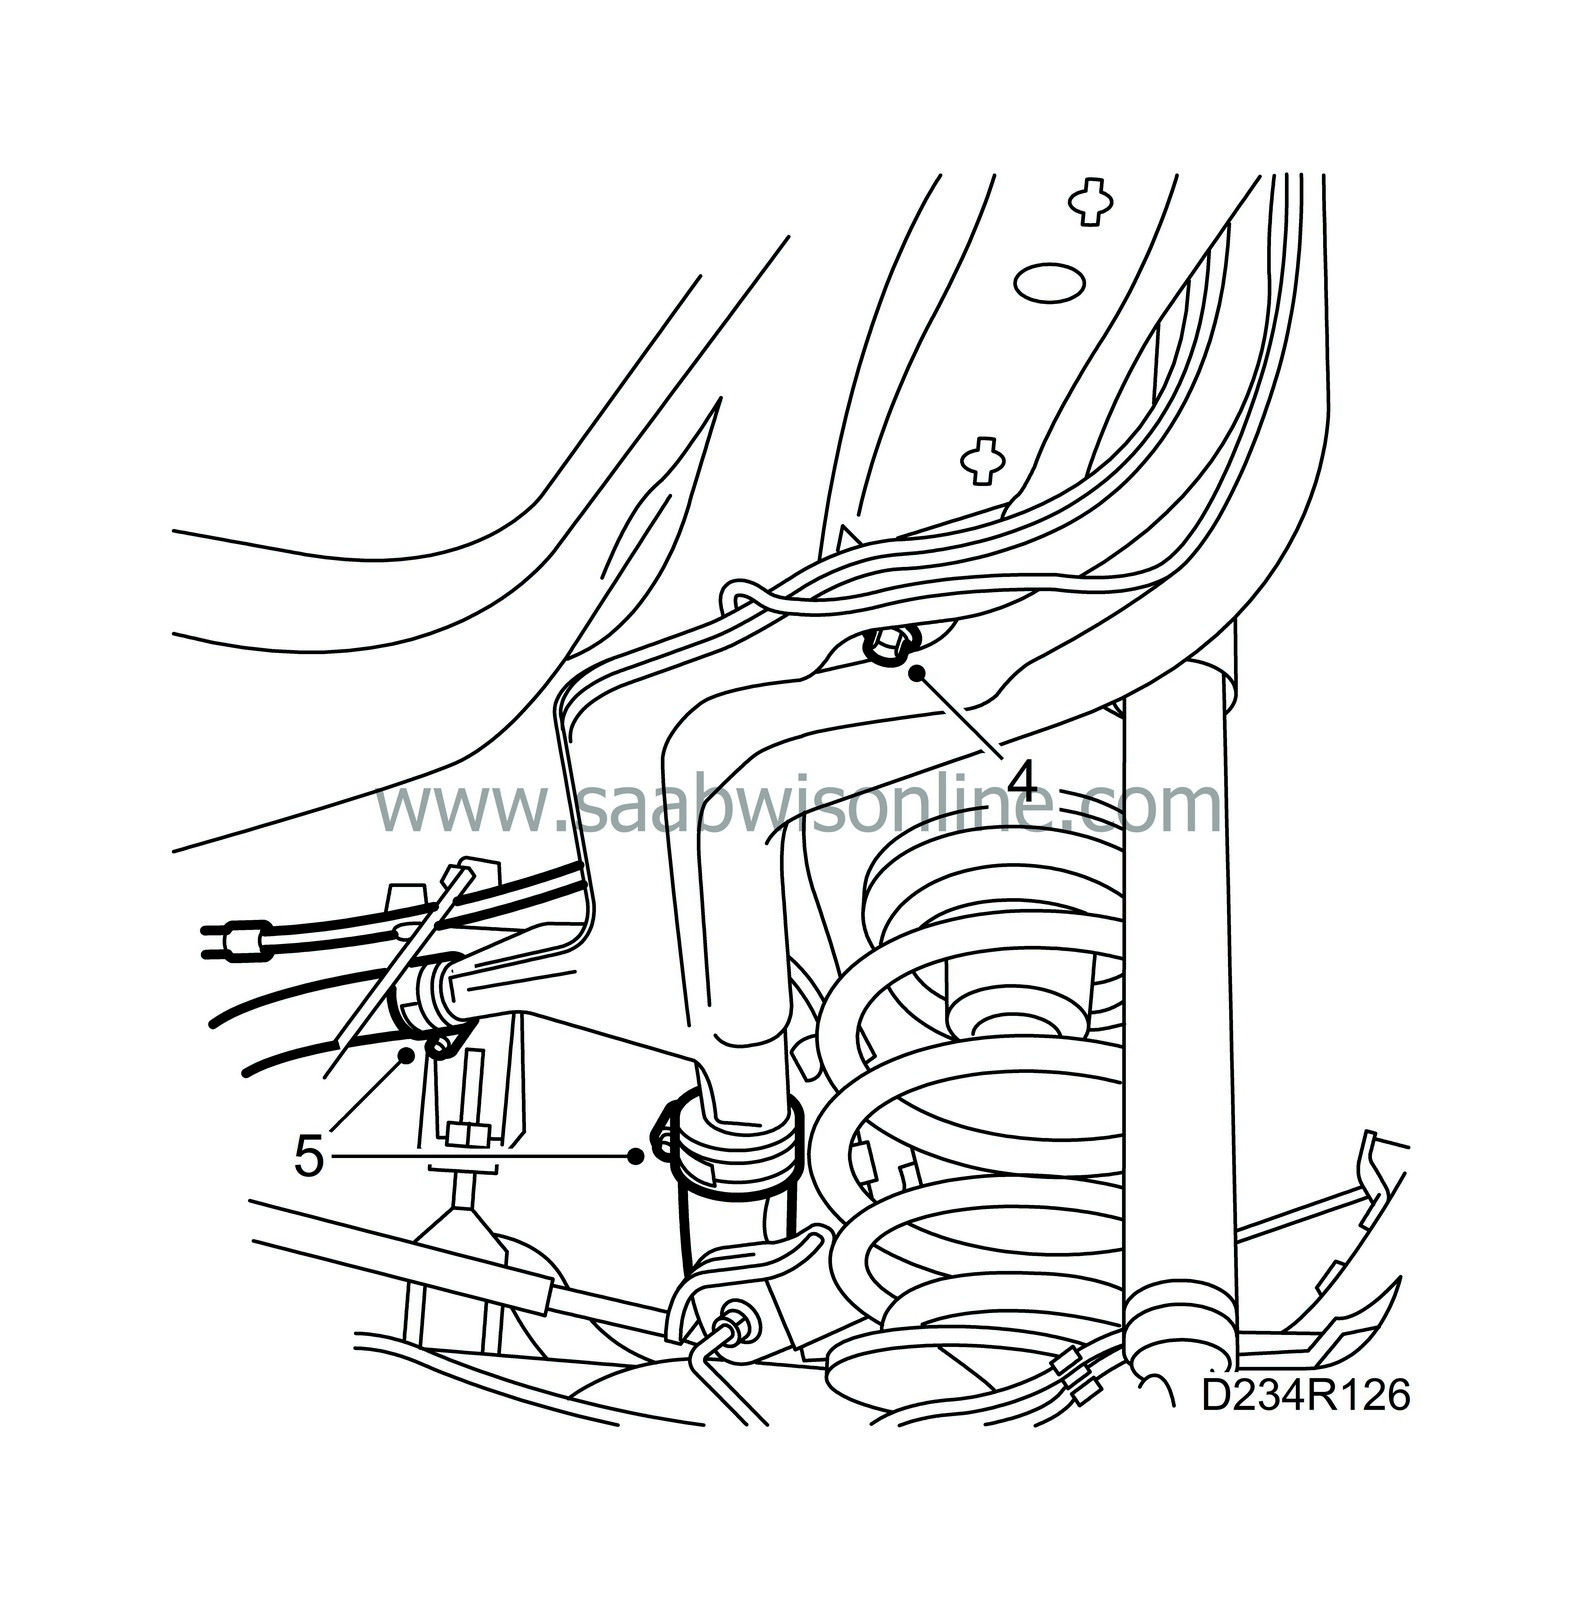
Remove the plastic screw securing the filler pipe to the body.
|
|
| 5. |
Detach the filler pipe from the tank hoses.
|
|
| 6. |
Lower the car and unscrew the filler cap.
|
|
| 7. |
Grip the pipe with one hand under the rear wing and remove the filler pipe from the filler cap collar. Use a screwdriver.
|
|
| 8. |
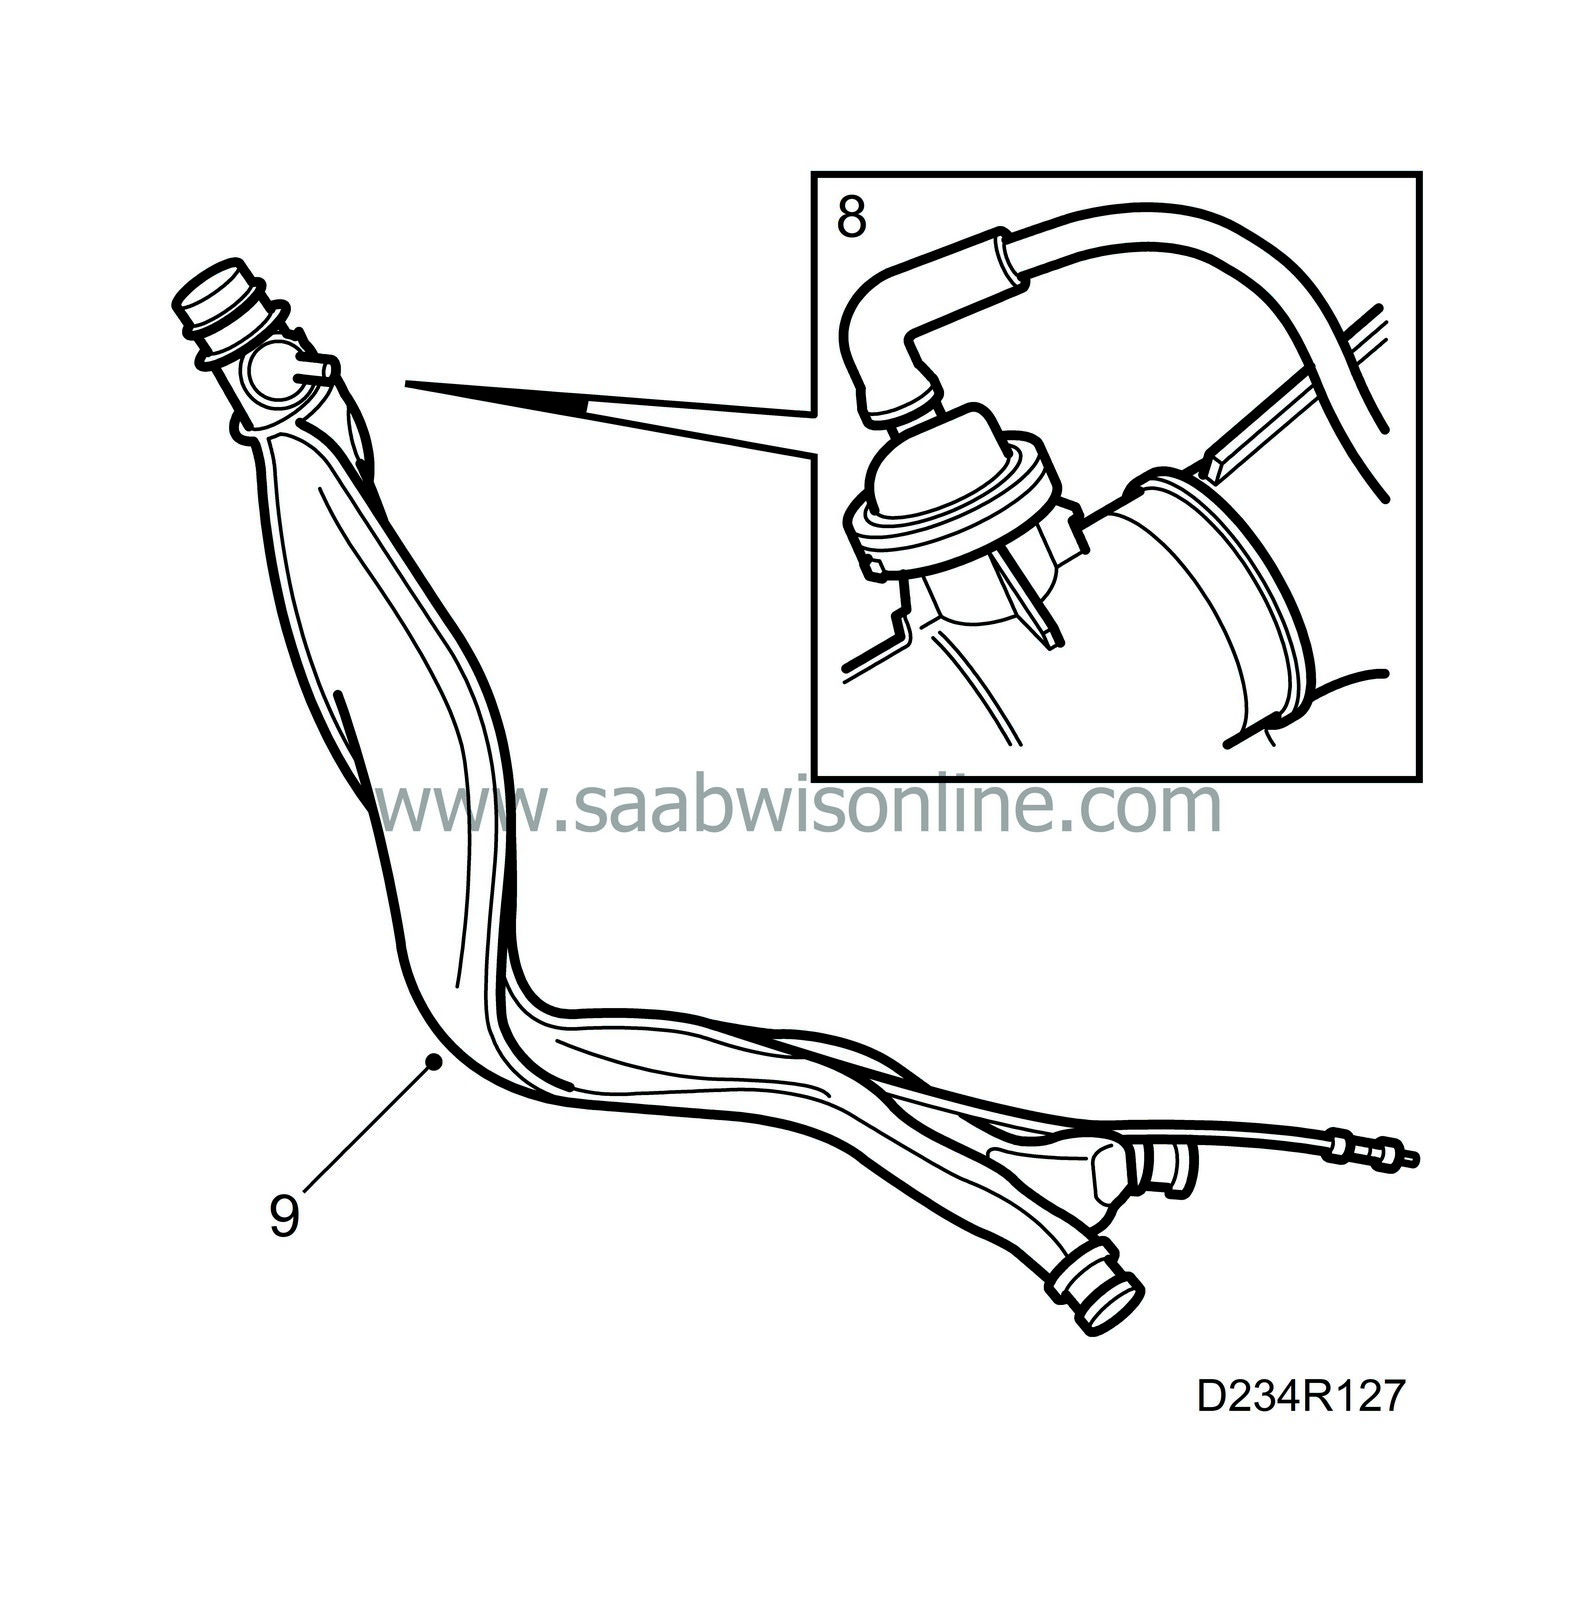
Pull out the pipe slightly to give better access when detaching the vent hose form the upper part of the fuel filler pipe.

|
|
| 9. |
Pull out the filler pipe.
|
|
| To fit |

| Important | ||
|
It is important that the old plastic screw is replaced with a new one when removing/fitting the fuel filler pipe. In the event of a collision, the plastic screw must give way to avoid damaging the filler pipe, which is also make of plastic. |
||
| 1. |
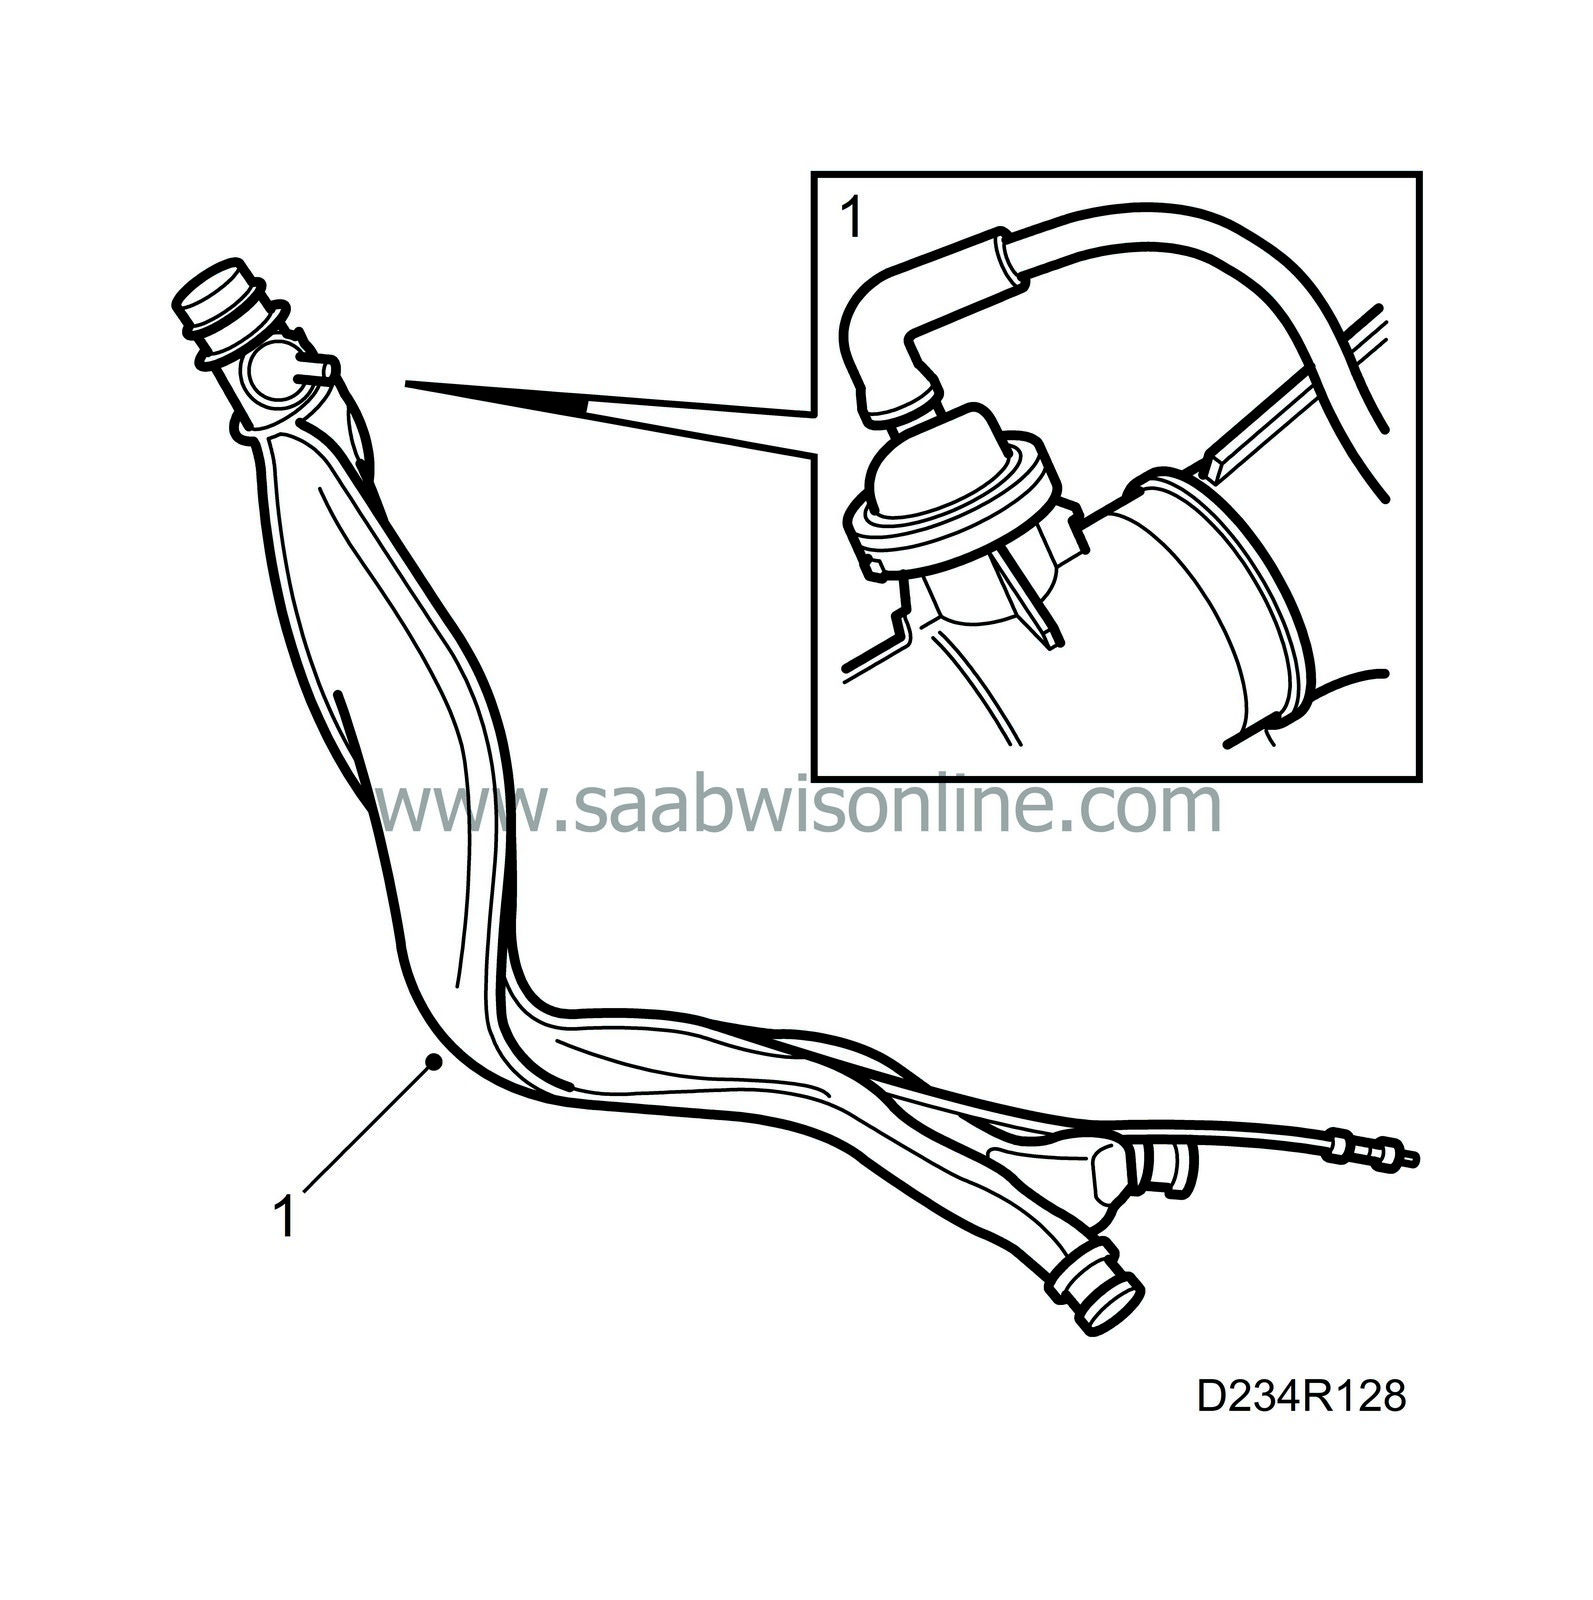
Position the filler pipe and refit the hose to the upper part of the fuel filler pipe.
|
|
| 2. |
Make sure the fuel filler pipe is correctly fitted to the filler cap collar.
|
|
| 3. |
Fit the filler cap.
|
|
| 4. |
Raise the car.
|
|
| 5. |
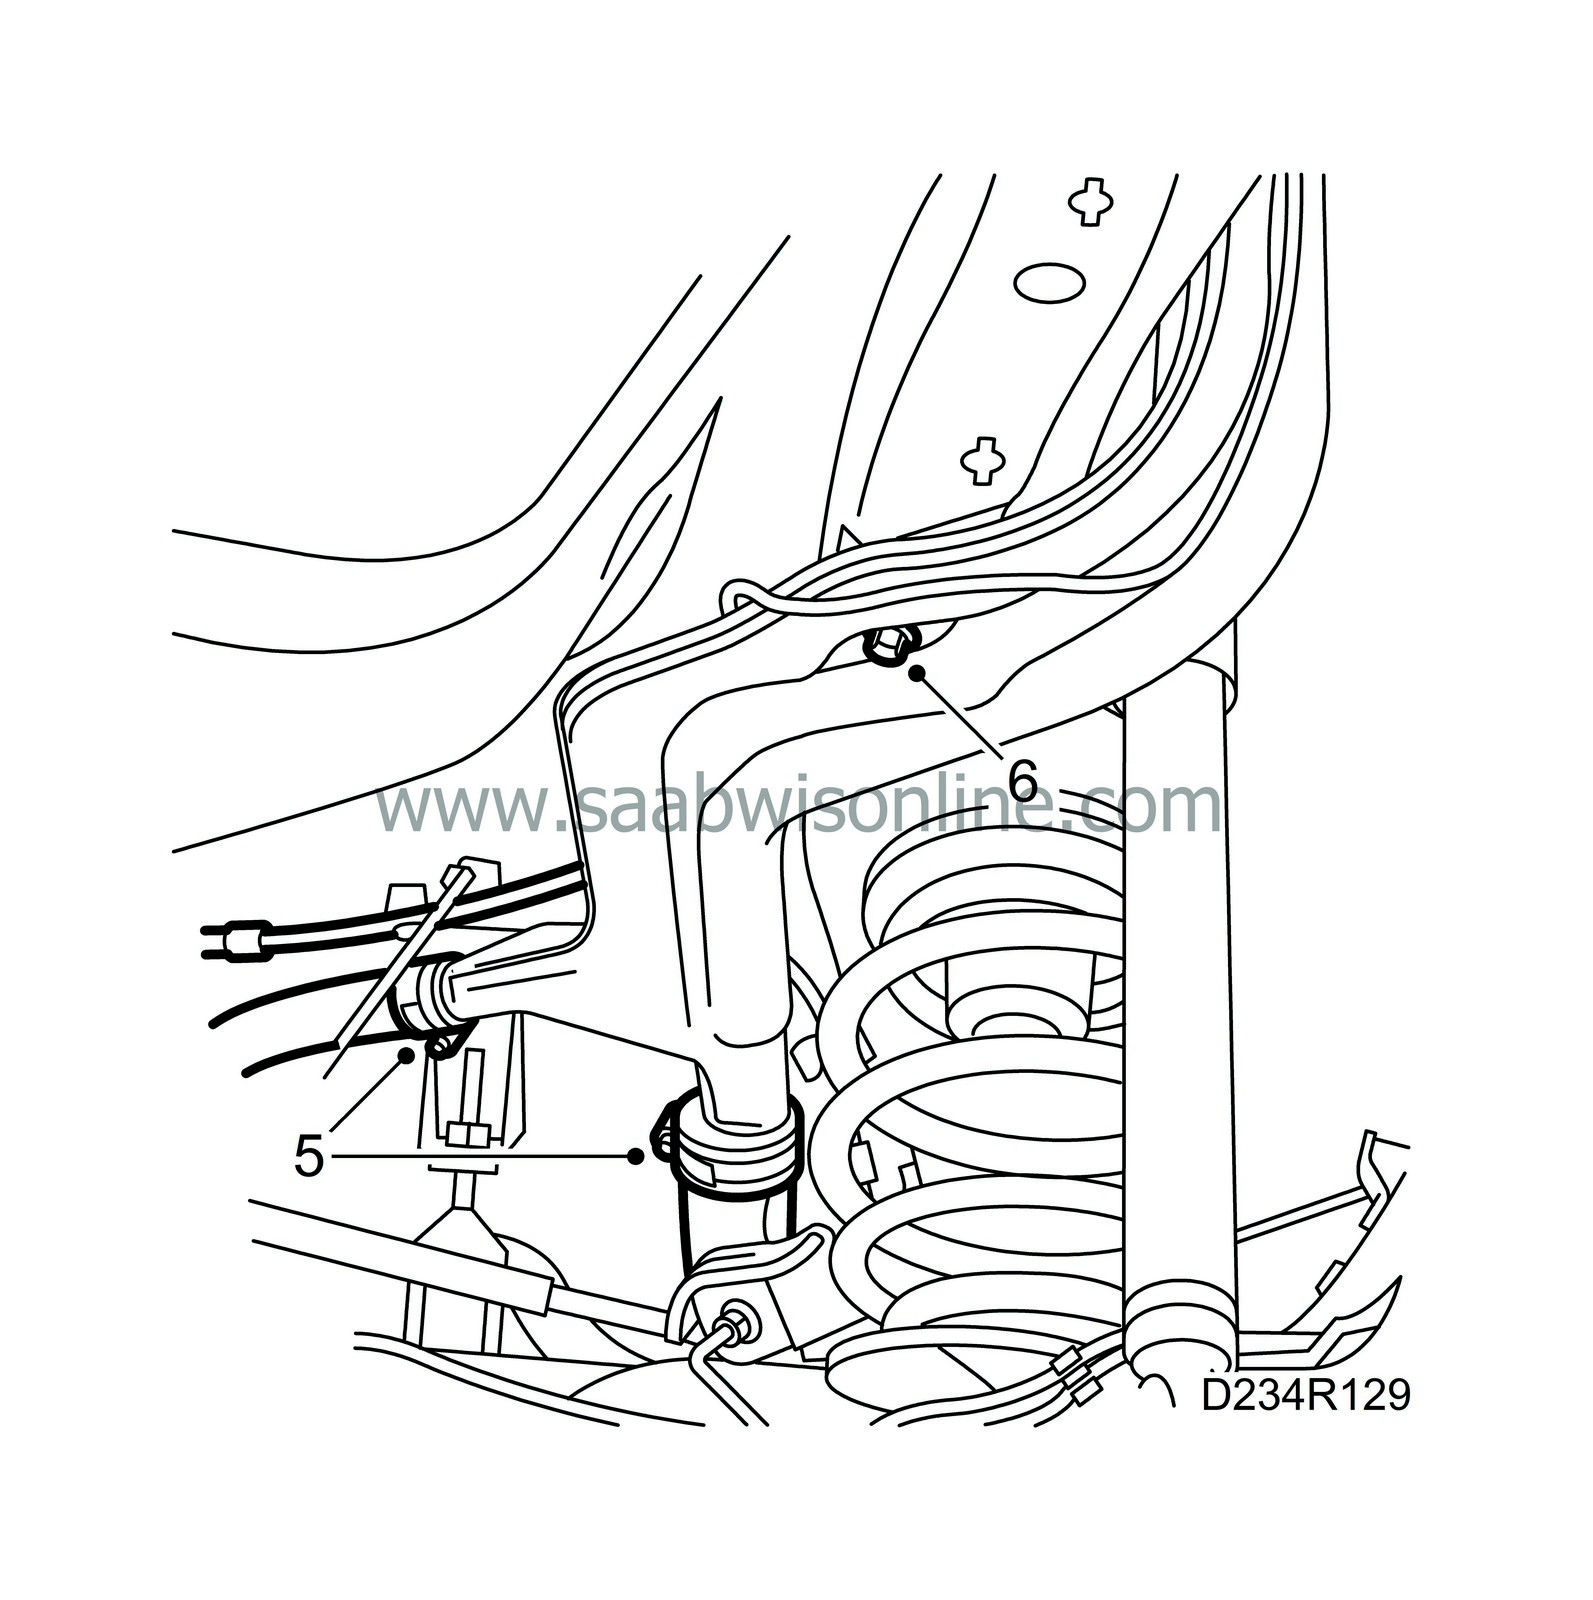
Connect the fuel filler pipe to the fuel tank hoses.

|
|
| 6. |
Fit the plastic screw securing the filler pipe to the body.
Tightening torque 1.5 Nm (1.1 lbf ft). |
|
| 7. |
Refit the wheel.
Tightening torque 110 Nm (81 lbf ft). Lower the car. |
|

 Warning

