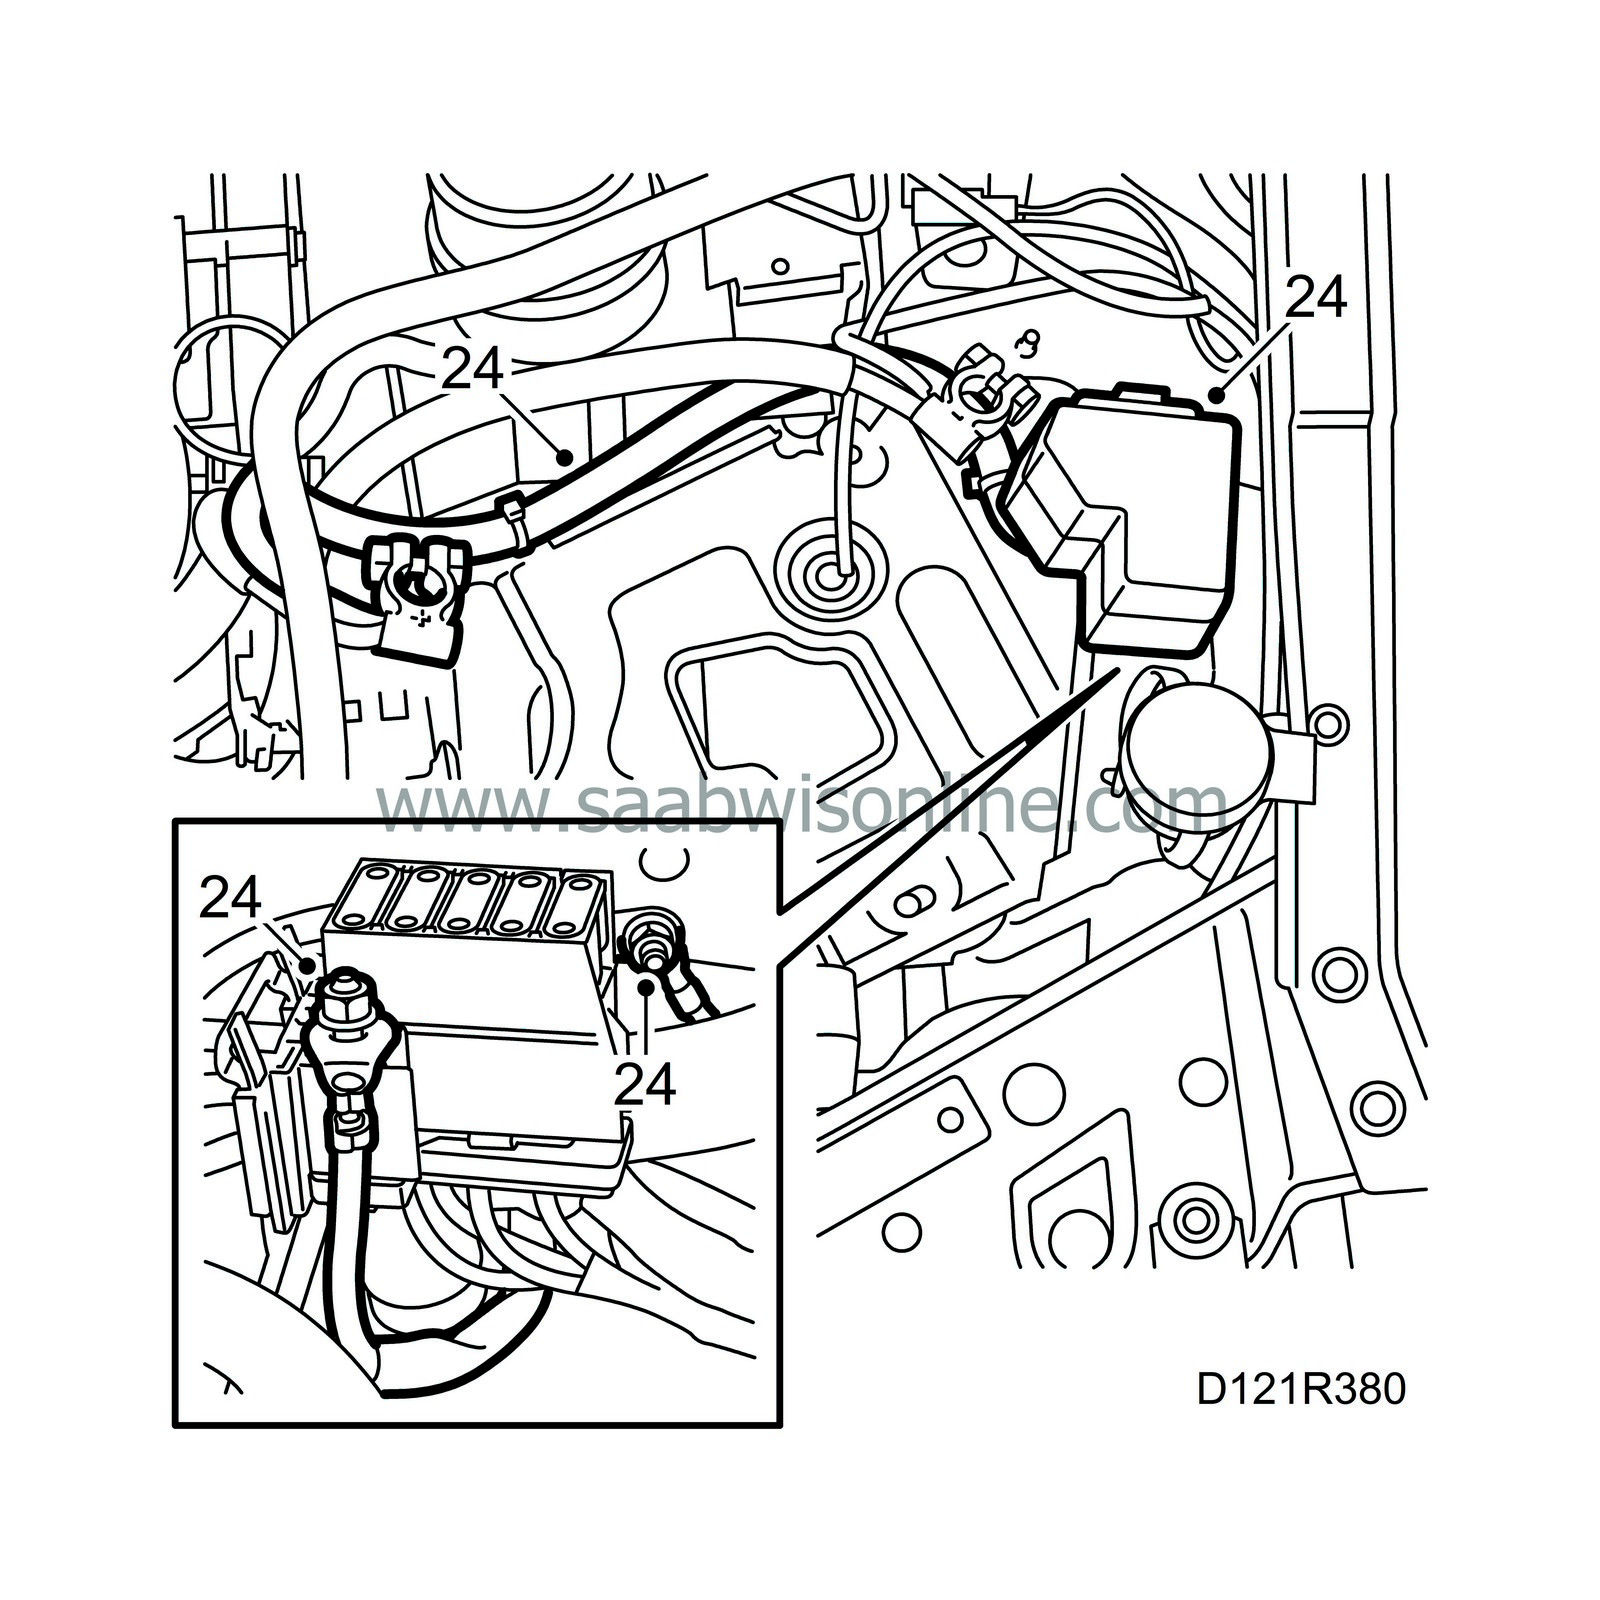
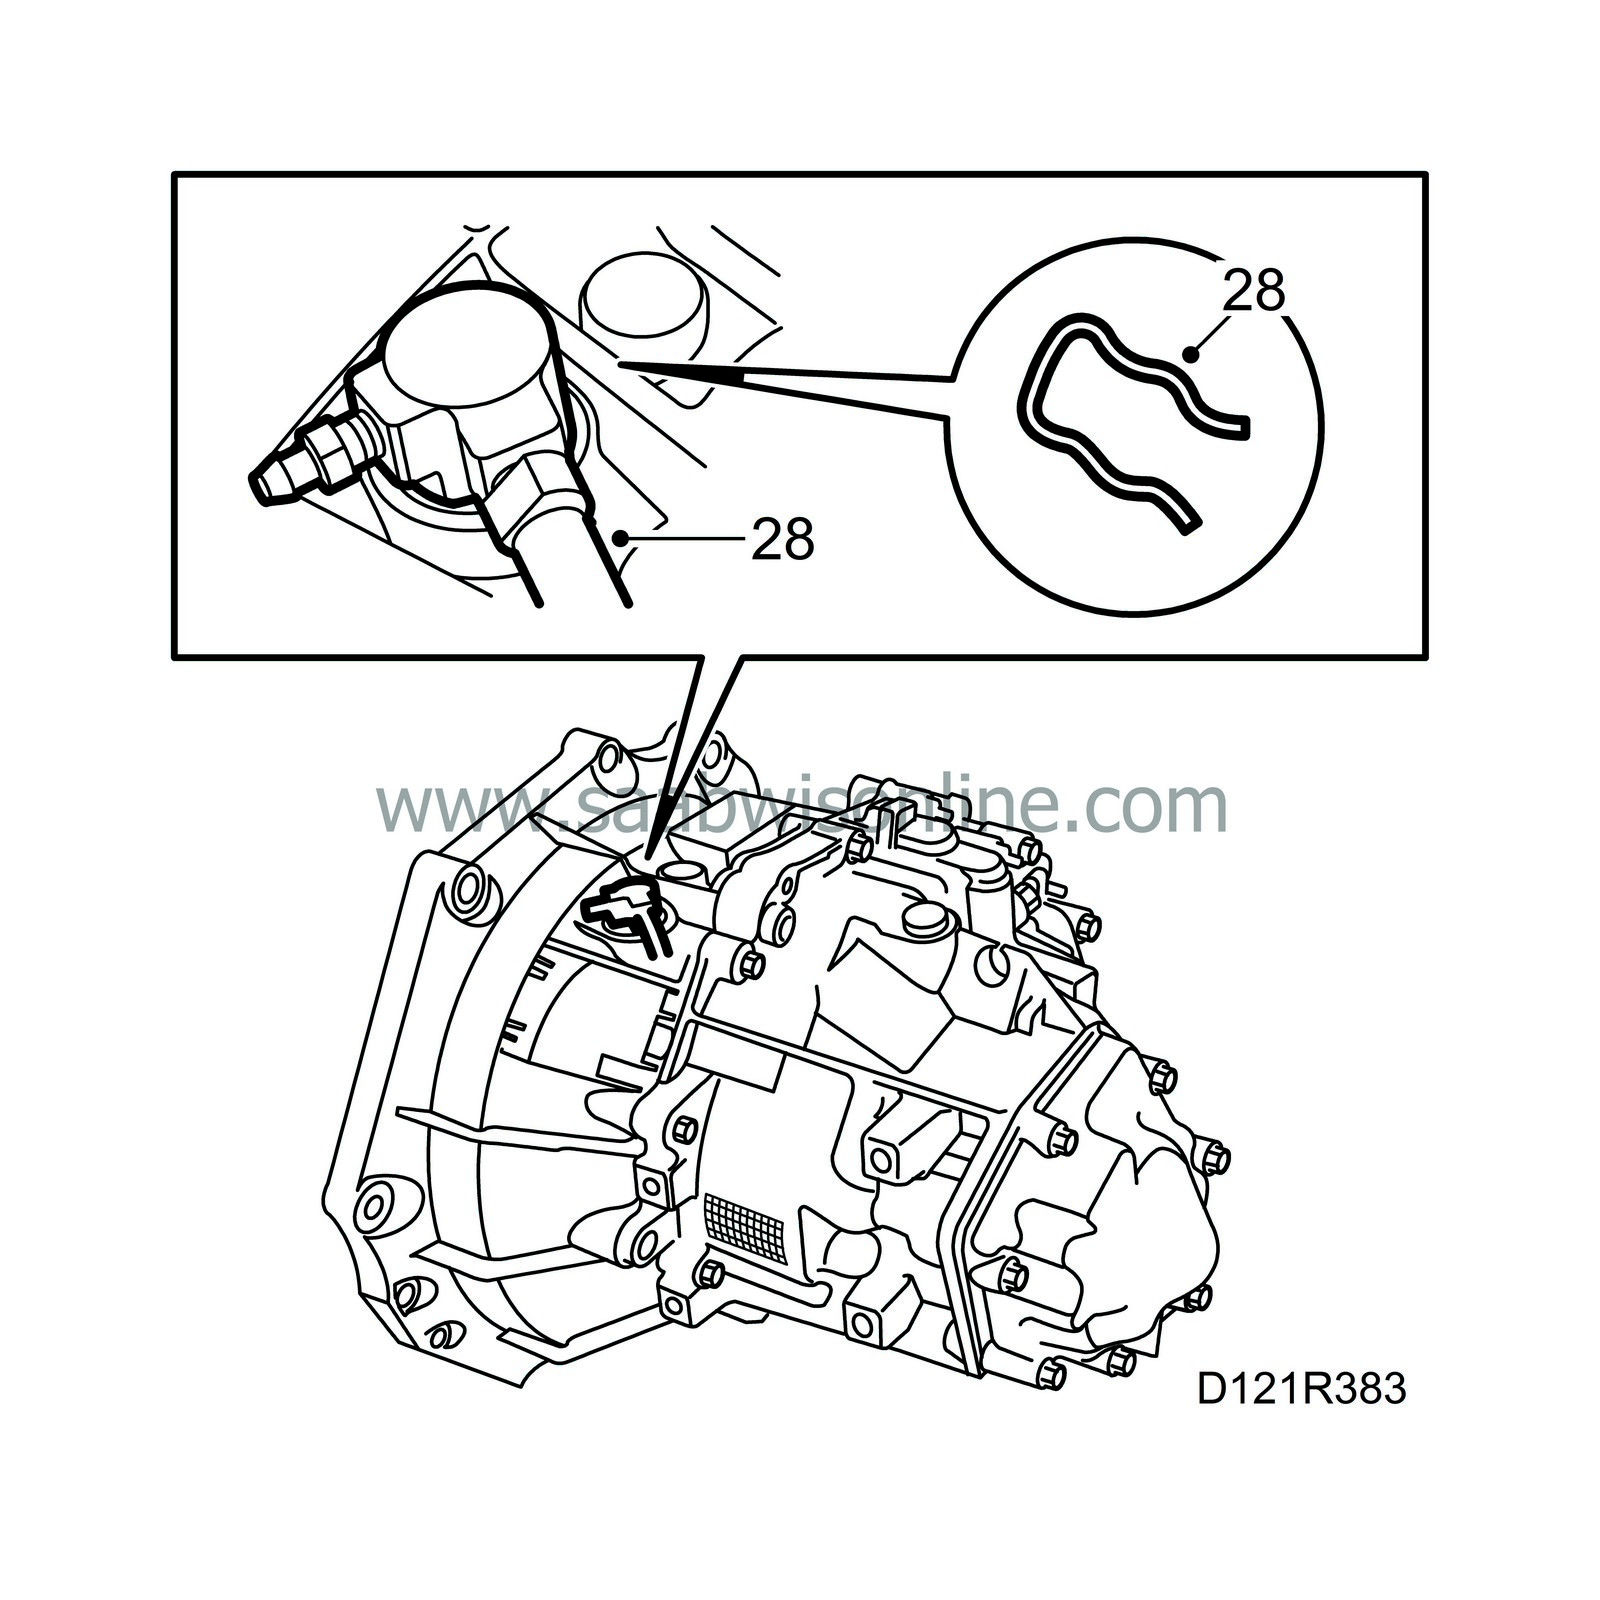
Removing the power train
| Removing the power train |
|
|||||||
| 1. |
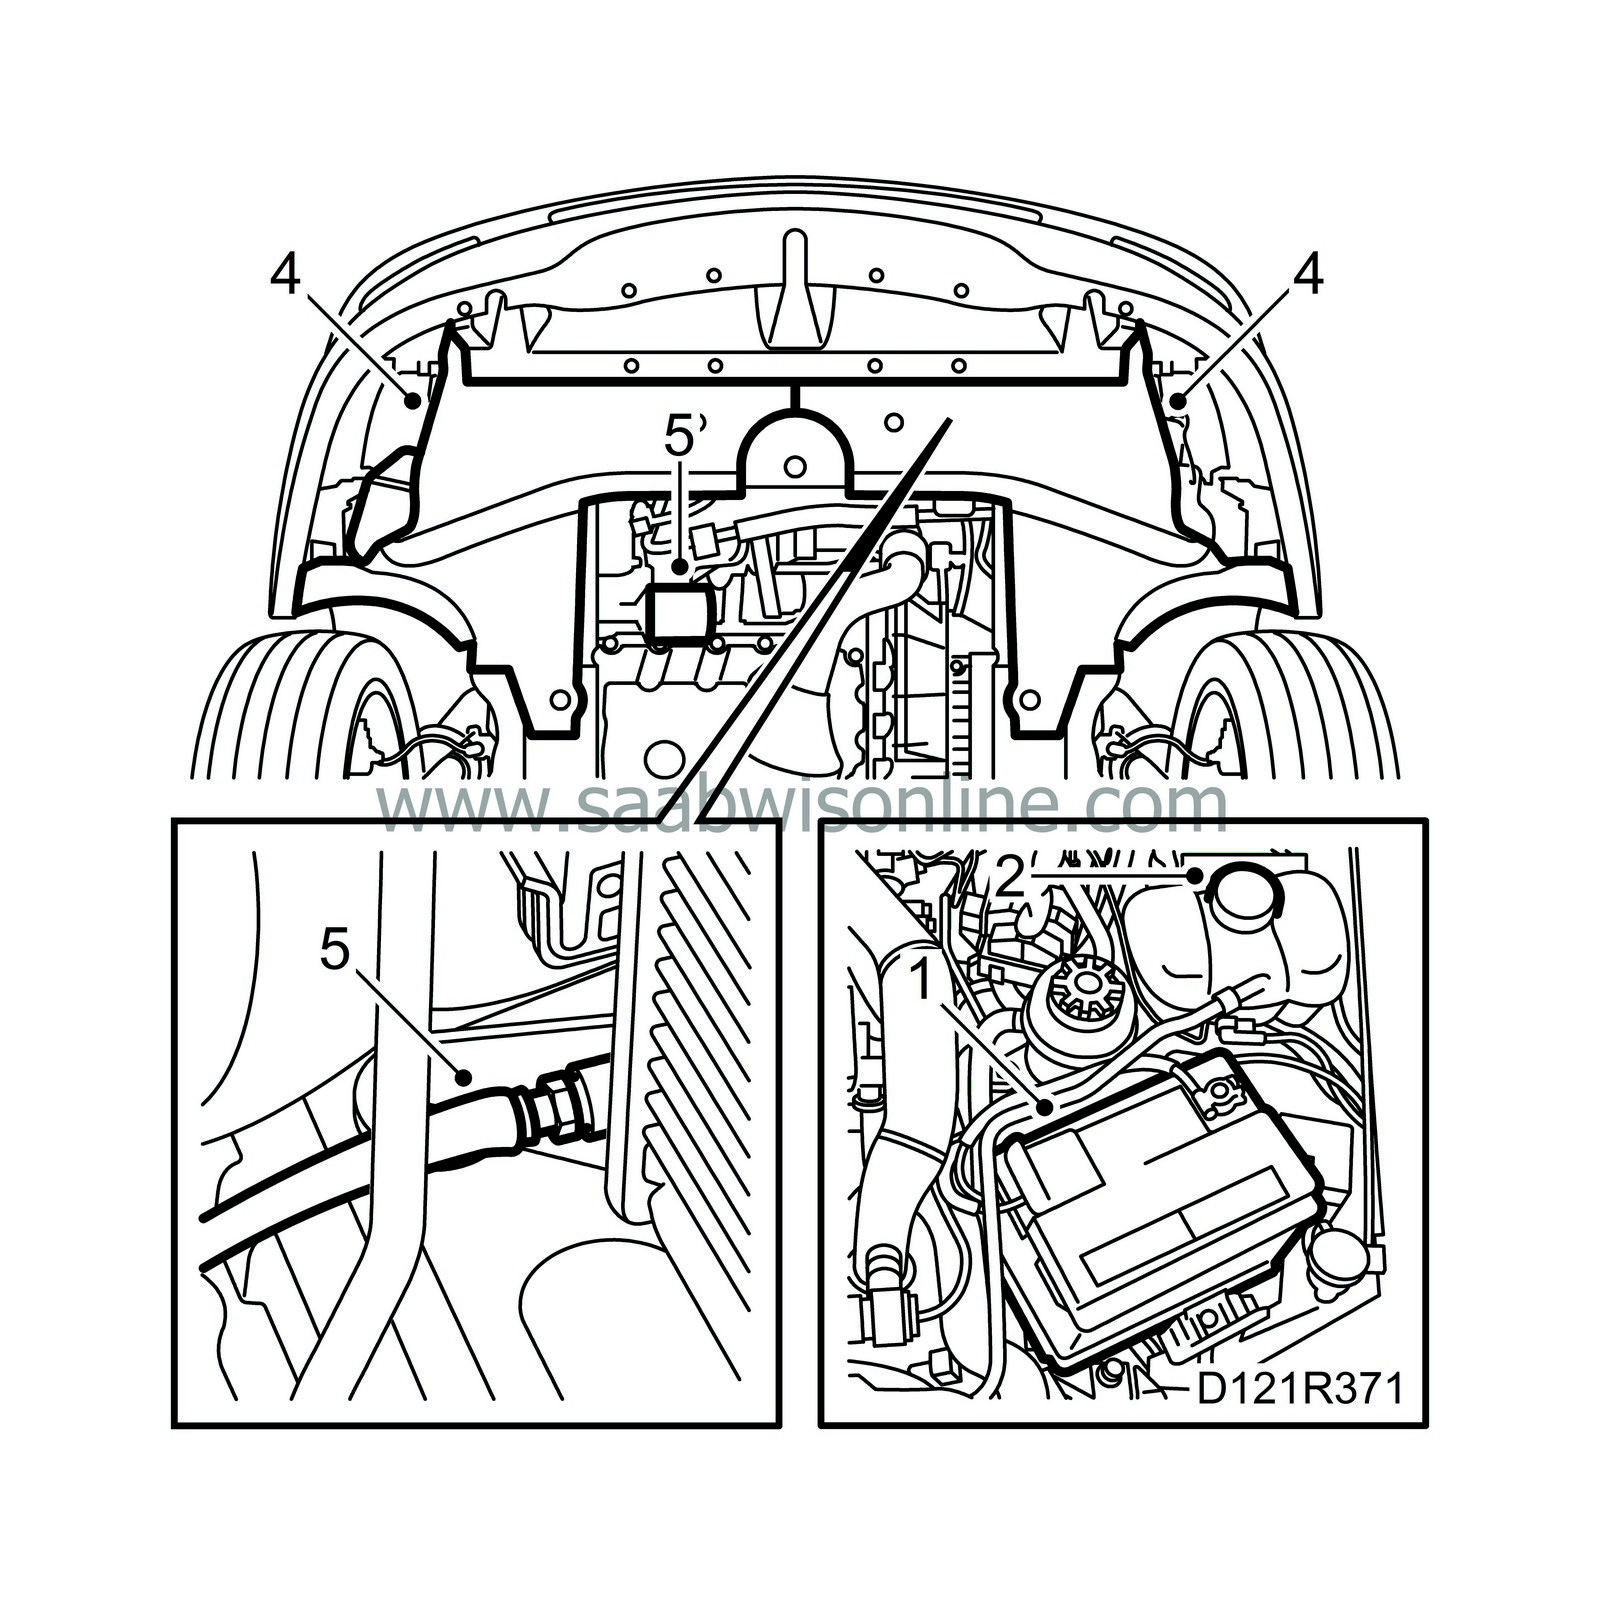
Cover the wings and remove the battery. Make a note of the radio code if necessary.
|
|
| 2. |
Remove the cap from the expansion tank to speed up draining the coolant.
|
|
| 3. |
Raise the car.
|
|
| 4. |
Remove the lower engine cover.
|
|
| 5. |
Take a receptacle and open the drain plug to drain the coolant. If the engine is to be dismantled, drain the oil and remove the oil filter.
|
|
| 6. |
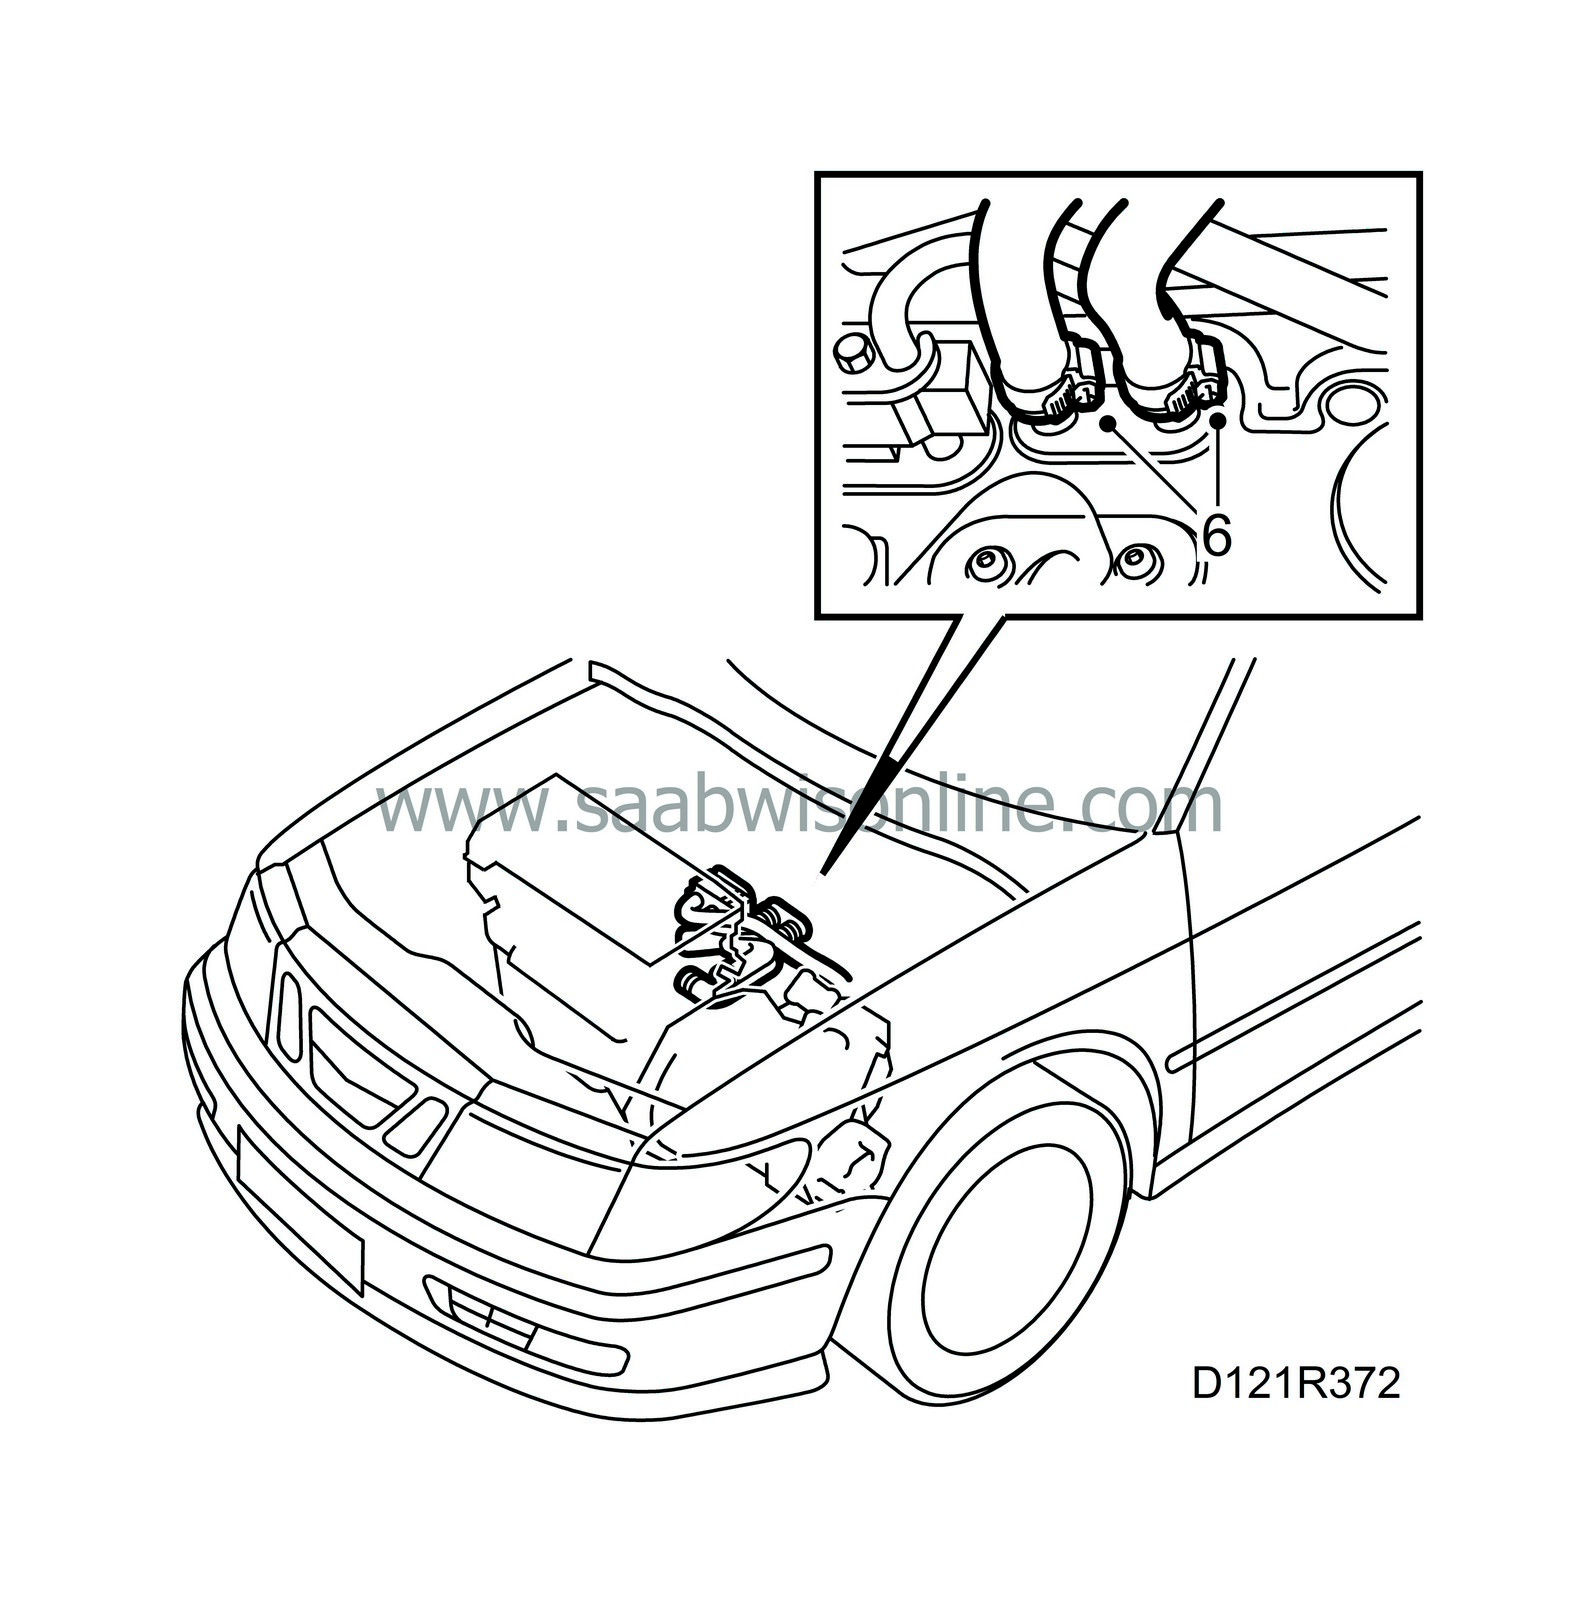
Remove the coolant hoses from the heater unit.
|
|
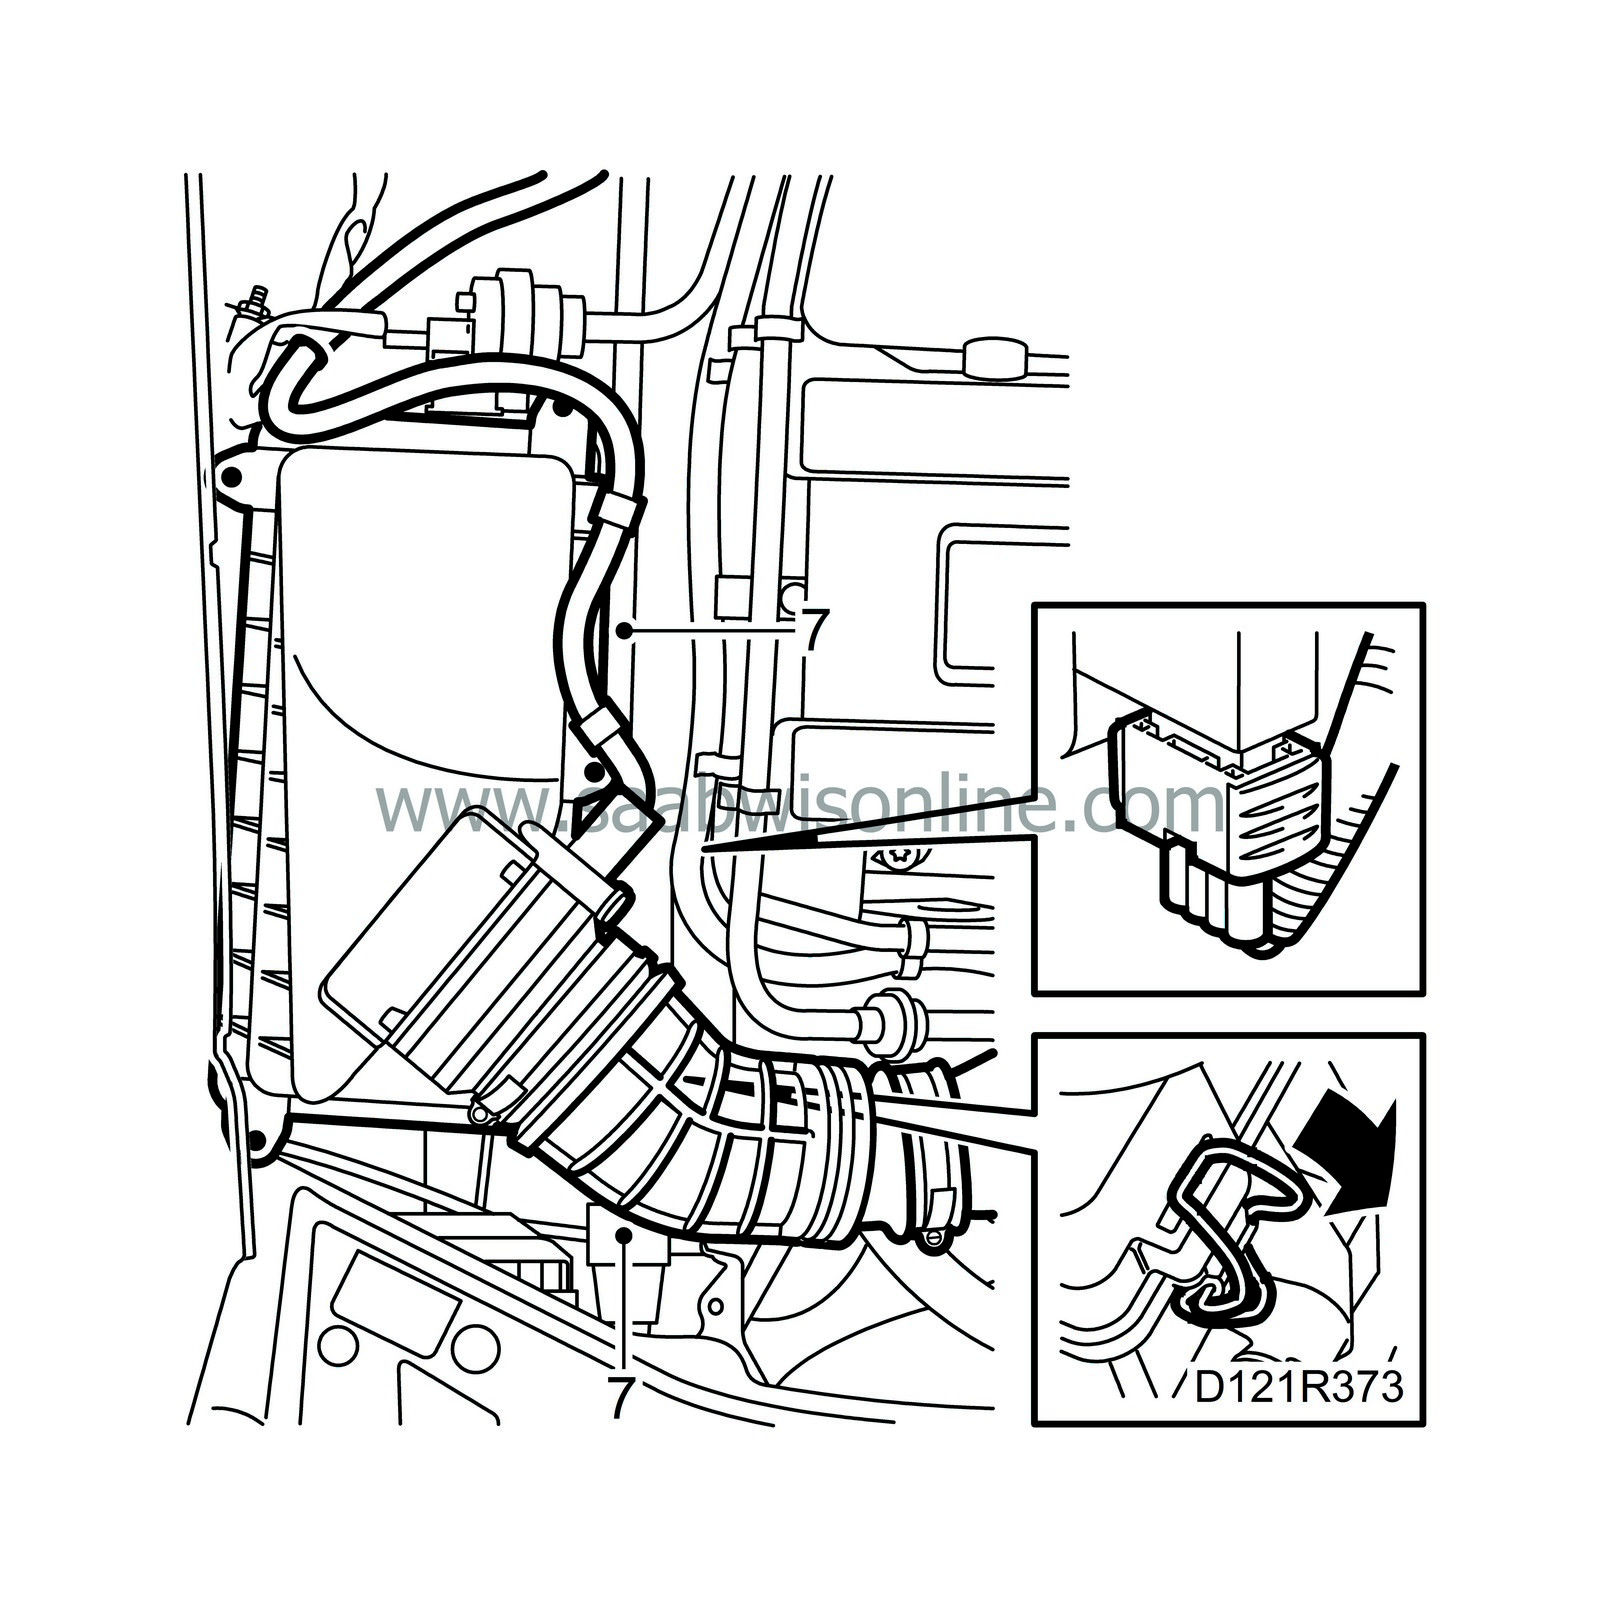
| 7. |
Lower the car and remove the air cleaner. Refer to
Air collector casing.
|
|
| 8. |
Remove the upper engine cover.
|
|
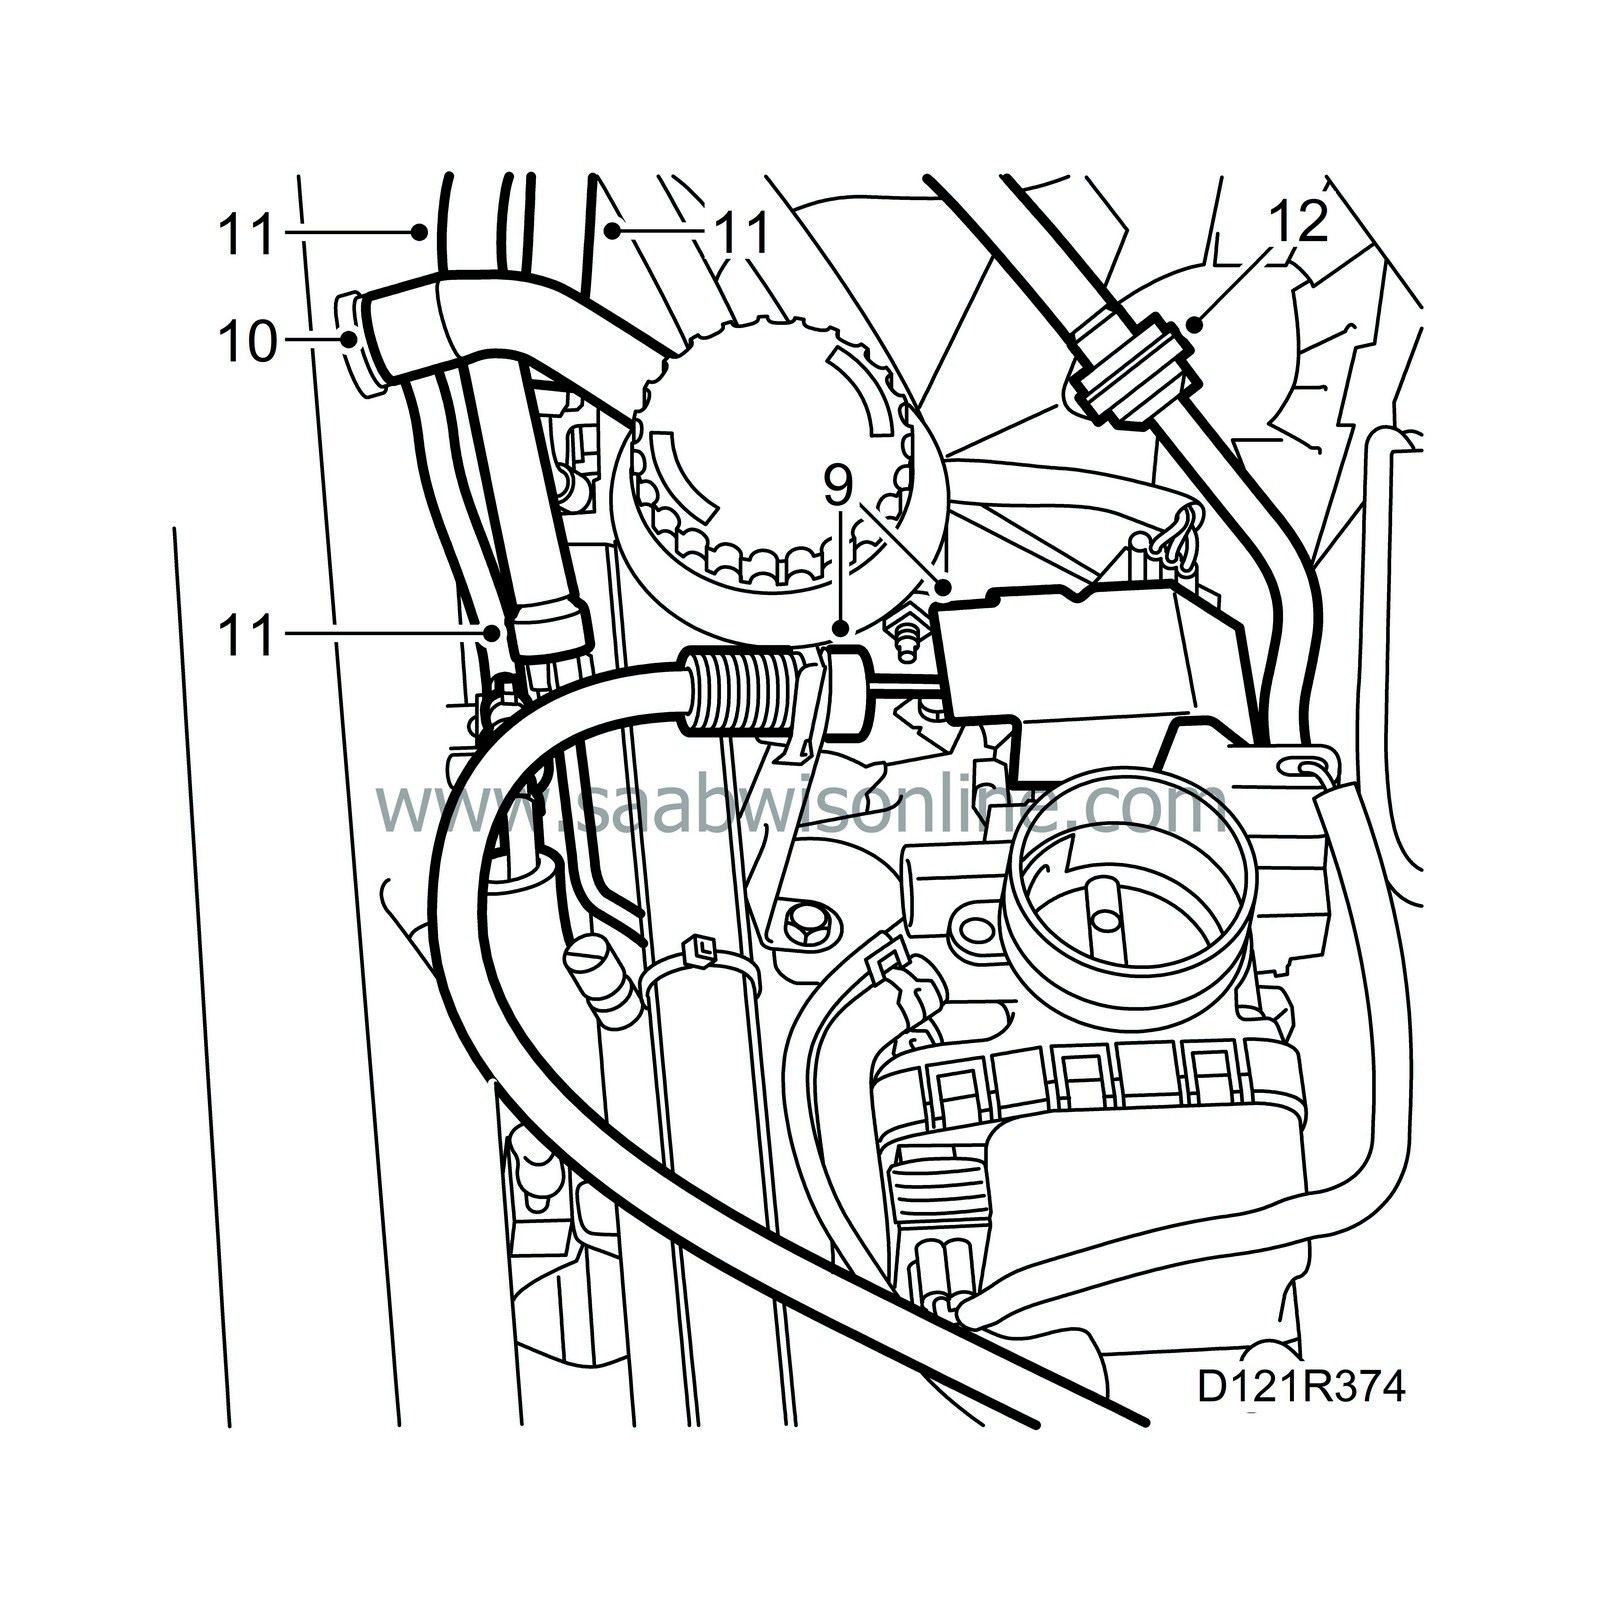
| 9. |
Detach the protective cap on the accelerator wire. Detach the accelerator wire and place it to one side.
|
|
| 10. |
Remove the hose and vacuum hose from the crankcase ventilation.
|
|
| 11. |
Separate the fuel lines with tool
Fuel line tool
83 95 261 and a pair of flat nose pliers for dismantling the rubber seal in the quick-release coupling. Wipe up any fuel spill with a cloth.
|
|
| 12. |
Detach the tank ventilation hose and bend it to one side.
|
|
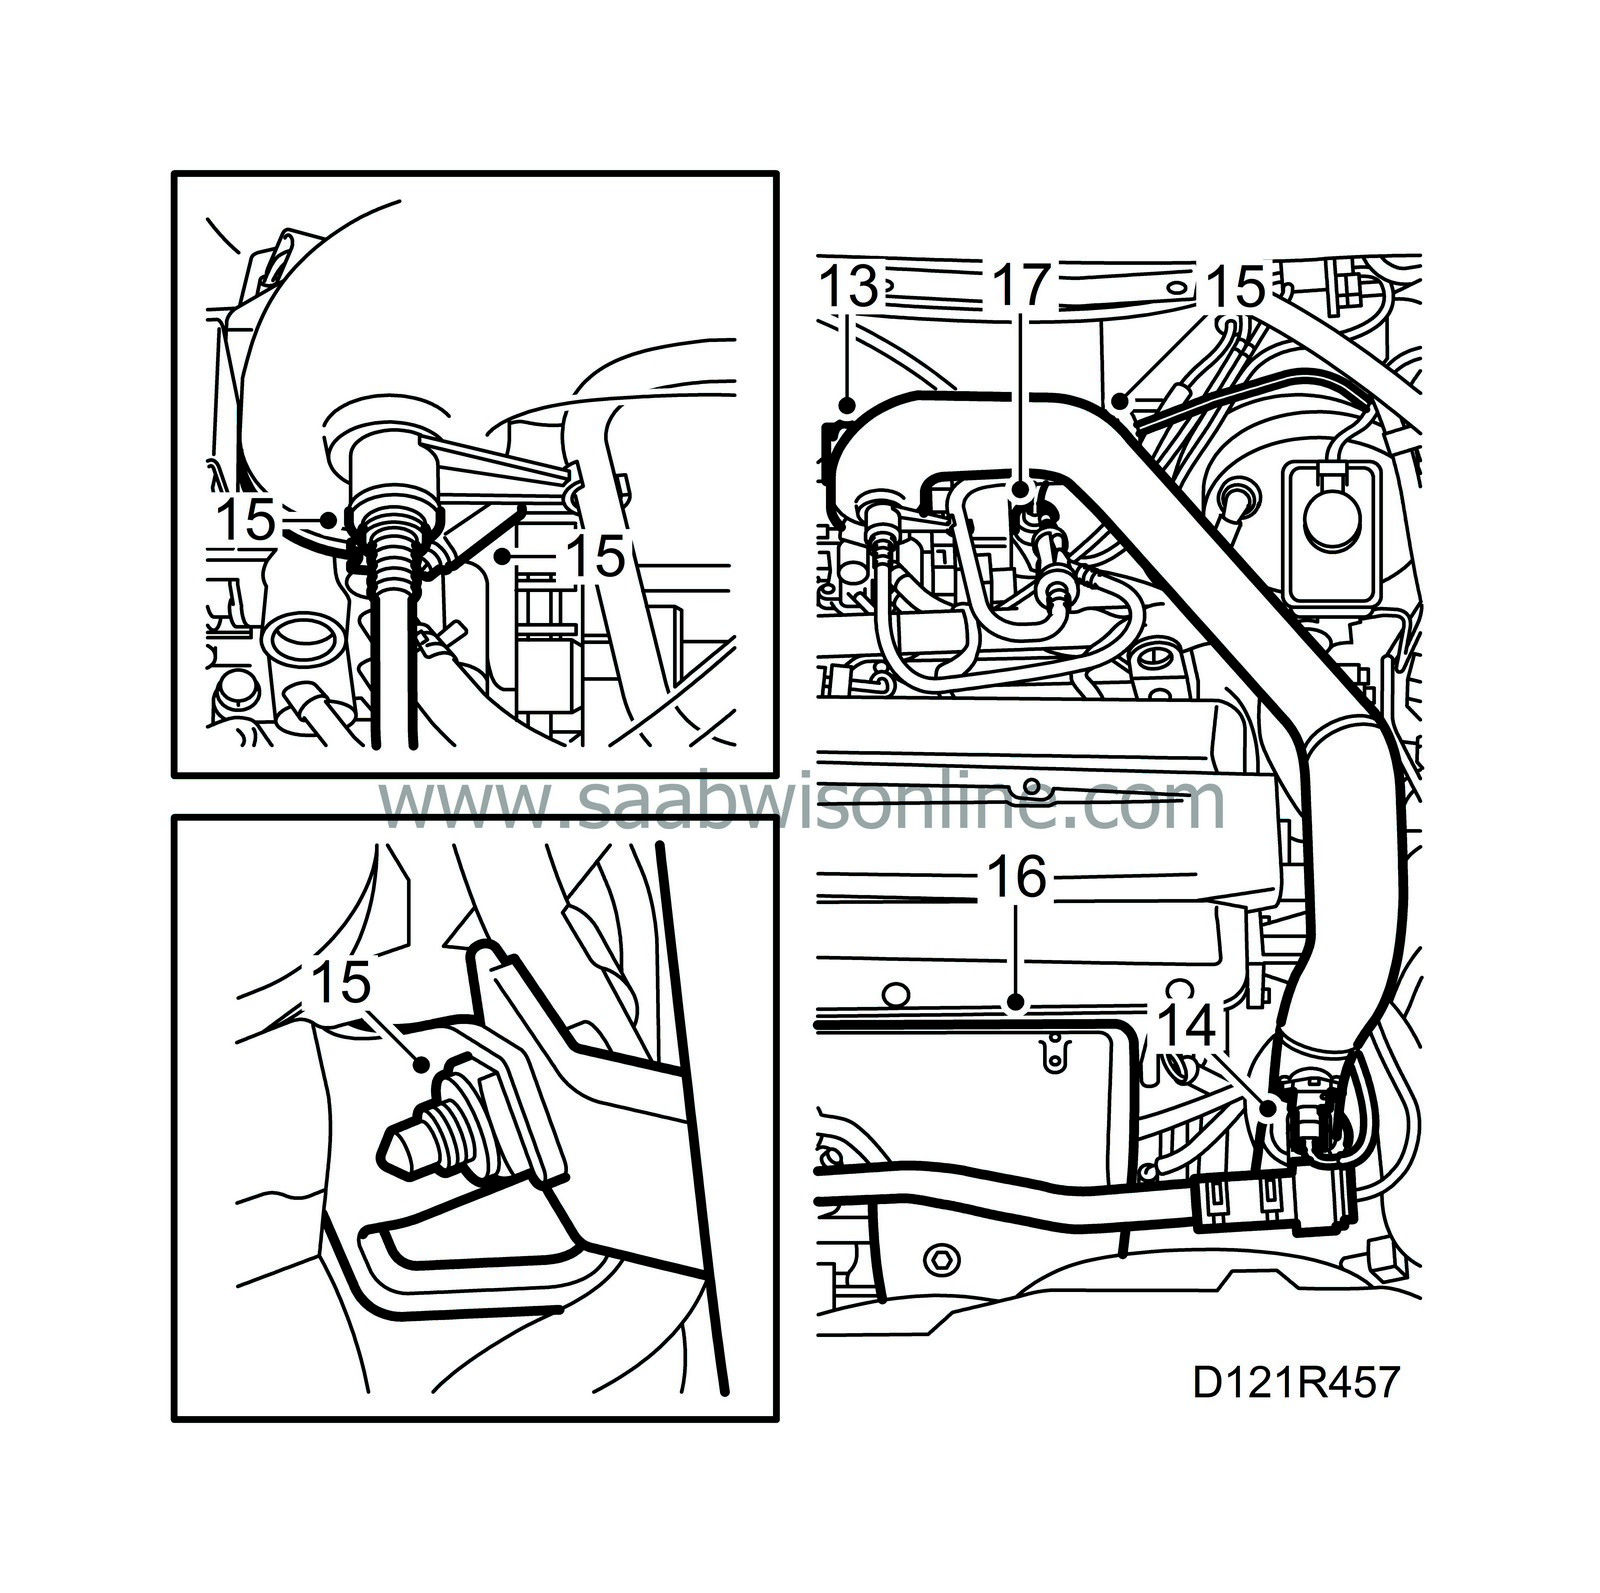
| 13. |
Undo the hose clips on the charge air pipe.
|
|
| 14. |
Unplug the pressure/temperature sensor.
Man: Disconnect the venturi hose from the charge air pipe. |
|
| 15. |
Remove the hose and the bolt from the bypass pipe. Remove as a unit. Plug the hoses and the hose connections.
|
|
| 16. |
Remove the heat shield over the exhaust manifold.
|
|
| 17. |
Detach the vacuum hose to the brake servo from the intake manifold.
|
|
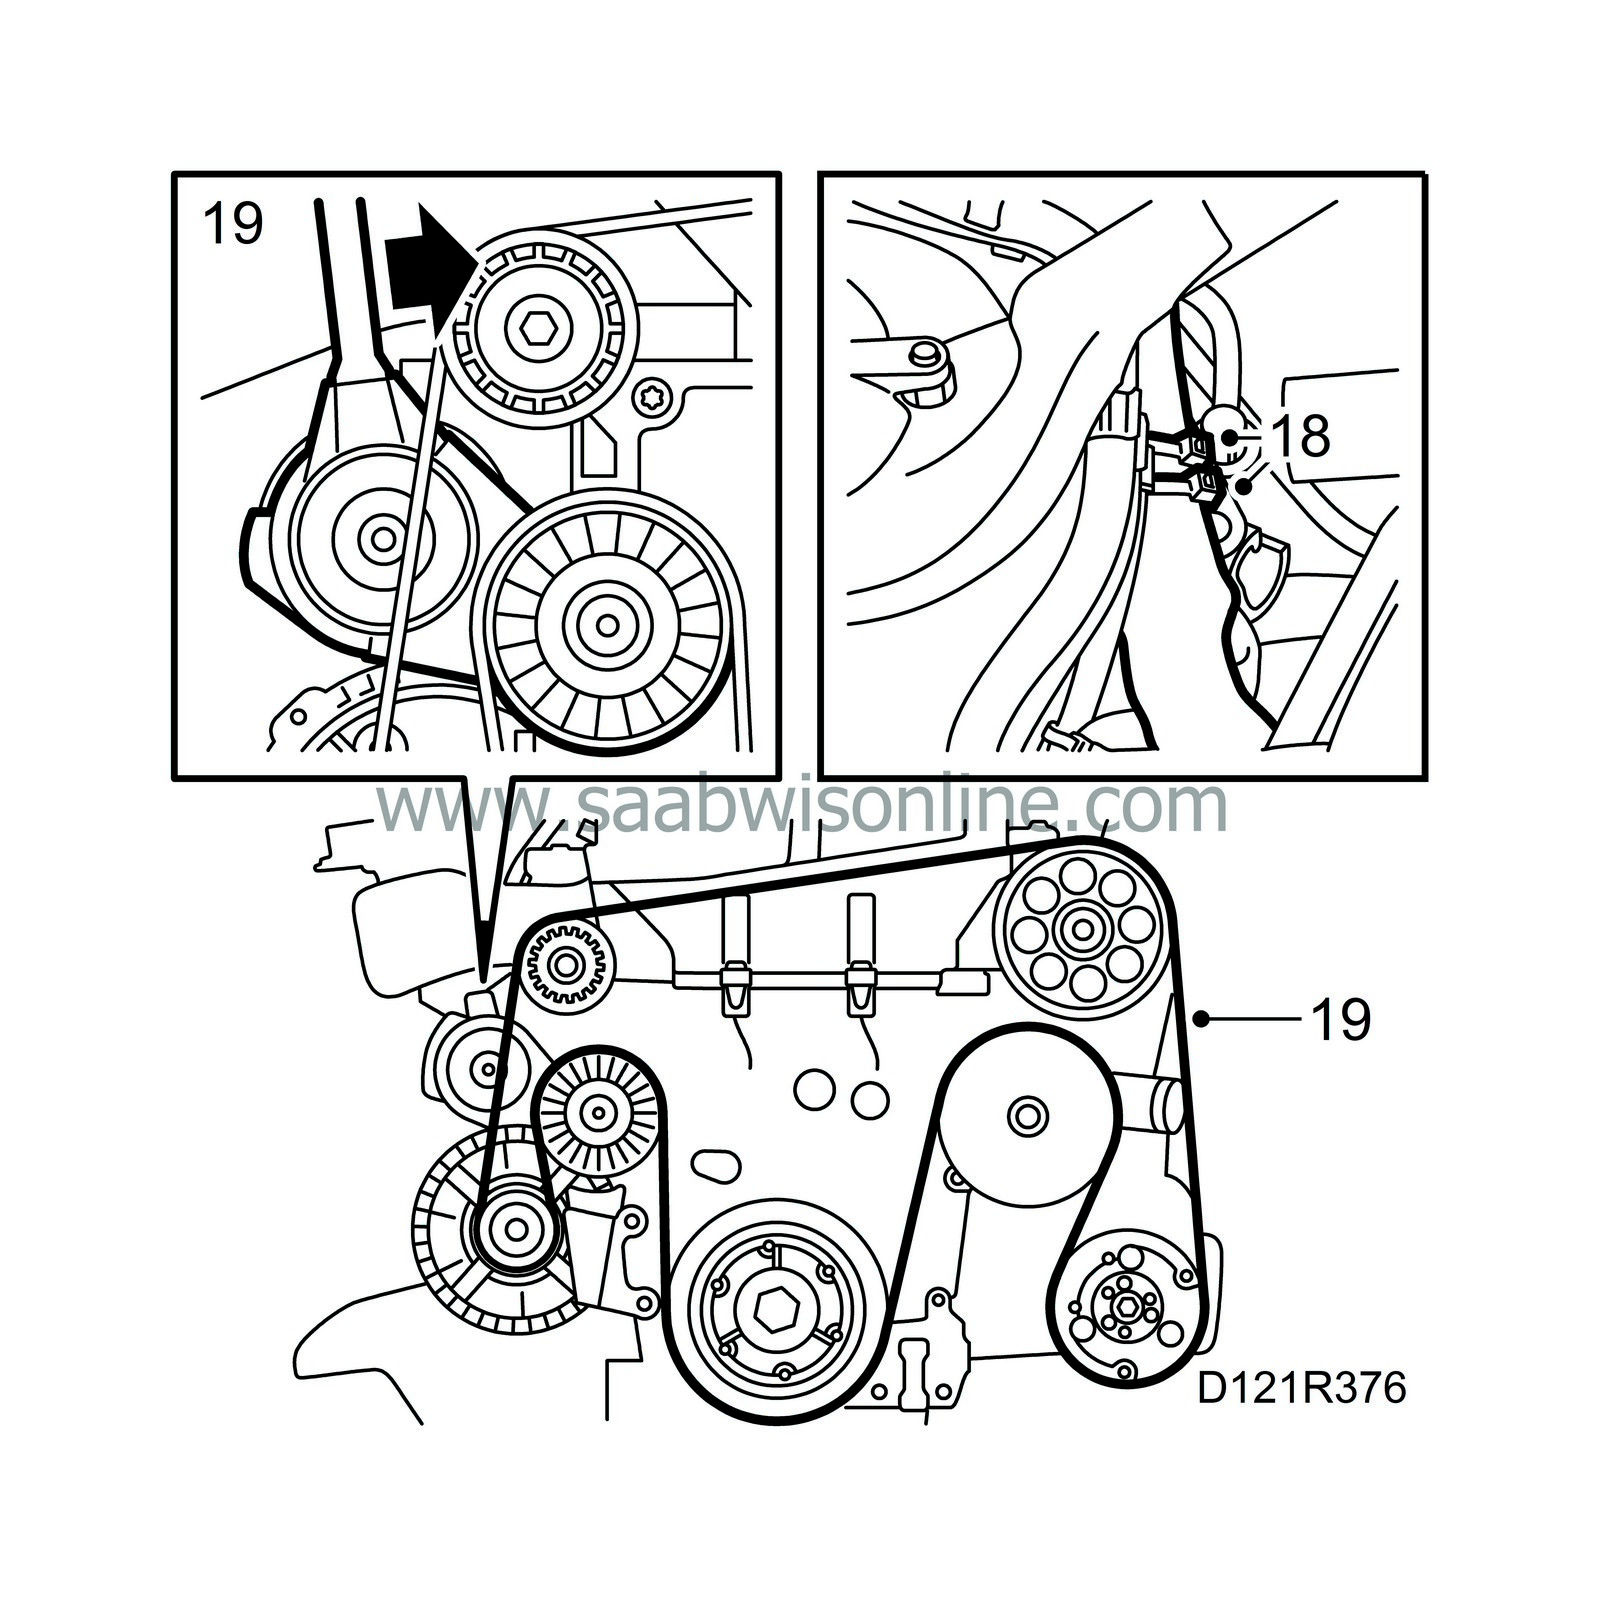
| 18. |
Cut the cable ties on the cables by the MacPherson strut.
|
|
| 19. |
Relieve the tension on the belt tensioner with an ratchet handle extension piece and insert a 3.5 mm drill in the hole. Lift off the belt.
|
||||||||||
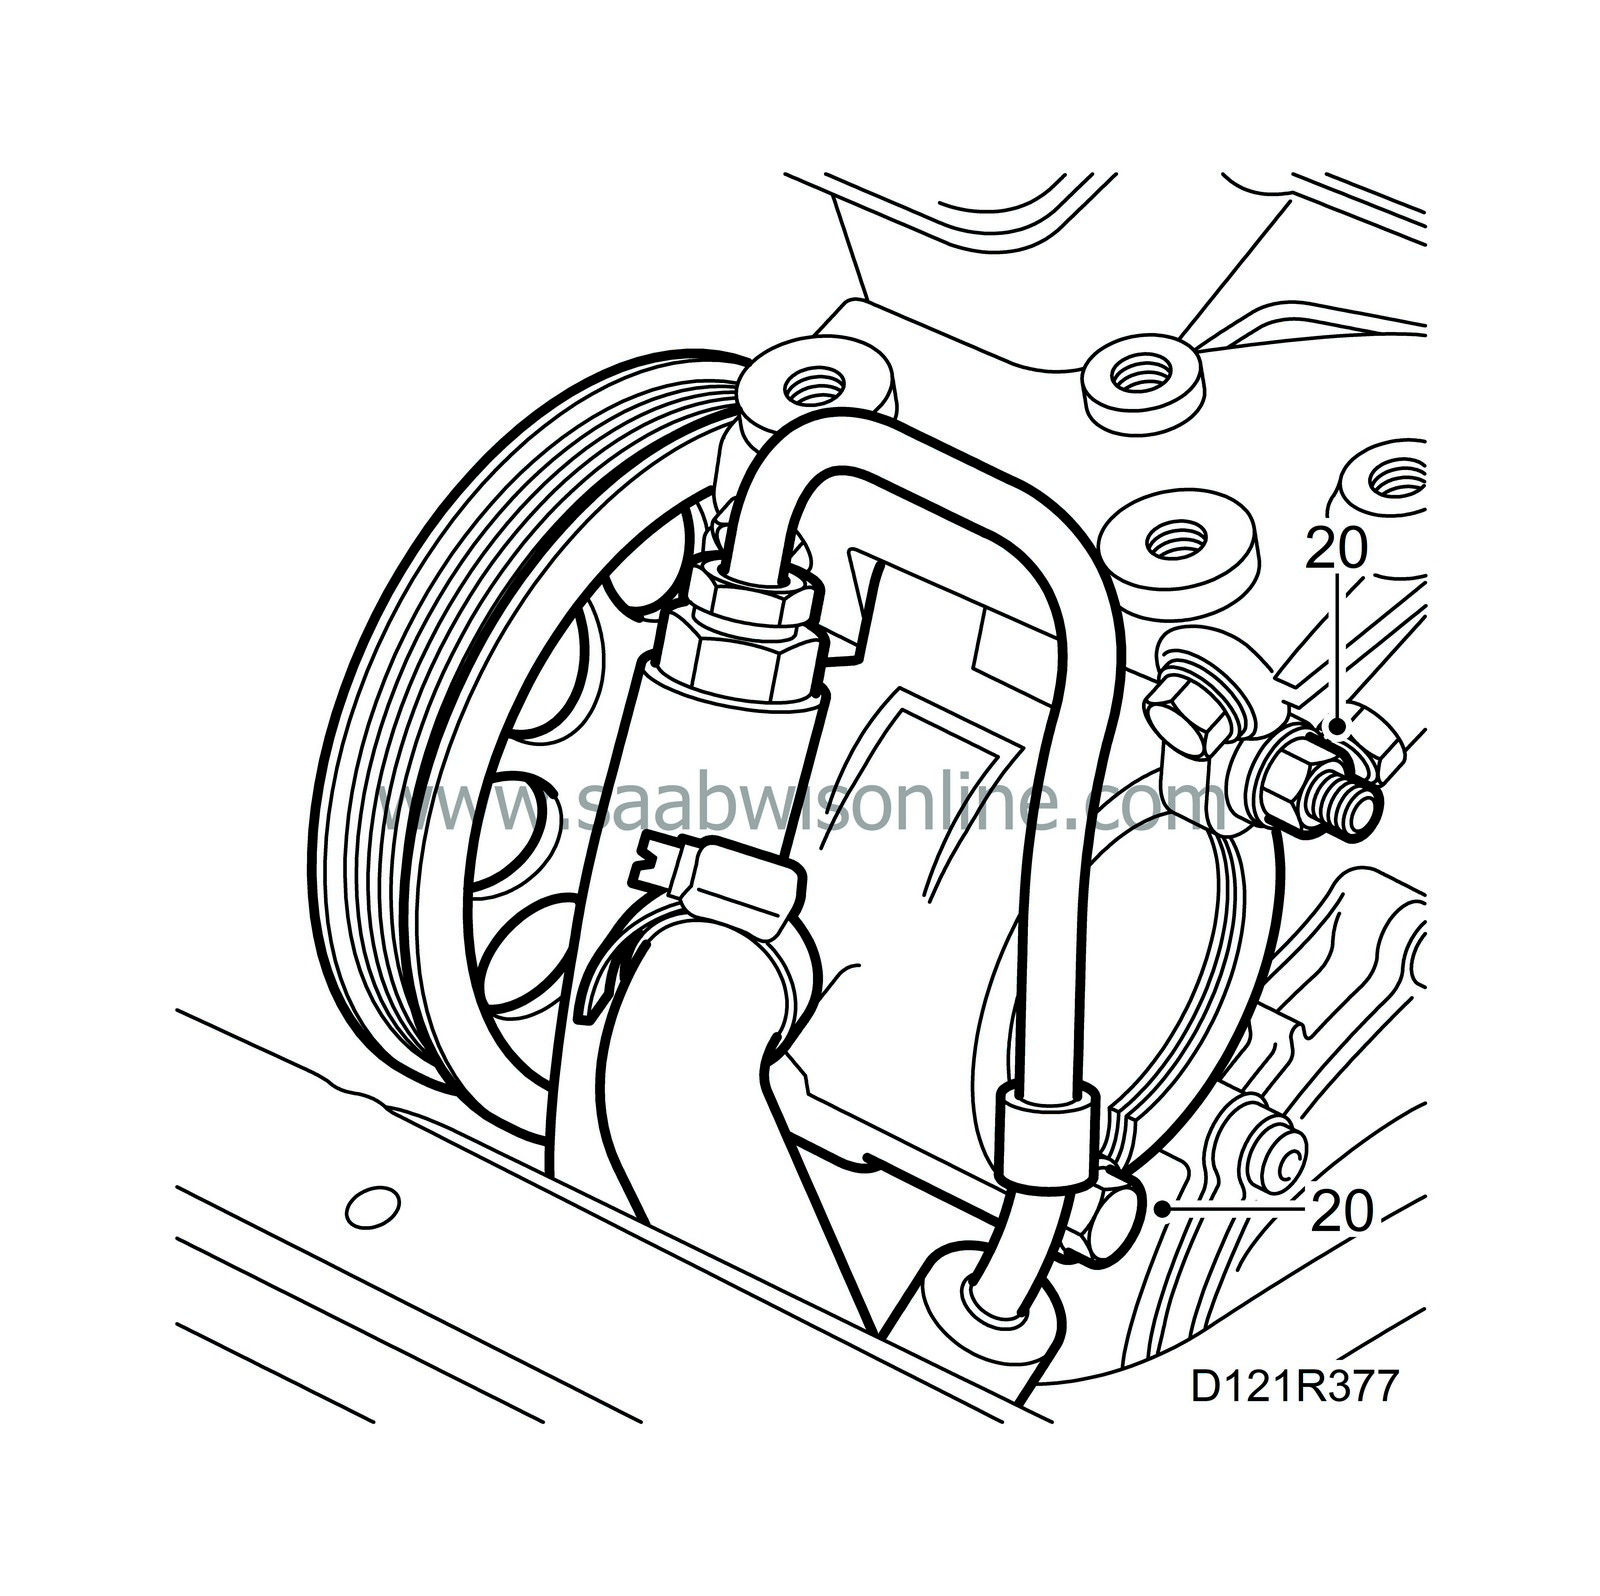
| 20. |
Remove the power steering pump from its bracket and place it out of the way.
|
|
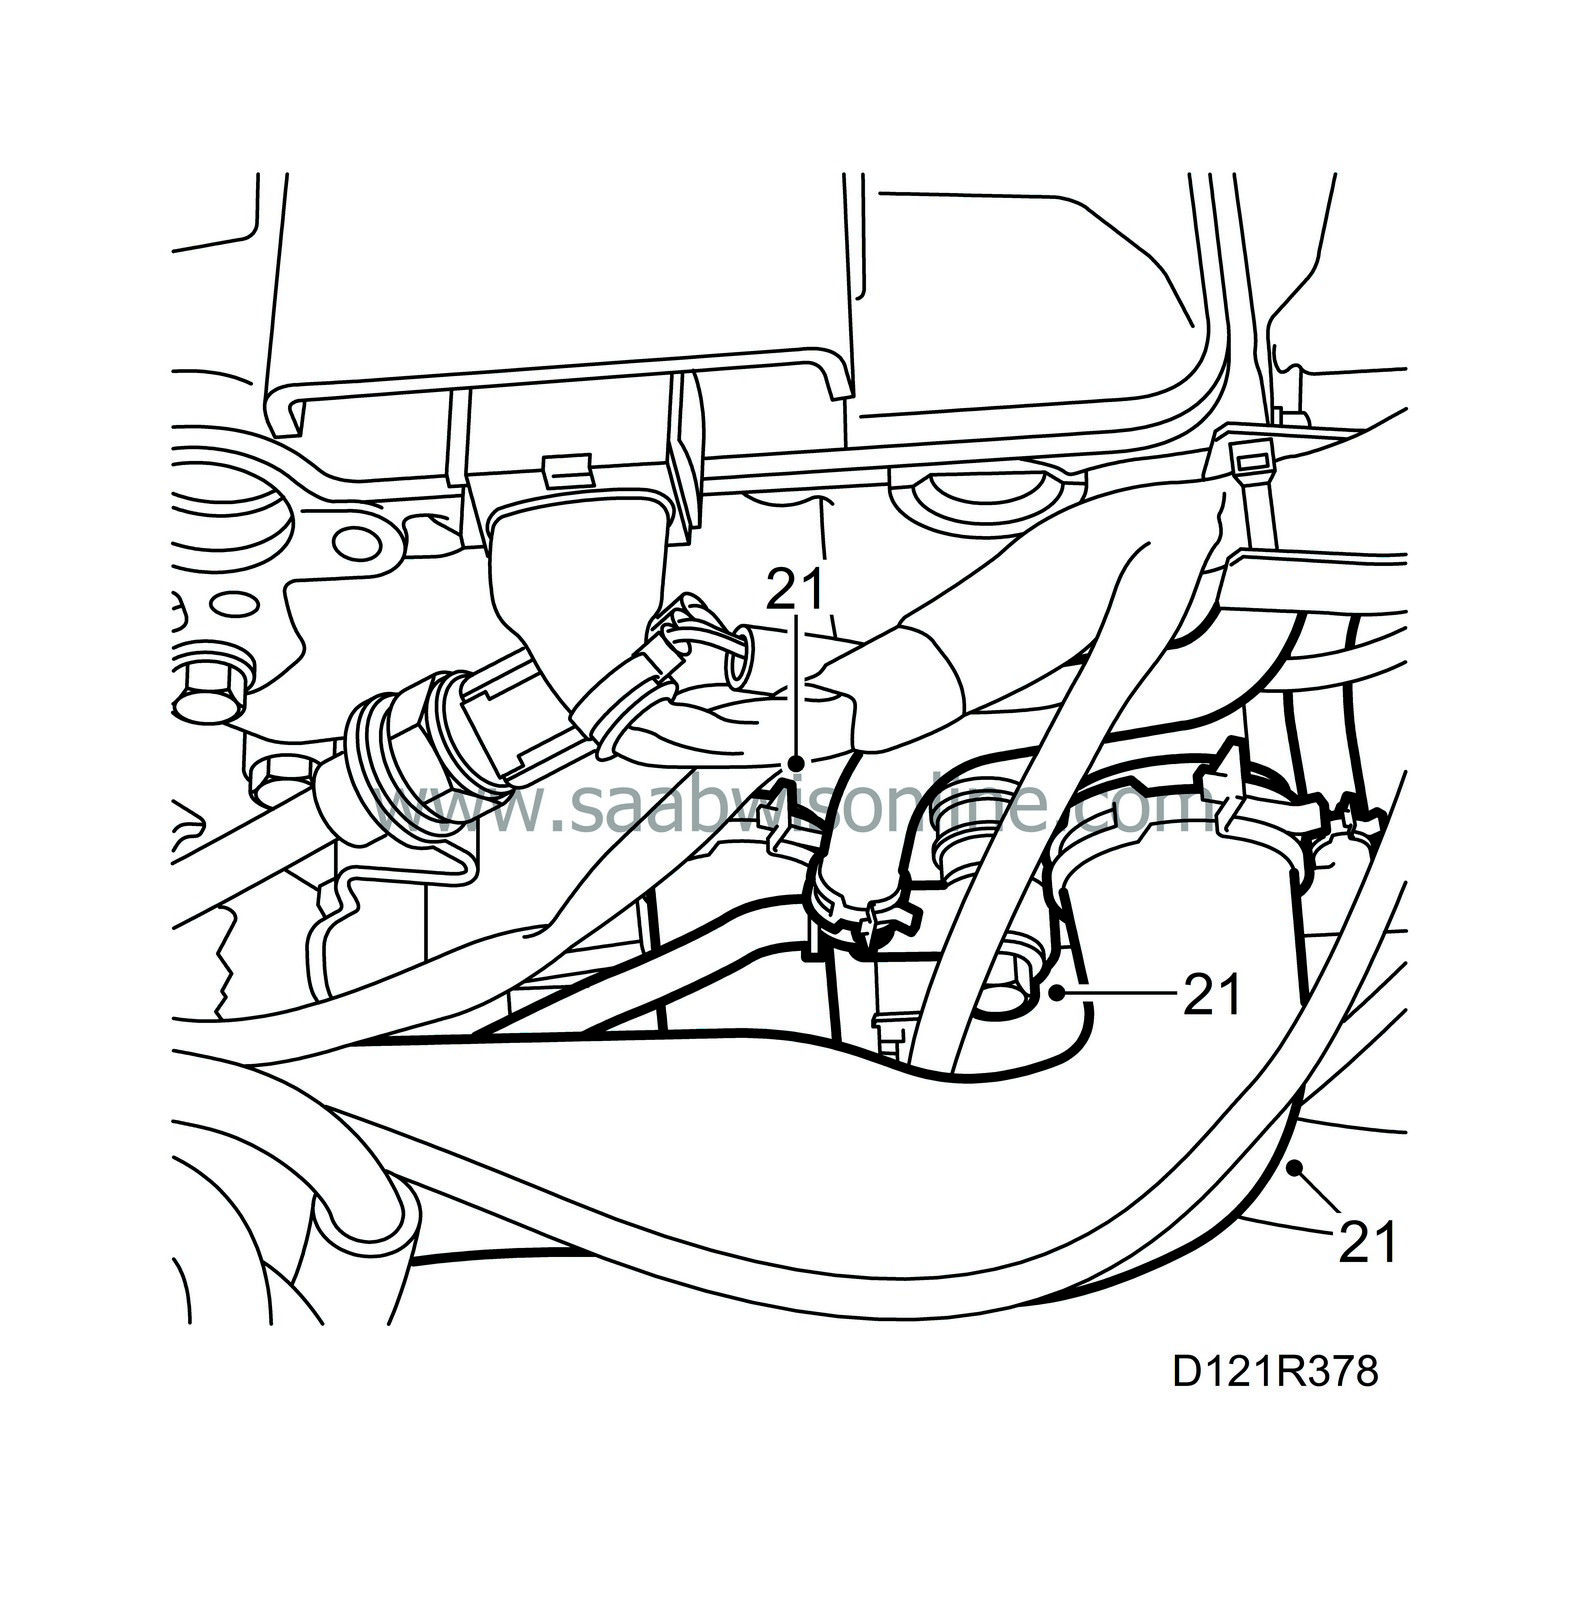
| 21. |
Detach the coolant hoses from the radiator, water pump, expansion tank - cylinder head, and the hoses to the bypass valve.
|
|
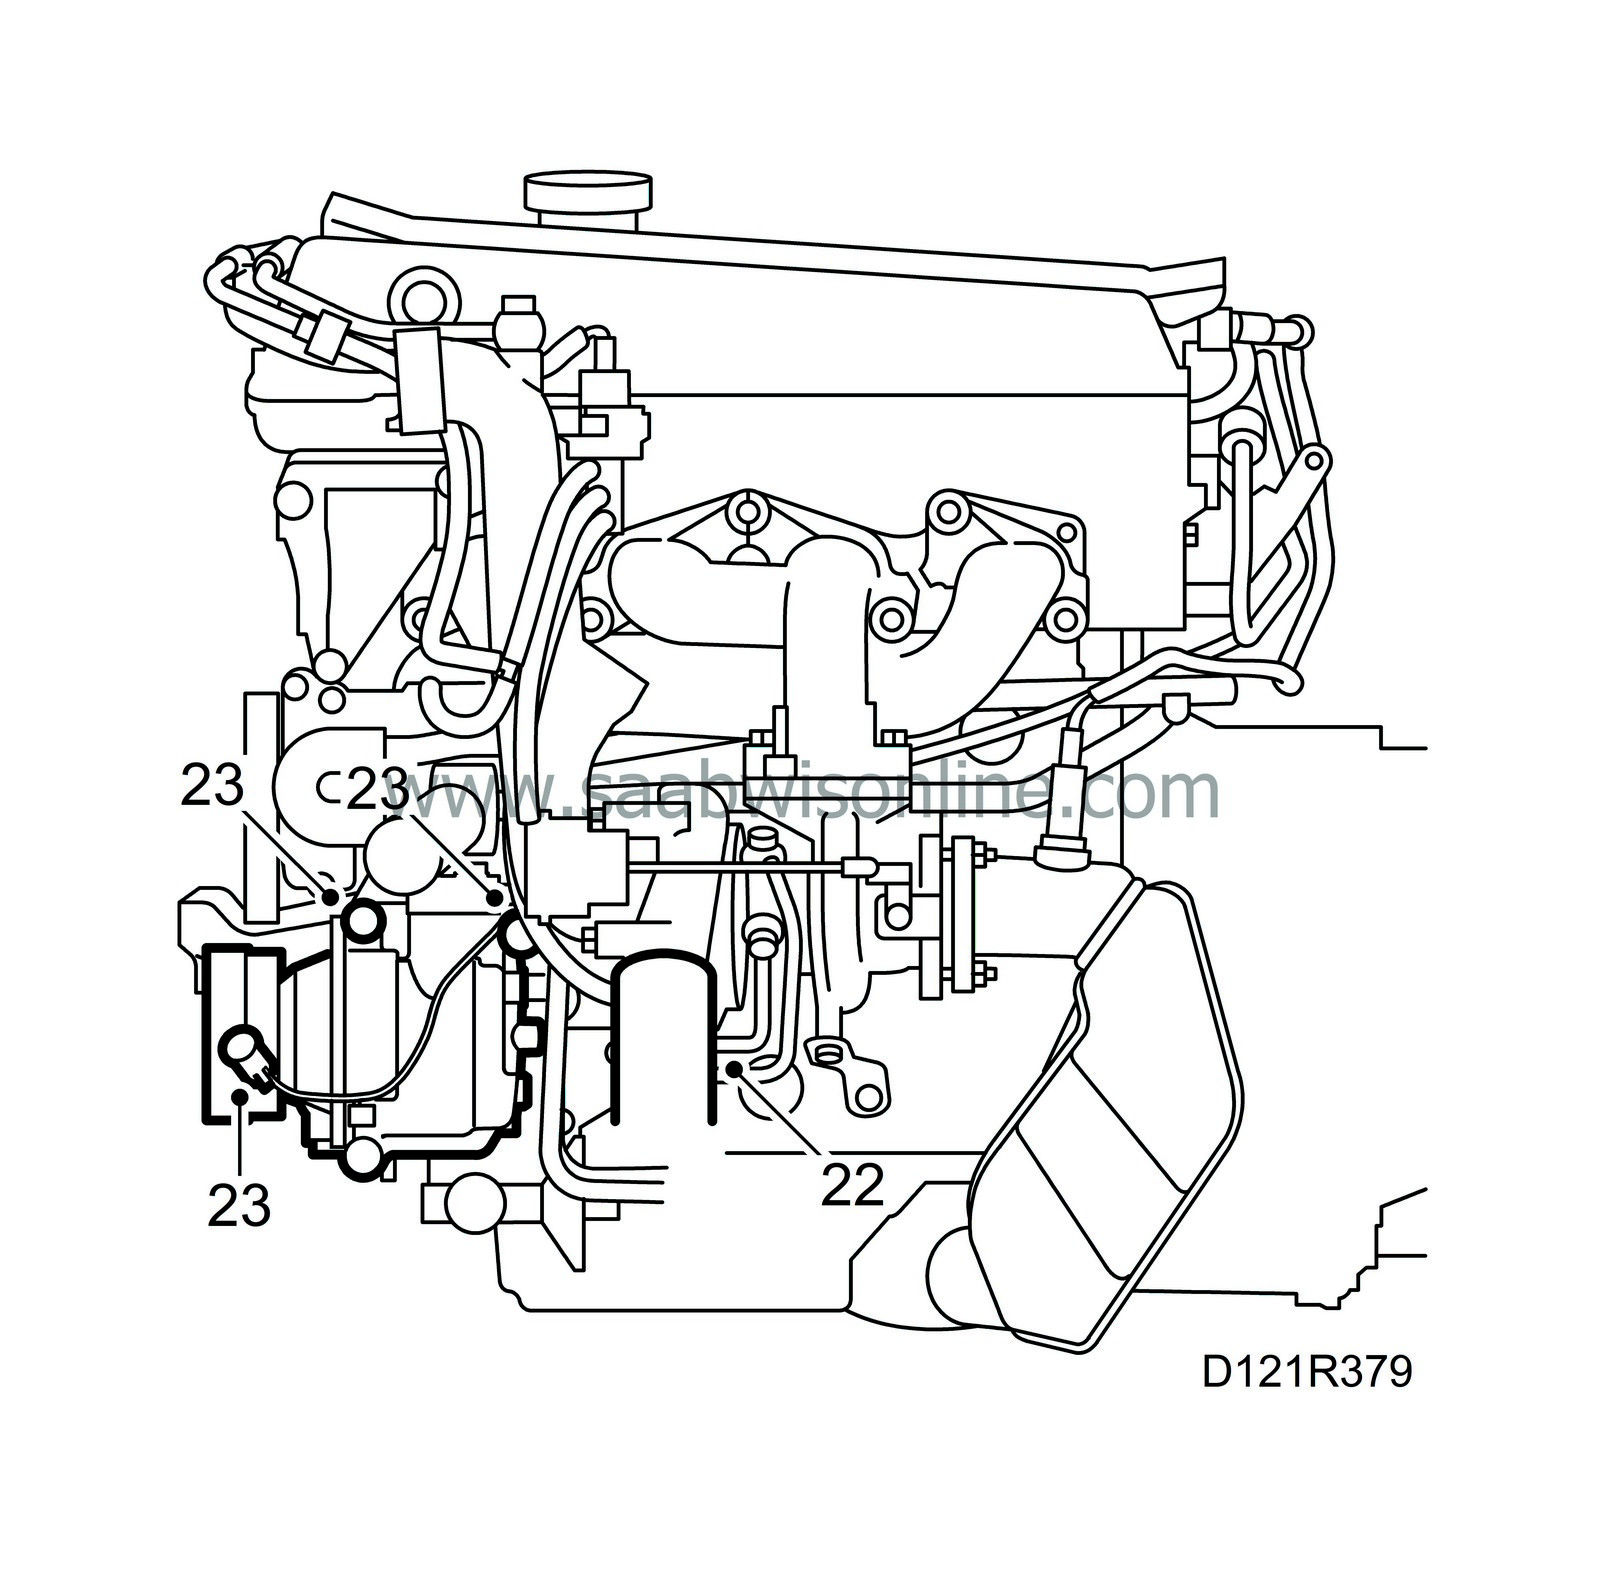
| 22. |
Undo the hoses to the turbo and remove the hose to the charge air cooler.
|
|
| 23. |
Disconnect the A/C compressor signal cable and undo the top retaining bolt on the A/C compressor.
|
|
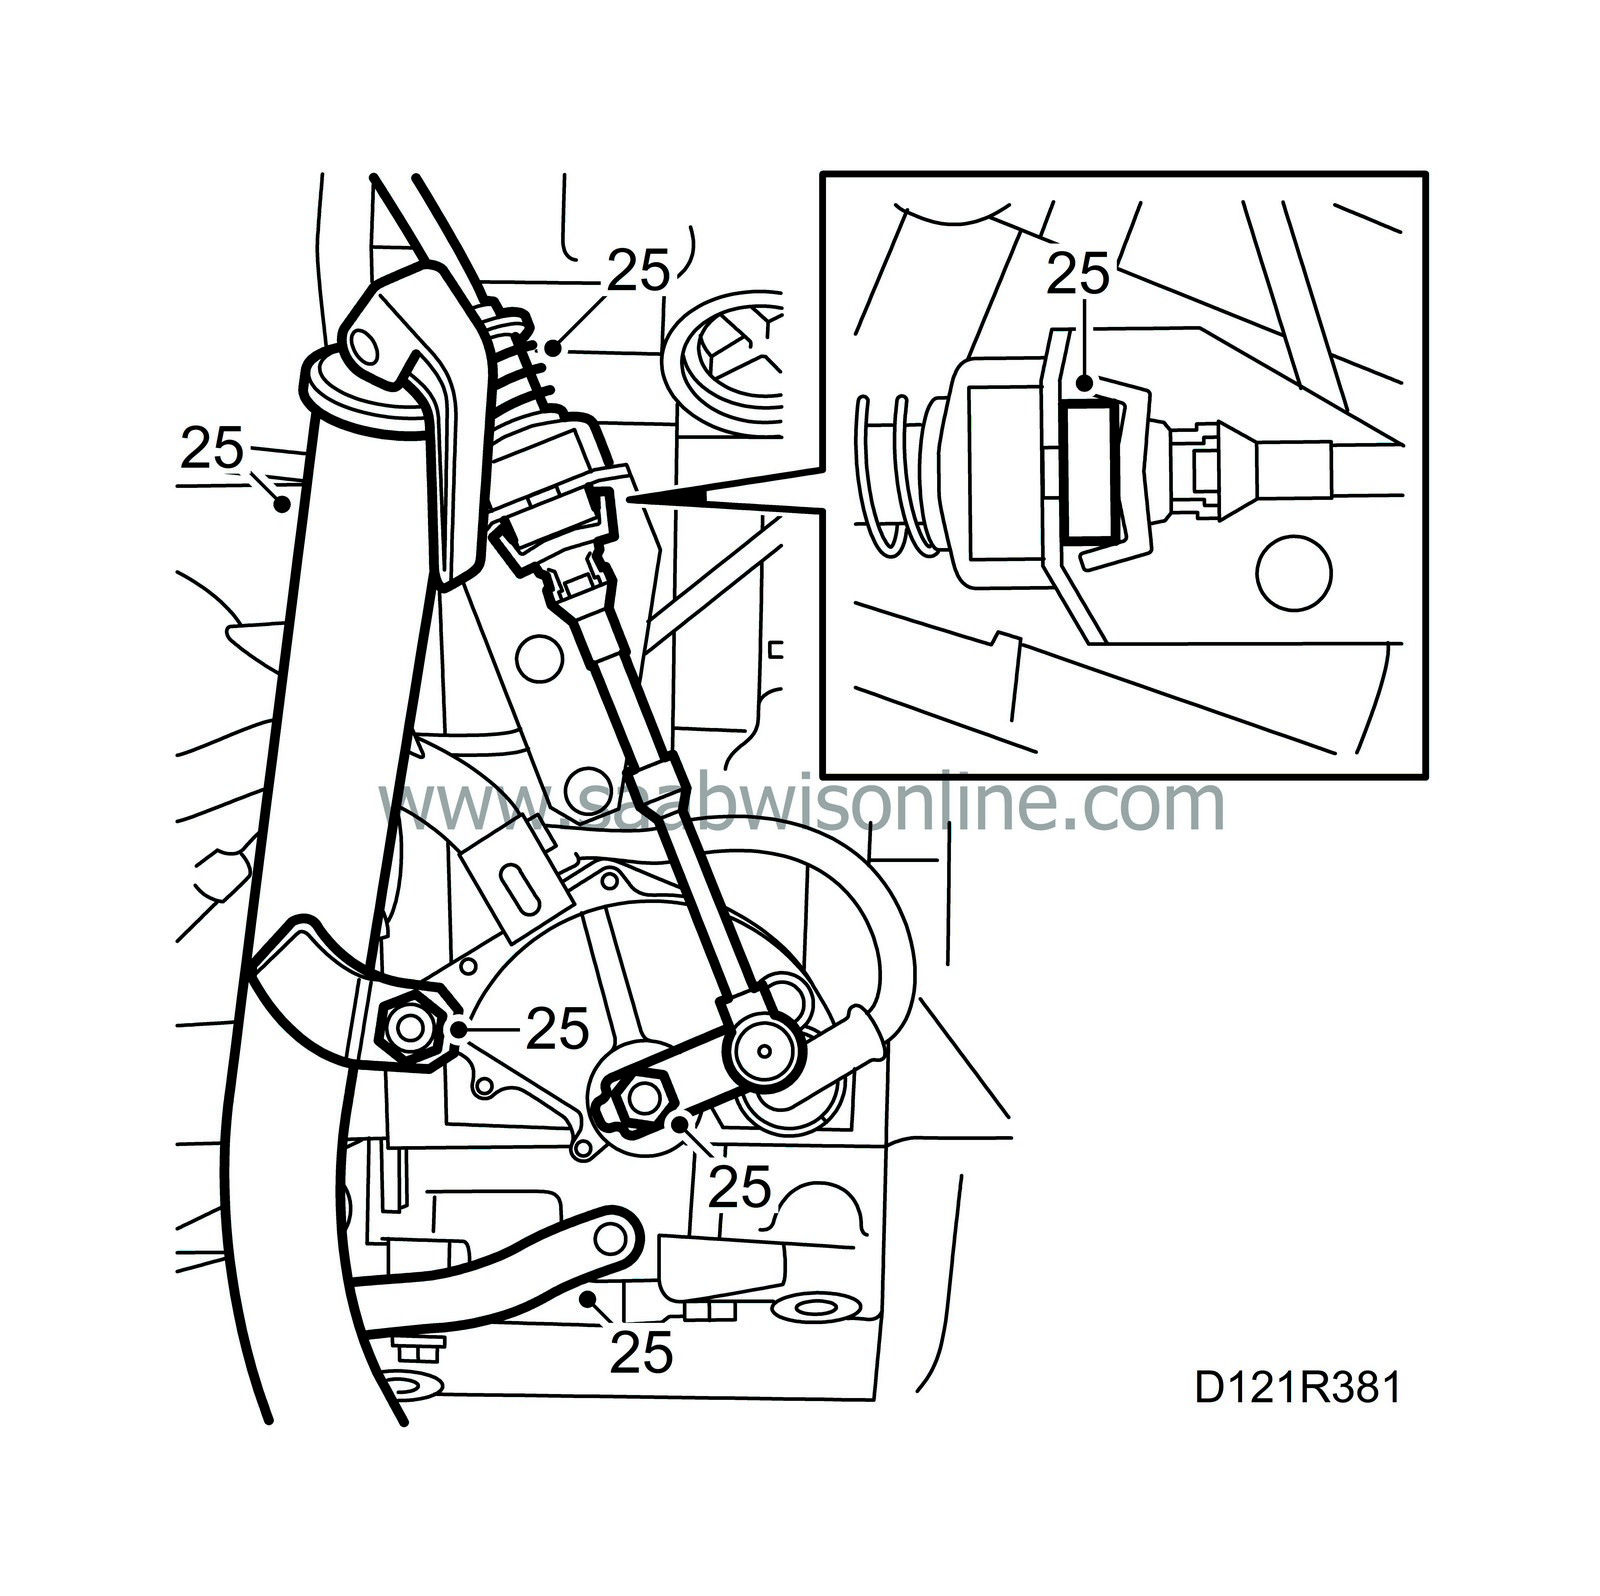
| 25. |
Aut:
Remove the nut securing the lever and remove the lever from the gearbox.
|
|
| • |
Undo the retaining clip by the bracket holding the wire. Detach the wire sheath by the bracket on the gearbox.
|
| • |
Press in the catches with a screwdriver.
|
| • |
Unplug the connectors linked to the gearbox (located on a bracket behind the battery).
|
| • |
Remove the oil cooler pipe from the gearbox. Plug the hole.
|
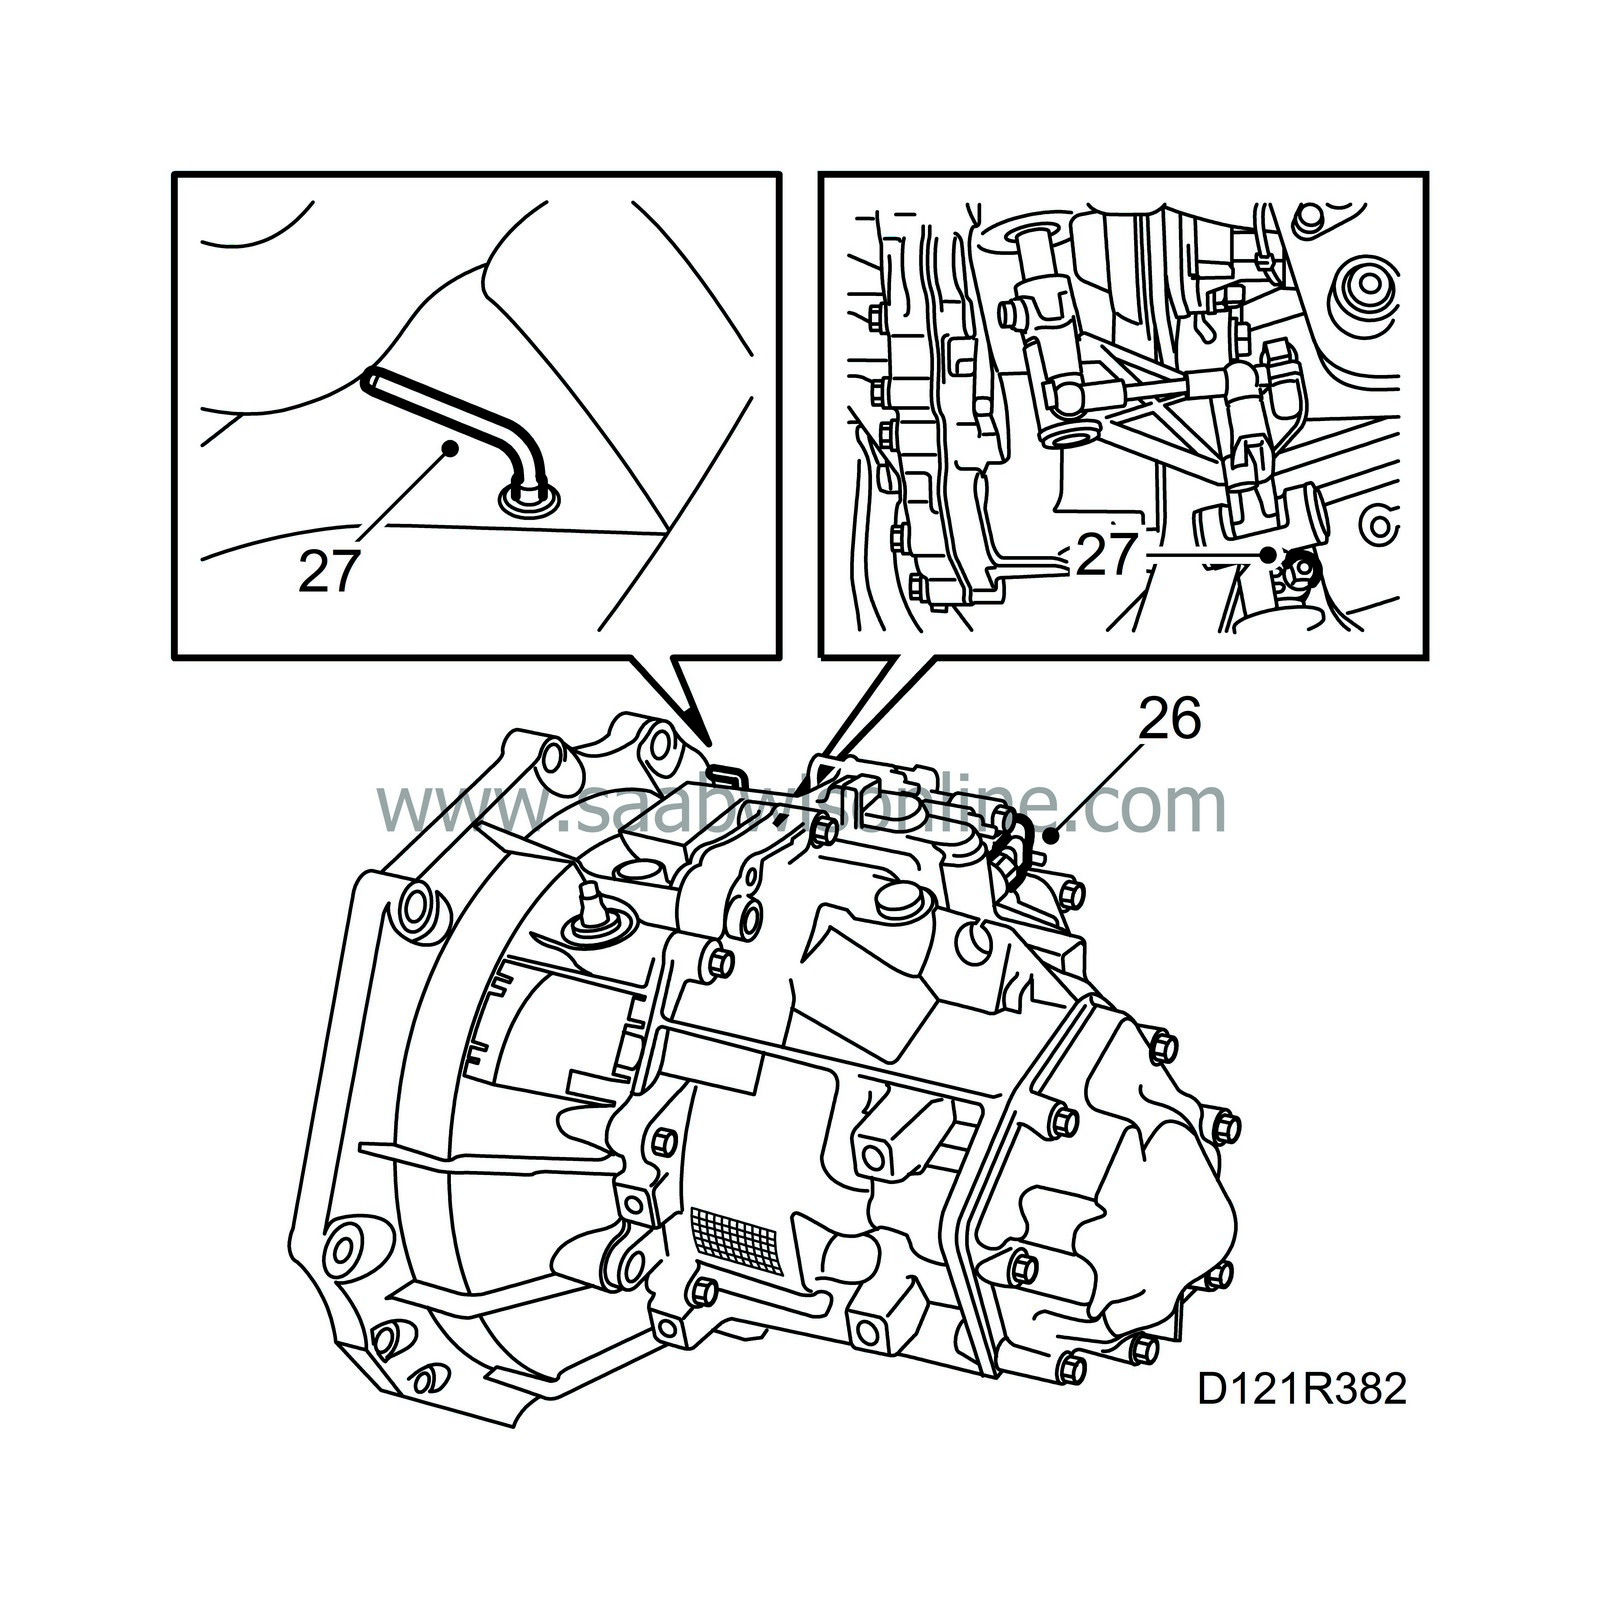
| 26. |
Man:
Unplug the reverse gear sensor on the gearbox.
|
|
| 27. |
Engage 4th gear. Remove the plastic plug from the gearbox and insert a locking pin. Separate the selector lever. Engage 3rd gear and secure the gear lever with a locking pin.
|
|
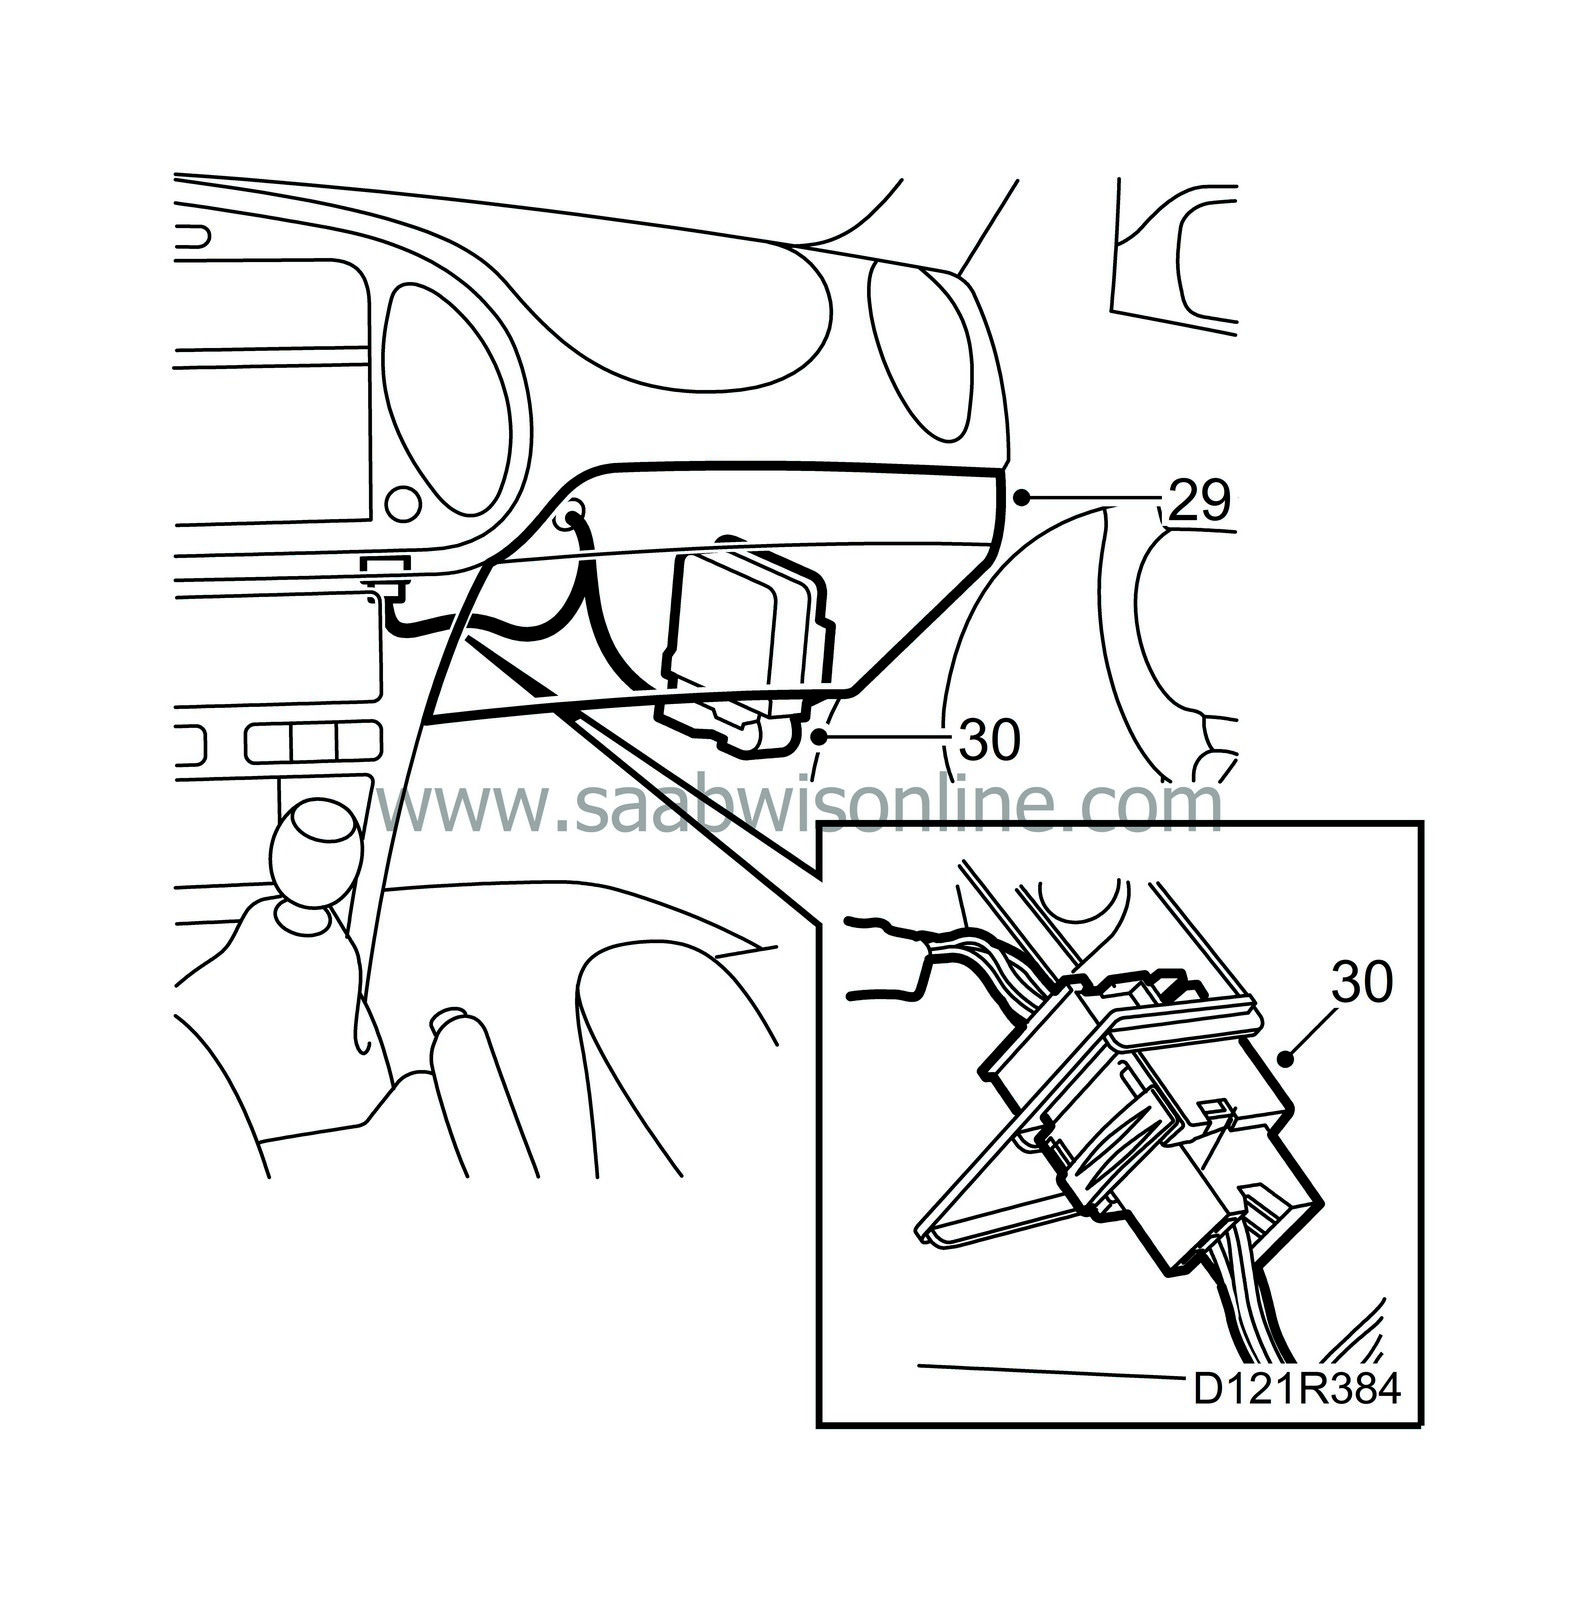
| 29. |
Remove the glove box (LHD) or, alternatively, the lower section of the dashboard on the right-hand side (RHD). Fold back the floor mat. Remove the air duct and unplug the connector for the instrument wiring harness. Detach the wiring harness to the engine.
|
|
| 30. |
Unplug the connector above the grommet in the engine bay. Pull out the wiring harness through the grommet and lay it on the engine.
|
|
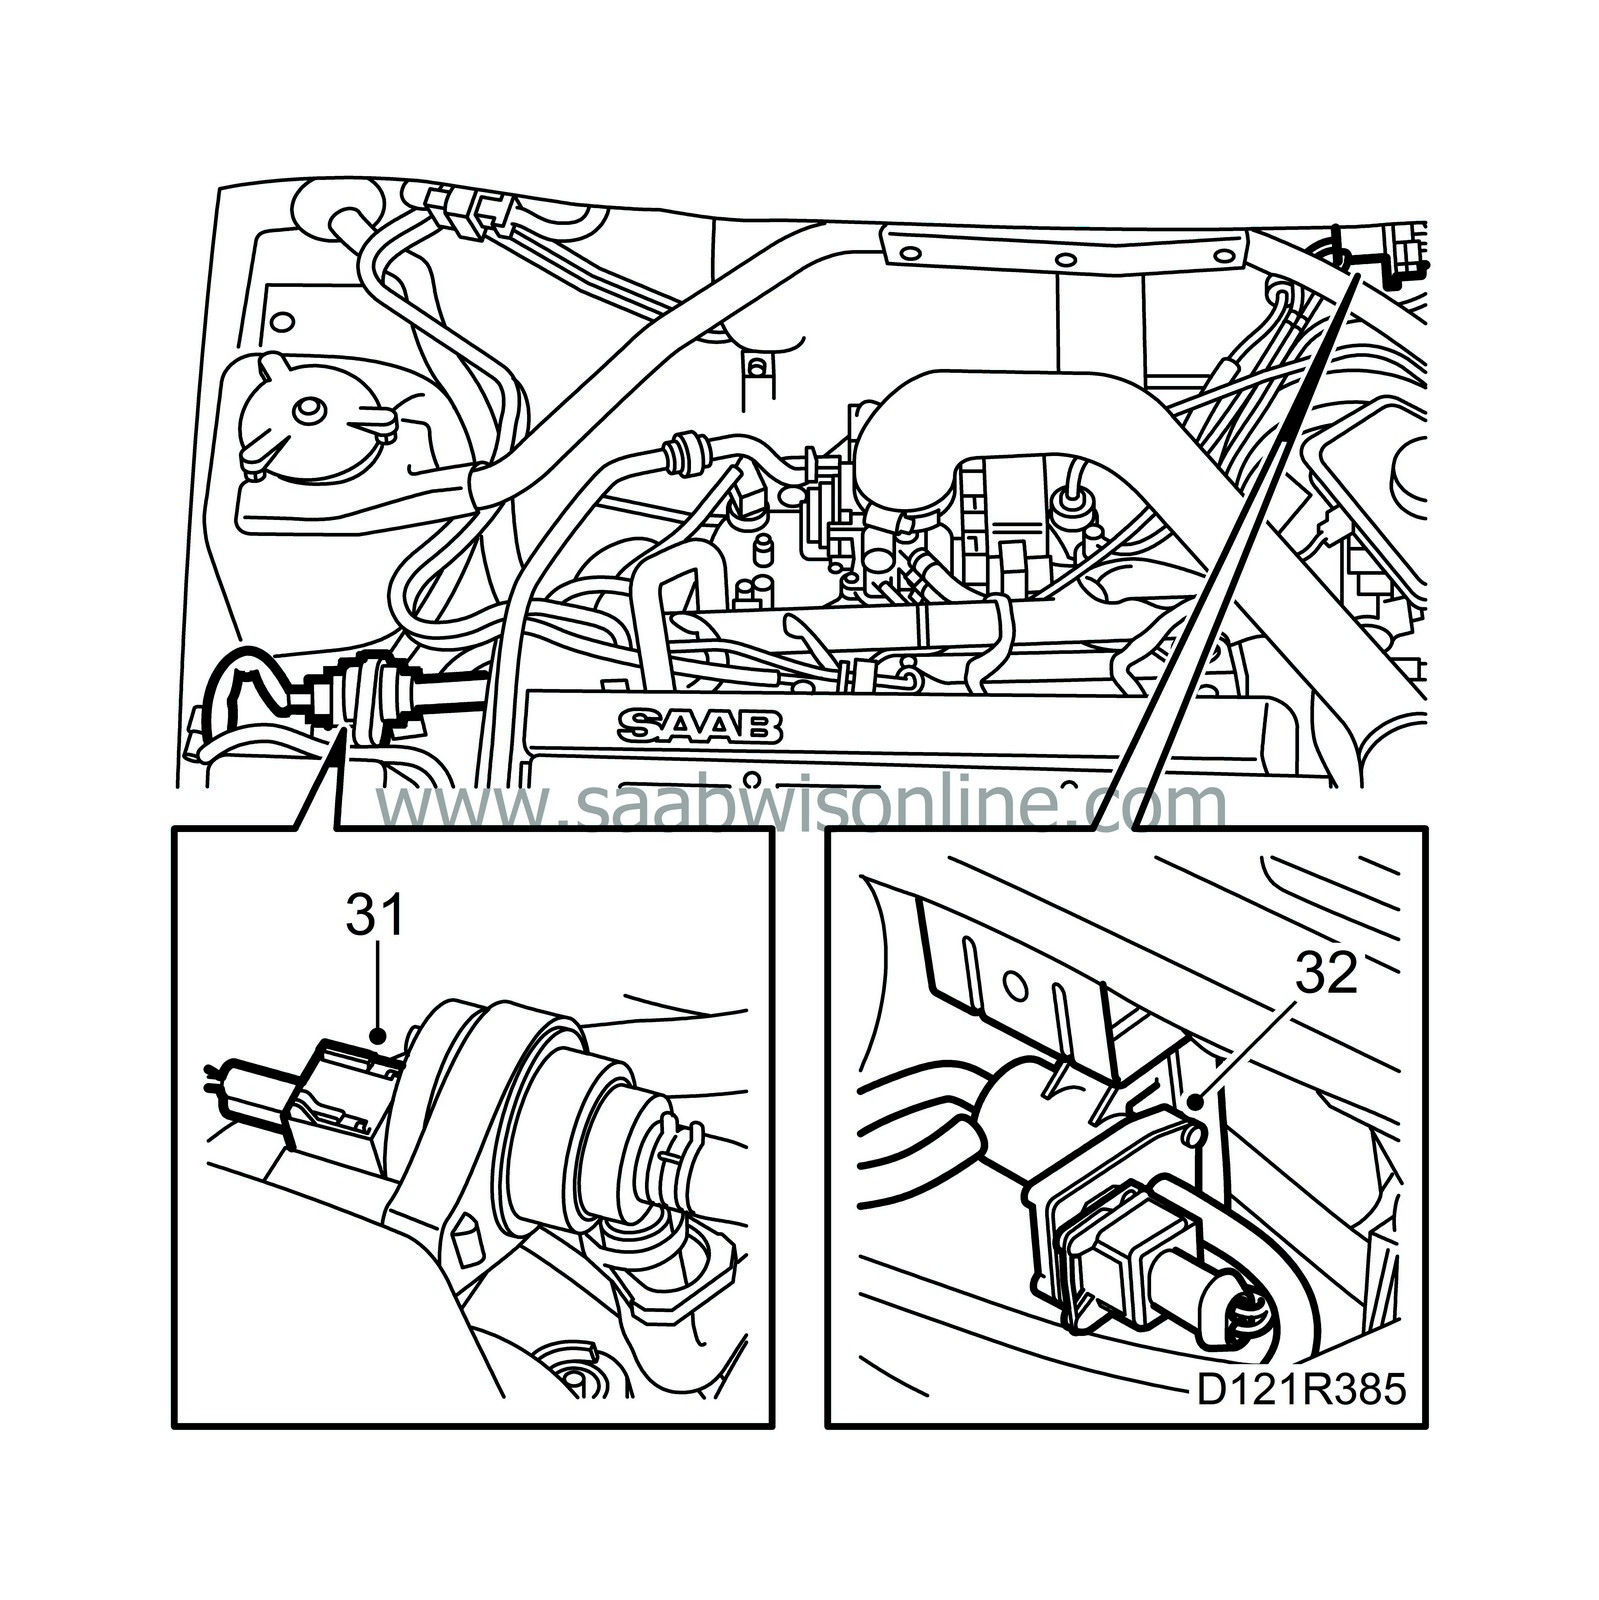
| 31. |
Unplug the EVAP canister purge valve connector.
|
|
| 32. |
Remove the bypass valve from the bulkhead and lay the valve and hoses on the engine.
|
|
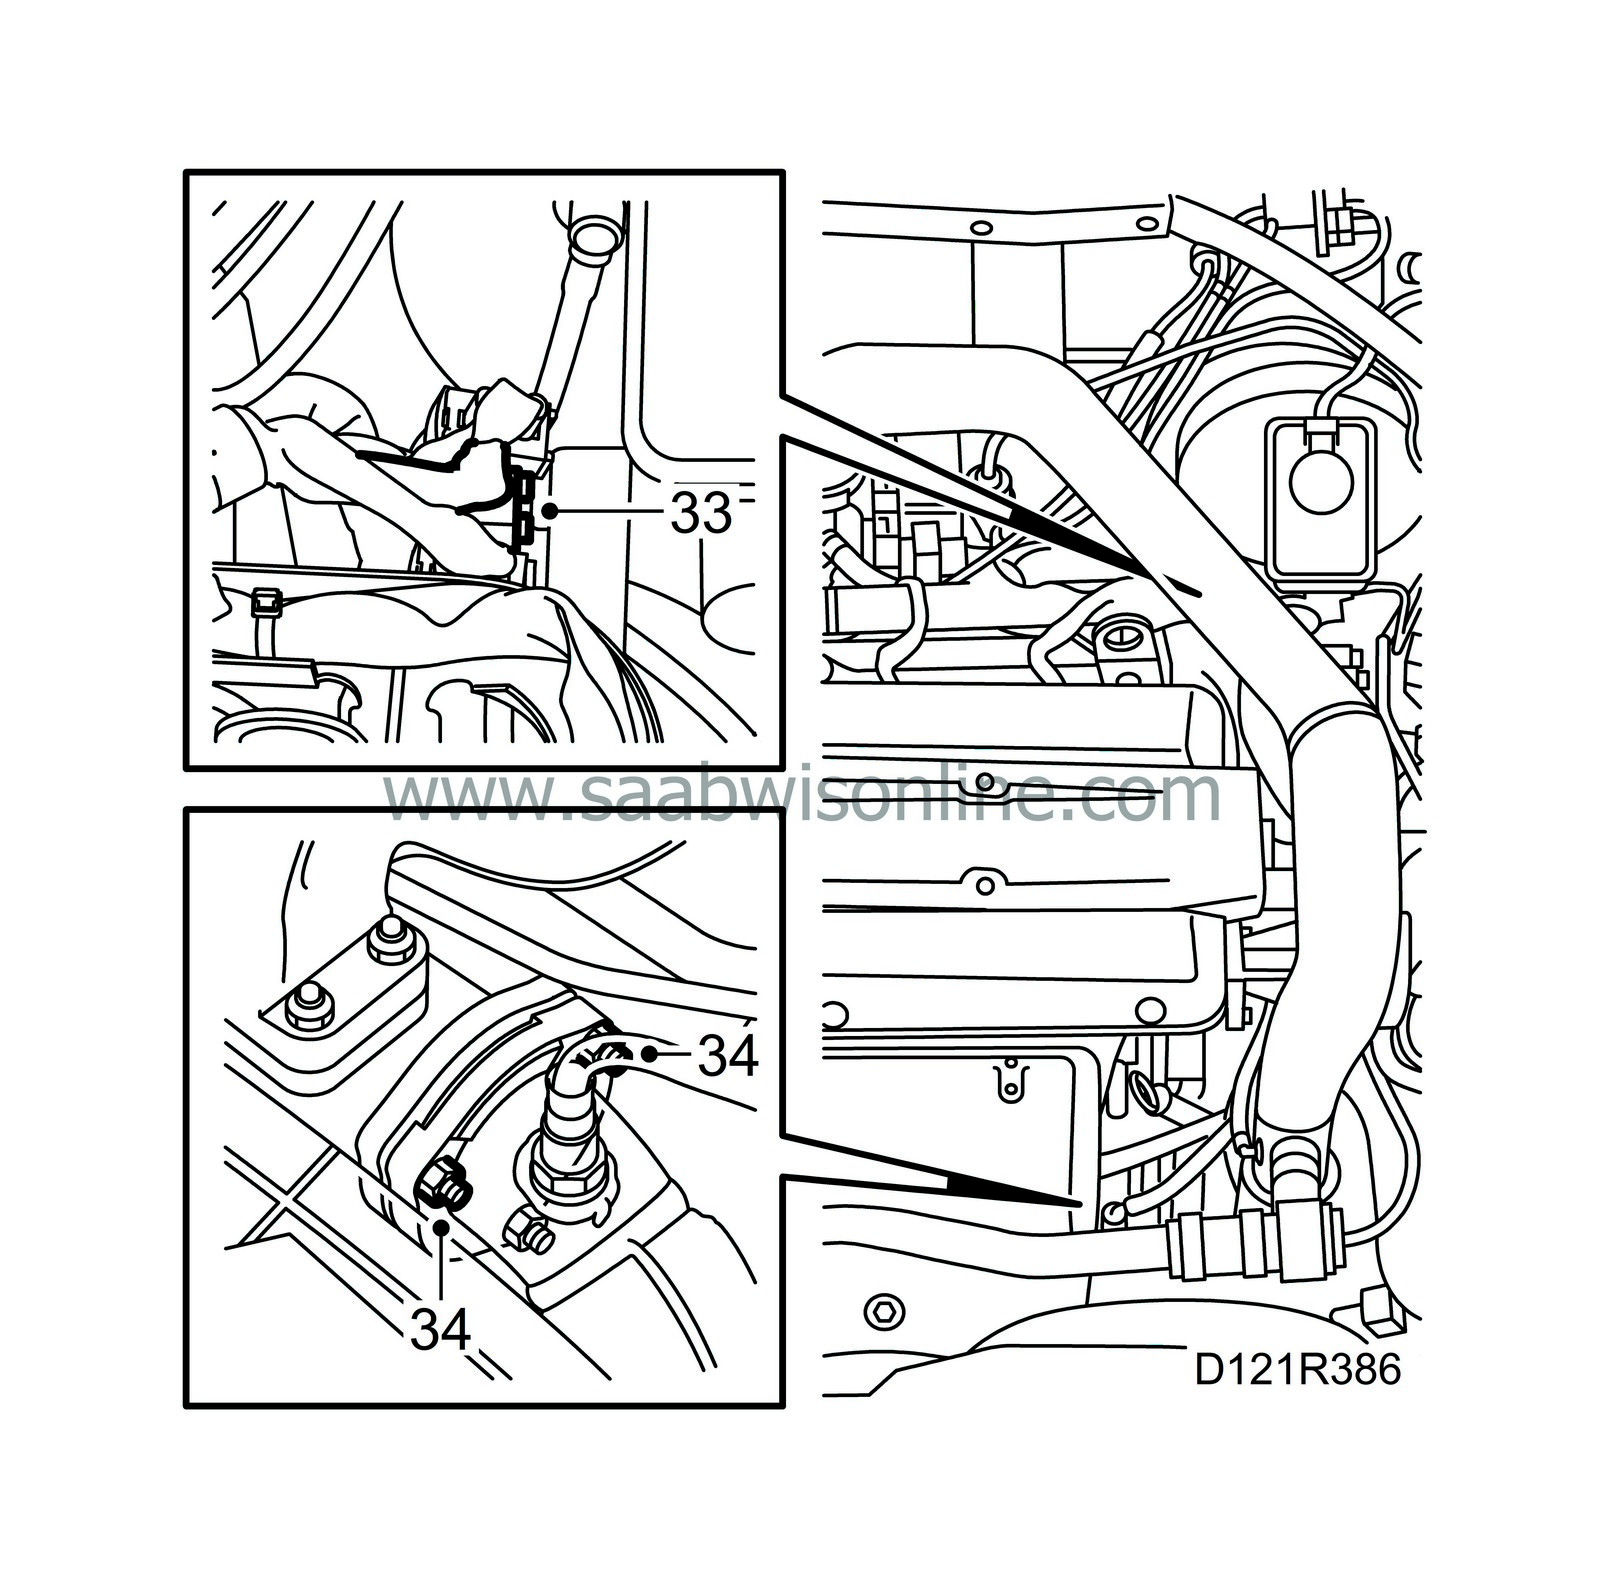
| 33. |
Unplug the oxygen sensor.
|
|
| 34. |
Remove the two upper nuts securing the exhaust pipe to the turbocharger.
|
|
| 35. |
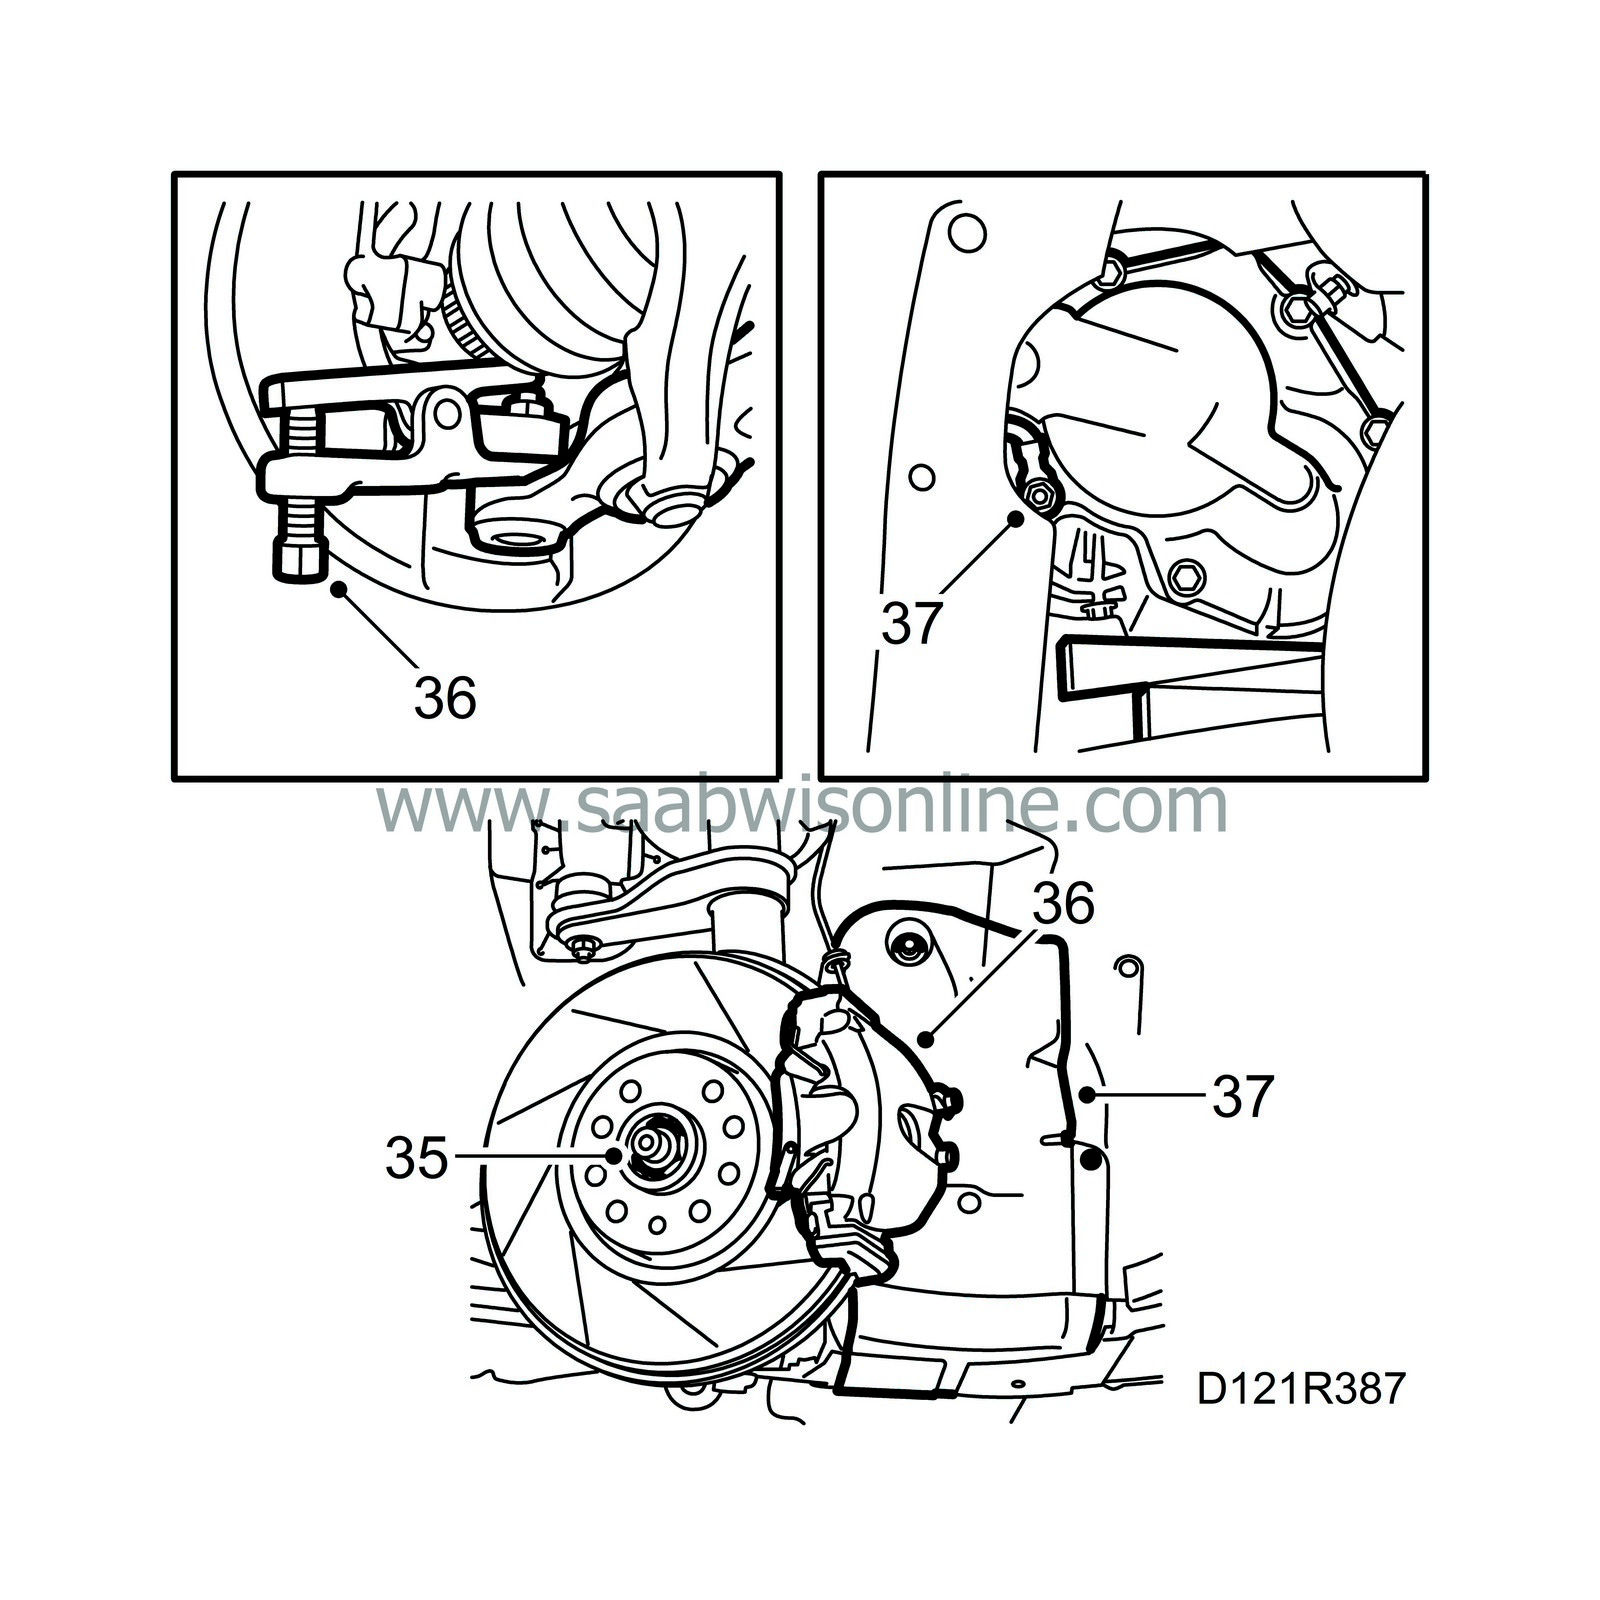
Undo the hub centre-nuts on both sides and raise the car to a comfortable working height.
|
|
| 36. |
Remove both the front wheels and remove the hub centre-nuts. Undo the brake calipers and hang them from the MacPherson struts. Undo the suspension arm nuts on both sides and lower the suspension arms. Use
89 96 696 Puller
. If it is difficult to insert the puller, grind it down slightly.
|
|
| 37. |
Remove the belt circuit cover. Remove the grounding point between the gearbox and body.
|
|
| 38. |
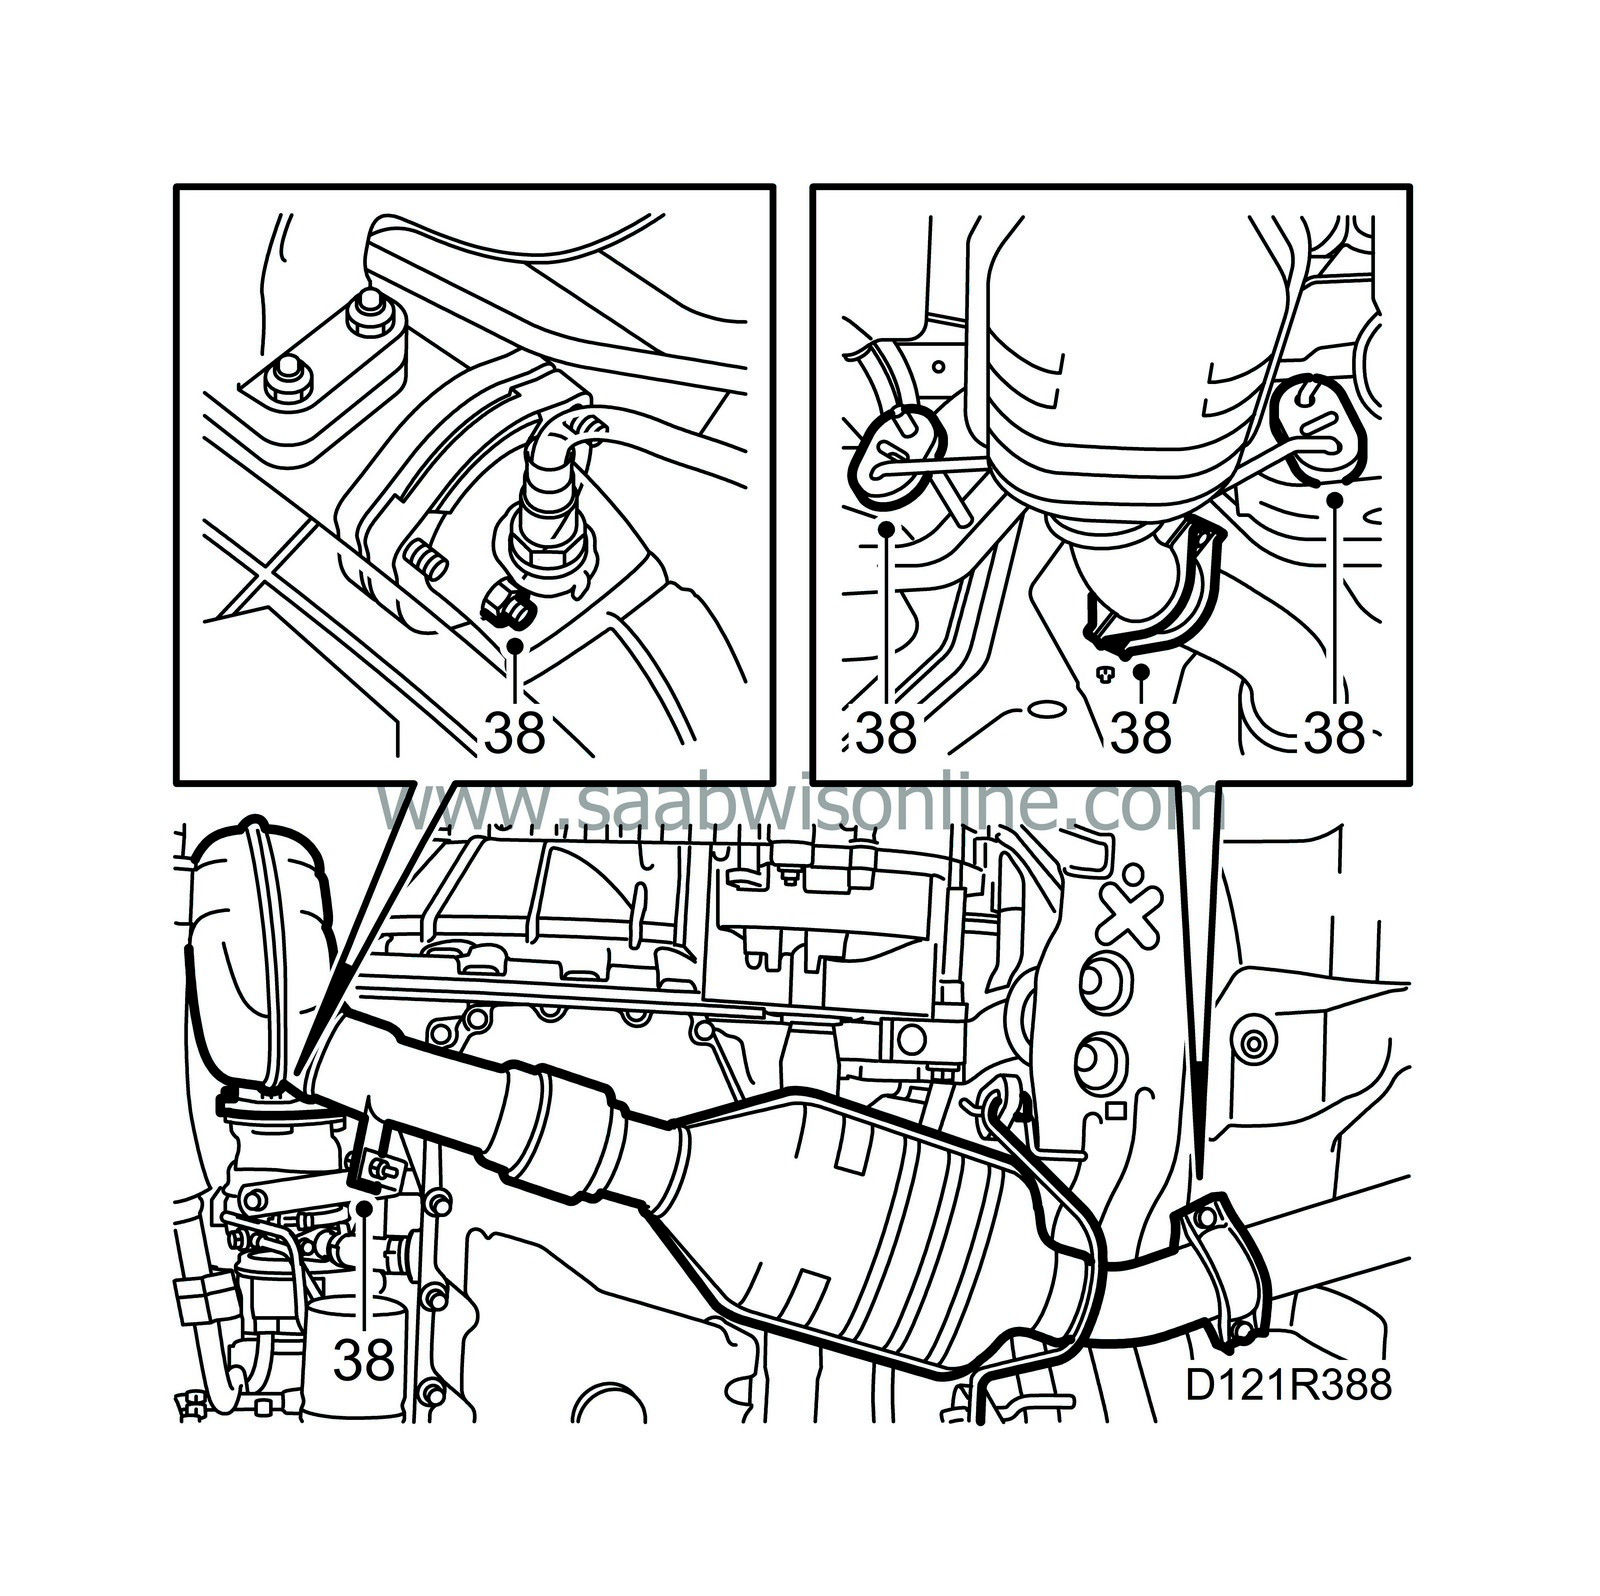
Remove the lower nut and holder from the exhaust pipe. Undo the joint between the front exhaust pipe and the intermediate pipe. Lower the front exhaust pipe.
|
|
| 39. |
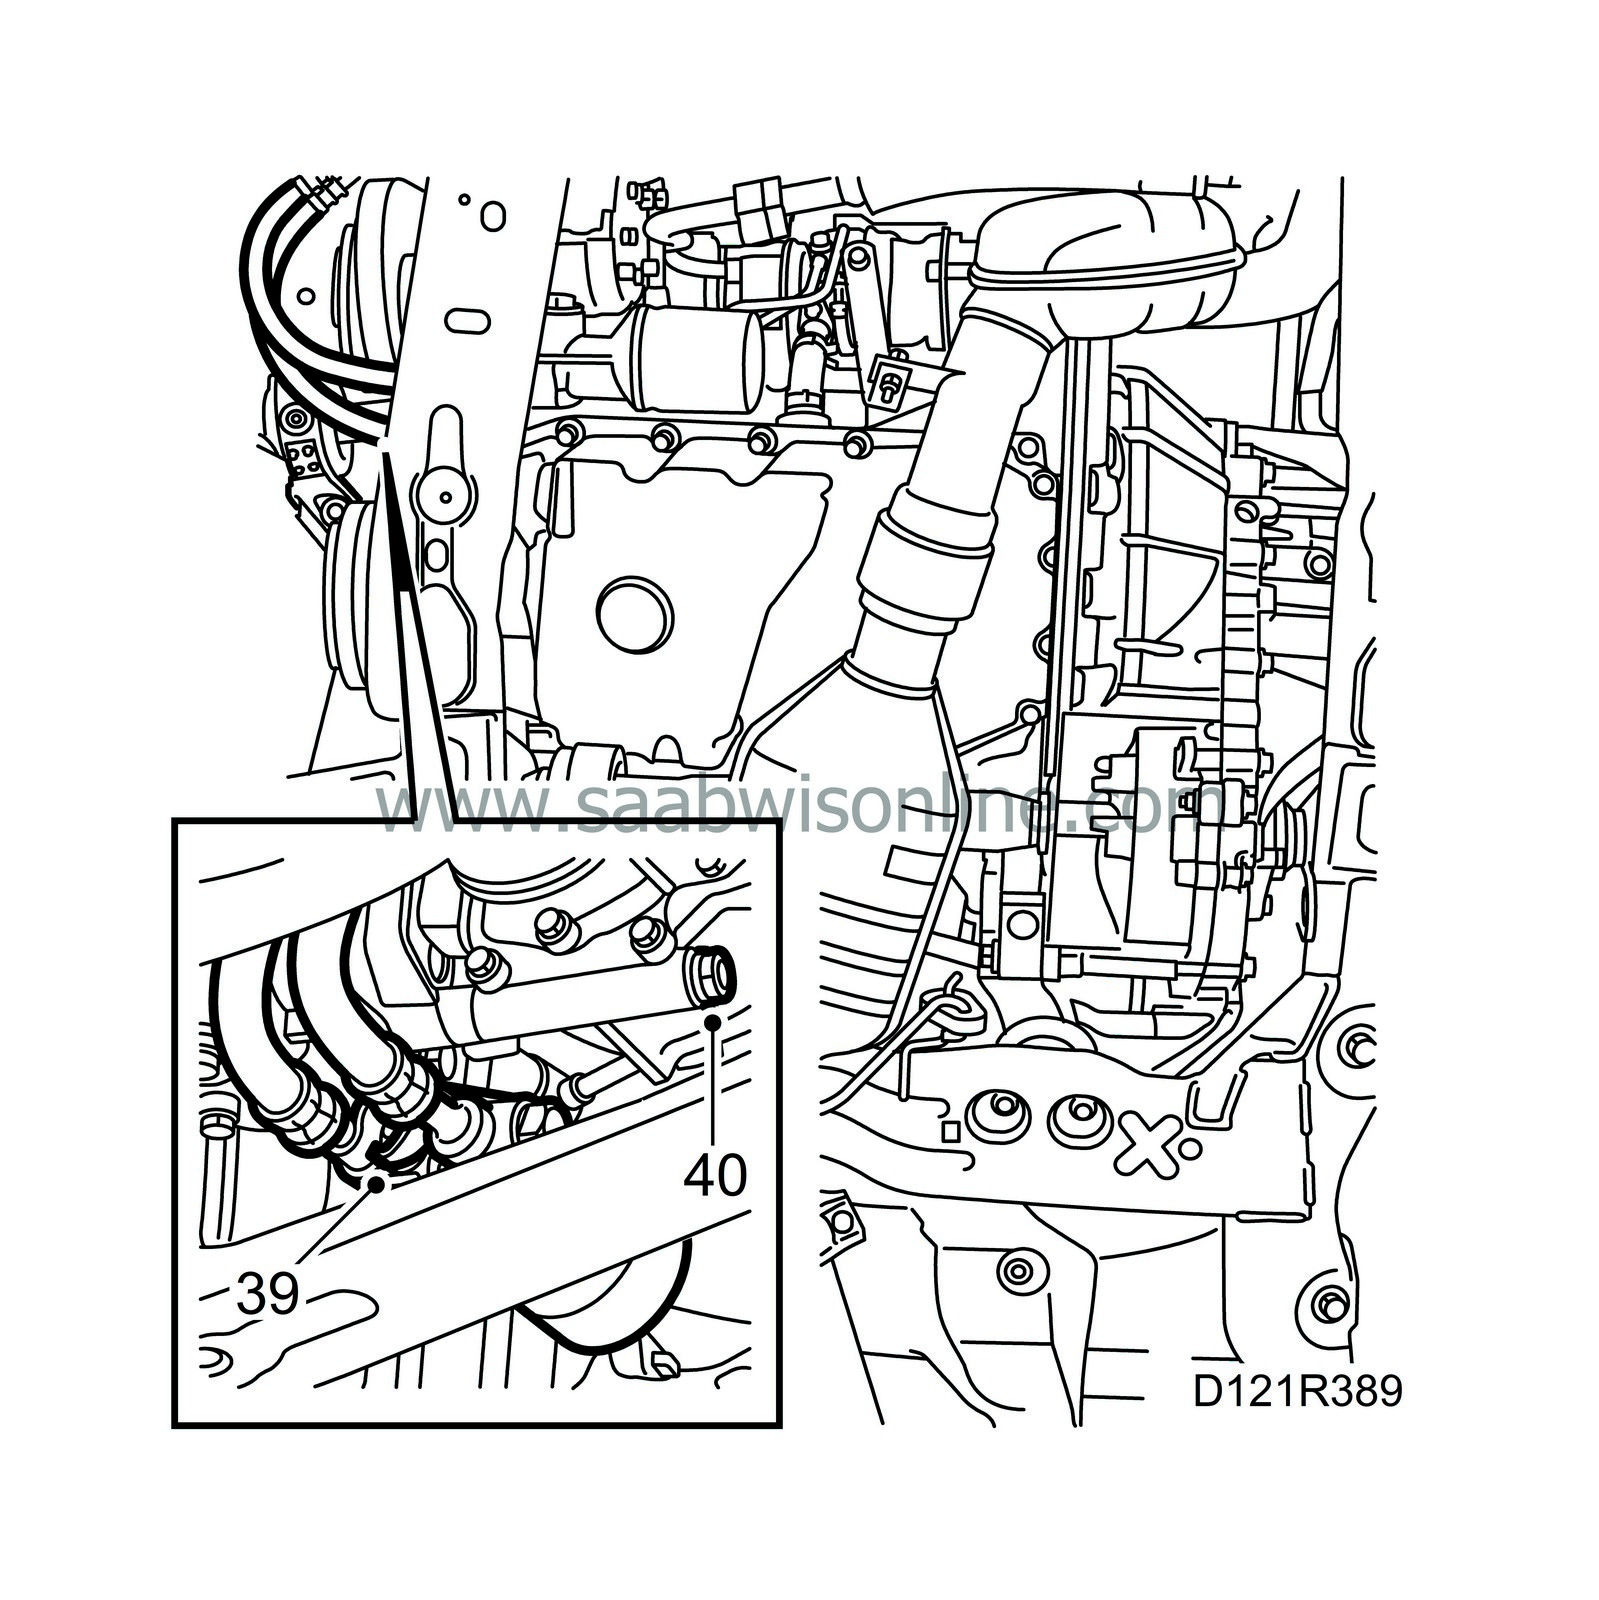
Detach the oil hoses leading to the oil cooler and plug the hoses. Place a suitable receptacle underneath to collect any oil that leaks out.
|
|
| 40. |
Slacken the lower bolt securing the A/C compressor.
|
|
| 41. |
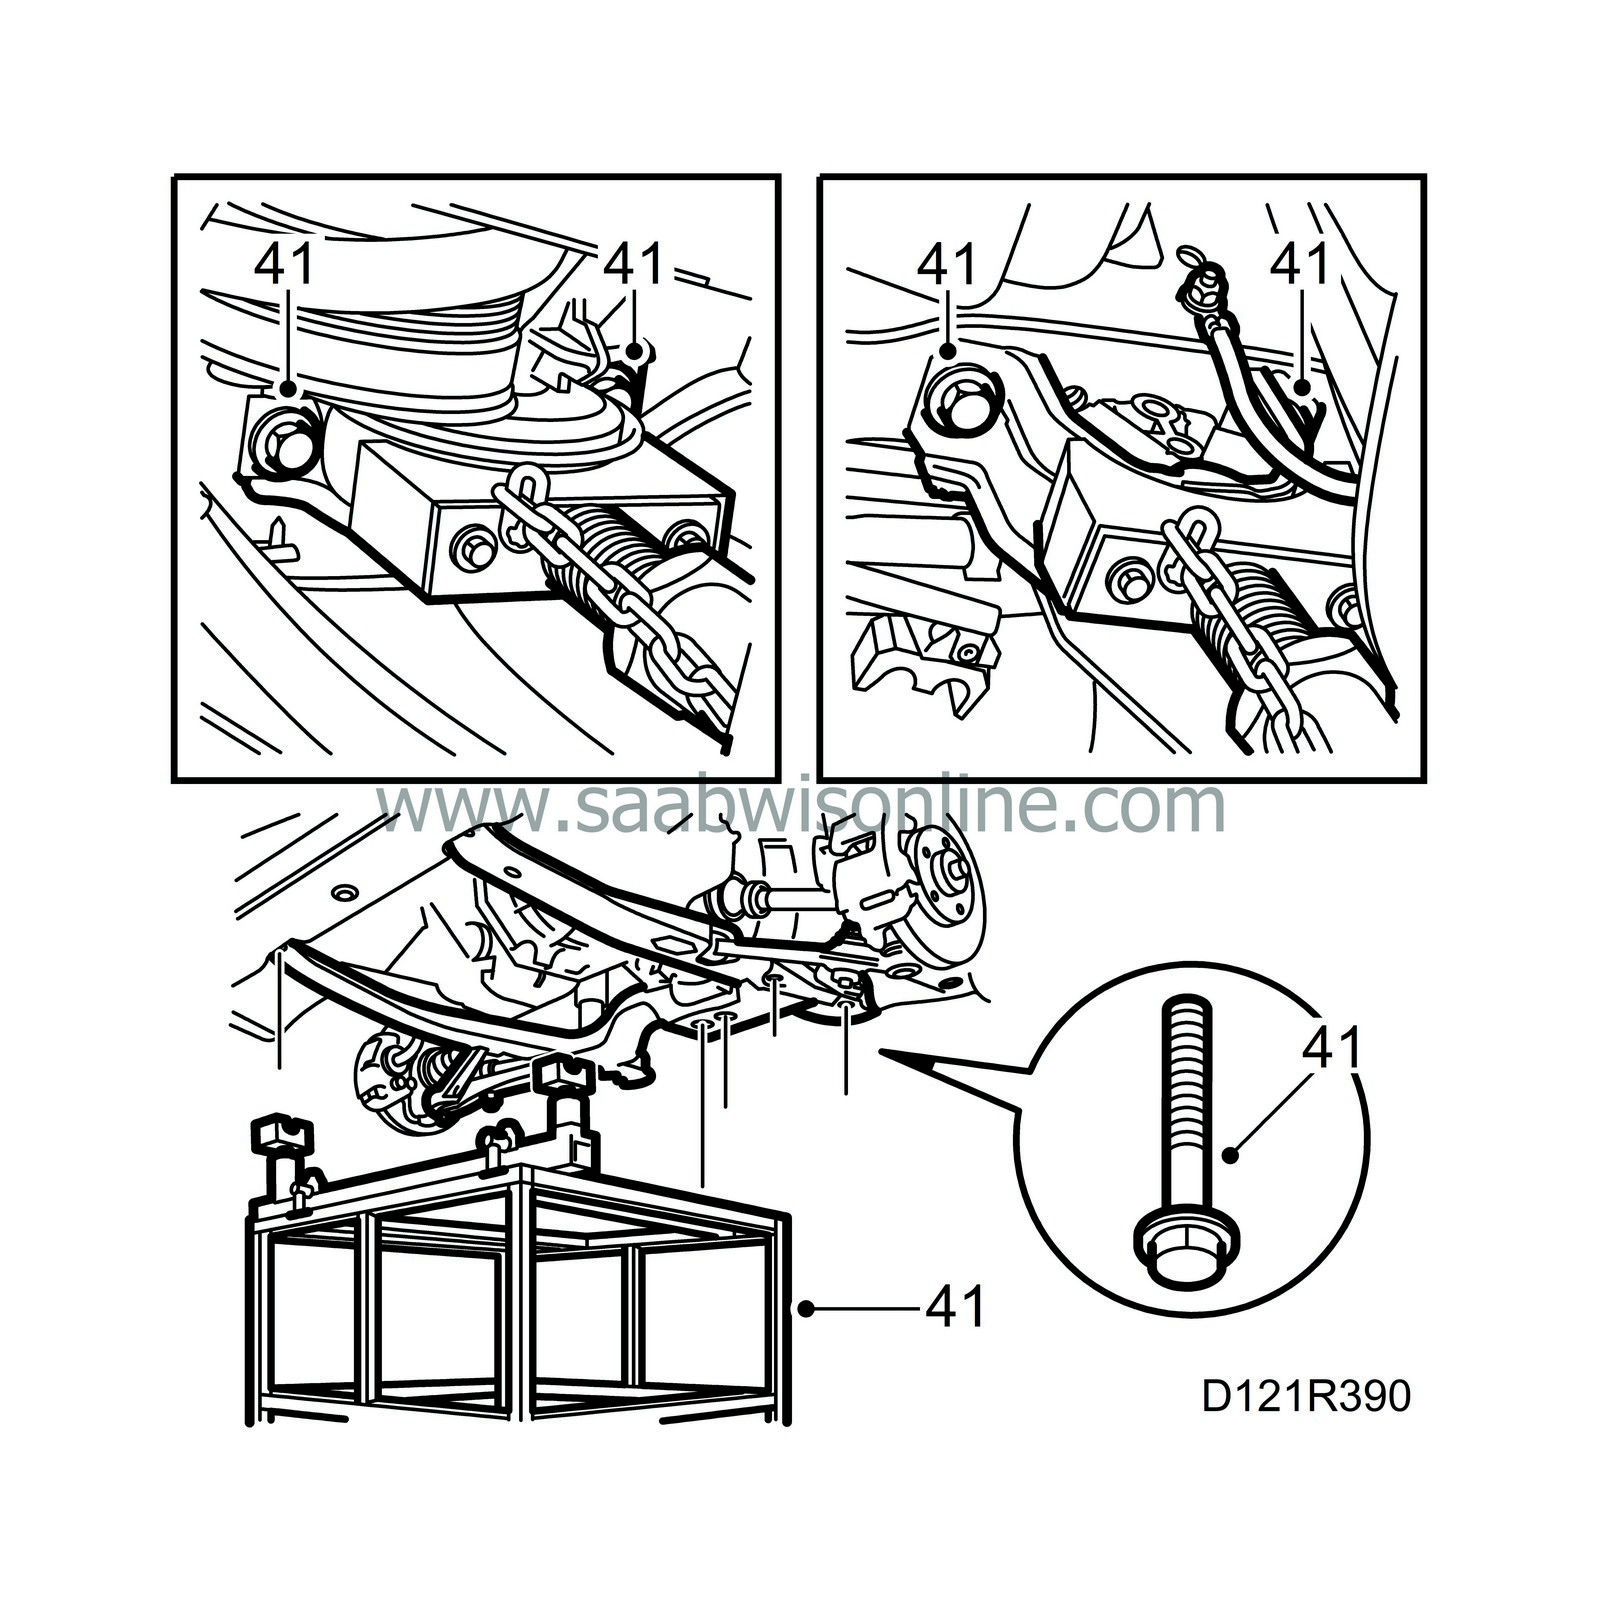
Place a lifting trolley under the car so that the supports are centred under the front engine mountings and the gearbox. Remove the bolts on the subframe and the front engine mountings.
|
|
| 42. |
Lower the lifting trolley slightly and with it the drive train and subframe. Remove the drive shaft from the hub on both sides.
|
|
| 43. |
Suspend the A/C compressor from the front crossmember. Check that all electrical connectors between the engine and car have been unplugged. Lower the lifting table completely.
|
|

 Warning
