Radiator, ch no 12020001-
|
|
Radiator, ch no 12020001-
|
|
1.
|
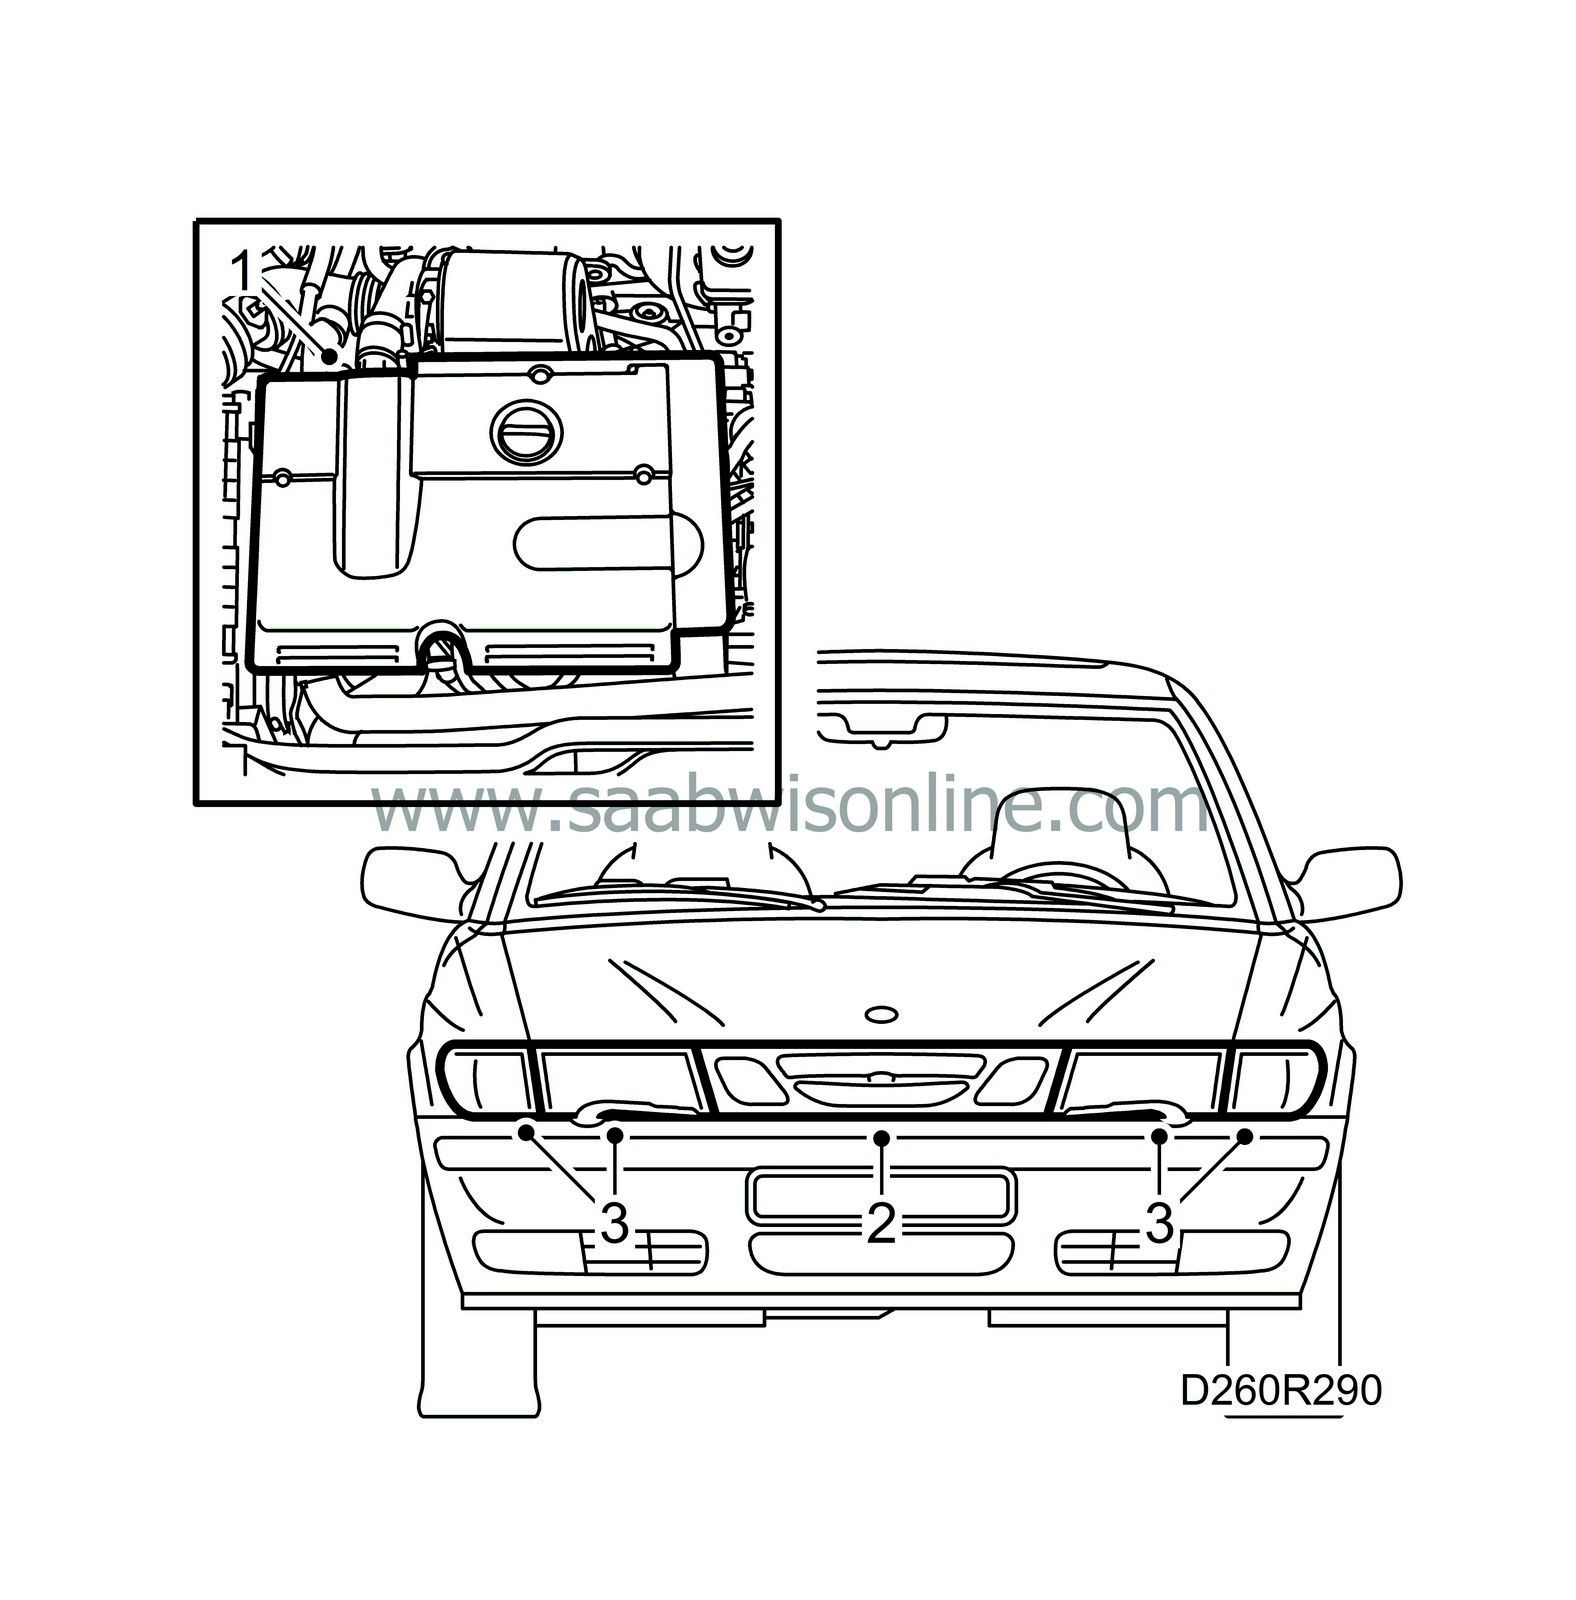
Remove the upper engine cover.
|
|
2.
|
Remove the front grille.
|
|
3.
|
Remove the light clusters and the headlamps.
|
|
4.
|
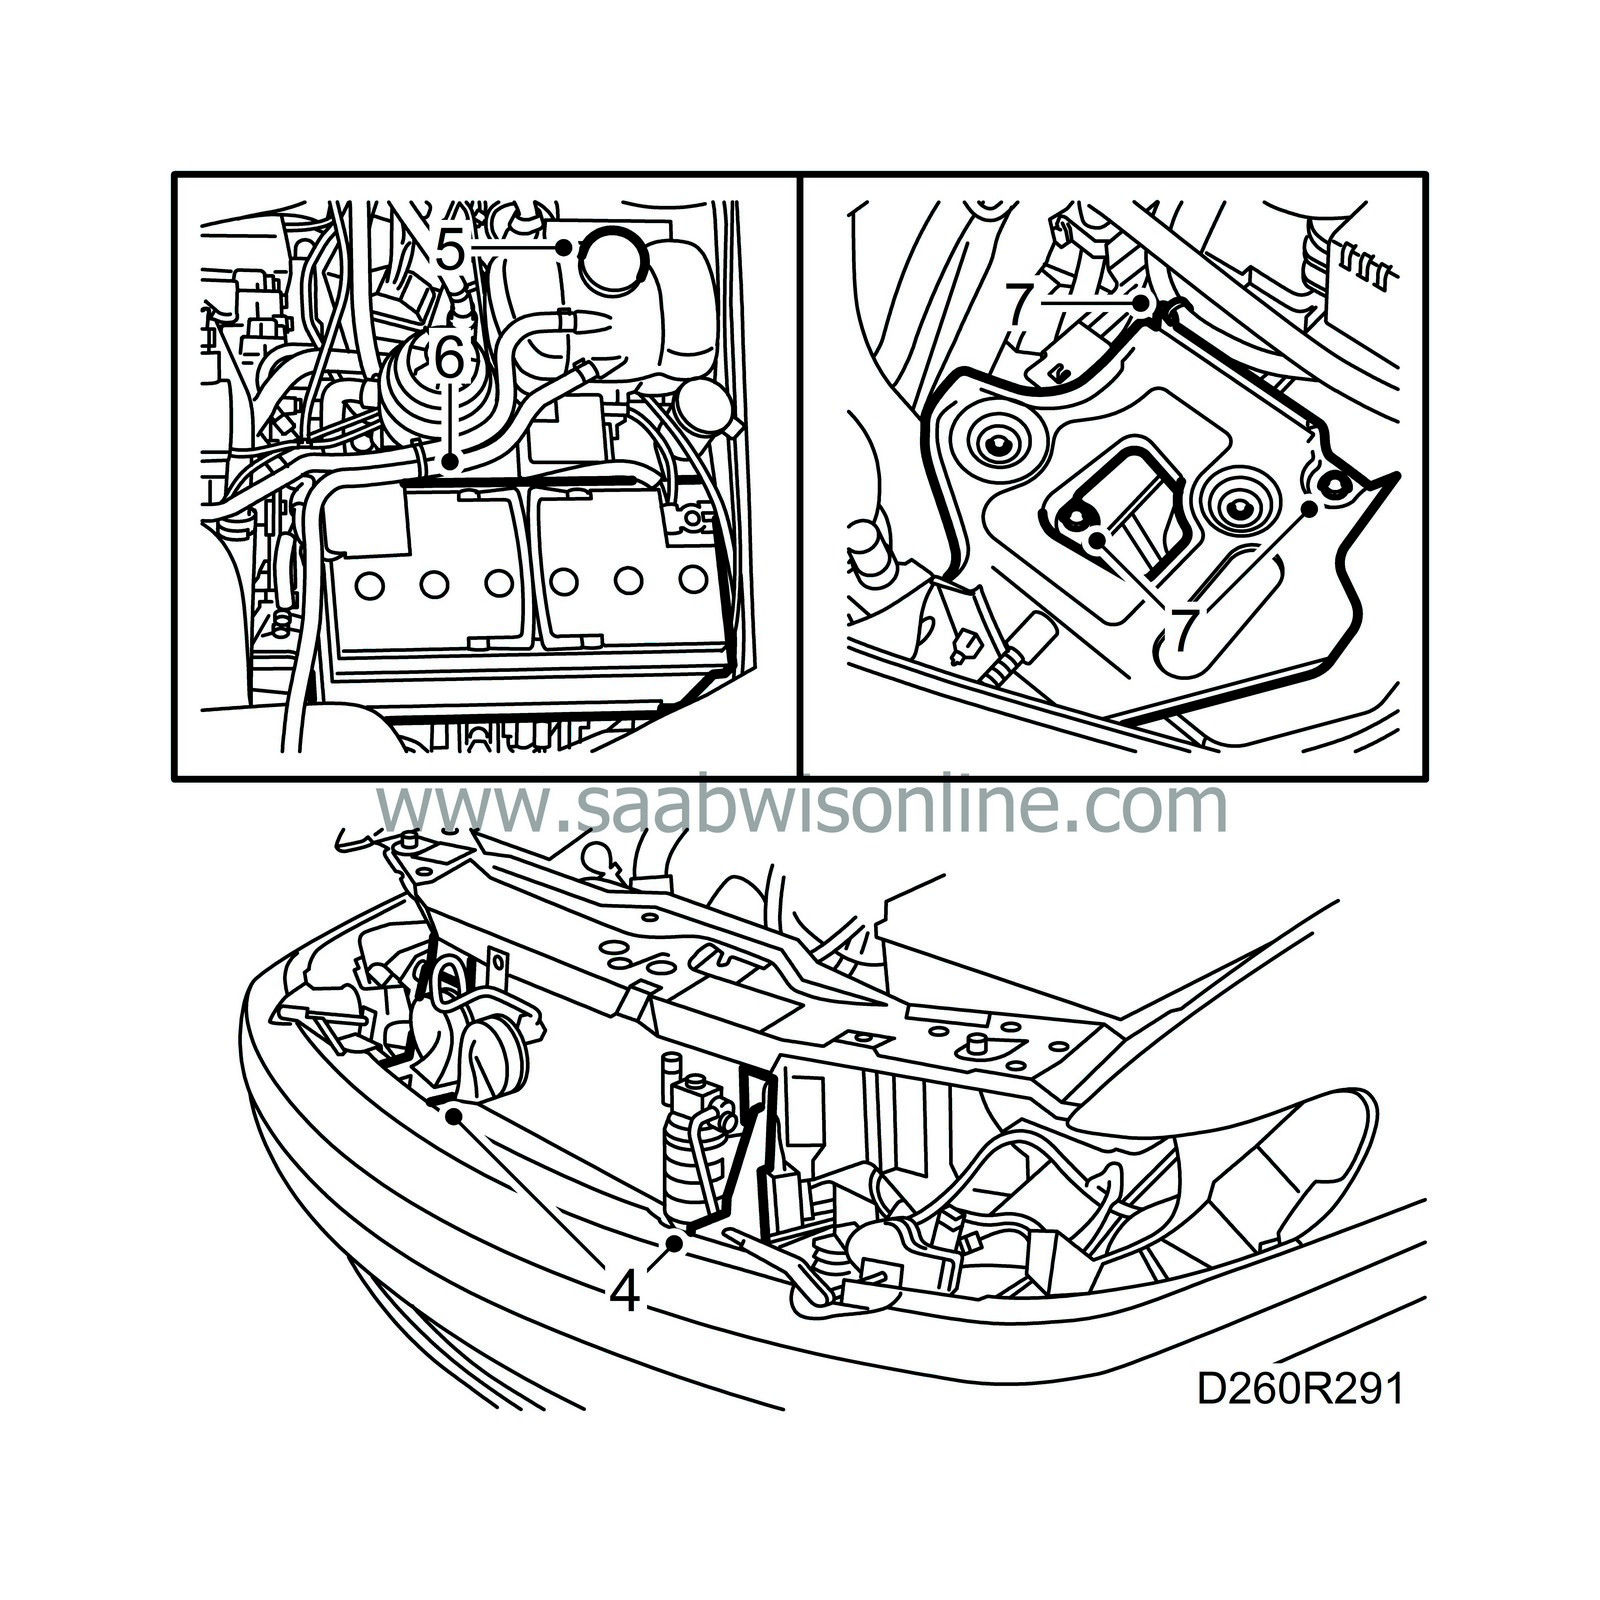
Loosen and move aside the air deflectors by the condenser.
|
|
5.
|
Open the expansion tank cap to release the pressure.
|
|
6.
|
Disconnect the battery, remove the air vent hose and lift out the battery.
|
|
7.
|
Loosen the battery tray, cut the cable ties for the wiring and remove the battery tray.
|
|
8.
|
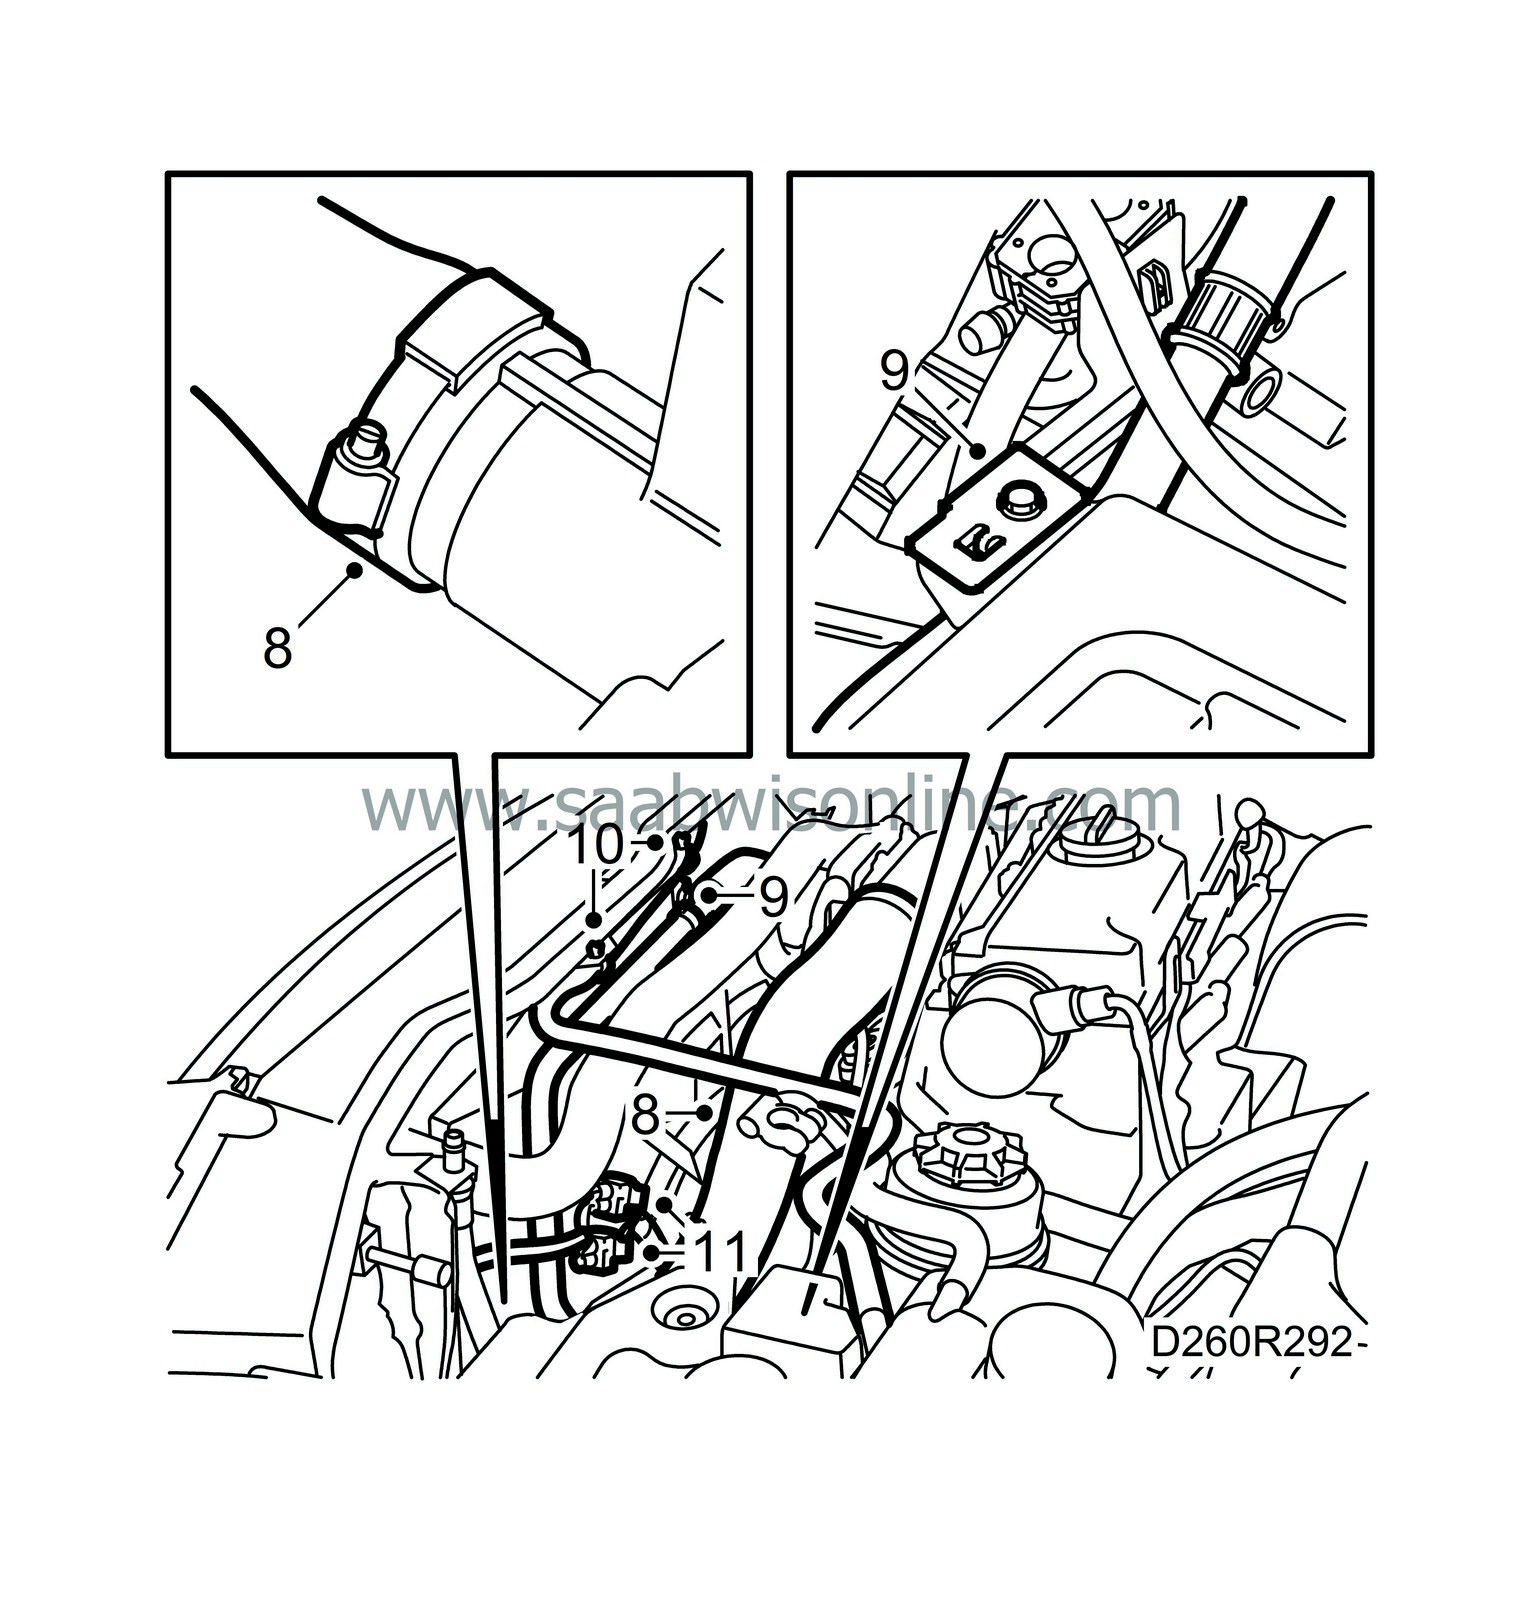
Remove the hose from the throttle body, seal this and remove the hose between the charge air cooler and the delivery pipe.
|
|
9.
|
Remove the power steering fluid pipe from the brackets on the radiator crossmember and below the battery tray.
|
|
10.
|
Disconnect the vent hose from the radiator crossmember, cut the cable ties and move the hose aside.
|
|
11.
|
Disconnect the radiator fan connector.
|
|
12.
|
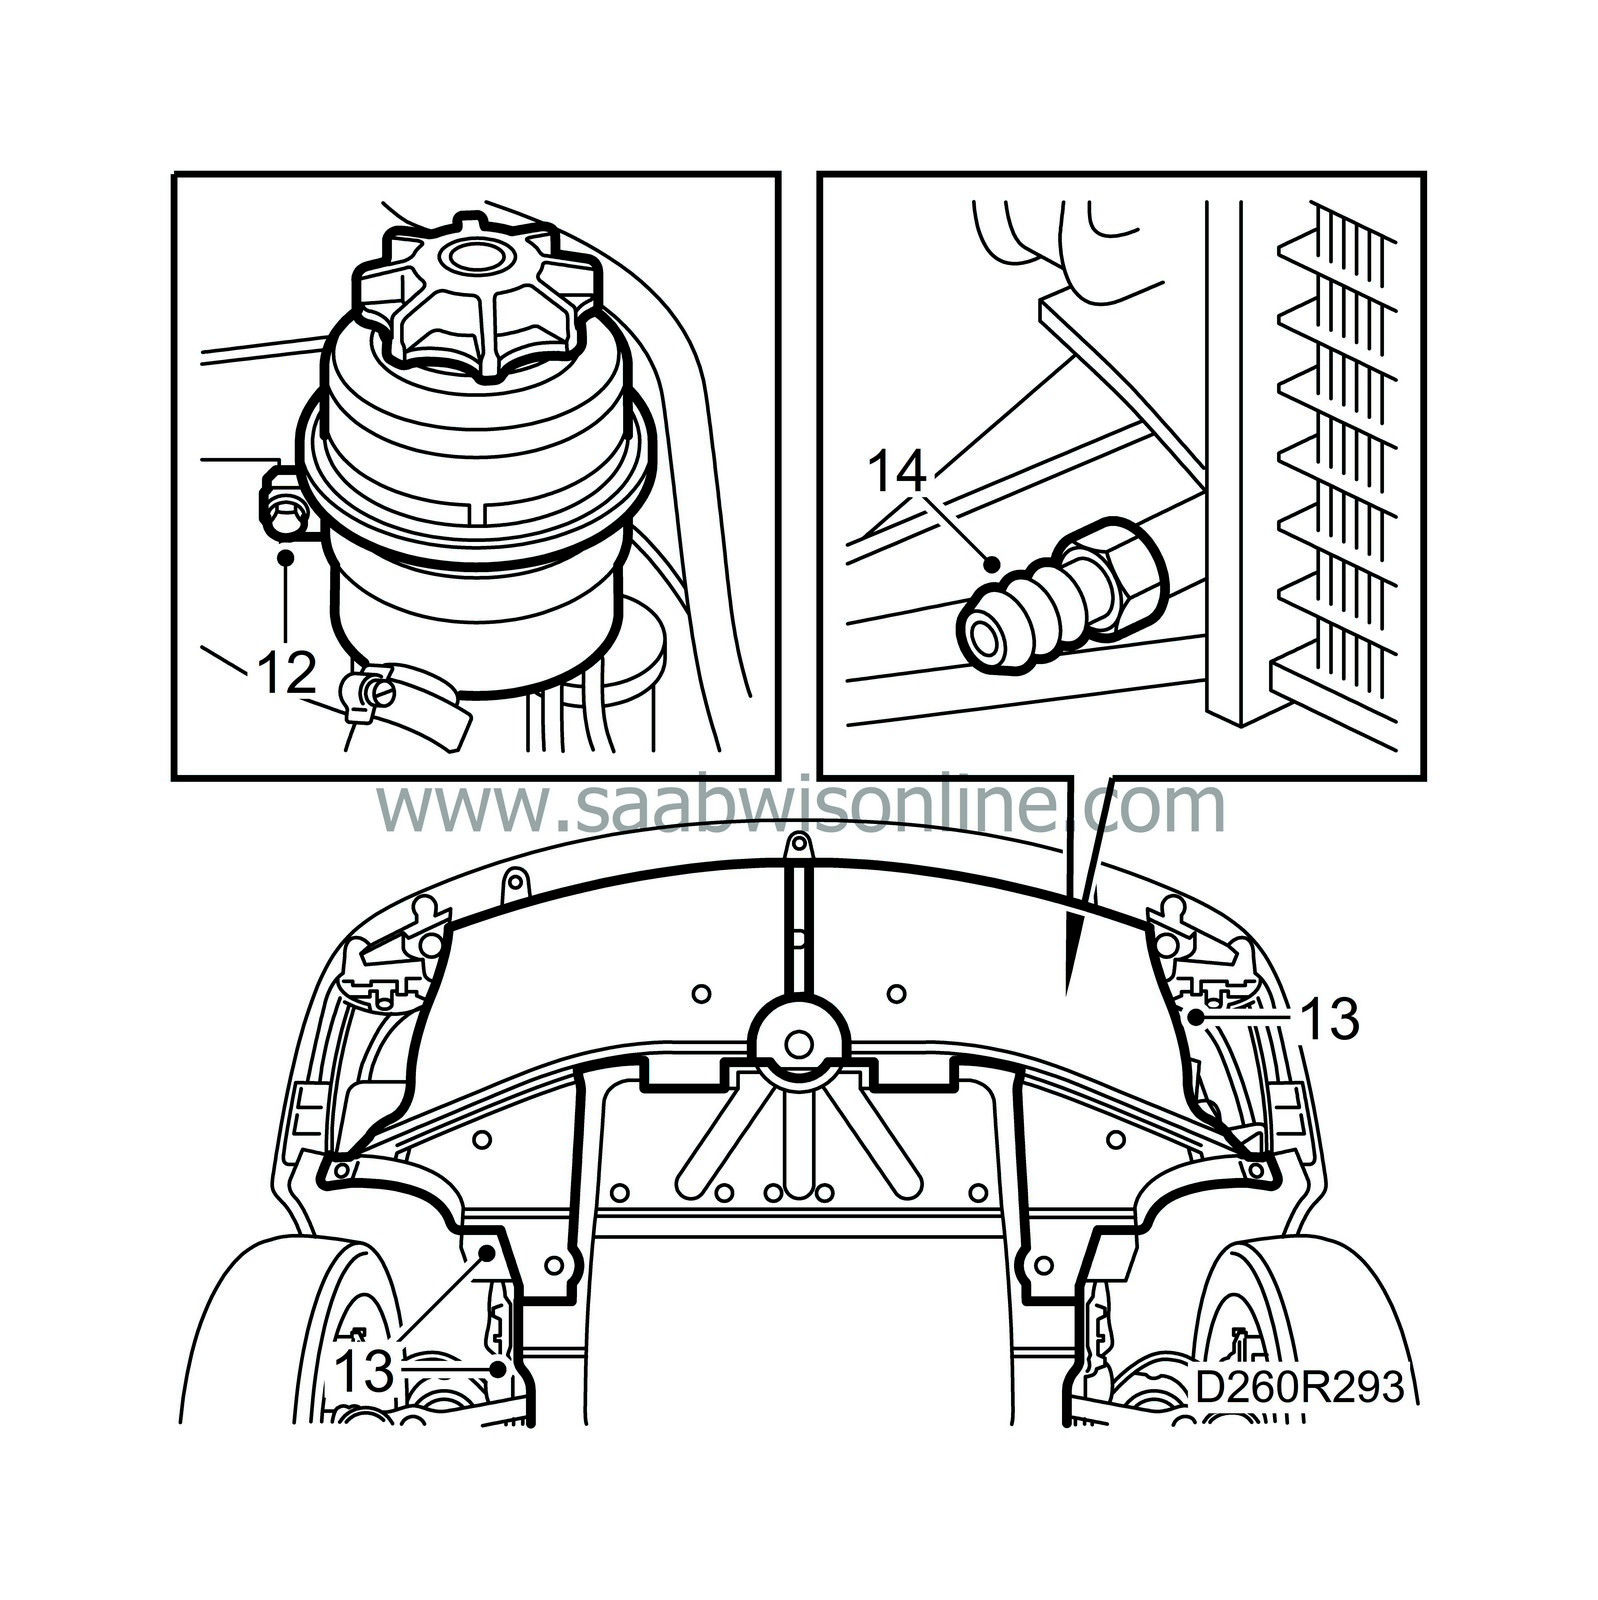
Remove the power steering fluid reservoir from the bracket and move the reservoir aside.
|
|
13.
|
Raise the car, remove the bottom cover and the air shields.
|
|
14.
|
Place a receptacle under the radiator and drain the coolant.
|
|
15.
|
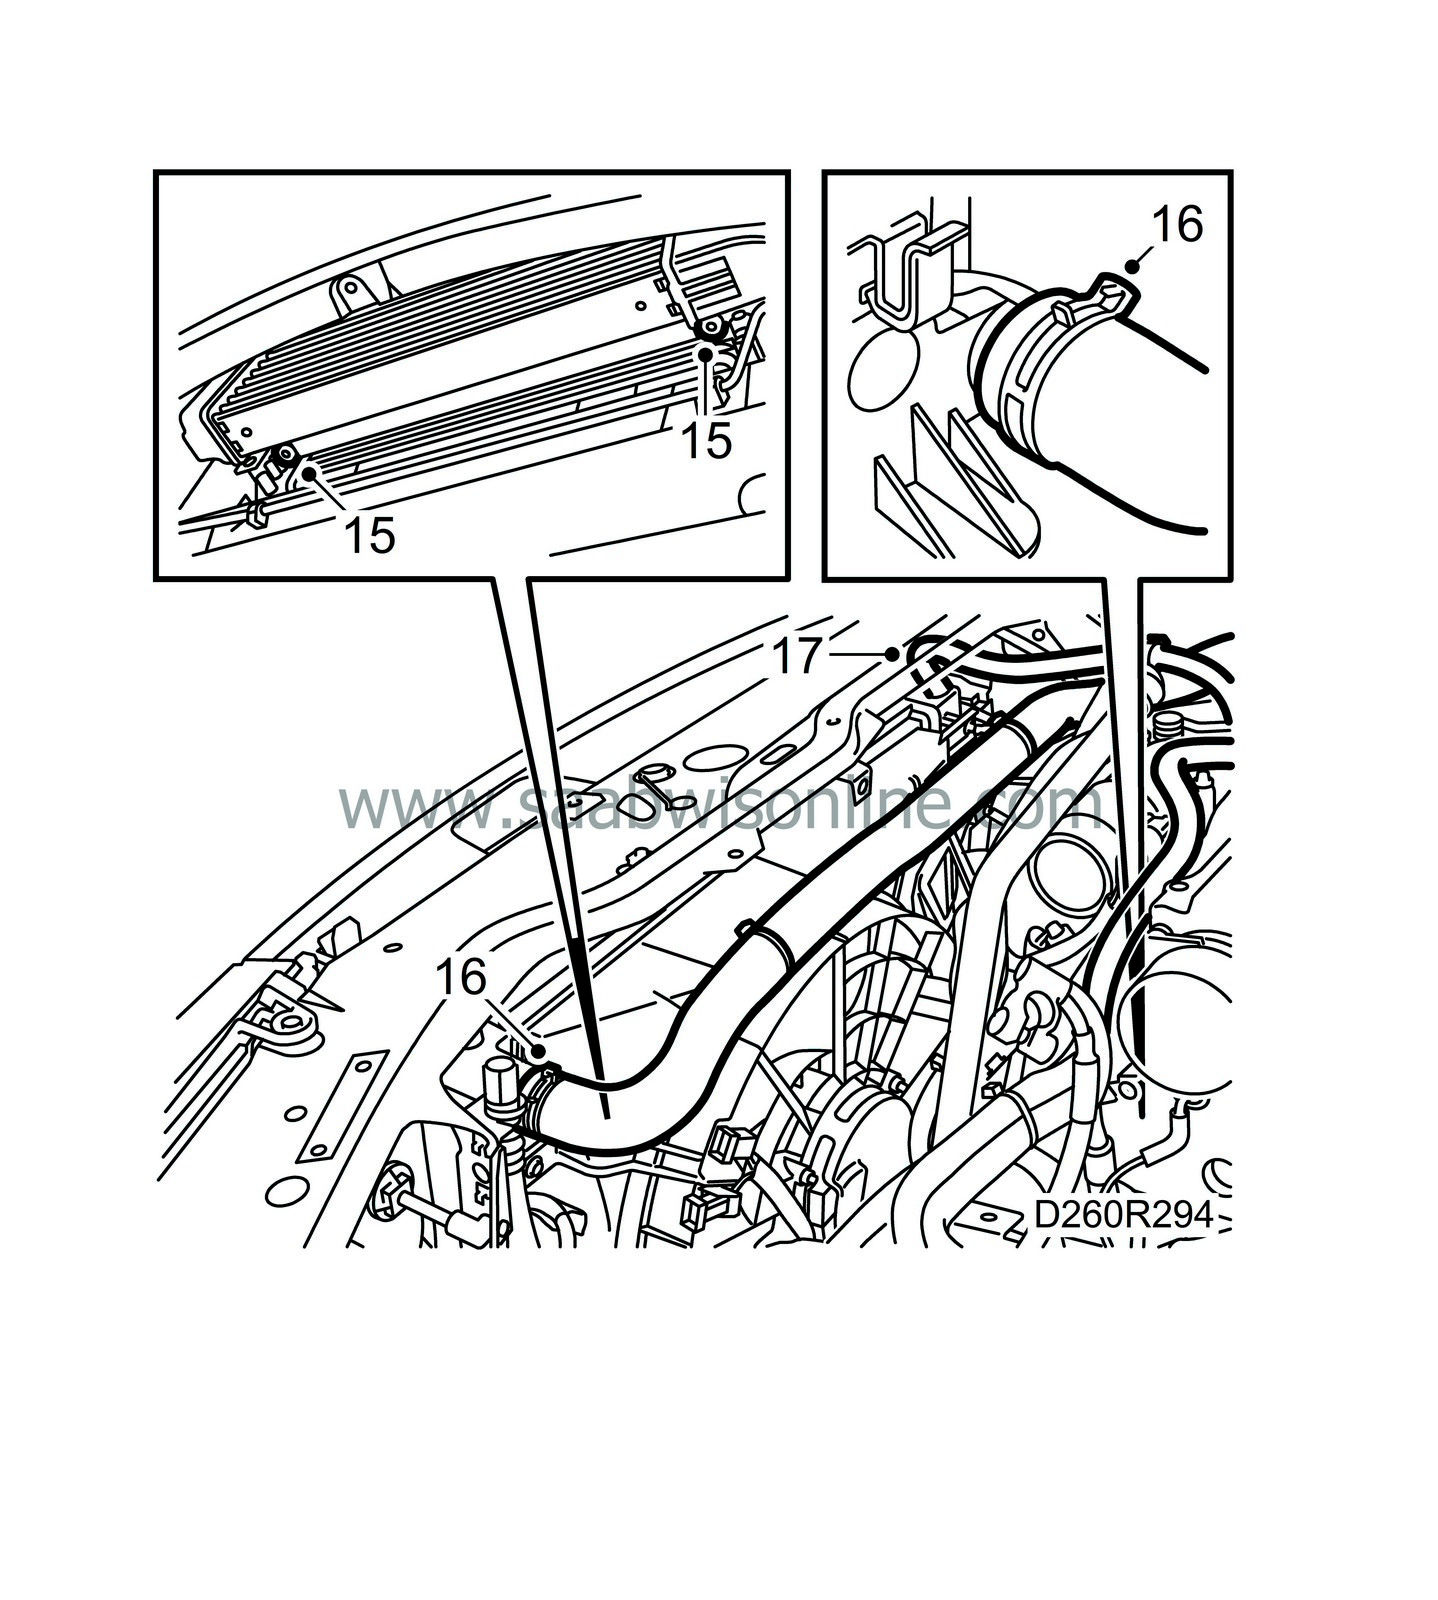
Remove the condenser mounting bolts.
|
|
16.
|
Lower the car, release the lower coolant hose from the radiator and the upper coolant hose from the radiator and the thermostat housing.
|
Important
|
|
There is still plenty of coolant in the engine, so always have a suitable container under the engine when working on the cooling system.
|
|
|
|
|
17.
|
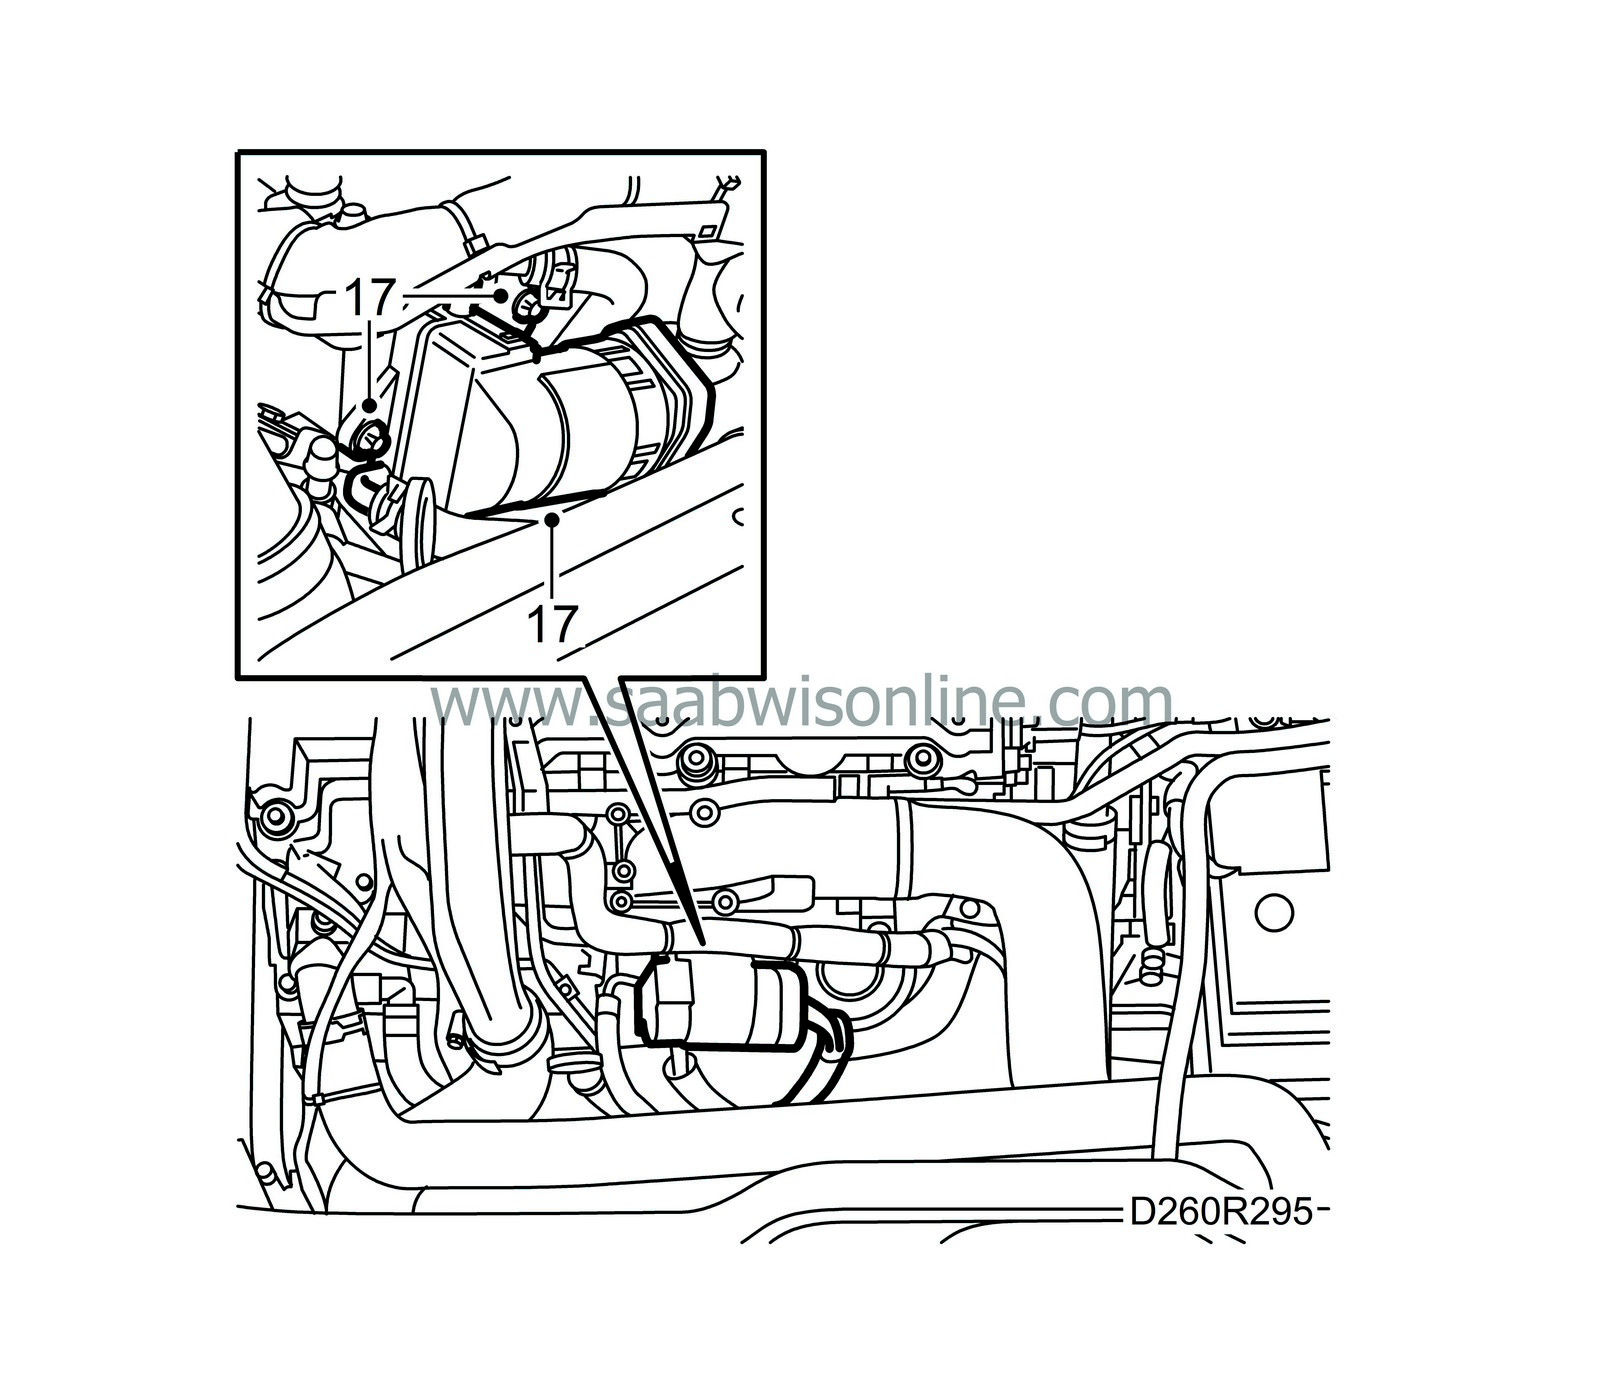
Remove the vent hose from the radiator.
|
|
18.
|
Remove the EGR valve bolts and lay the valve aside.
|
|
19.
|
Unhook the condenser from the radiator.
|
|
20.
|
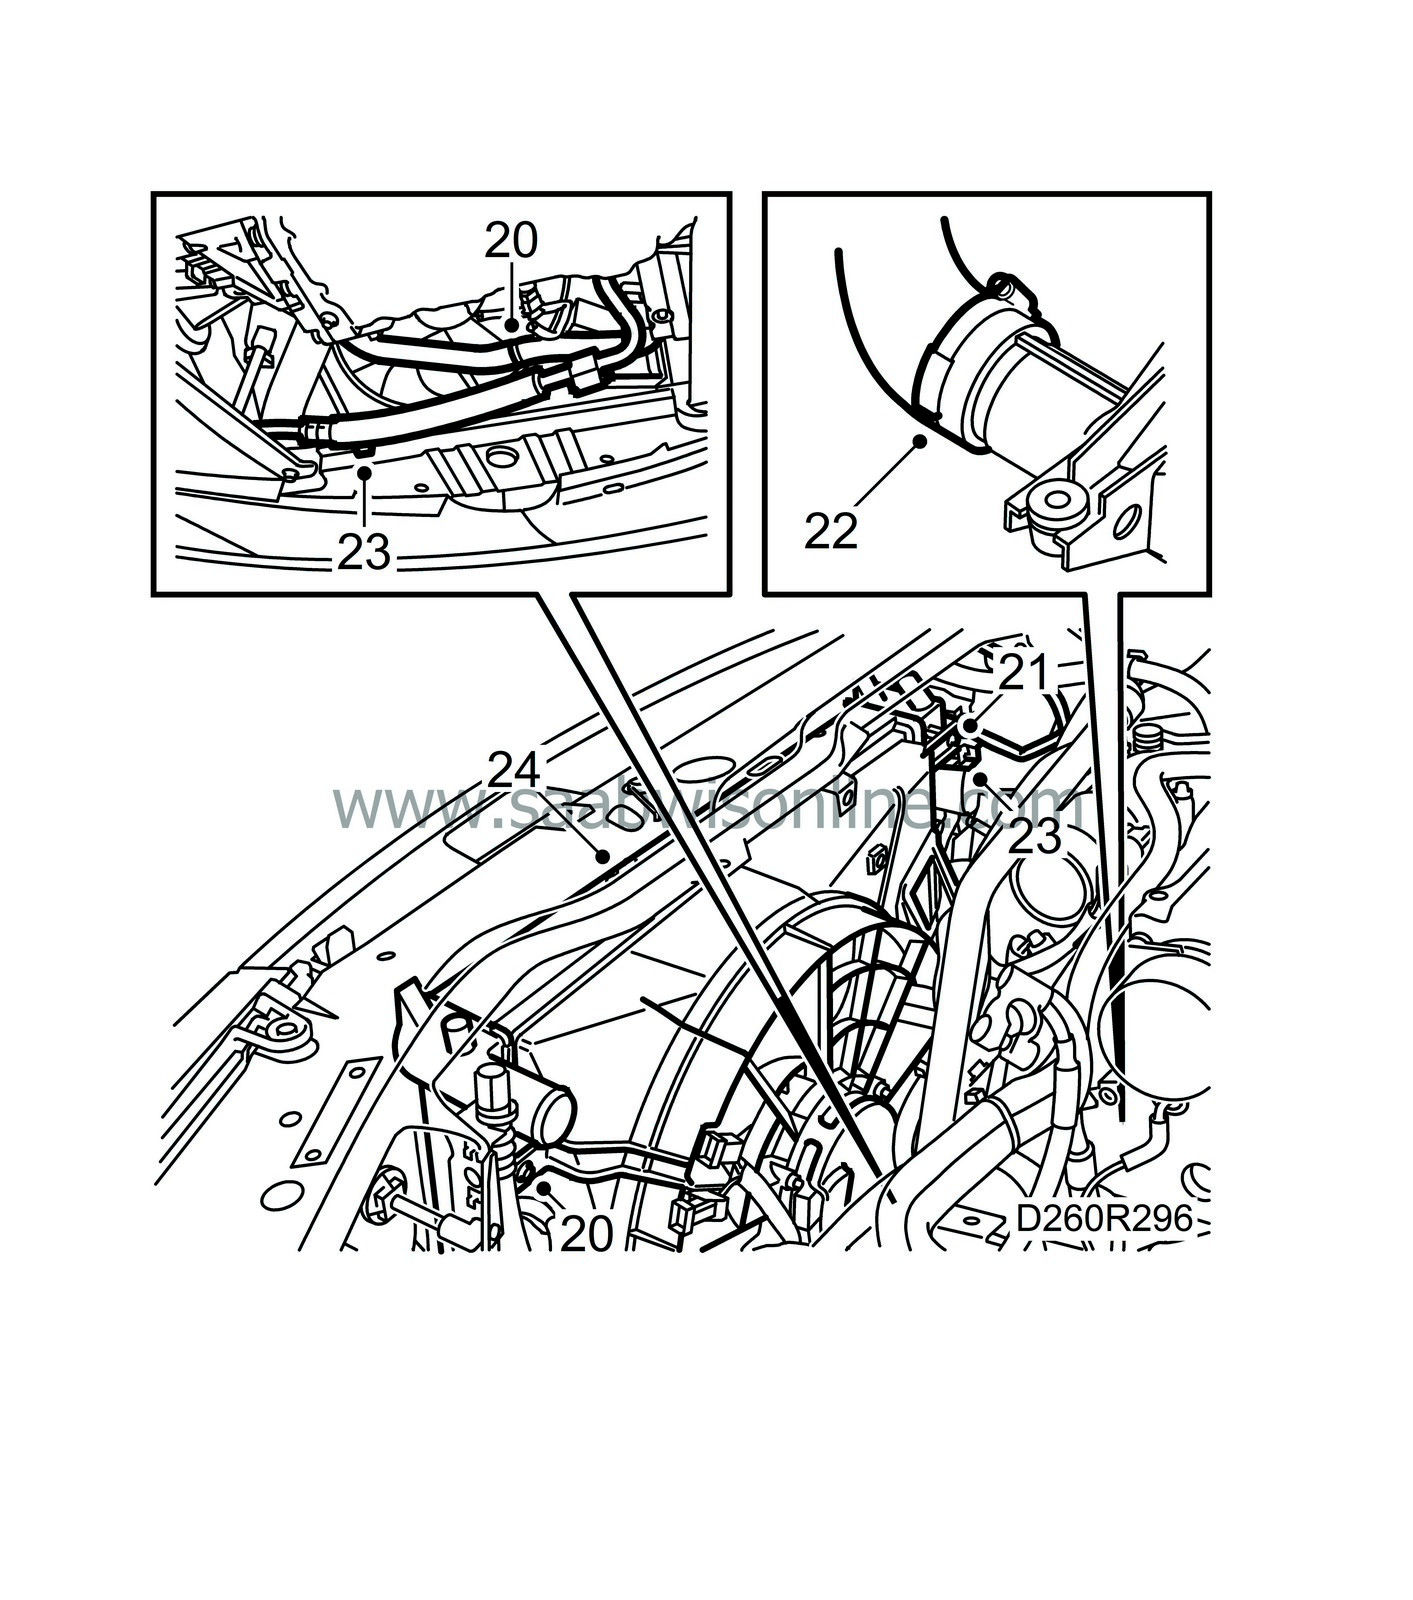
Cut the cable tie on the lower coolant hose. Remove the radiator fan cowling from the fan.
|
|
21.
|
Remove the clamps that secure the radiator to the radiator crossmember and remove the fan cowling.
|
|
22.
|
Remove the second hose from the charge air cooler.
|
|
23.
|
Remove the AC compressor cable from the radiator and remove the AC pipe from the radiator crossmember.
|
|
24.
|
Lift up the radiator.
|
Important
|
|
Check that nothing is loose or damaged.
|
|
|
|
|
1.
|
Check that the radiator drain plug is tight and apply acid-free vaseline to the rubber bushes.
|
|
2.
|
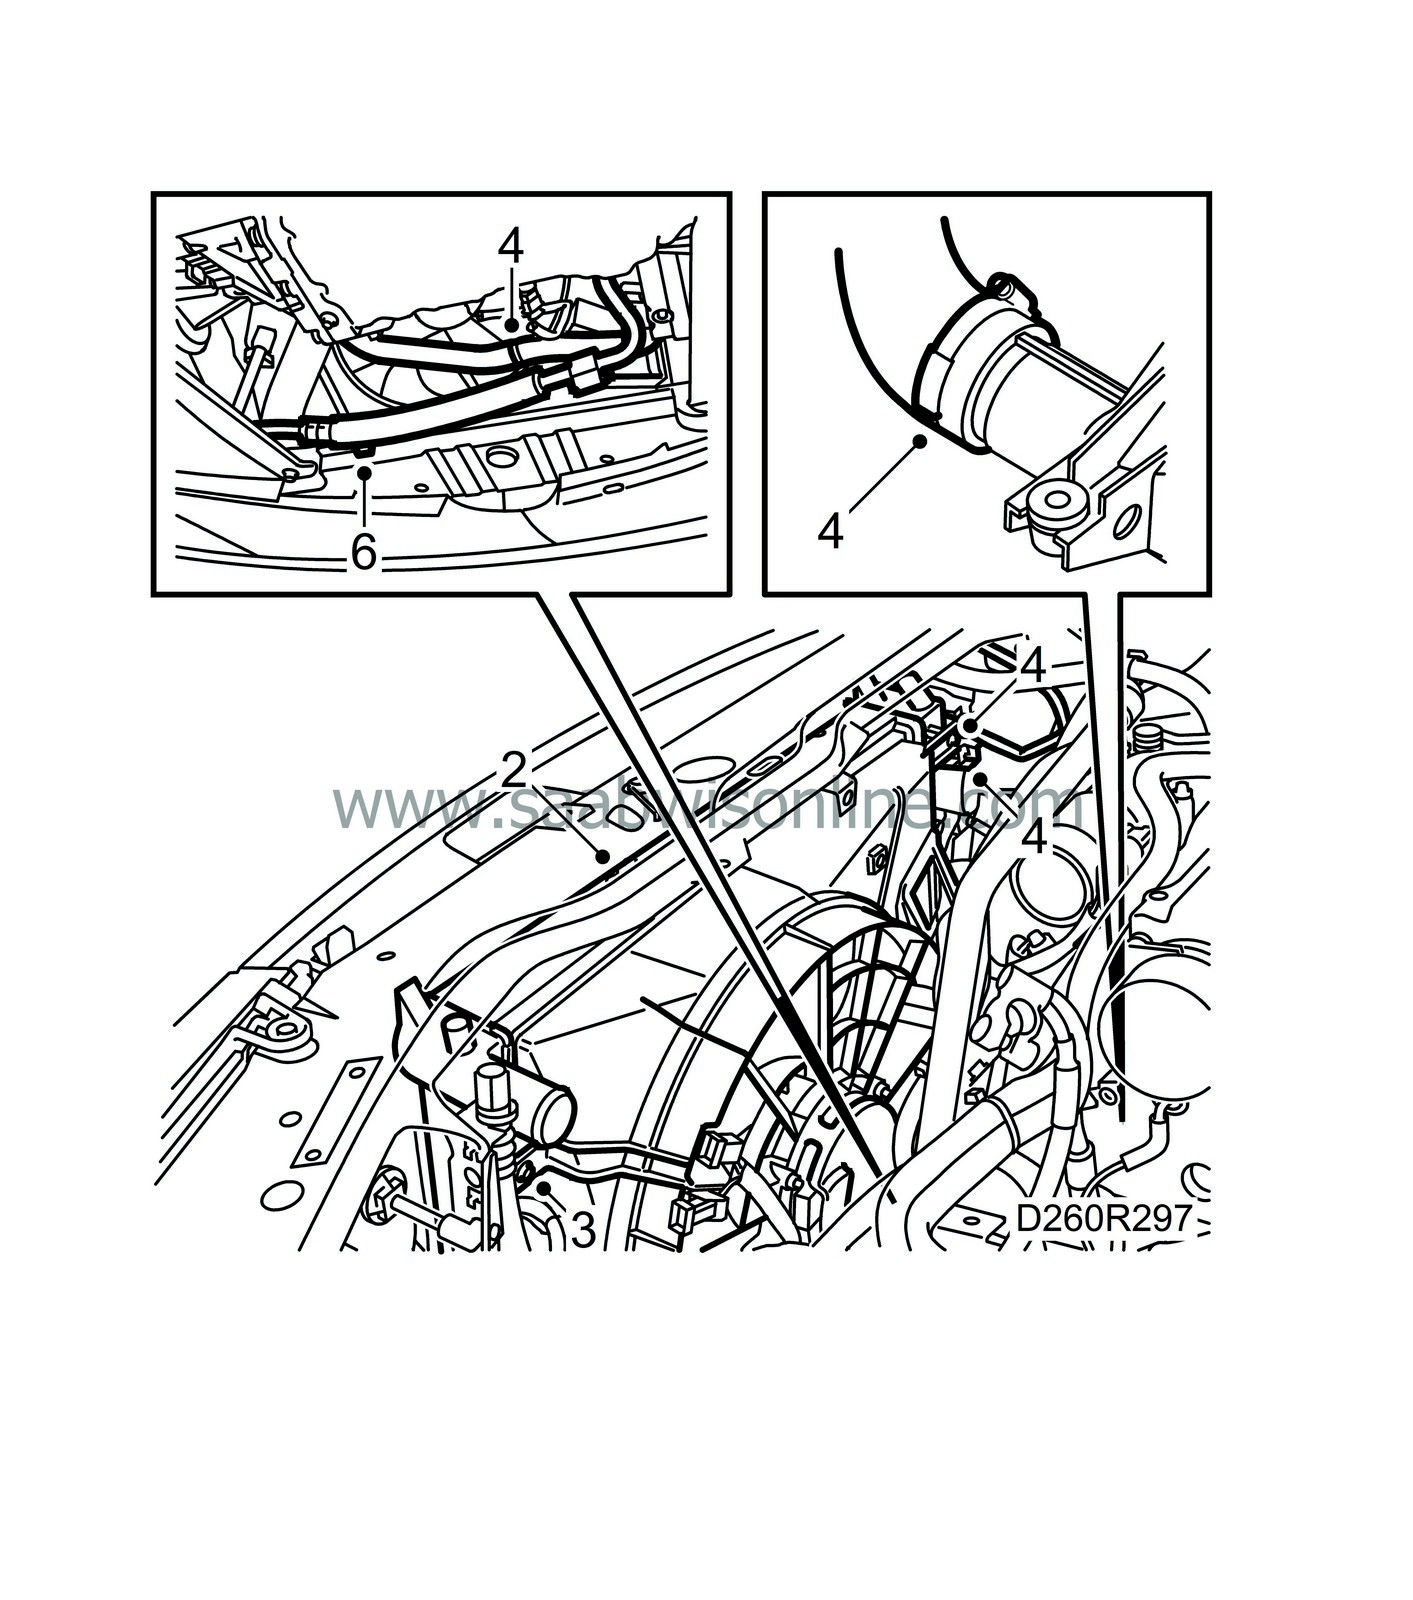
Fit the radiator.
|
Important
|
|
Check that nothing is loose or damaged.
|
|
|
|
|
3.
|
Fit the fan cowling to the radiator and tighten the bolts.
|
Important
|
|
Check that nothing is loose or damaged.
|
|
|
|
|
4.
|
Connect the lower coolant hose and attach a cable tie to the fan. Attach the A/C compressor cable to the fan.
|
|
5.
|
Hook the condenser on the radiator.
|
|
6.
|
Raise the car and replace the A/C pipe in its mounting.
|
|
7.
|
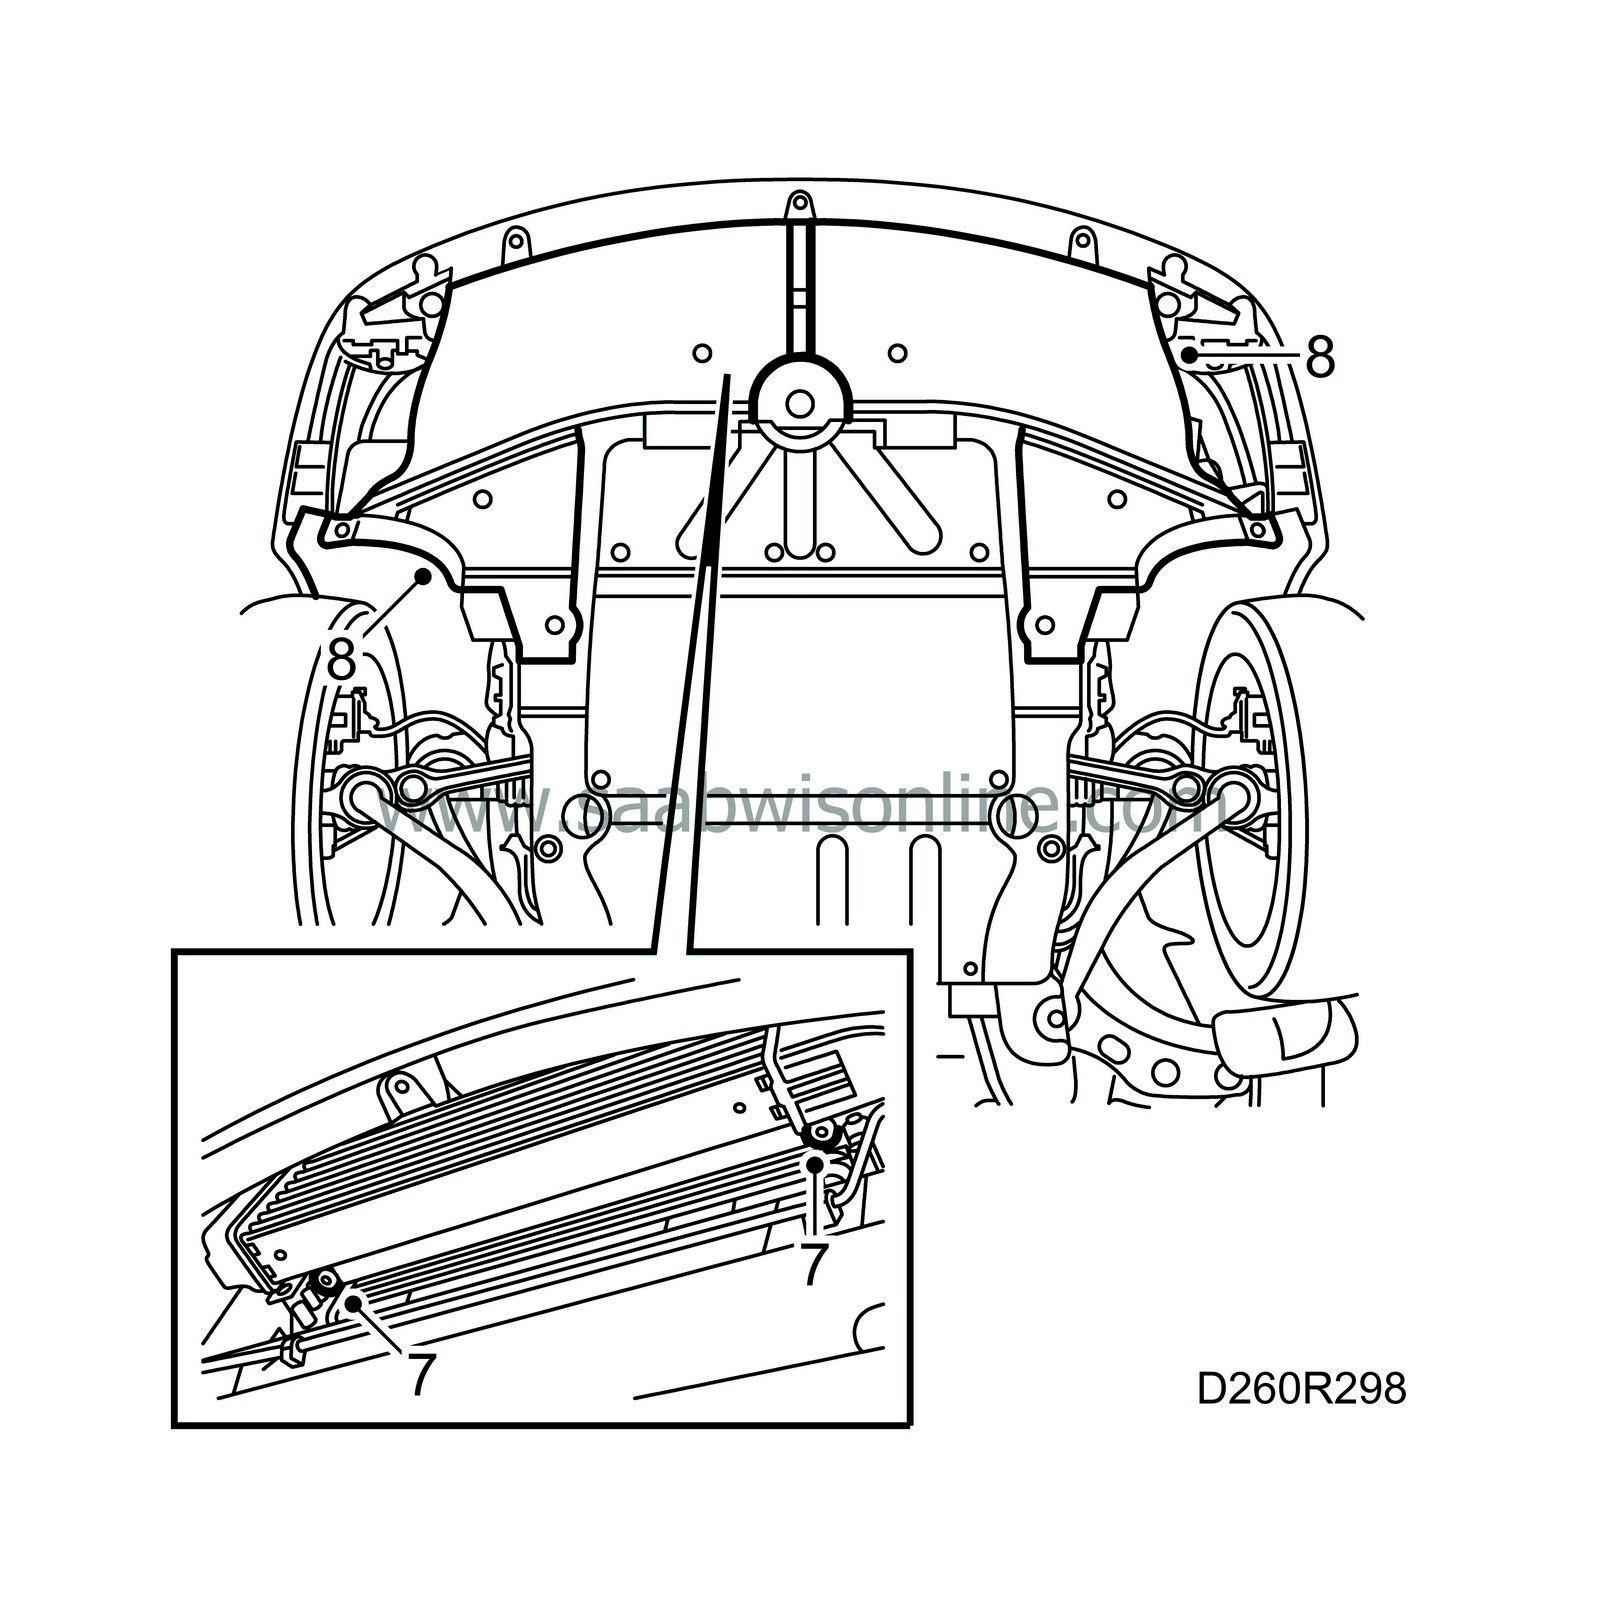
Fit the condenser.
|
|
8.
|
Refit the air shields and the bottom cover. Lower the car.
|
|
9.
|
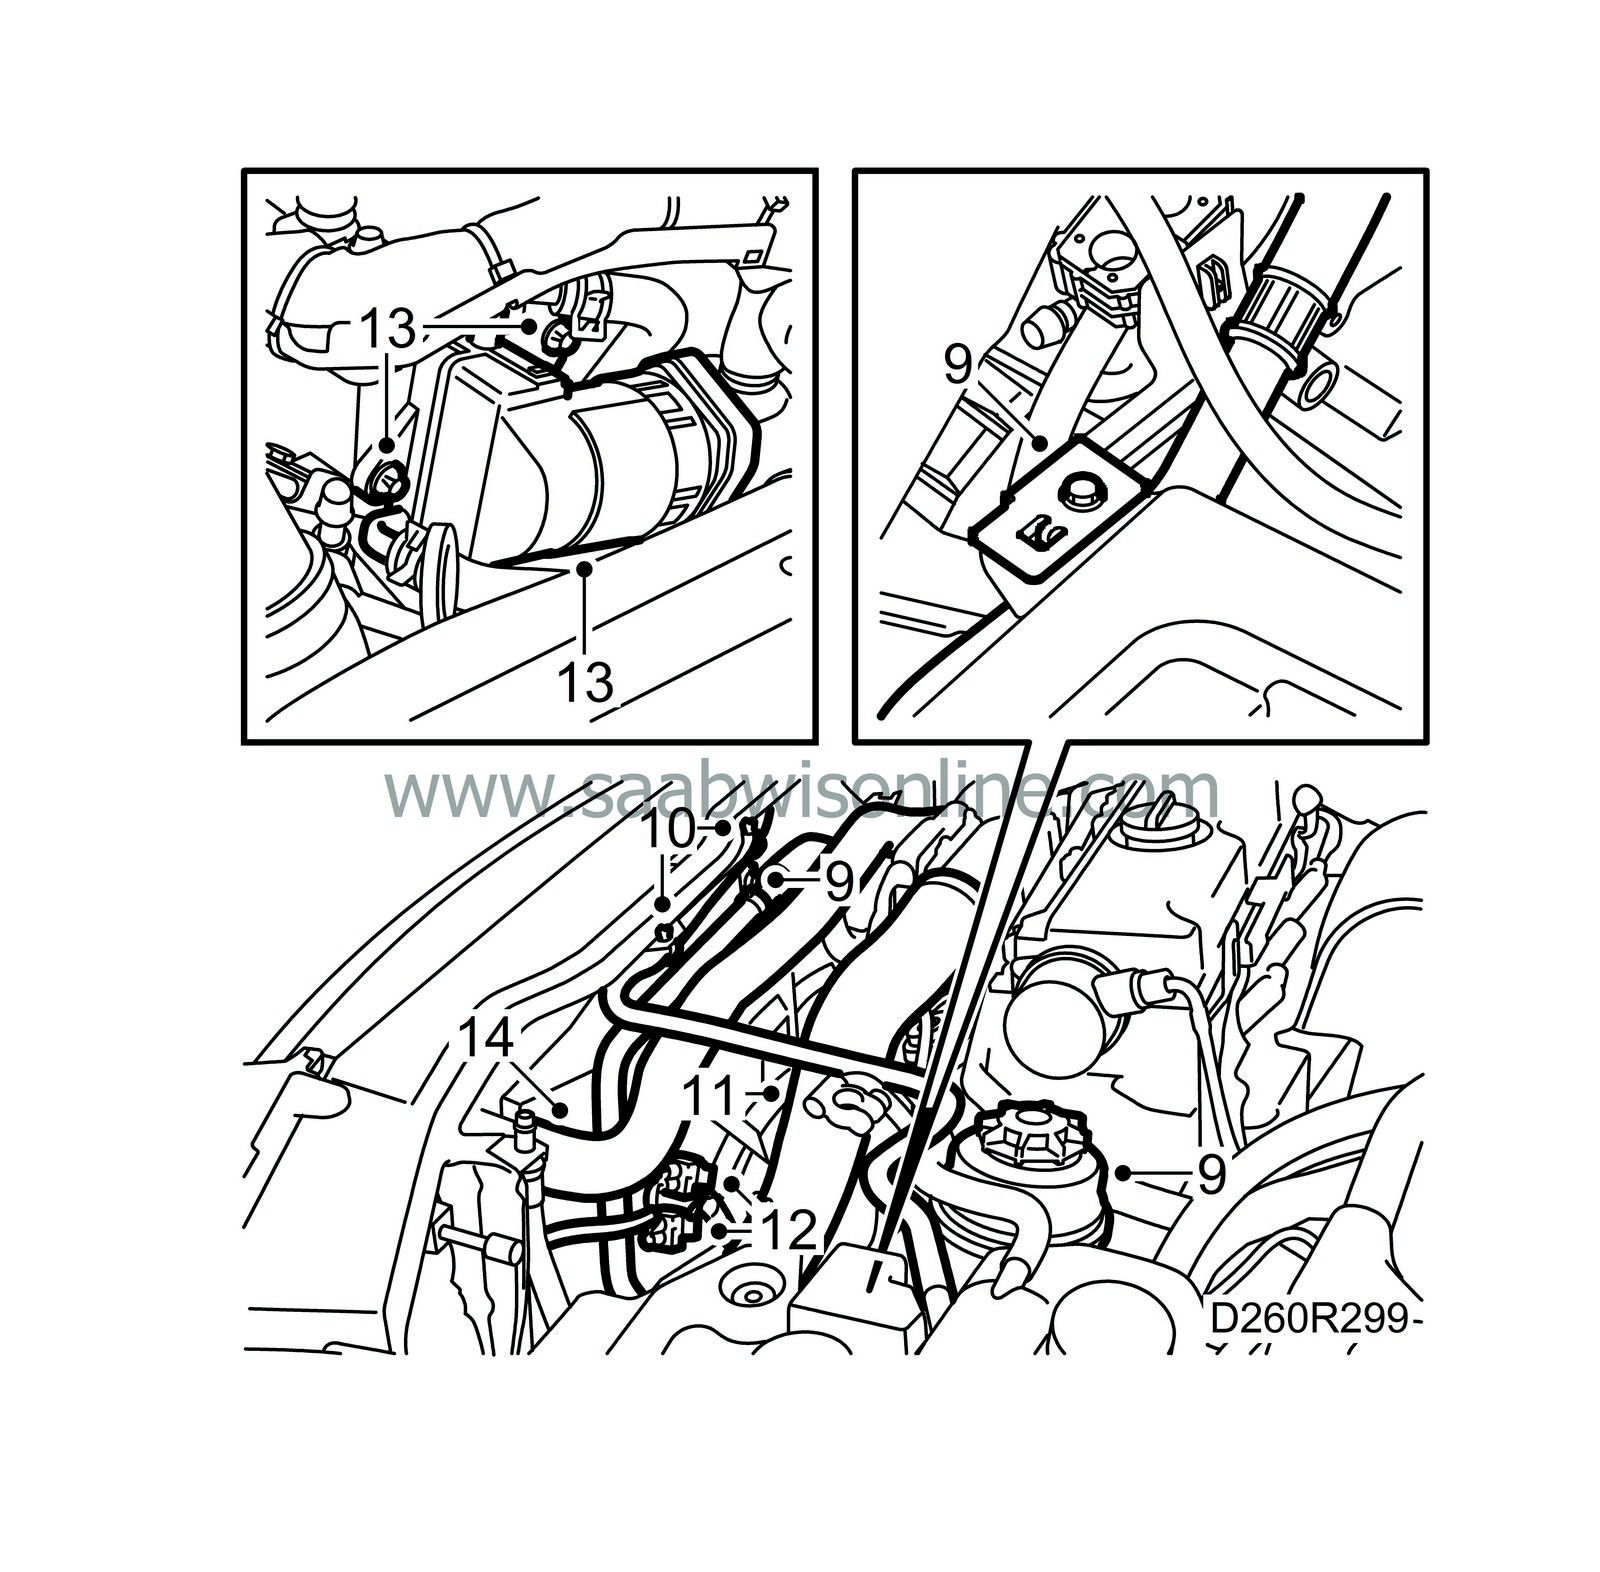
Fit the power steering fluid pipe in the brackets on the radiator crossmember and below the battery tray and refit the power steering fluid reservoir.
|
|
10.
|
Reconnect the venting hose and fix it to the radiator crossmember.
|
|
11.
|
Connect the hoses to the throttle body and charge air pipe.
|
|
12.
|
Connect the radiator fan connector.
|
|
14.
|
Connect the upper coolant hose and fit the hose clamp.
|
|
15.
|
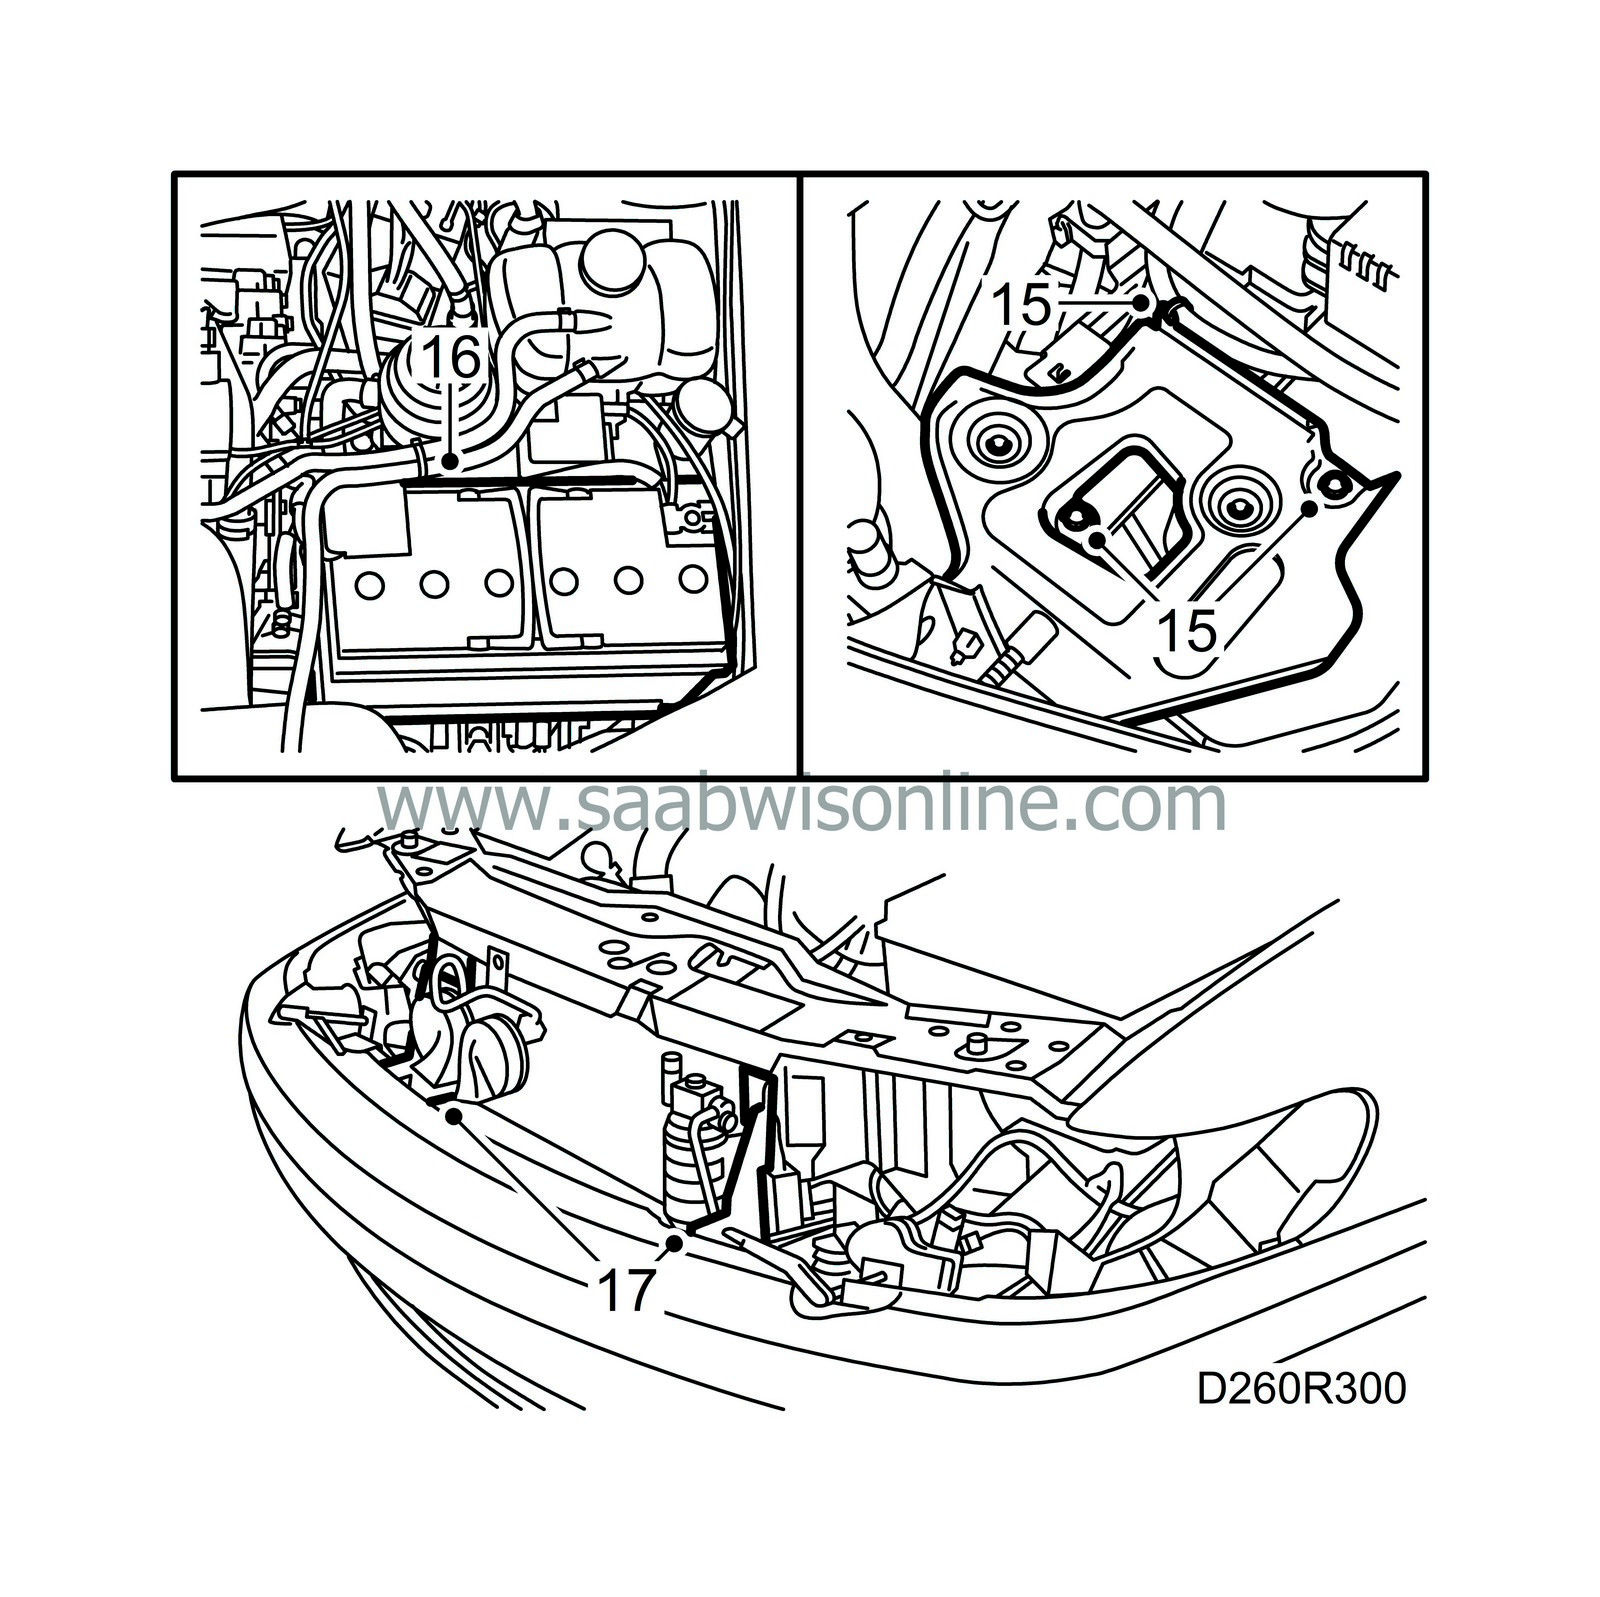
Fit the battery tray and attach the wiring.
|
|
16.
|
Refit and reconnect the battery. Connect the venting hose.
|
|
17.
|
Fit the air shields by the condenser.
|
|
18.
|
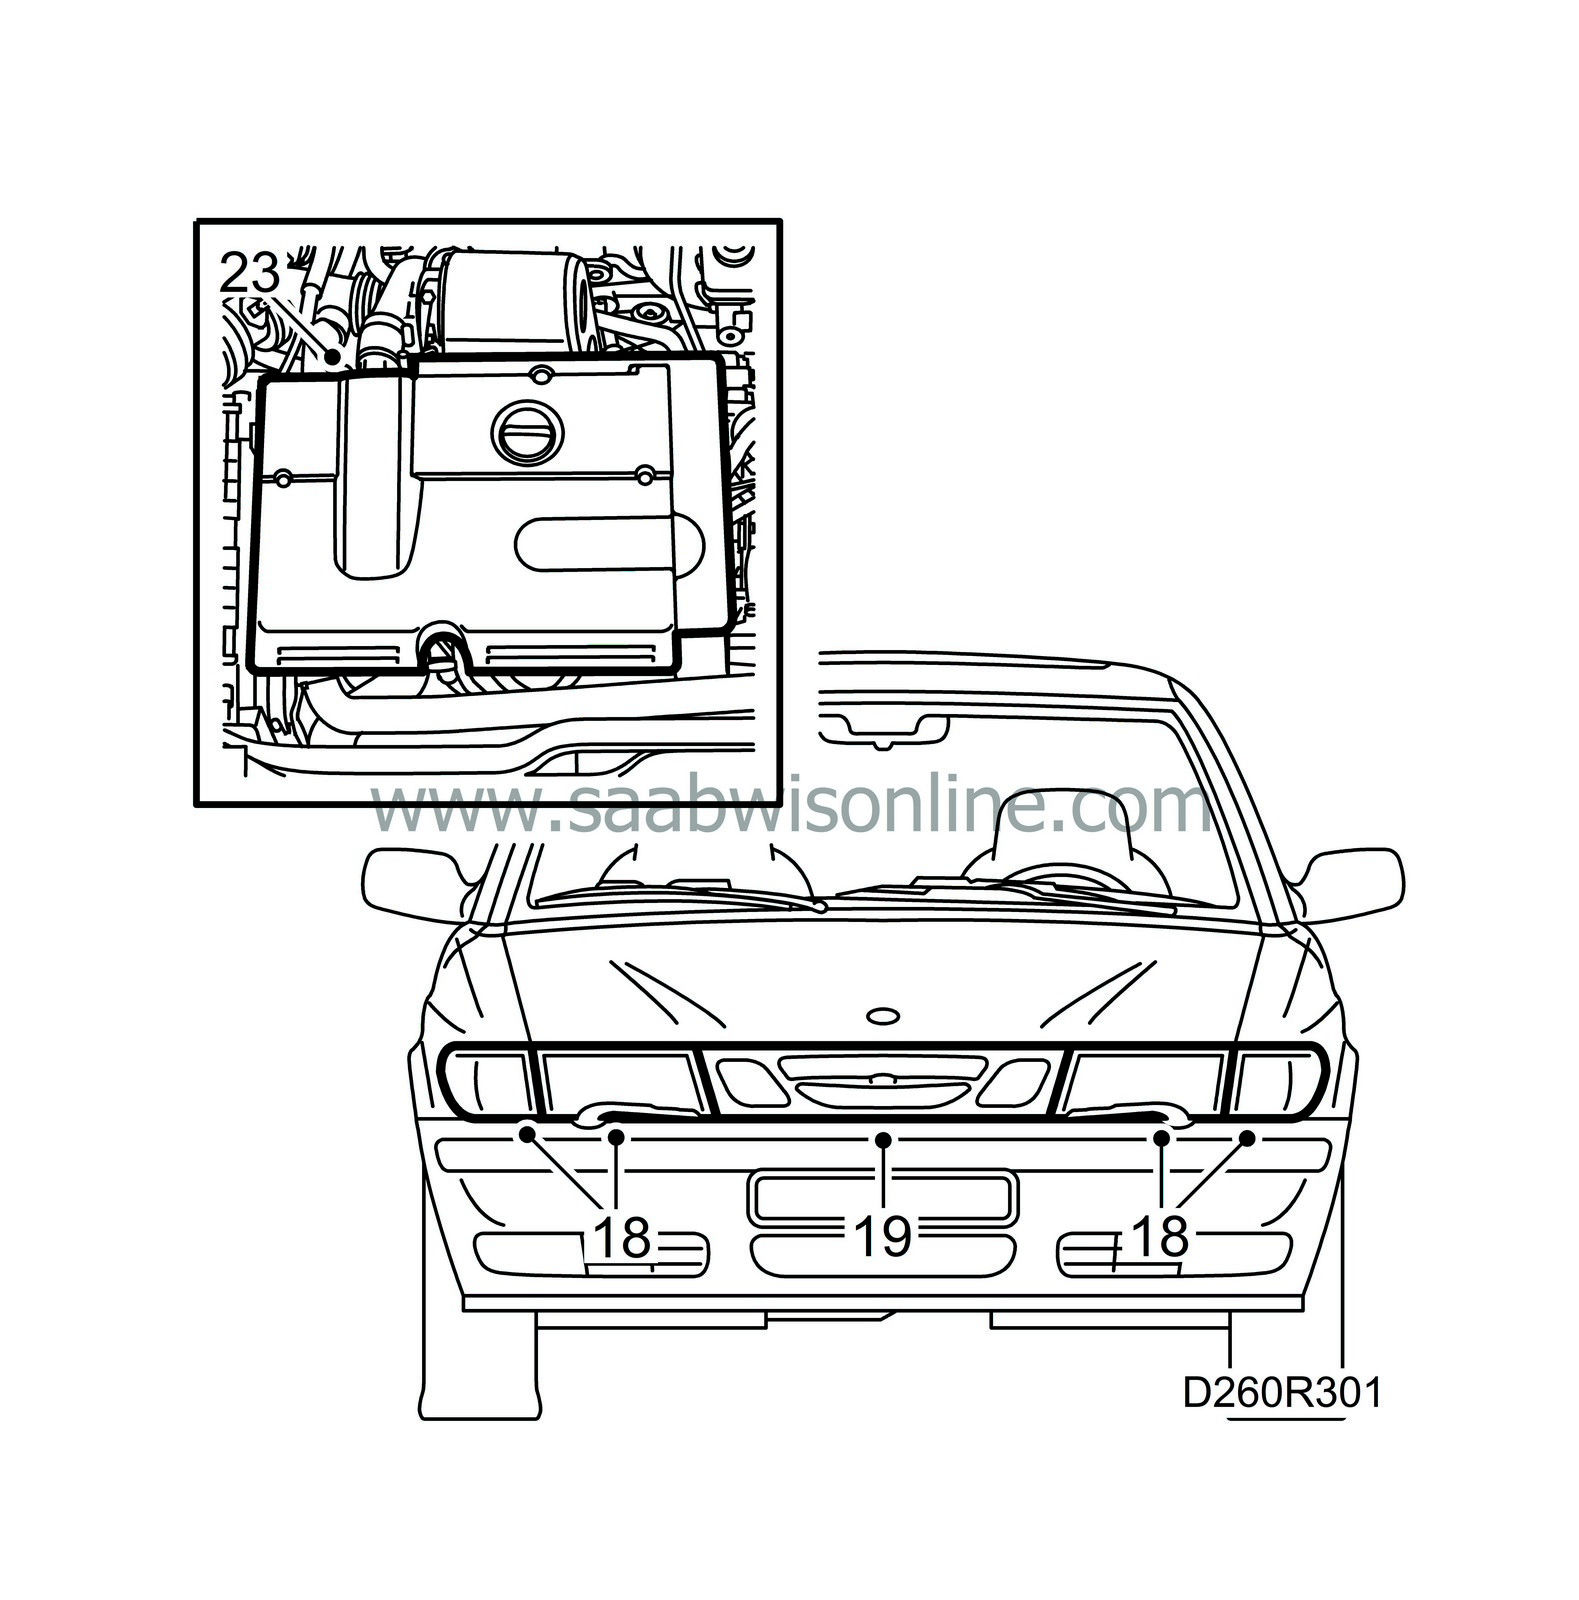
Fit the headlamps and the light clusters.
|
|
19.
|
Refit the grille.
|
|
20.
|
Adjust the clock in the car and press 5 times on the remote control lock/unlock button.
|
|
21.
|
Fill with coolant, check the integrity of the system and bleed it as follows:
Connect exhaust hoses to both the engine exhaust system and the auxiliary heater exhaust system and start the engine.
Start the parking heater with the diagnostic tool (Body, SID, Activate, Heater). The parking heater stops when the engine temperature has reached 80°C or on exiting the parking heater menu.
Check that there is a continuous flow of coolant in the hose from the thermostat housing to the expansion tank. Rev the engine briefly to ensure circulation of the liquid.
Run the engine until the thermostat has opened.
|
|
22.
|
Shut off the engine and top up the cooling system if needed.
|
|
23.
|
Fit the engine cover.
|


