Injectors, VIN 12020001-
| Injectors, VIN 12020001- |
| To remove |
|
|||||||
| • |
Make provision for good ventilation! If approved ventilation for extracting fuel fumes is available then it must be used.
|
|
| • |
Use protective gloves! Prolonged contact with fuel may irritate the skin.
|
|
| • |
Keep a class BE fire extinguisher close at hand! Watch out for sparks, e.g. in connection with breaking electric circuits, short-circuits, etc.
|
|
| • |
Smoking is absolutely forbidden.
|
|
| 1. |
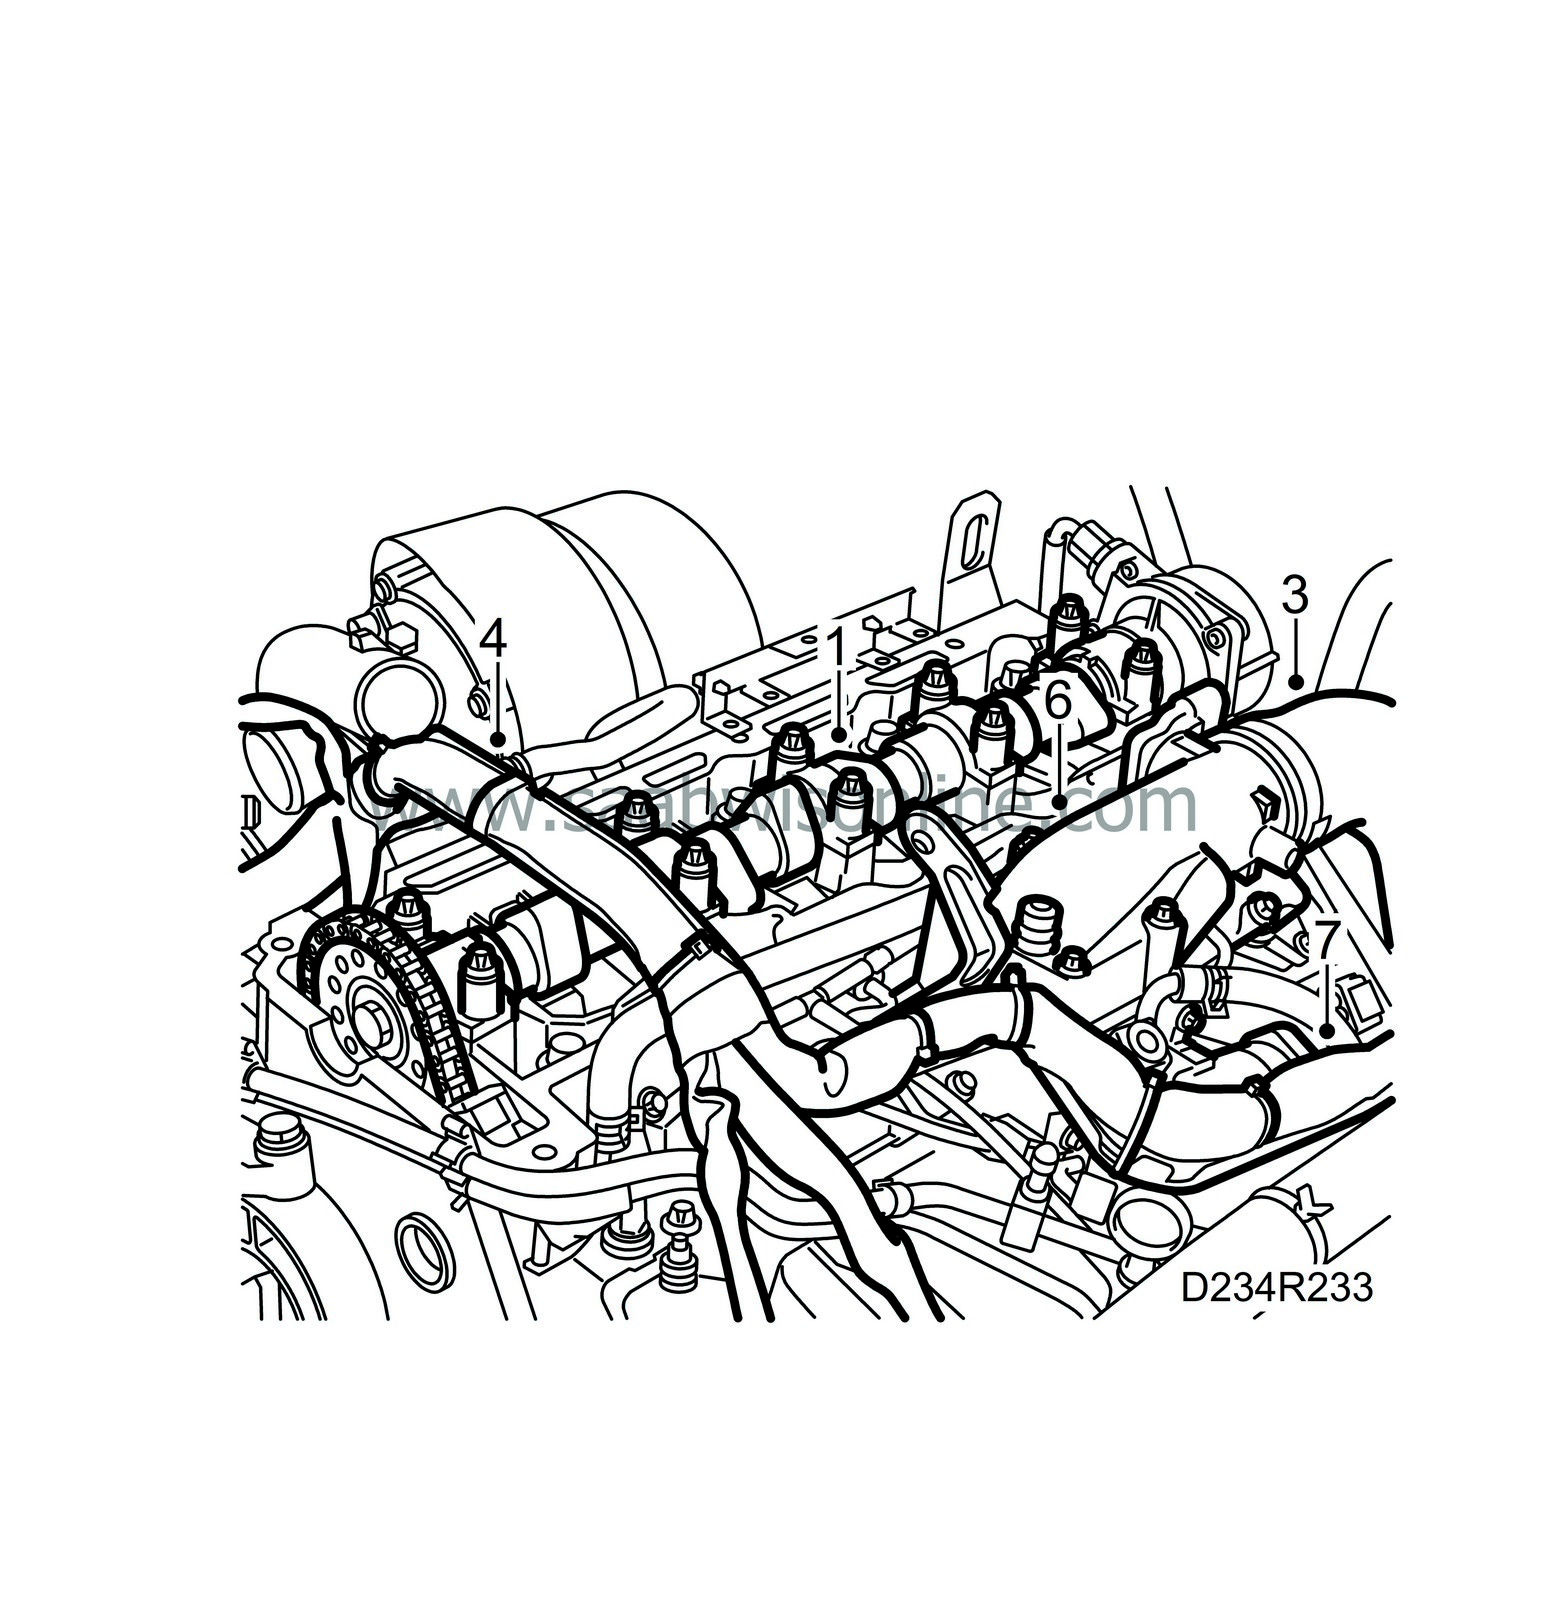
Remove the
Camshaft
.
|
|
| 2. |
Suck up the oil on top of the cylinder head.
|
|
| 3. |
Detach the air hose from the throttle body. Bend it to one side and plug it.
|
|
| 4. |
Bend aside the wiring harness duct.
|
|
| 5. |
Unplug the EGR valve.
|
|
| 6. |
Remove the throttle body.
|
|
| 7. |
Remove the bolts securing the EGR valve and move the valve to one side.
|
|
| 8. |
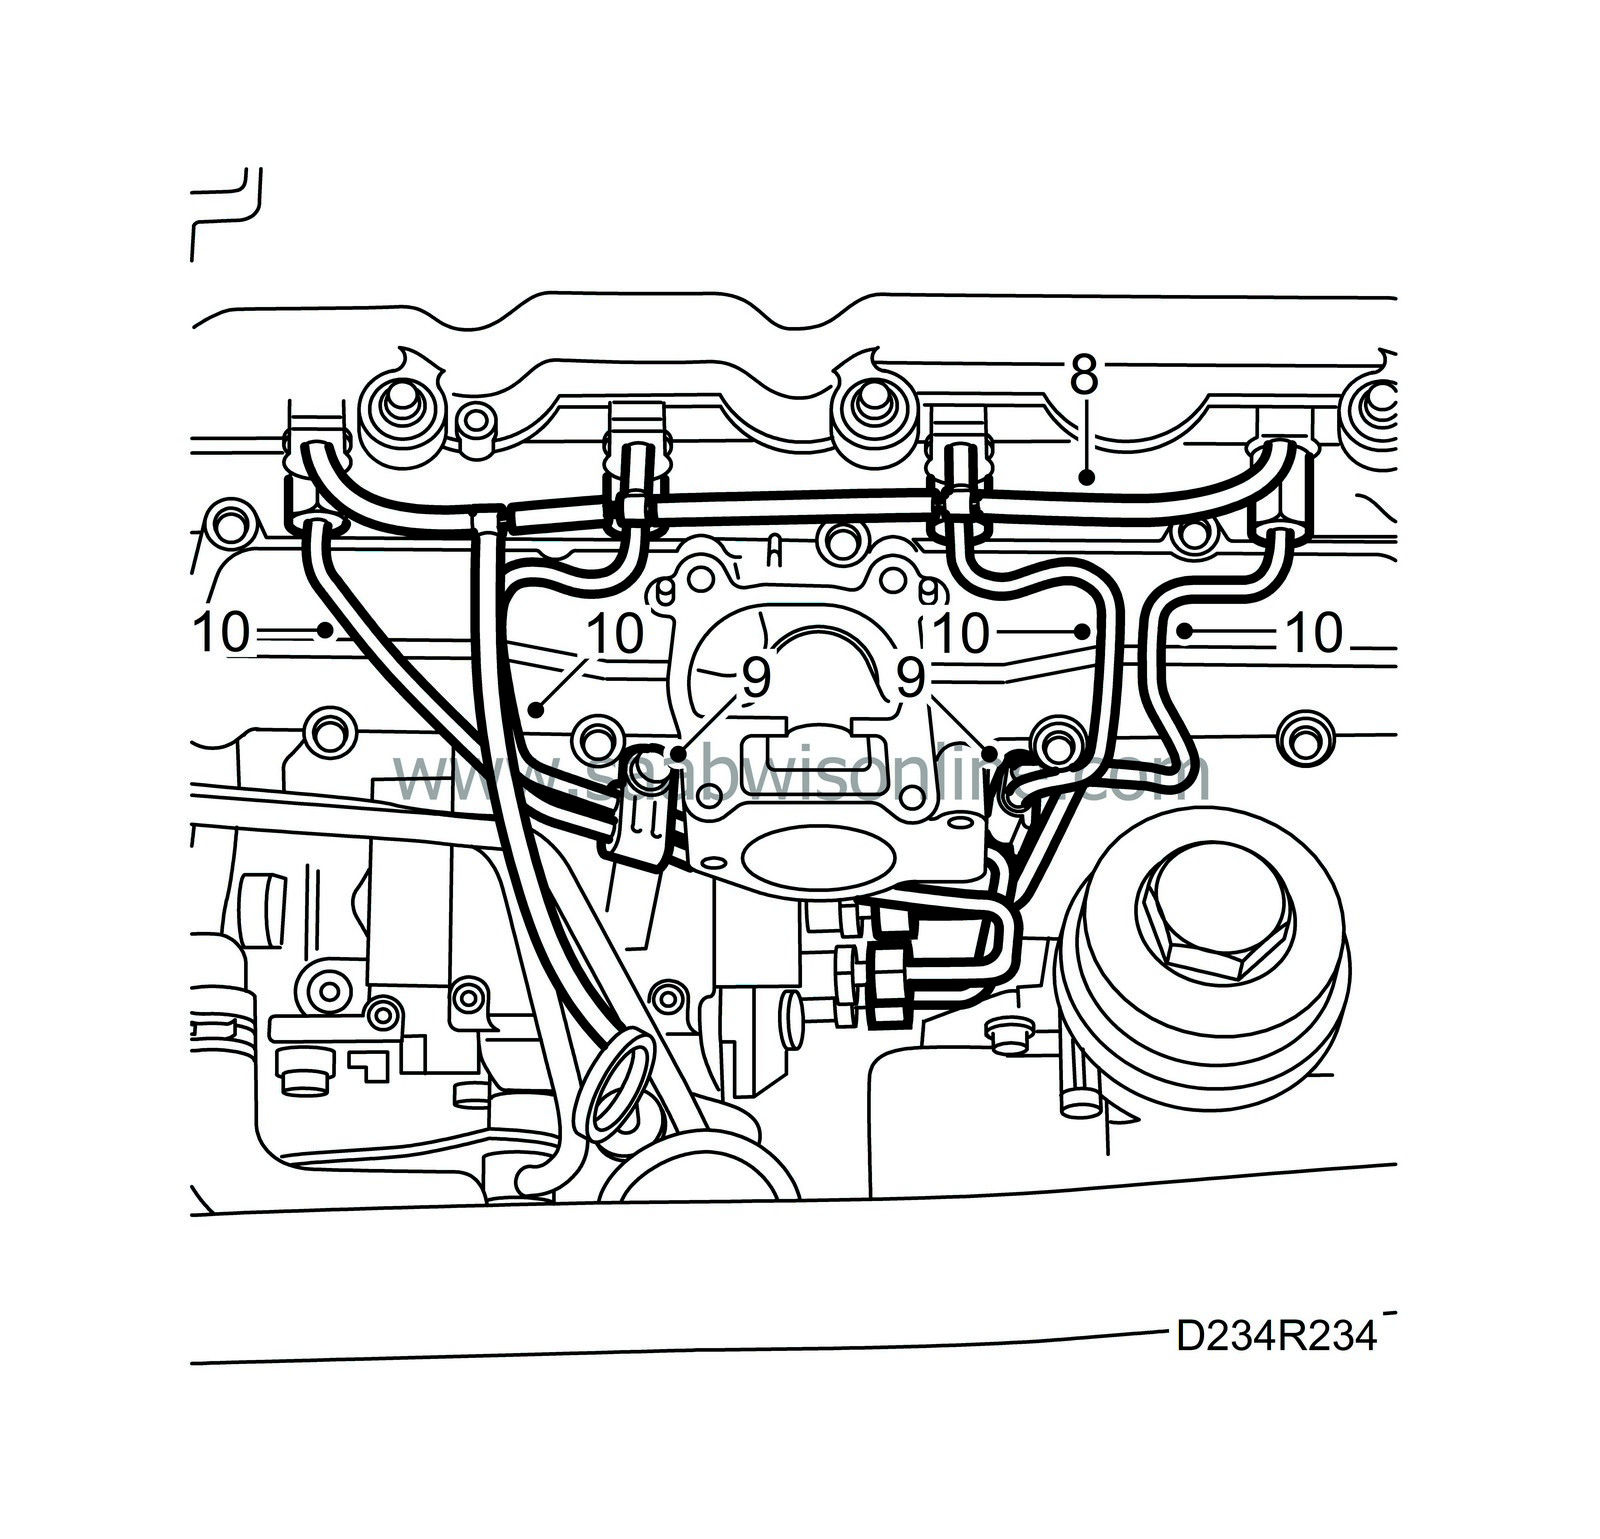
Remove the fuel return hoses.
|
|
| 9. |
Note the position of the fuel rails and their clips and mark them.
|
|
| 10. |
Remove the fuel rails (remove the clips if necessary).
|
|
| 11. |
Remove the upper part of the intake manifold and seal the passageways.

|
|
| 12. |
Remove the retaining screws for the fuel bridges, lift the fuel bridges and pull them out of the cylinder head.
|
|
| 13. |
Remove the seals on the injector connections in the cylinder head.
|
|
| 14. |
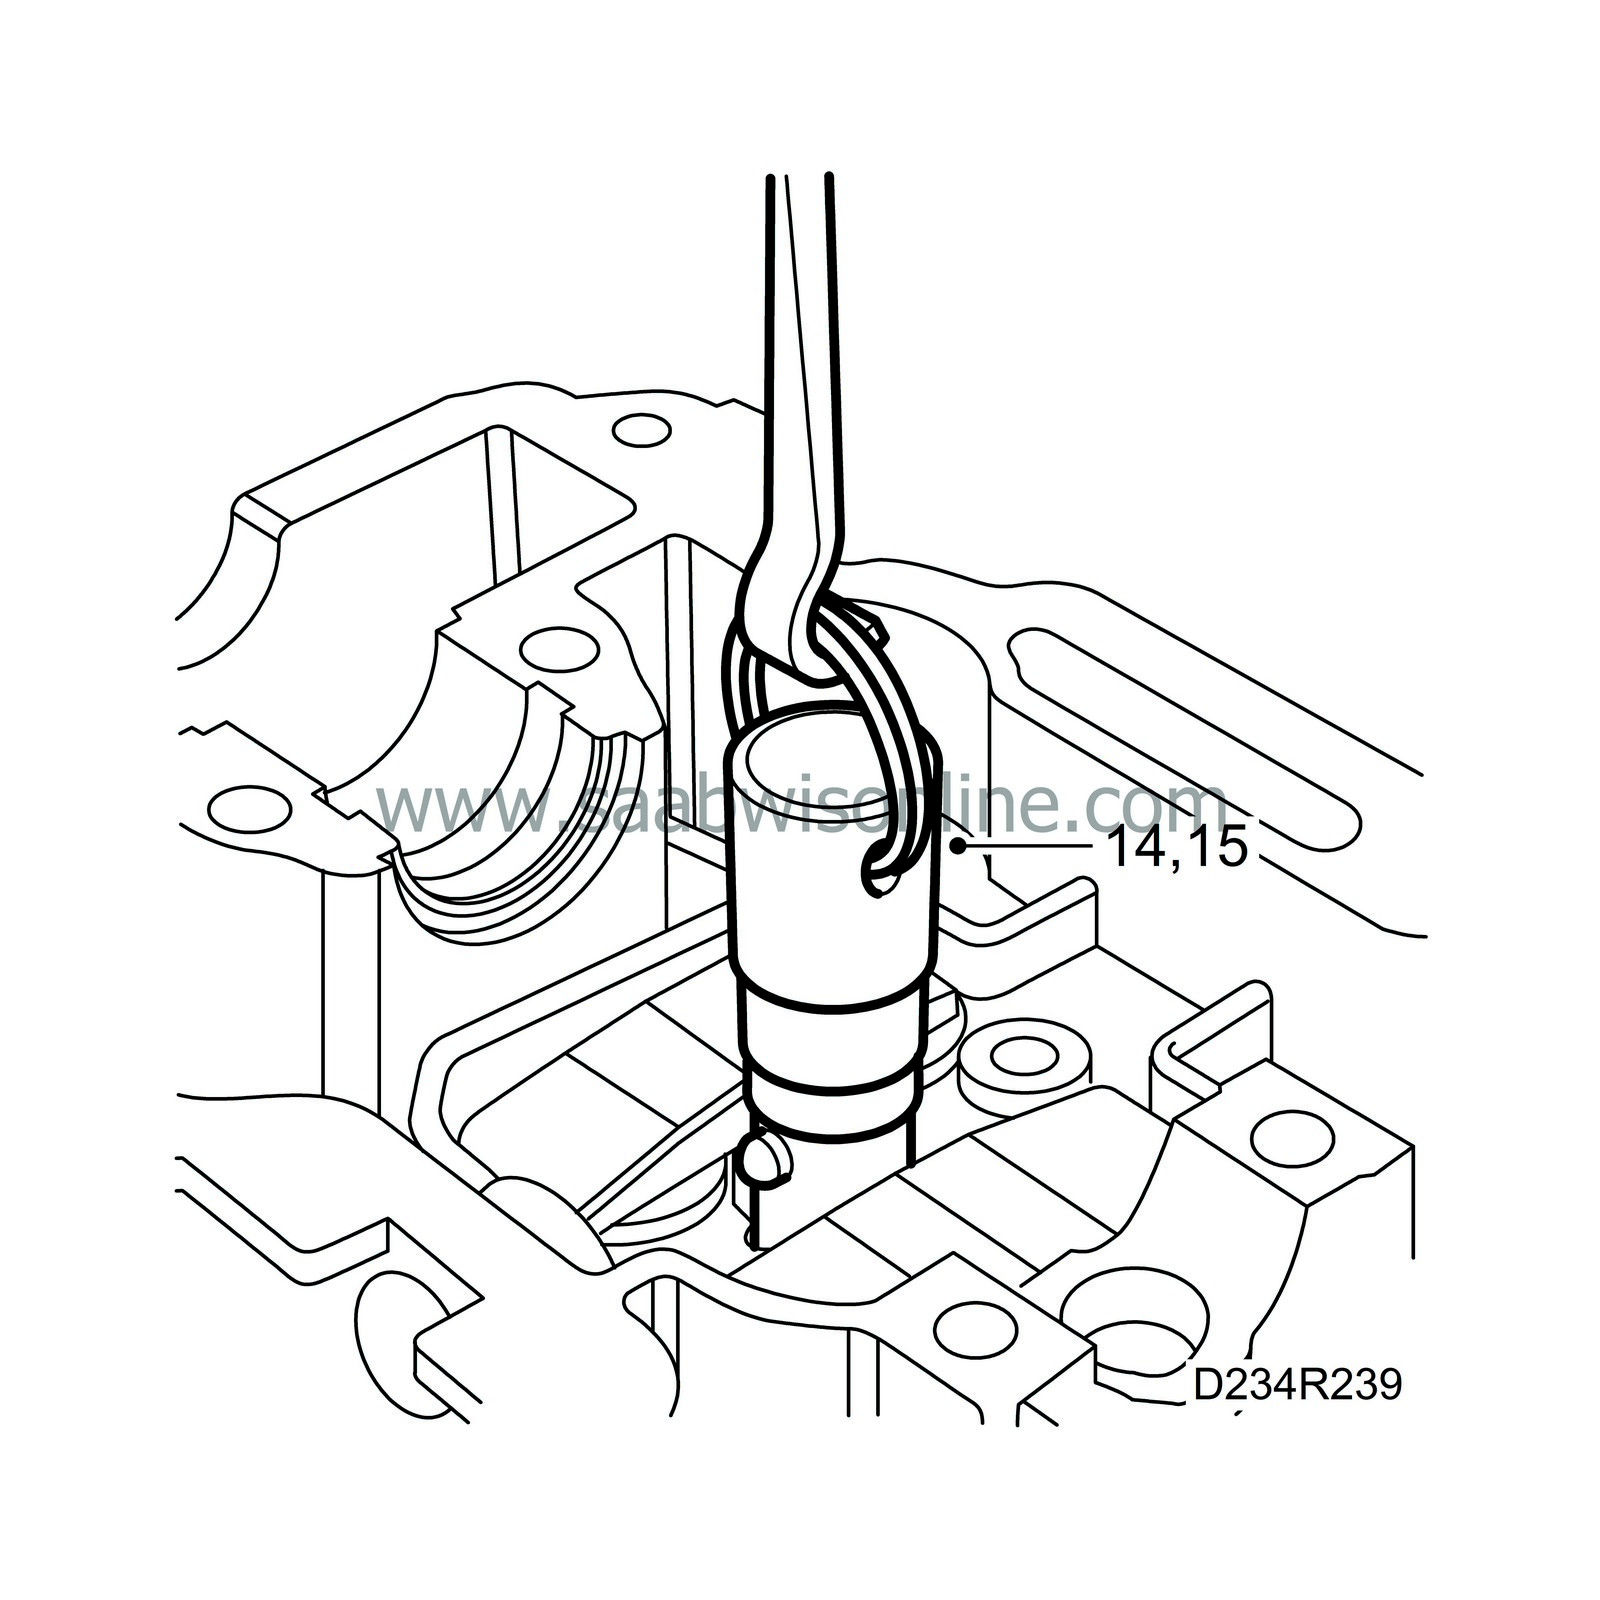
Screw
Removal tool, injectors
83 95 378 to the injectors, fit
Puller
87 91 360 to the adapter and pull out the injectors.
|
|
| 15. |
Remove the seals from the fuel injectors.
|
|
| To fit |
| 1. |
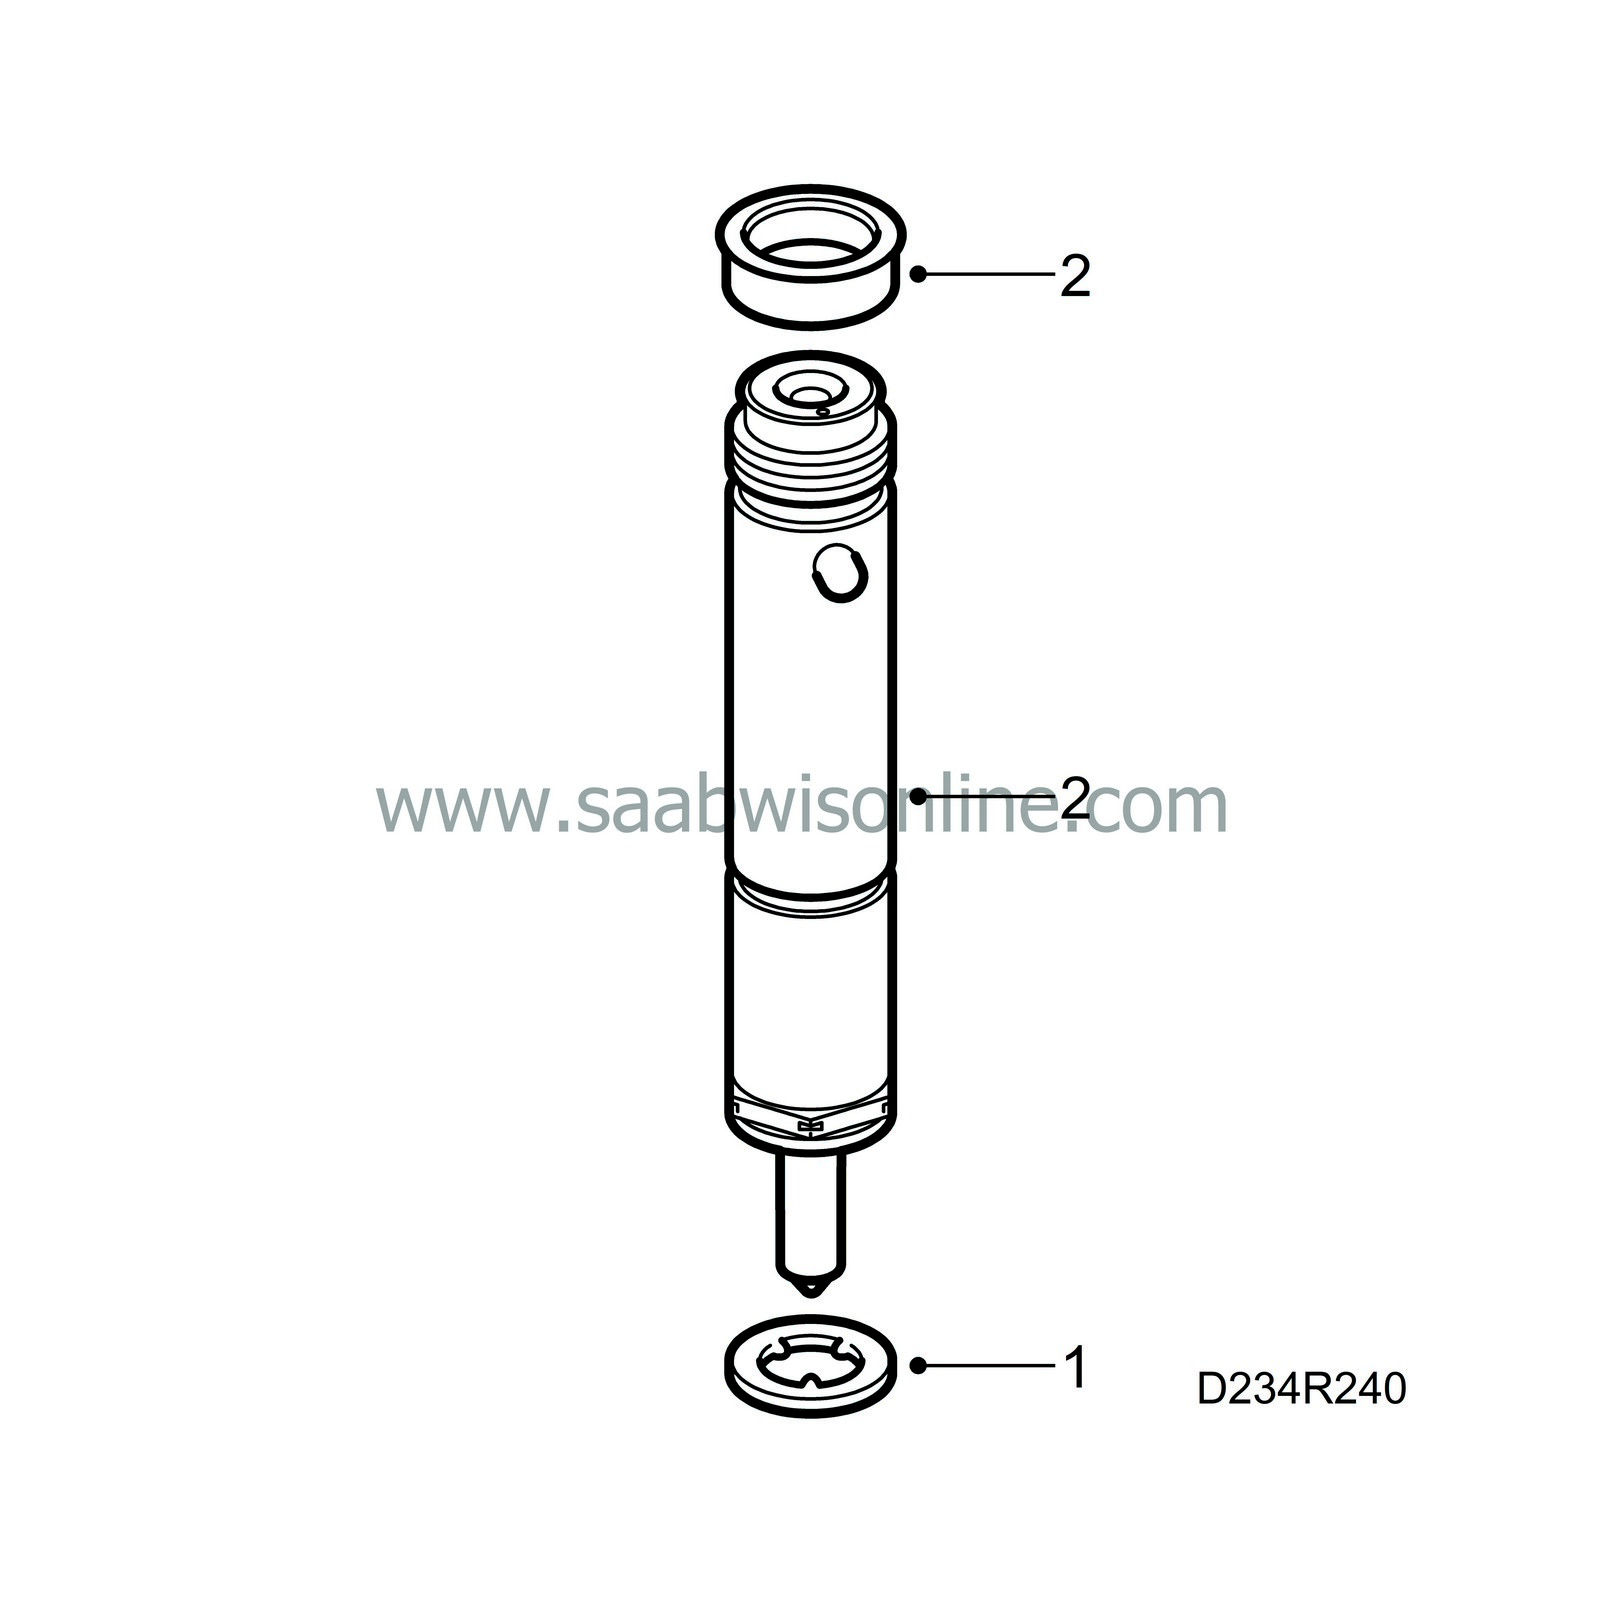
Fit new seals onto the fuel injectors and fit the injectors.
|
|
| 2. |
Fit new seals on the injector connections in the cylinder head. Remove any old sealing compound remains.
|
|
| 3. |
Blow the holes for the fuel bridge retaining bolts clean.
|
|
| 4. |
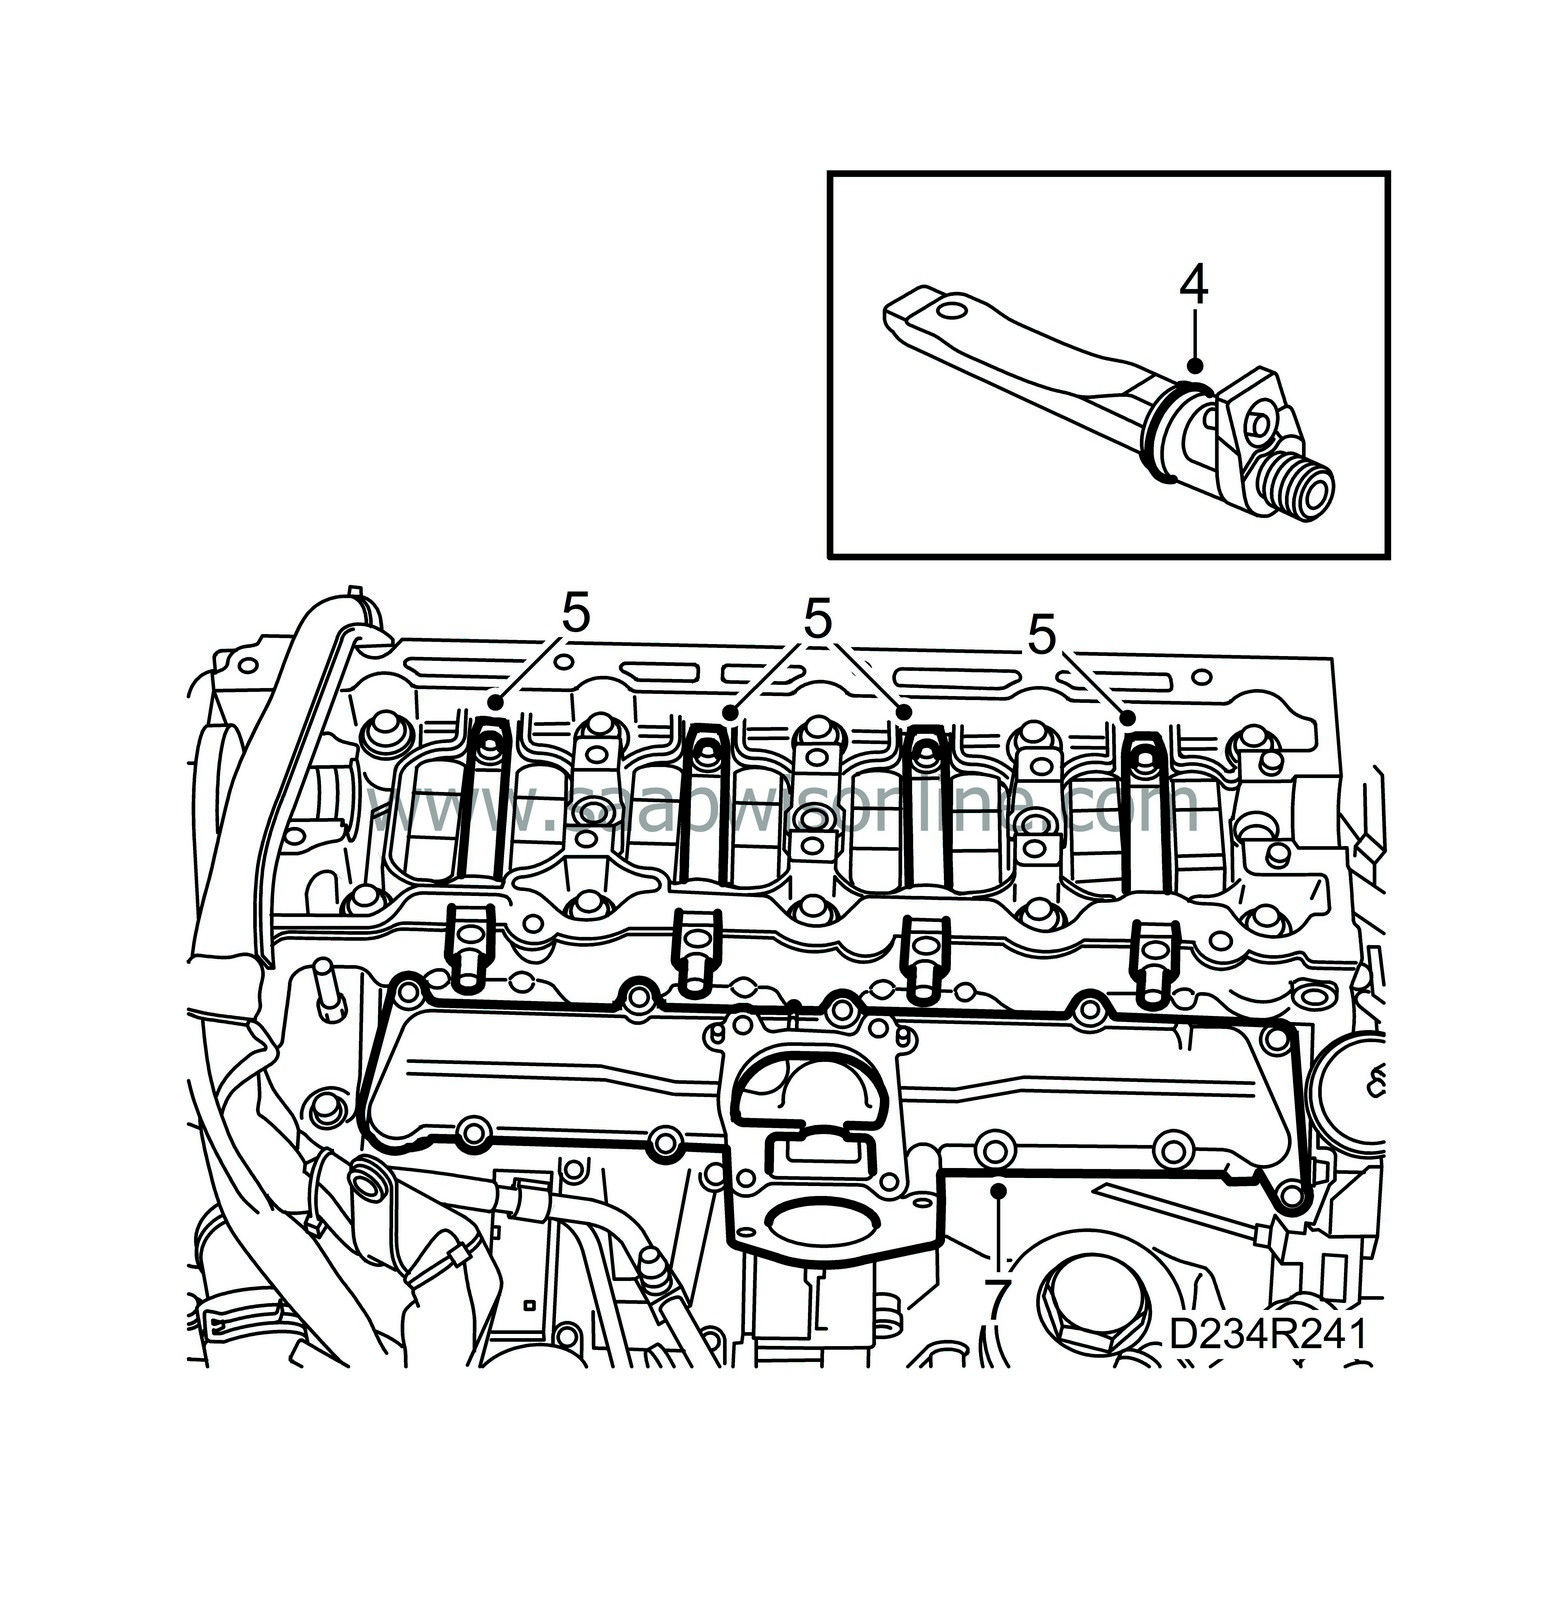
Fit new O-rings on the fuel bridges, lubricate the O-rings with acid-free petroleum jelly and slide the fuel bridges into the cylinder head.
|
|
| 5. |
Tighten the fuel bridge bolts.
Tightening torque 5 Nm + 360° (4 lbf ft + 360°) |
|
| 6. |
Clean the sealing surfaces.
|
|
| 7. |
Fit a new gasket to the lower part of the intake manifold and fit the upper part.
Tightening torque 10 Nm (7 lbf ft). |
|
| 8. |
Check the fuel rail connecting cones and replace them if necessary.
|
|
| 9. |
Connect the fuel rails with clips in their original positions.
Tightening torque 25 Nm (19 lbf ft) 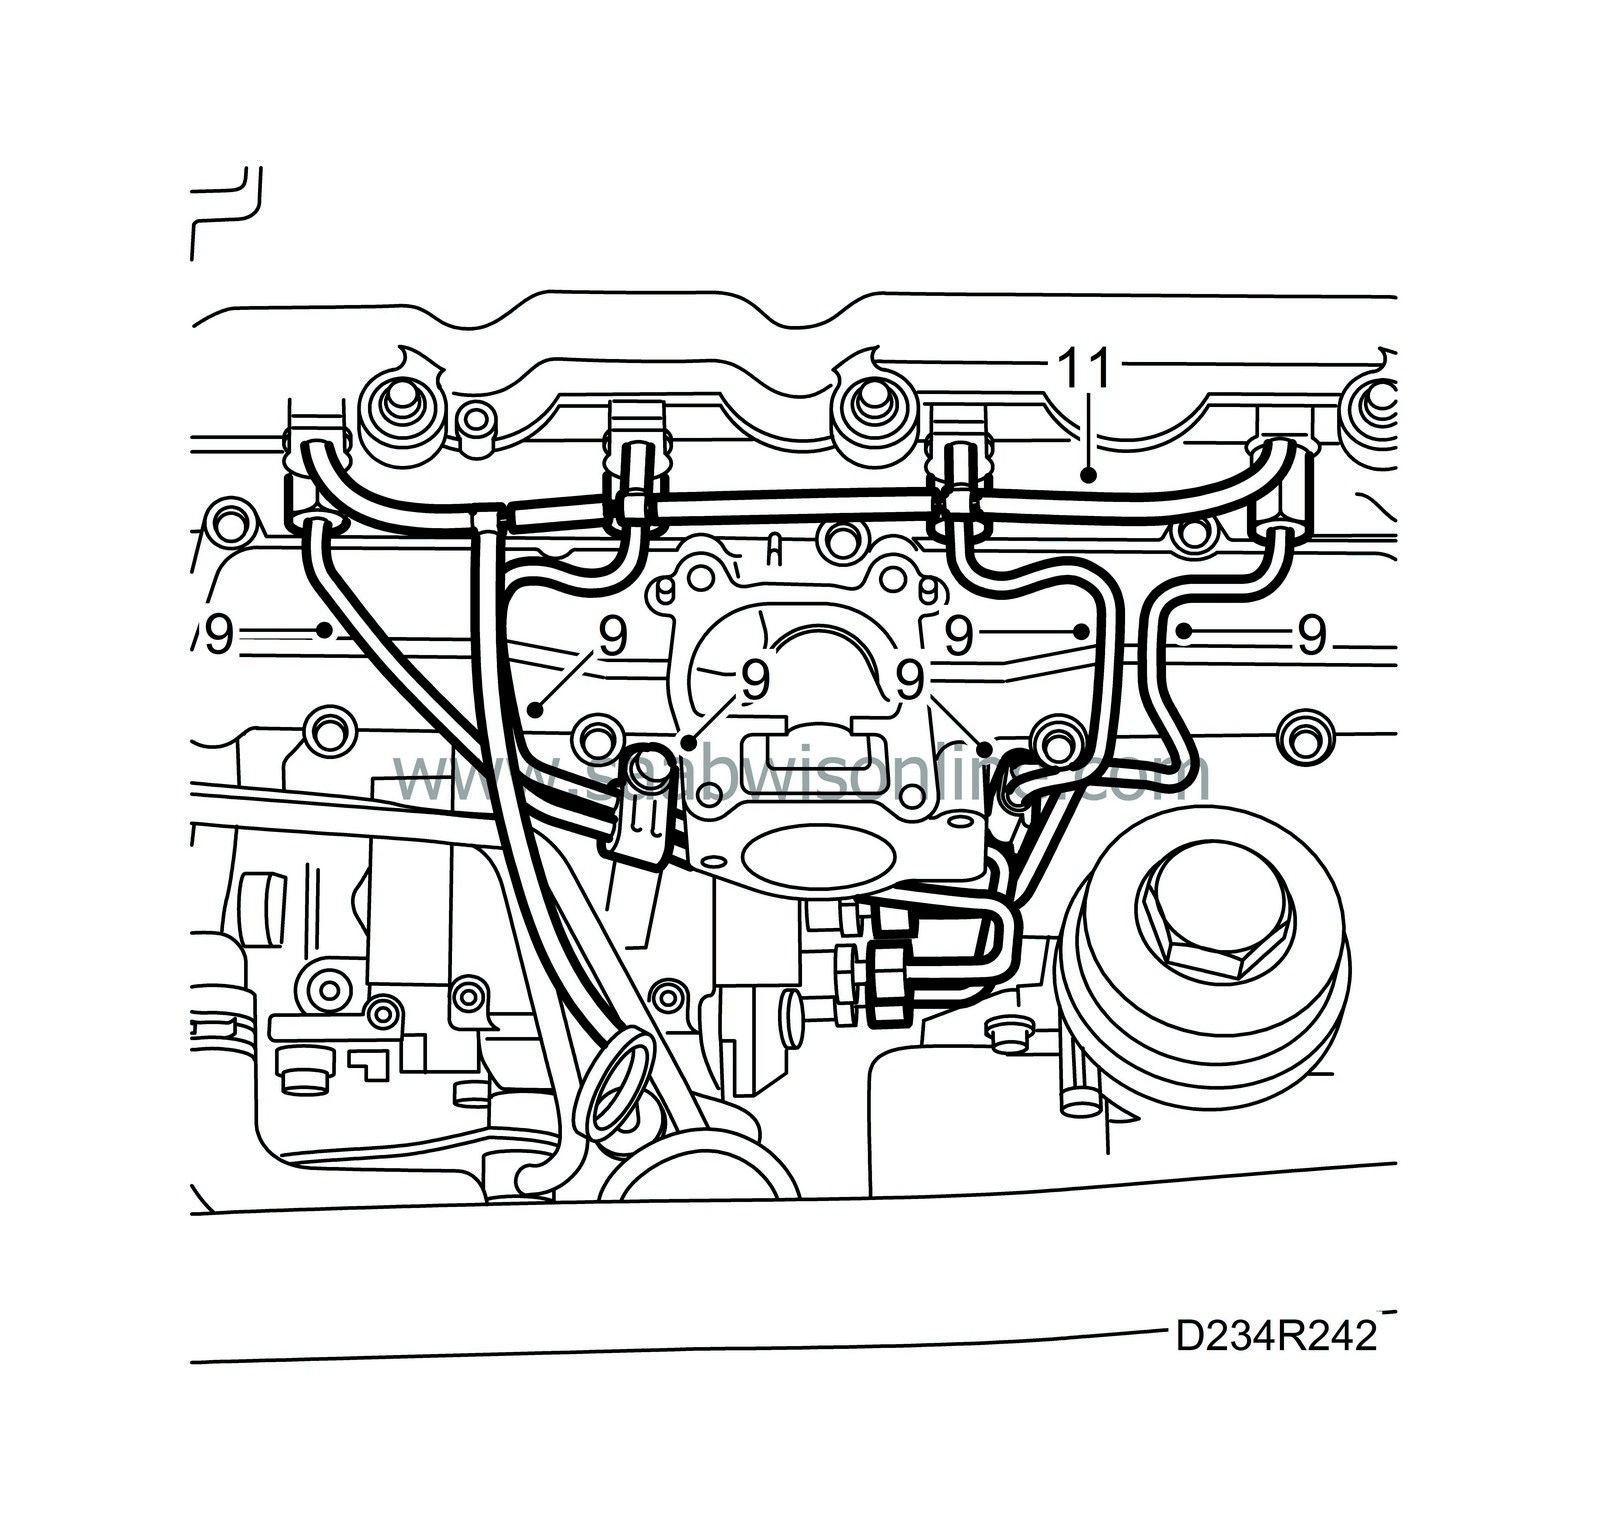
|
|
| 10. |
Check the condition of the fuel return hoses and joints and replace as necessary.
|
|
| 11. |
Connect the fuel return hoses to the fuel bridges. Detach the fuel return hose from the fuel pump and connect the hose to
30 14 883 Pressure/vacuum pump
. Create a vacuum of 750 mbar and wait 1 minute. Check that the pointer on the tool has not moved.
If there is found to be a leak, the fuel bridges must be examined individually. Connect the pressure/vacuum pump to the return fuel connection (not to the return hose) on each fuel bridge. If the fuel bridges are OK, check the return fuel hoses with T-pieces. The hoses should be pliable and exhibit no cracks or other damage. If there are signs of leakage, change all fuel return hoses with T-pieces. If there is leakage in the fuel bridge, remove it, change the seal and refit the bridge. Check for leakage once again. 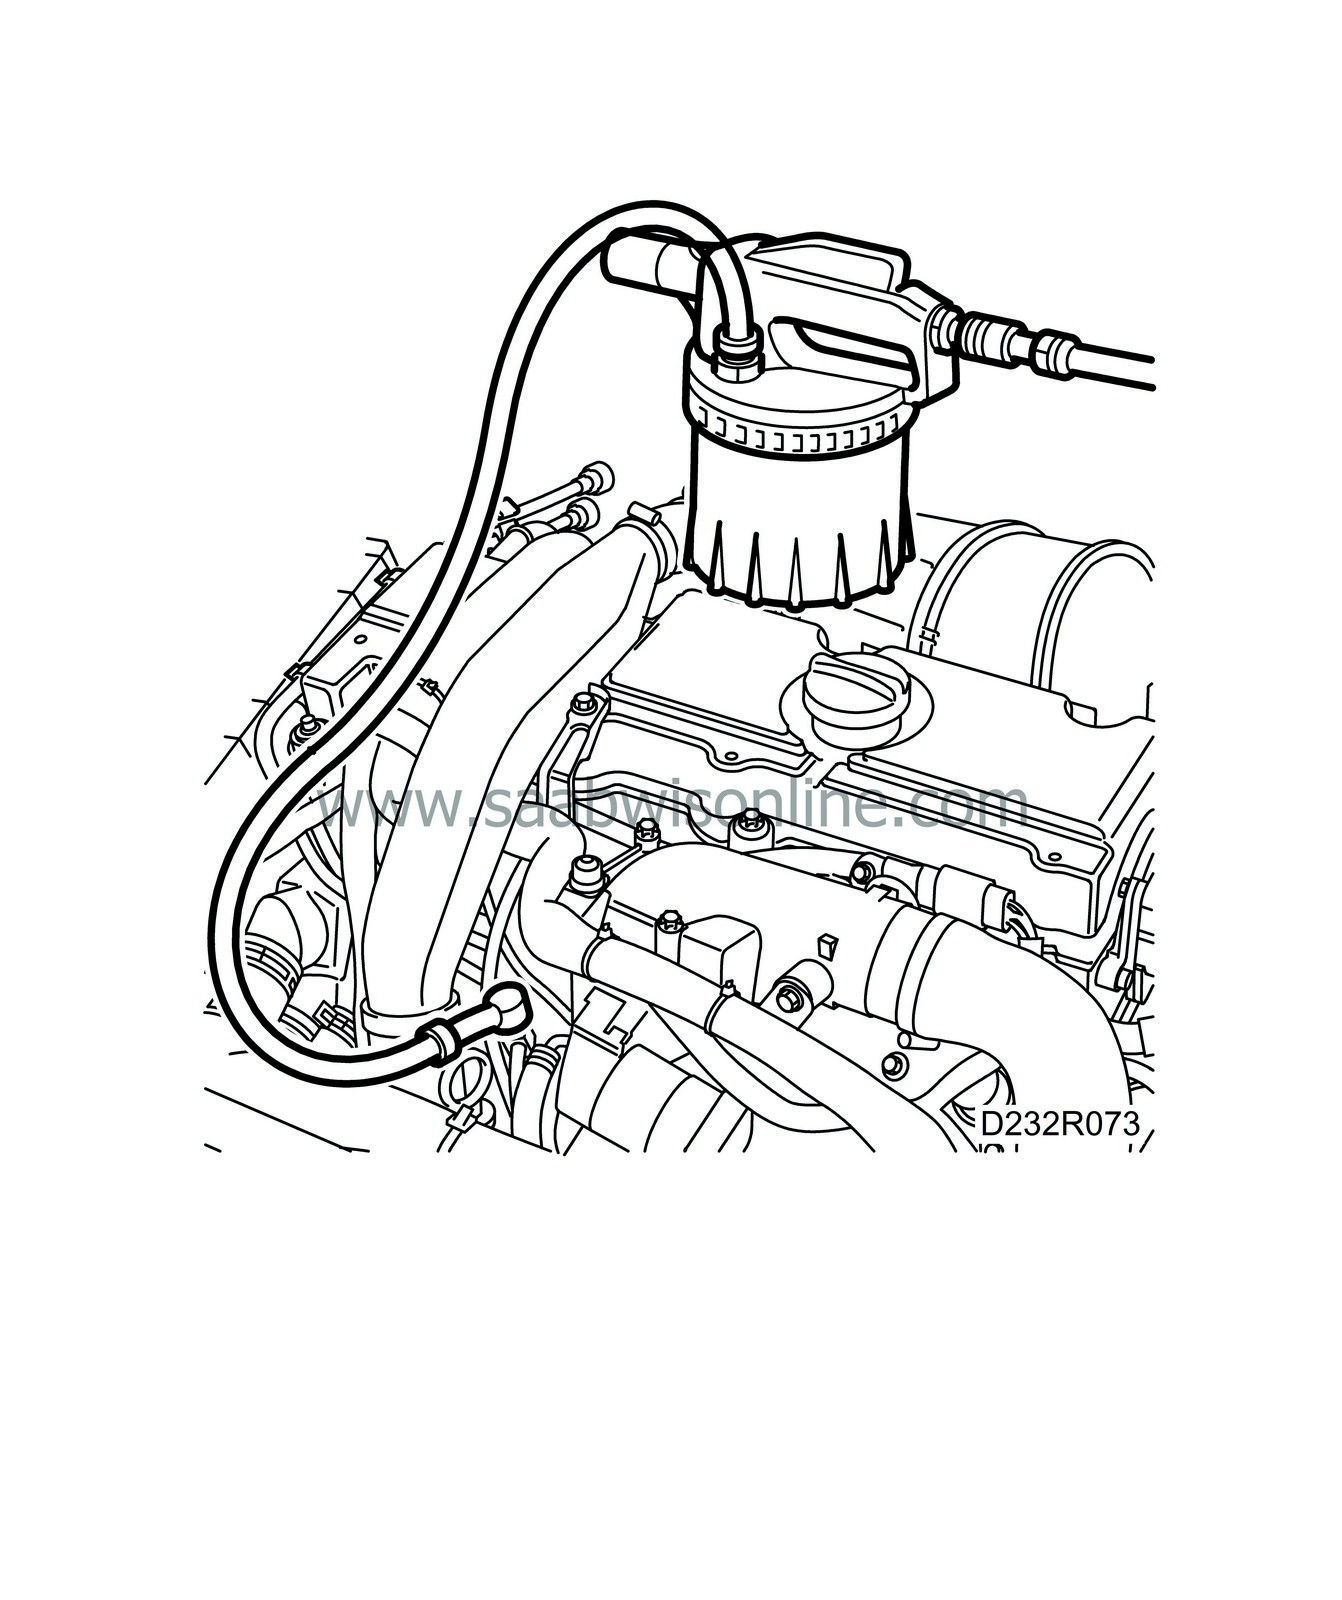
|
|
| 12. |
Fit the EGR valve and throttle body. Plug in the EGR valve.

|
|
| 13. |
Fit the wiring harness channel to the engine.
|
|
| 14. |
Secure the wiring harness as it was previously.
|
|
| 15. |
Refit the hose to the intake manifold.
|
|
| 16. |
Fit the camshaft, refer to
Camshaft
.
|
|

 Warning

