Wastegate valve, turbo pressure, ch no 12020000
| Wastegate valve, turbo pressure, ch no 12020000 |
|
|||||||
| 1. |
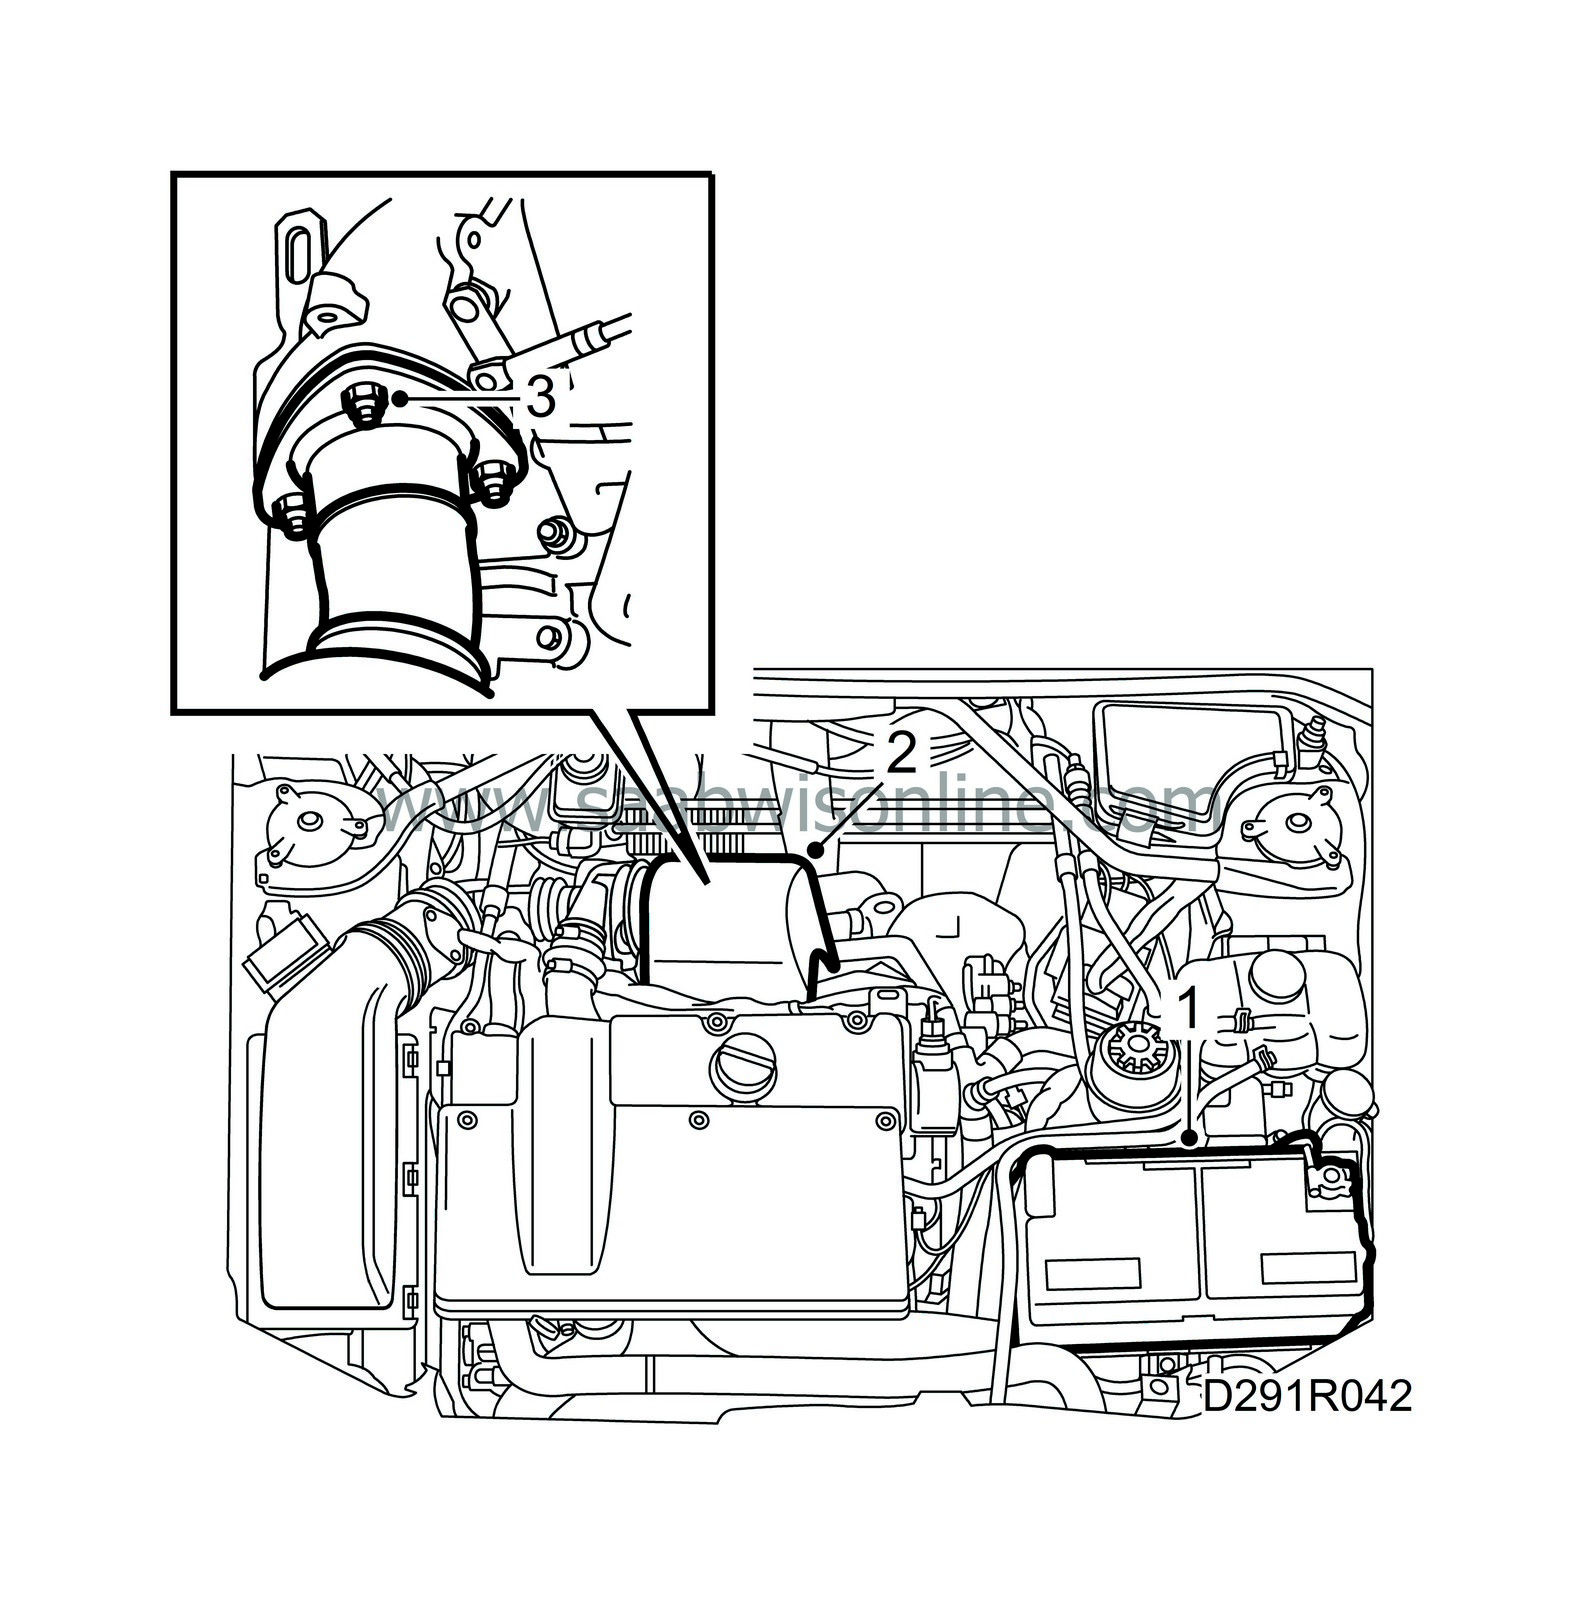
Lay out wing covers and remove the battery negative cable.
|
|
| 2. |
Remove the heat shields over the turbo charger.
|
|
| 3. |
Remove the middle, rear nut that secures the front exhaust pipe to the turbo charger.
|
|
| 4. |
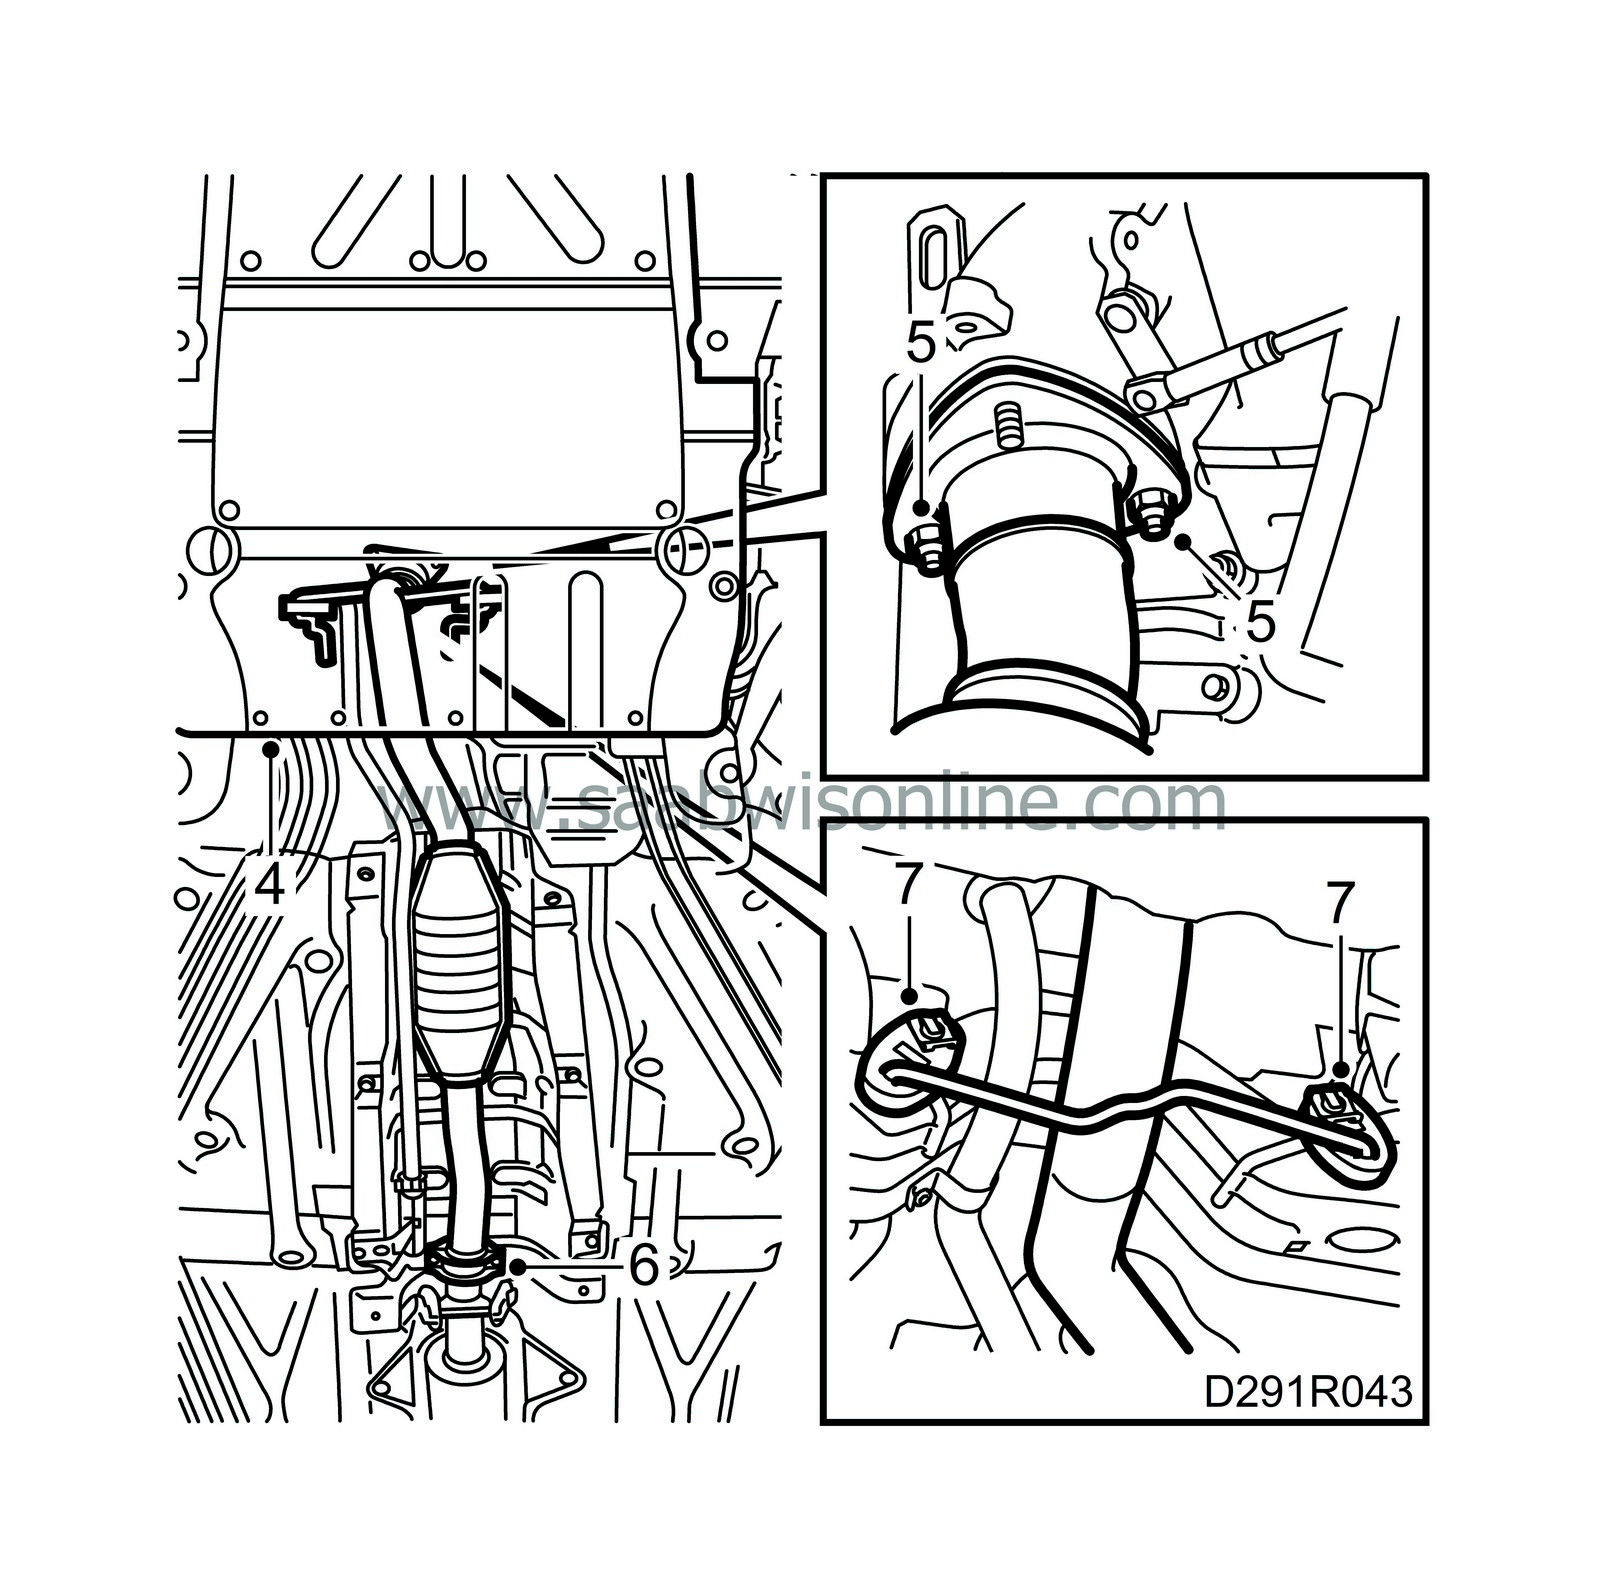
Raise the car and remove the bottom engine cover.
|
|
| 5. |
Remove the remaining nuts between the turbocharger and the front exhaust pipe.
|
|
| 6. |
Loosen the joint between the front exhaust pipe and the middle pipe.
|
|
| 7. |
Remove the front rubber mountings and lower the exhaust pipe.
|
||||||||||
| 8. |
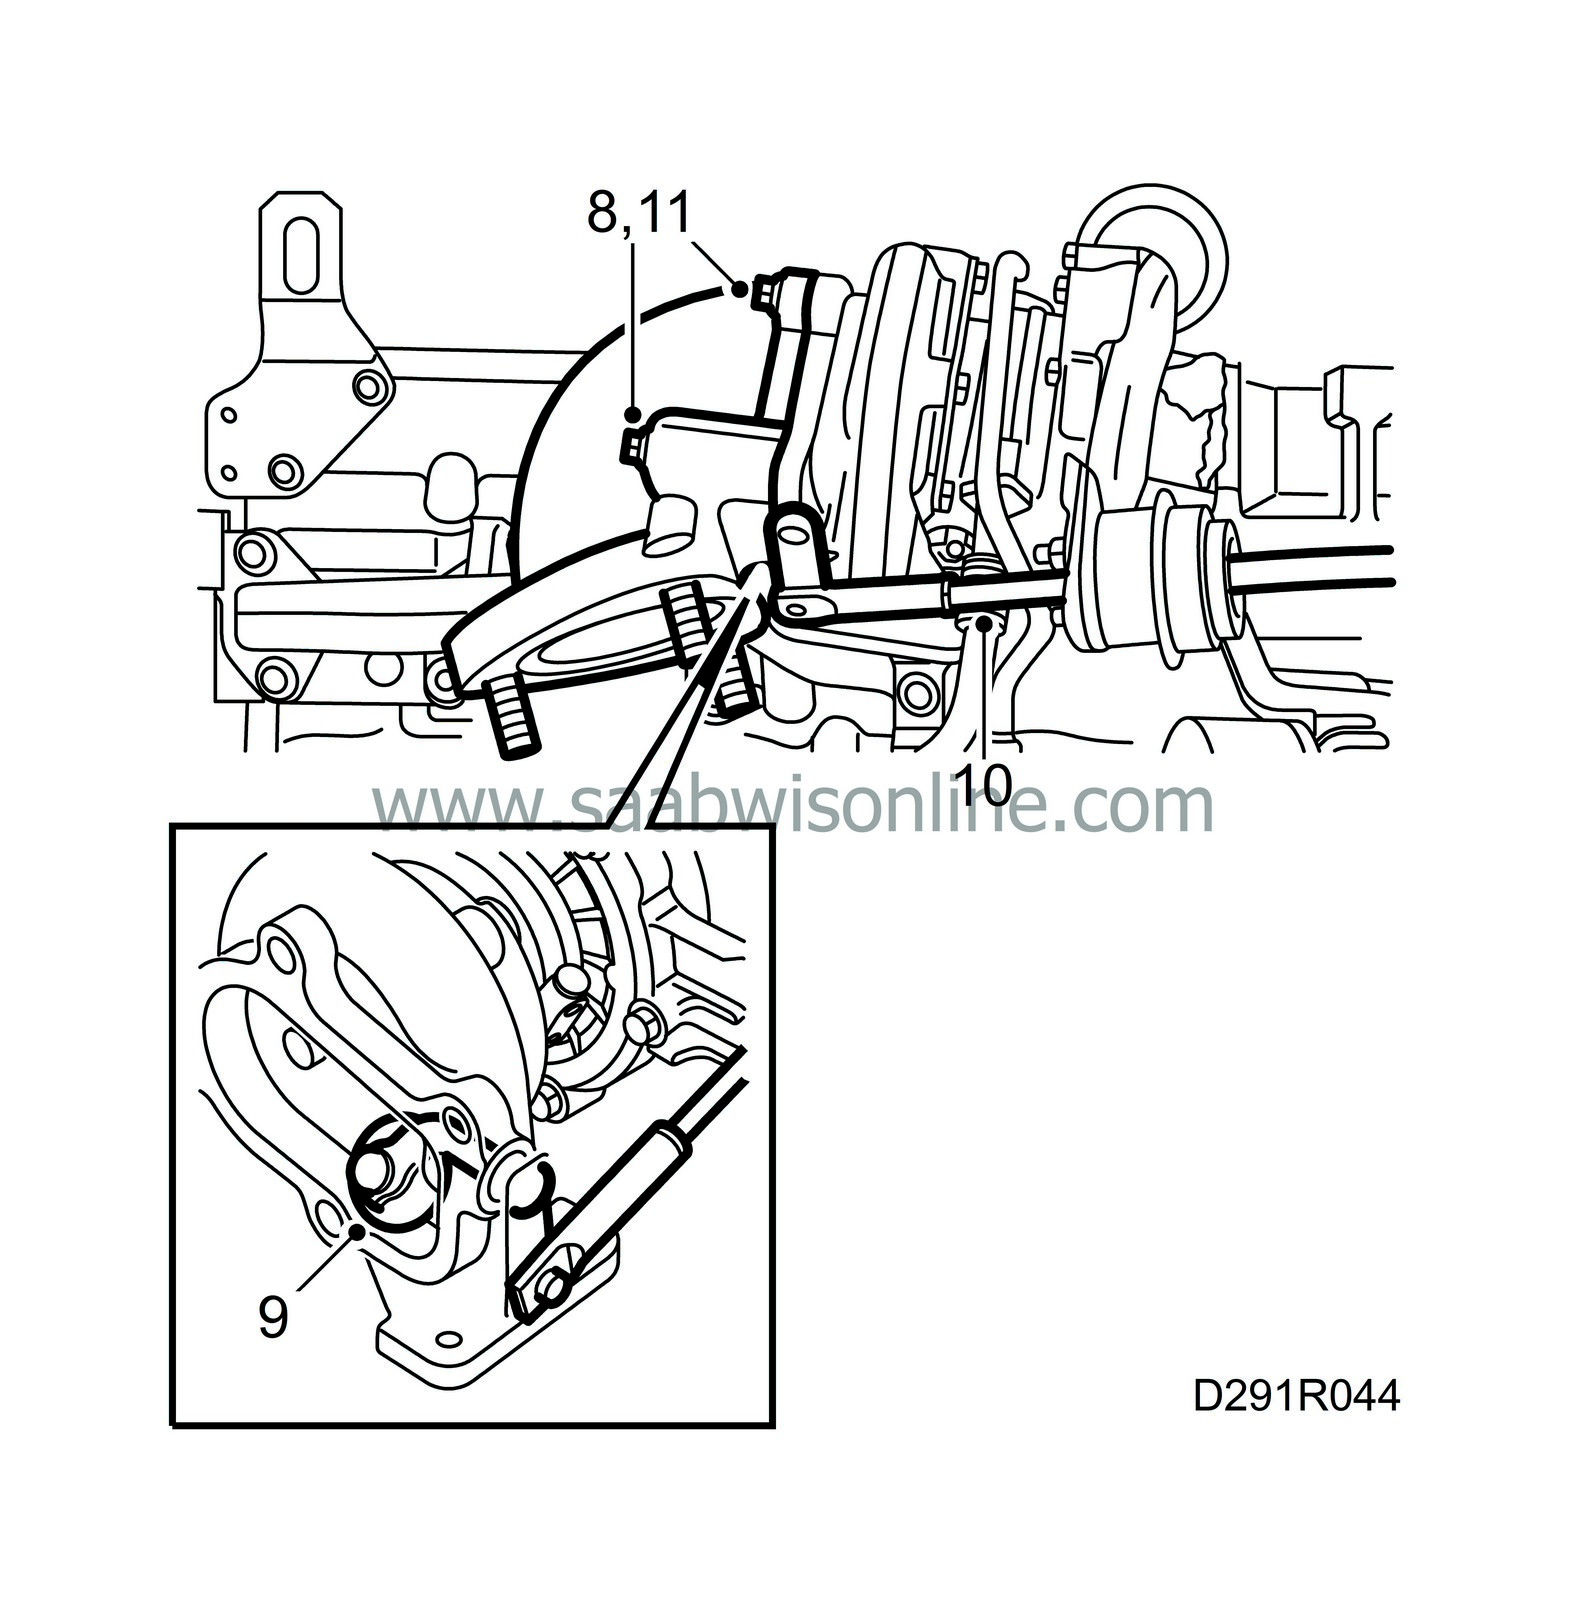
Lower the car and remove the exhaust pipe section from the turbocharger.
|
|
| 9. |
Check visually that the flap valve position against the turbine housing.
|
|
| 10. |
Check that the arm moves easily.
Replace the defective turbocharger. |
|
| 11. |
Clean the sealing surfaces, apply Molycote 1000 on the turbocharger studs and fit the exhaust pipe section to the turbocharger.
Tightening torque 30 Nm (22 lbf ft). |
|
| 12. |
Apply Molycote 1000 on turbocharger studs and raise the car.
|
|
| 13. |
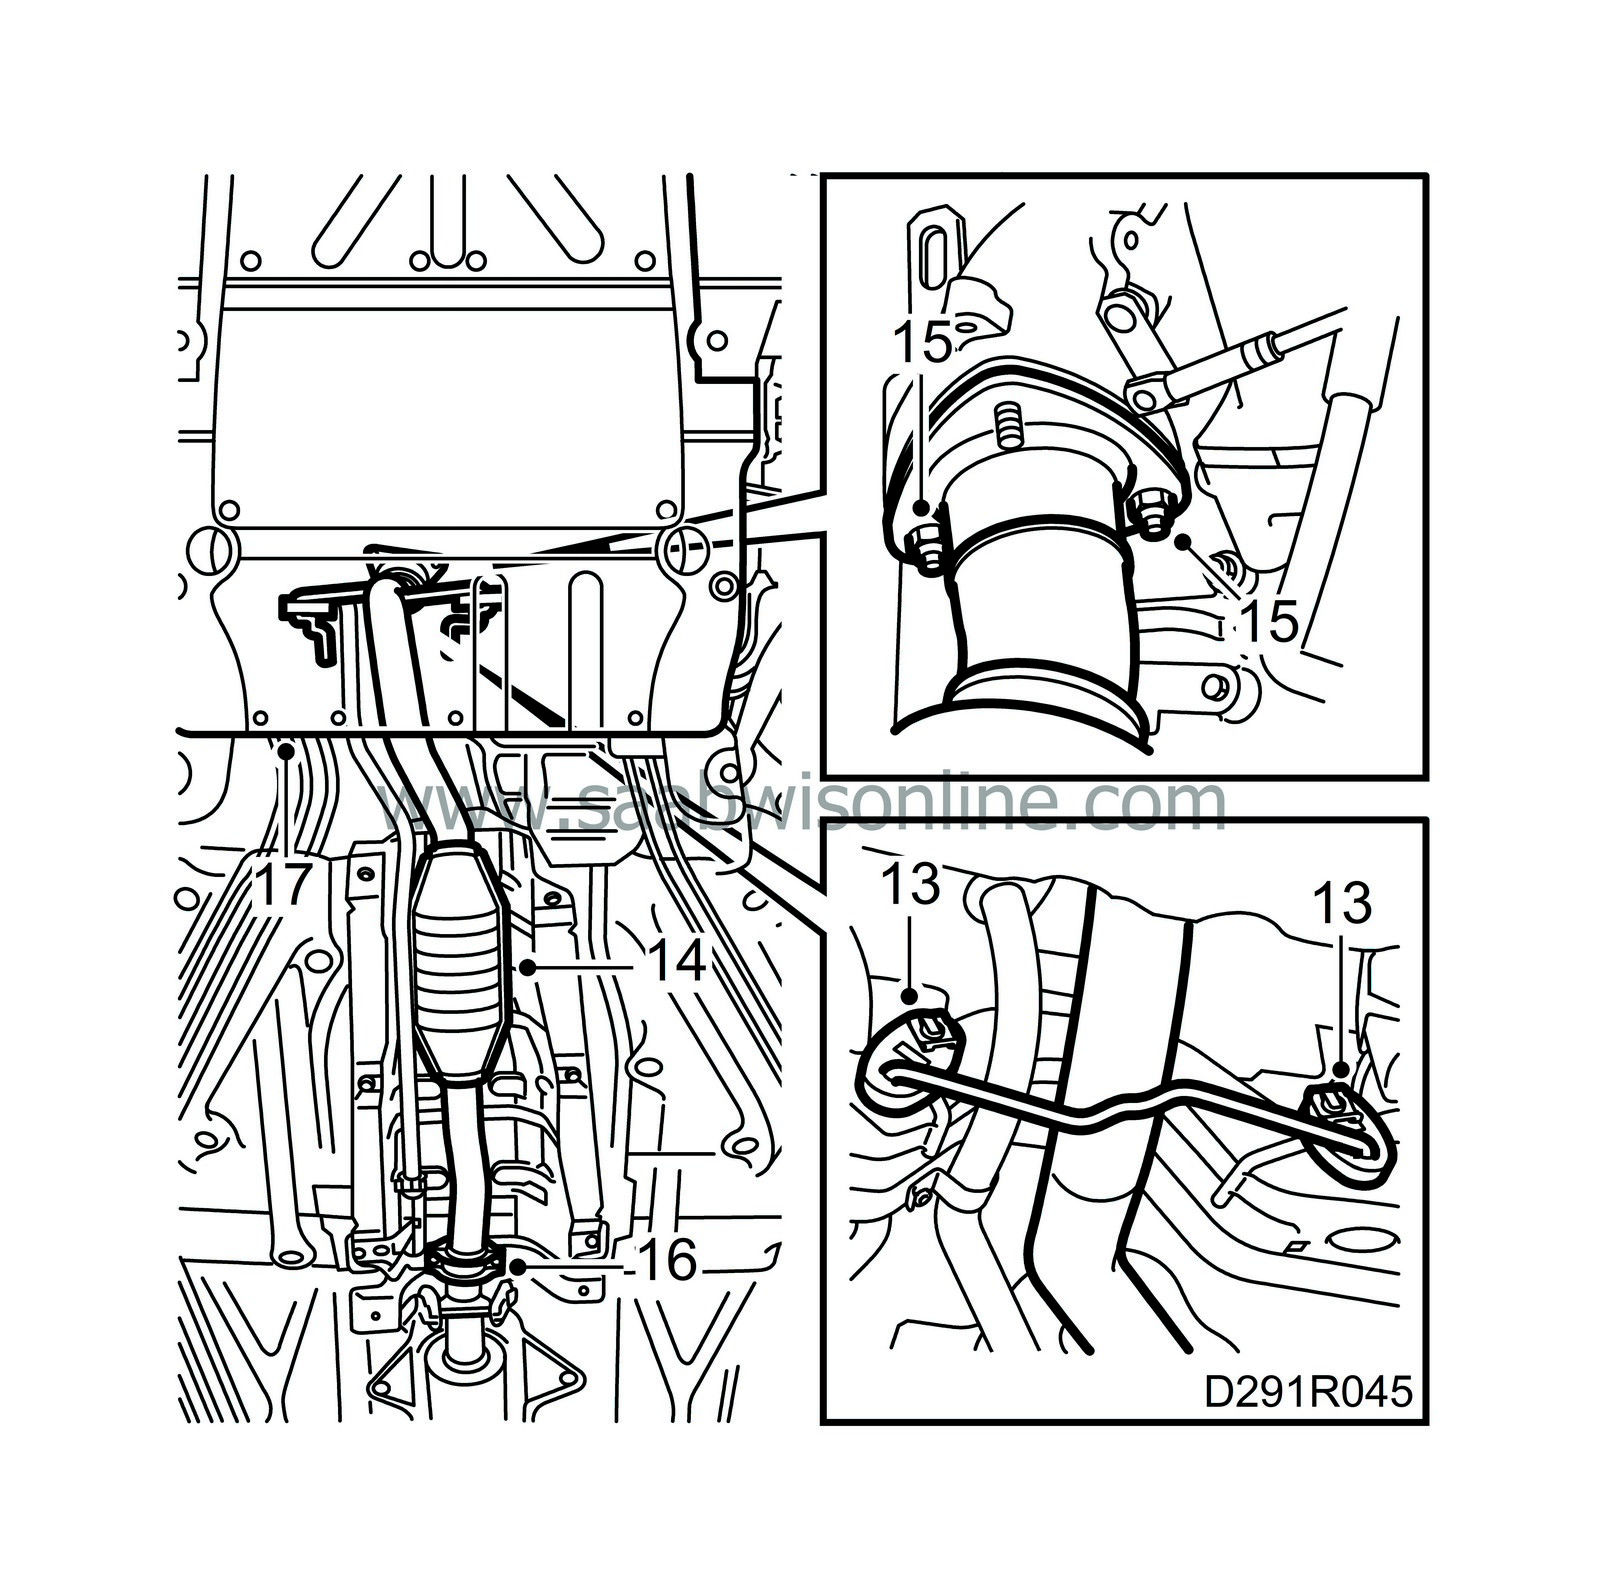
Clean the exhaust pipe joints and replace rubber mountings if needed.
|
|
| 14. |
Fit the front section of the exhaust pipe using a new gasket and insert the new nuts.
|
|
| 15. |
Fit the front exhaust pipe loosely, make sure that there are no forces or stresses acting on the exhaust pipe and tighten it to the turbocharger.
Tightening torque 20 Nm (15 lbf ft). |
|
| 16. |
Tighten the exhaust pipe to the middle pipe.
Tightening torque 20 Nm (15 lbf ft). |
|
| 17. |
Fit the bottom engine cover and lower the car.
|
|
| 18. |
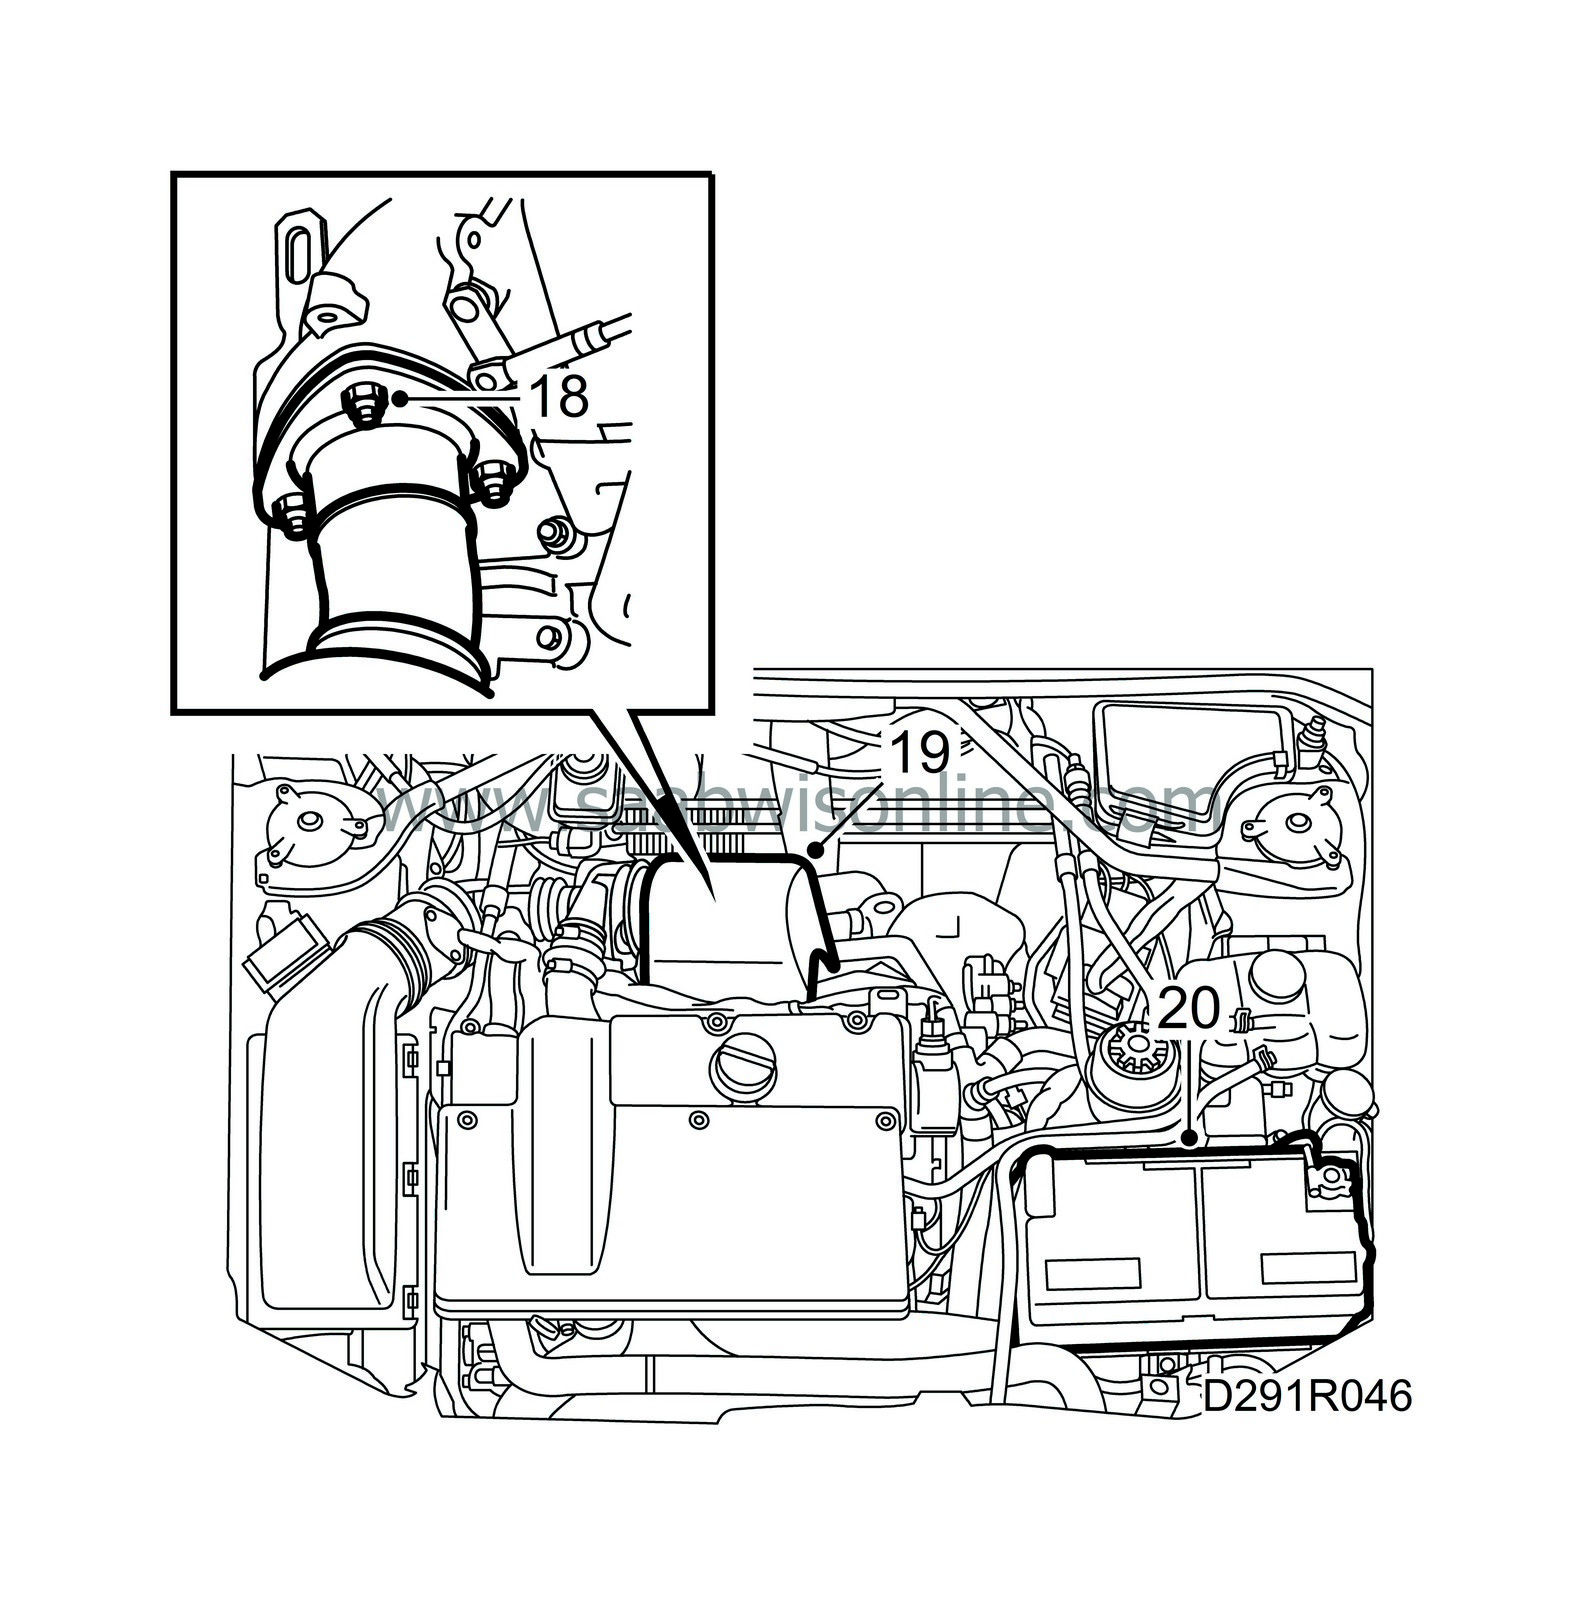
Tighten the last nut between the turbocharger and the front exhaust pipe.
Tightening torque 20 Nm (15 lbf ft). |
|
| 19. |
Refit the heat shield over the turbocharger.
|
|
| 20. |
Connect the battery negative cable.
|
|
| 21. |
Adjust the clock in the car and press 5 times on the remote control lock/unlock button.
|
|
| 22. |
Start the engine and check for leaks.
|
|

 Warning

