End cover
| End cover |
| To remove |
| Important | ||
|
It is very important to observe great cleanliness when working on the gearbox. Dirt particles can seriously damage the function and service life of the gearbox. |
||
| 1. |
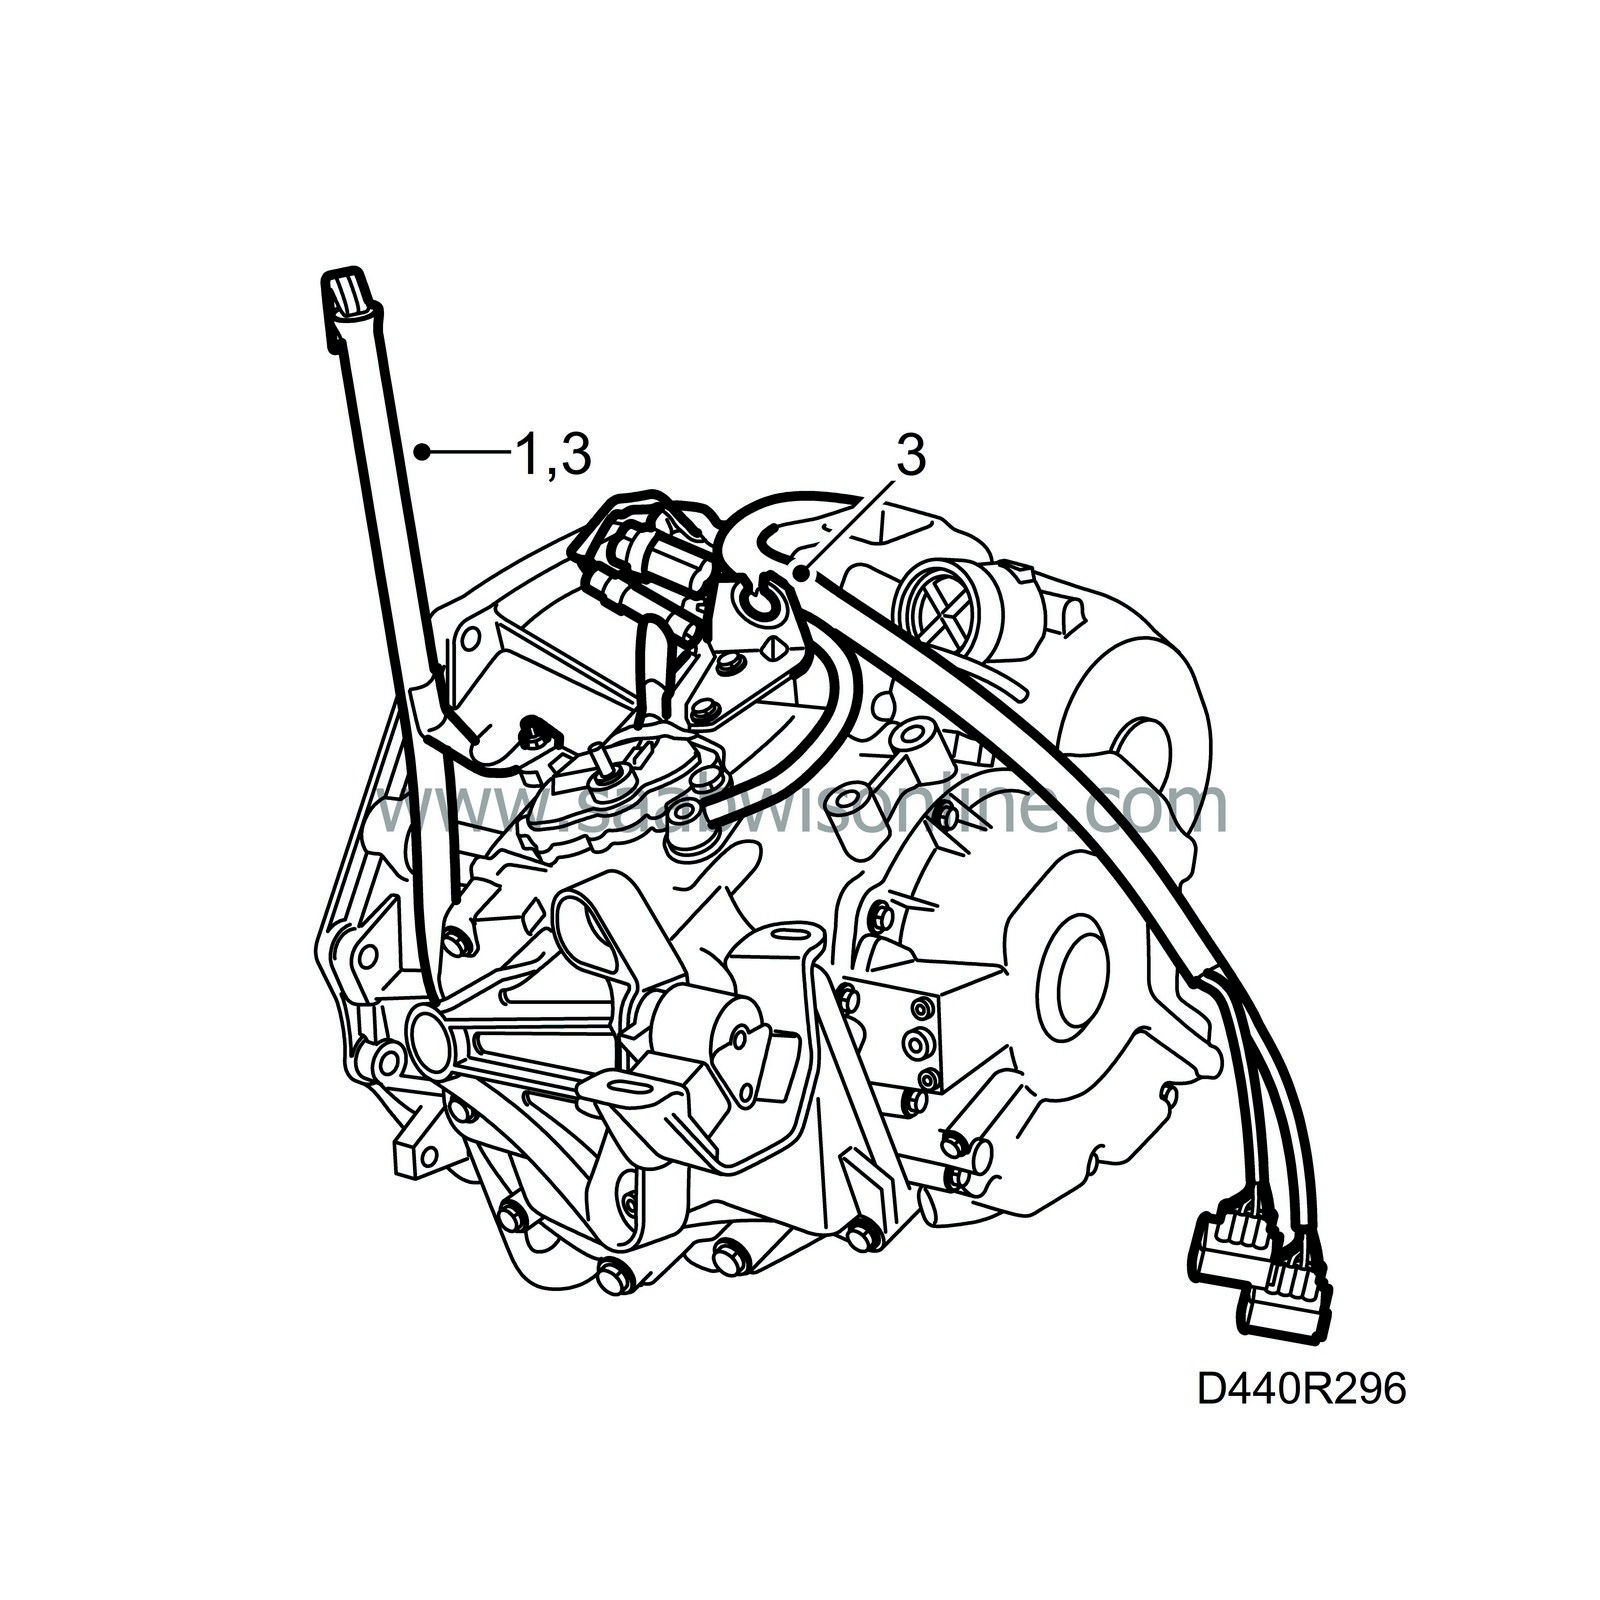
Drain the oil from the gearbox before removing any parts. Remove the gearbox from the car. See Adjustment/replacement, Automatic gearbox assembly. Fit the dipstick pipe.
|
|
| 2. |
Plug the shaft hole. Clean the exterior of the gearcase. Use plug 91 32 929, 91 32 937 and 87 92 244. Plug the breather pipe.
|
|
| 3. |
Remove the dipstick pipe. Remove the selector lever bracket.
|
|
| 5. |
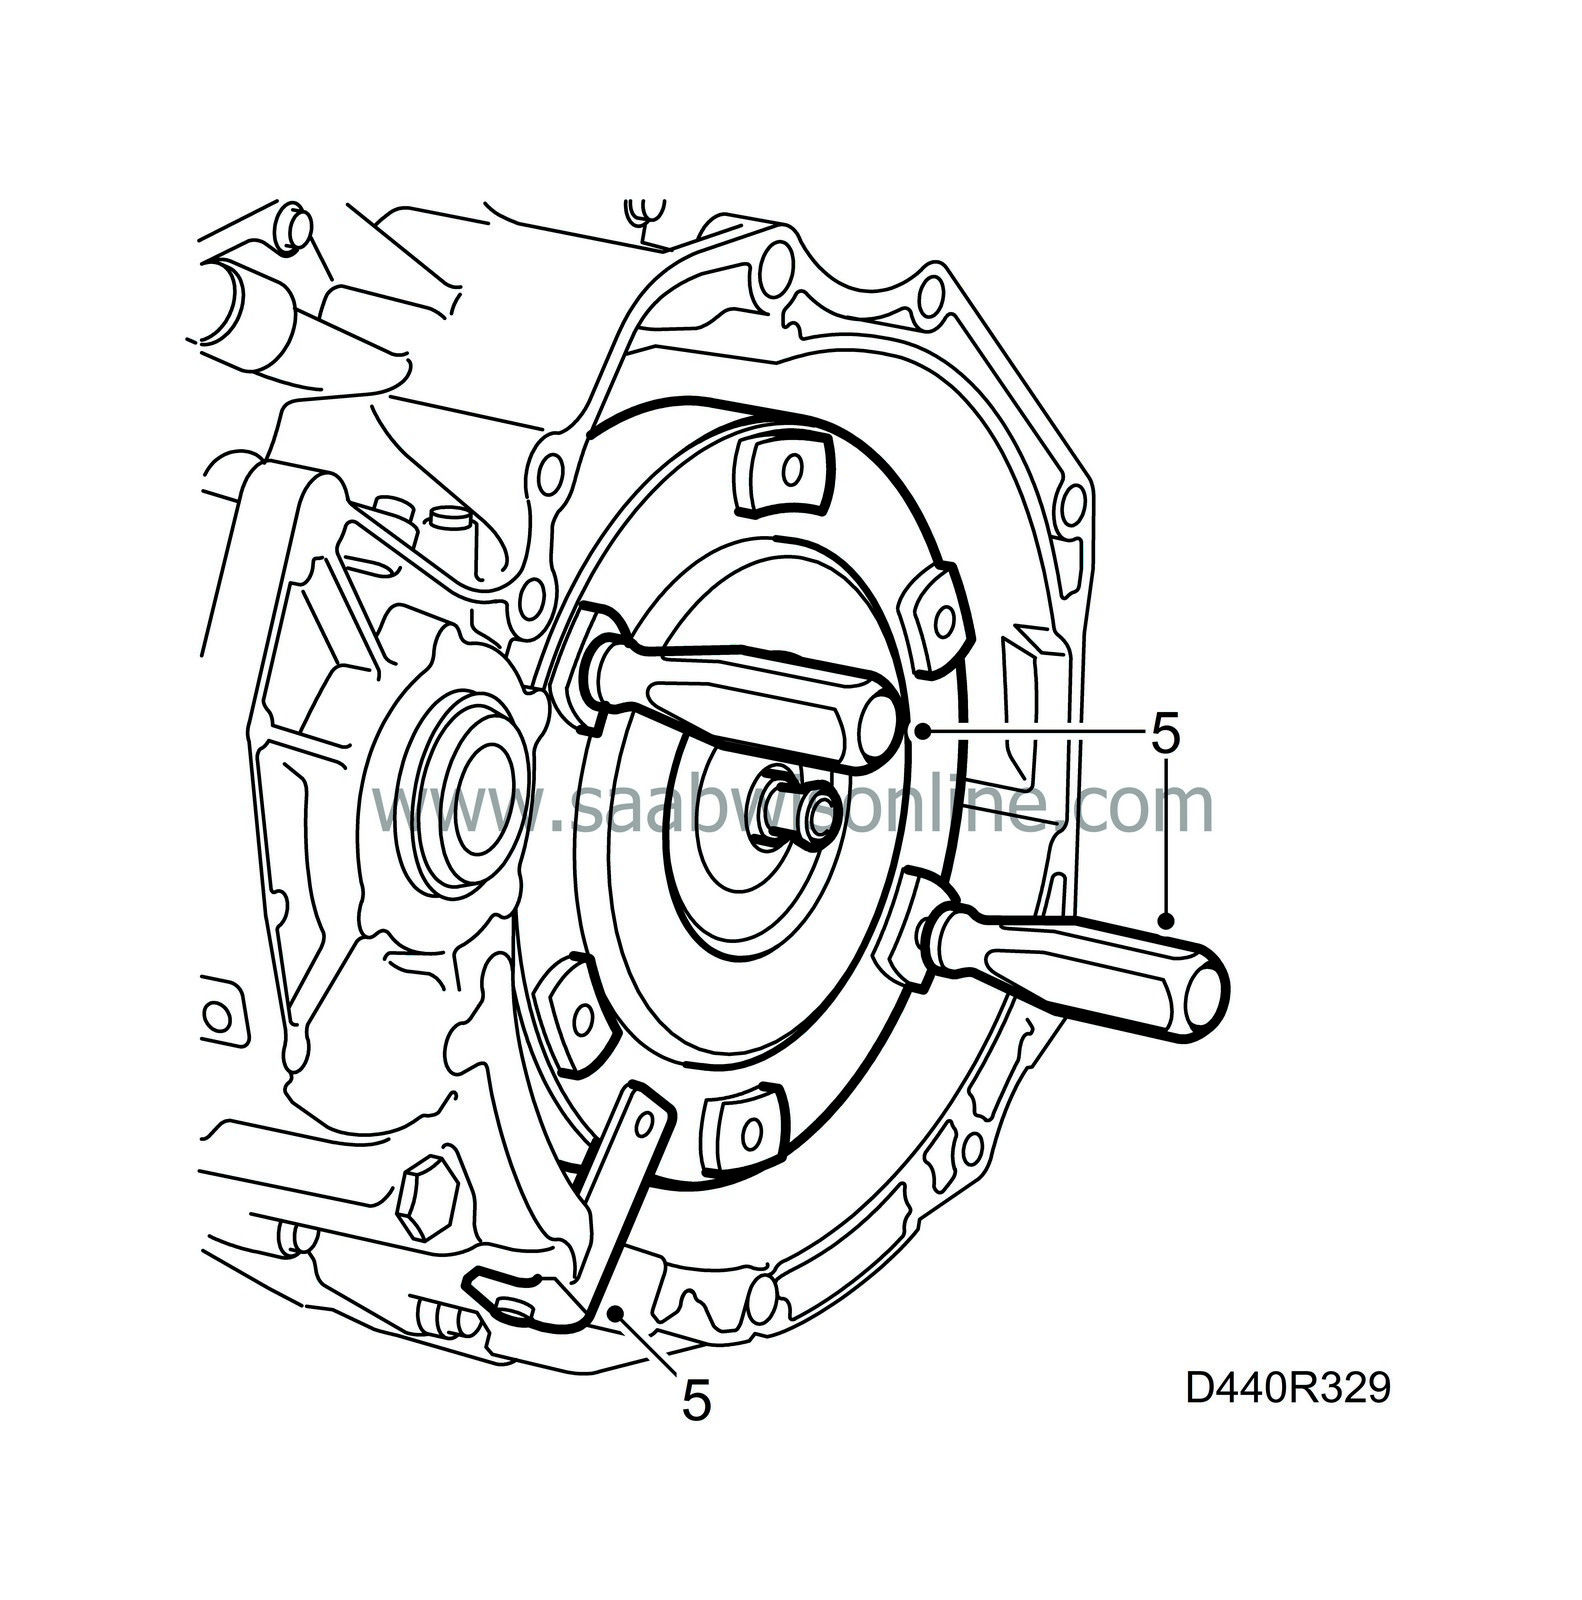
Fit tool 87 92 681 or 87 91 766 to the torque converter. Remove holder 87 92 277 or 87 92 574. Remove the torque converter.
|
|
| 6. |
Turn the gearbox 90° on the stand.
|
|
| 7. |
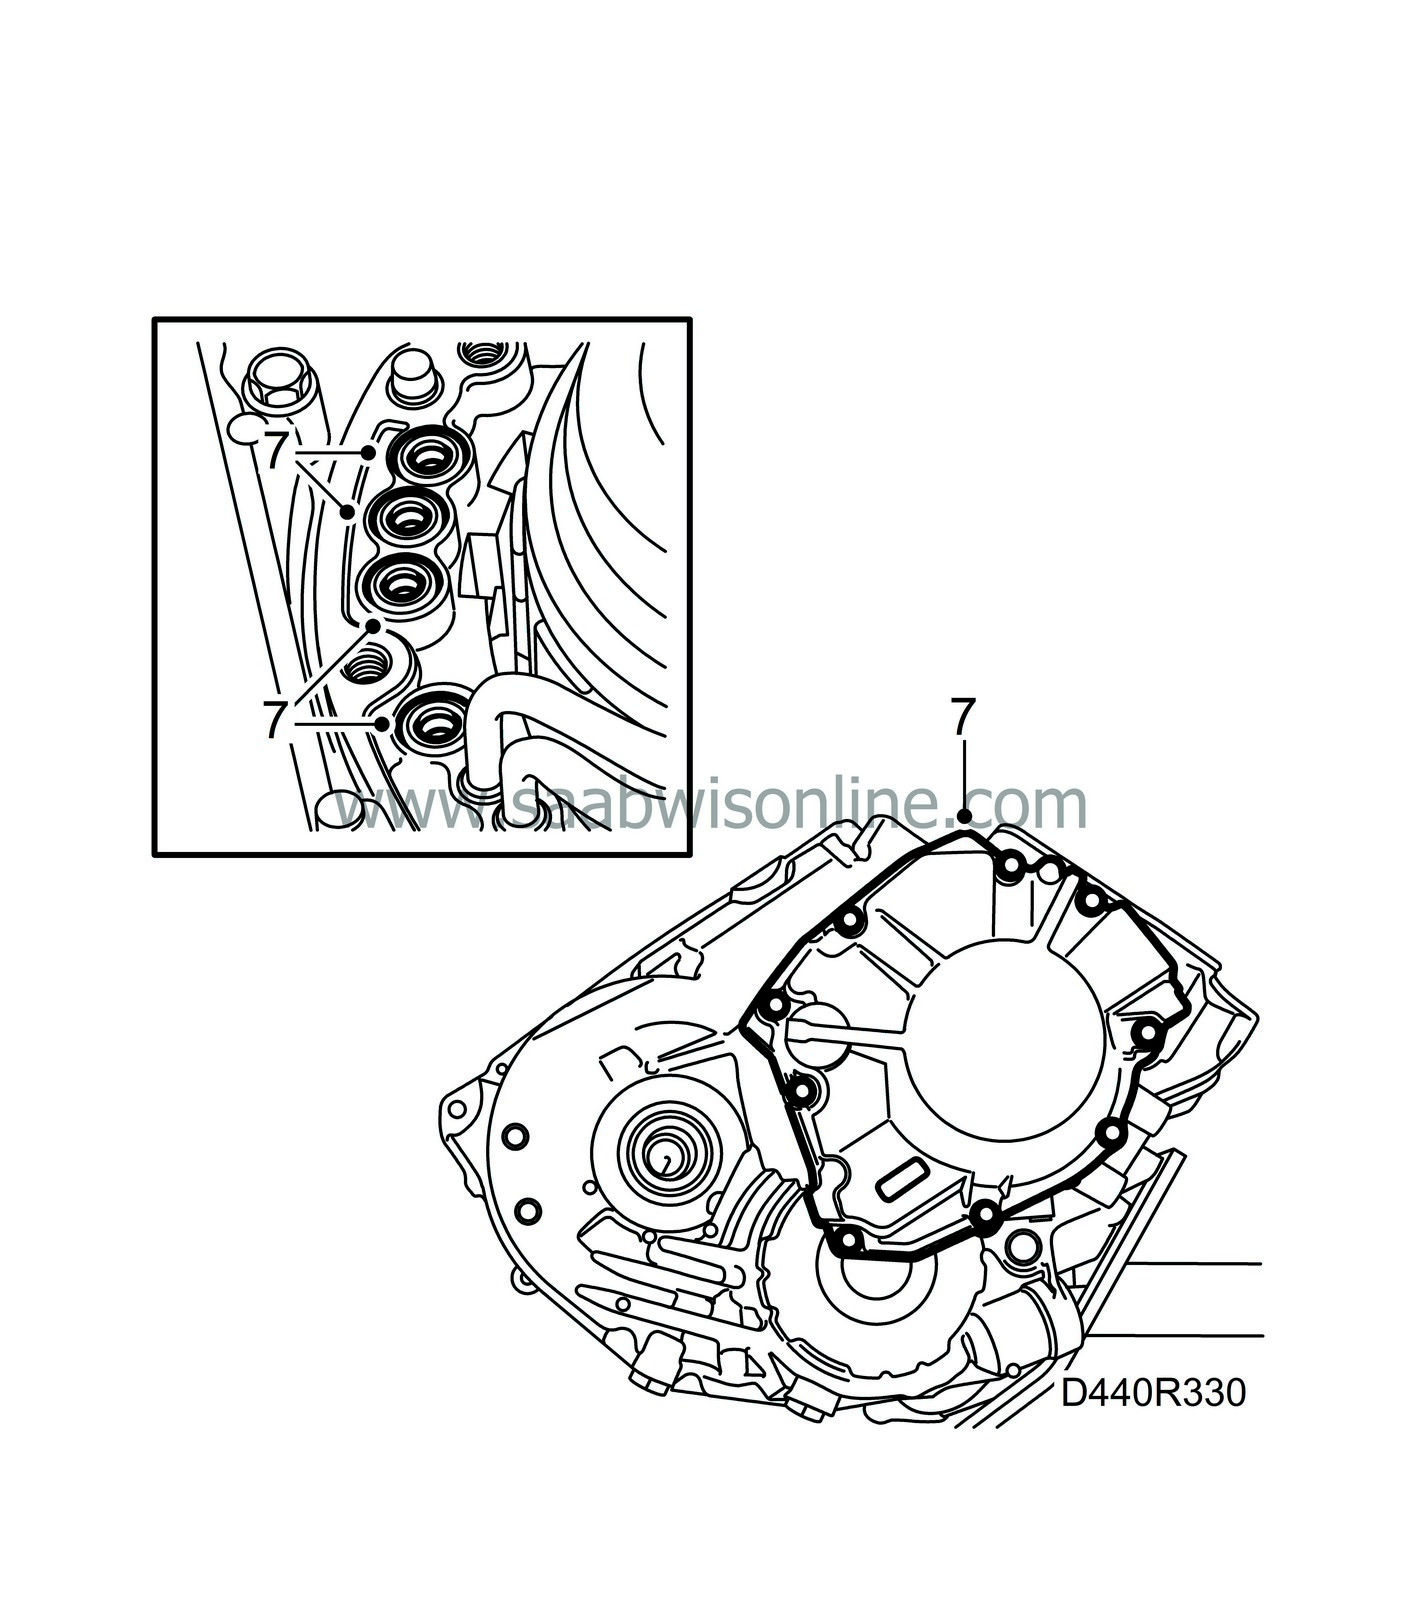
Remove the bolts holding the end cover. Tap off the cover using a plastic mallet. Remove the four seals.
|
|
| 8. |
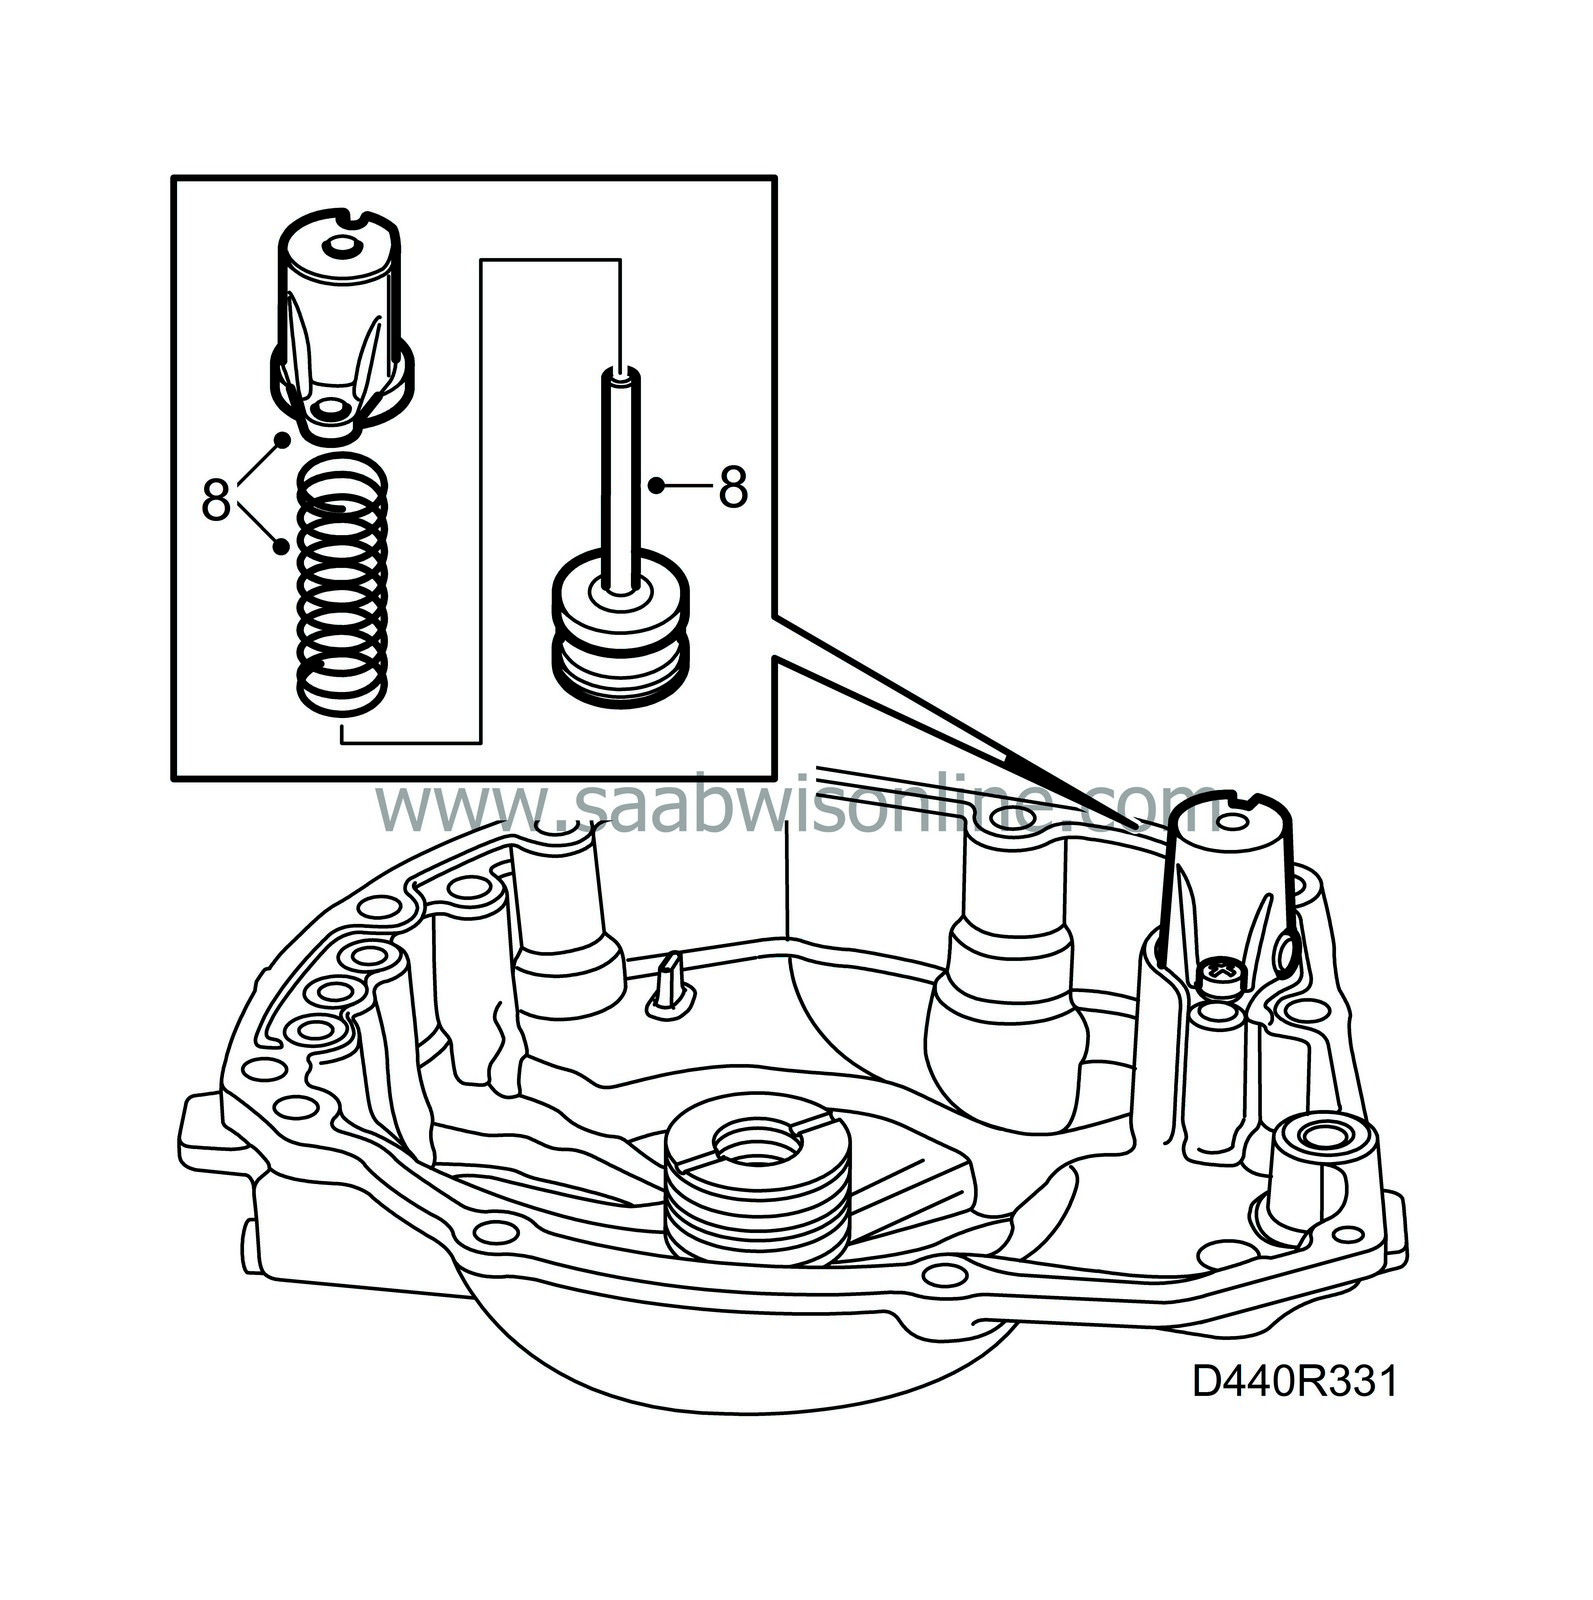
If necessary, remove the accumulator of C1 from the end cover with spring and piston.
|
|
| 9. |
Carefully remove any gasket remains from the sealing surfaces of the gearcase and torque converter housing using a gasket scraper.
|
|
| Important | ||
|
The remains of old gaskets and other particles must under no circumstances fall into the oil ducts, openings or components. |
||
| To fit |
| 1. |
Fit the C1 accumulator to the end cover. Use new O-rings greased with vaseline.
Tightening torque 10 Nm (7 lbf ft) 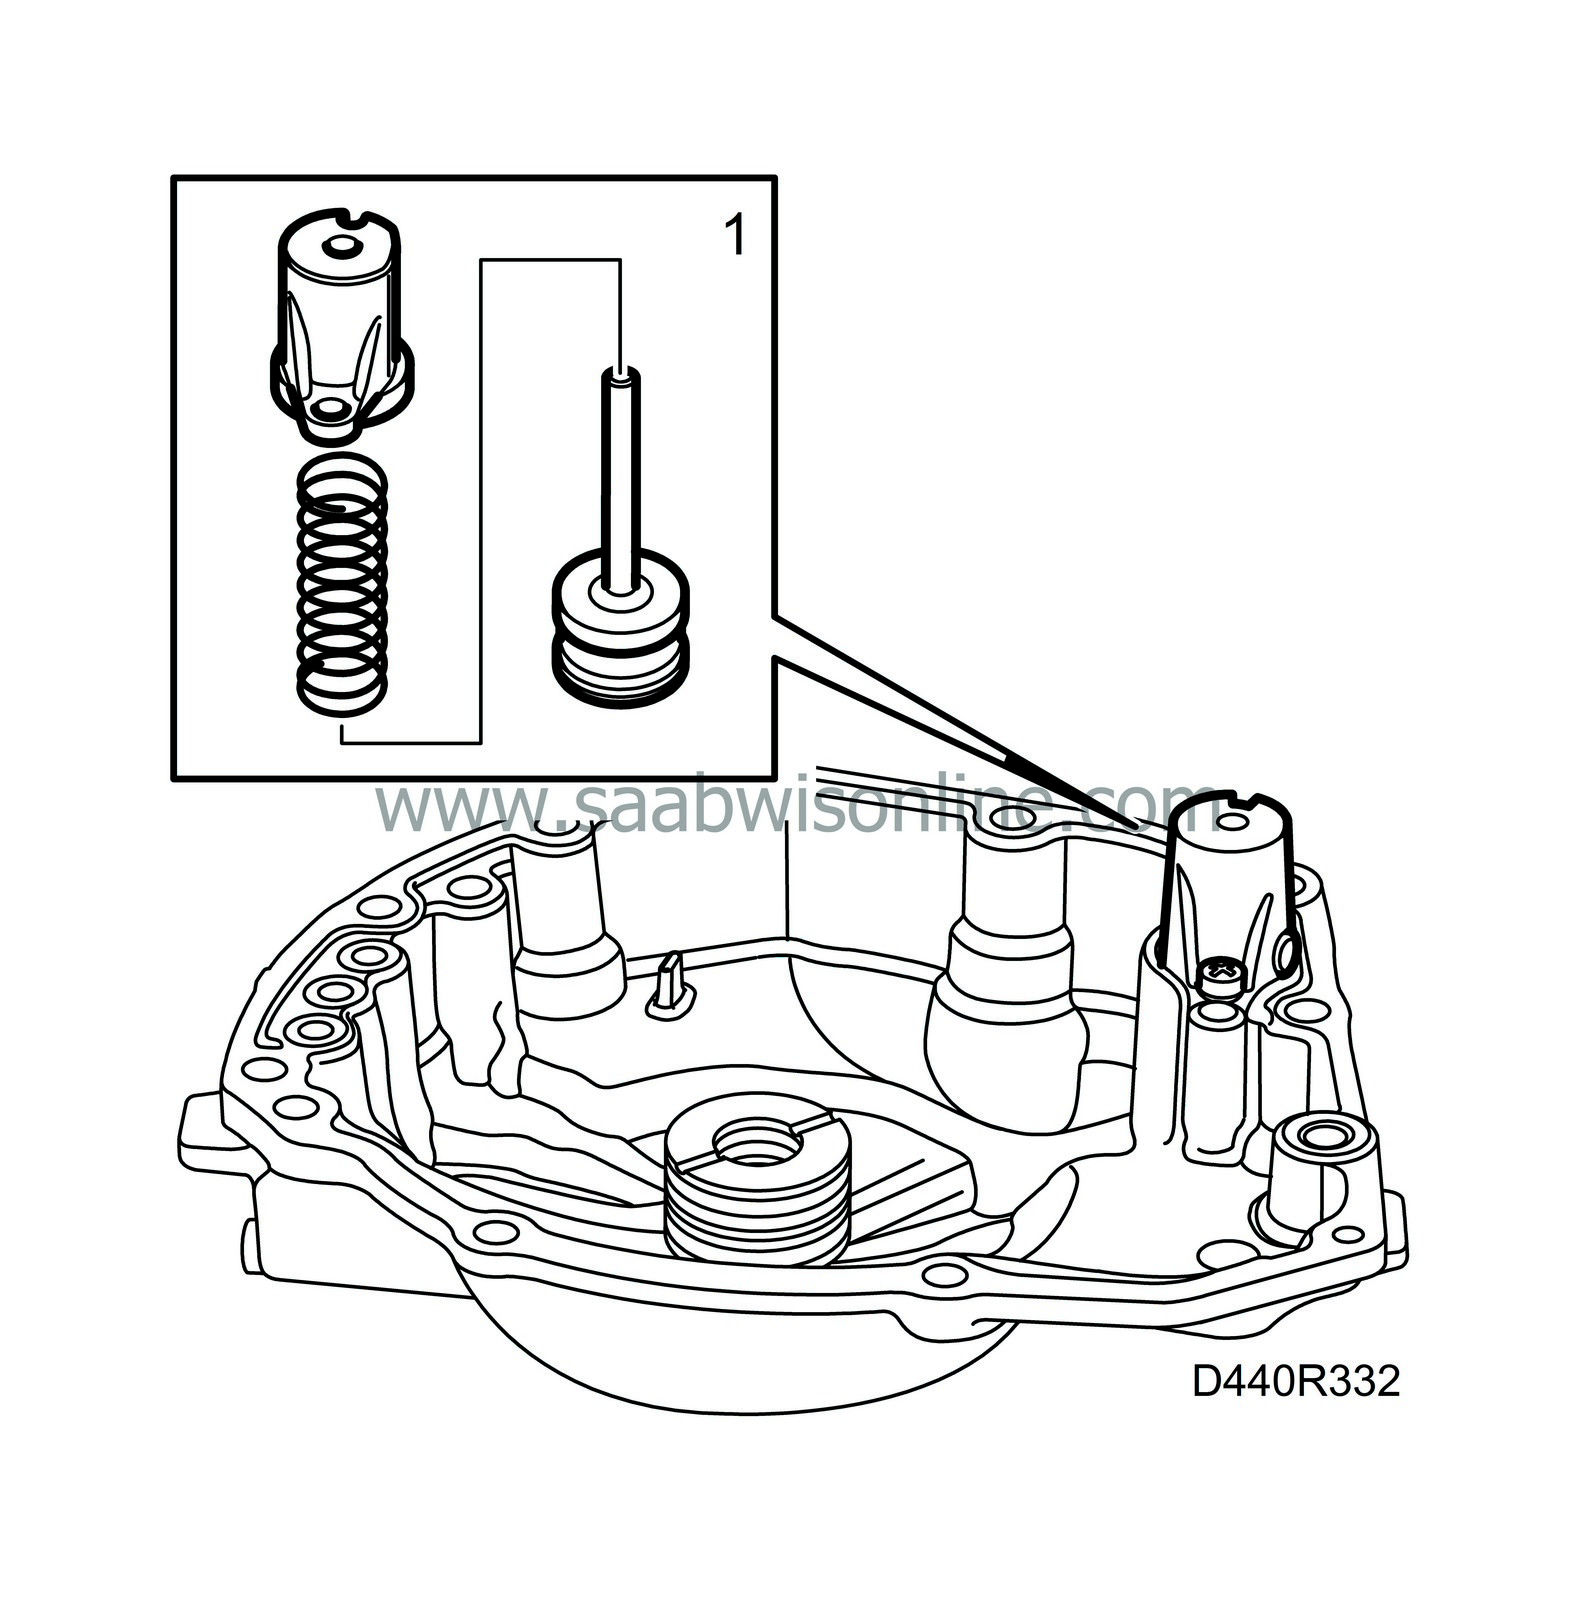
|
|
| 2. |
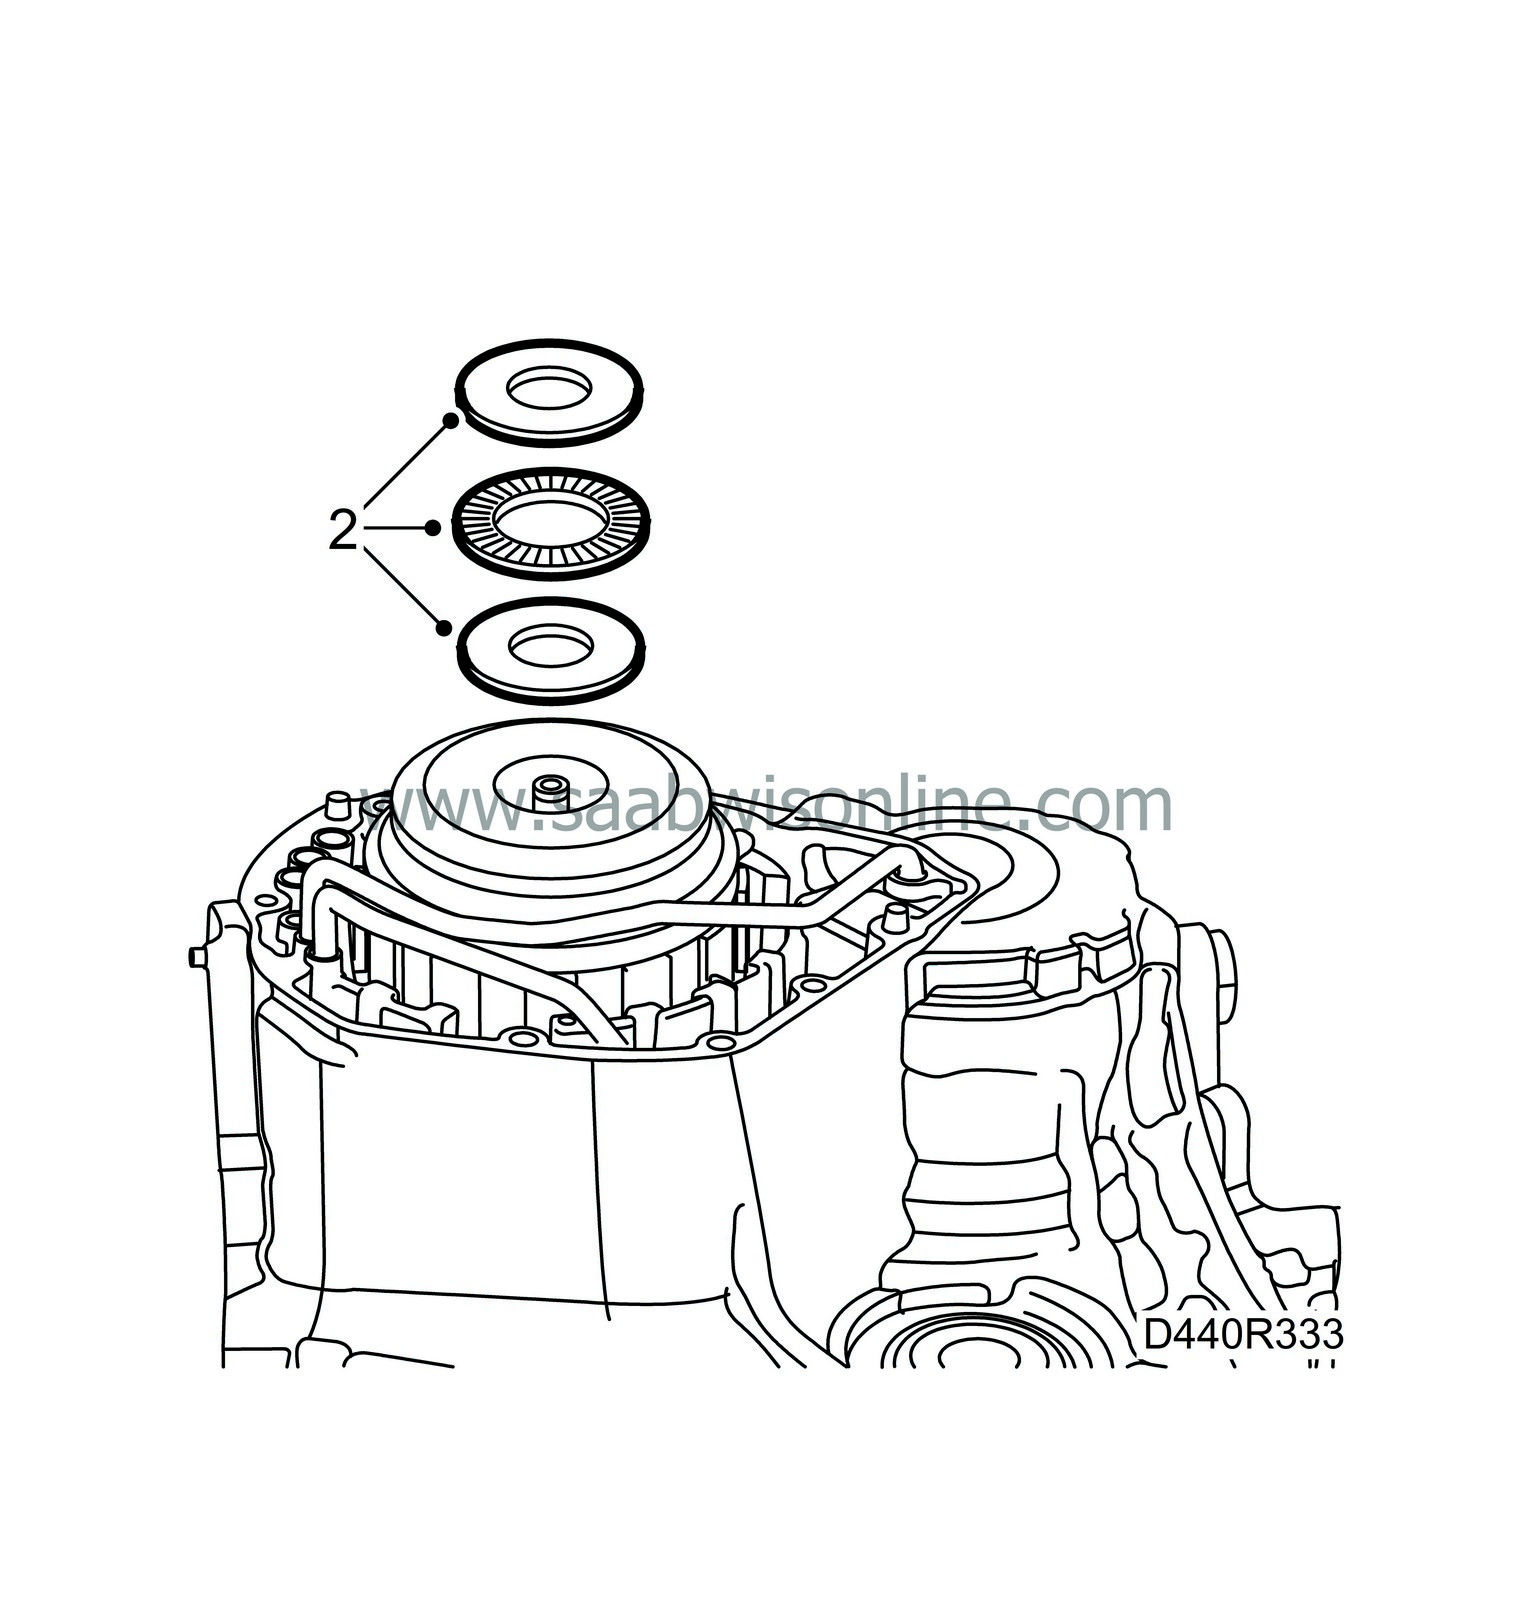
Fit the bearing race into position on the rear cover. Grease the bearing race with vaseline. Fit the bearing race and thrust bearing to the C1/C2 unit.
|
|
| 3. |
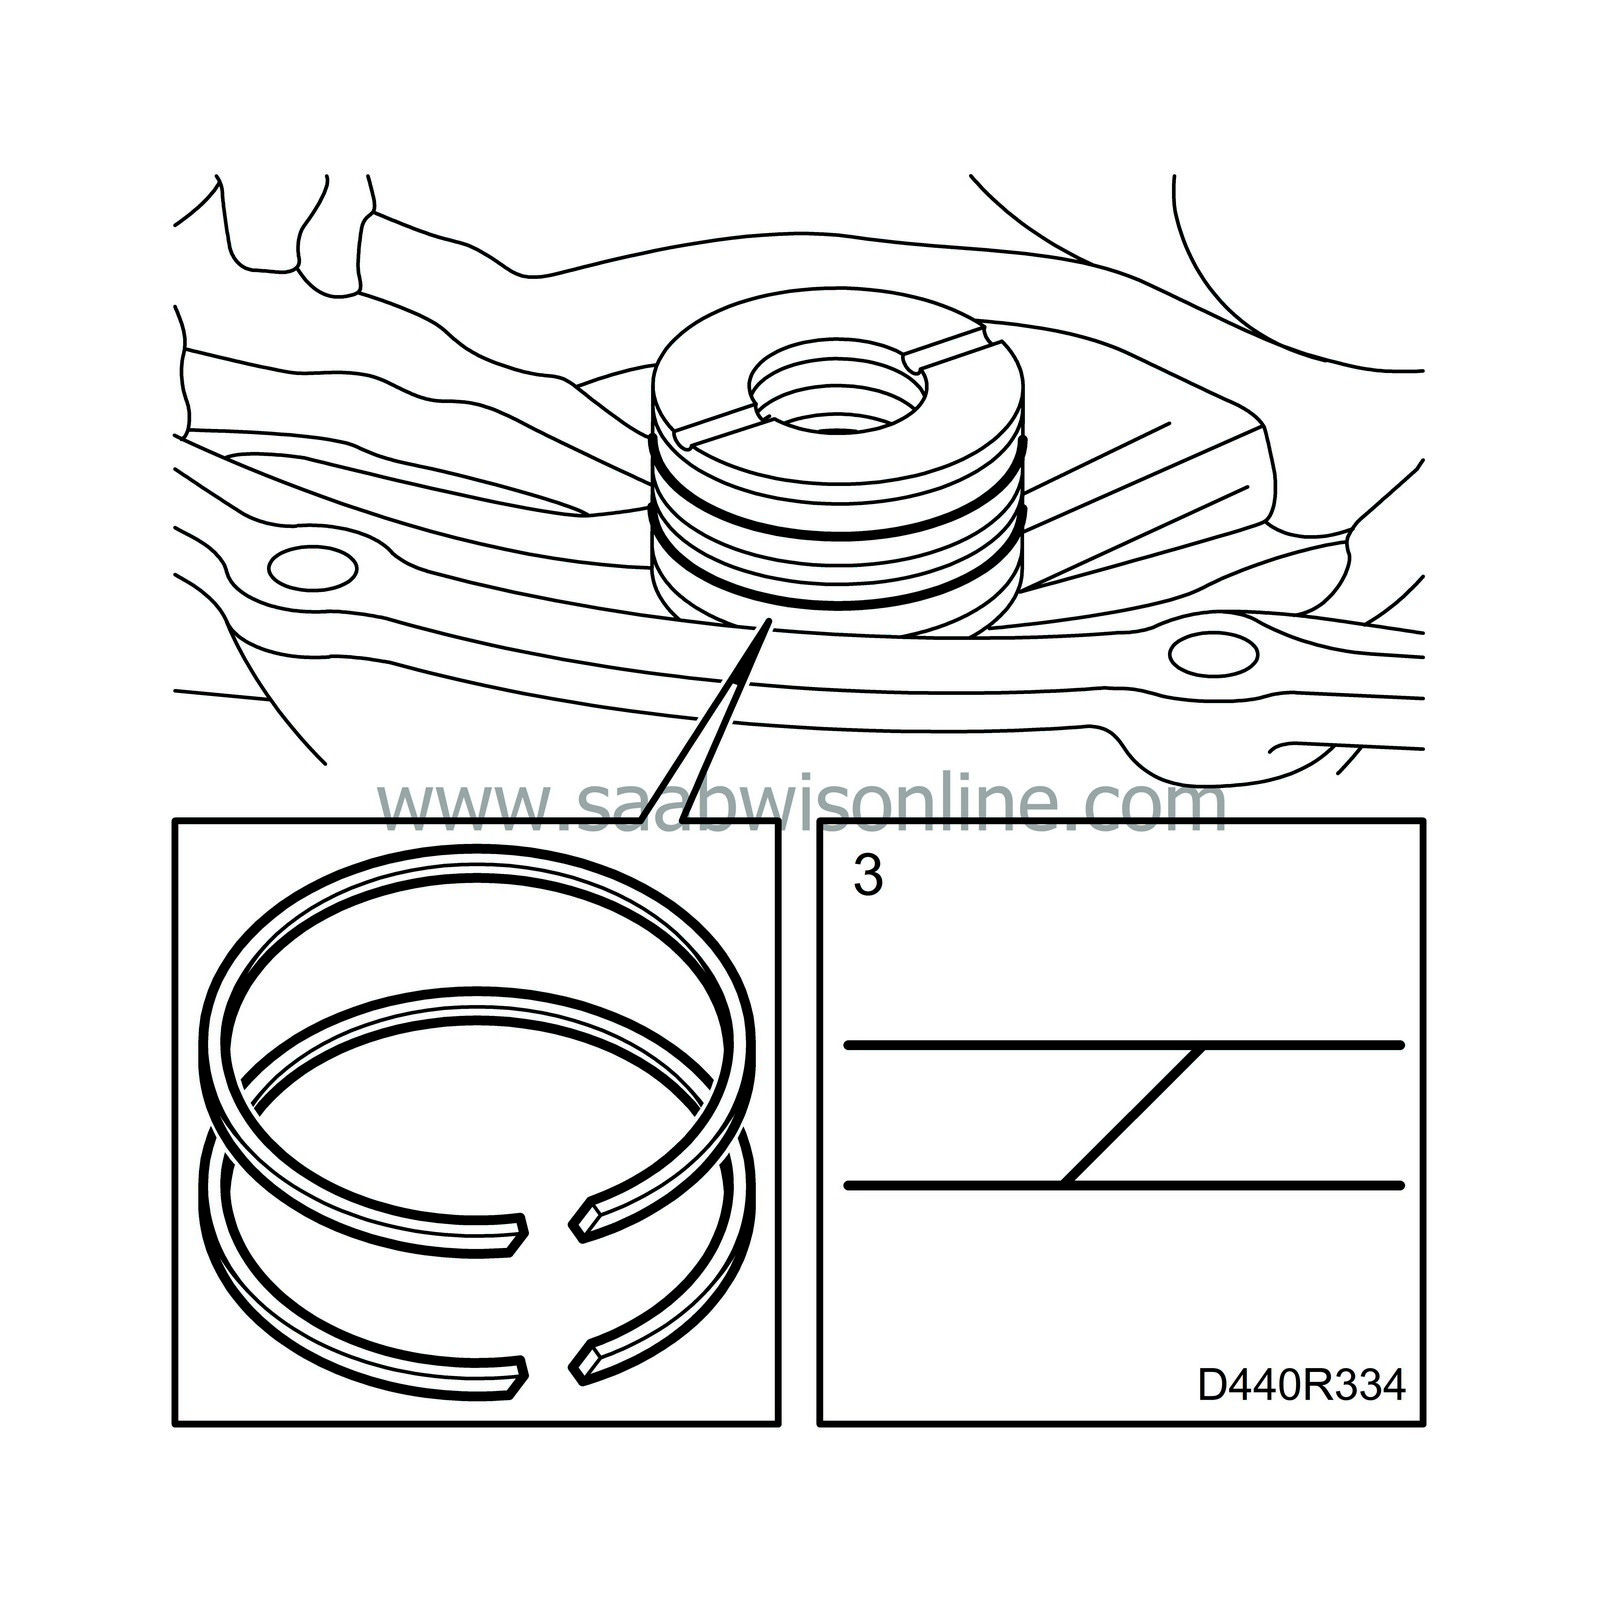
Fit the sealing rings to the bearing housing of the end cover. Do not stretch them more than necessary.
|
|
| 4. |
Fit a new sealing ring to the C1/C2 shaft.
|
|
| 5. |
Clean the sealing surfaces with cleaner 30 02 599.
|
|
| 6. |
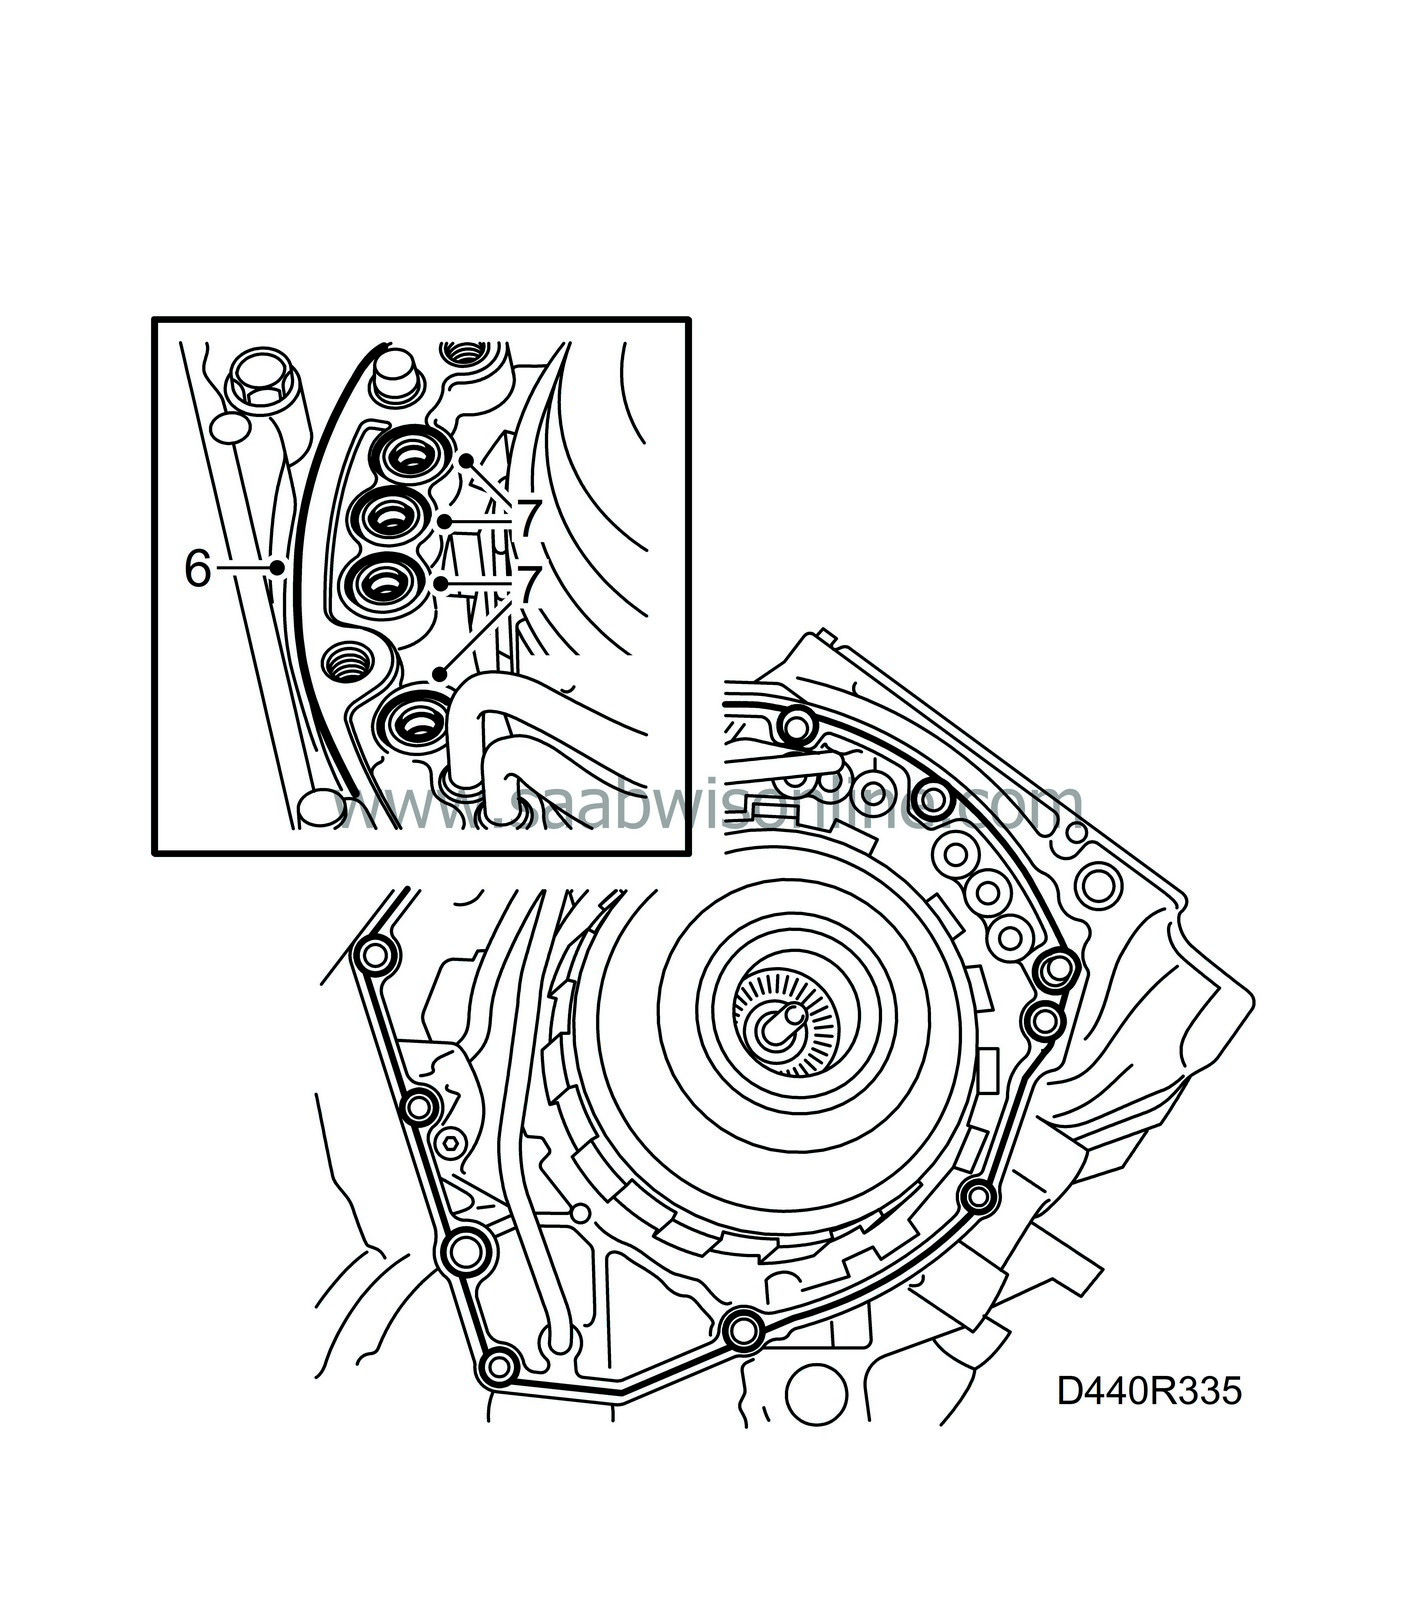
Apply a 1 mm thick bead of flange sealant 93 21 795 to the end cover. Keep the sealing surfaces free of oil and grease.
|
|
| 7. |
Grease four new sealing rings for the oil holes with vaseline and fit them to the gearcase.
|
|
| 8. |
Fit the end cover to the gearcase. Apply thread sealant 74 96 284 to the bolts (different lengths) and tighten them.
Tightening torque M6 10 Nm (7 lbf ft) Tightening torque M8 25 Nm (18 lbf ft) 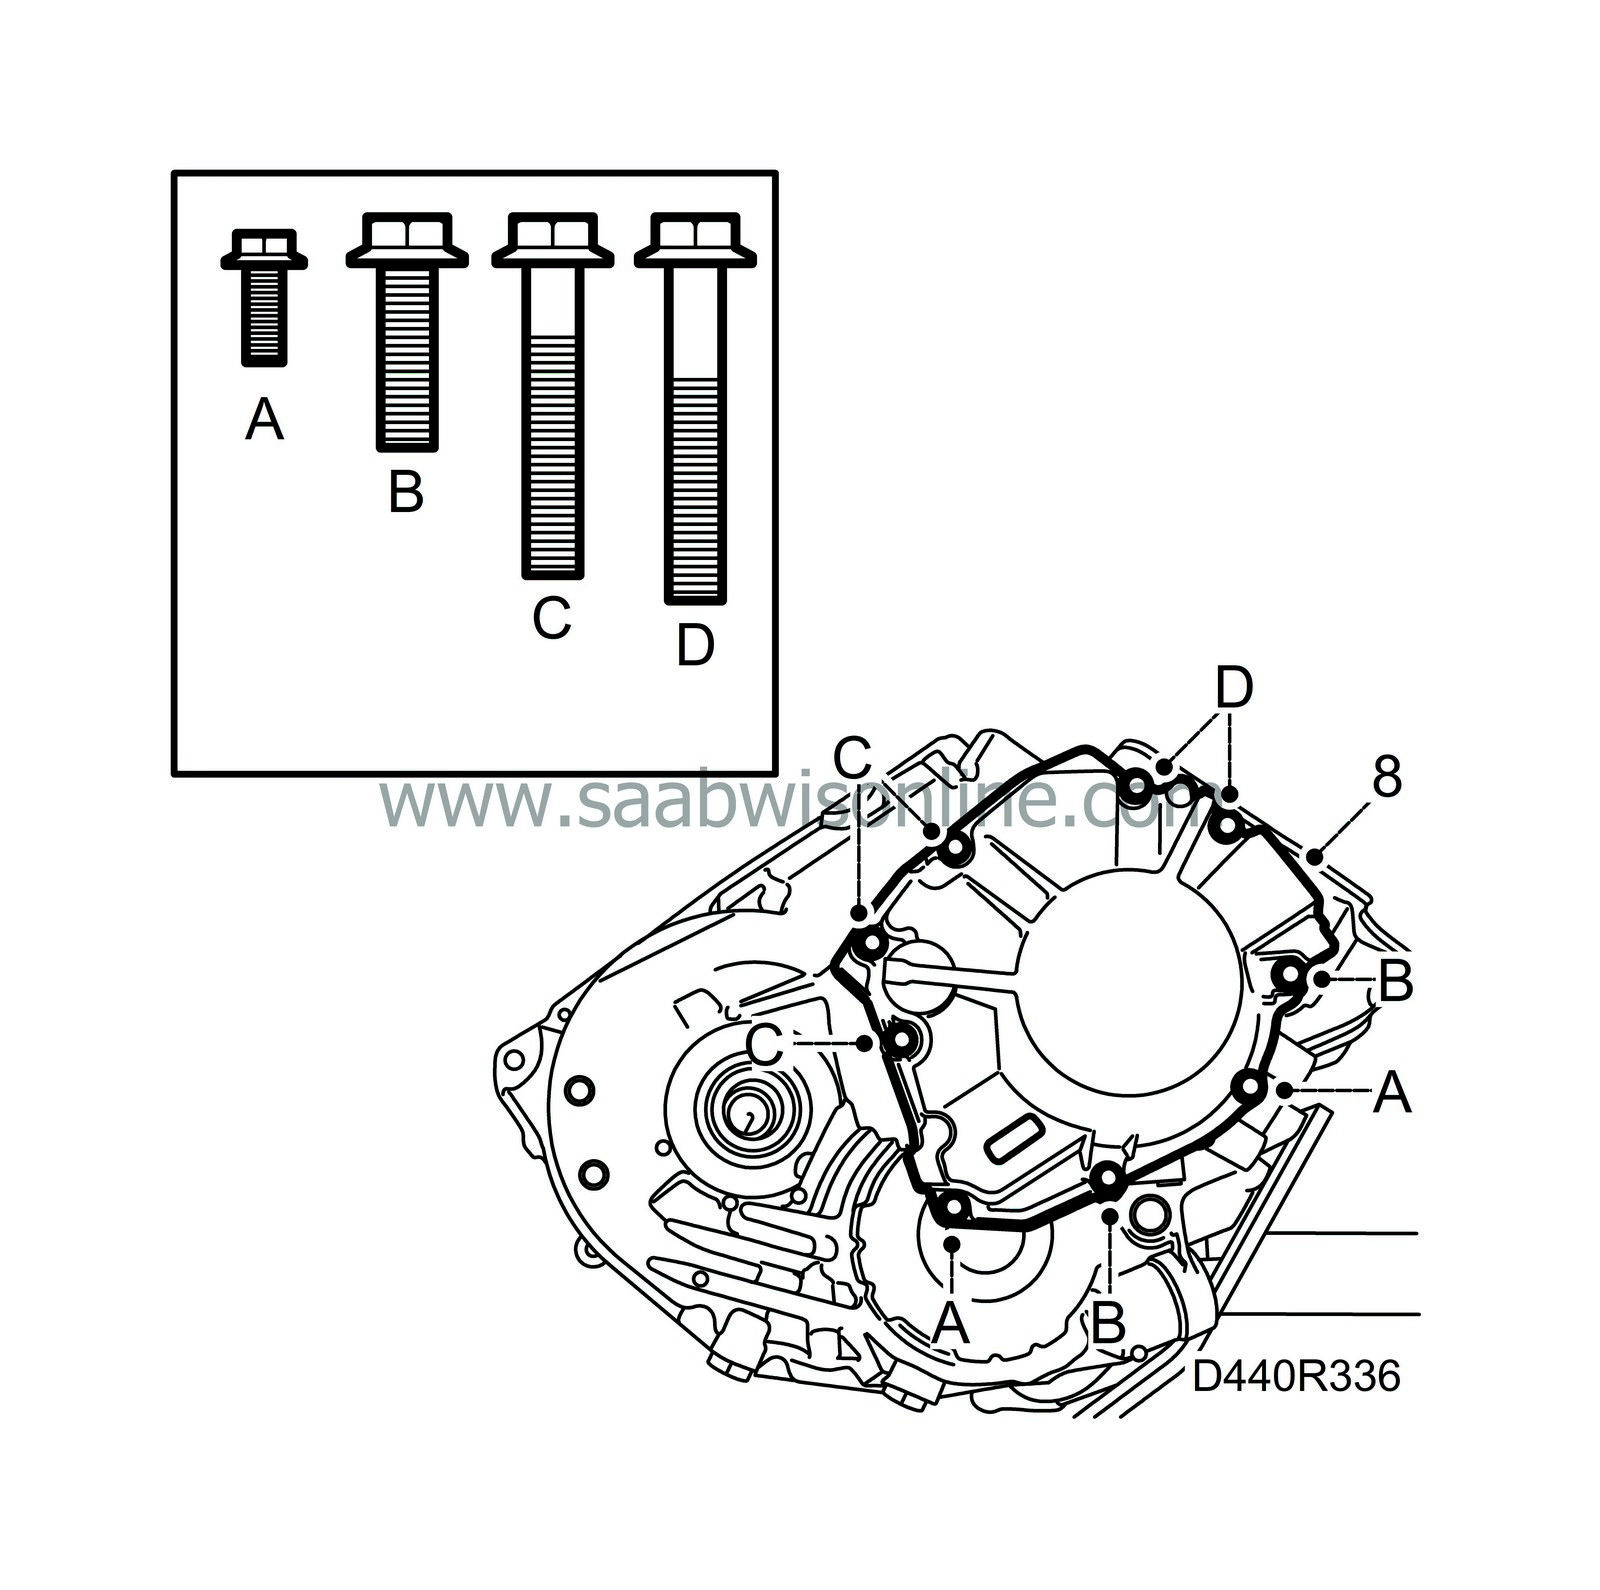
|
|
| 9. |
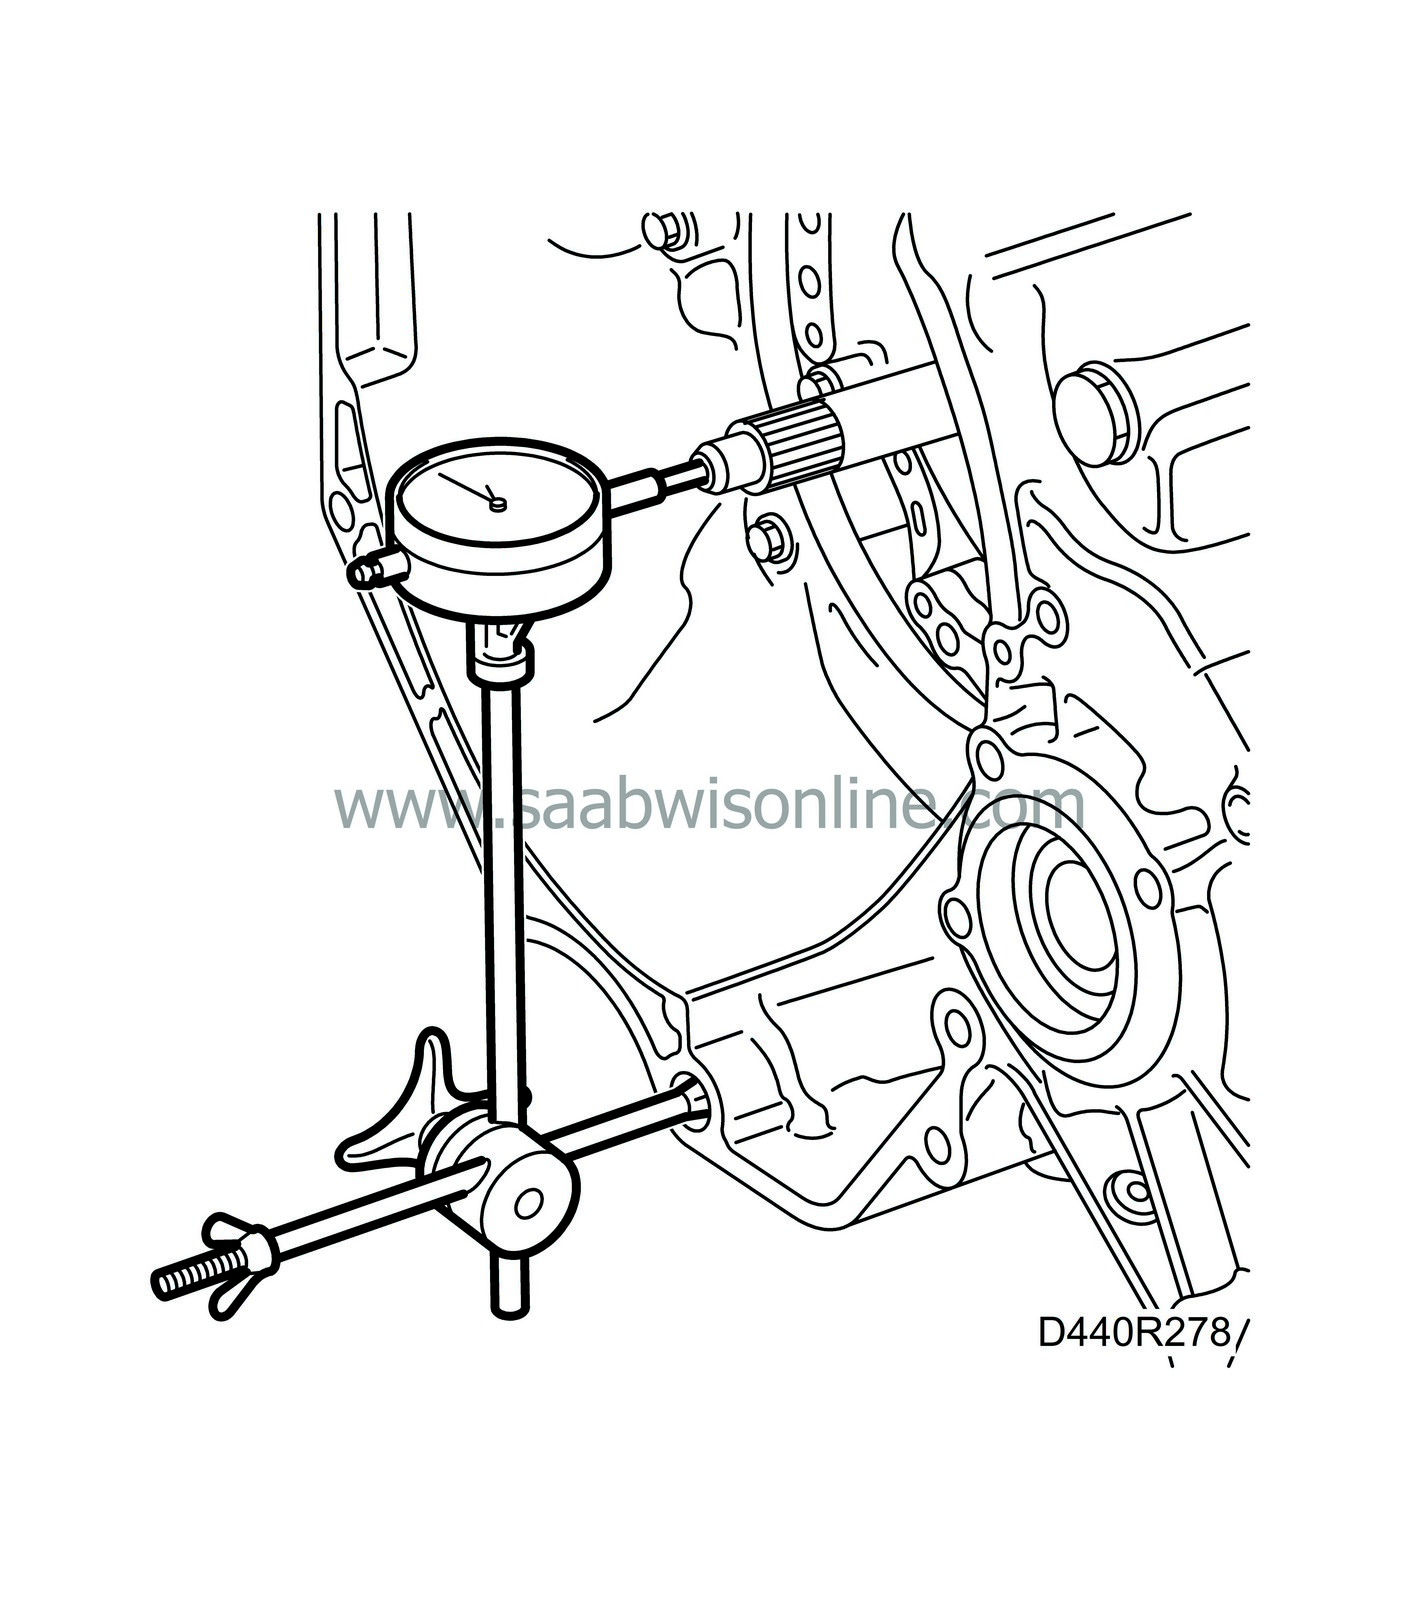
Check that the axial play of the turbine shaft is 0.37 - 0.9 mm. Use gauge 78 40 622 and stand 87 90 727 as illustrated.
|
|
| 10. |
Change the torque converter seal. See Adjustment/replacement, Torque converter seal.
|
|
| 11. |
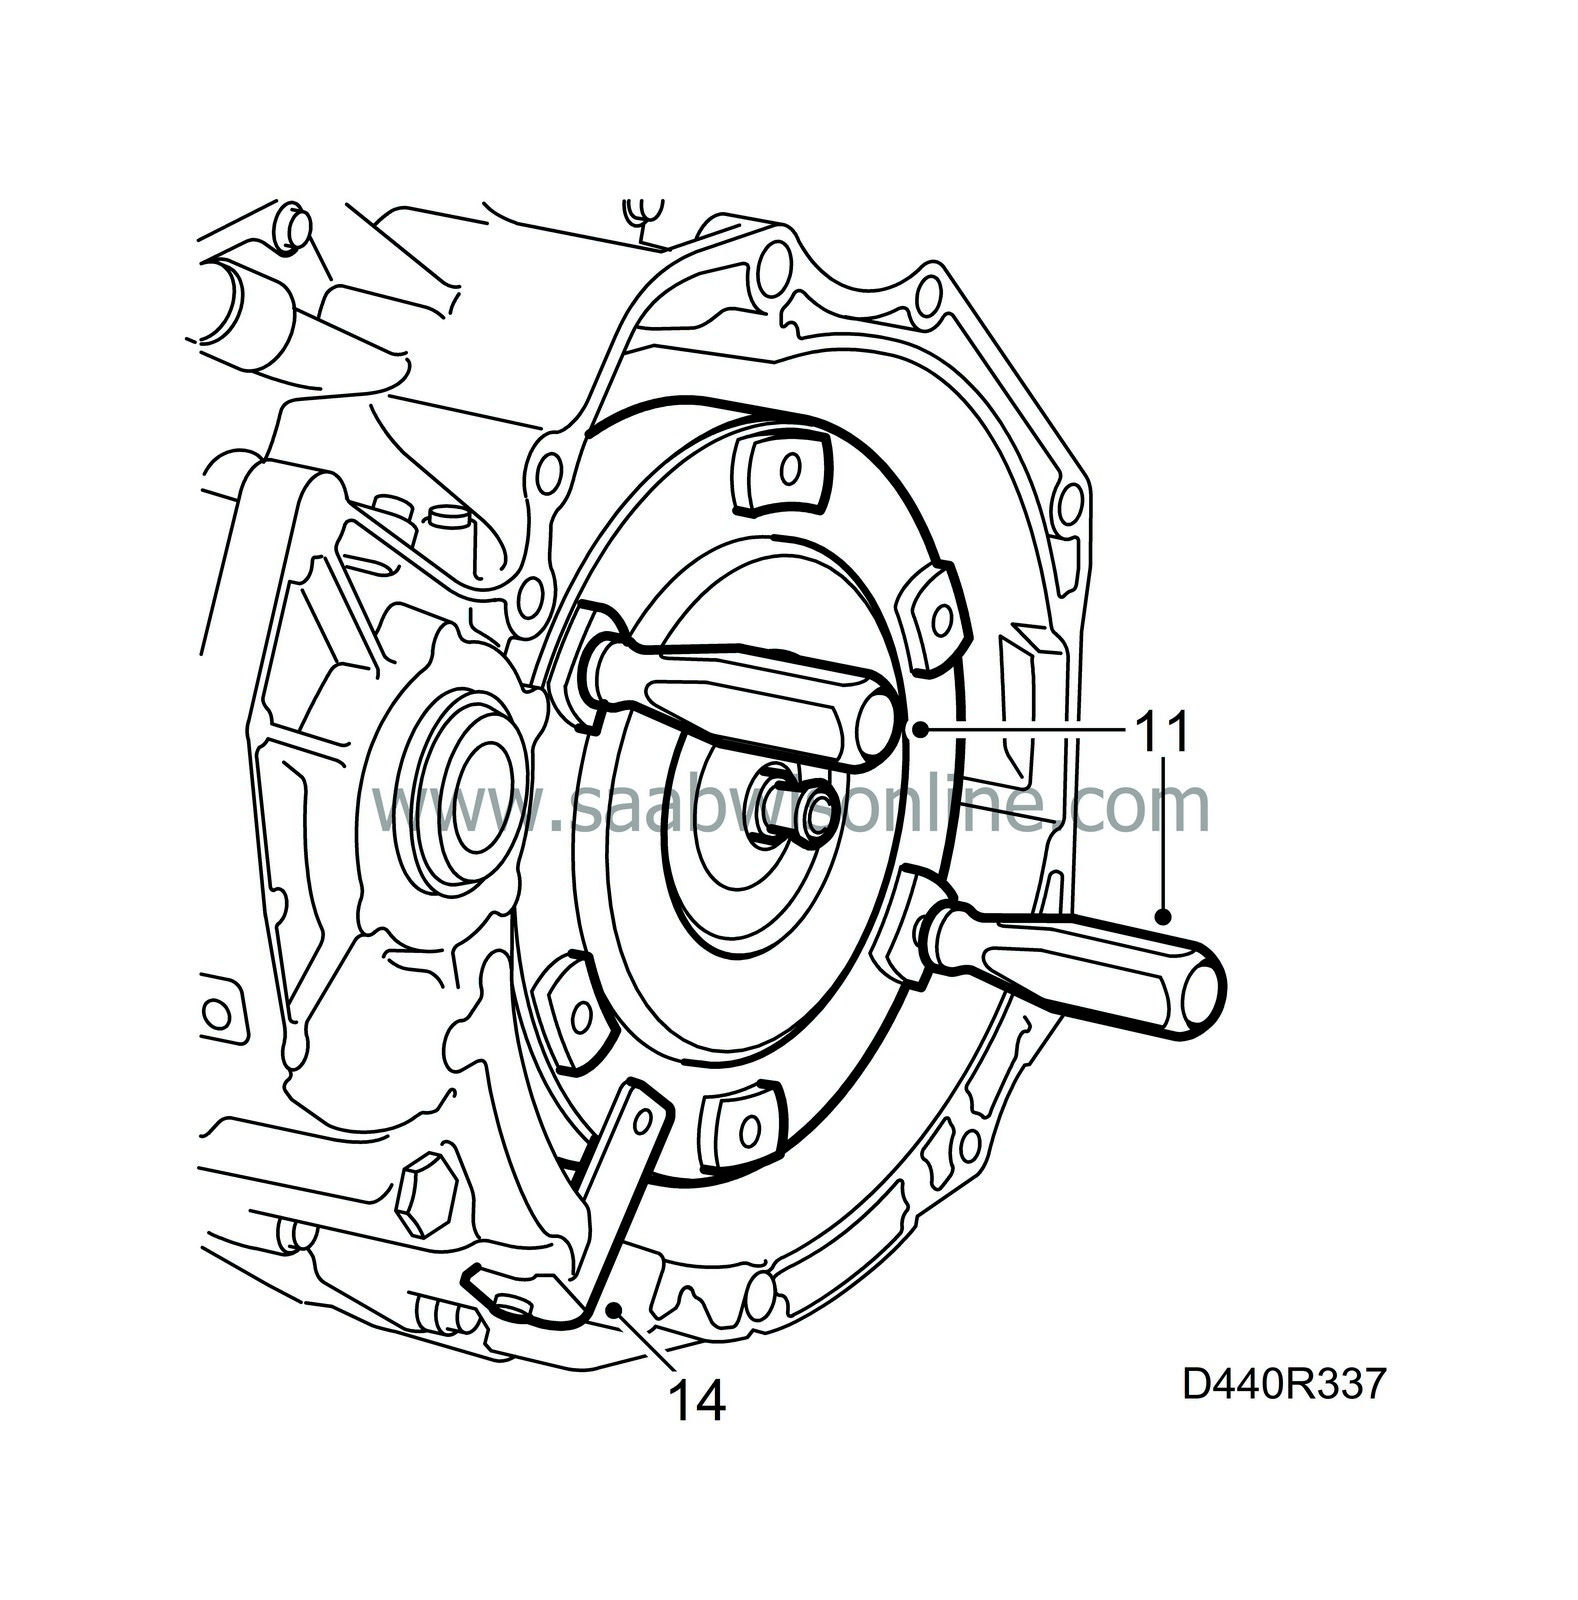
Fit the torque converter. Use holder 87 92 681 or 87 91 766.
|
|
| 12. |
Check that the torque converter is correctly positioned by placing a steel ruler on the mating face of the torque converter. Measure the distance between the mating face and the contact surface of the drive plate on the torque converter. The distance should be: 4-cyl. min. 9 mm; 6-cyl. min. 15 mm.
|
|
| 13. |
Remove holder 87 92 681 or 87 91 766
|
|
| 14. |
Fit the torque converter holder, part number 87 92 277 or 87 92 574.
|
|
| 15. |
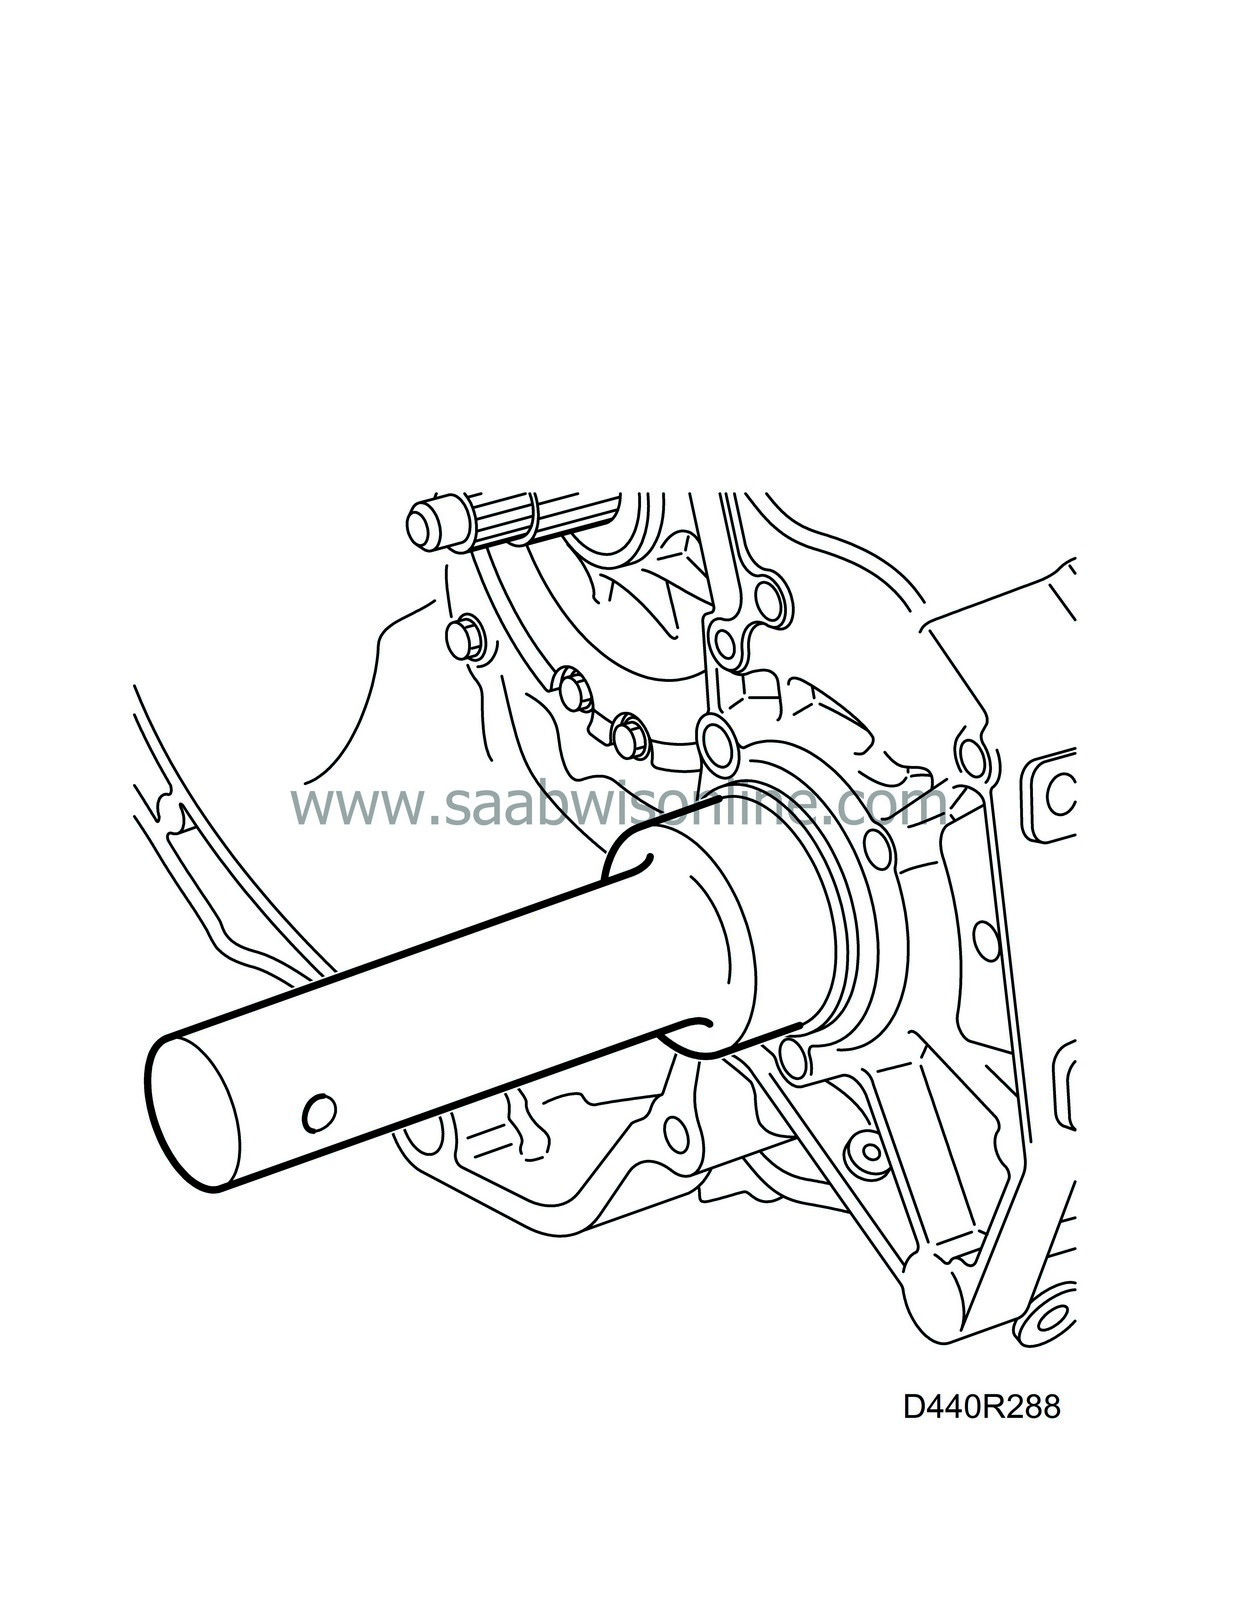
Change the drive shaft seals. Use drift 83 90 122.
|
|
| 16. |
Lift down the gearbox.
|
|
| 17. |
Remove holder 87 92 392
|
|
| 18. |
Fit the selector wire mounting.
|
|
| 19. |
Fit the gearbox to the car. See Adjustment/replacement, Automatic gearbox assembly.
|
|


