Torque converter housing
| Torque converter housing |
| To remove |
| Important | ||
|
It is very important to observe great cleanliness when working on the gearbox. Dirt particles can seriously damage the function and service life of the gearbox. |
||
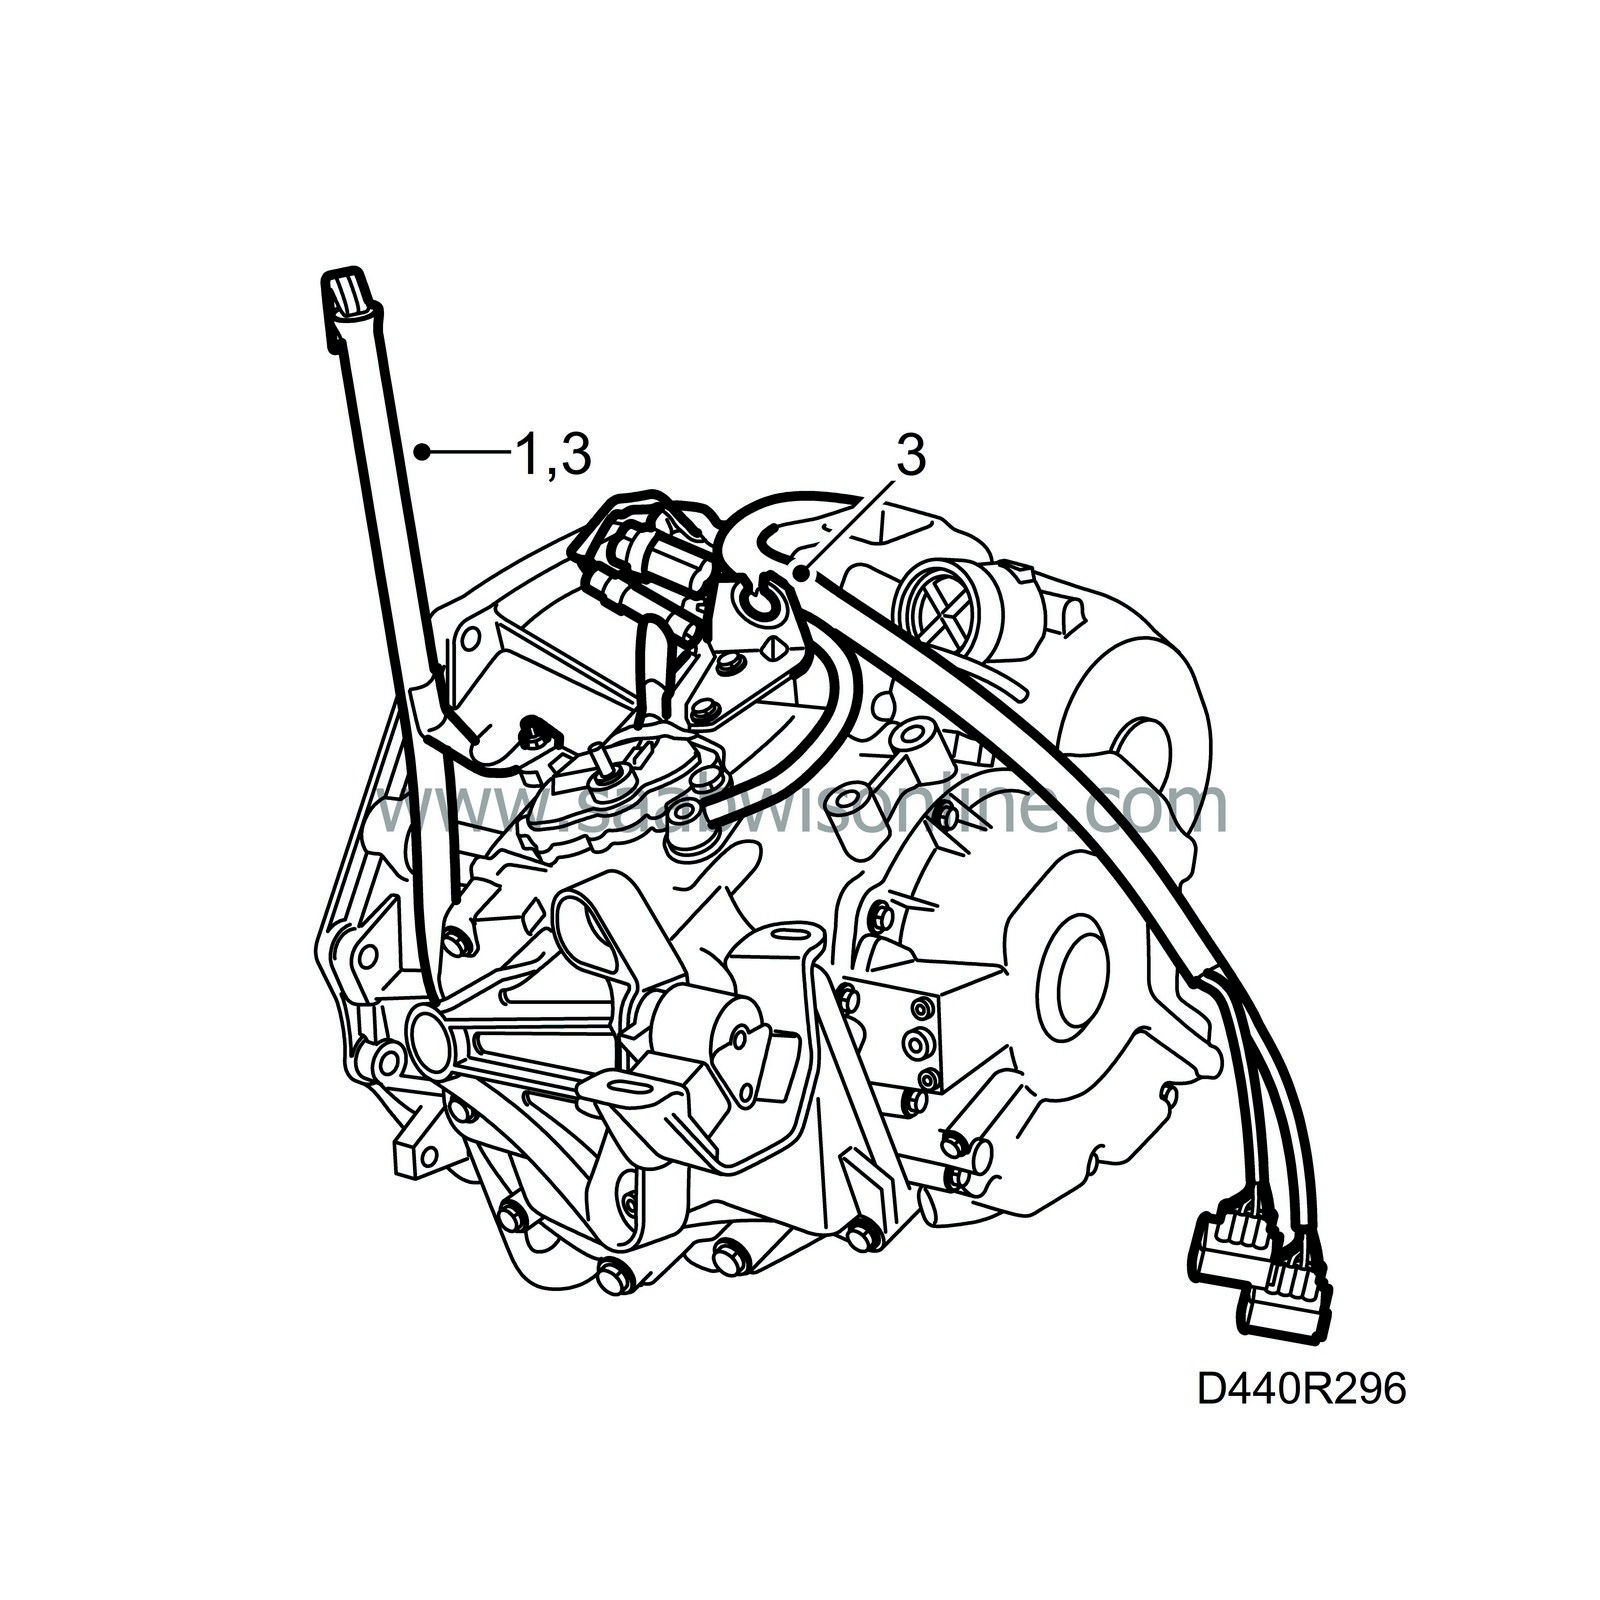
| 1. |
Drain the oil from the gearbox before removing any parts. Remove the gearbox from the car. See Adjustment/replacement Automatic gearbox assembly. Fit the dipstick pipe.
|
|
| 2. |
Plug the shaft hole. Clean the exterior of the gearcase. Use plug 91 32 929, 91 32 937 and 87 92 244. Plug the breather pipe.
|
|
| 3. |
Remove the dipstick pipe. Remove the selector lever bracket.
|
|
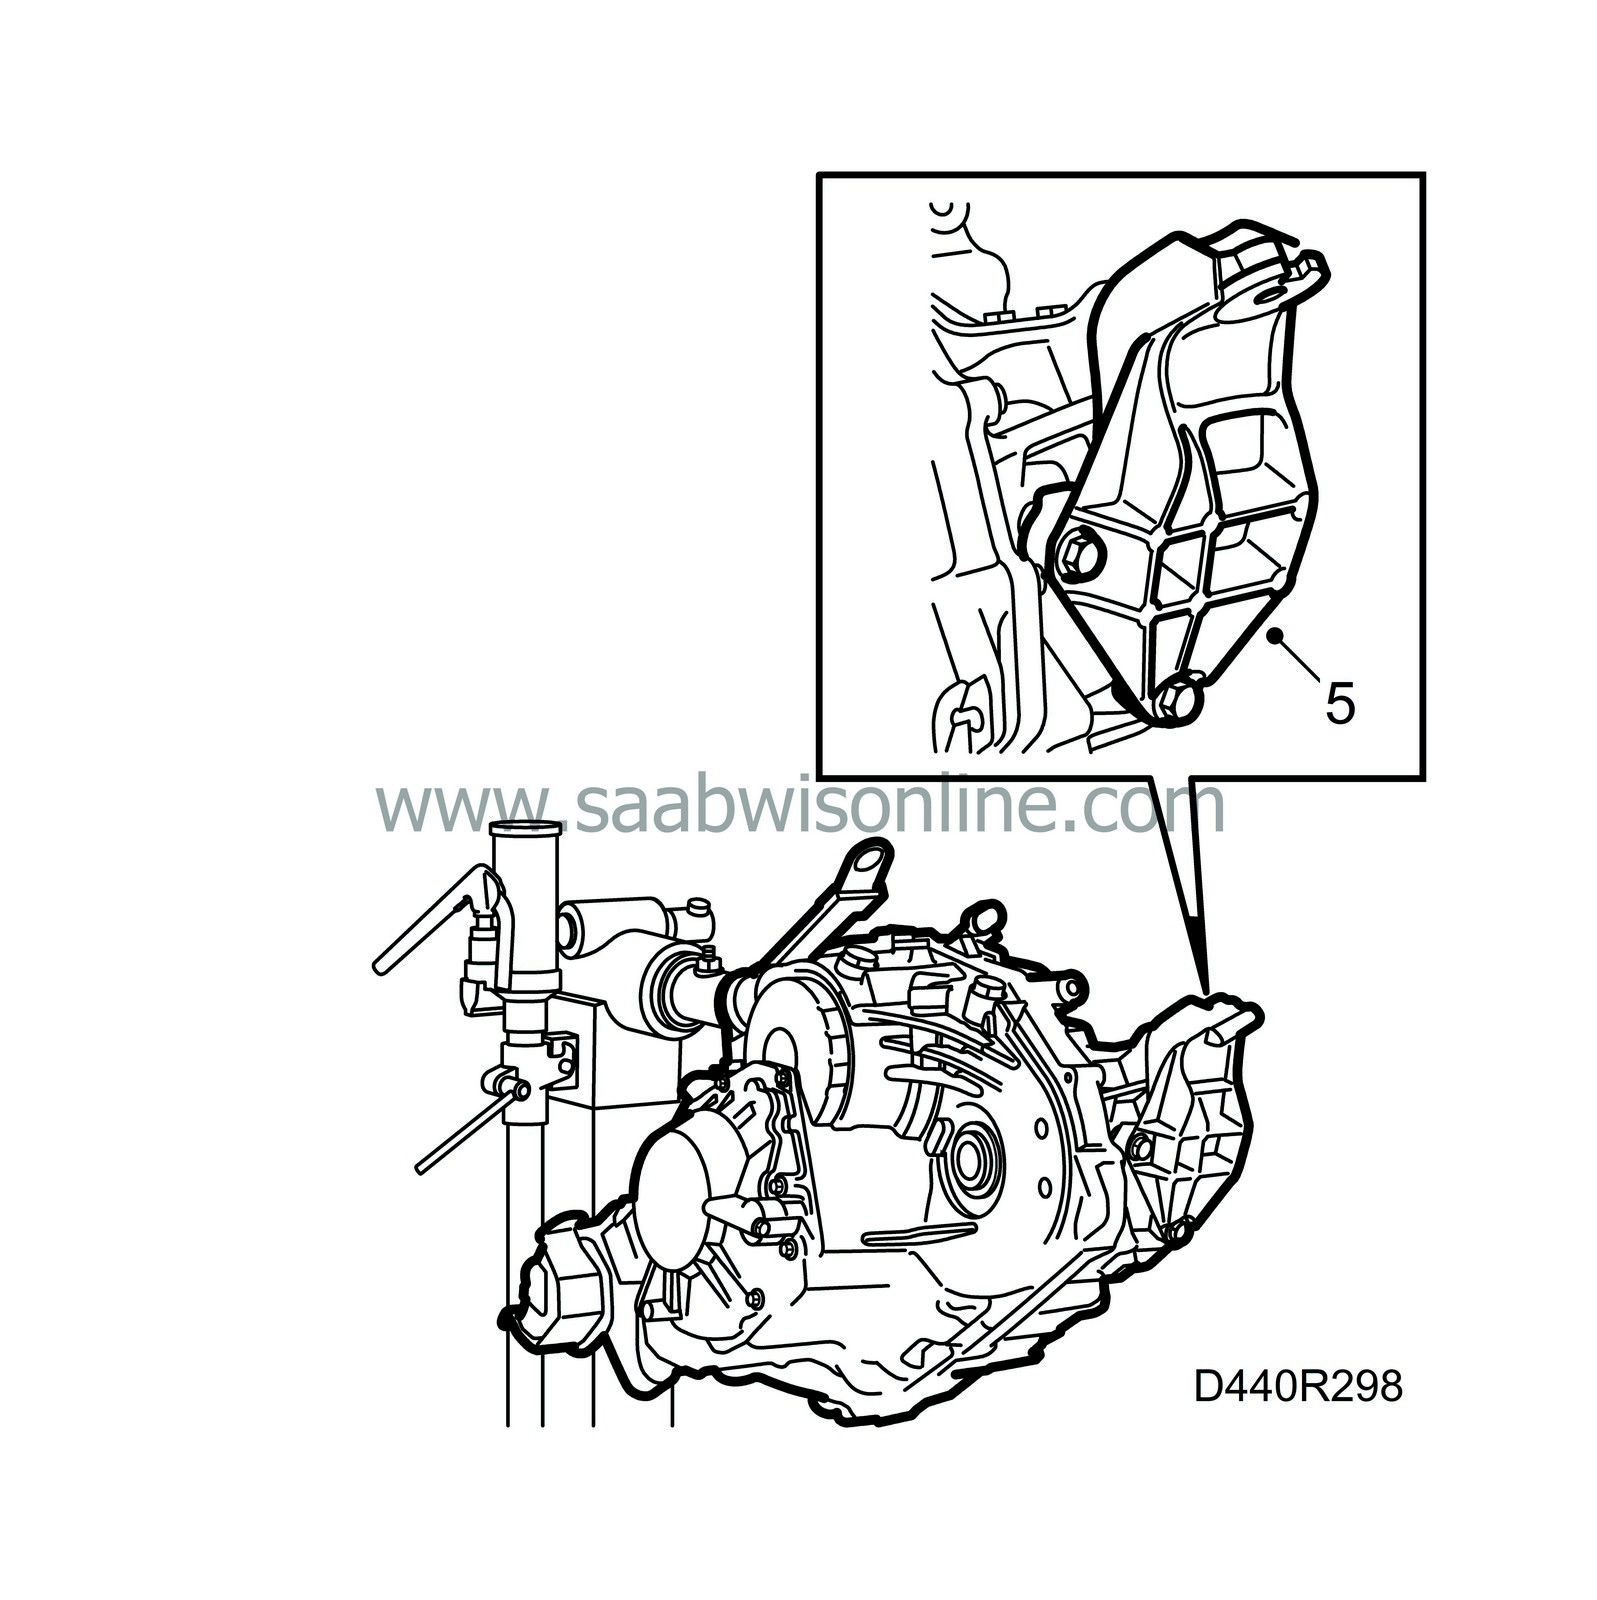
| 5. |
Remove the rear engine mounting if there is one on the gearbox.
|
|
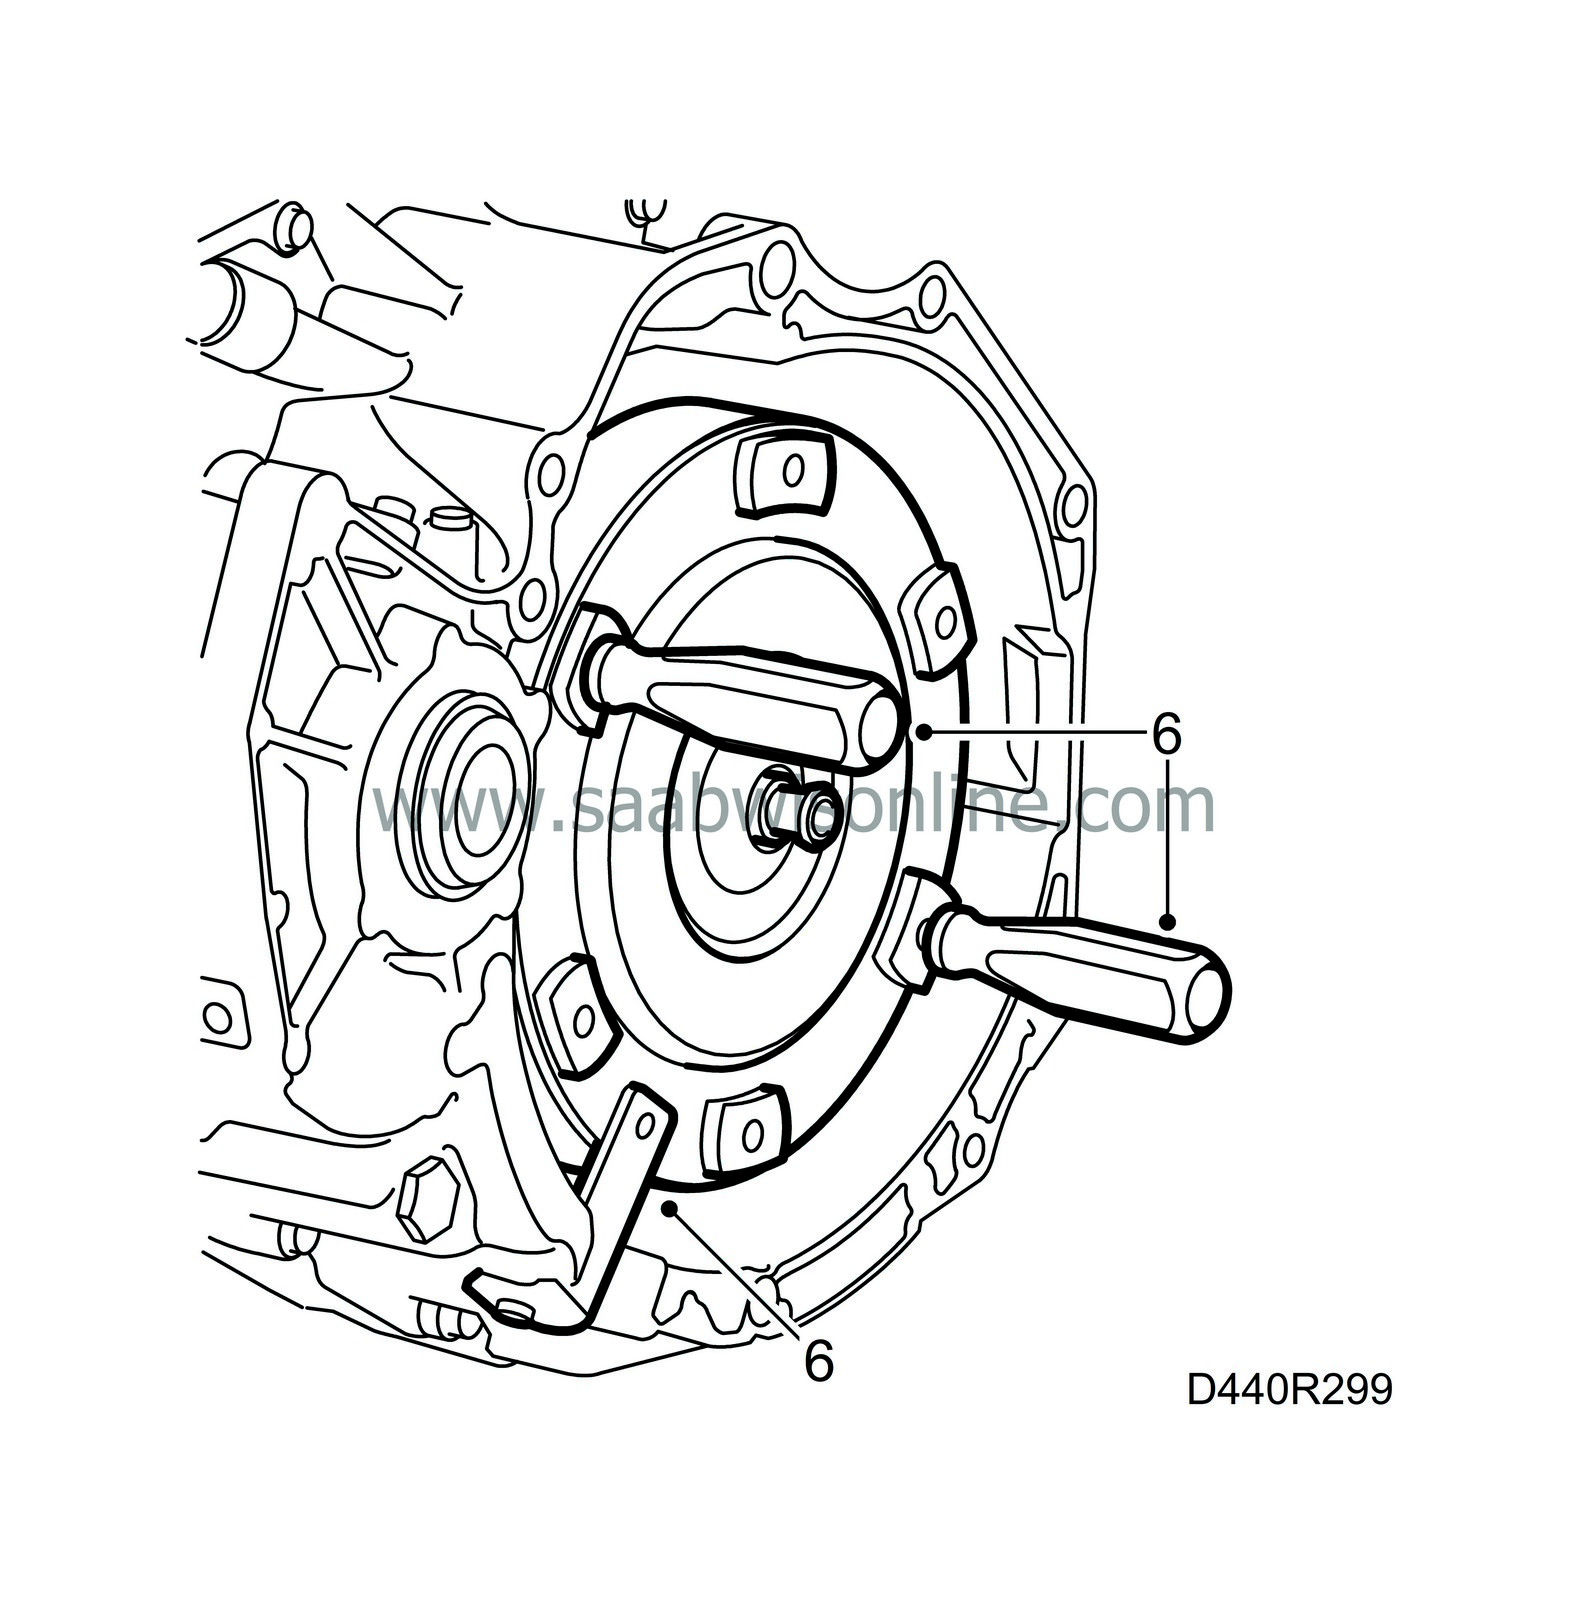
| 6. |
Fit tool 87 92 681 or 87 91 766 to the torque converter. Remove holder 87 92 277 or 87 92 574. Remove the torque converter.
|
|
| 7. |
Turn the gearbox 180° on the stand.
|
|
| 8. |
Remove the cover plate of the temperature sensor and the metal cover.

|
|
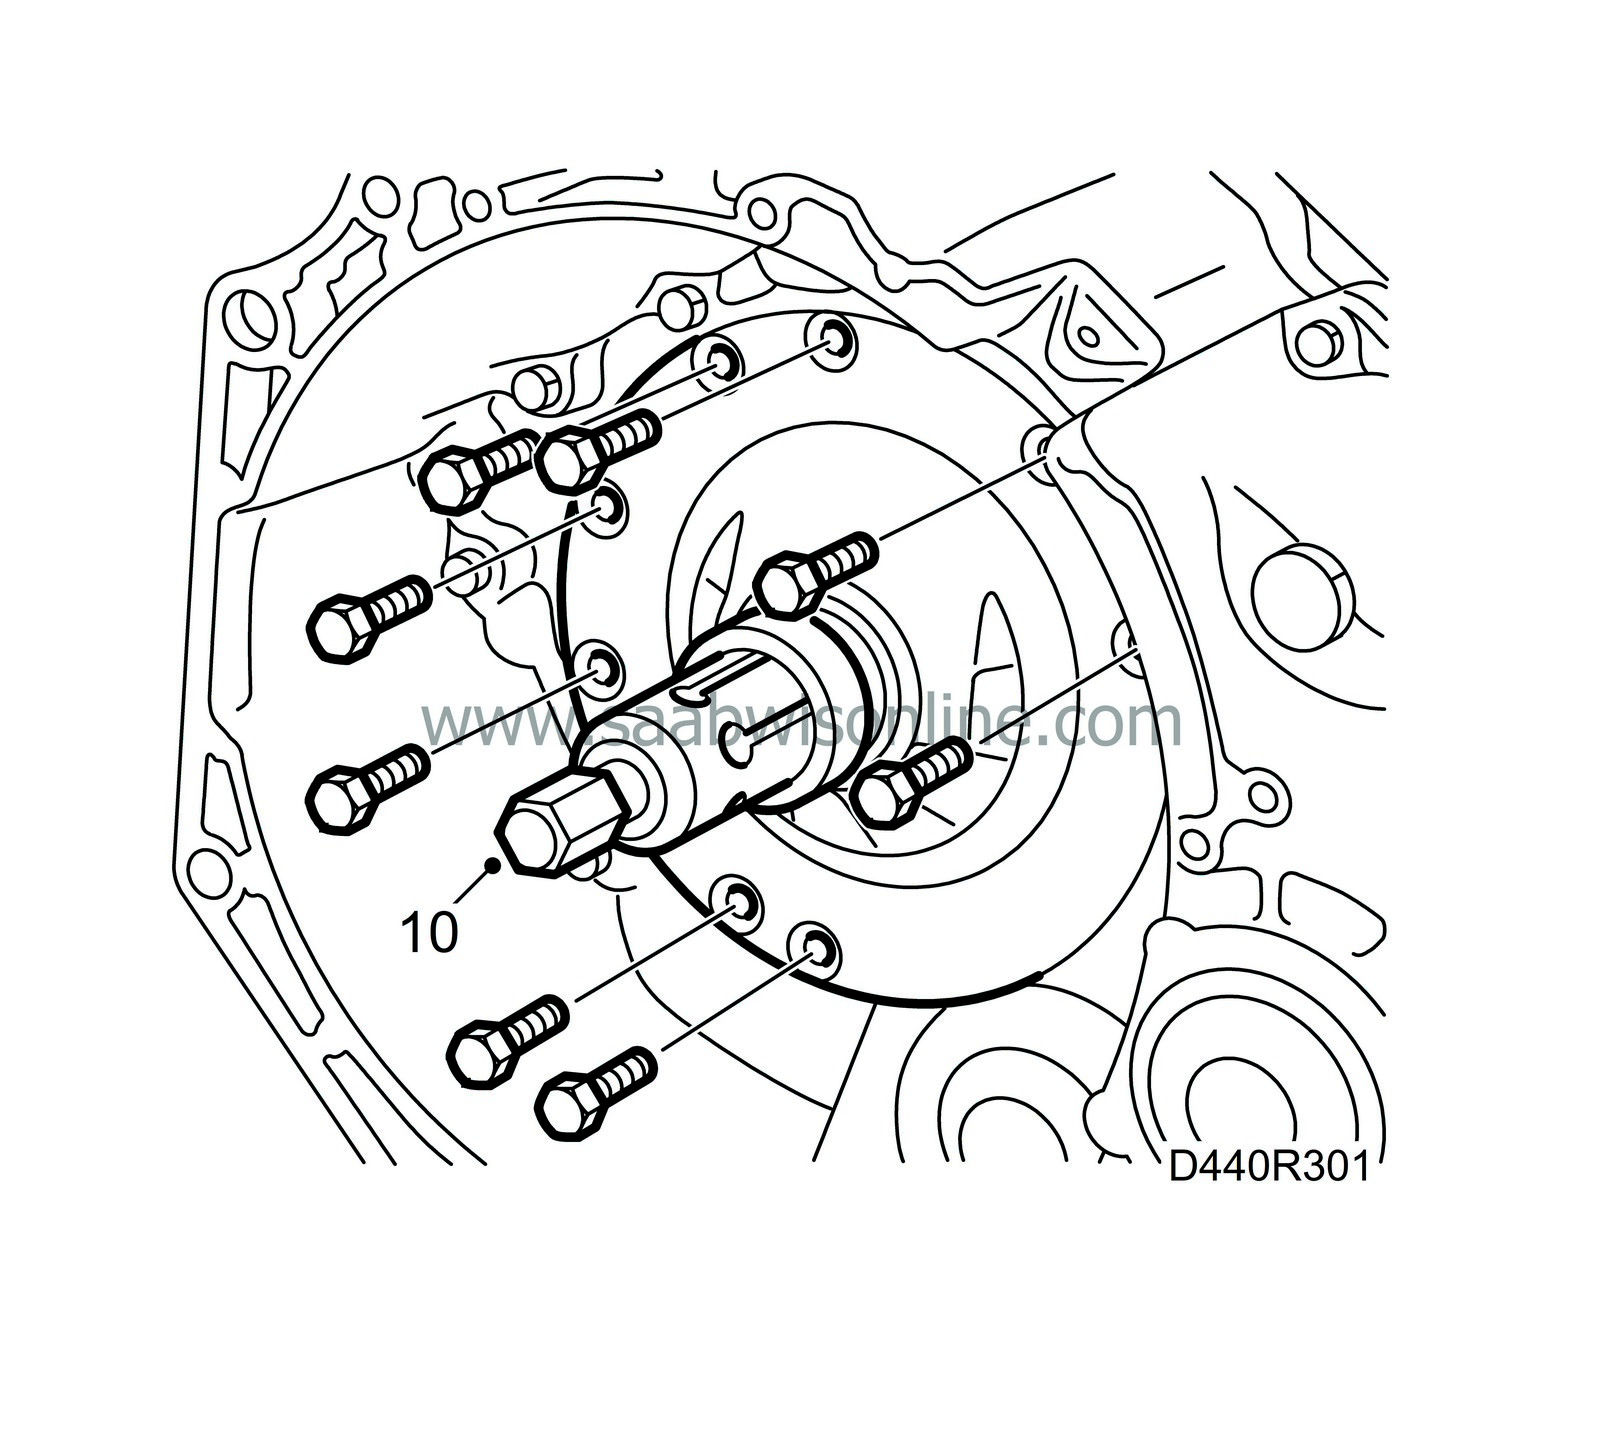
| 9. |
Remove the bolts securing the oil pump to the gearcase.
|
|
| 10. |
Pull the oil pump and brake unit B2 off from the gearcase using puller 87 92 699.
|
|
| 11. |
Remove the brake hub and freewheel F1.
|
|
| 12. |
Turn the gearbox 90° on the stand.
|
|
| 13. |
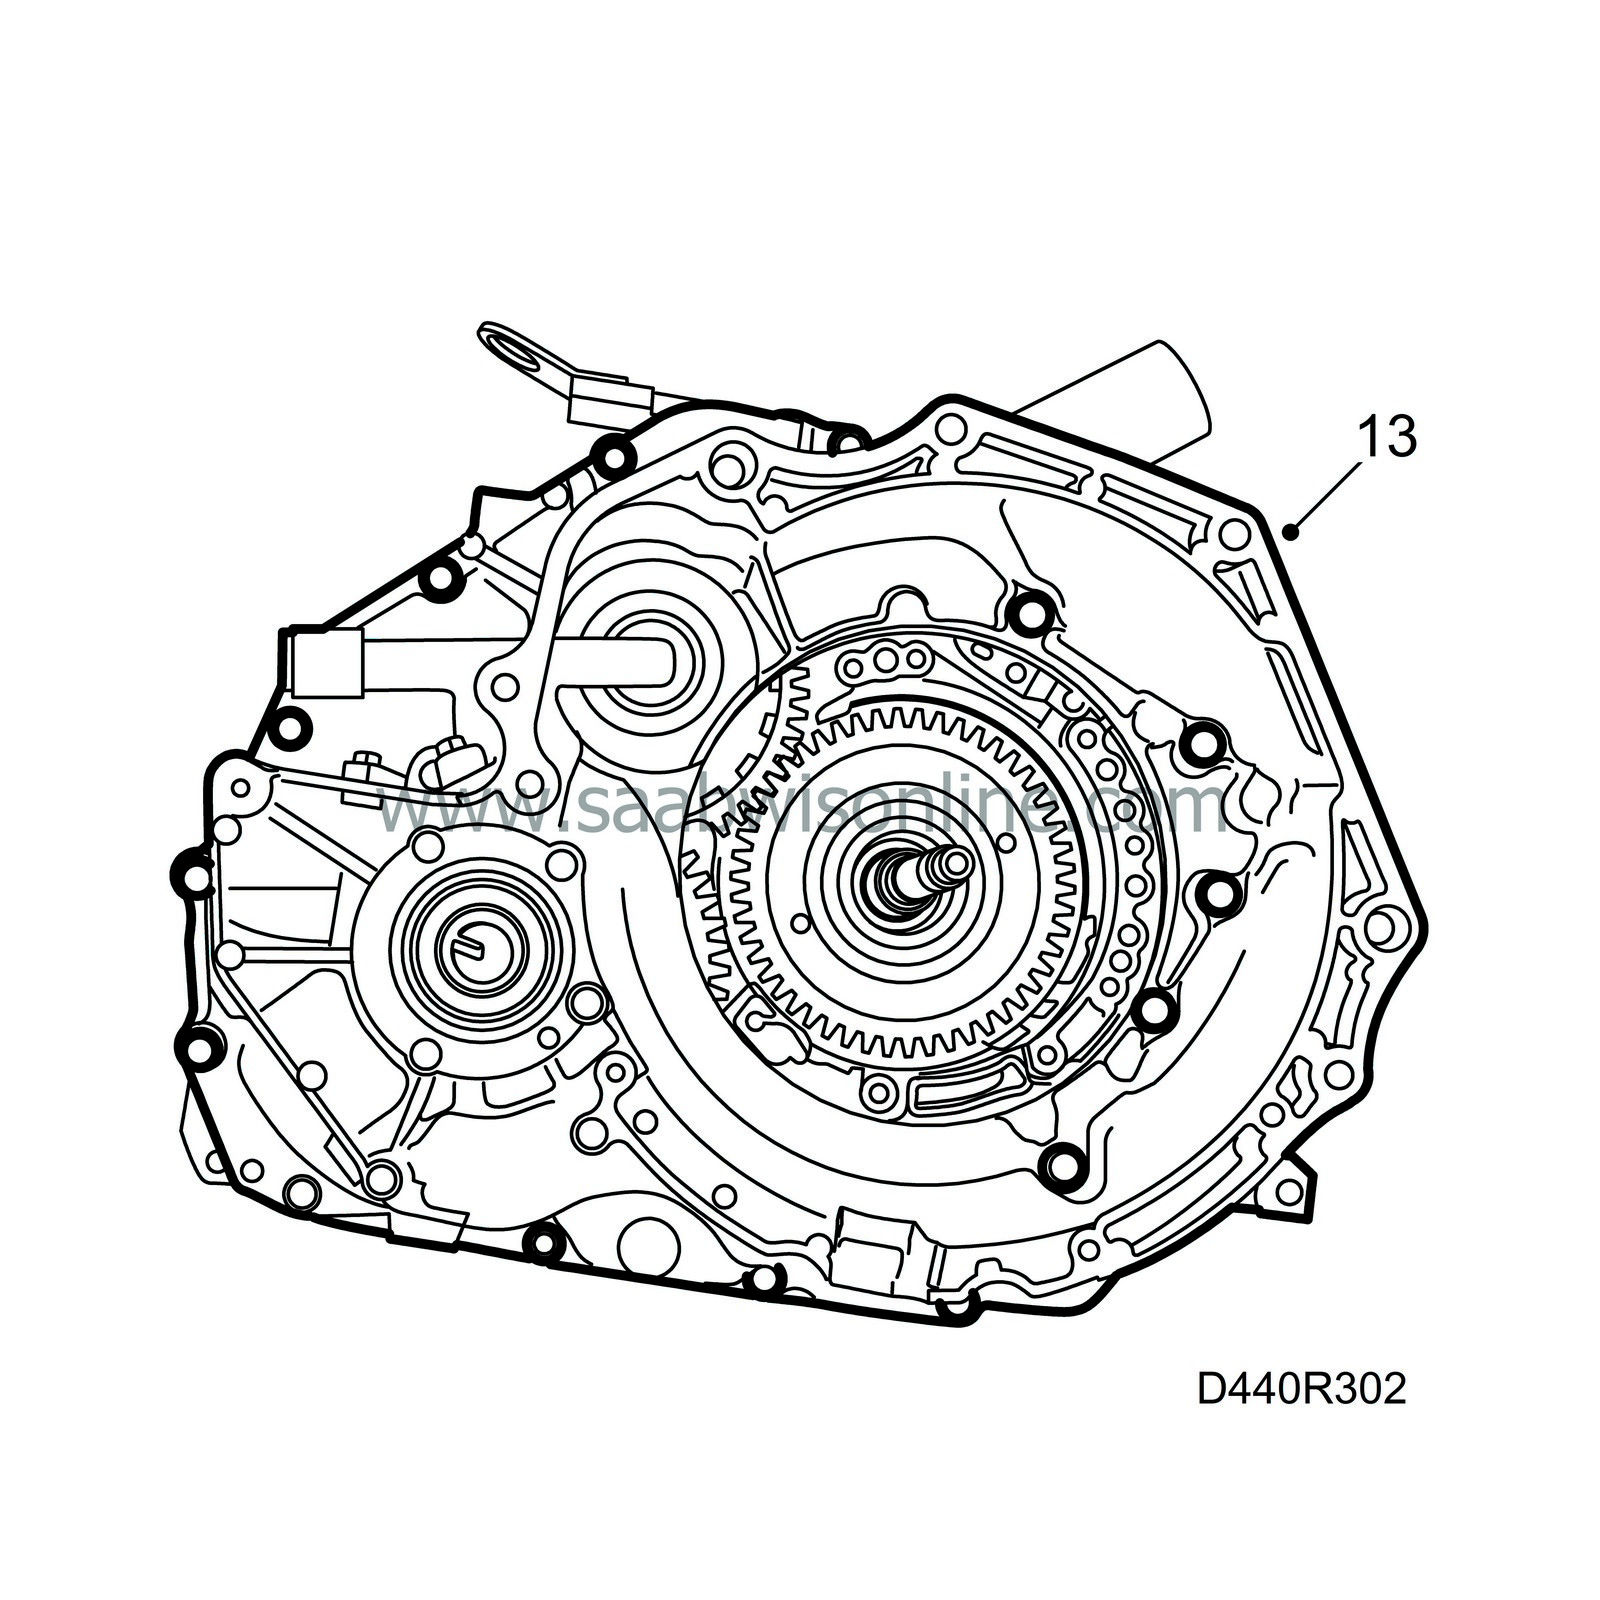
Remove the torque converter housing. Knock the housing loose using a plastic mallet. Remove the small seal.
|
|
| 14. |
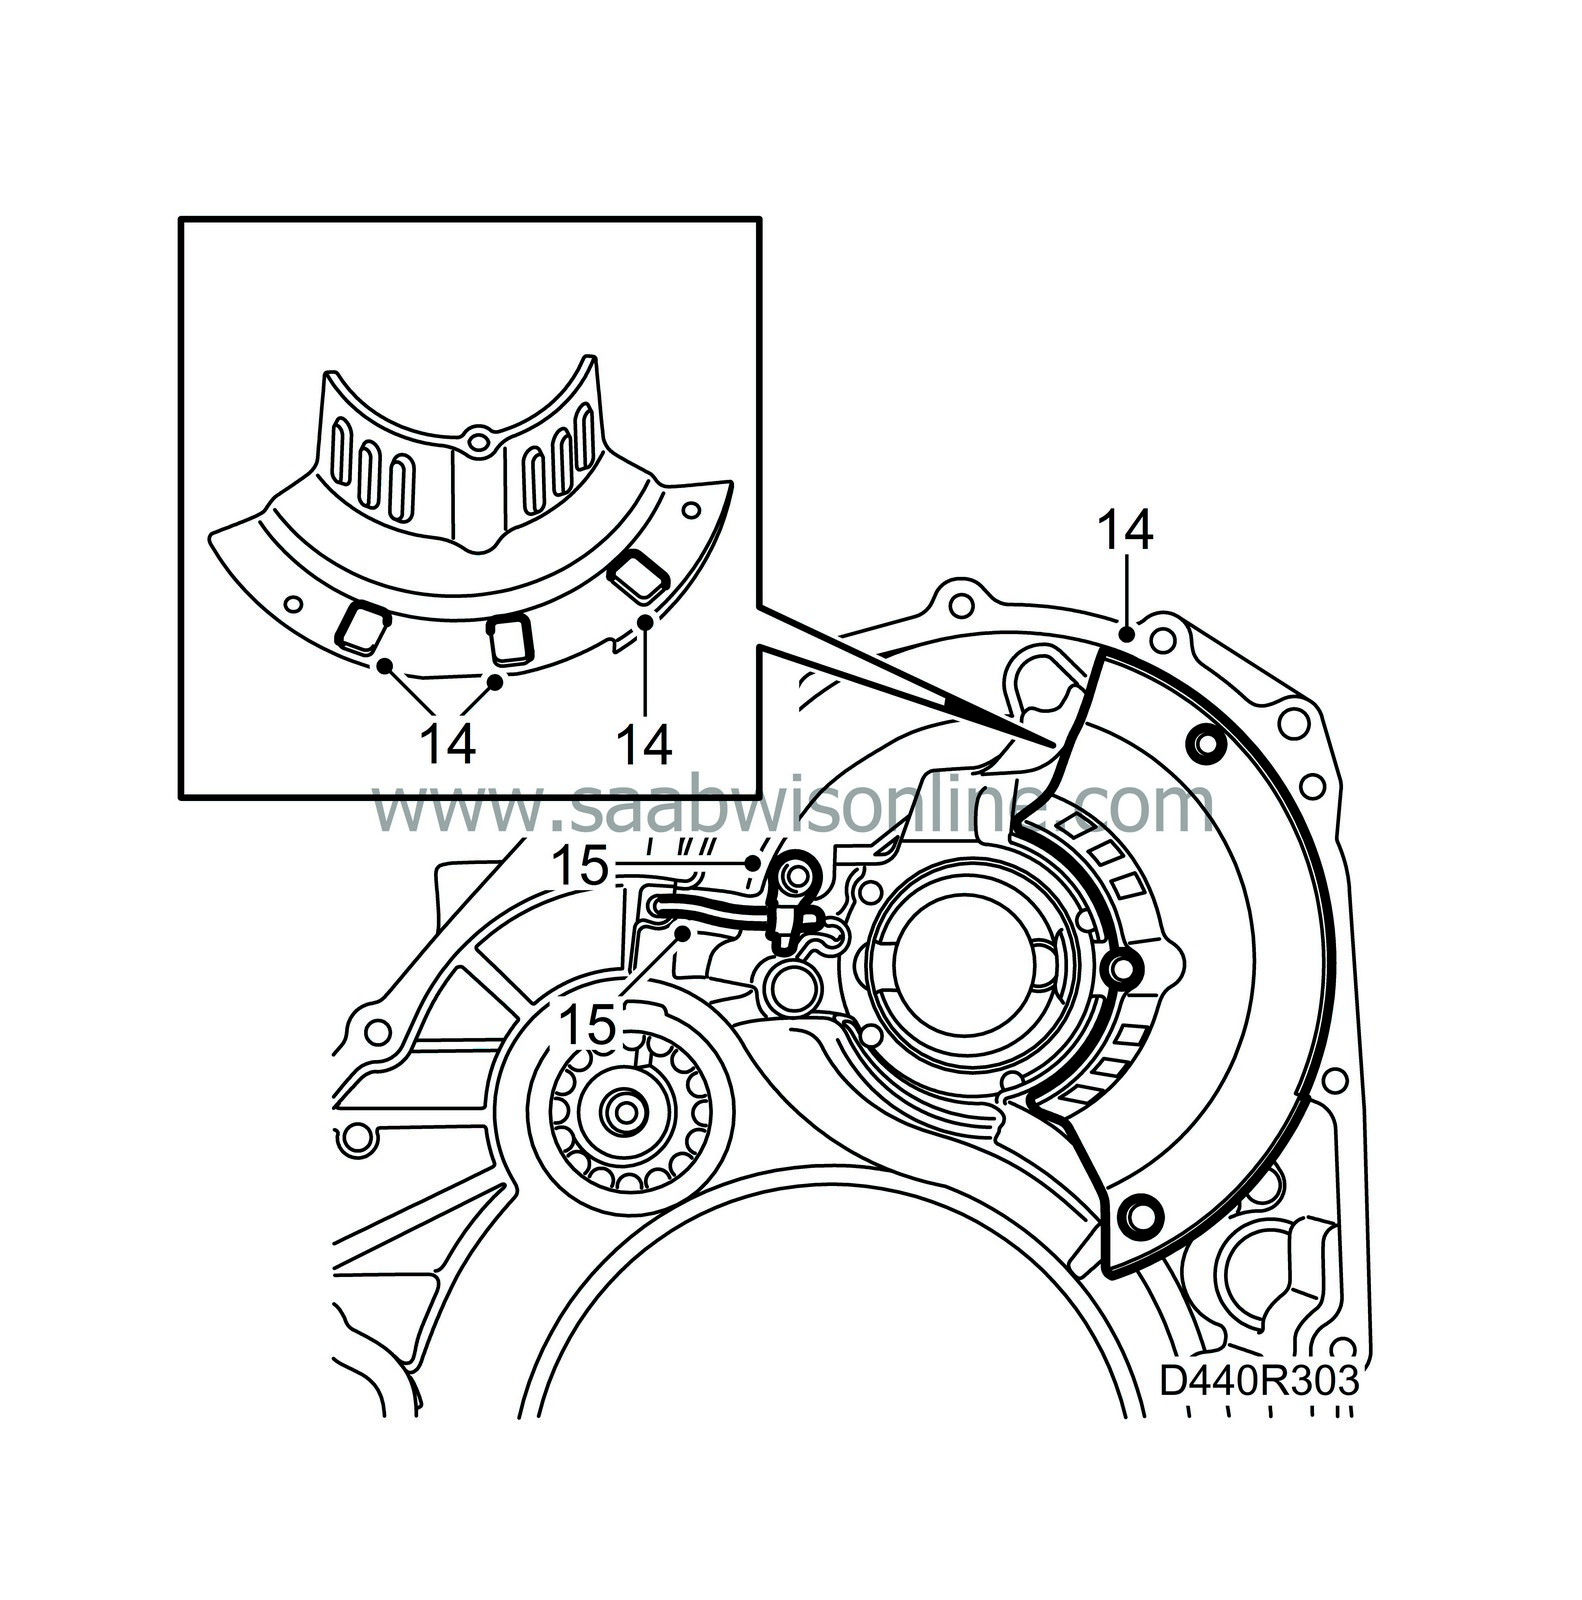
Remove the oil duct plate. Keep the three magnets safe.
|
|
| 15. |
Remove the pipe bracket and the pipe. Use sliding hammer 83 90 270 and hook 87 92 384.
|
|
| 16. |
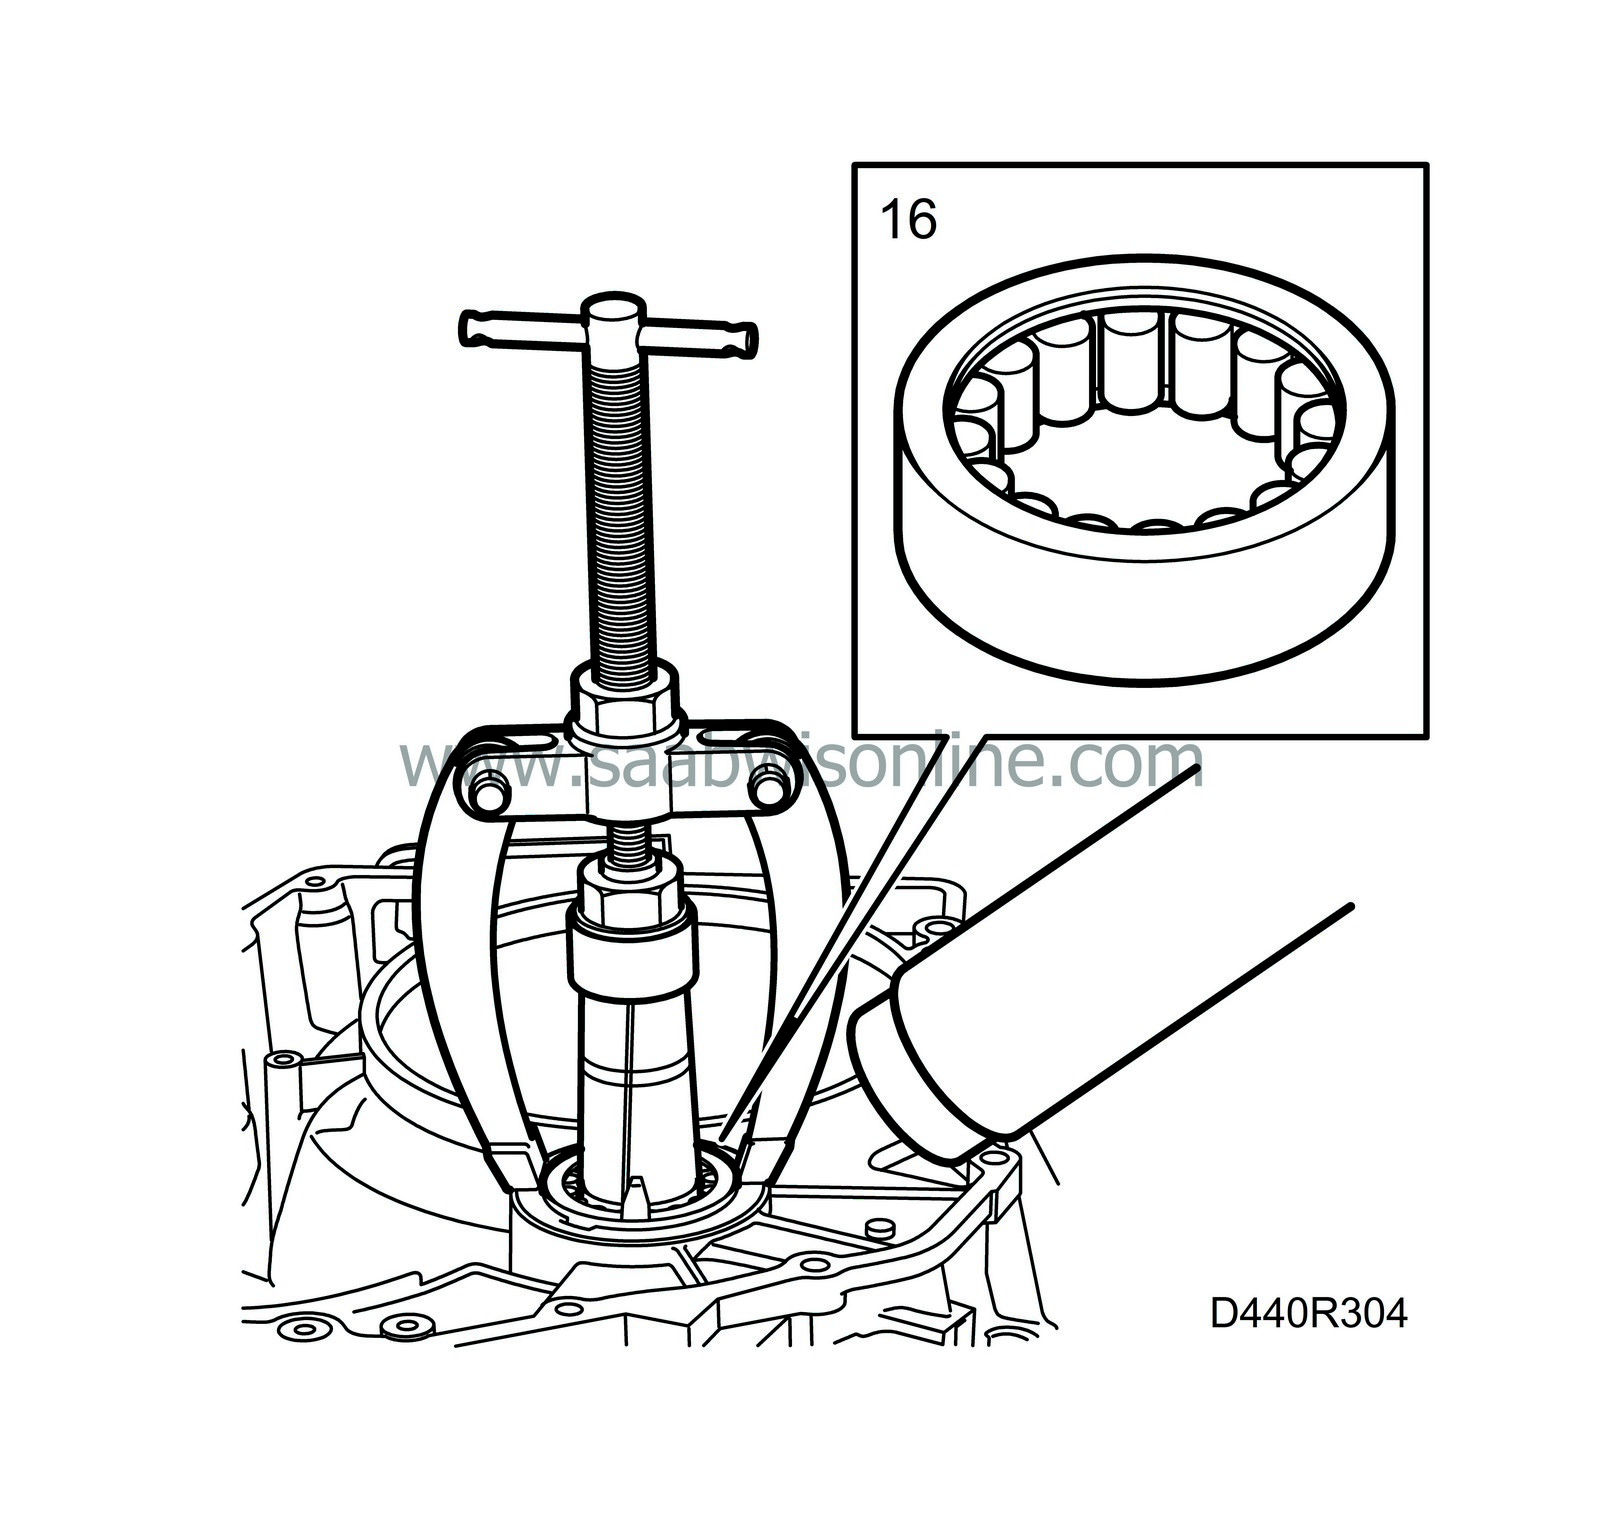
Fit pullers 87 91 675 and 87 91 683 and remove the roller bearing by heating the bearing housing with a heat gun for about 5 minutes. Pull out the bearing.
|
|
| 17. |
Fit pullers 87 92 707 and 87 92 715. Remove the bearing race of the conical roller bearing from the torque converter housing by heating around the bearing seat with a heat gun for about 5 minutes. Pull out the bearing and on certain variants the washer.

|
|
| 18. |
Remove the cover and other plugs.
|
|
| 19. |
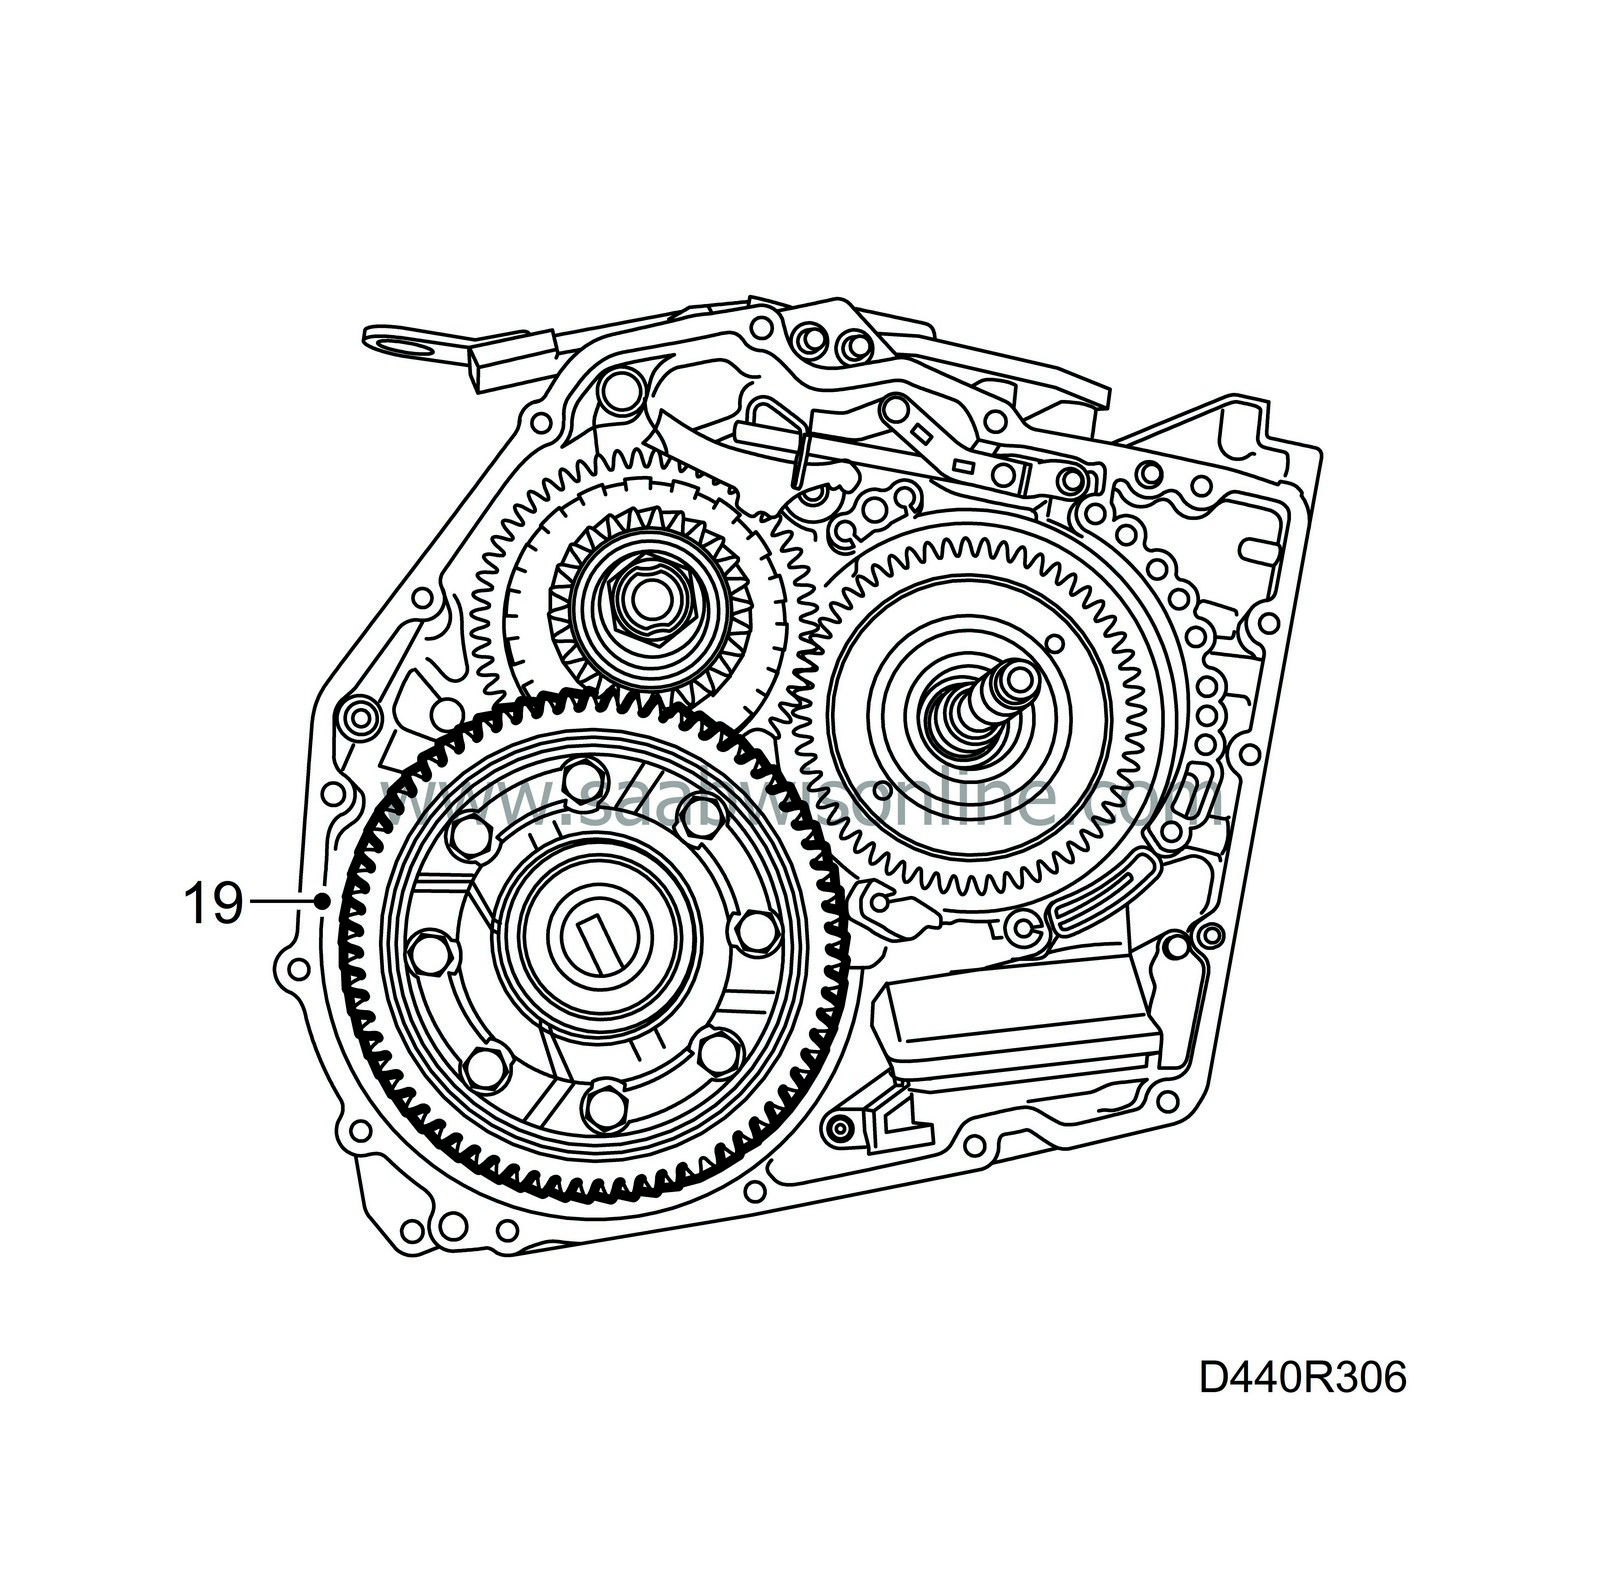
Lift out the differential unit.
|
|
| 20. |
Carefully remove any gasket remains from the sealing surfaces of the gearcase using a gasket scraper.
|
||||||||||
| 21. |
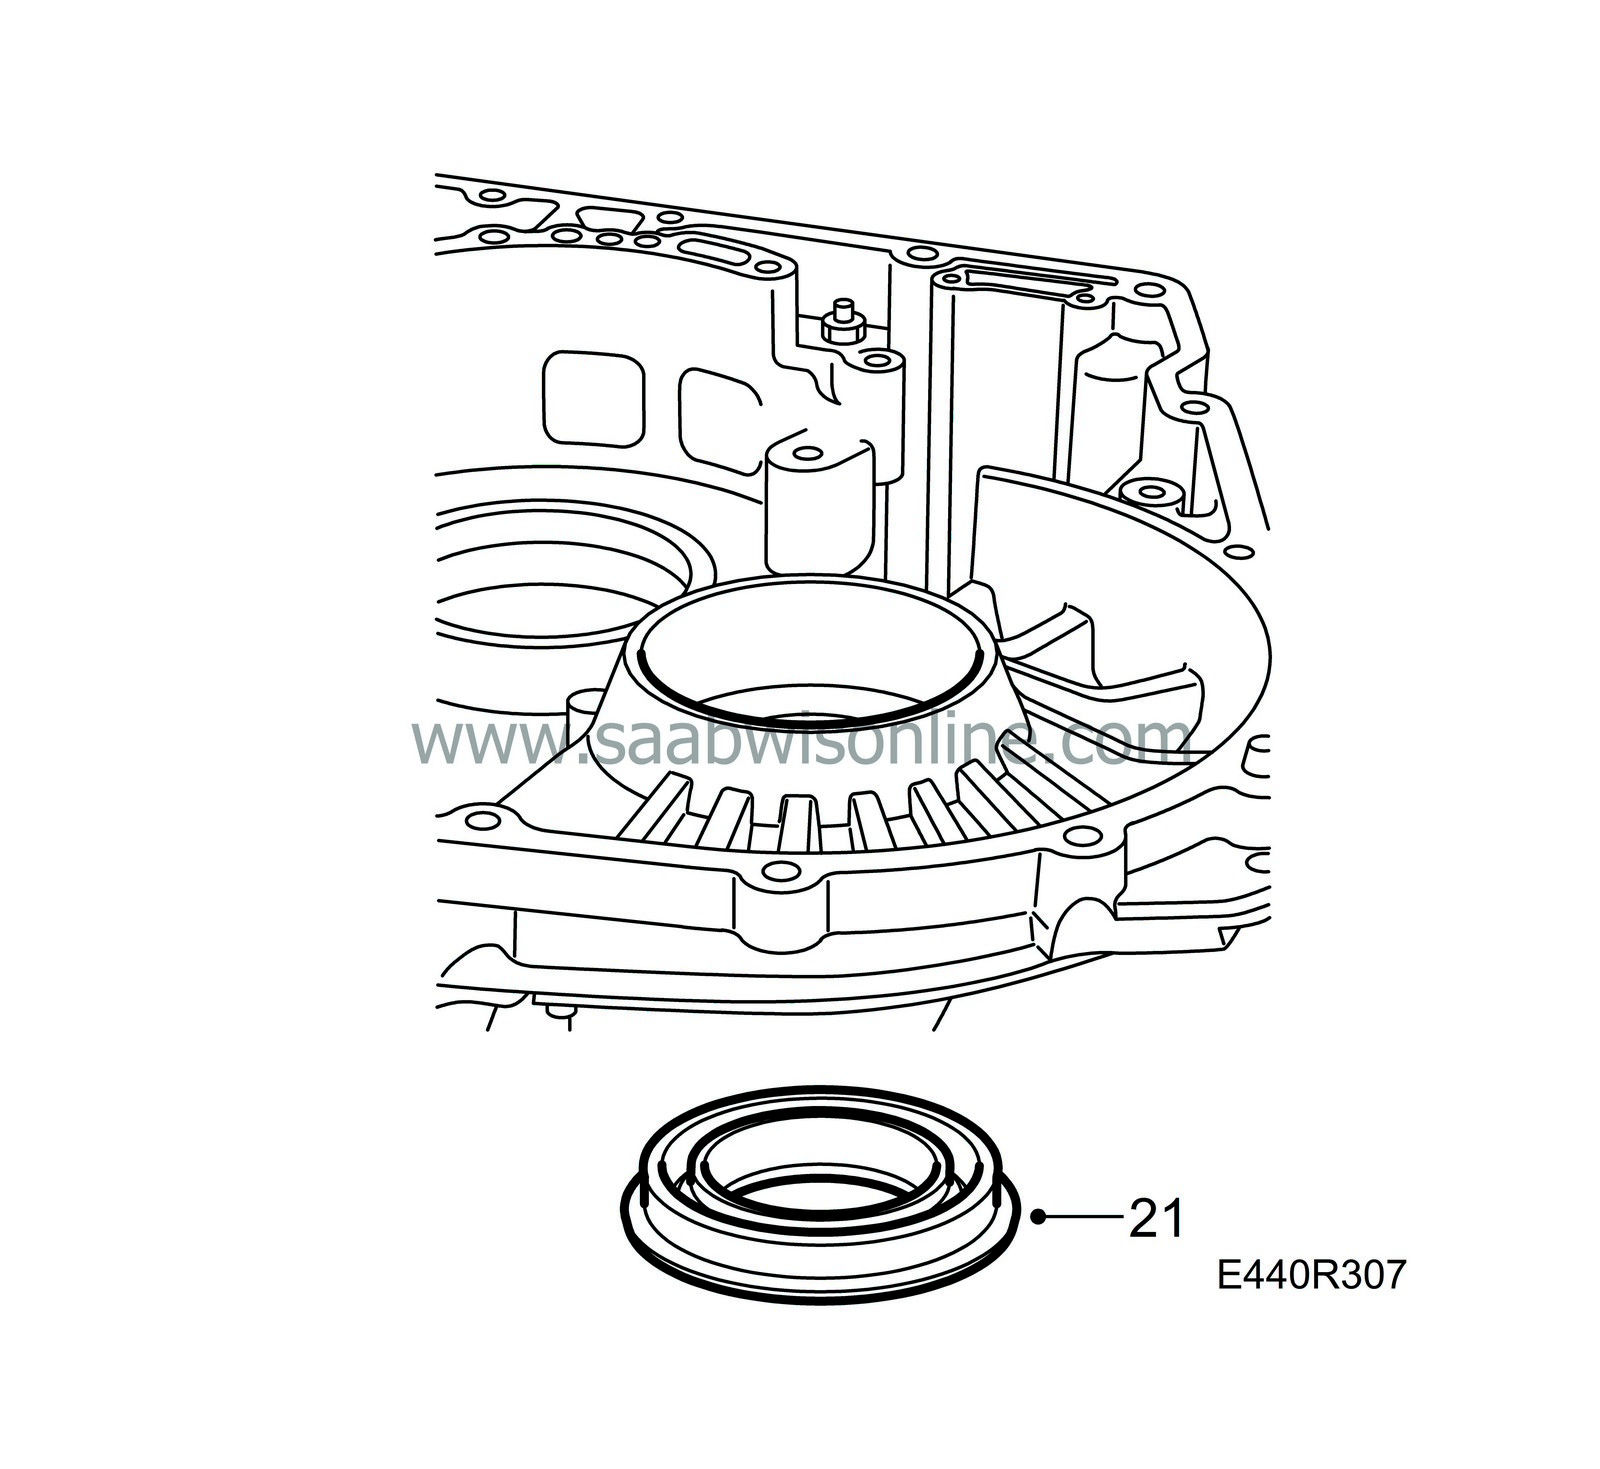
Tap out the shaft seal.
|
|
| 22. |
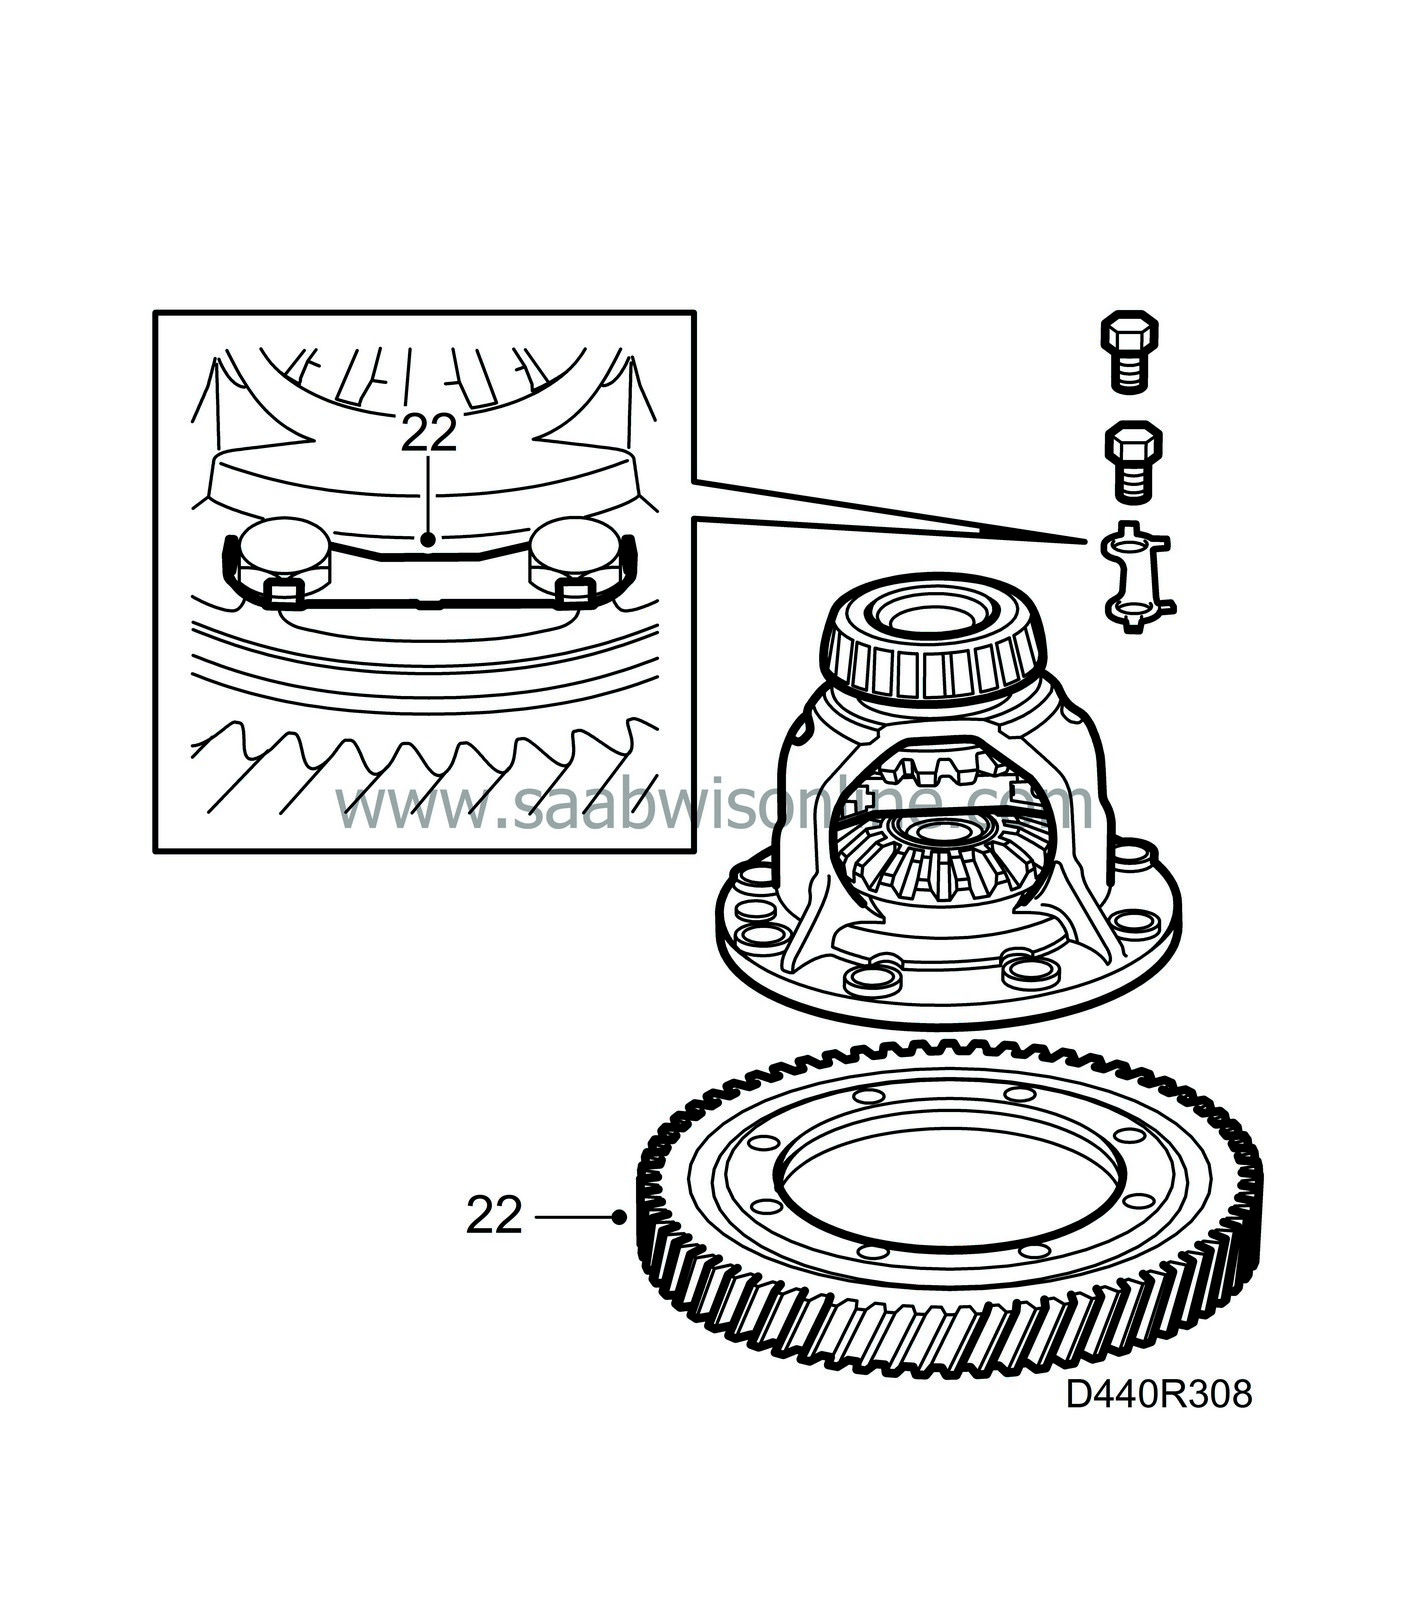
Bend out the lock plate on the crown wheel and remove the bolts. Tap off the crown wheel with a shatterproof plastic mallet.
|
|
| To fit |
| 1. |
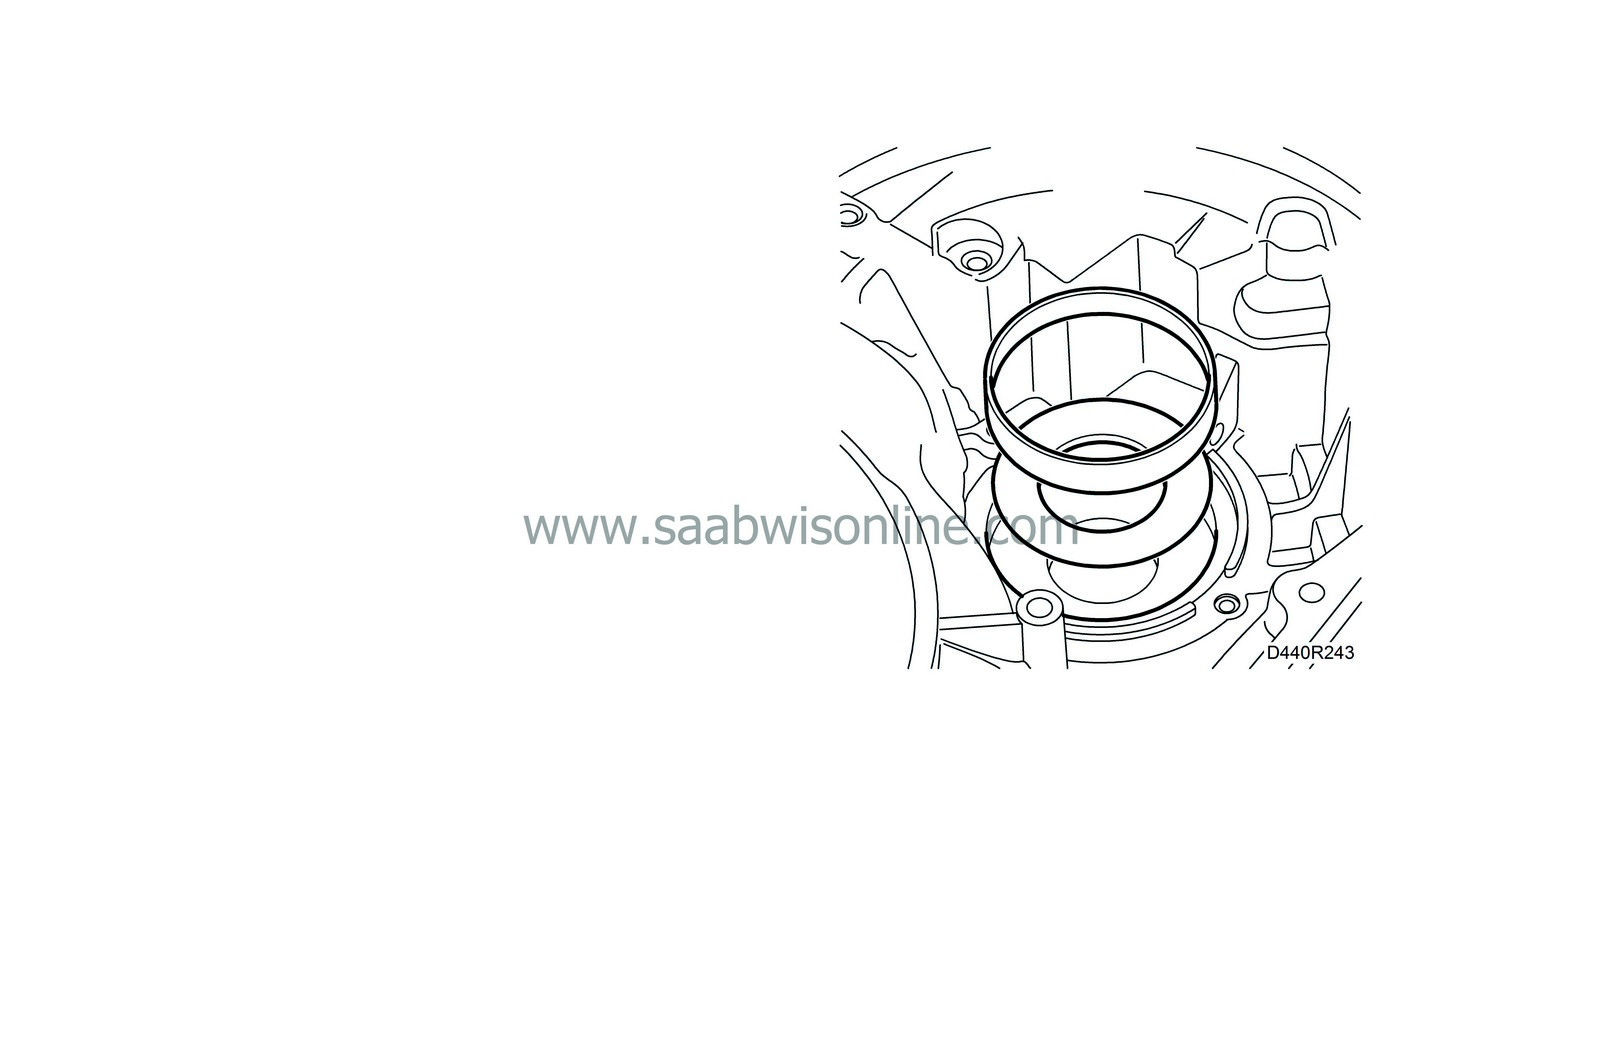
Heat the bearing seat of the differential bearing race in the torque converter housing. Fit a washer on the variants that require this and fit the bearing race. Check that the bearing race is in contact with the bottom by trying to turn the washer. The washer should not turn.
|
|
| 2. |
Heat the bearing seat with a heat gun and fit the roller bearing into the torque converter housing with the text facing downwards. Press it until it reaches the bottom of the torque converter housing. The side of the roller bearing forms the bearing race of the output shaft's thrust bearing.
|
|
| 3. |
Clean the three magnets and place them on the oil reservoir plate. Apply threadlock 74 96 268 to the bolts and fit the oil duct plate.
Tightening torque 5.5 Nm (4 lbf ft) 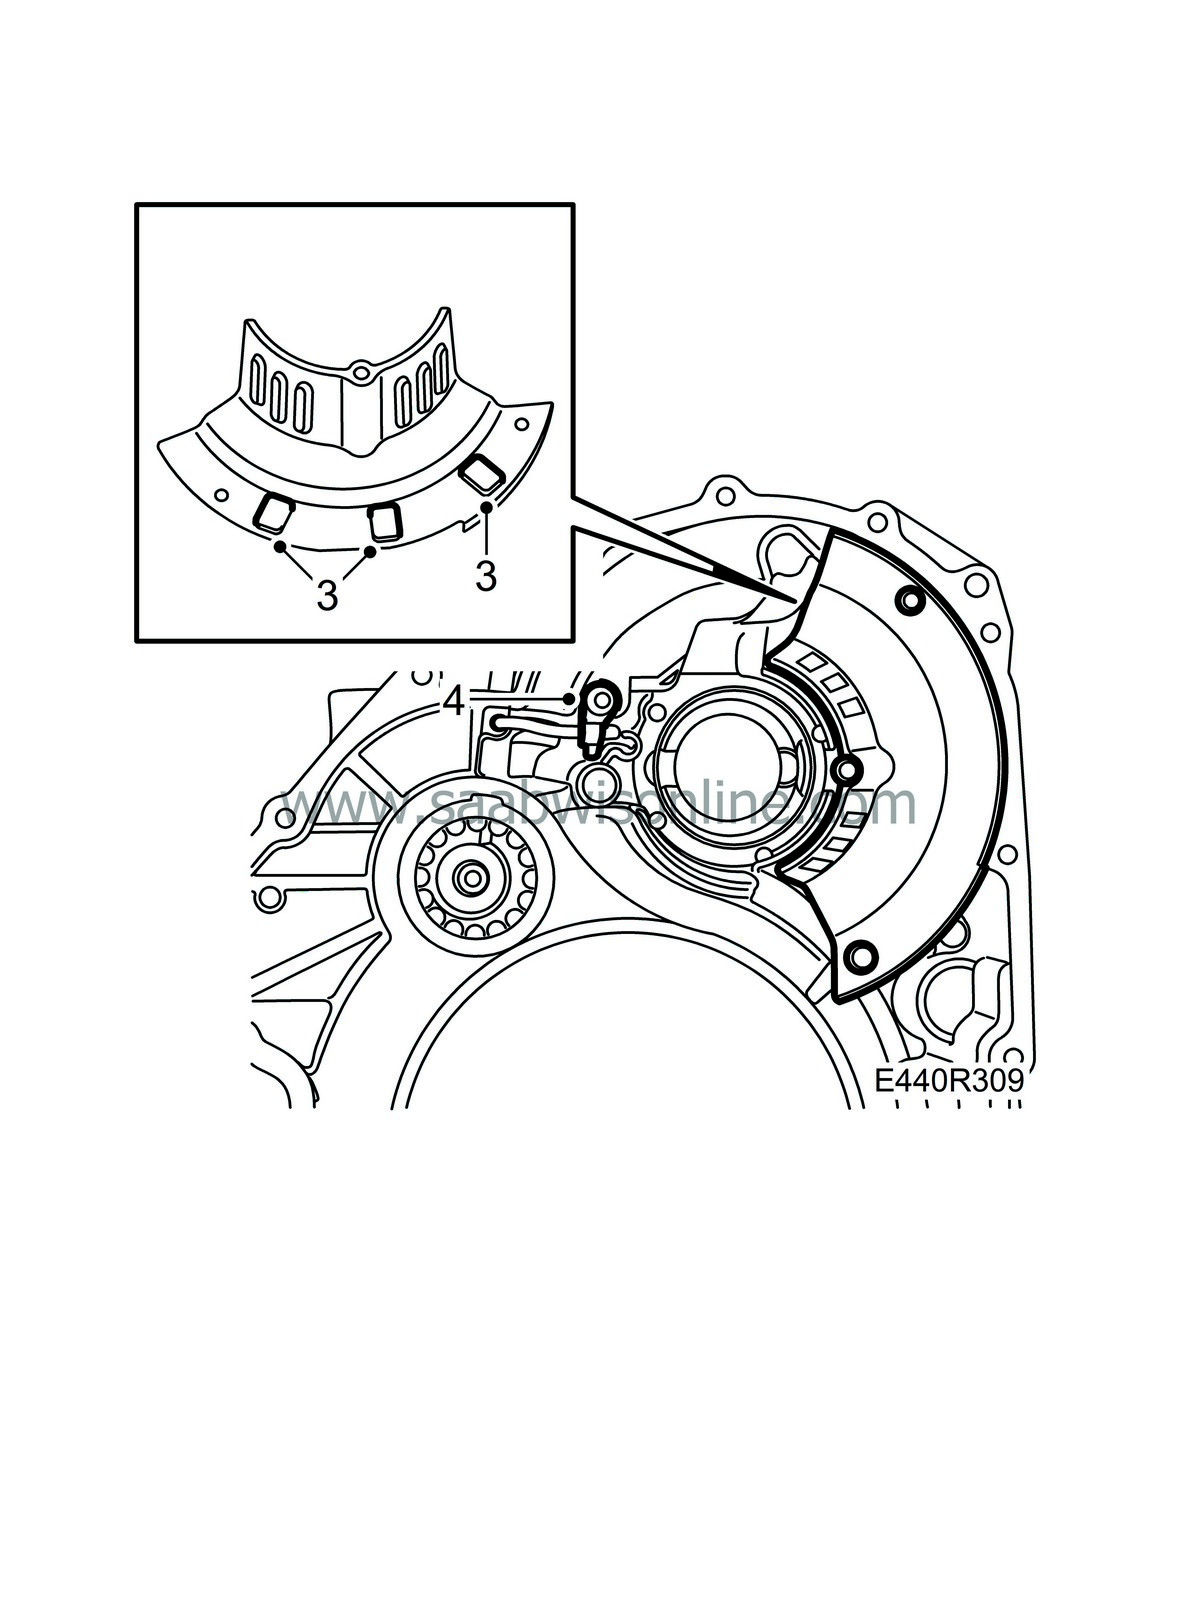
|
|
| 4. |
Fit the oil pipe using a shatterproof plastic mallet. Be careful not to bend or damage the pipe. Fit the pipe clip.
|
|
| 5. |
Grease the bearing with transmission fluid and fit the differential excluding crown wheel into the gearcase.
|
|
| 6. |
Fit the torque converter housing. Only fit every other bolt.
Tightening torque 25 Nm (18 lbf ft) Measure the preload of the differential bearing using a dynamometer 87 92 483 and drift 87 91 337. Turn until the reading stabalizes. Start value: 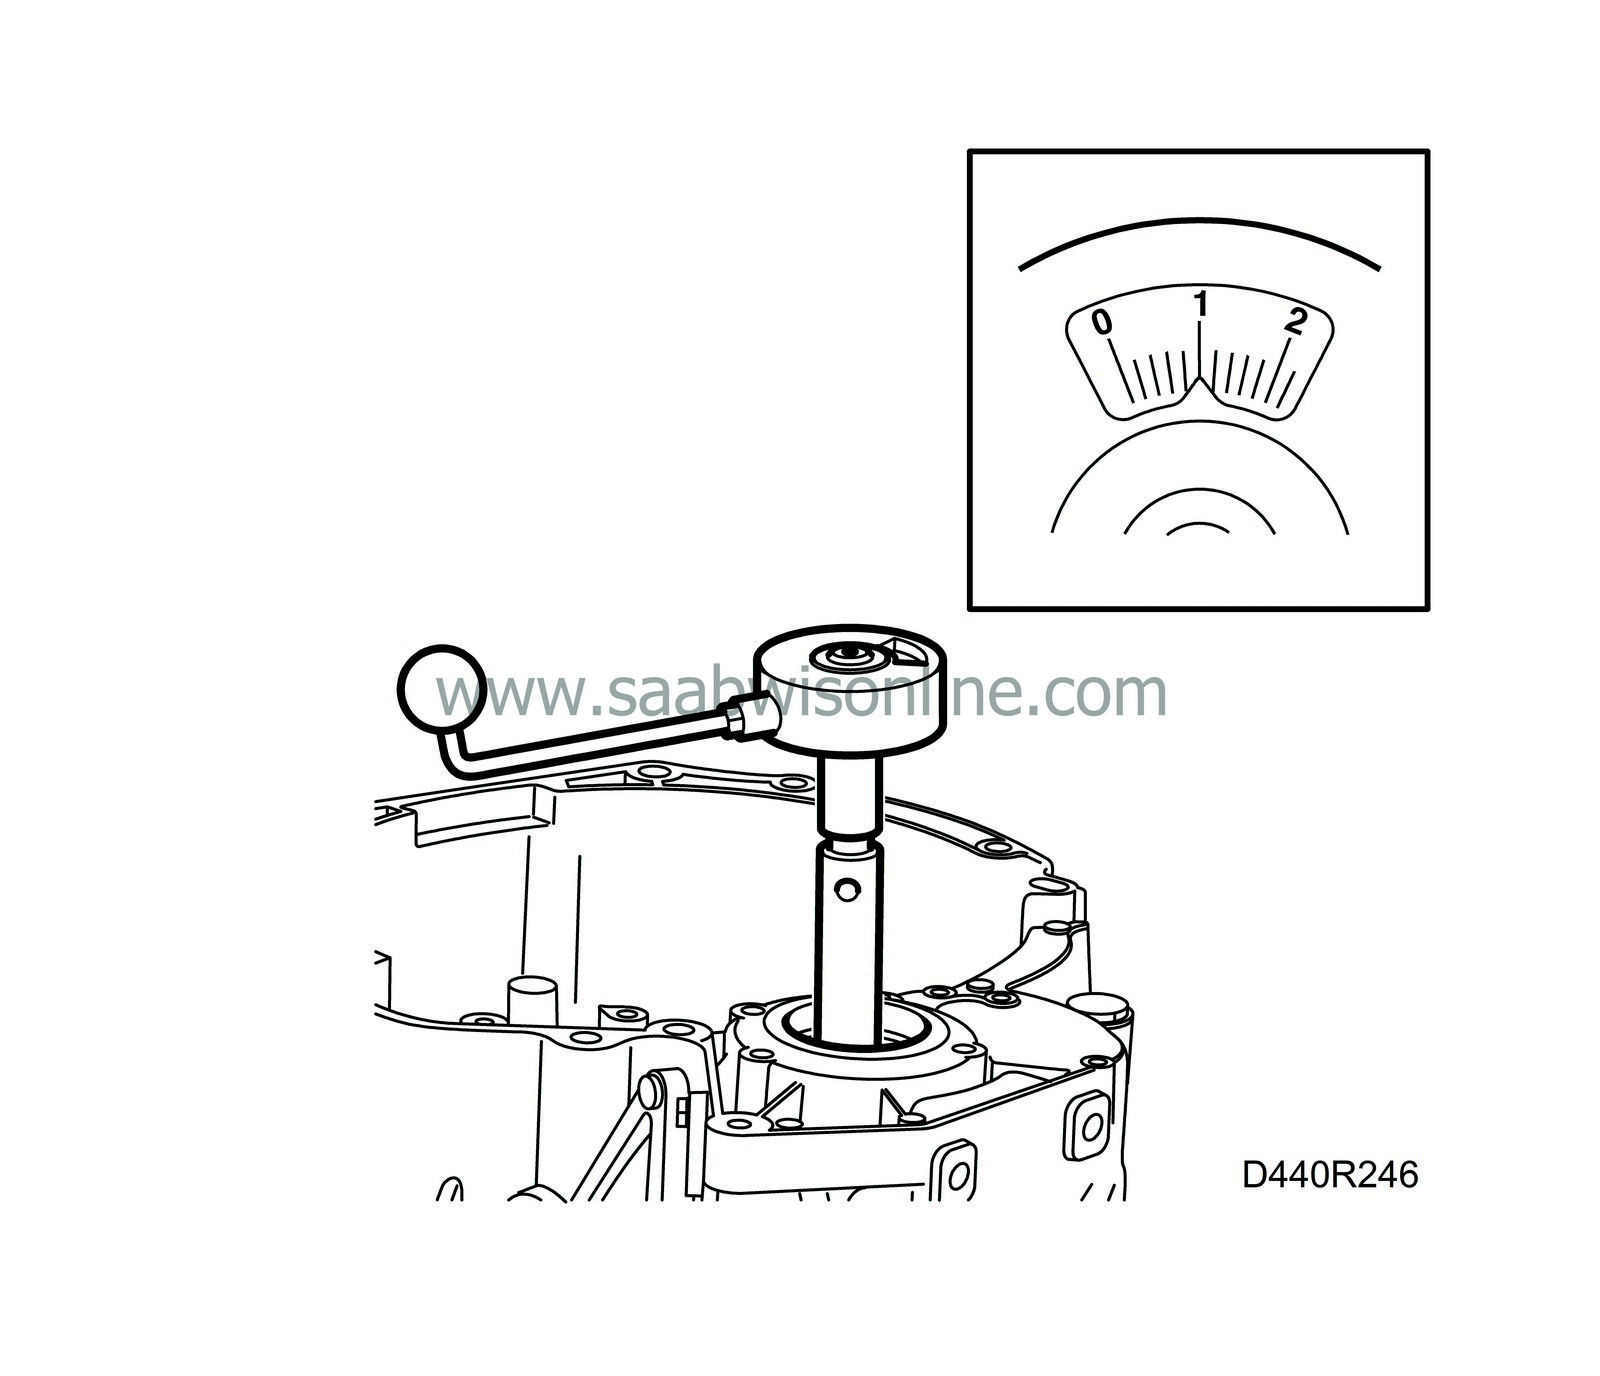
|
|||||
| 7. |
If the preload deviates from the specified value, remove the differential and bearing race from the gearcase and change the shims. If the reading exceeds the value above, thinner shims should be used. If the reading is lower than the given value, thicker shims should be used. Shims are available in varying thicknesses from 1.0 - 1.90 mm
|
|
| 8. |
Remove the torque converter housing and lift out the differential.
|
|
| 9. |
Heat the crown wheel with a heat gun for about 5 minutes.
|
|
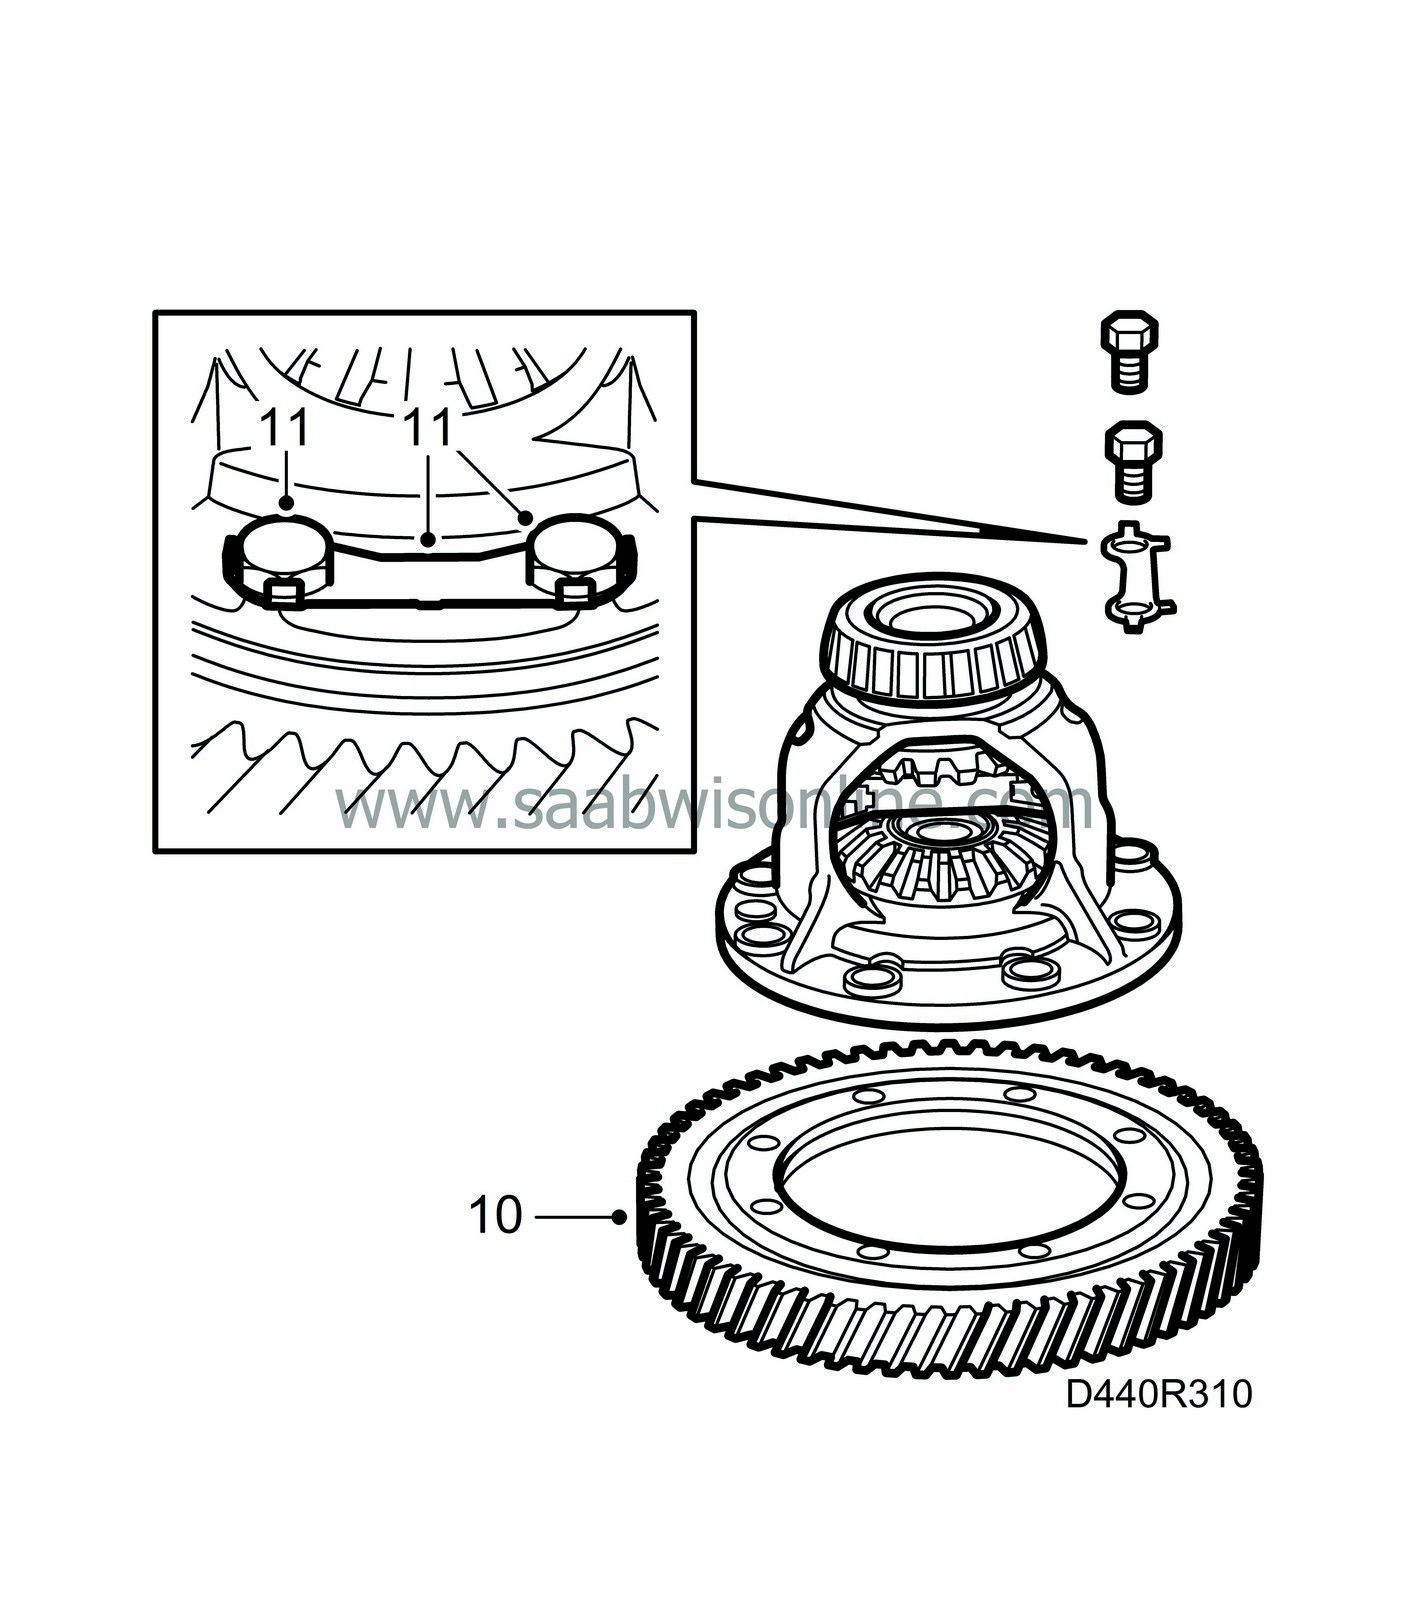
| 10. |
Fit the crown wheel to the new differential.
|
|
| 11. |
Fit a new lock plates and fit the bolts.
Tightening torque 100 Nm (74 lbf ft) |
|
| 12. |
Bend up the lock plates against the flat surfaces of the bolt heads.
|
|
| 13. |
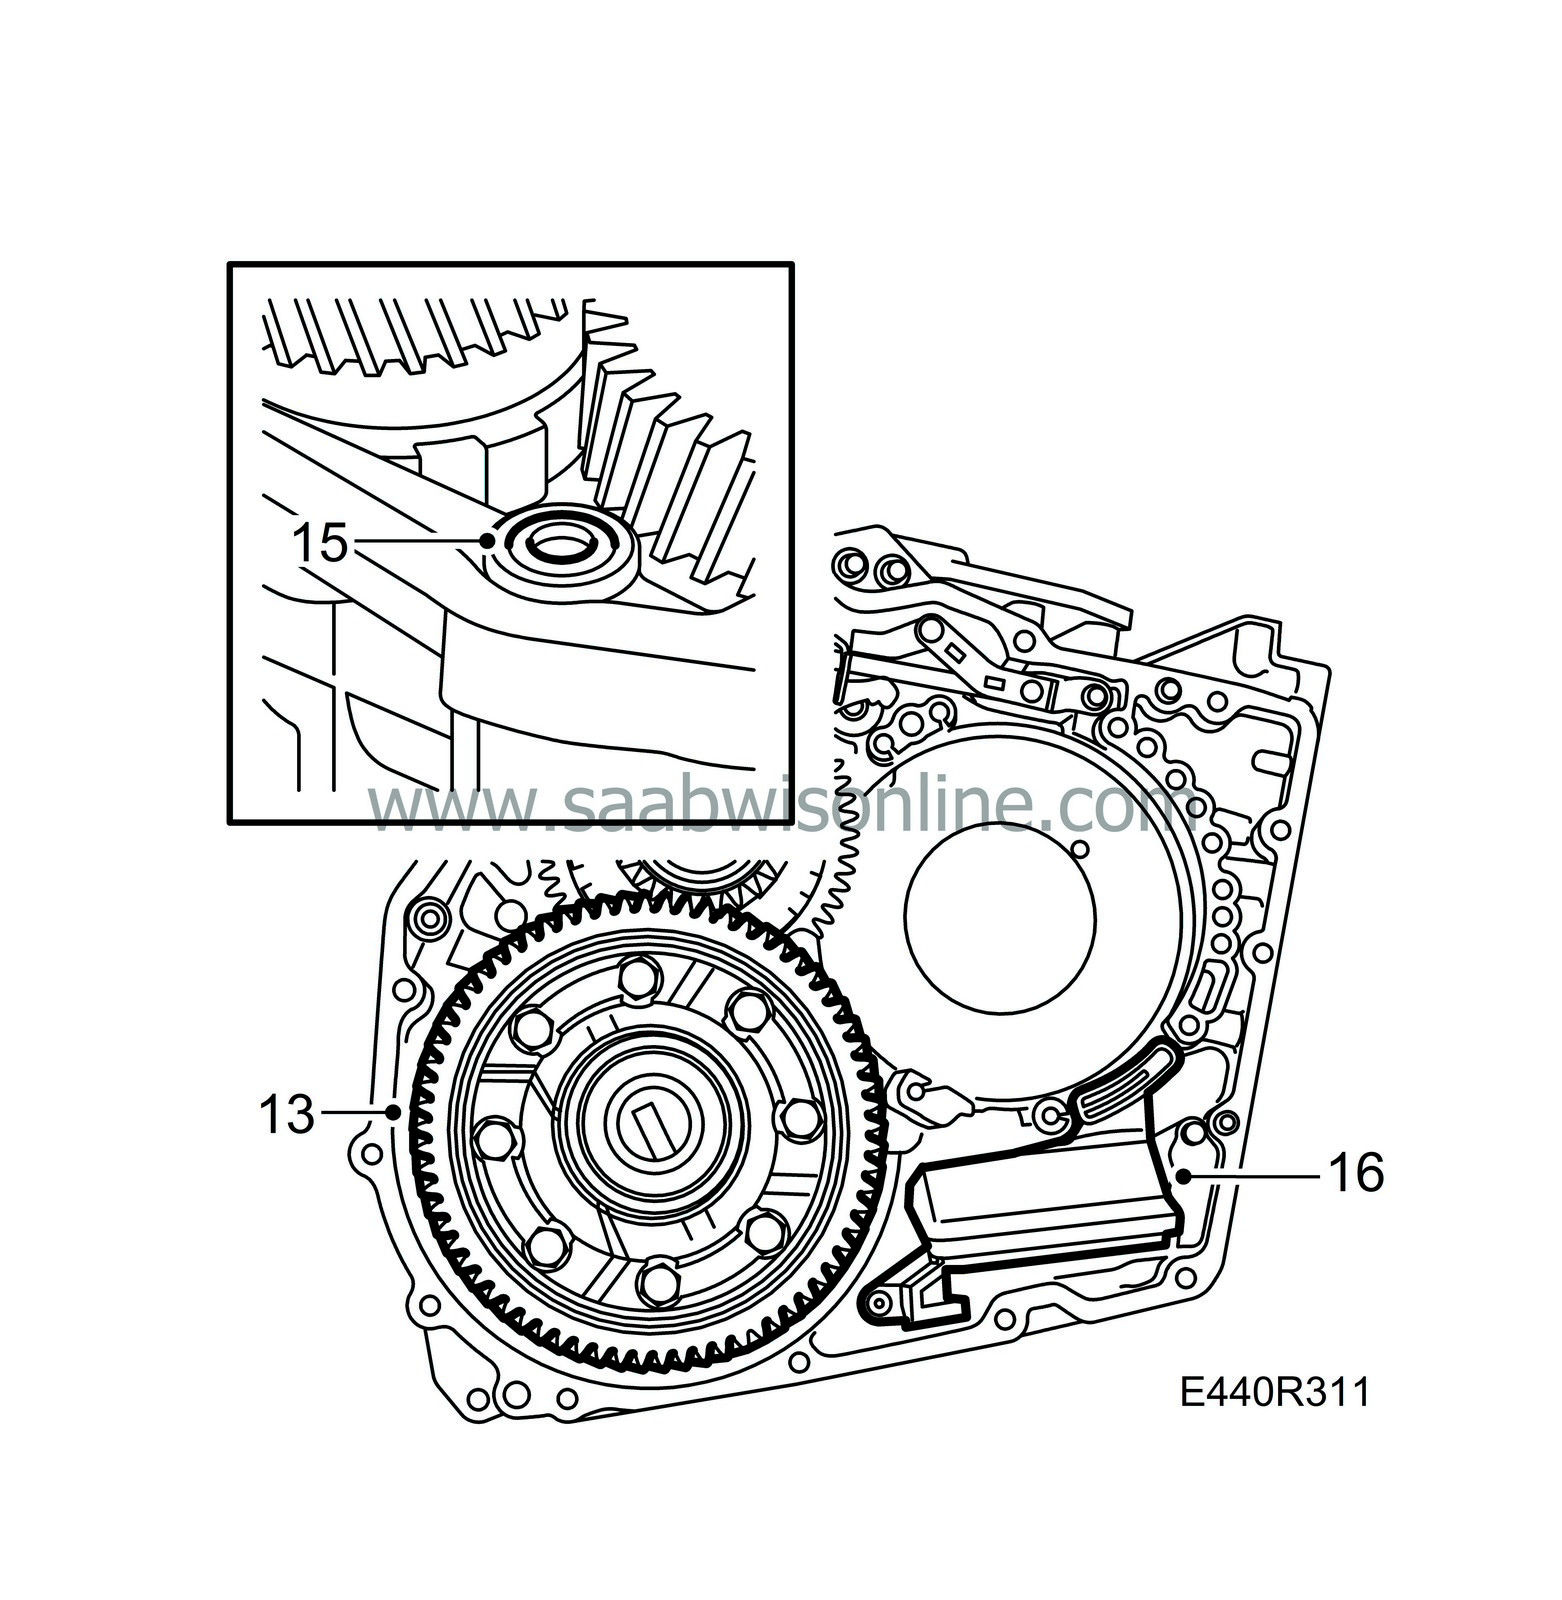
Fit the differential unit.
|
|
| 14. |
Clean the sealing surfaces of the gearcase and torque converter housing. Use cleaner 30 02 599. Keep the surfaces free of grease and oil.
|
|
| 15. |
Fit a new seal in the gearcase.
|
|
| 16. |
Change the oil strainer in the gearcase.
|
|
| 17. |
Apply a 1 mm bead of flange sealant 93 21 795 to the gearcase as illustrated, and fit the torque converter housing.

|
|
| 18. |
Apply thread sealant 74 96 284 to the internal bolts. Fit the bolts (different lengths). Tighten the bolts.
Tightening torque: 25 Nm (18 lbf ft) 
|
|
| 19. |
Fit the protective plate of the fluid temperature sensor with a washer, nut and bolt.
Tightening torque, bolt 25 Nm (18 lbf ft) Tightening torque, nut 10 Nm (7 lbf ft) 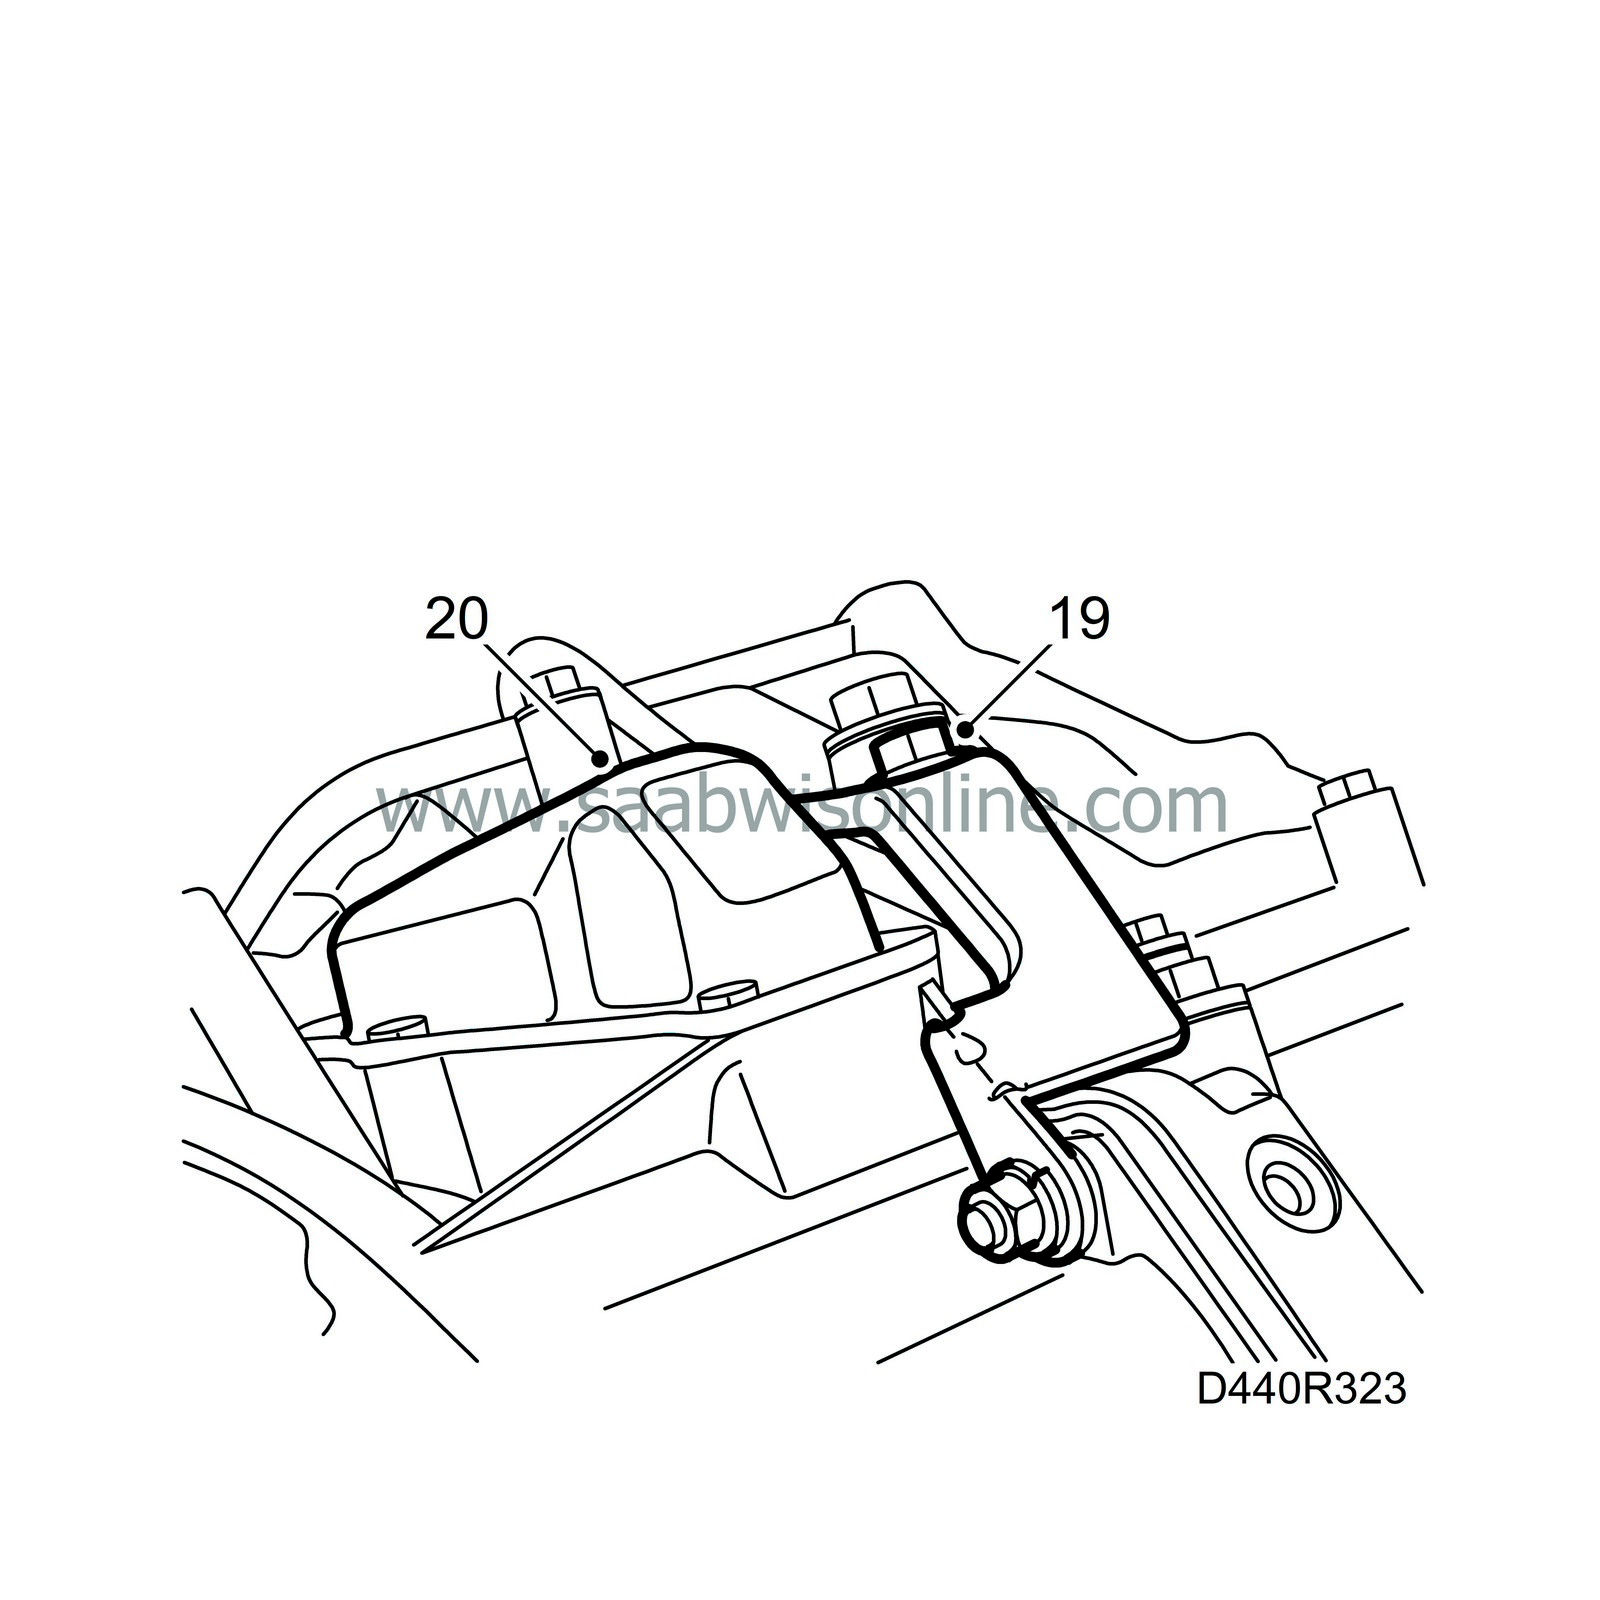
|
|
| 20. |
Fit the metal cover.
|
|
| 21. |
Clean the magnetic surface of the drain plug and fit it with a new washer. Fit the other external plugs.
|
|
| 22. |
Turn the gearbox so that the turbine shaft points 45° downwards.
|
|
| 23. |
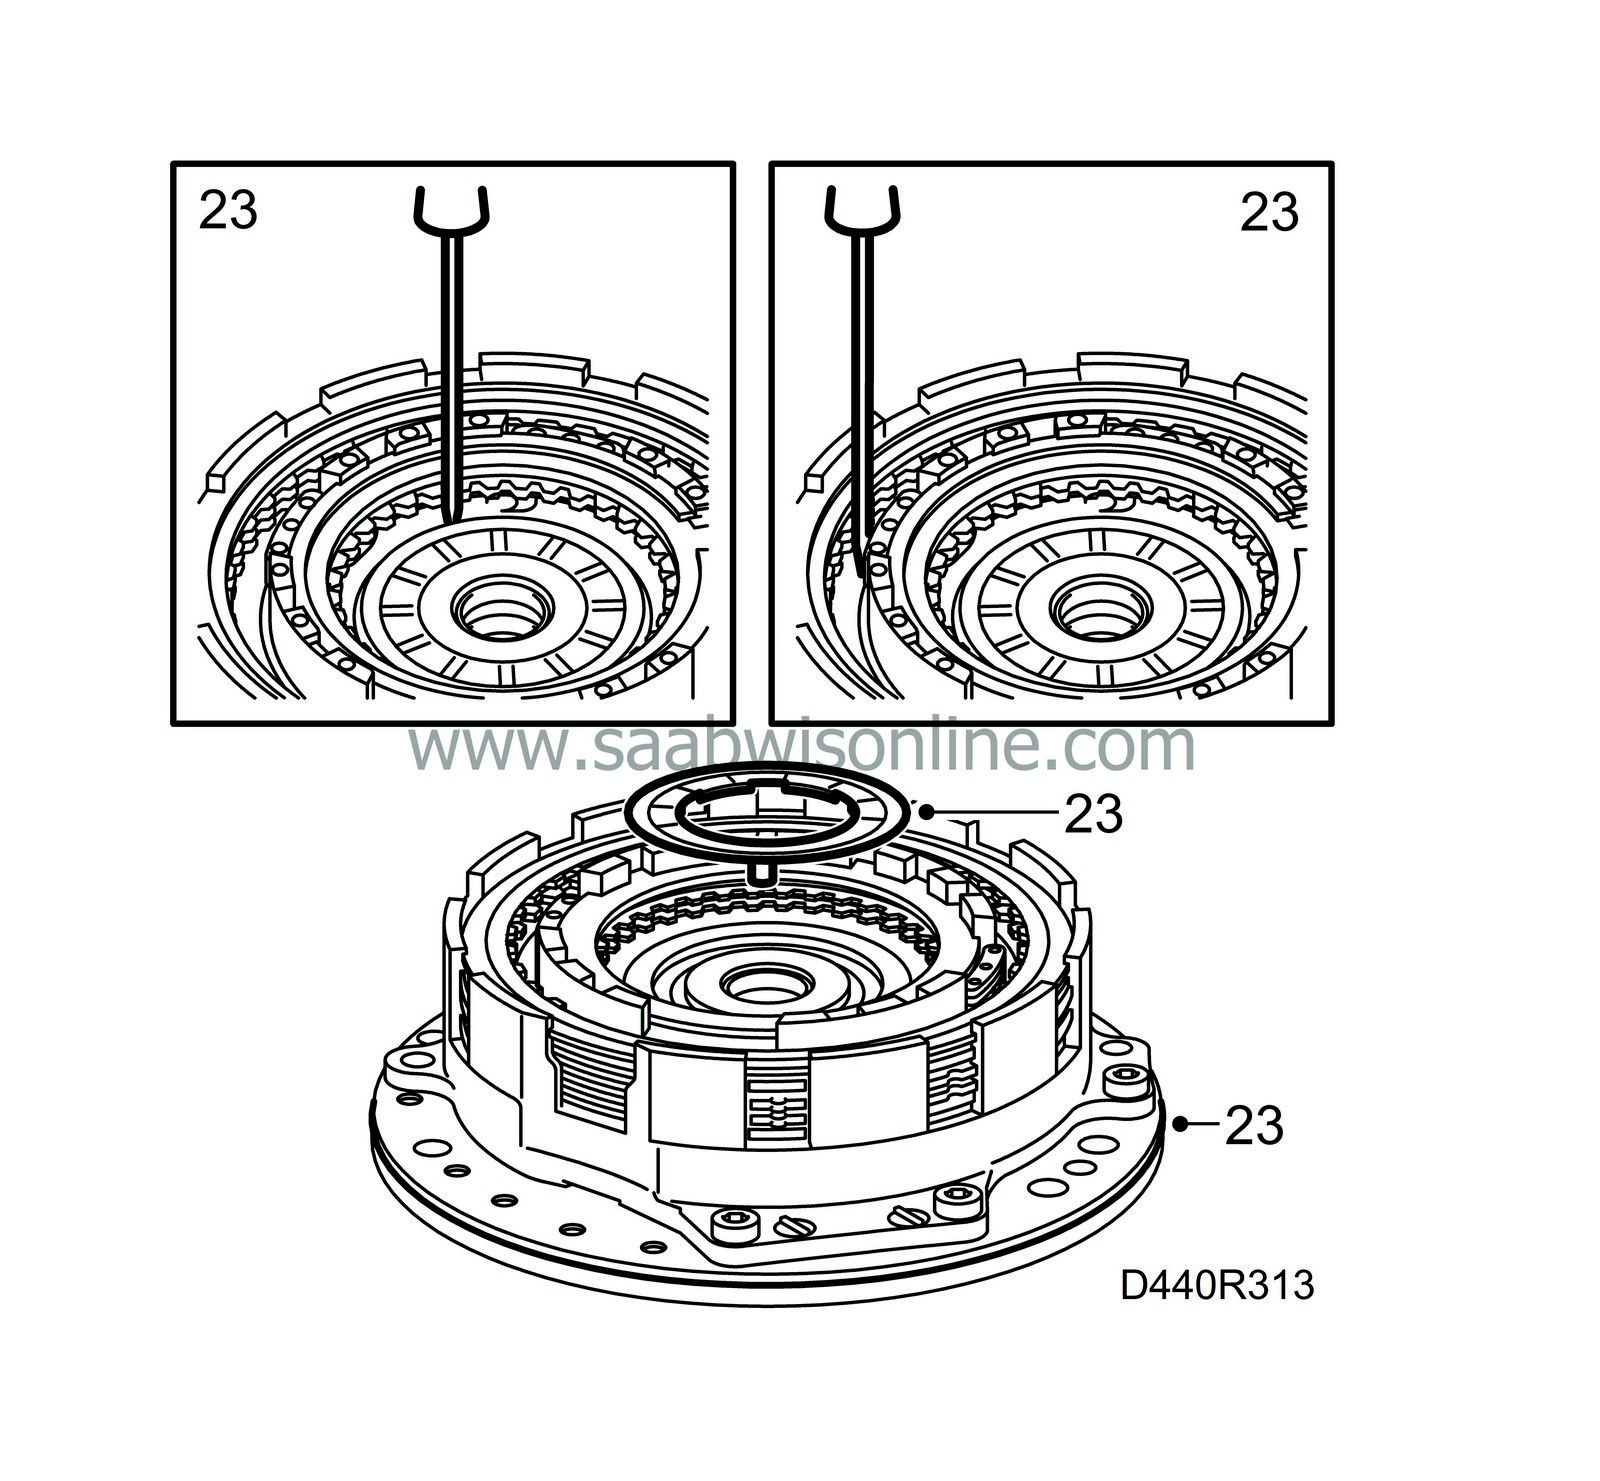
Apply vaseline to the O-ring of the oil pump unit. Align the plate package using a small screwdriver. Fit thrust washers greased with vaseline to brake B1/B2.
|
|
| 24. |
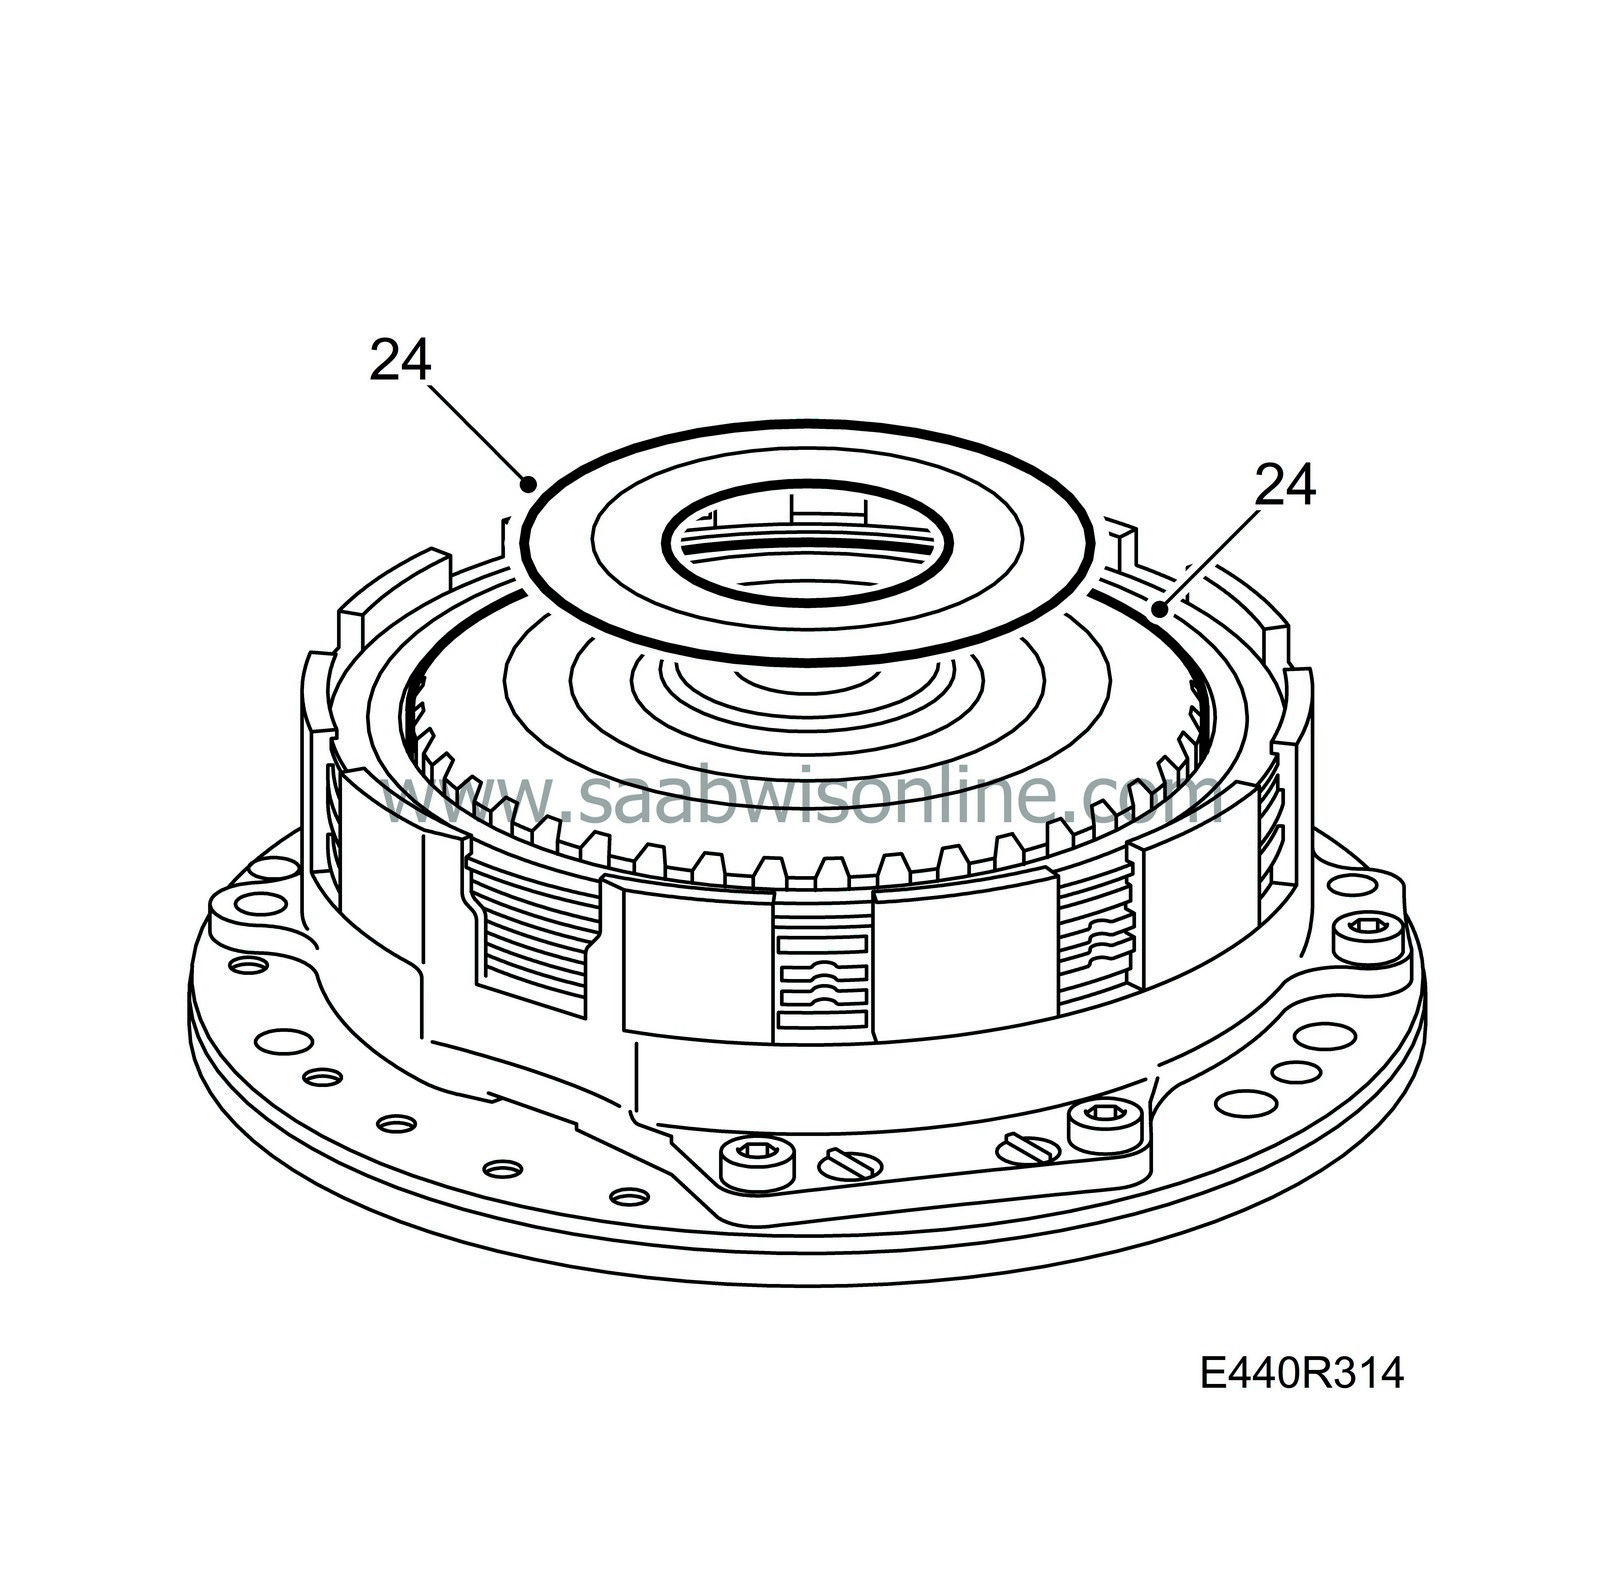
Fit freewheel F1 and the bearing race of brakes B1 and B2 to the oil pump unit. Grease the bearing race of F1 with vaseline and fit it.
|
|
| 25. |
Place the oil pump unit so that the bolt holes are aligned with those of the gearcase. Carefull press the pump unit into place. Carefully tighten the bolts alternately. Check that the axial play of the turbine shaft is 0.37 - 0.9 mm.
Tightening torque 25 Nm (19 lbf ft) 
|
|
| 26. |
Turn the gearbox back 45°.
|
|
| 27. |
Change the torque converter seal. See Adjustment/replacement, Torque converter seal.
|
|
| 28. |
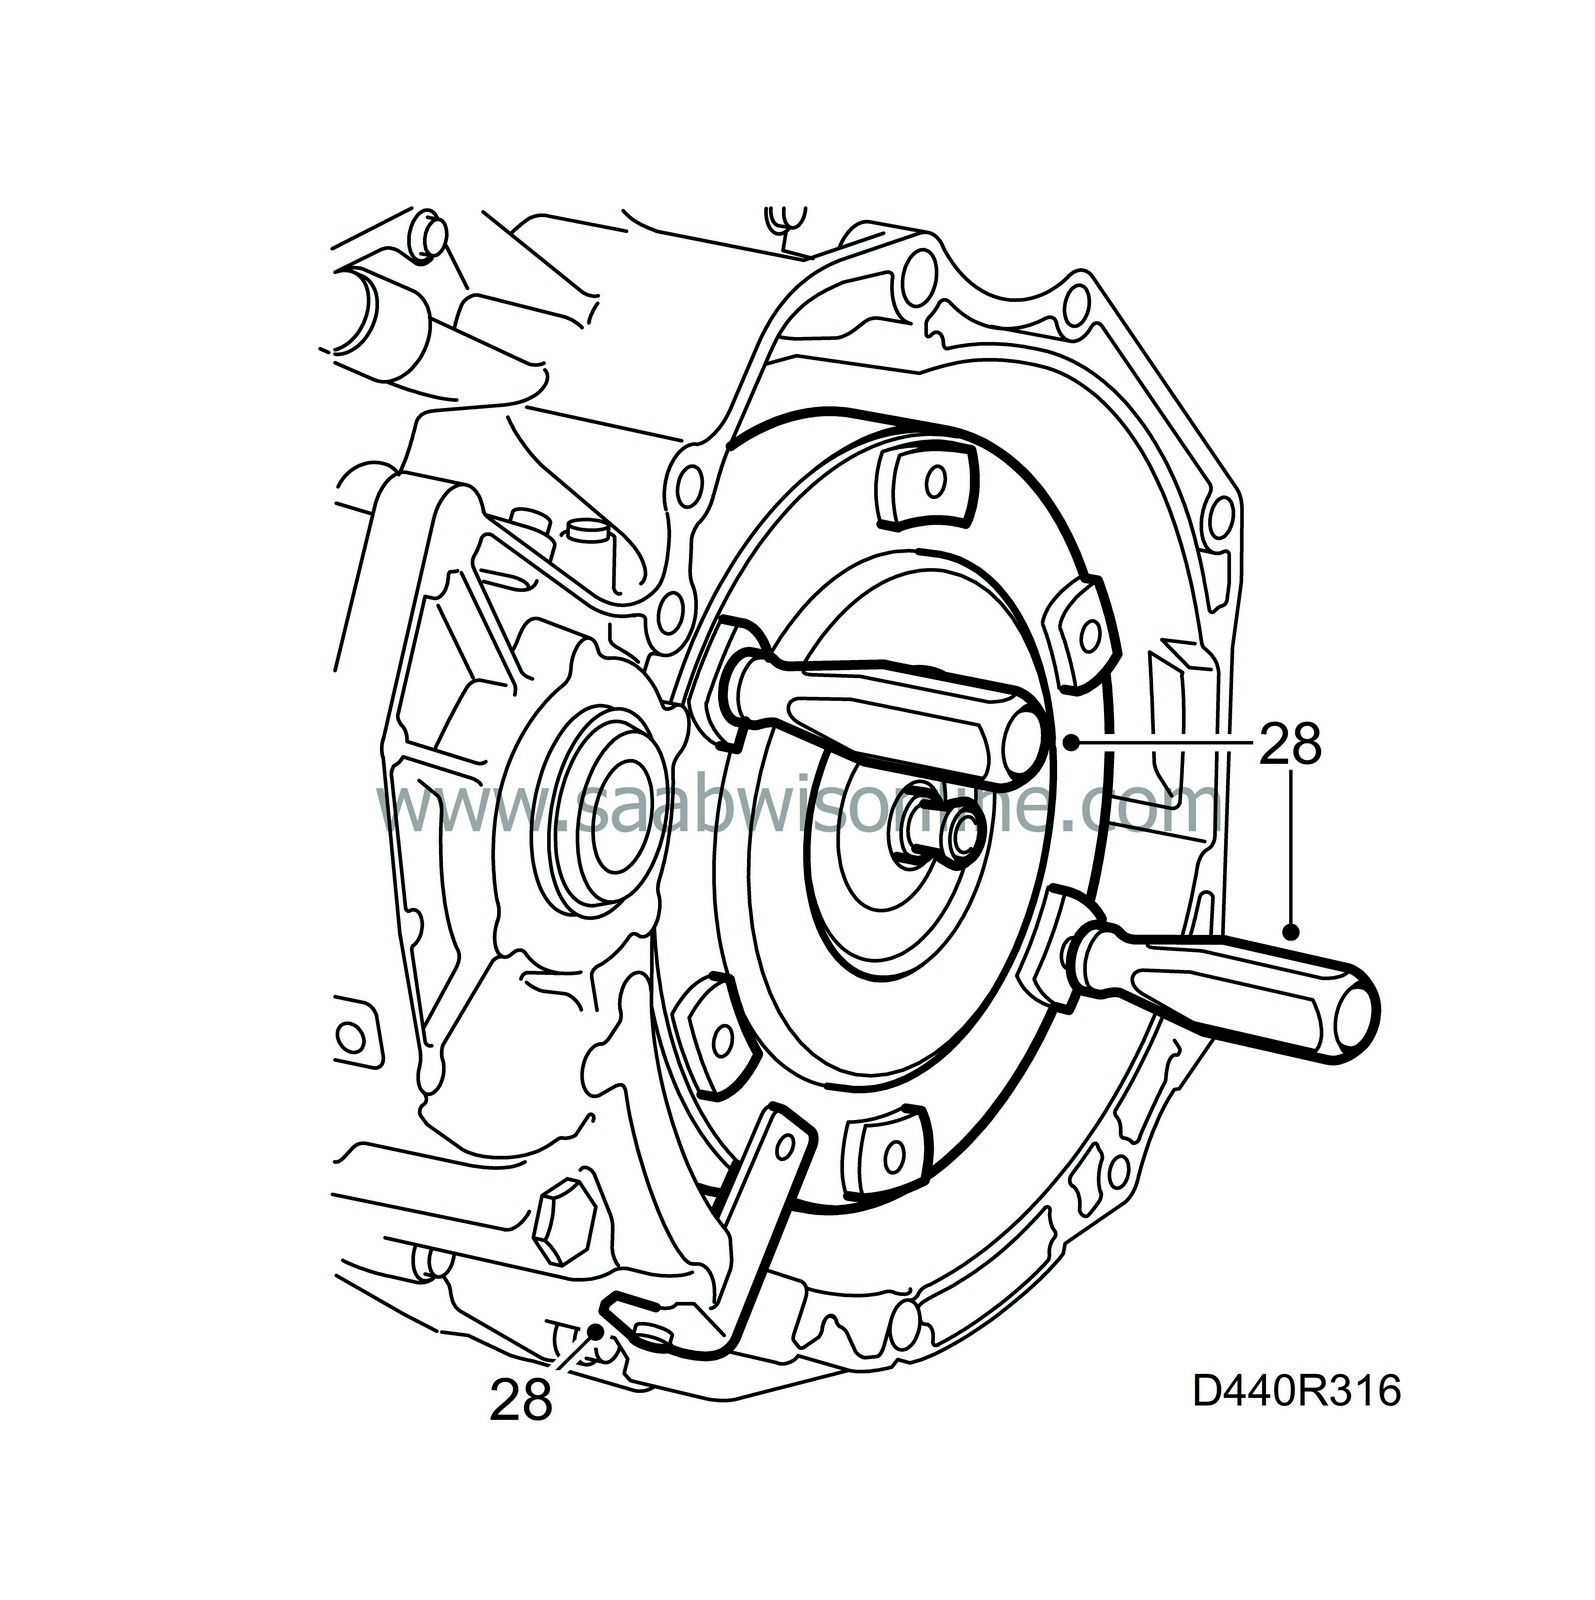
Fit the torque converter. Use holder 87 92 681 or 87 91 766. Fit assembly retainer 87 92 277 or 87 92 574.
|
|
| 29. |
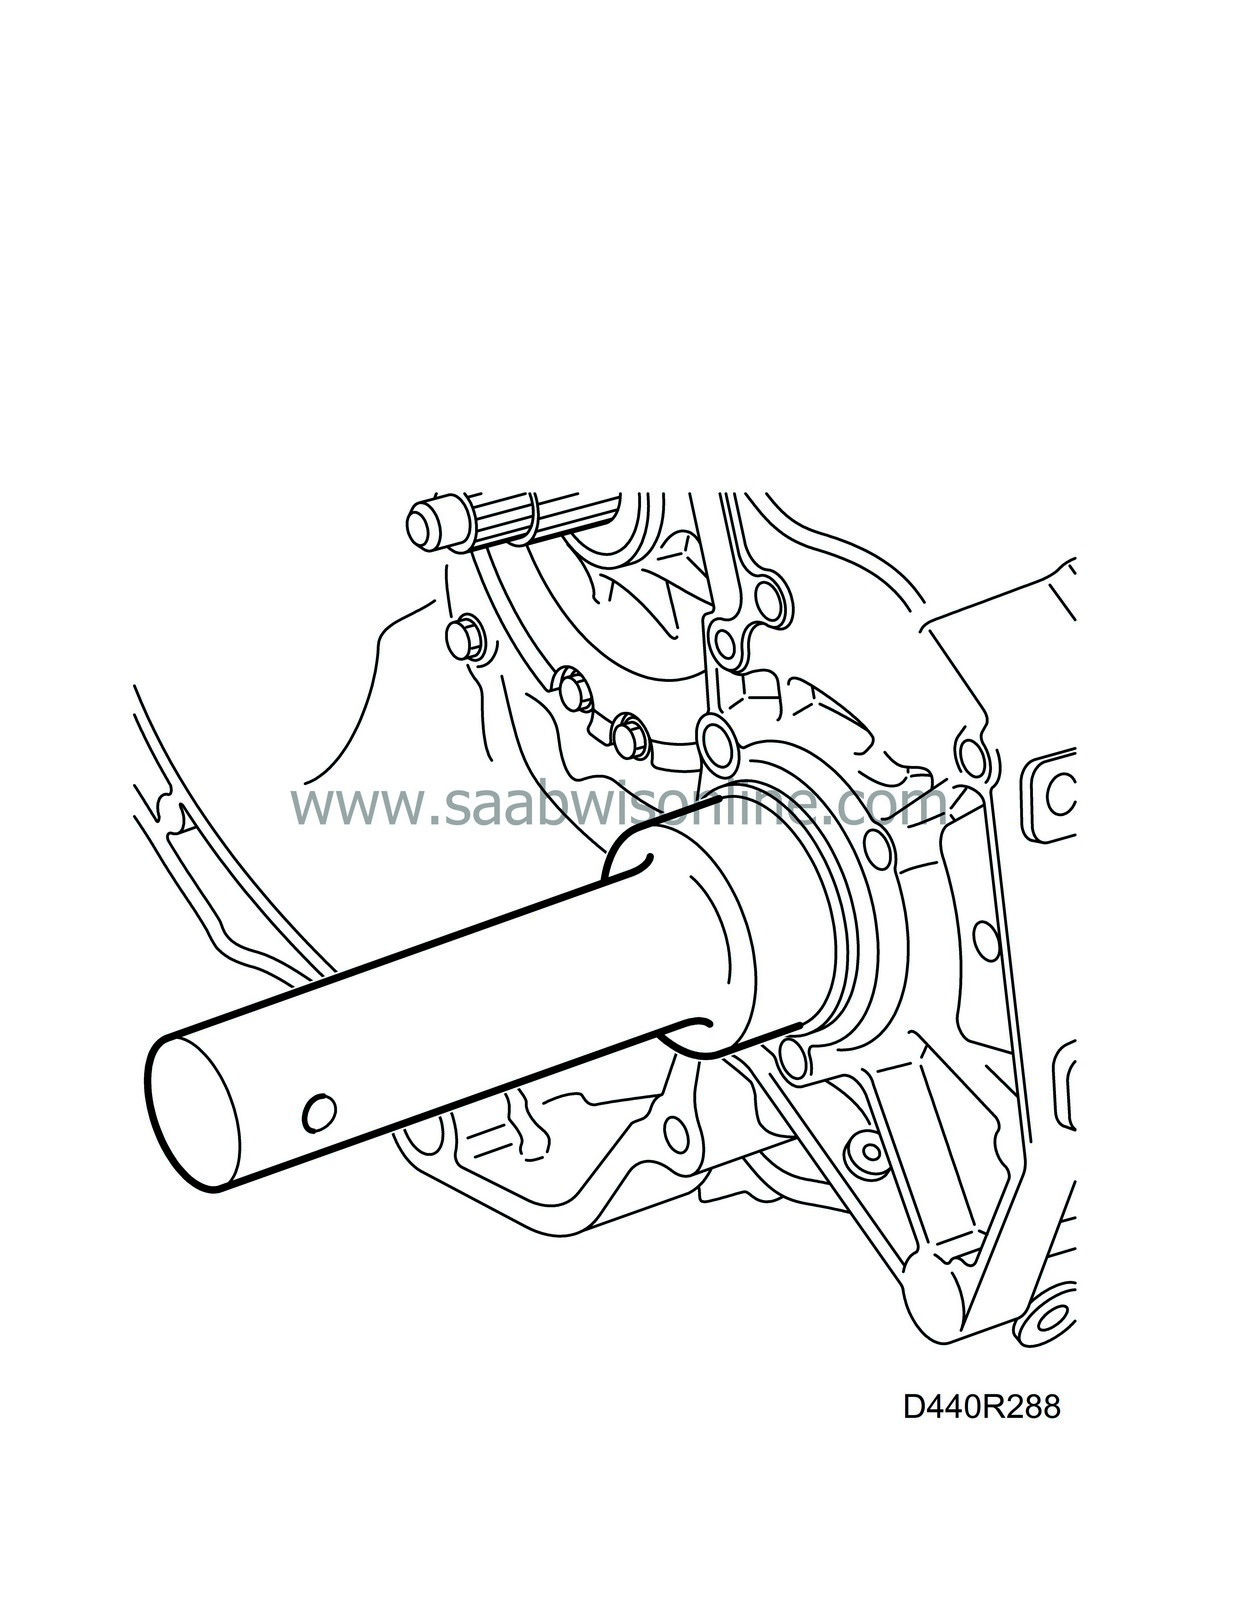
Fit new drive shaft seals. Use drift 83 90 122.
|
|
| 30. |
Fit the engine mounting.
Tightening torque 47 Nm (35 lbf ft) 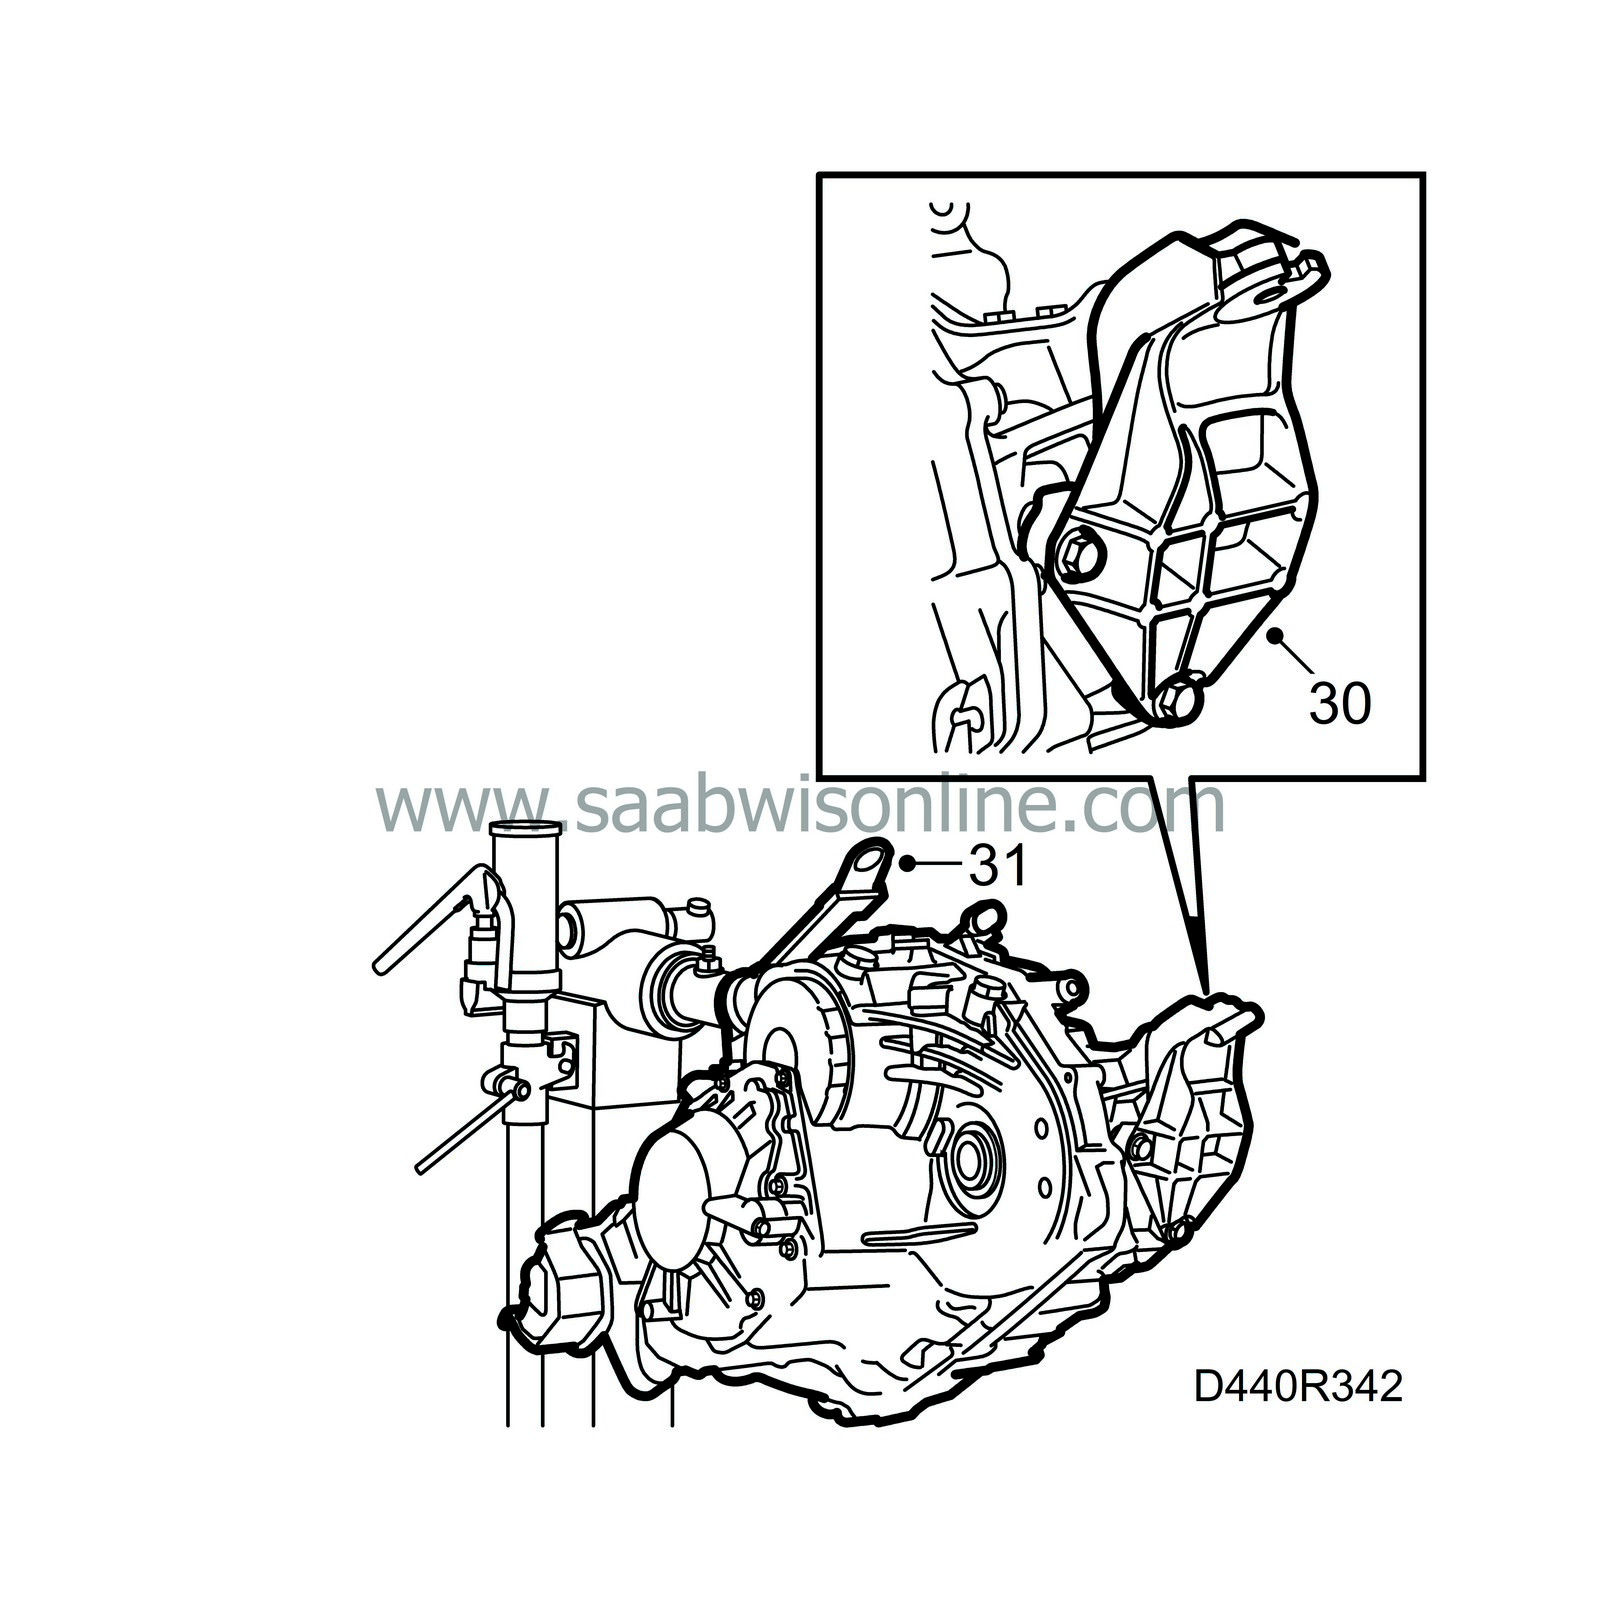
|
|
| 31. |
Lift the gearbox from the stand and remove the holder.
|
|
| 32. |
Fit the selector wire mounting.
|
|
| 33. |
Fit the gearbox to the car. See Adjustment/replacement, Automatic gearbox assembly.
|
|


