Power steering pump with bracket, diesel engine
|
|
Power steering pump with bracket, diesel engine
|
 Warning
|
|
Remember that the servo system is highly sensitive to impurities, so observe the strictest cleanliness when working on the power steering system.
|
|
|
|
|
|
|
Note
|
|
The power steering pump is available separately as a spare part which means that the bracket does not require dismantling provided it is not damaged. See
Power steering pump, diesel engine
.
|

|
1.
|
Raise the car and remove the sound insulation, right-hand spoiler lower section and the right-hand lower wing liner.
|
|
2.
|
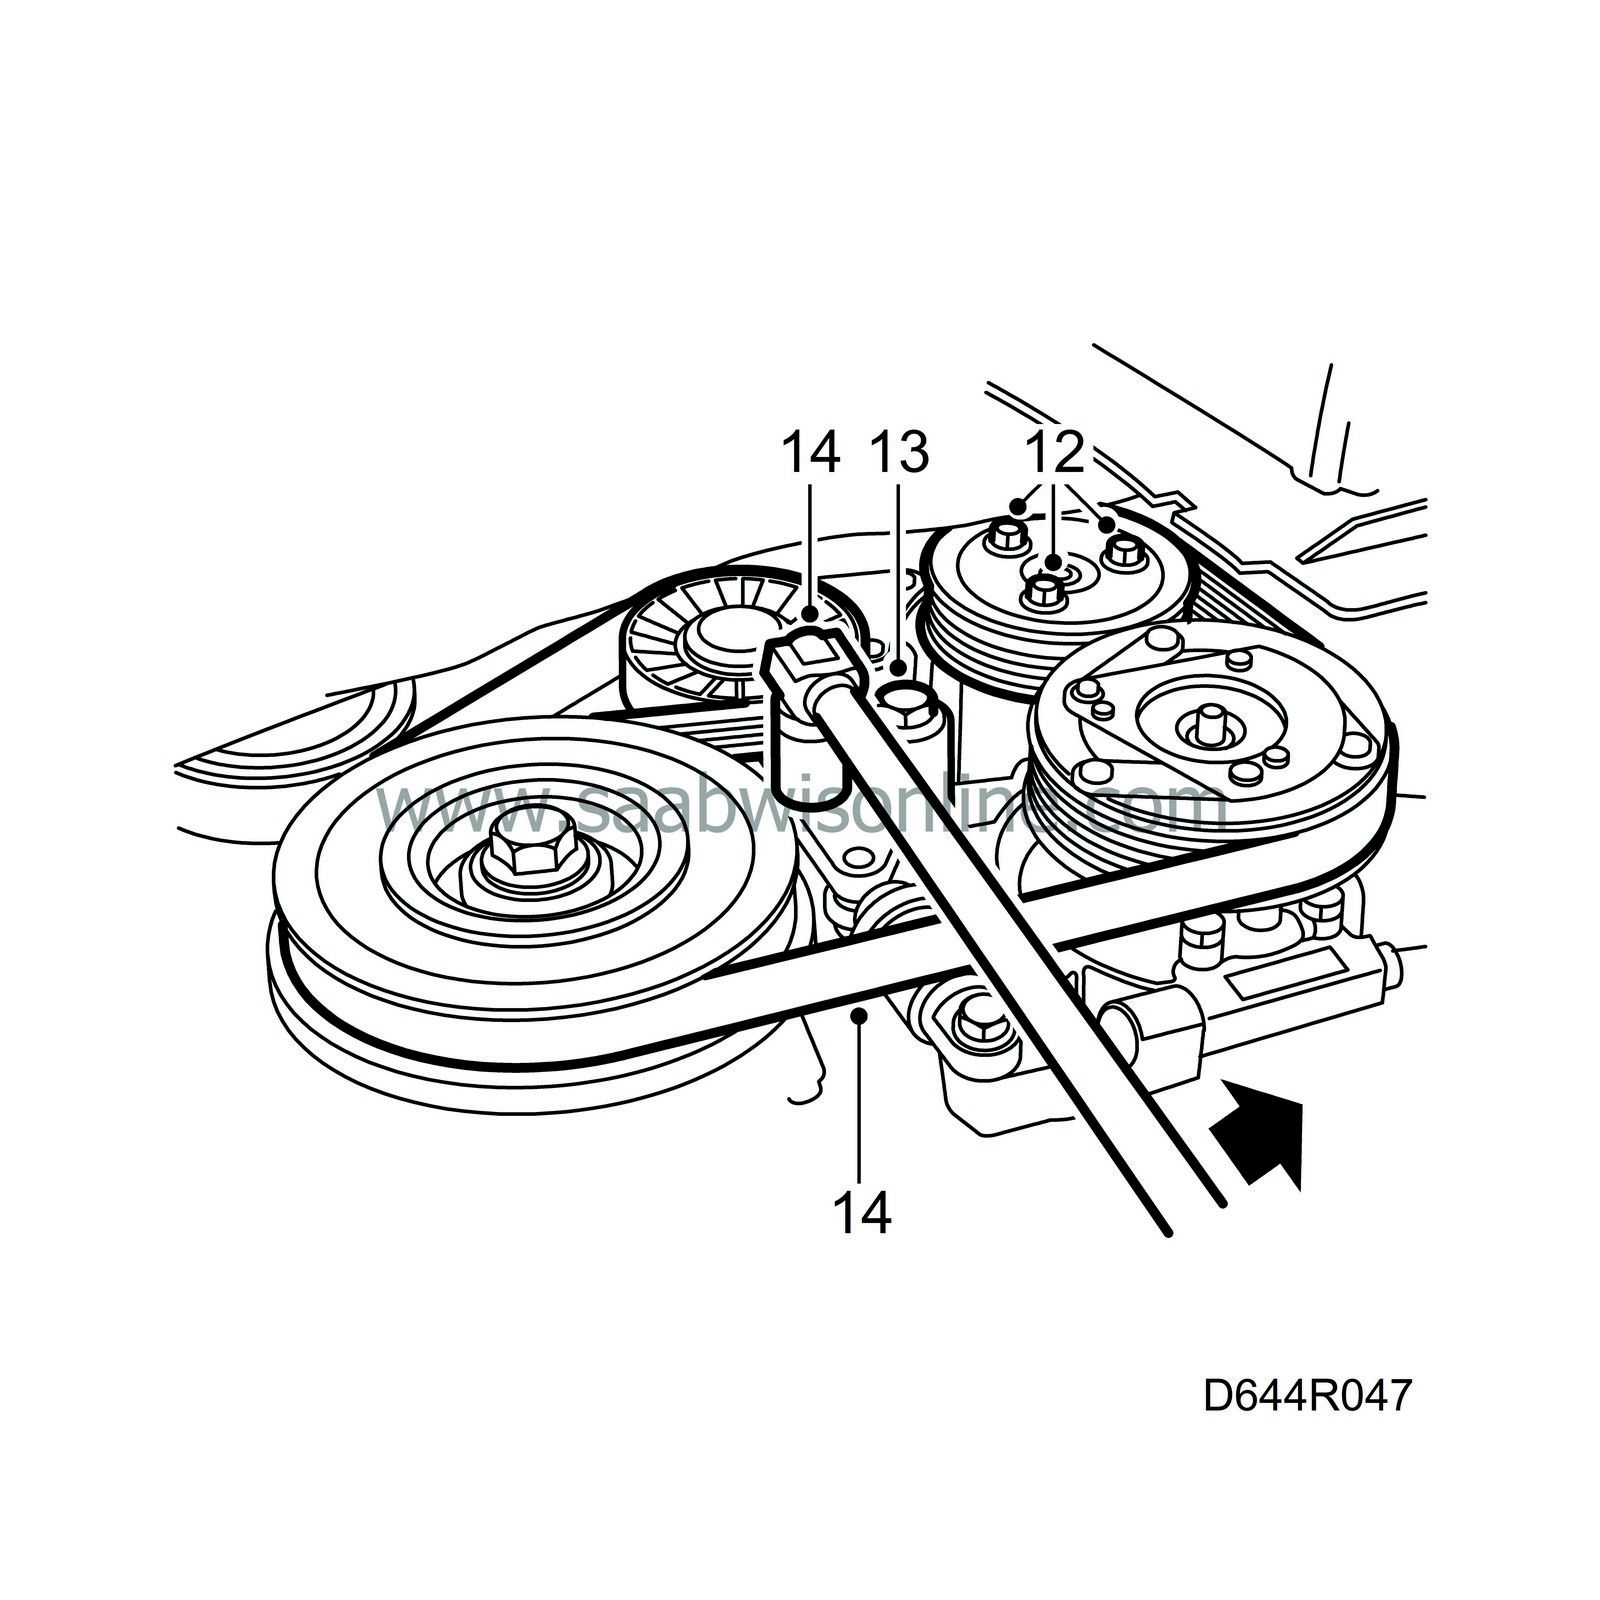
Relieve the belt tensioner of tension and lift the belt off the pulley.
Remove the belt pulley from the pump. Prise the engine slightly to the left to enable the removal of the belt pulley.

|
|
3.
|
Remove the belt tensioner.
|
|
5.
|
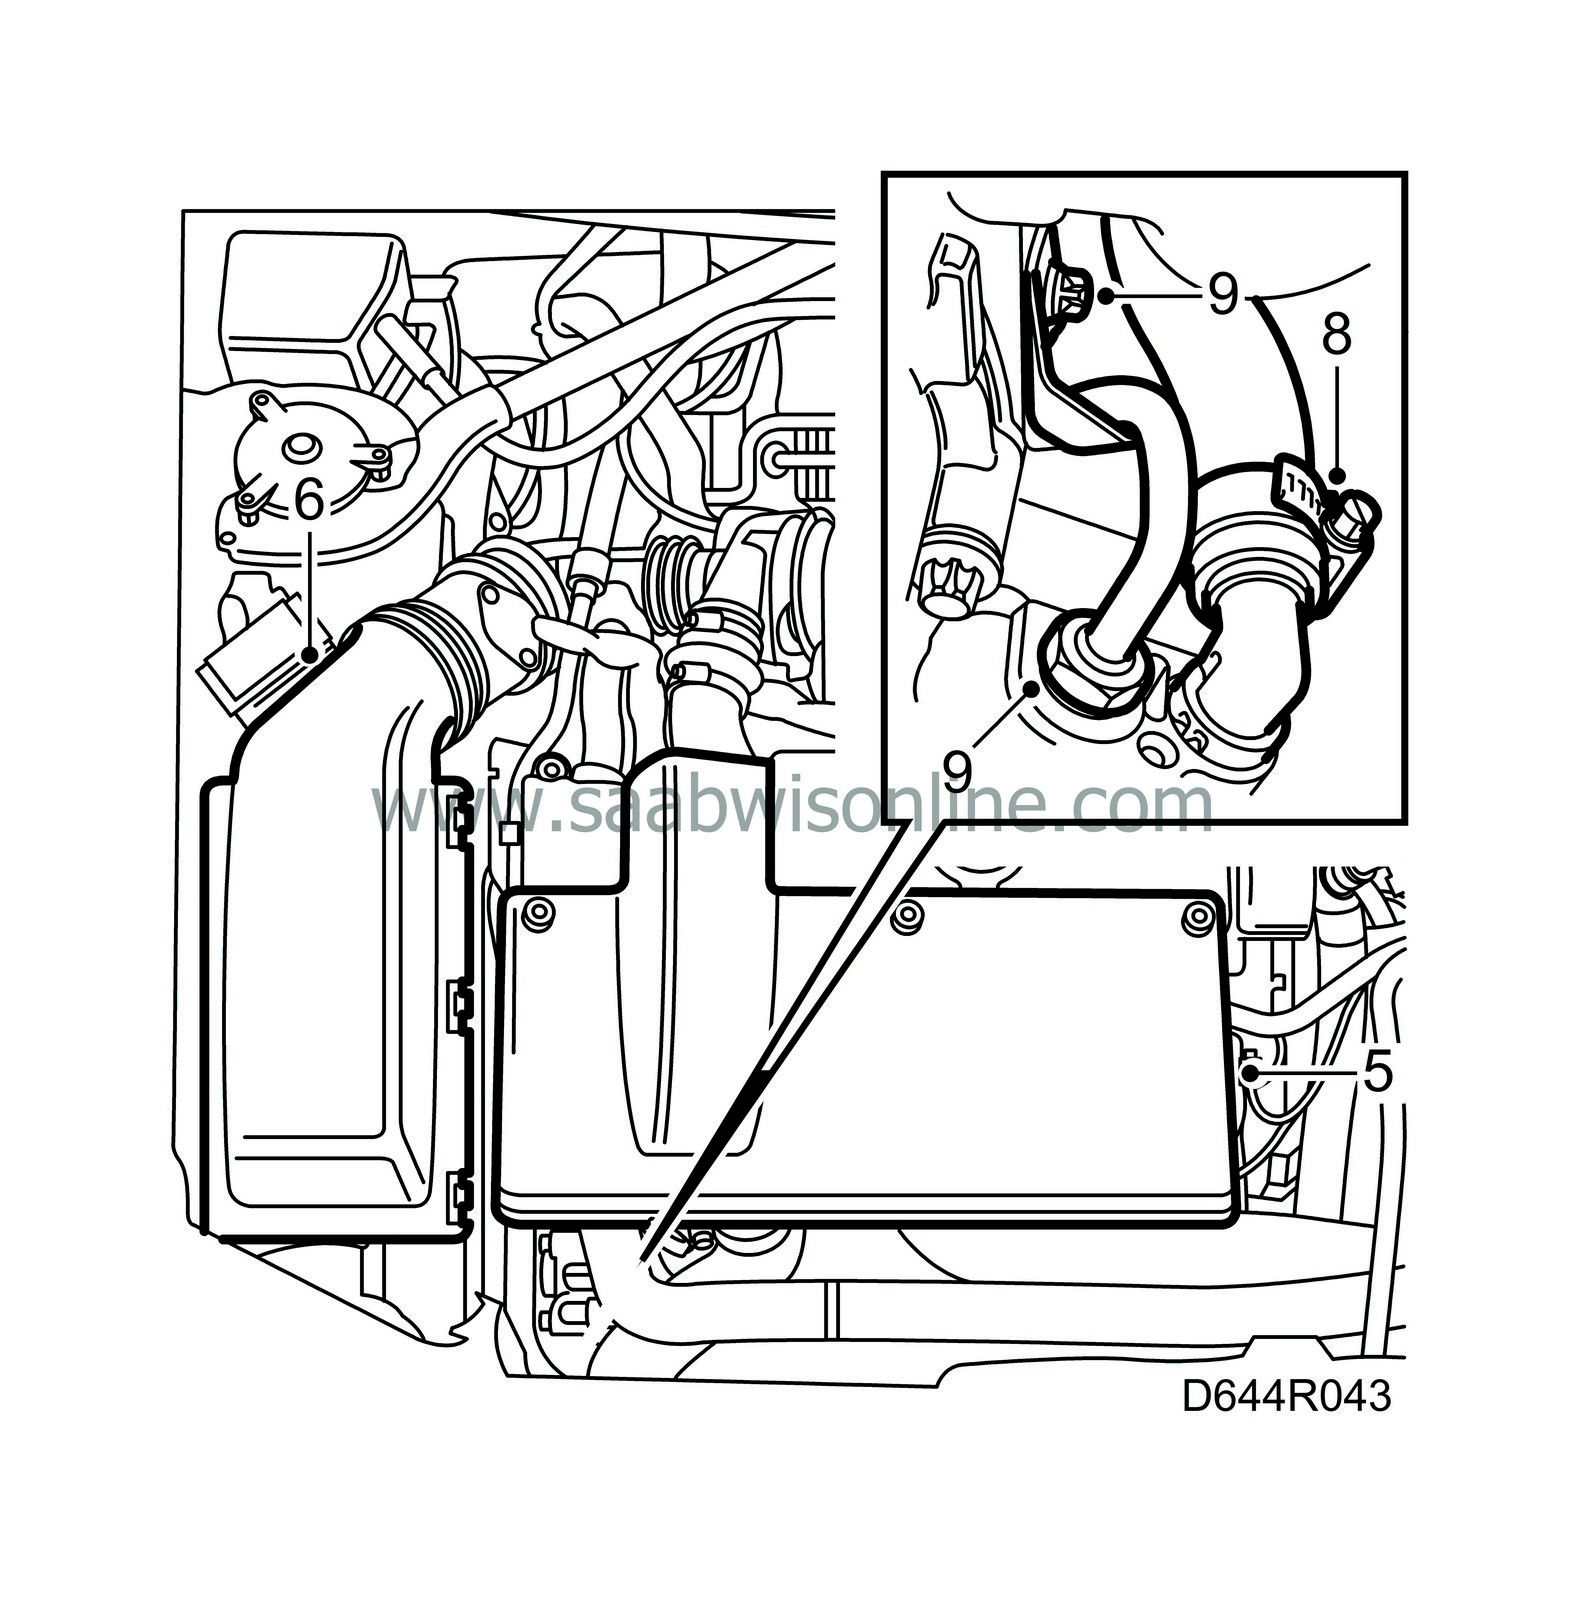
Remove the cover on the engine.

|
|
6.
|
Remove the air filter assembly.
|
|
7.
|
Place a container under the car.
|
|
8.
|
Clean and detach the inlet hose from the pump and let the fluid run down into the container. Point the hose at the container.
|
|
9.
|
Remove the delivery hose's screw (which also holds the dipstick tube) from the engine and the connection from the pump. Use special tool No. 89 96 803.
|
|
11.
|
Unscrew the bolts to the A/C compressor.

|
|
12.
|
Unplug the connectors to the A/C compressor.
|
|
13.
|
Unscrew the bolts to the power steering pump mounting.
|
|
15.
|
Unscrew the bolts securing the right-hand engine mounting to the body. Unscrew the exhaust pipe flange. Raise the engine on a jack (use wooden blocks) approximately 60 mm measured at the mounting.
|
Important
|
|
Place a wooden block between the jack and the oil pan to avoid damaging the oil pan.
|
|
|
|
|
16.
|
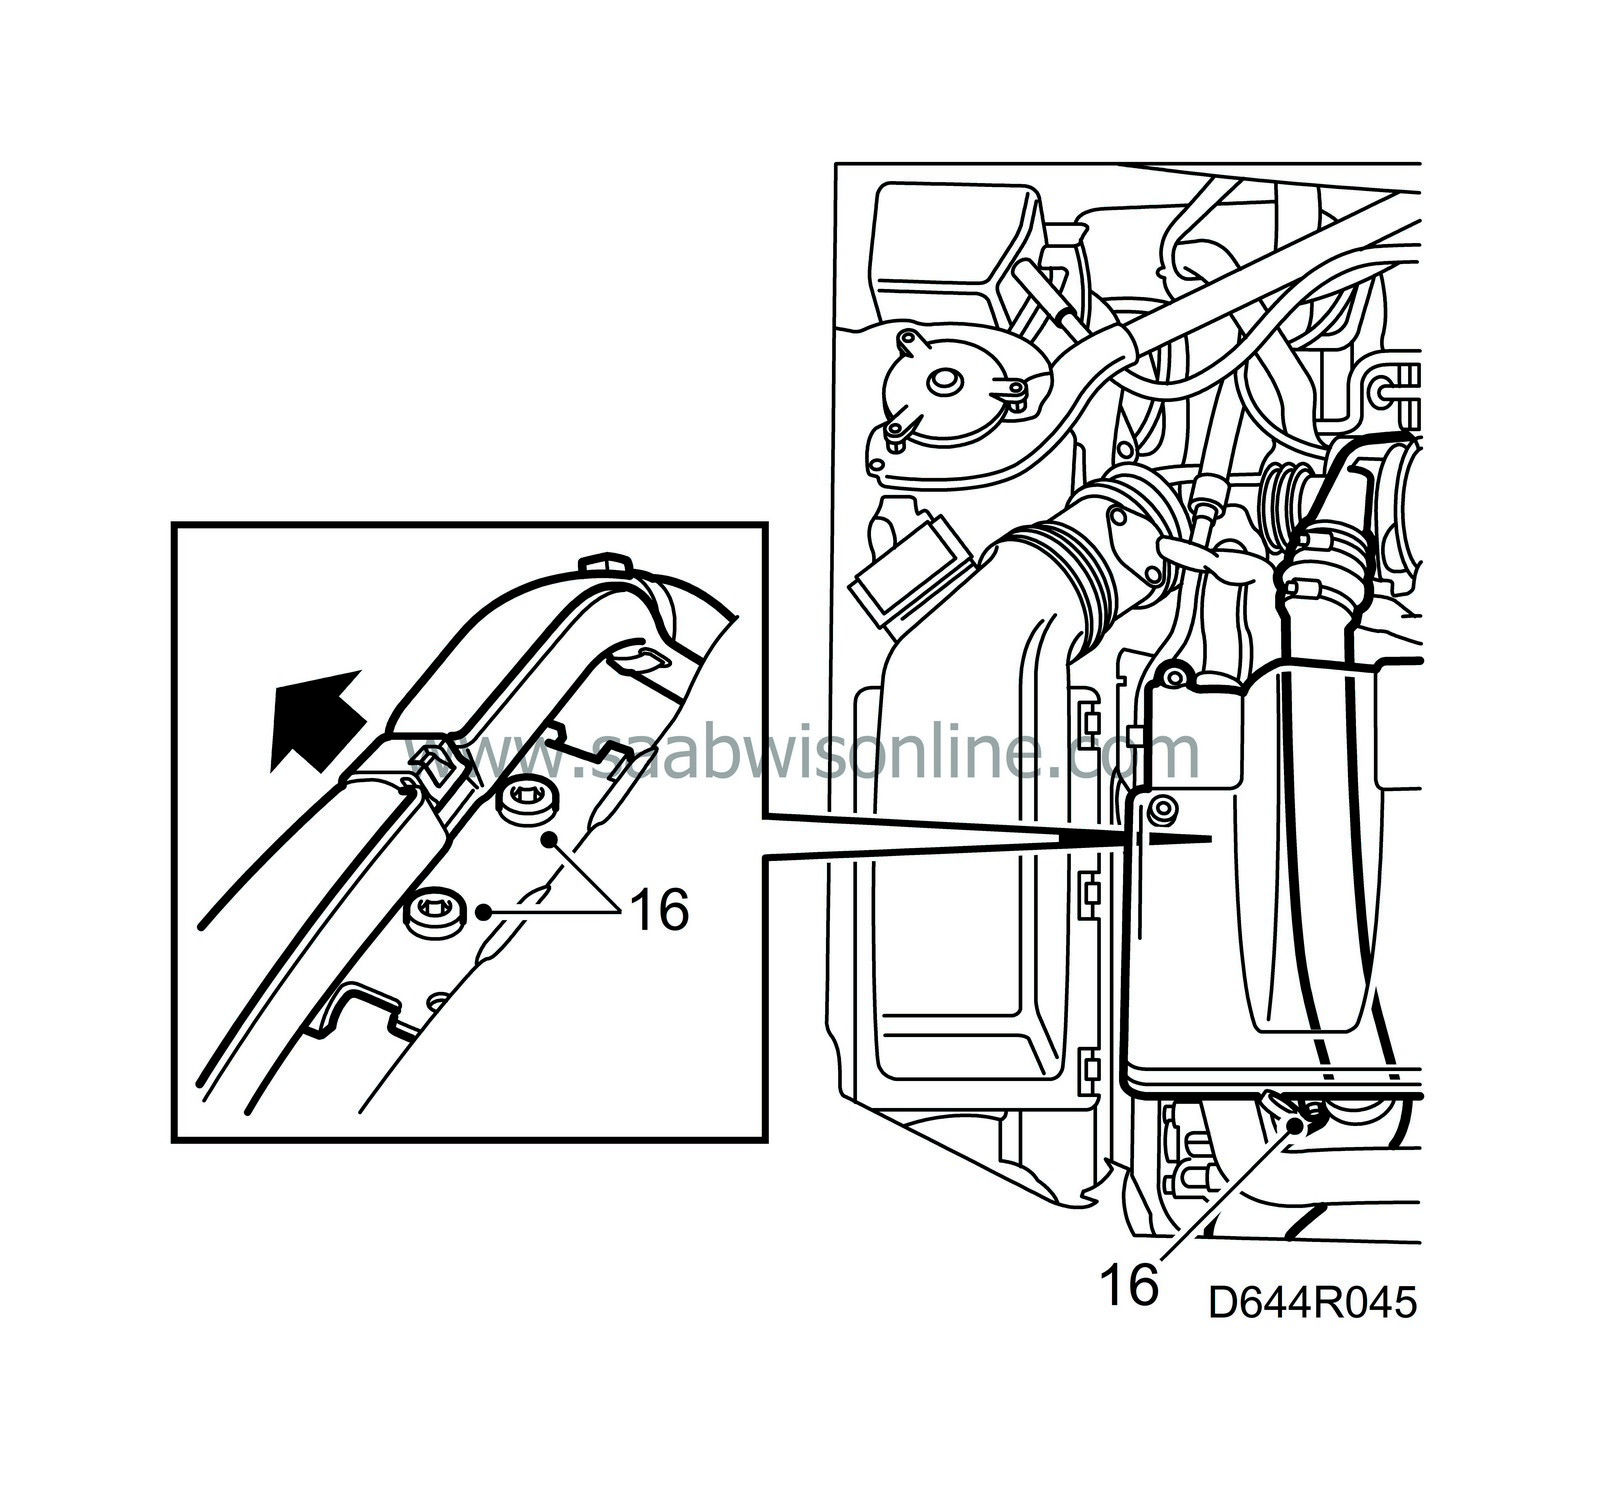
Undo the turbo pipe from the camshaft cover and the hose from the turbo. Pull out the dipstick and the dipstick tube (the tube extends approx. 200 mm into the oil pan). Plug all openings.

|
|
19.
|
Press the A/C compressor forwards carefully and lift out the power steering pump complete with mounting.
|

|
1.
|
Press the A/C compressor forwards carefully and position the power steering pump and mounting (first clean around the hole for the dipstick tube in the engine block).
|
|
3.
|
Raise the engine on a jack (use wooden blocks) approx. 60 mm measured at the mounting. Press down the dipstick tube to its correct position. Make sure the dipstick tube is behind the coolant hoses.
|
Important
|
|
Place a wooden block between the jack and the oil pan to avoid damaging the oil pan.
|
|
|
|
|
6.
|
Tighten the bolts on the power steering pump and mounting.
|
|
7.
|
Tighten the bolts on the A/C compressor.
Tightening torque: 24 Nm (19 lbf ft)
|
|
8.
|
Plug in the A/C compressor connector.
|
|
10.
|
Connect the delivery pipe to the power steering pump and tighten it (special tool No. 89 96 803). Fit a new seal.
Tightening torque: 25 Nm (18 lbf ft)
|
|
12.
|
Fit and secure the belt pulley. Prise the engine slightly to the left to enable the fitting of the belt pulley.

|
|
13.
|
Fit and secure the belt tensioner.
|
|
14.
|
Relieve the belt tensioner of tension and fit the belt. Make sure it is correctly fitted on all pulleys.
|
|
15.
|
Fit the wheel arch liner, spoiler bottom and sound insulation.

|
|
17.
|
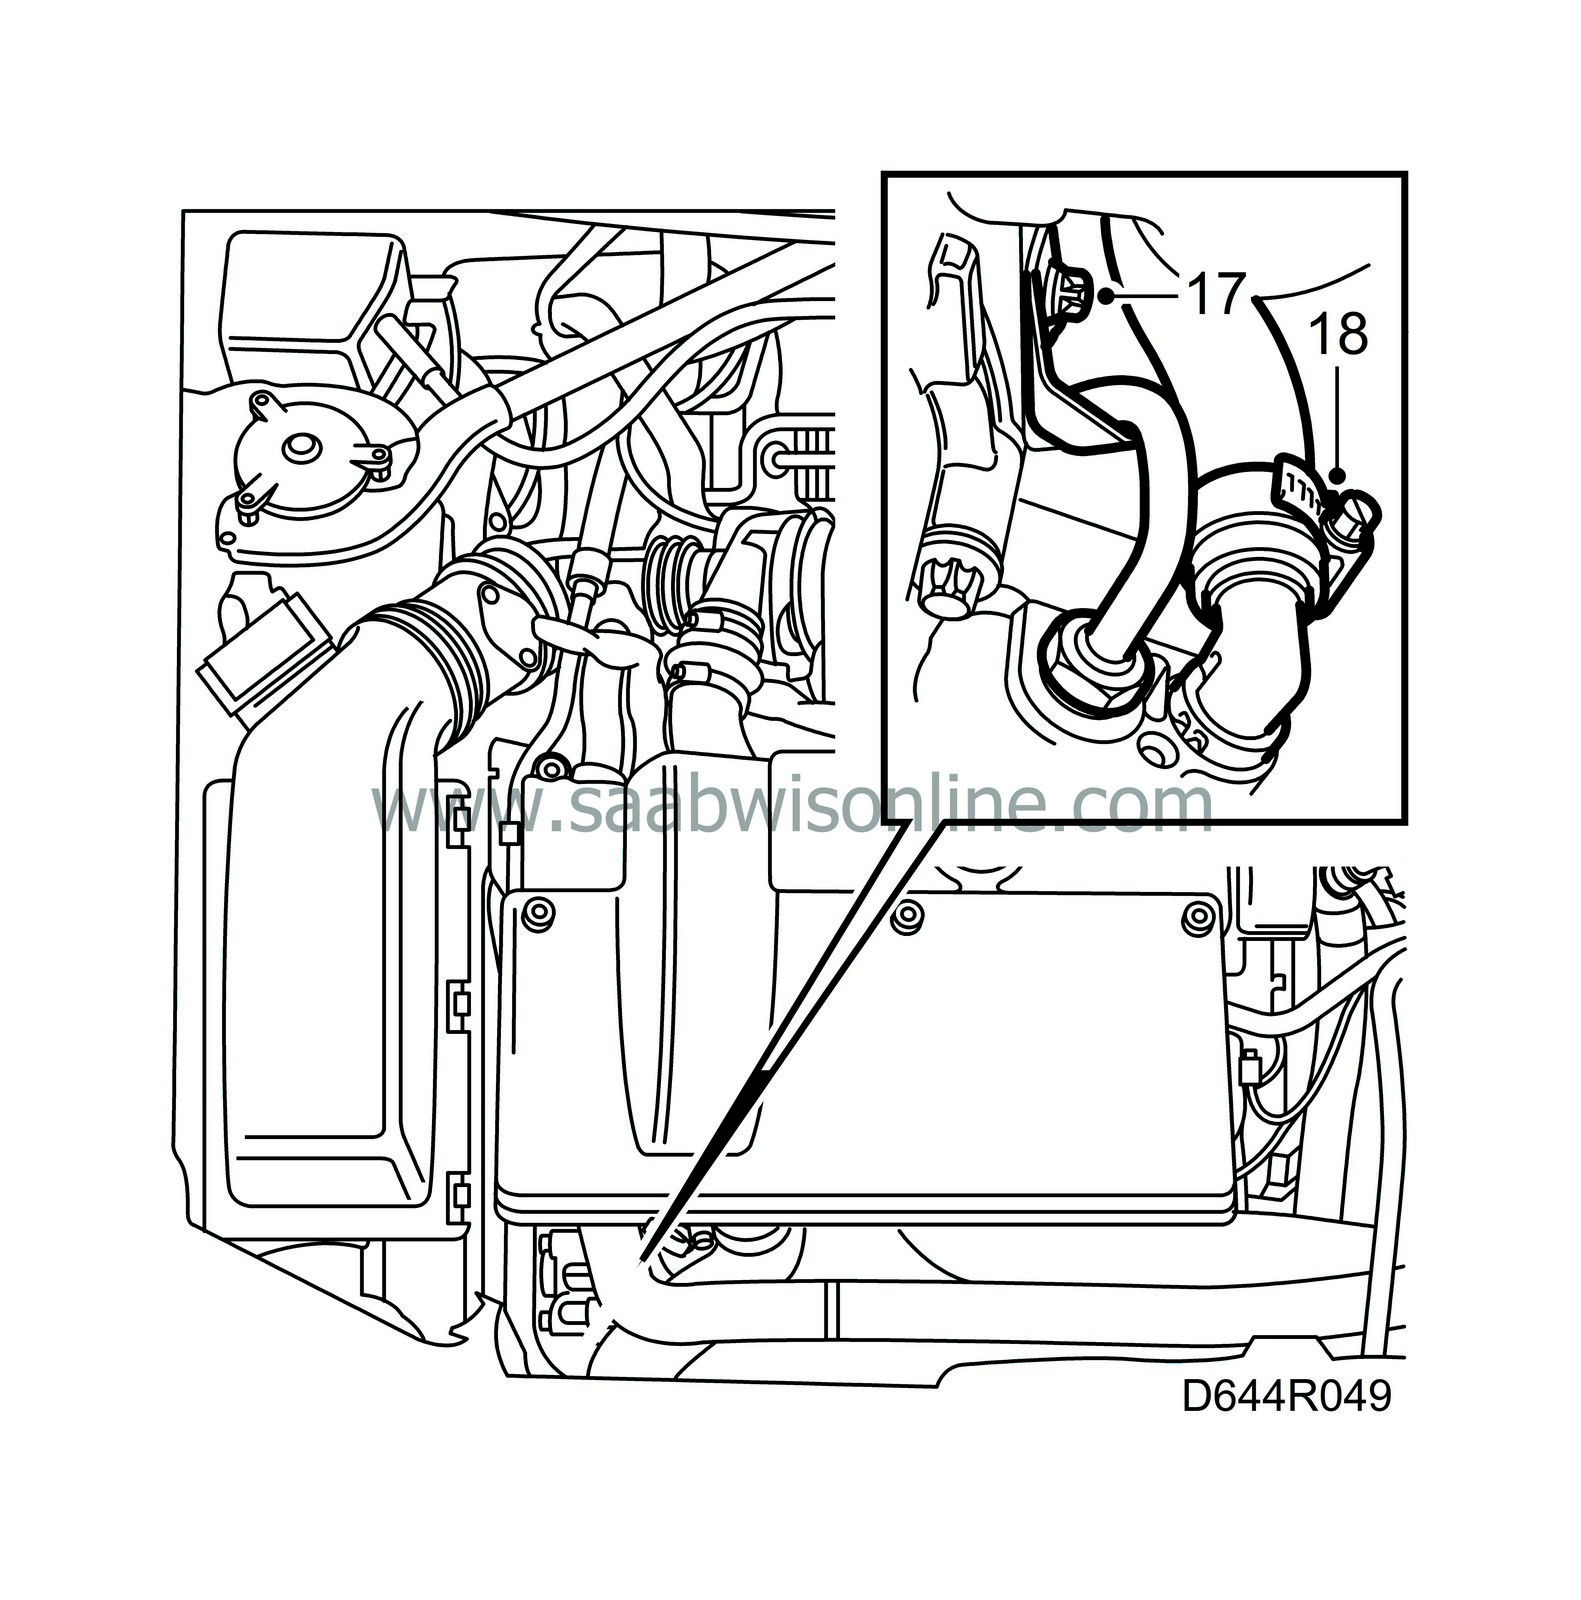
Secure the dipstick tube together with the delivery pipe mounting in the engine block.

Tightening torque: 9.5 Nm (7.0 lbf ft)
|
|
18.
|
Connect the inlet hose to the power steering pump.
|
|
19.
|
Connect and secure the turbo pipe to the turbo and camshaft cover. Press on the wiring harness retainer.

|
|
20.
|
Connect and secure the exhaust pipe flange.
Tightening torque: 25 Nm (18 lbf ft)
|
|
21.
|
Fit the cover on the engine.
|
|
22.
|
Tighten the engine mounting and fit the air filter assembly.
Tightening torque: 47 Nm (35 lbf ft)
|
|
23.
|
Fill up the system with fresh fluid as per specification.
|
Note
|
|
• Always use fresh fluid.
|
|
• Do
not
turn the steering wheel. Air could then get into the system and be the cause of longer bleeding times.
|
|
|
24.
|
Run the engine for 5 seconds.
 Warning
|
|
The pump could be damaged if the engine is run for longer than 5 seconds.
|
|
|
|
|
|
|
|
25.
|
Check the fluid level in the reservoir and top up as necessary. At 20
°
C, it should be midway between the MAX and MIN marks.
|
|
26.
|
Start the engine again and run it until the fluid in the reservoir stops bubbling. Use a torch to see properly.
An abnormally loud noise from the pump indicates that there is still some air in the system.
|
|
27.
|
Stop the engine and check the fluid level. Top up as necessary.
|
|
28.
|
Check the pump connections for leaks.
|


 Warning

