A-pillar, upper part
| A-pillar, upper part |
| 1. |
Position the car in an aligning bench and cross-measure if necessary.
|
|
| 2. |
Remove the door frame, see
Section of door frame, three-door body
;
Door frame, three-door body
or
Section of door frame, five-door body
.
|
|
| 3. |
Position a door opening support between the floor and roof so that the roof does not sag when the A-pillar is removed.
|
|
| 4. |
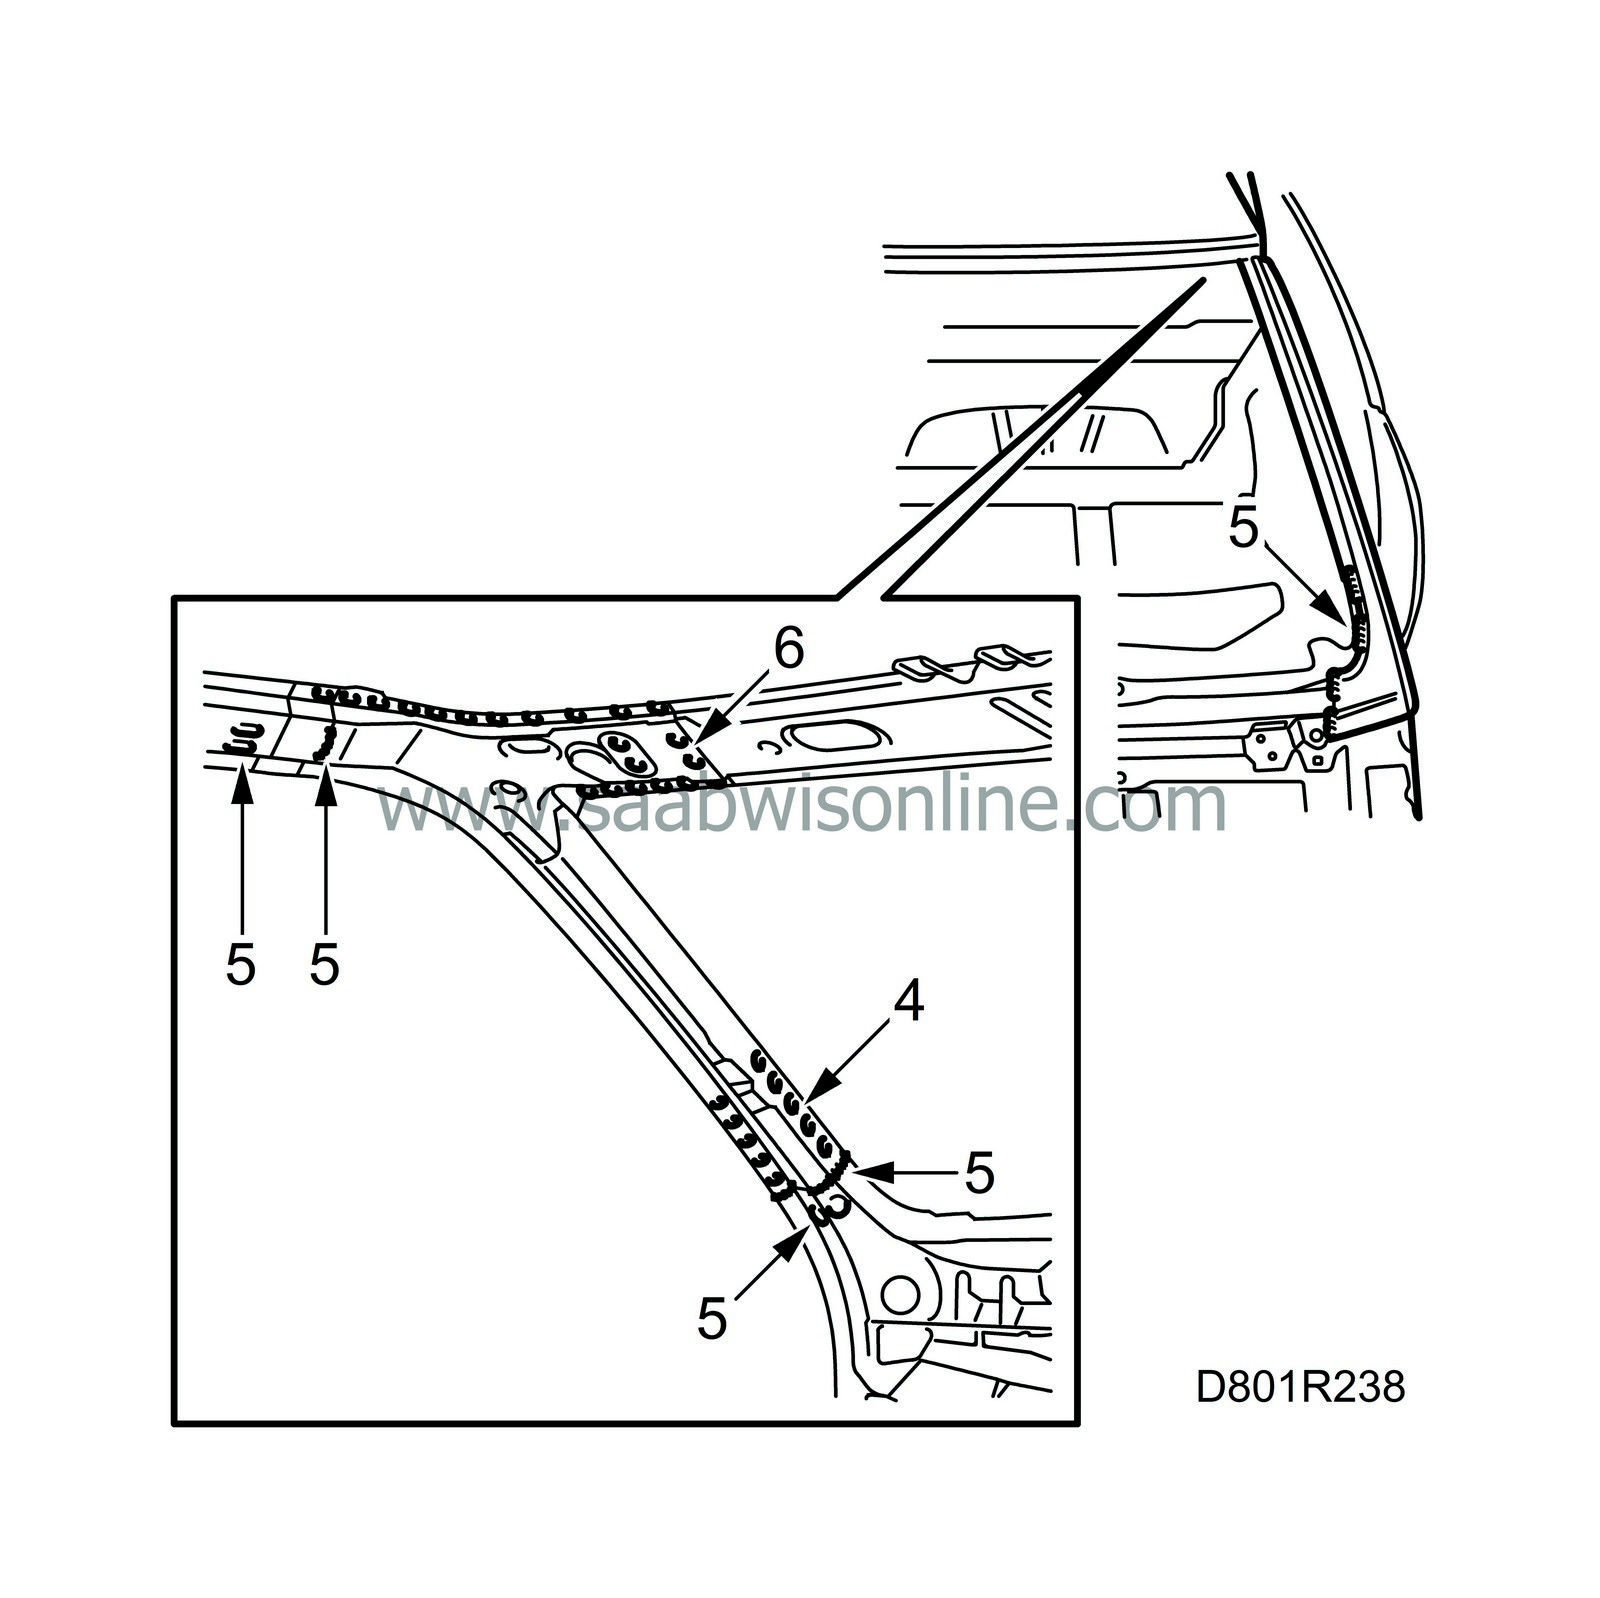
Drill out the spot-welds that secure the A-pillar inner part to the lower reinforcement.

|
|
| 5. |
Grind down the seam welds.
|
|
| 6. |
Drill out the spot welds securing the top of the A-pillar to the roof member. Knock loose the inside of the A-pillar.
|
|
| 7. |
Align any sheet metal or panel damage.
|
|
| 8. |
Drill holes for plug-welding in the upper part of the A-pillar.
|
|
| 9. |
Grind clean the surfaces to be welded on the body and A-pillar.
|
|
| 10. |
Apply welding primer on the surfaces to be spot-welded. Use Teroson Zinkspray.
|
|
| 11. |
Fit the A-pillar and fixate with a couple of welding clamps.
|
|
| 12. |
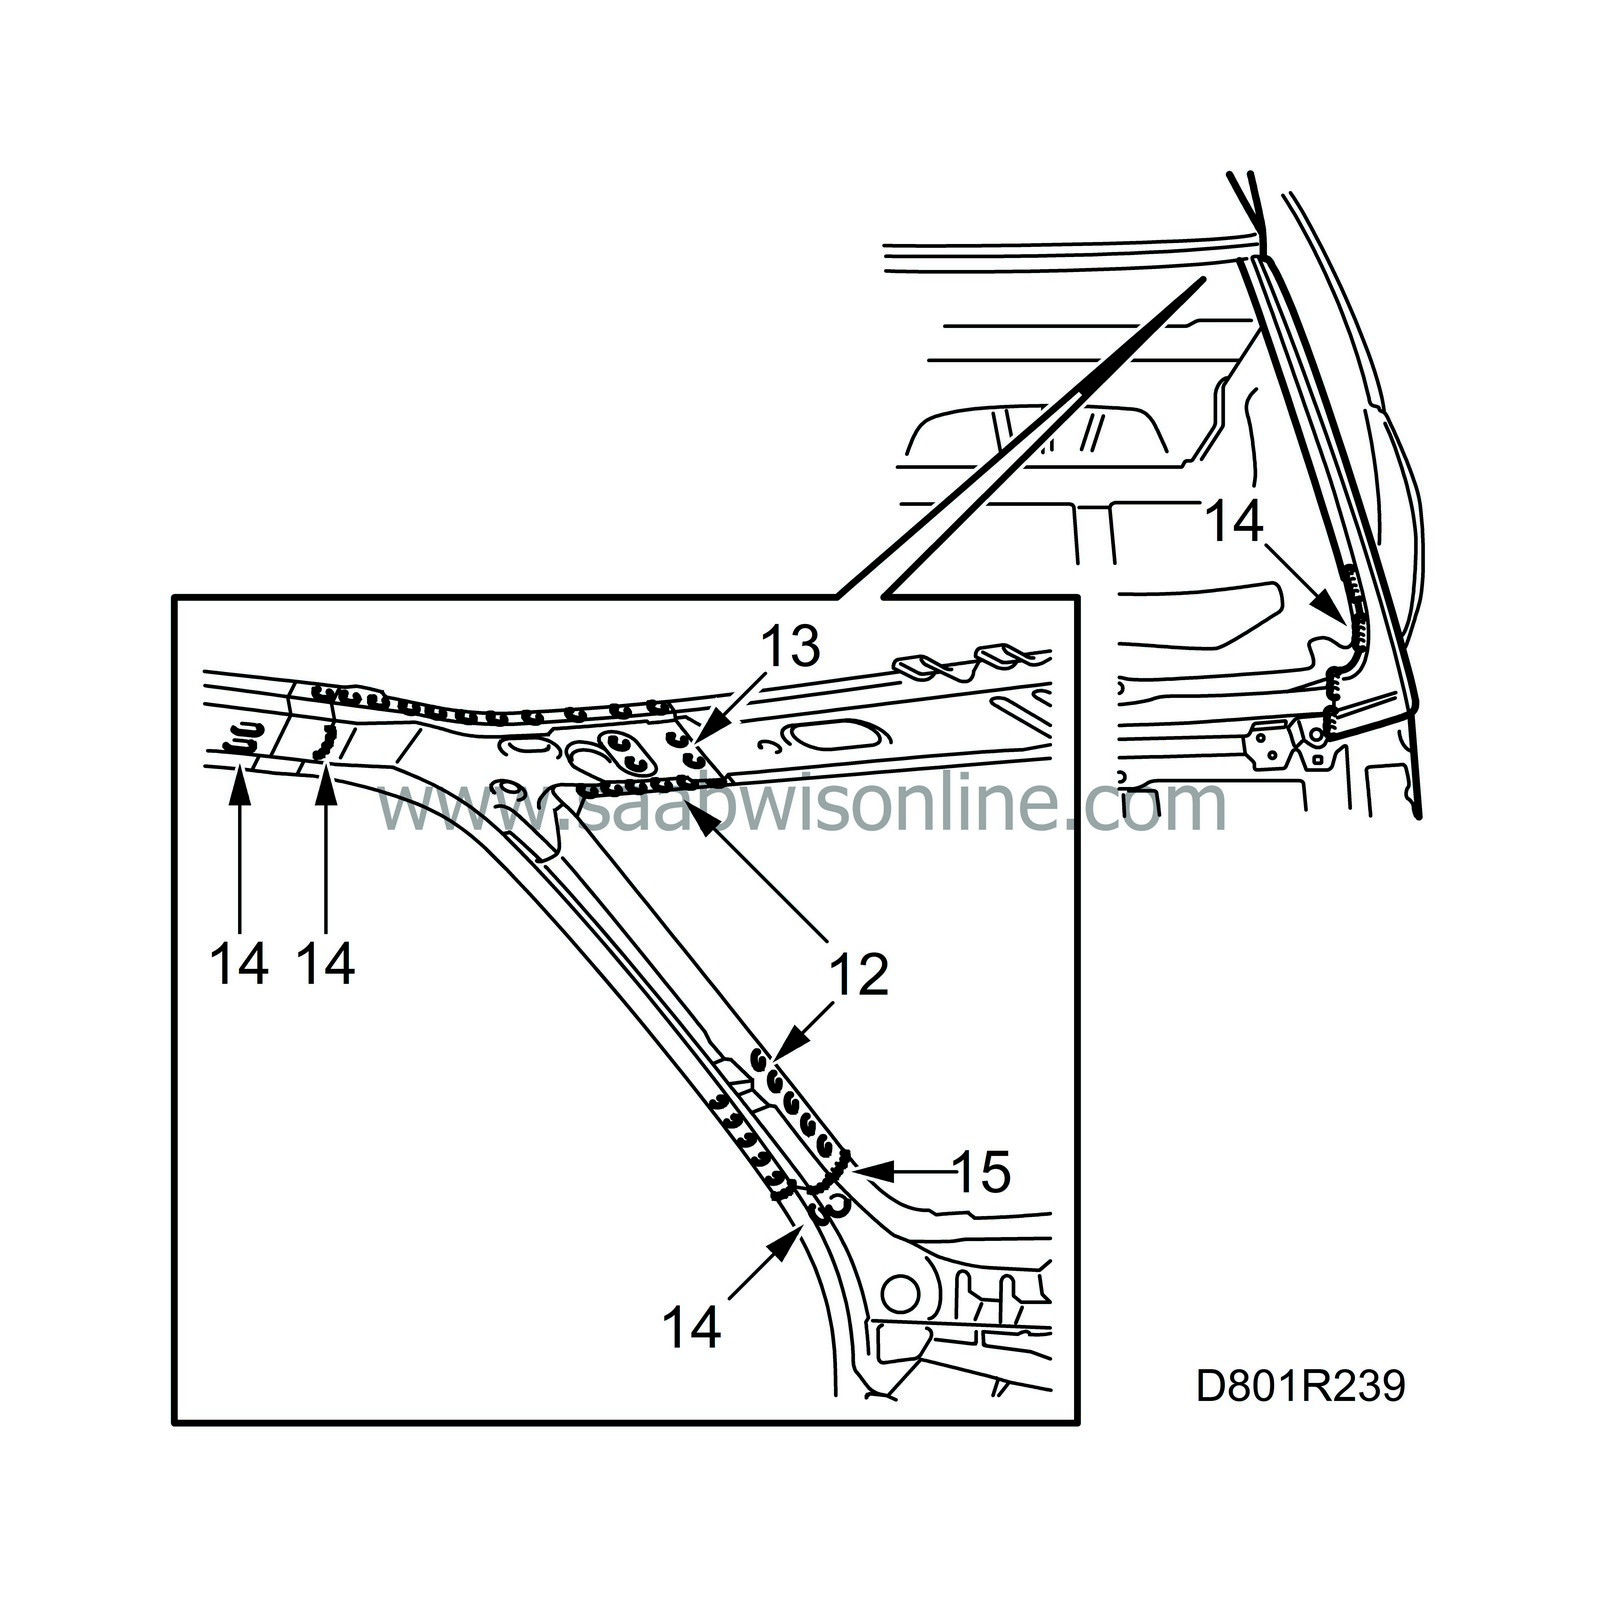
Spot-weld the A-pillar.

|
|
| 13. |
Plug-weld the upper part of the A-pillar.
|
|
| 14. |
Seam-weld the A-pillar.
|
|
| 15. |
All-weld the joint on the inside of the A-pillar.
|
|
| 16. |
Grind the welds.
|
|
| 17. |
Remove any remaining welding primer. Welding primer reduces adhesion of paint, filler and sealant.
|
|
| 18. |
Apply primer to all ground surfaces. Use Standox 1K Primer.
|
|
| 19. |
Seal joints and sheet metal flanges with sealant. Use Terostat 1K-PUR.
|
|
| 20. |
Fit the door frame.
|
|
| 21. |
Apply anti-corrosion agent to internal surfaces after painting. Use Terotex HV 400 or Mercasol 1.
|
|


