Hydraulic valve
| Hydraulic valve |
| Removing |
| 1.a. |
Release the rear seat backrest and fold it forward.
|
| 1.b. |
Remove the cover on the emergency opening valve and open the valve about one half turn
(A)
.
|
| 1.c. |
Unlatch the soft top from the windscreen frame.
|
| 1.d. |
Activate the fifth bow latch to UNLATCH using the diagnostic tool and raise the fifth bow.
|
| 1.e. |
Insert the wheel bolt tool through the opening in the right-hand luggage compartment trim and attach it in the drive mechanism link arm
(B)
.
|
| 1.f. |
Unlatch the soft top cover by pulling back on the tool until the soft top cover is lifted a few centimetres
(C)
.
|
| 1.g. |
Remove the tool, close the boot lid and open the soft top cover.
|
| 1.h. |
Carefully lower the soft top.
|
|||||||||
| 1.i. |
Close the soft top cover.
|
| 2. |
Release the rear seat backrest and fold it forward.

|
|
| 3. |
Remove the cover on the hydraulic unit.
|
|
| 4. |
Fold back the luggage compartment mat and remove the bolts securing the hydraulic unit.
|
|
| 5. |
Lift up the hydraulic unit, taking care not to damage the hydraulic hoses. Press out the locking pins in the plastic rivets and remove the relay holder.
|
|
| 6. |
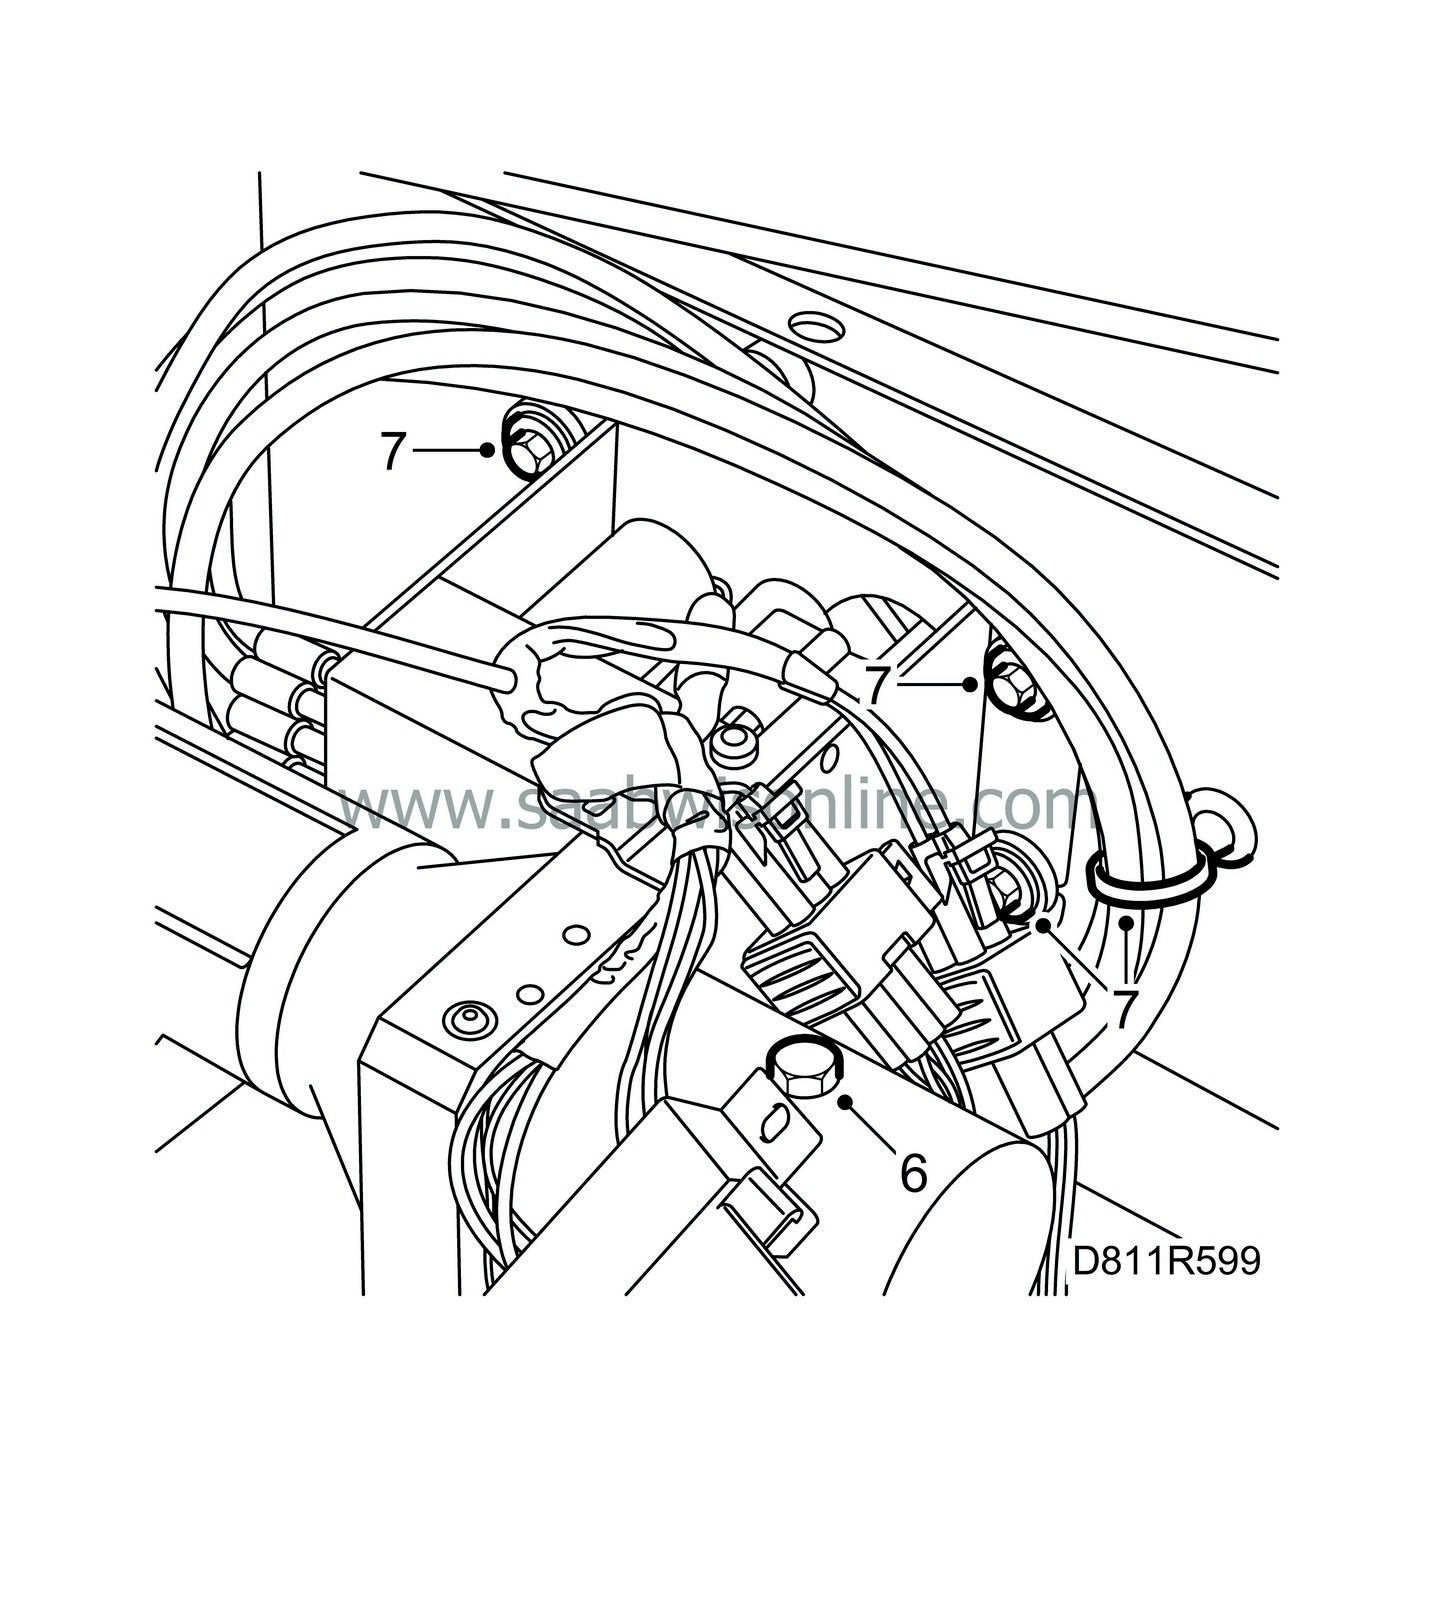
Open the emergency opening valve and remove the plug from the fluid reservoir to equalize the pressure. Refit the plug.
|
|
| 7. |
Remove the bracket with the hydraulic unit and valves from its attachment bracket.
Remove the cable tie securing the hoses. |
|
| 8. |
Determine which valve to change using the diagnostic tool.

The hydraulic valves are located as follows: |
|
| 8.1. |
5th bow down
|
| 8.2. |
Main cylinder up
|
| 8.3. |
5th bow up
|
| 8.4. |
Main cylinder down
|
| 9. |
Us a small screwdriver to unplug the connector on the faulty valve.

|
|
| 10. |
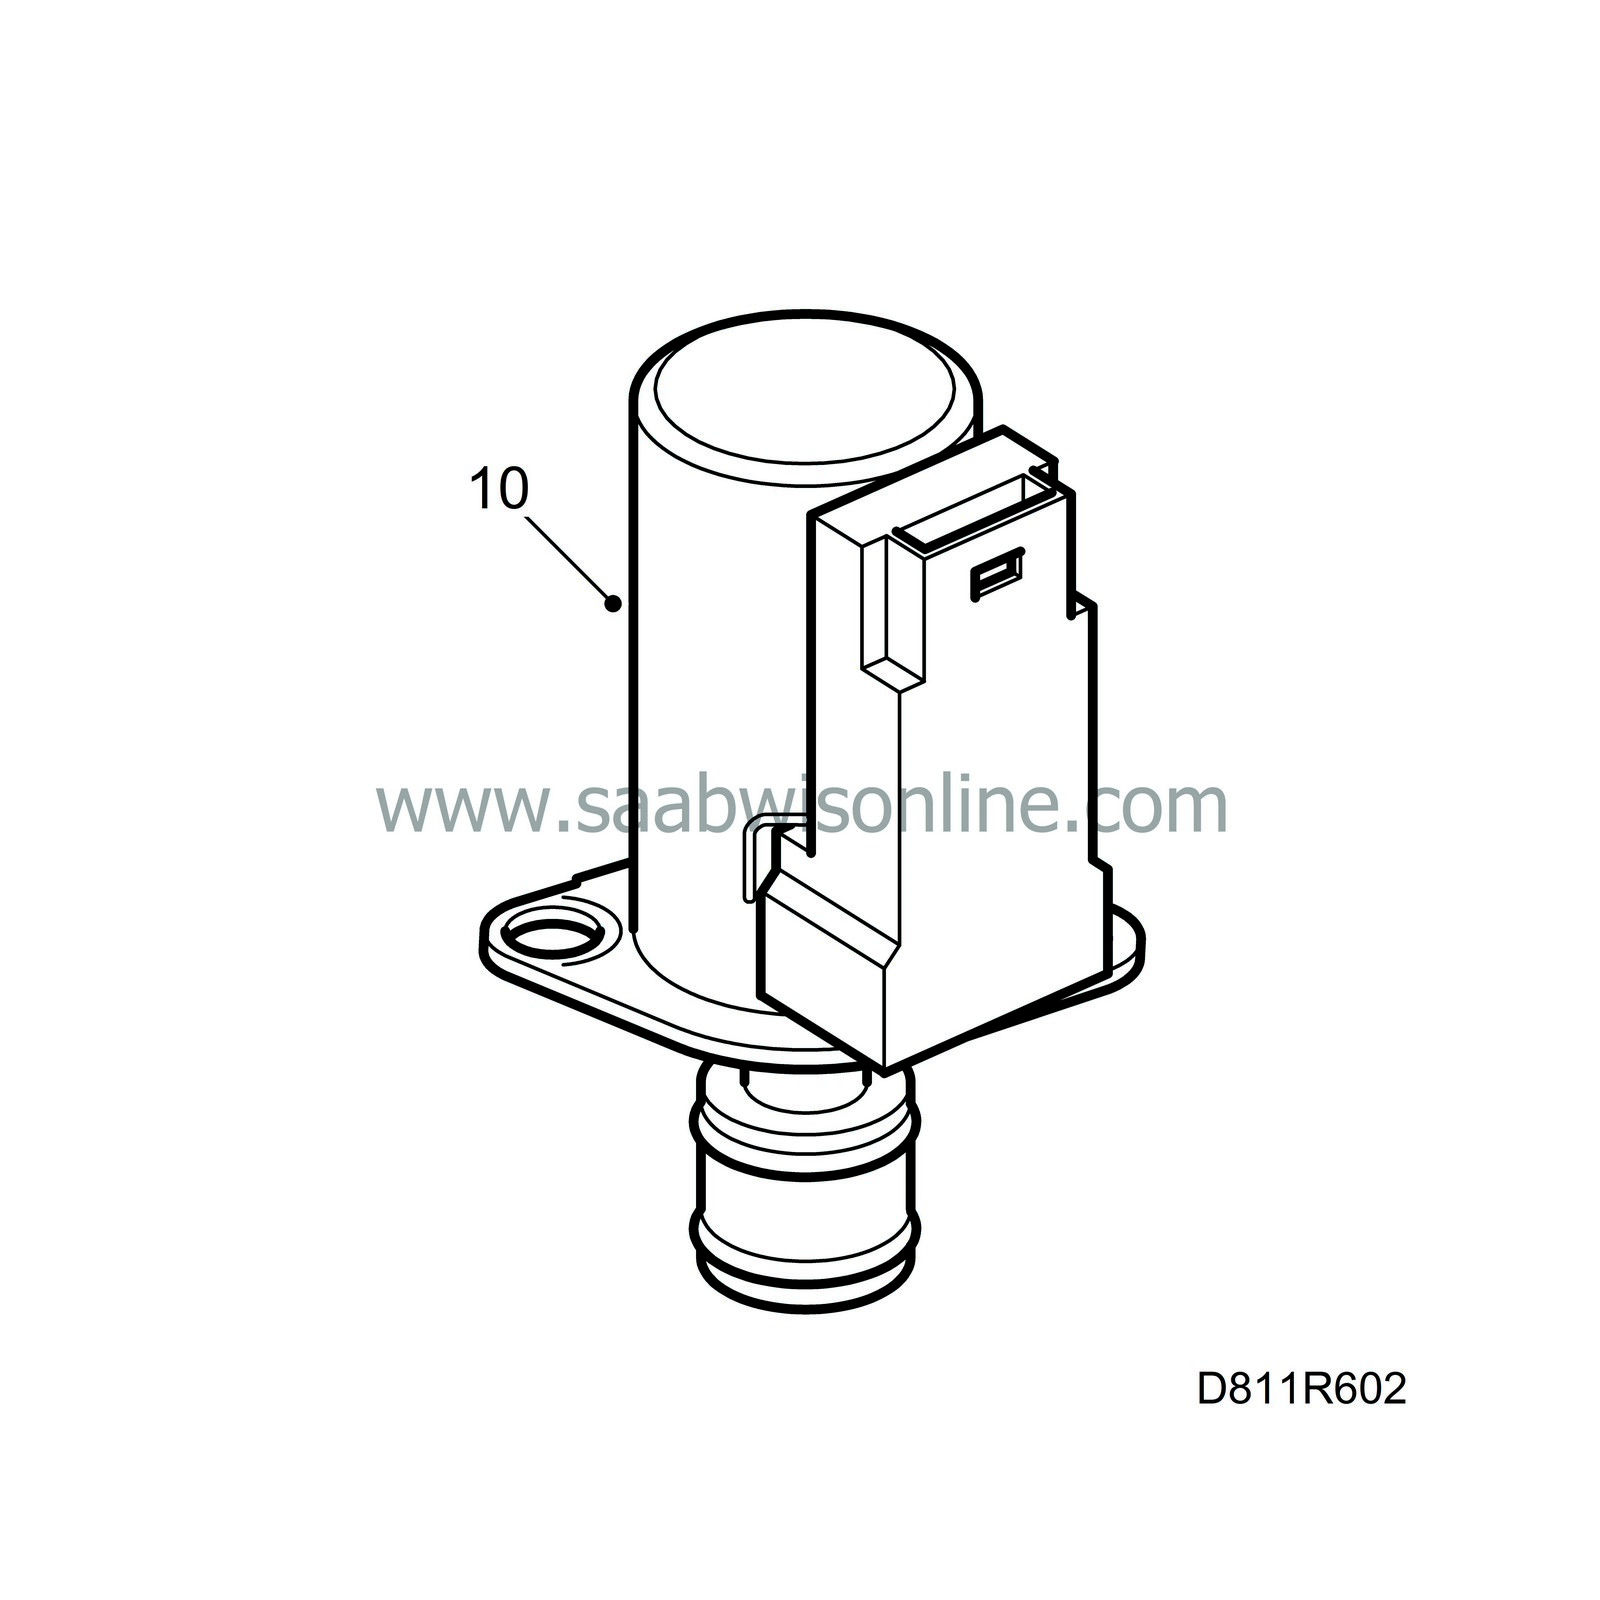
Remove the bolts securing the valve and remove the valve.
|
|
| Fitting |
| 1. |
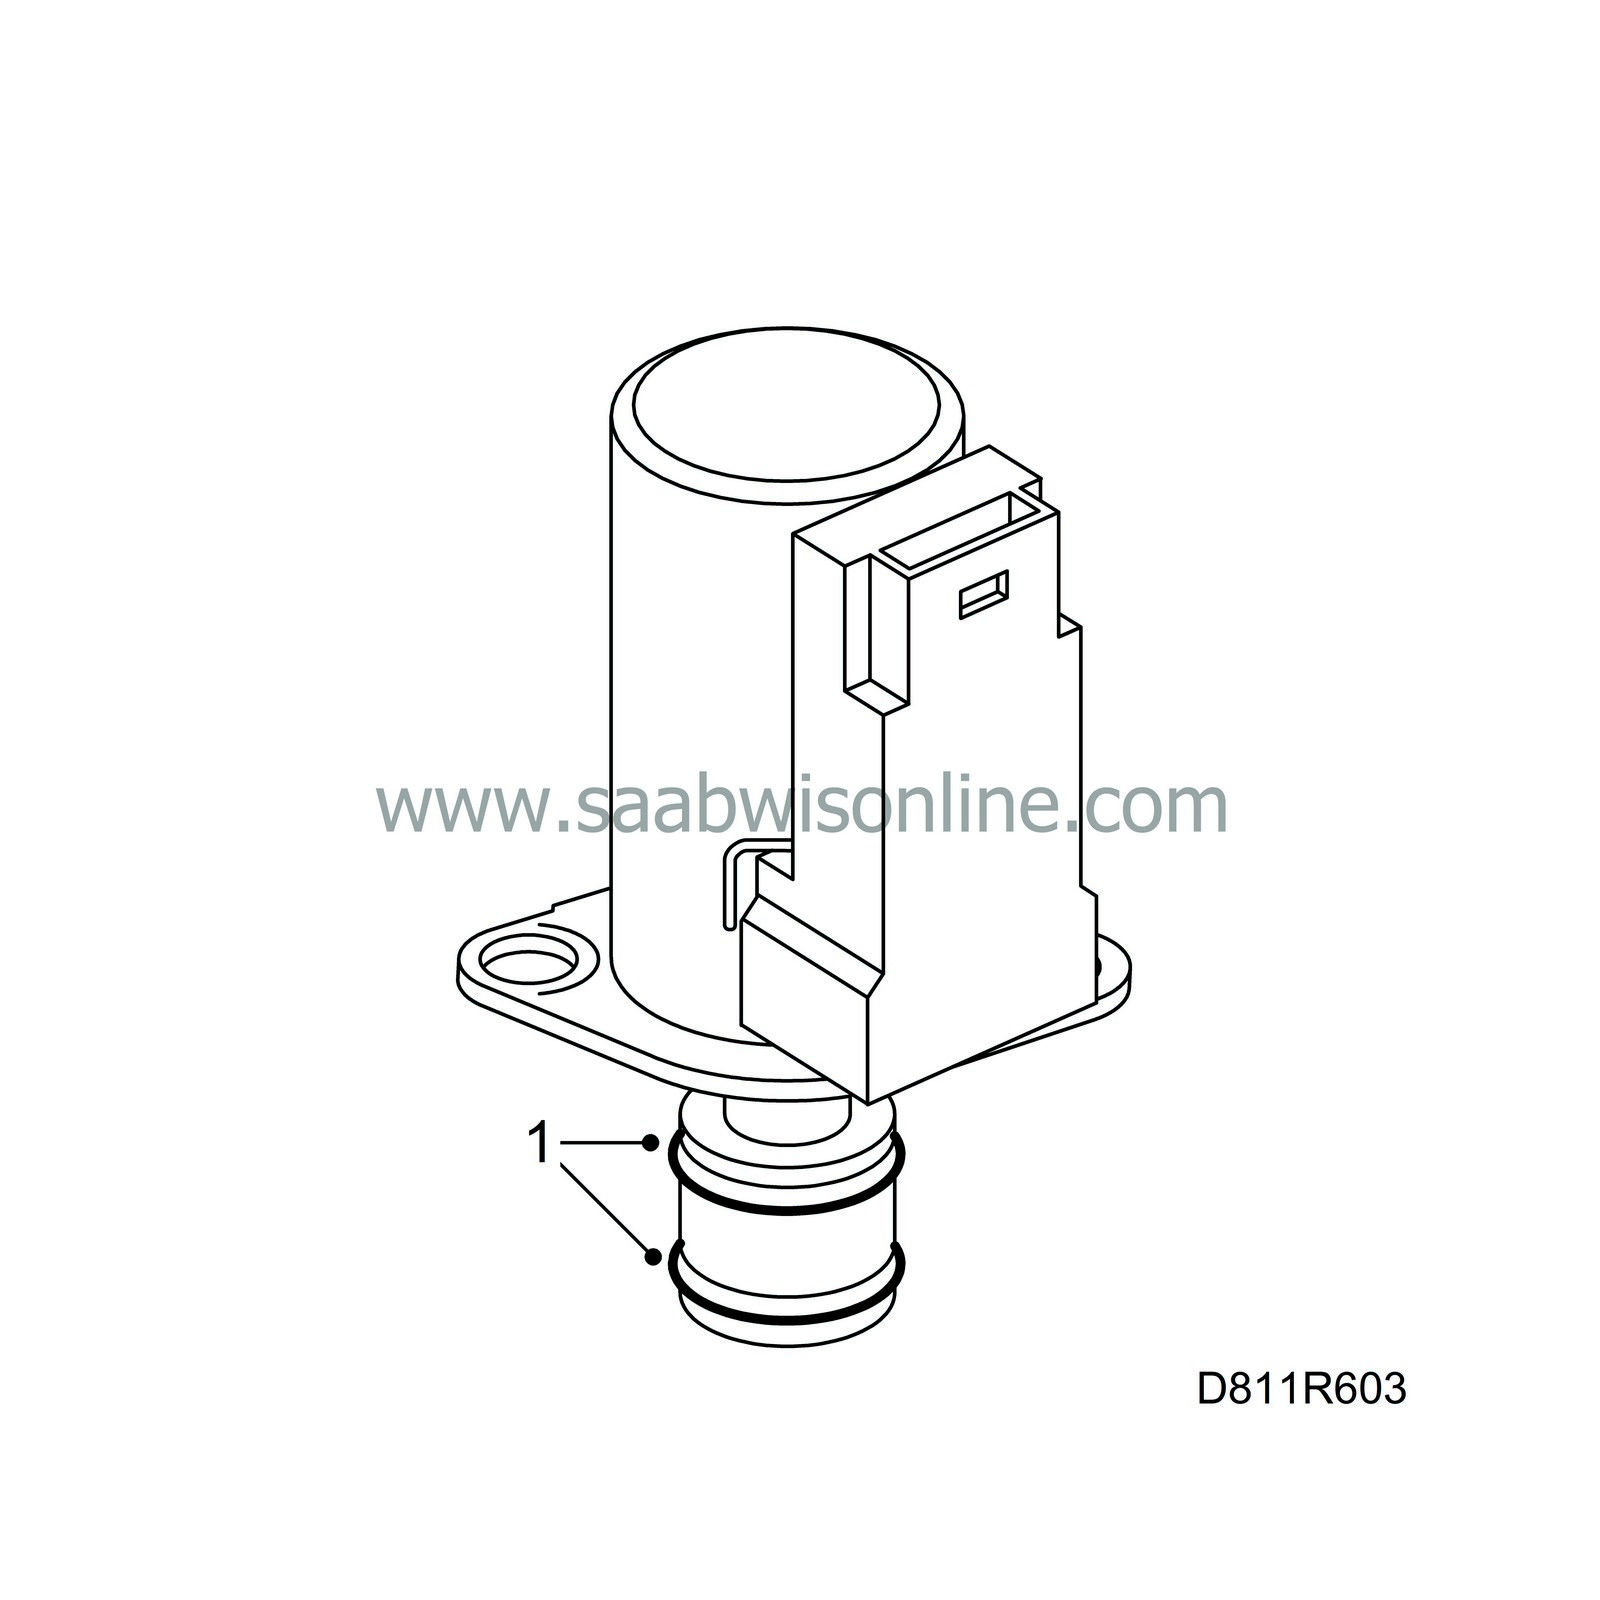
Apply a small amount of oil to the O-rings and fit the new valve.
|
|
| 2. |
Plug in the connector to the new valve.

|
|
| 3. |
Connect the diagnostic tool and program the valve. See the
Programming
heading in
Tech 2 menu structure
.
|
|
| 4. |
Erase any diagnostic trouble codes.
|
|
| 5. |
Close the emergency opening valve and operate the soft top using the ROOF button a few time to see whether any DTCs are generated.
|
|
| 6. |
Operate the soft top to raised (closed) position.
|
|
| 7. |
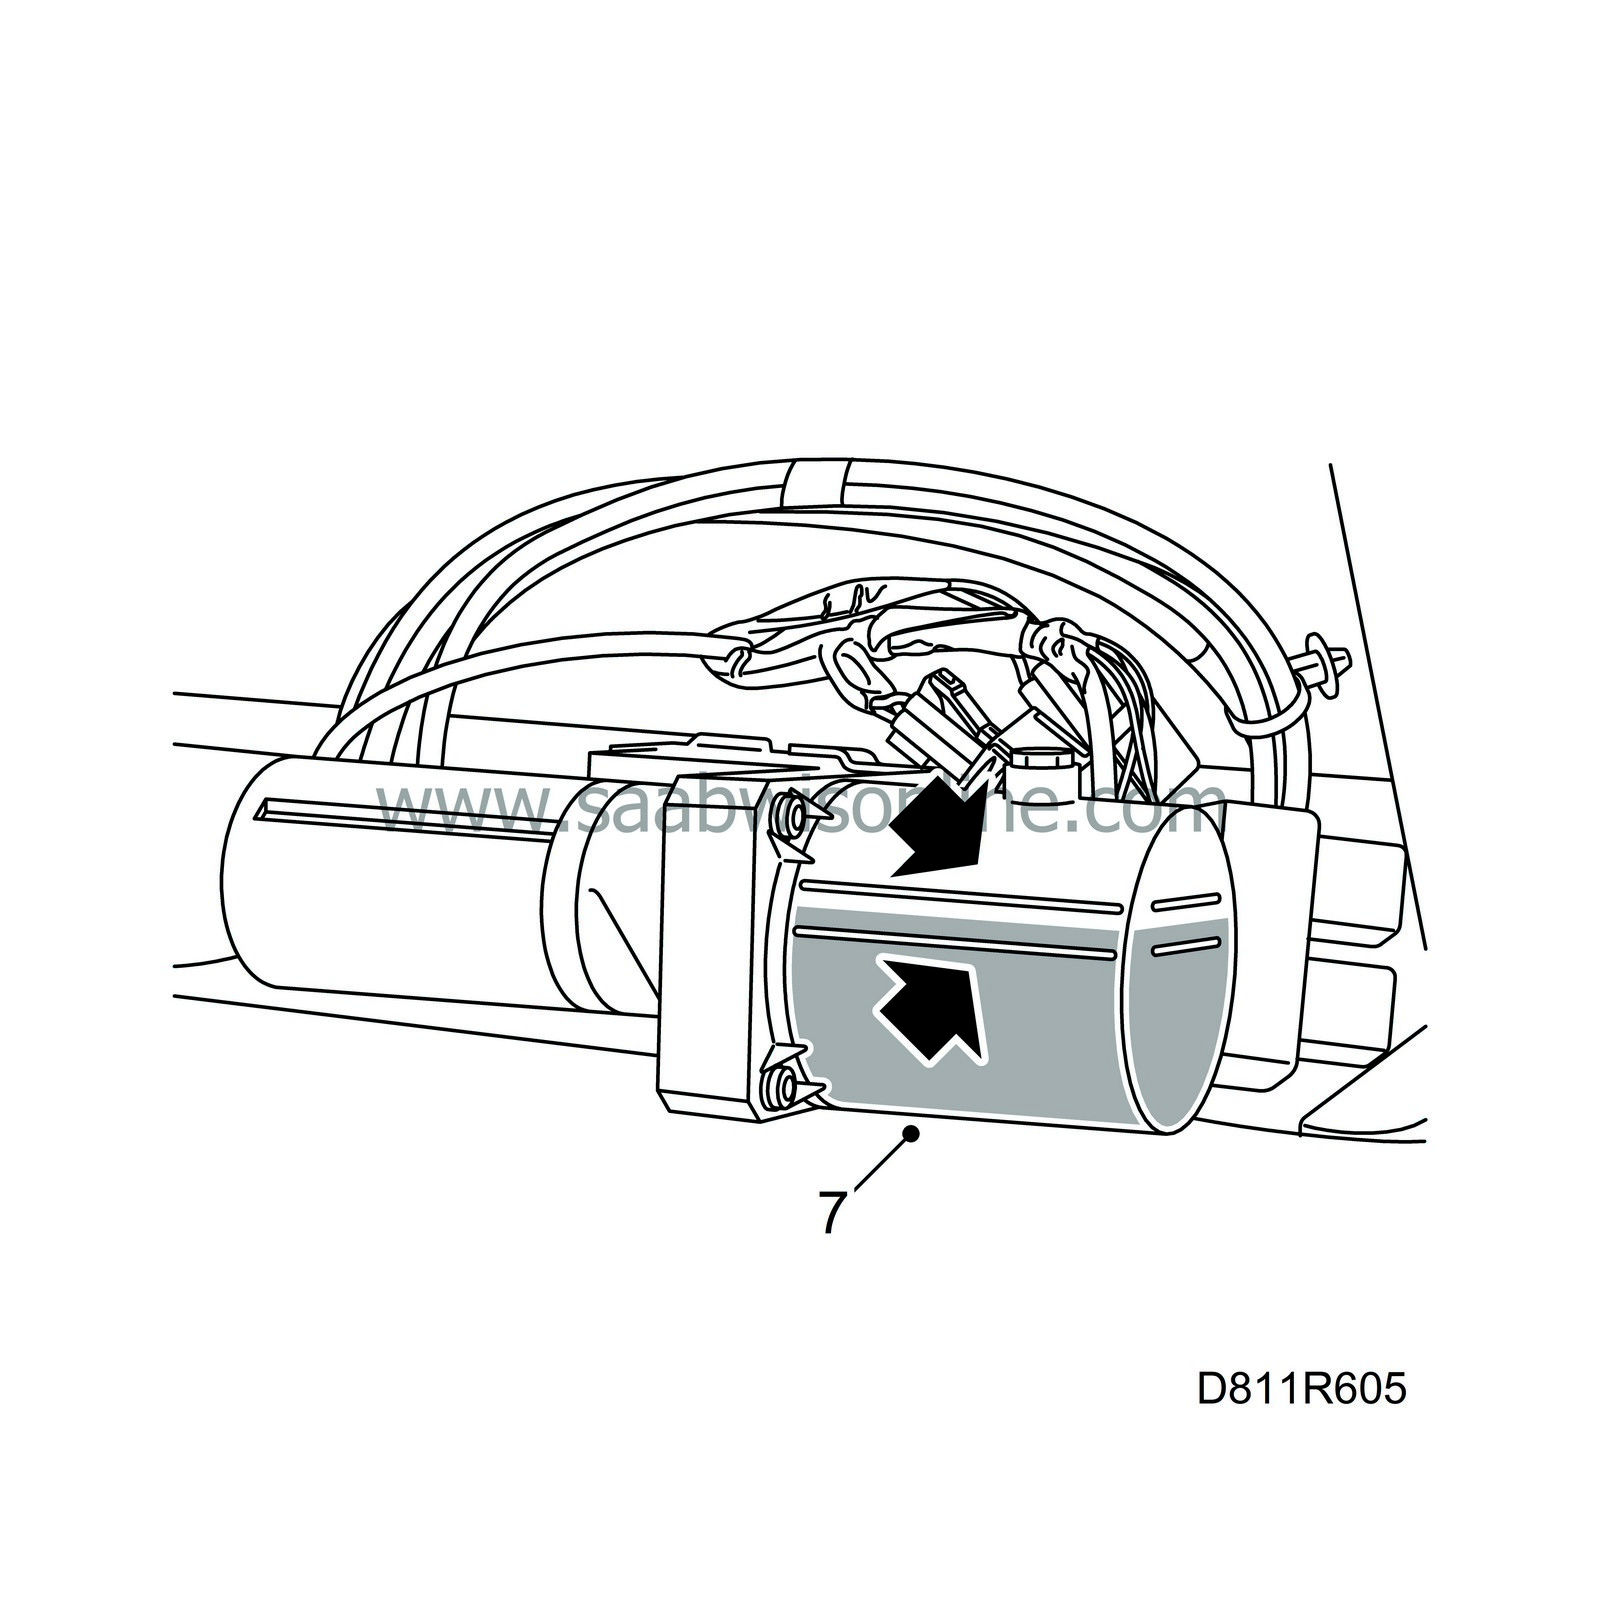
Check the fluid level by turning the hydraulic unit so that the plug is pointing straight up. Check that the fluid level is between the two marks.
|
|
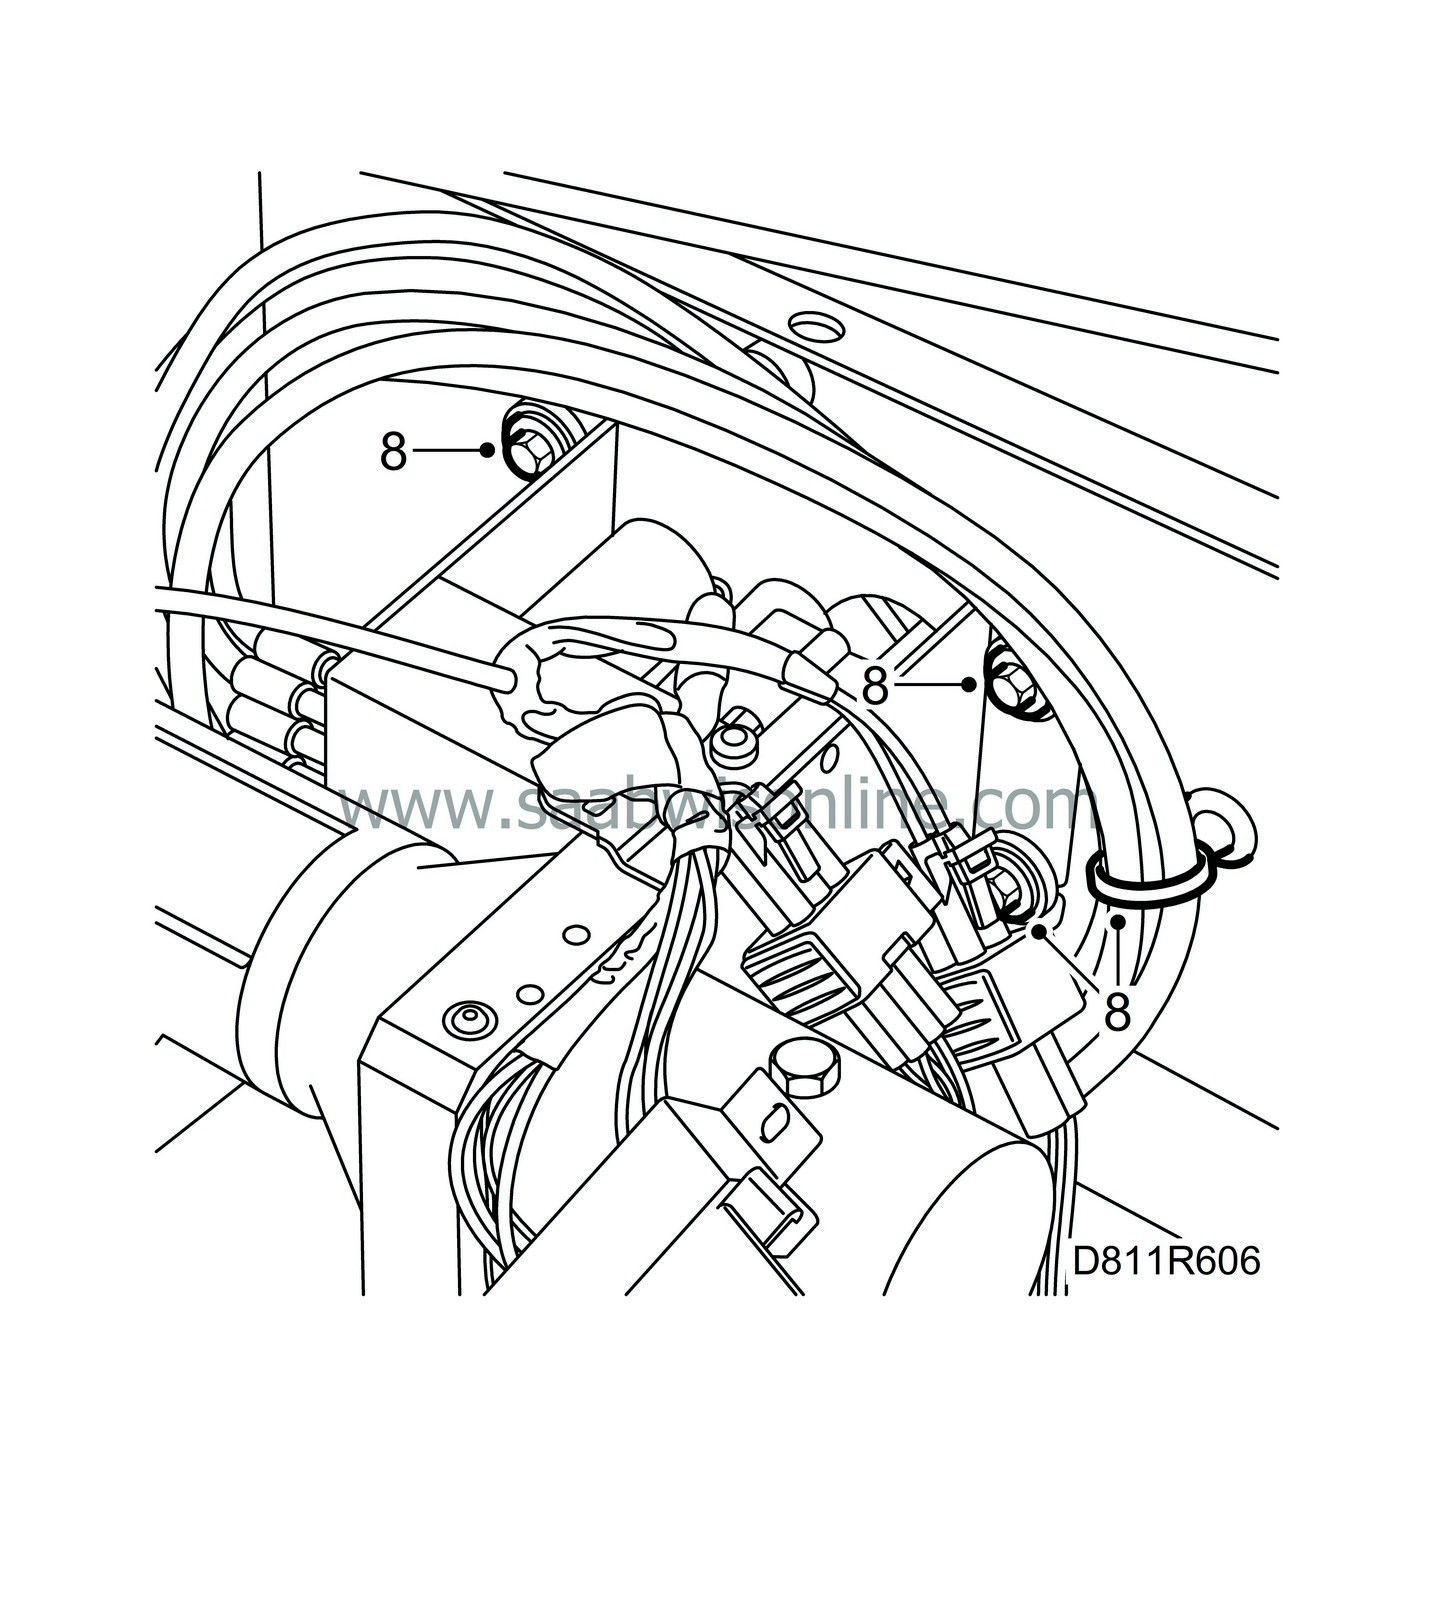
| 8. |
Fit the bracket and the cable ties for the hydraulic hoses, taking care not to damage the hydraulic hoses.
|
|
| 9. |
Fit the relay holder.

|
|
| 10. |
Fit the hydraulic unit. Replace the luggage compartment mat and refit the cover on the hydraulic unit.
|
||||||||||
| 11. |
Raise the rear seat backrest.
|
|


 Warning

