Lock cylinder, driver's door
|
|
Lock cylinder, driver's door
|
|
2.
|
Remove the microswitch by pulling of the clip and lifting the microswitch from its groove.
|
|
3.
|
Remove the circlip securing the lock arm to the lock cylinder with circlip pliers.
|
|
4.
|
Lift off the lock arm. Make sure that the roller remains in the lock arm.
|
|
5.
|
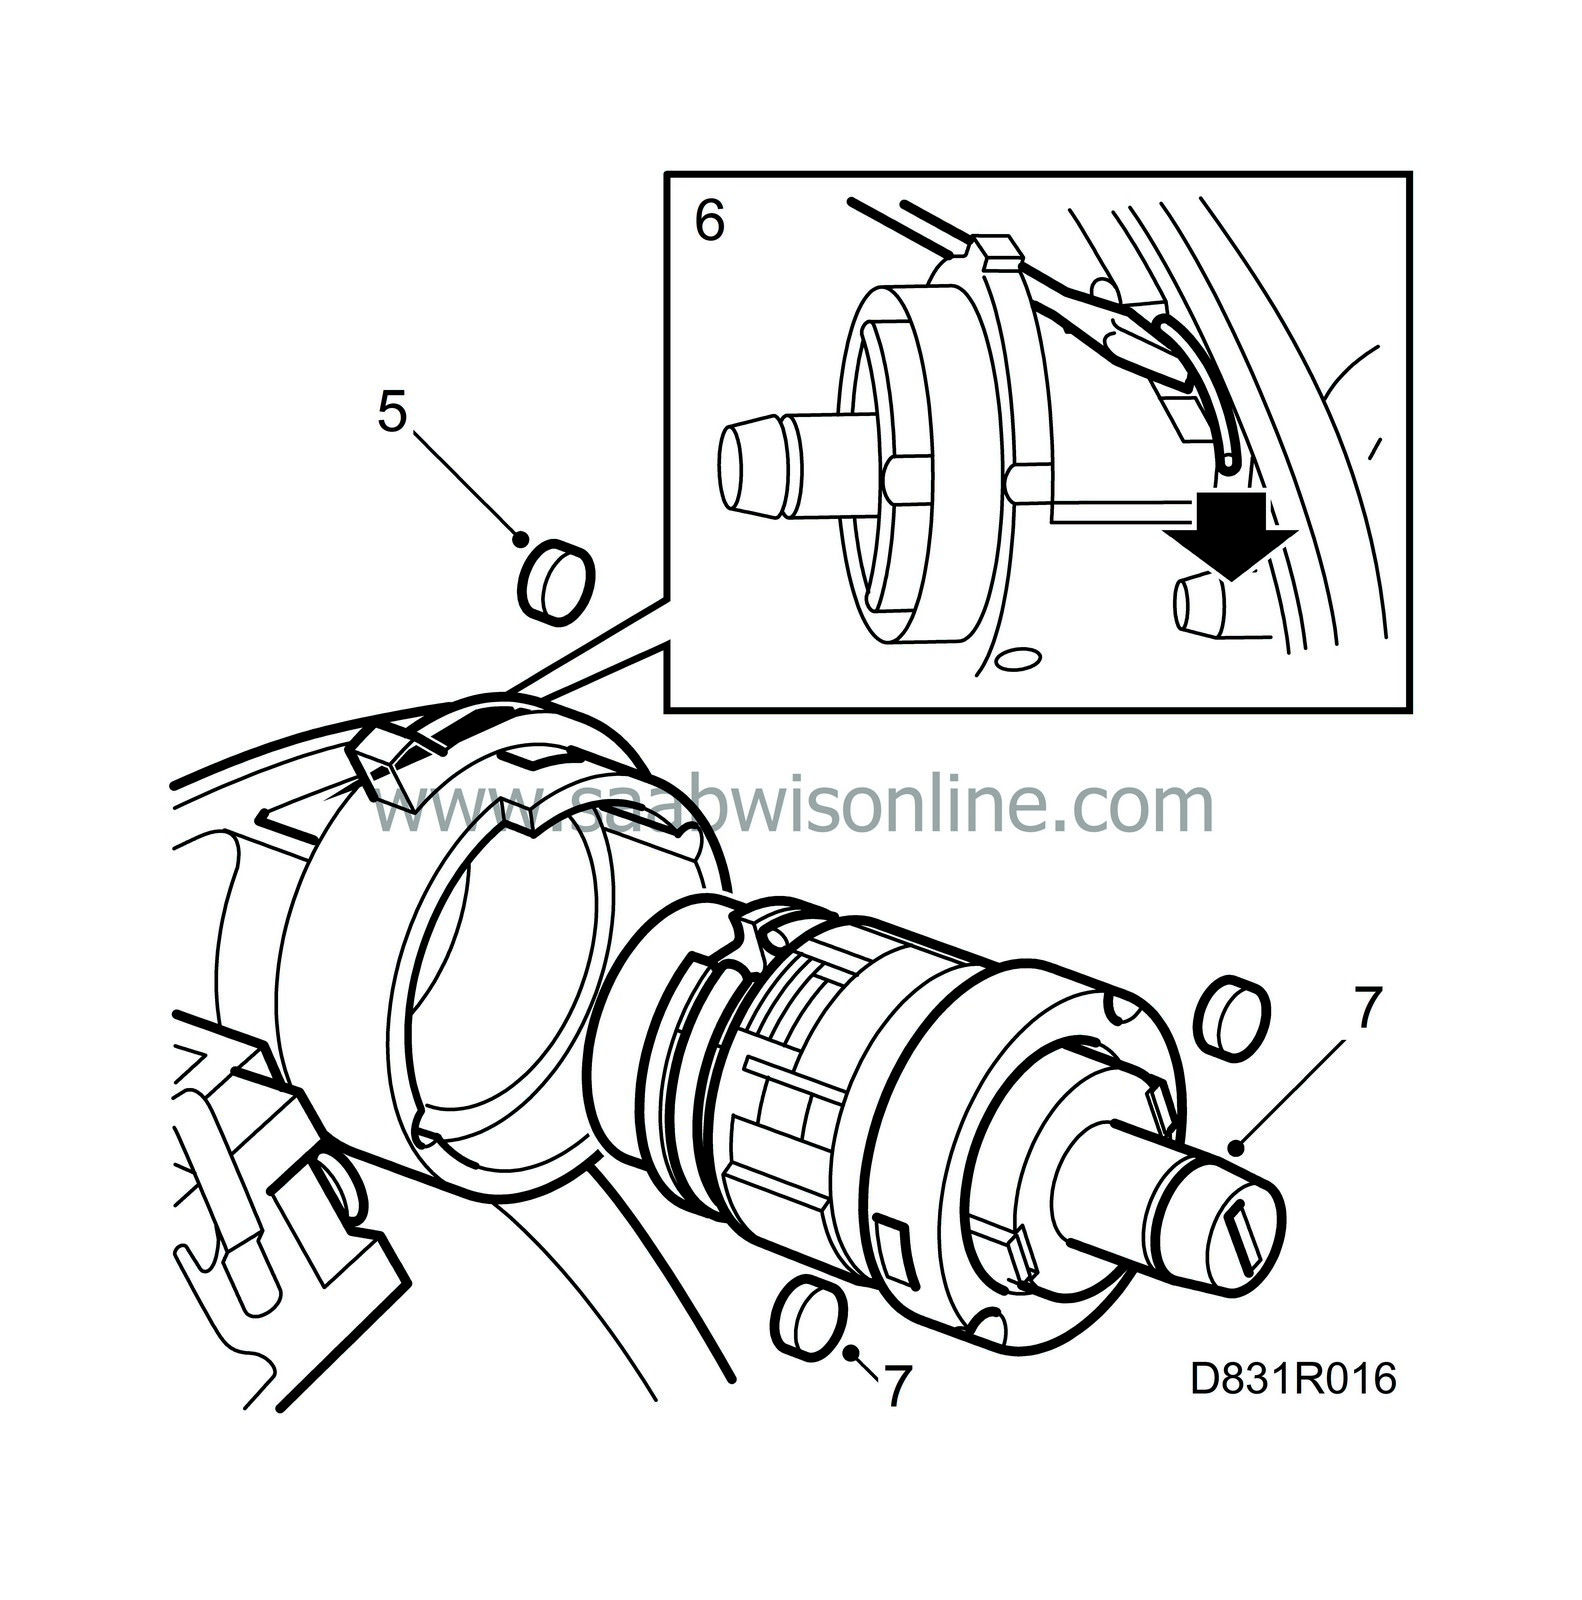
When the lock arm is removed, a roller is released. Remove the roller from its groove and keep it safe. Remove the handle gasket.

|
|
6.
|
Use a screwdriver and pull out an end of the circlip which locks the lock cylinder to the handle. Select the end pointing towards the end of the handle, closest to the cylinder. When the end of the circlip is visible in the opening (drain hole), bend it out so that it can be gripped with pliers. Pull out the circlip, without scratching the handle, and throw away the circlip.
|
|
7.
|
Press out the lock cylinder and retain the two remaining rollers that are now released.
|

|
1.
|
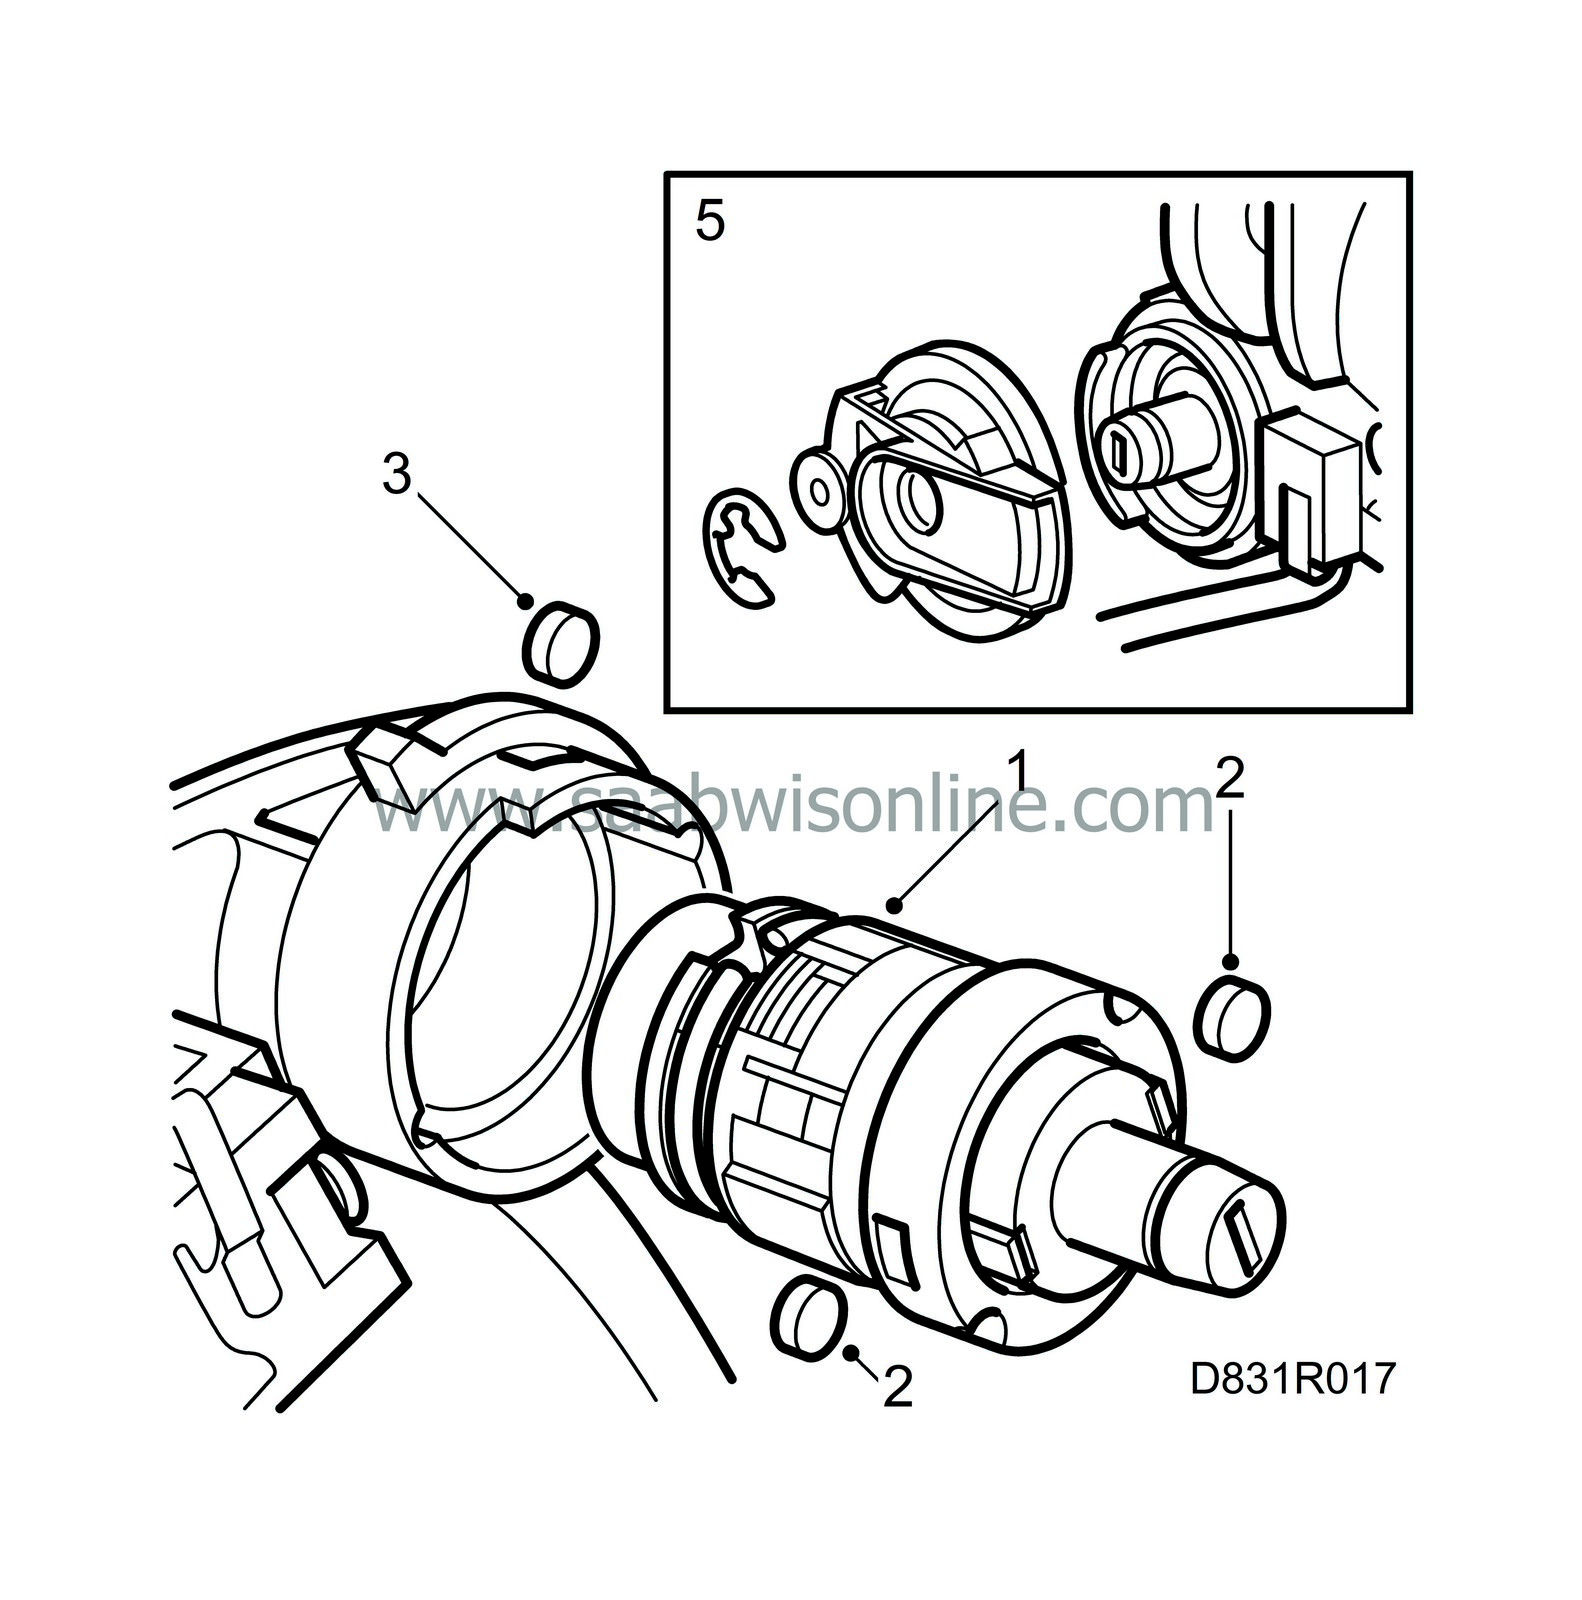
Fit a new circlip in the groove on the cylinder.
|
Note
|
|
Do not refit a used circlip. Also make sure that the rollers are positioned correctly, otherwise the cylinder must be removed again.
|
|
|
2.
|
Fit two rollers in position on the cylinder. Grease the lock cylinder and press it into the handle. The circlip must be fitted in its previous groove with the opening facing the drain hole.
|
|
3.
|
Fit the third roller in position.
|
|
4.
|
Make sure that the roller is positioned correctly in the lock arm. Fit the lock arm.
|
|
5.
|
Fit a new circlip to the lock arm and fit the handle gasket.
|
|
6.
|
Fit the microswitch and fasten with the clip, the flat part of the clip facing up.
|


