Test pressurization of the charge air cooler and delivery pipes
|
|
Test pressurization of the charge air cooler and delivery pipes
|
|
1.
|
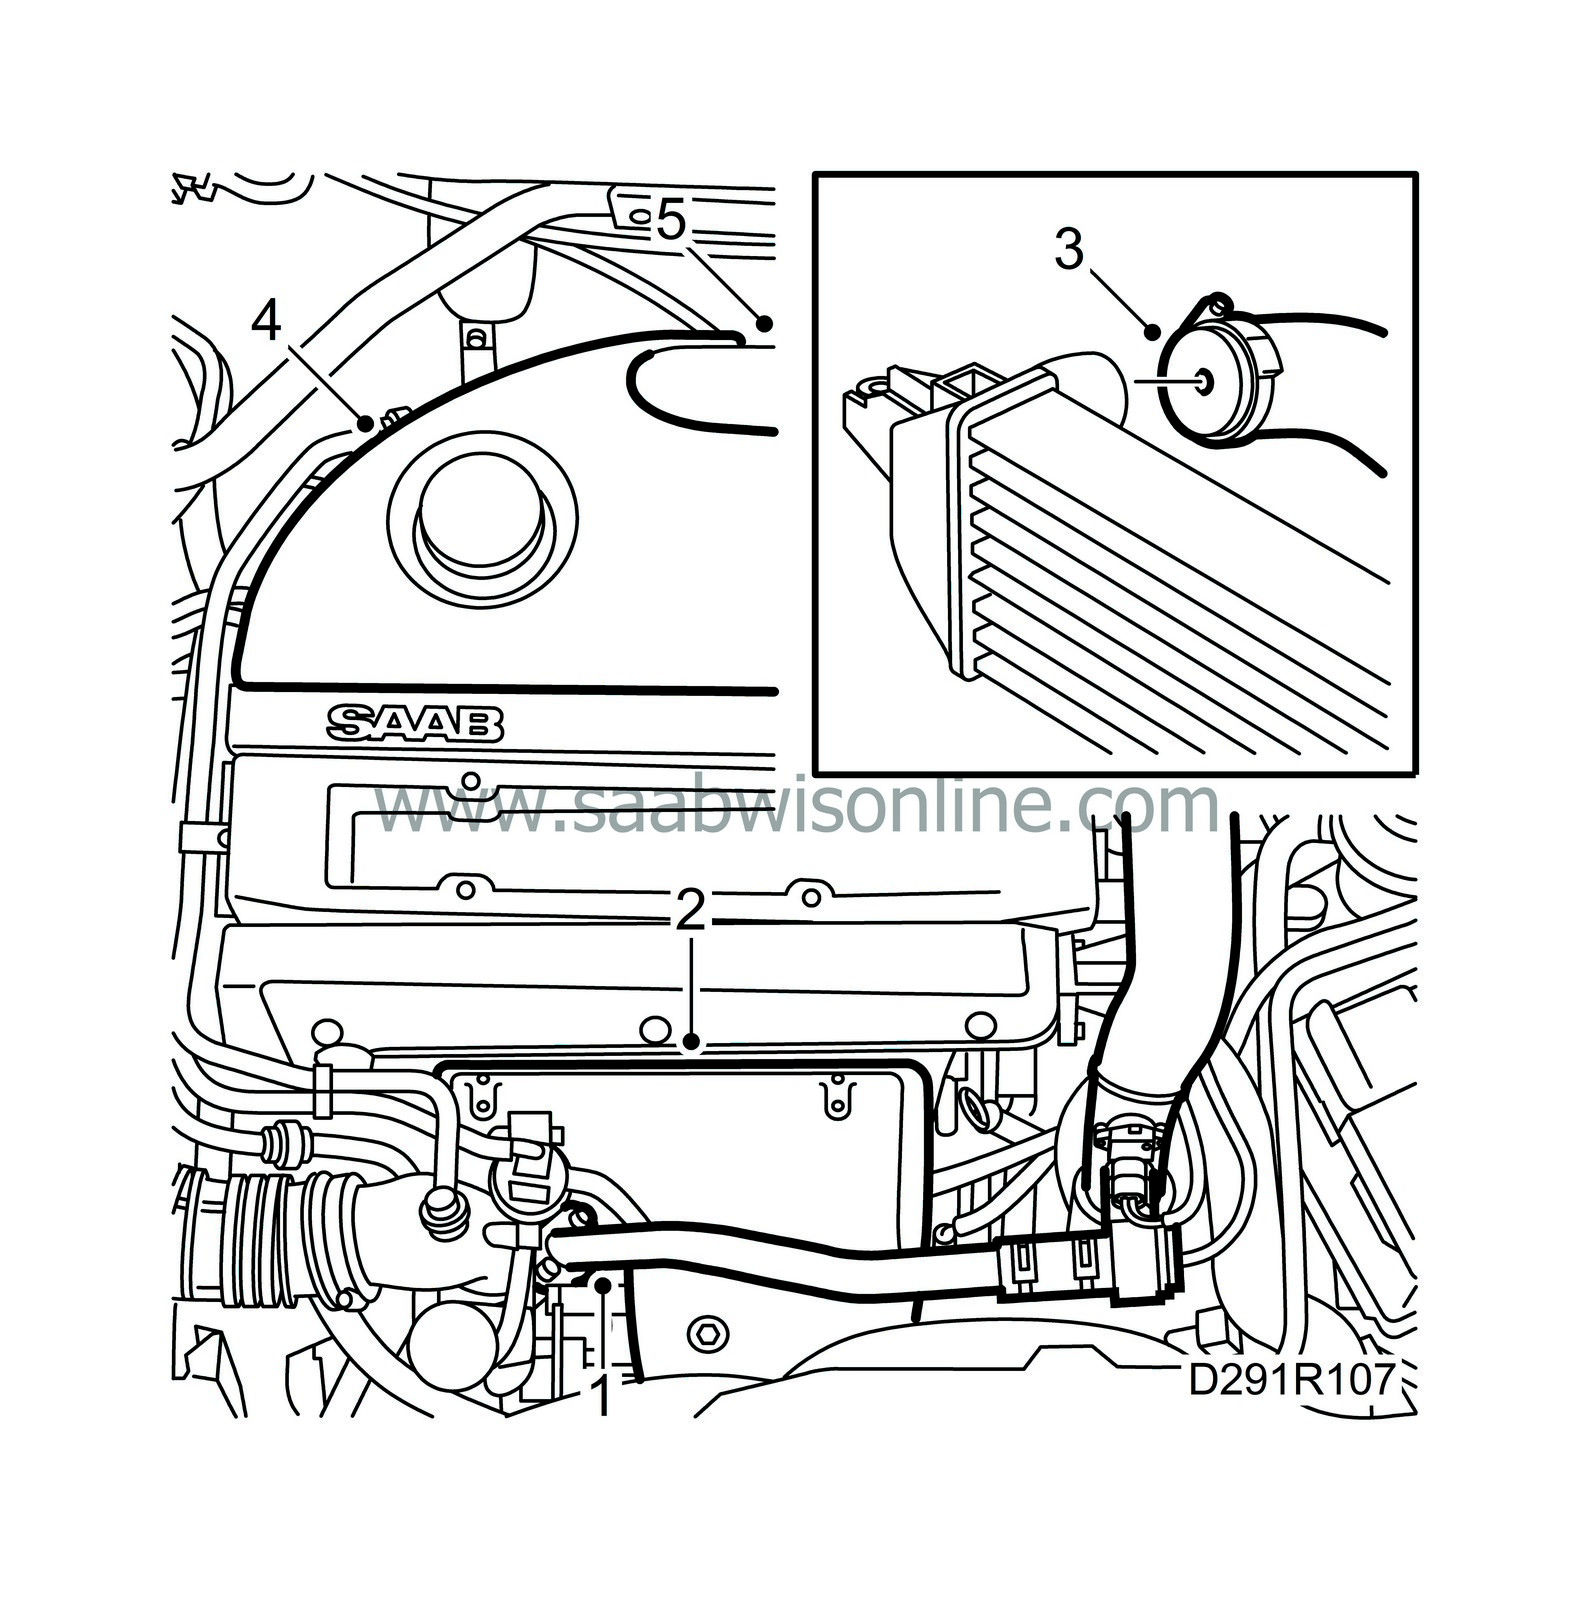
Remove the bypass pipe.
|
Note
|
|
There is an O-ring where the bypass pipe is fastened to the charge air pipe.
|

|
|
2.
|
Remove the exhaust manifold heat shield. The heat shield is fastened with a nut and two clips underneath.
|
|
4.
|
Remove the upper engine cover.
|
|
5.
|
Disconnect the charge air pipe from the throttle body.
Man: Disconnect the venturi hose from the charge air pipe.
|
|
8.
|
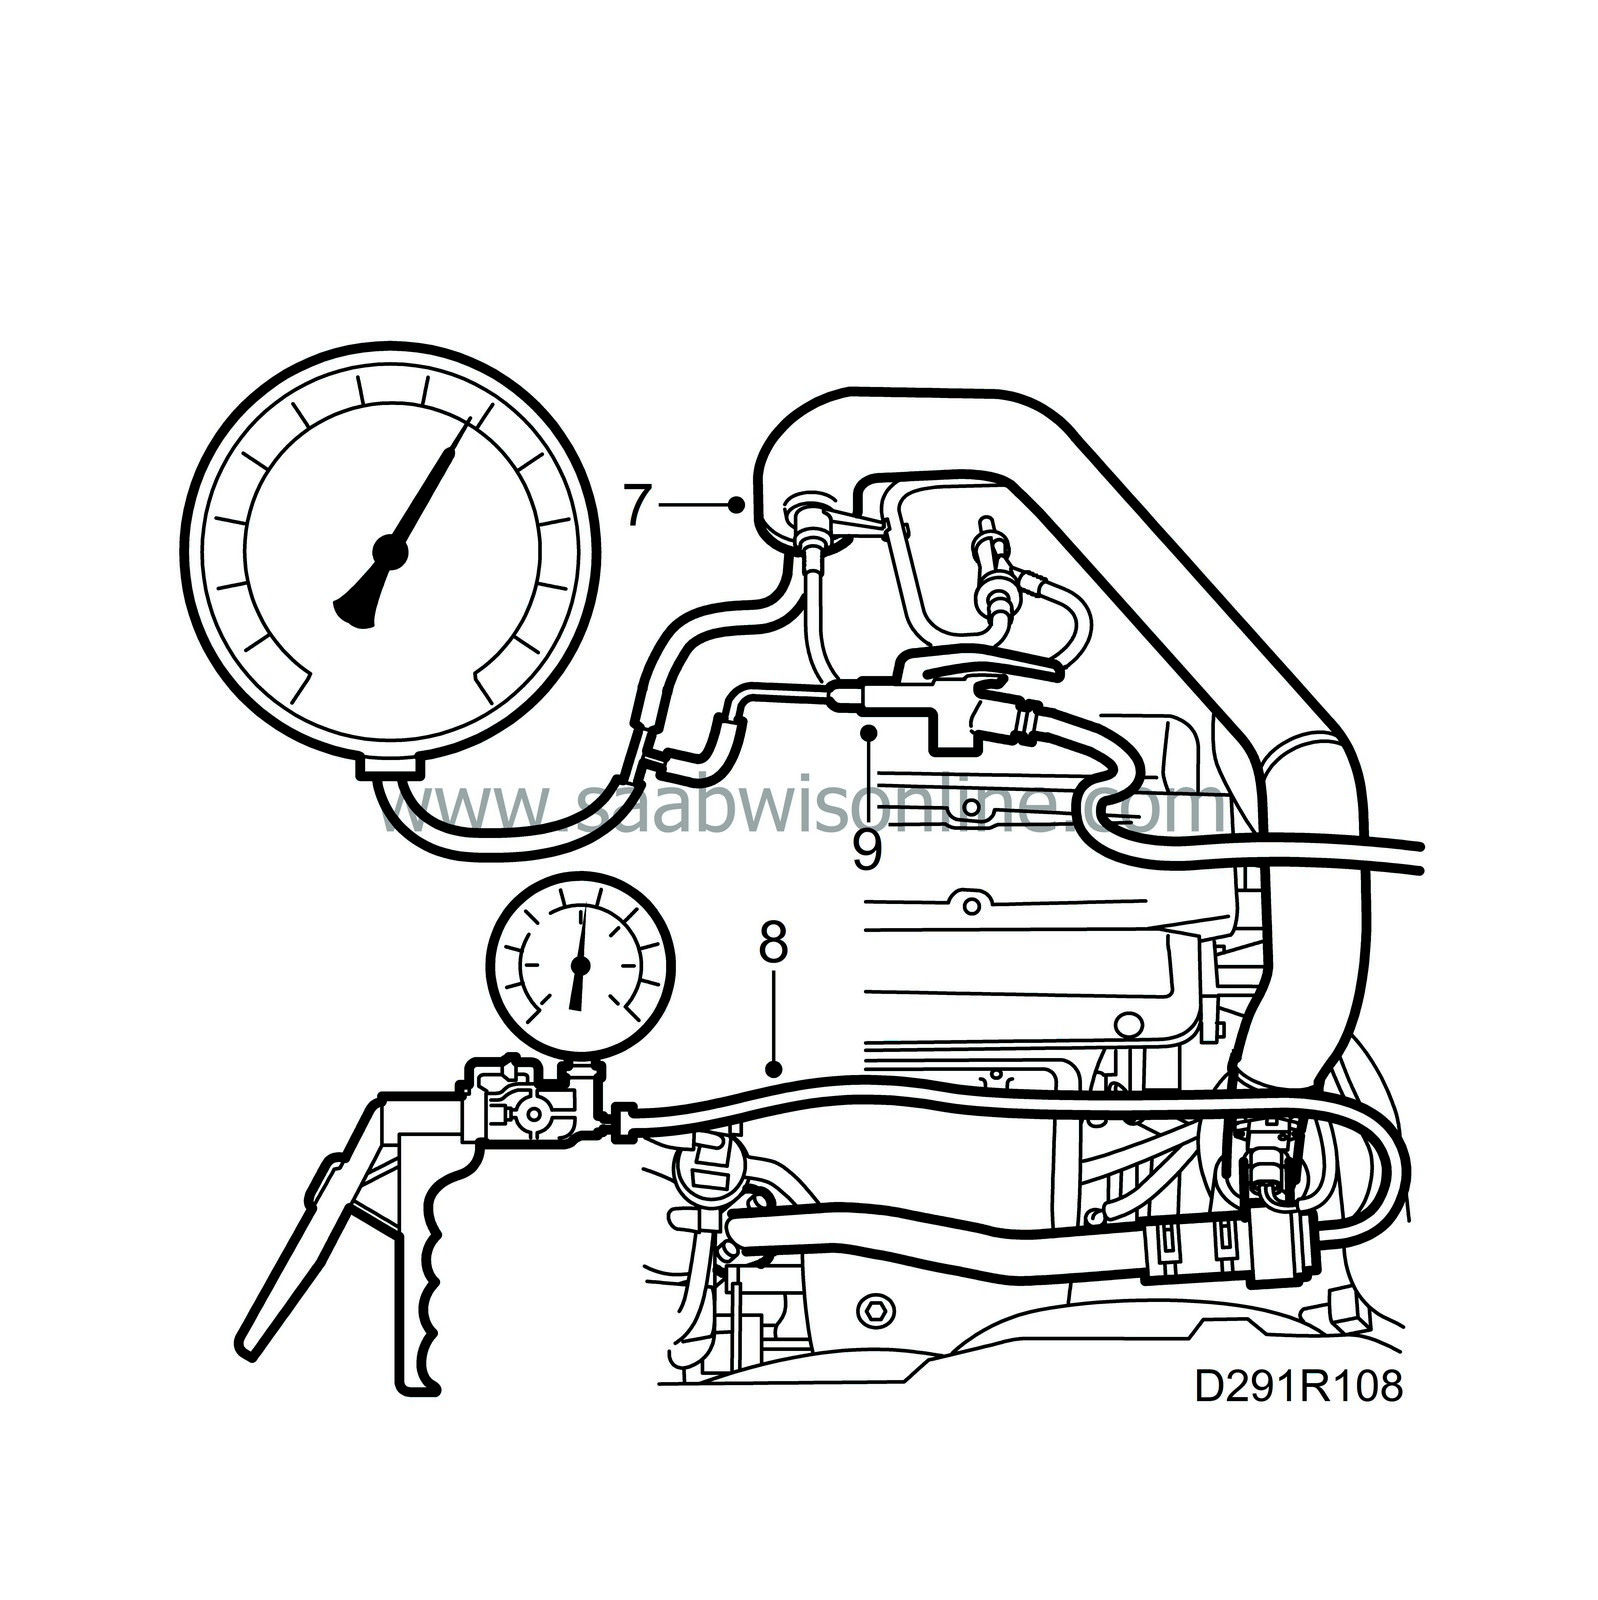
Connect
30 14 883 Pressure/vacuum pump
to the bypass valve. Create a pressure of approx. 1 bar.
|
Important
|
|
Be extremely careful when pressurizing the turbo system. Excessive pressure may damage hoses and connections.
|
|
|
|
|
10.
|
Make sure that the pressure does not drop by more than 0.1 bar in 30 seconds. If the pressure drop is greater than this or if there is an audible hissing sound, check hoses, pipes and connections for leaks.
|
|
11.
|
Check hoses/pipes and the air gun for leaks with fault tracing fluid, part no. 30 20 385, or equivalent.
|
|
12.
|
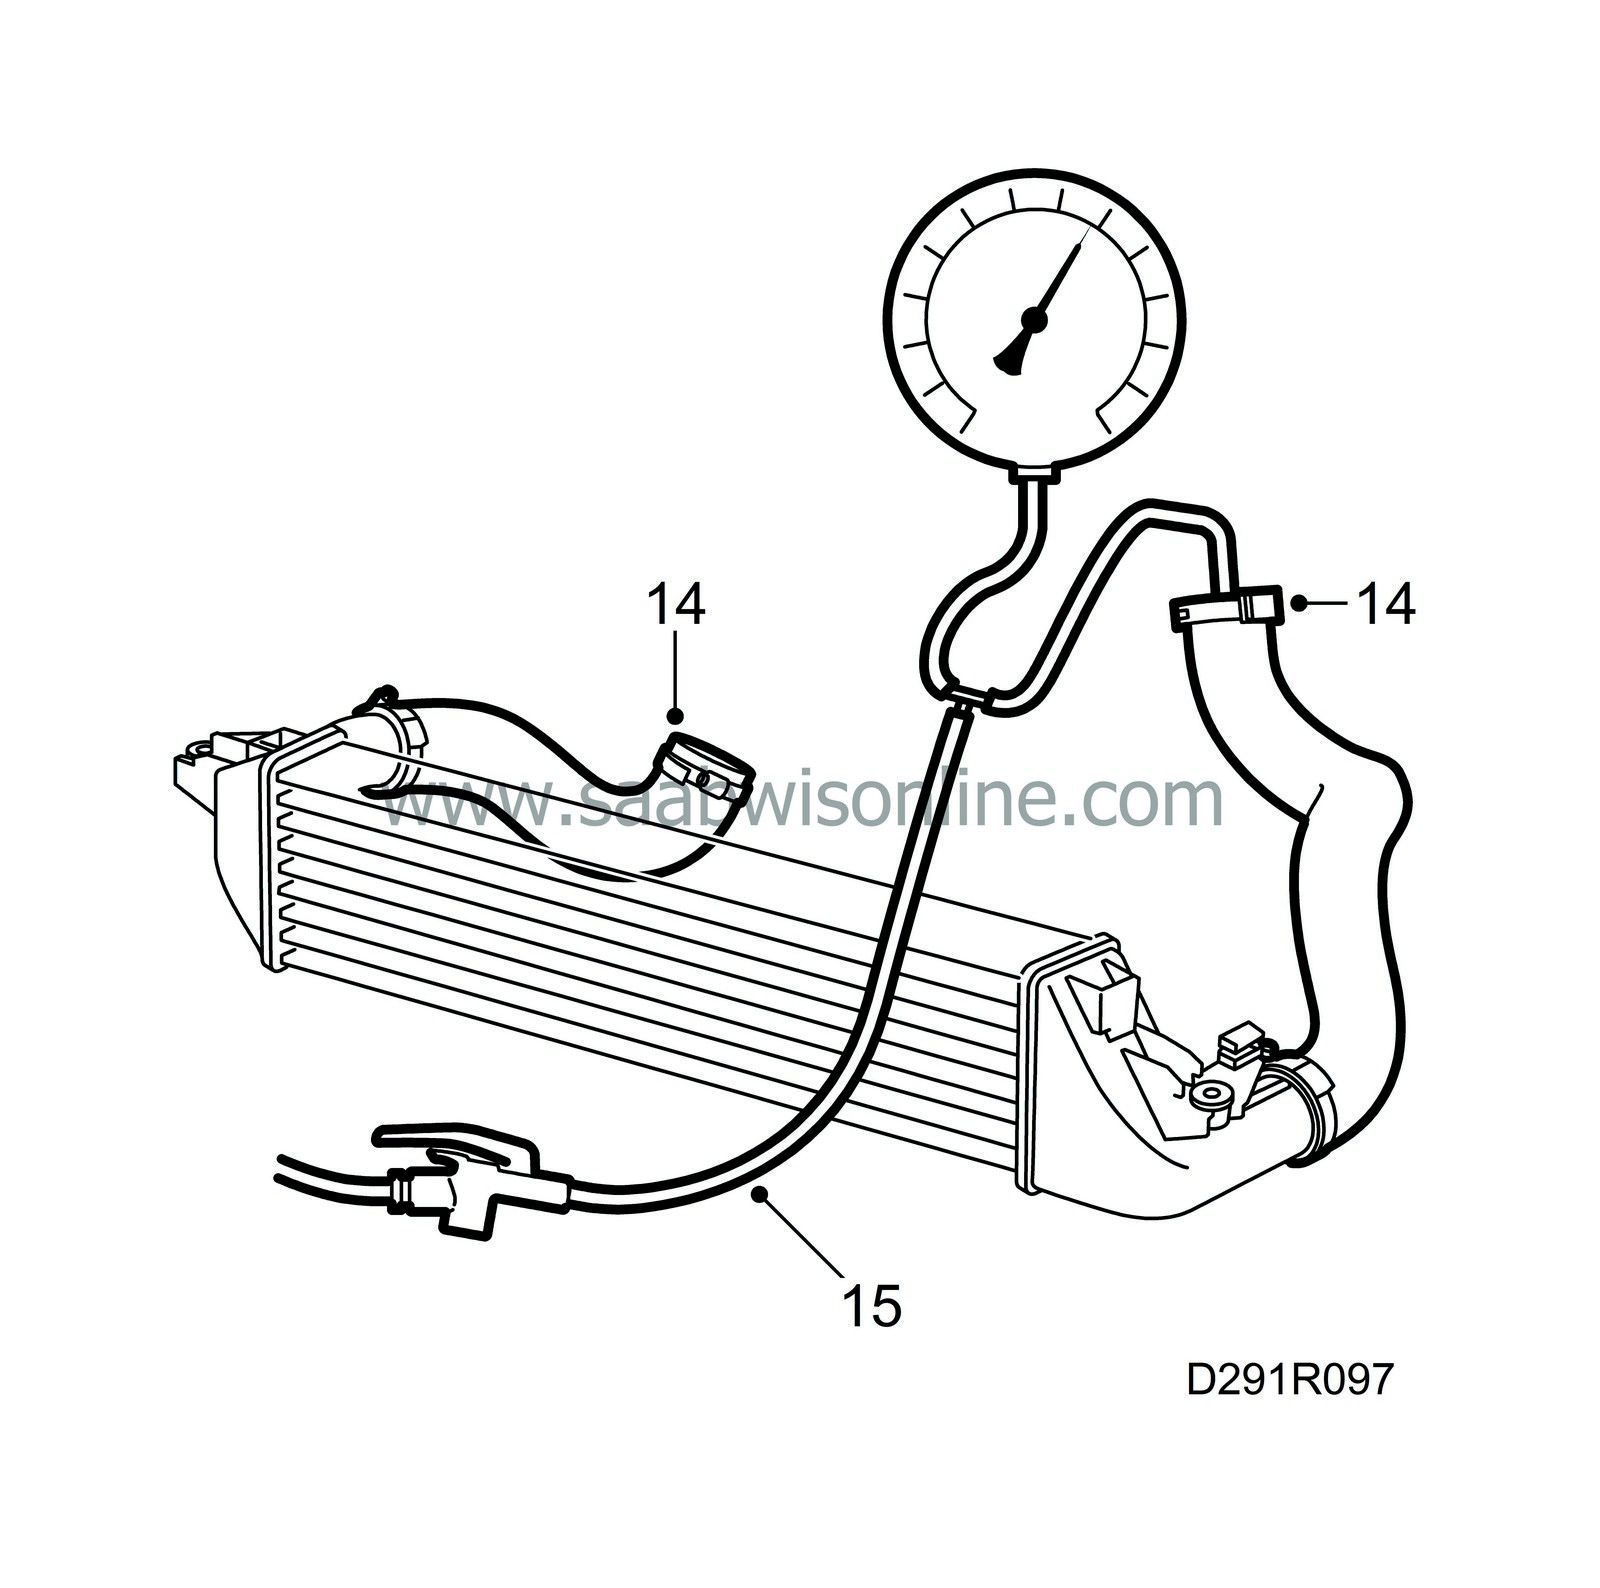
If a leak is not detected in hoses or pipes, perform a pressure test on the dismantled charge air cooler.
|
|
14.
|
Fit the inlet and outlet hoses to the charge air cooler and plug one of them. Connect pressure gauge equipment to the other hose.
|
|
15.
|
Connect a compressed air gun to the pressure gauge and carefully build up a pressure of approx. 1 bar.
|
|
16.
|
Make sure that the pressure does not drop by more than 0.1 bar in 30 seconds. If the pressure drop is greater than this or if there is an audible hissing sound, check hoses, pipes and connections for leaks. Use fault tracing fluid, part no. 30 20 385, or equivalent.
|
|
1.
|
Remove the test equipment.
|
Important
|
|
To reduce the risk of hoses mounted on the delivery side of the turbocharger coming loose due to low friction at high air pressures, the hoses and connecting pieces must be cleaned thoroughly before fitting. Use a rag dampened with 30 15 815 Cleaning agent to wipe clean inside the ends of the hoses. Clean also the connecting pieces. If hose clips are rusty or damaged, they must be replaced with new ones to maintain the correct clamping force.
|
|
|
|
|
3.
|
Remove the plug and fit the charge air pipe and connector. Spray the connector with Kontakt 61, part no. 30 04 520.
Man:
Connect the venturi hose to the charge air pipe.
Tightening torque, hose clip 8 Nm (6 lbf ft)
|
|
4.
|
Fit the exhaust manifold heat shield. Grease the studs with Molycote 1000, part no. 30 20 971, or equivalent.
Tightening torque 20 Nm (15 lbf ft)
|
|
5.
|
Fit the bypass pipe. Use new O-rings greased with acid-free petroleum jelly.
Tightening torque, bolt 8 Nm (6 lbf ft)
|
|
6.
|
Fit the upper engine cover.
|


