Part of side panel, 5D
| Part of side panel, 5D |
If the roof is undamaged, the side panel can be suitable joined further down the D-pillar. Damage to the paintwork on the roof can be avoided when the new side panel is welded on.
| Important | ||
|
The D-pillar must only be cut according to the following instructions. Otherwise, there is a risk that the reinforcement inside the D-pillar is damaged. |
||
| 1. |
Position the car in an aligning bench and cross-measure if necessary.
|
|
| 2. |
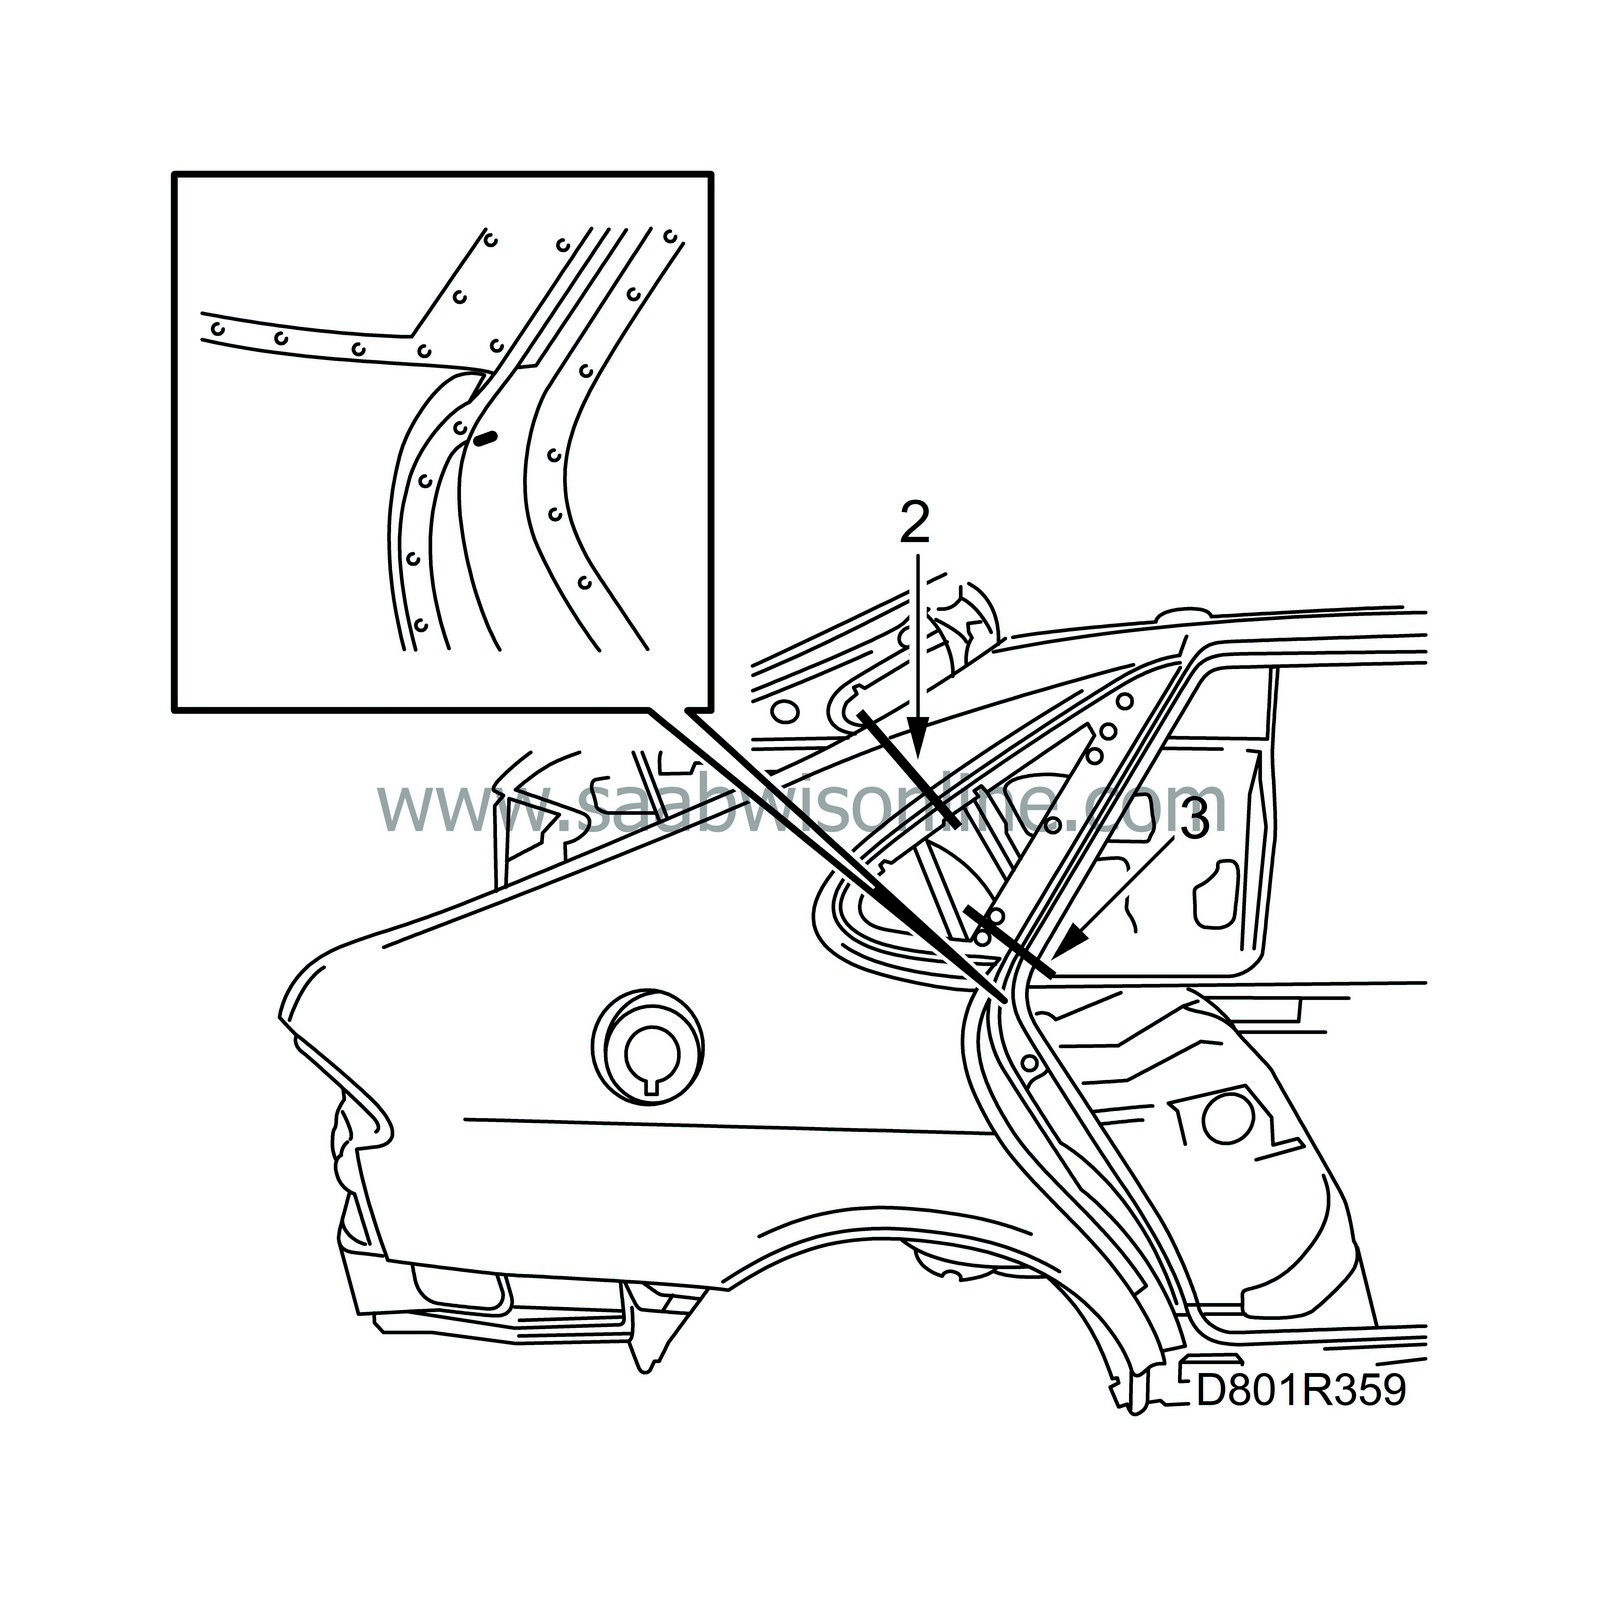
Cut the D-pillar 40 mm above the ball pin where the tailgate gas spring is attached.

|
|
| 3. |
Cut the C-pillar according to the illustration.
|
|
| 4. |
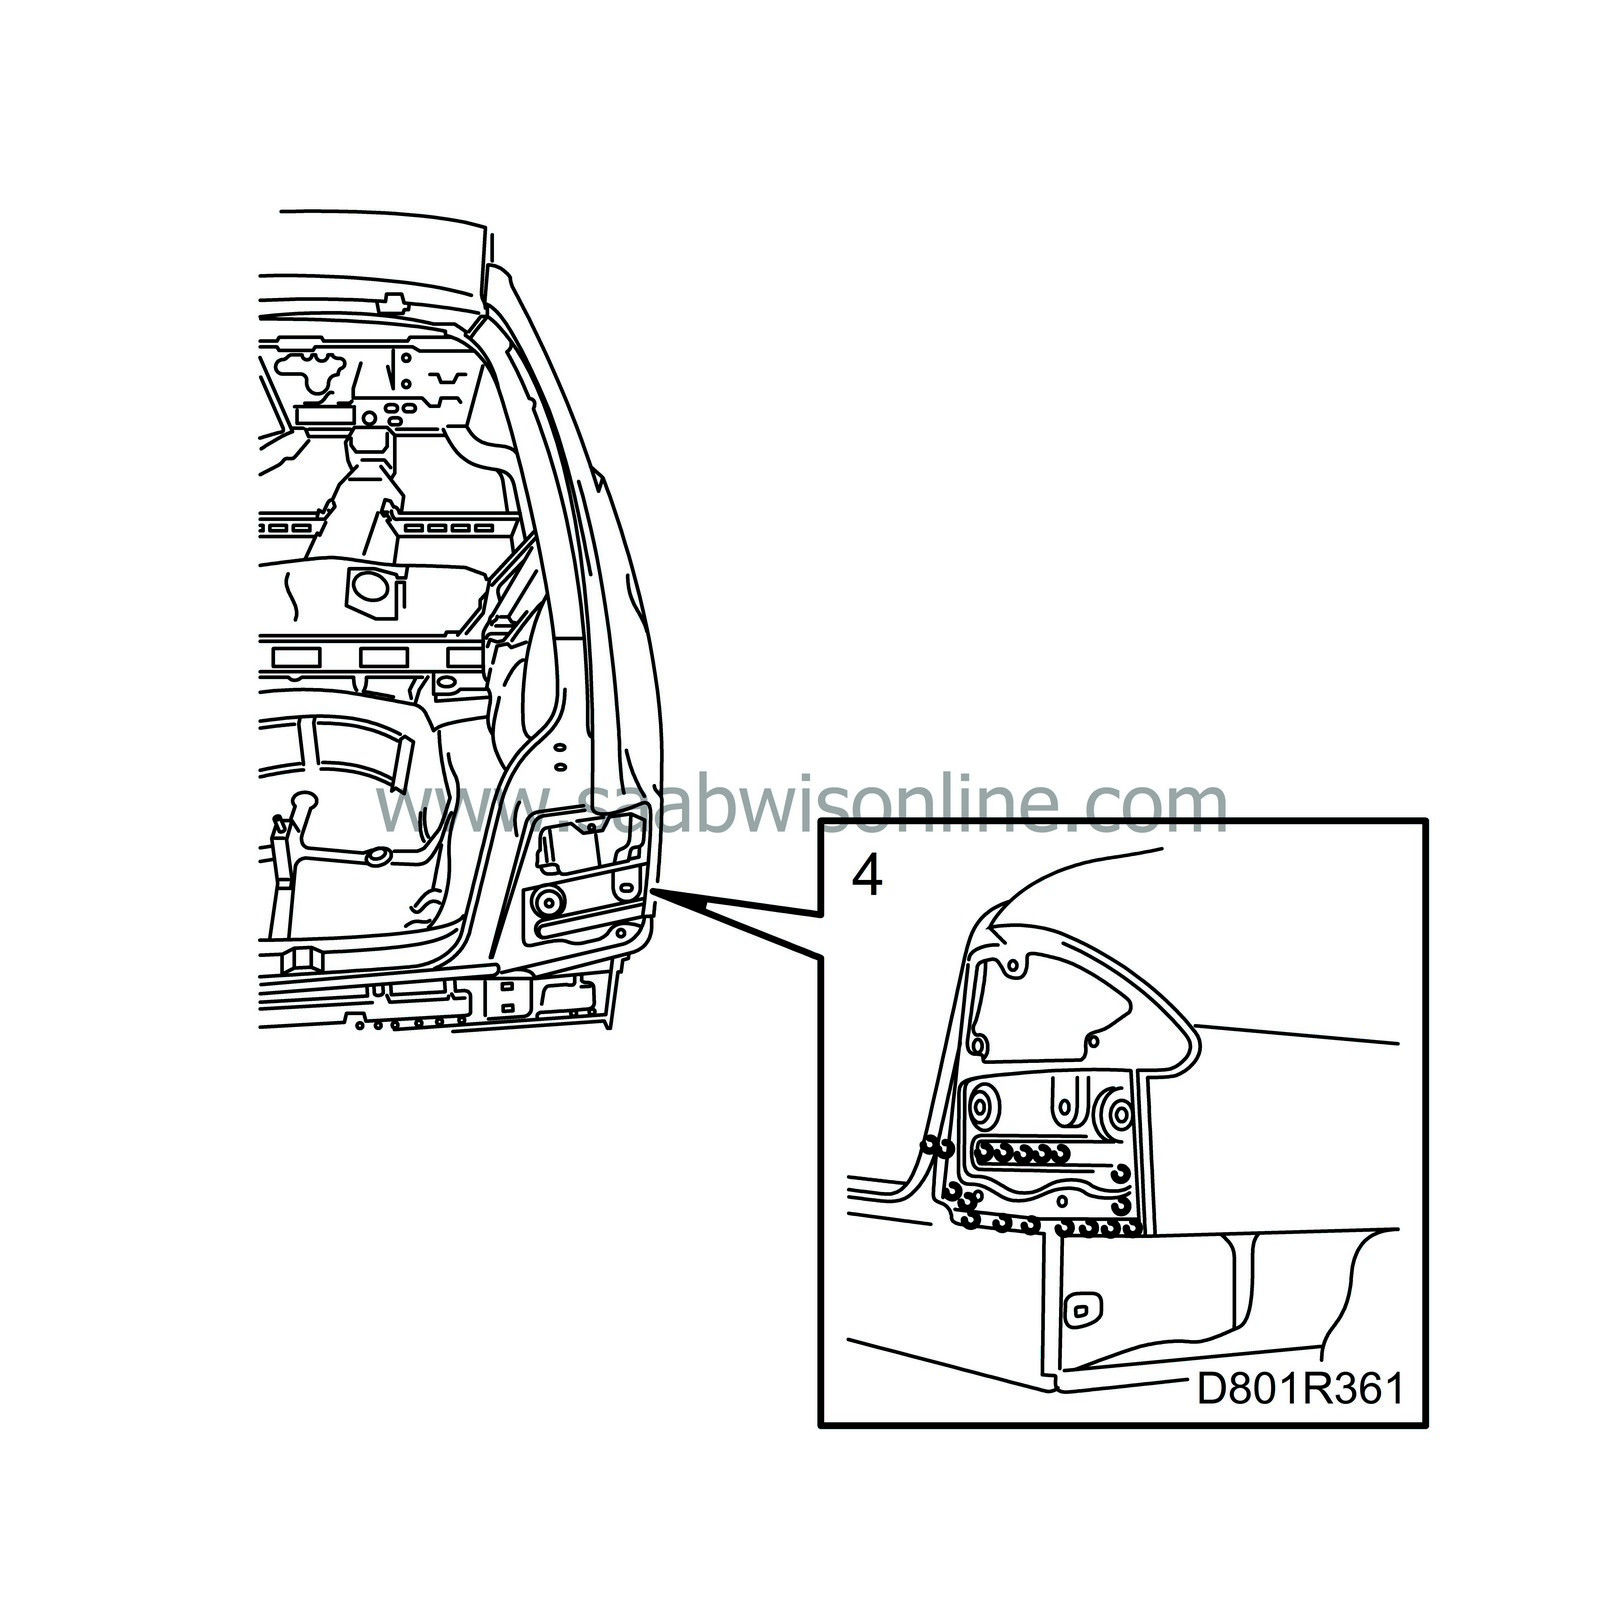
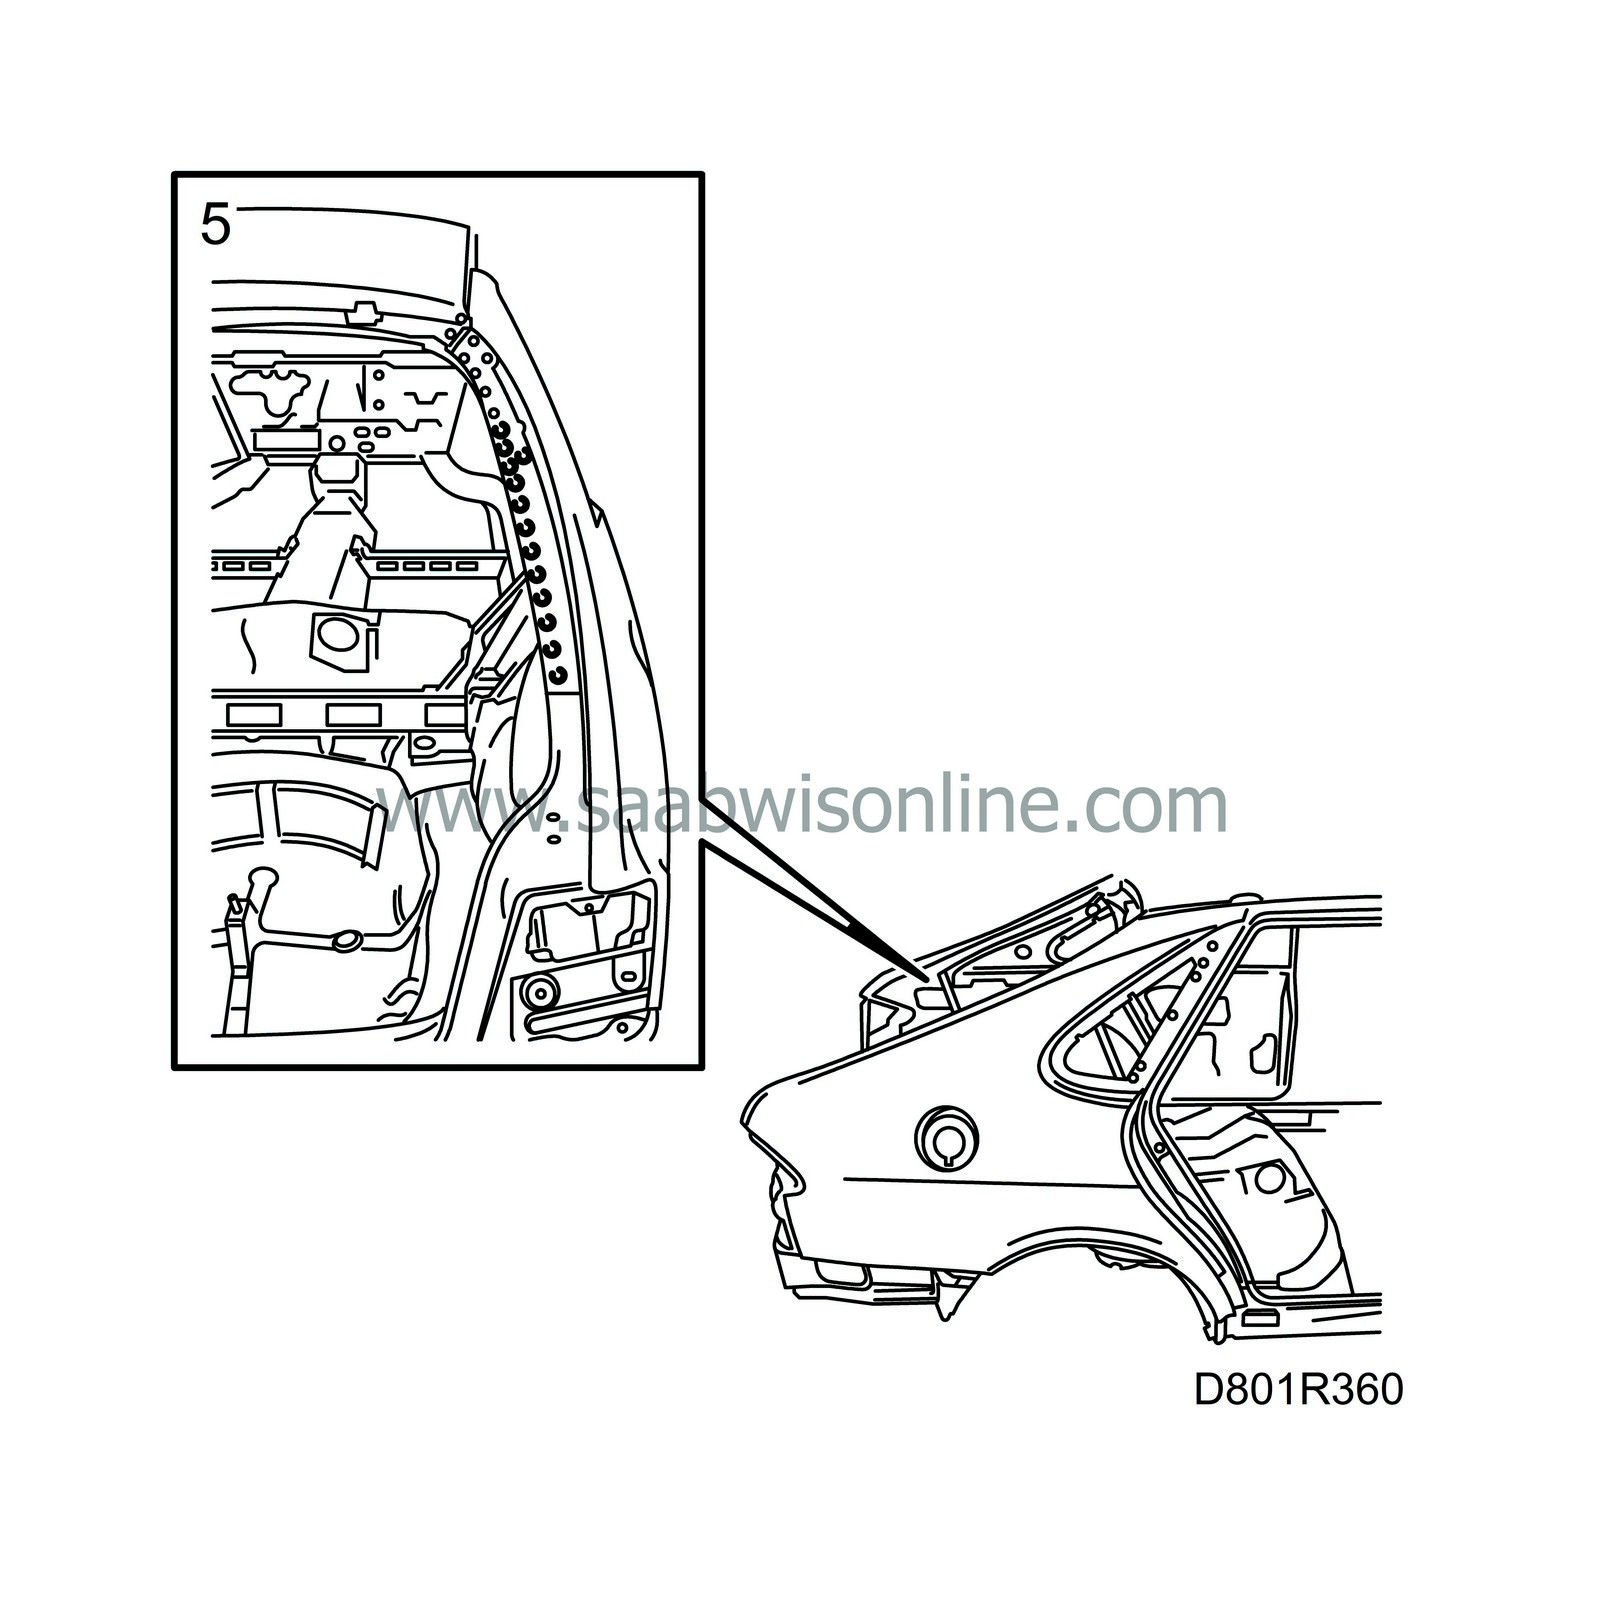
Drill out the spot-welds.

|
|
| 5. |
Drill out the spot-welds.

|
|
| 6. |
Drill out the spot-welds.

|
|
| 7. |
Tap loose the side panel and align deformed or damaged panels.
|
|
| 8. |
Cut the spare part so that it overlaps the intended joints by approximately three centimetres.
|
|
| 9. |
Drill holes for plug-welding in the spare part.
|
|
| 10. |
Fit the spare part and fixate with a couple of welding clamps.
|
|
| 11. |
Cut through the spare part and body at the same time so that the joint can be welded edge-to-edge.
|
|
| 12. |
Remove the spare part and grind clean the surfaces to be welded on the body and the spare part.
|
|
| 13. |
Apply welding primer on the surfaces to be plug and spot-welded. Use Teroson Zinkspray.
|
|
| 14. |
Fit the spare part and fixate it with a couple of welding clamps.
|
|
| 15. |
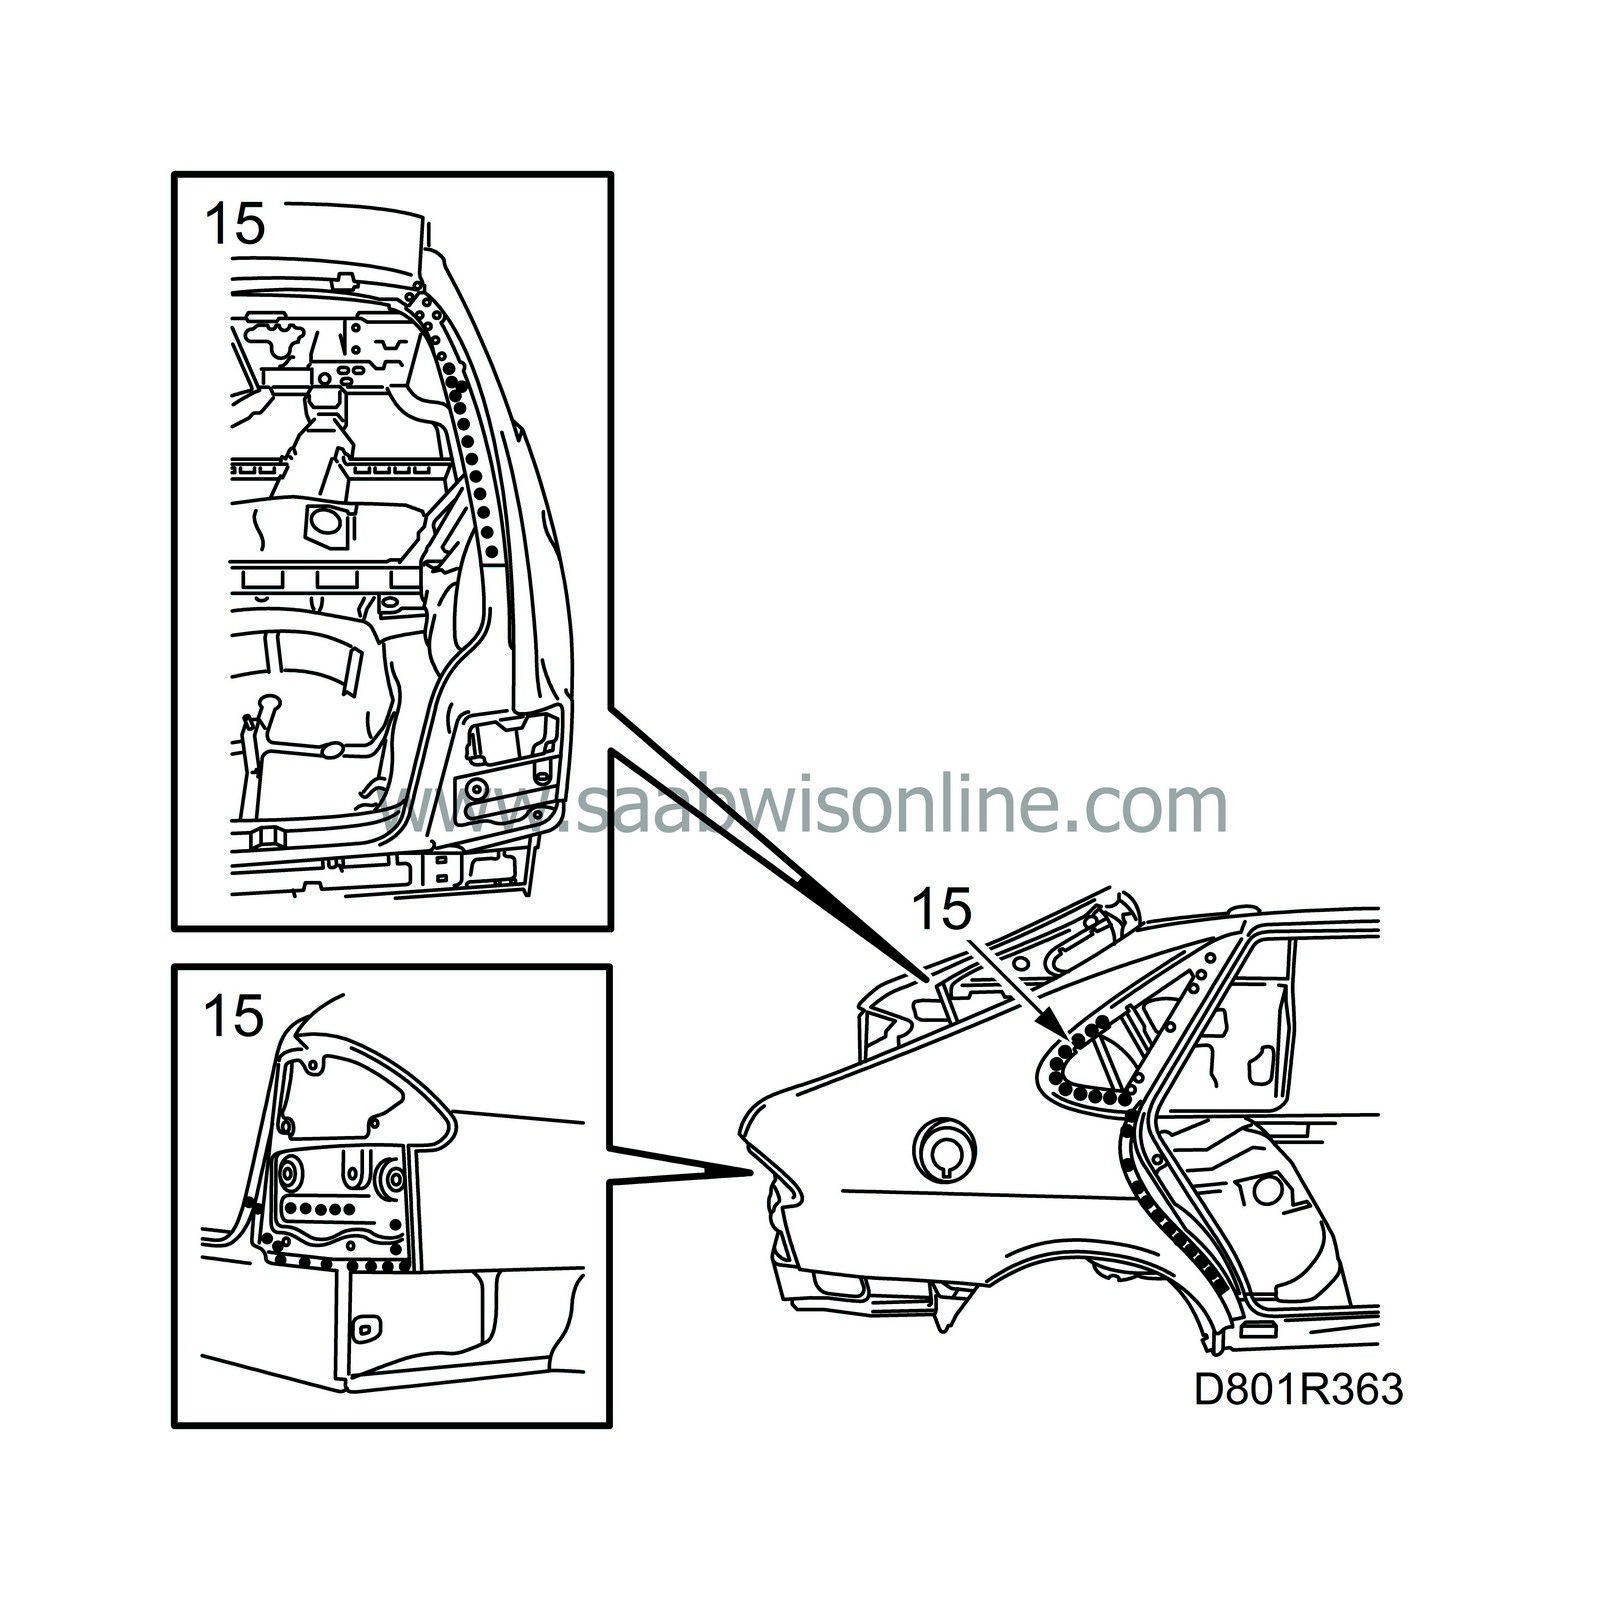
Spot-weld the spare part.

|
|
| 16. |
Plug-weld the spare part.

|
|
| 17. |
All-weld the joints.
|
|
| 18. |
Grind the welds.
|
|
| 19. |
Remove any remaining welding primer. Welding primer reduces adhesion of paint, filler and sealant.
|
|
| 20. |
Apply primer to all ground surfaces. Use Standox 1K Primer.
|
|
| 21. |
Seal joints and sheet metal flanges with sealant. Use Terostat 1K-PUR.
|
|
| 22. |
Apply anti-corrosion agent to the interior of the side panel. Use Terotex HV 400 or Mercasol 1.
|
|


