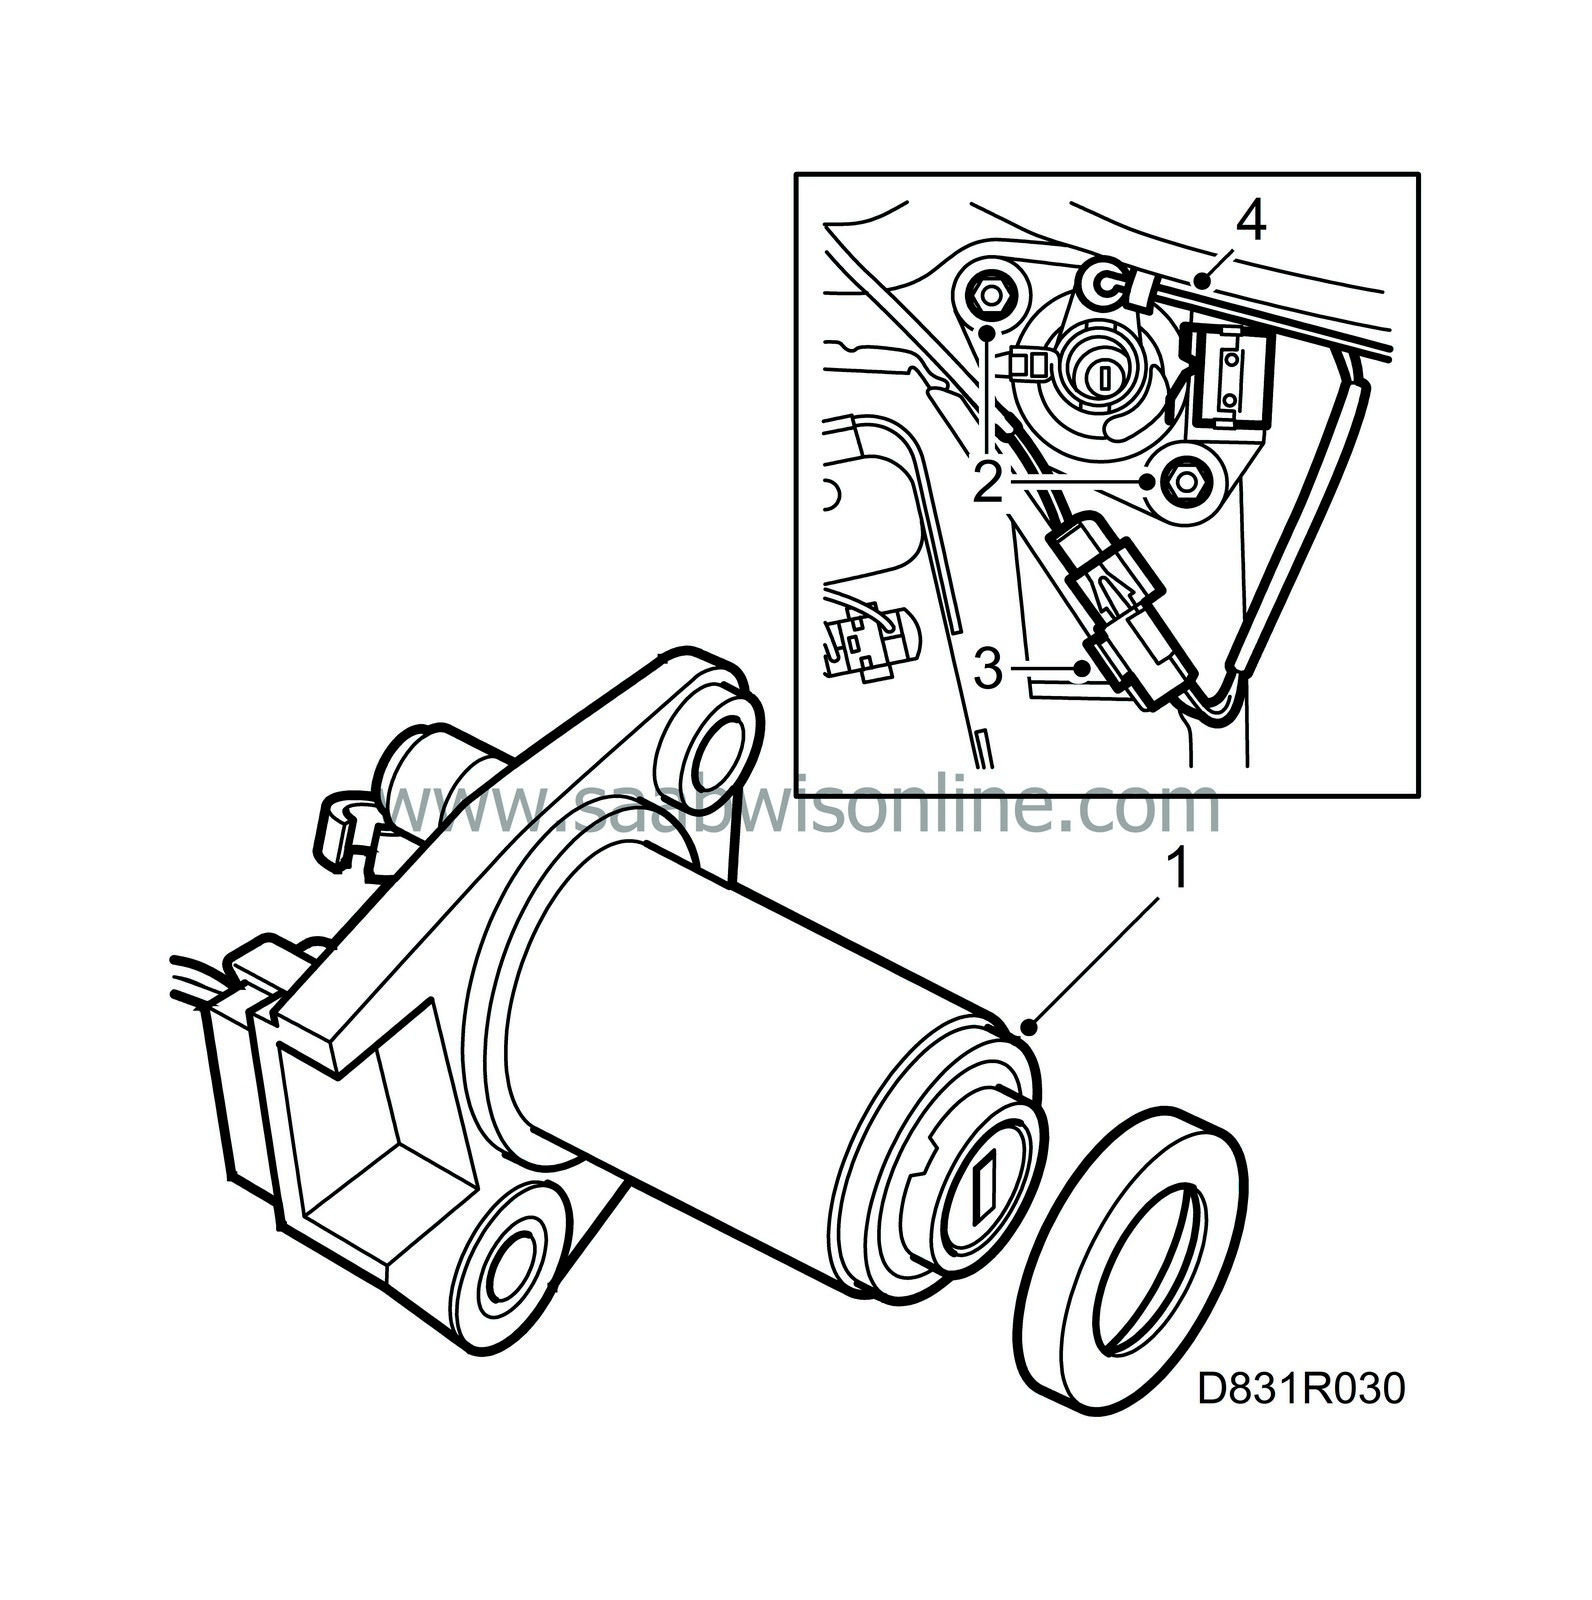
Tailgate lock cylinder
| Tailgate lock cylinder |
| 1. |
Open the tailgate.
|
|
| 2. |
Remove the trim, see
Door trim, tailgate
.
|
|
| 3. |
Remove the pull bar from the lock cylinder, fastened with clips, and leave it suspended.
|
|
| 4. |
Remove the microswitch by bending apart the small hooks and lift it off its groove. Alternatively, it may be sufficient to remove the microswitch connector.
|
|
| 5. |
Remove the retainer nuts (2 pcs) that secure the lock cylinder.
|
|
| 6. |
Remove the lock cylinder by pulling it inwards.
|
|
| Note | ||
|
Retain the rubber seal that rests against the glass. |
| To fit |

| 1. |
Push in the lock cylinder, make sure that the rubber seal is up against the glass.
|
||||||||||
| 2. |
Fit the retaining bolts (2 pcs) that secure the lock cylinder.
|
|
| 3. |
Plug in the microswitch connector or fit the microswitch by the lock cylinder.
|
|
| 4. |
Fasten the pull rod to the lock cylinder.
|
|
| 5. |
Fit the trim, see
Door trim, tailgate
.
|
|


