Pressure sensor, EVAP
| Pressure sensor, EVAP |
|
||||||||||||||||||||||
| Dismantling |
| Important | ||
|
A variant of the ORVR is available on the EU market that lacks both shut-off valve and tank pressure sensor (stripped ORVR) |
||
| 1. |
Drain the fuel from the tank.
|
||||||||||
| 2. |
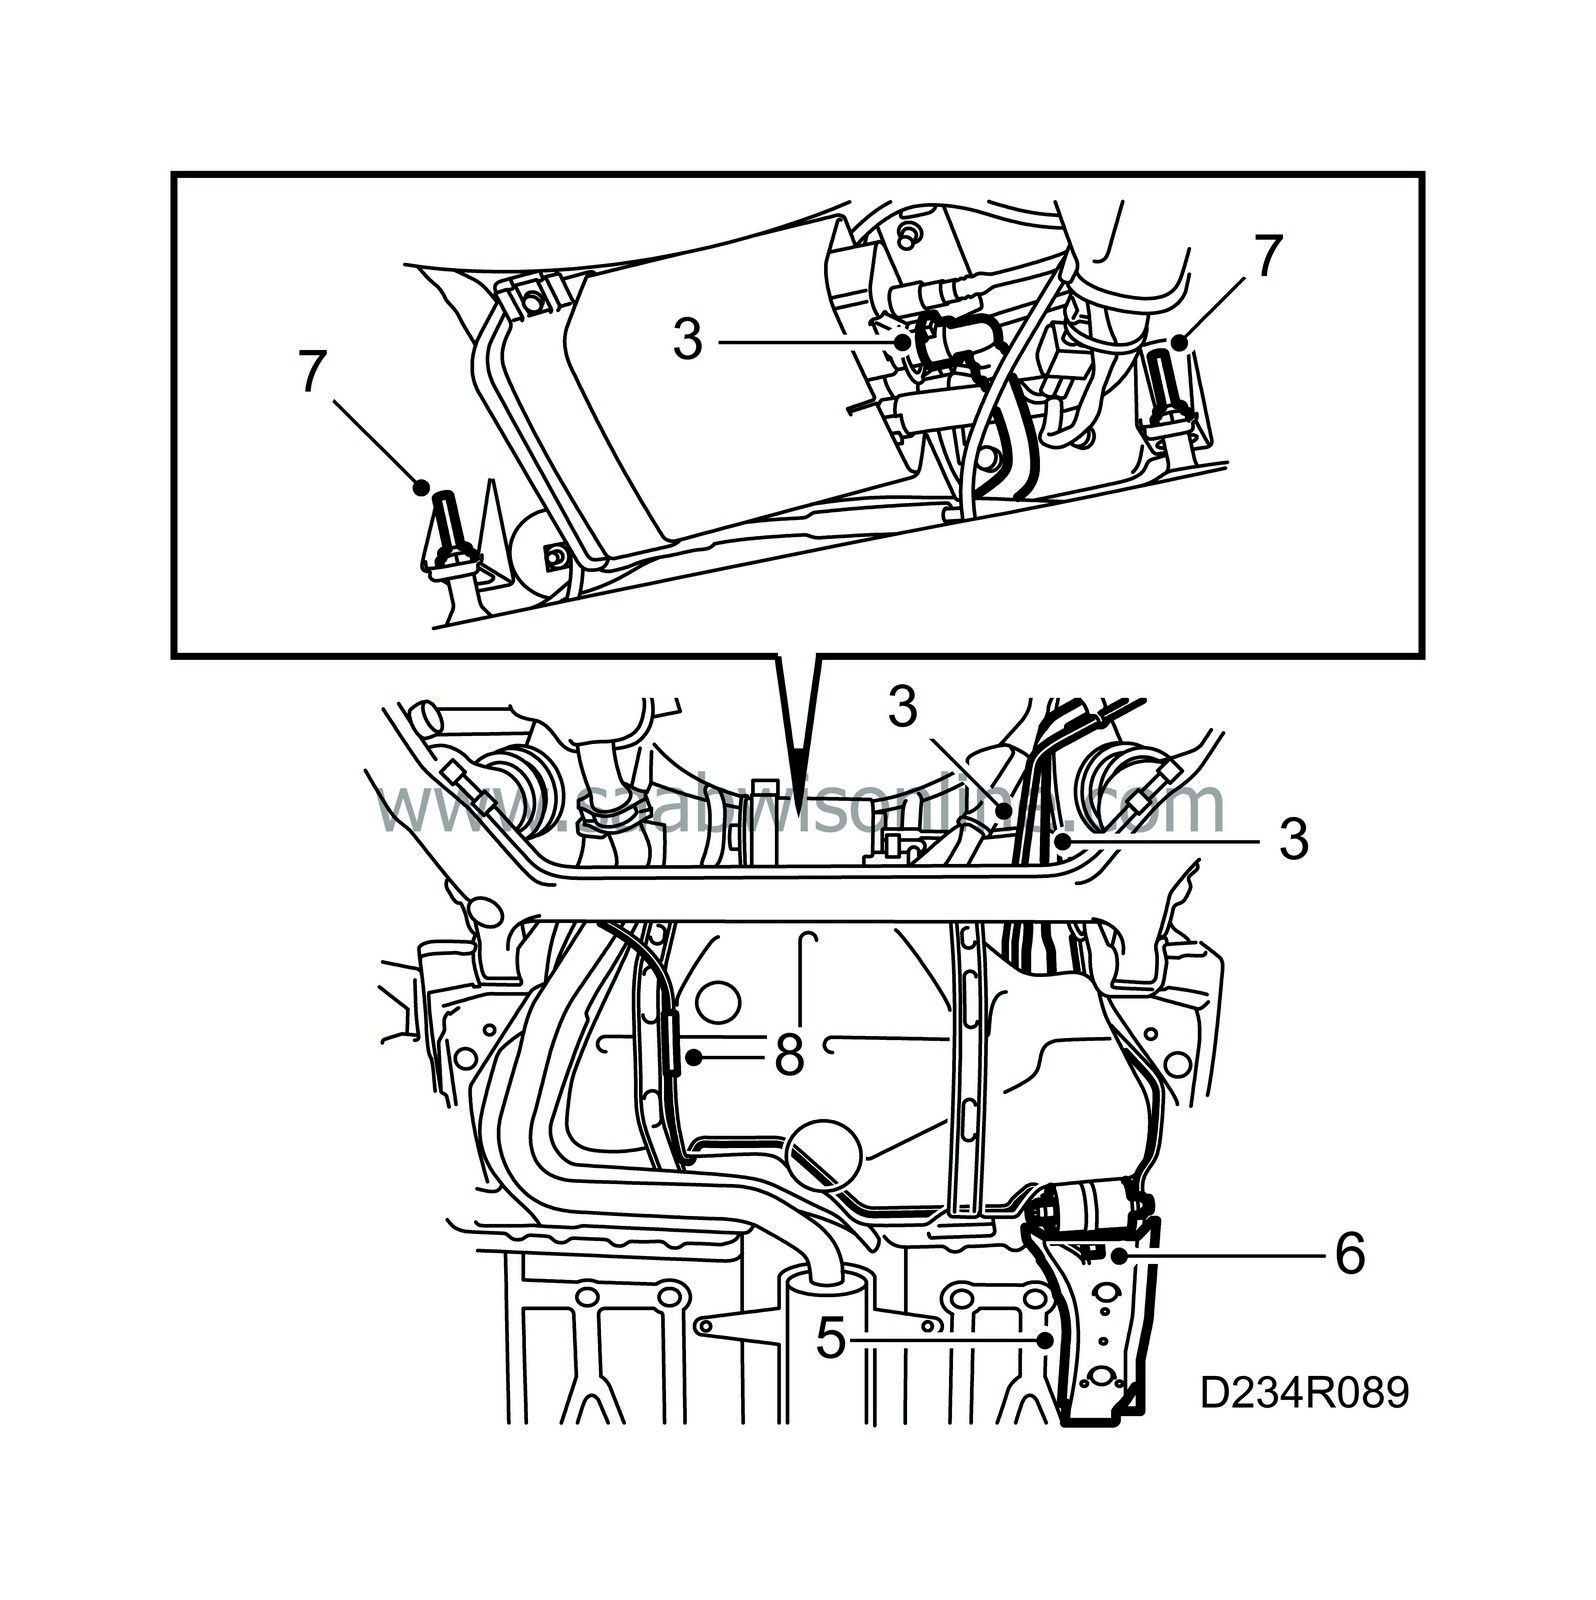
Raise the car, making sure that the right-hand lift arm is situated as far to the right as possible so as not to be an obstruction during removal.
|
|
| 3. |
Detach the hose to the filler pipe from the tank. Detach the purge line from the tank to the EVAP canister.
|
|
| 3.a. |
Press the connection inwards towards the EVAP canister in the direction of the connection.
|
| 3.b. |
Compress the ring so that the catches are bent upwards.
|
| 3.c. |
Release the connection by detaching it from the connector pipe on the EVAP canister.
|
| 4. |
Plug the tank. Release the quick-release coupling on the purge line to the filler pipe using tool 83 95 261.
|
|
| 5. |
Remove the protective cover from the fuel filter.
|
|
| 6. |
Undo the clamp securing the fuel filter.
|
|
| 7. |
Support the tank on a column lift, for example. Undo the nuts on the tank straps and unhook the straps.
|
|
| 8. |
Move the handbrake wire for the left-hand wheel to one side.
|
|
| 9. |
Carefully lower the tank, right-hand side first, until the top becomes visible.
|
|
| 10. |
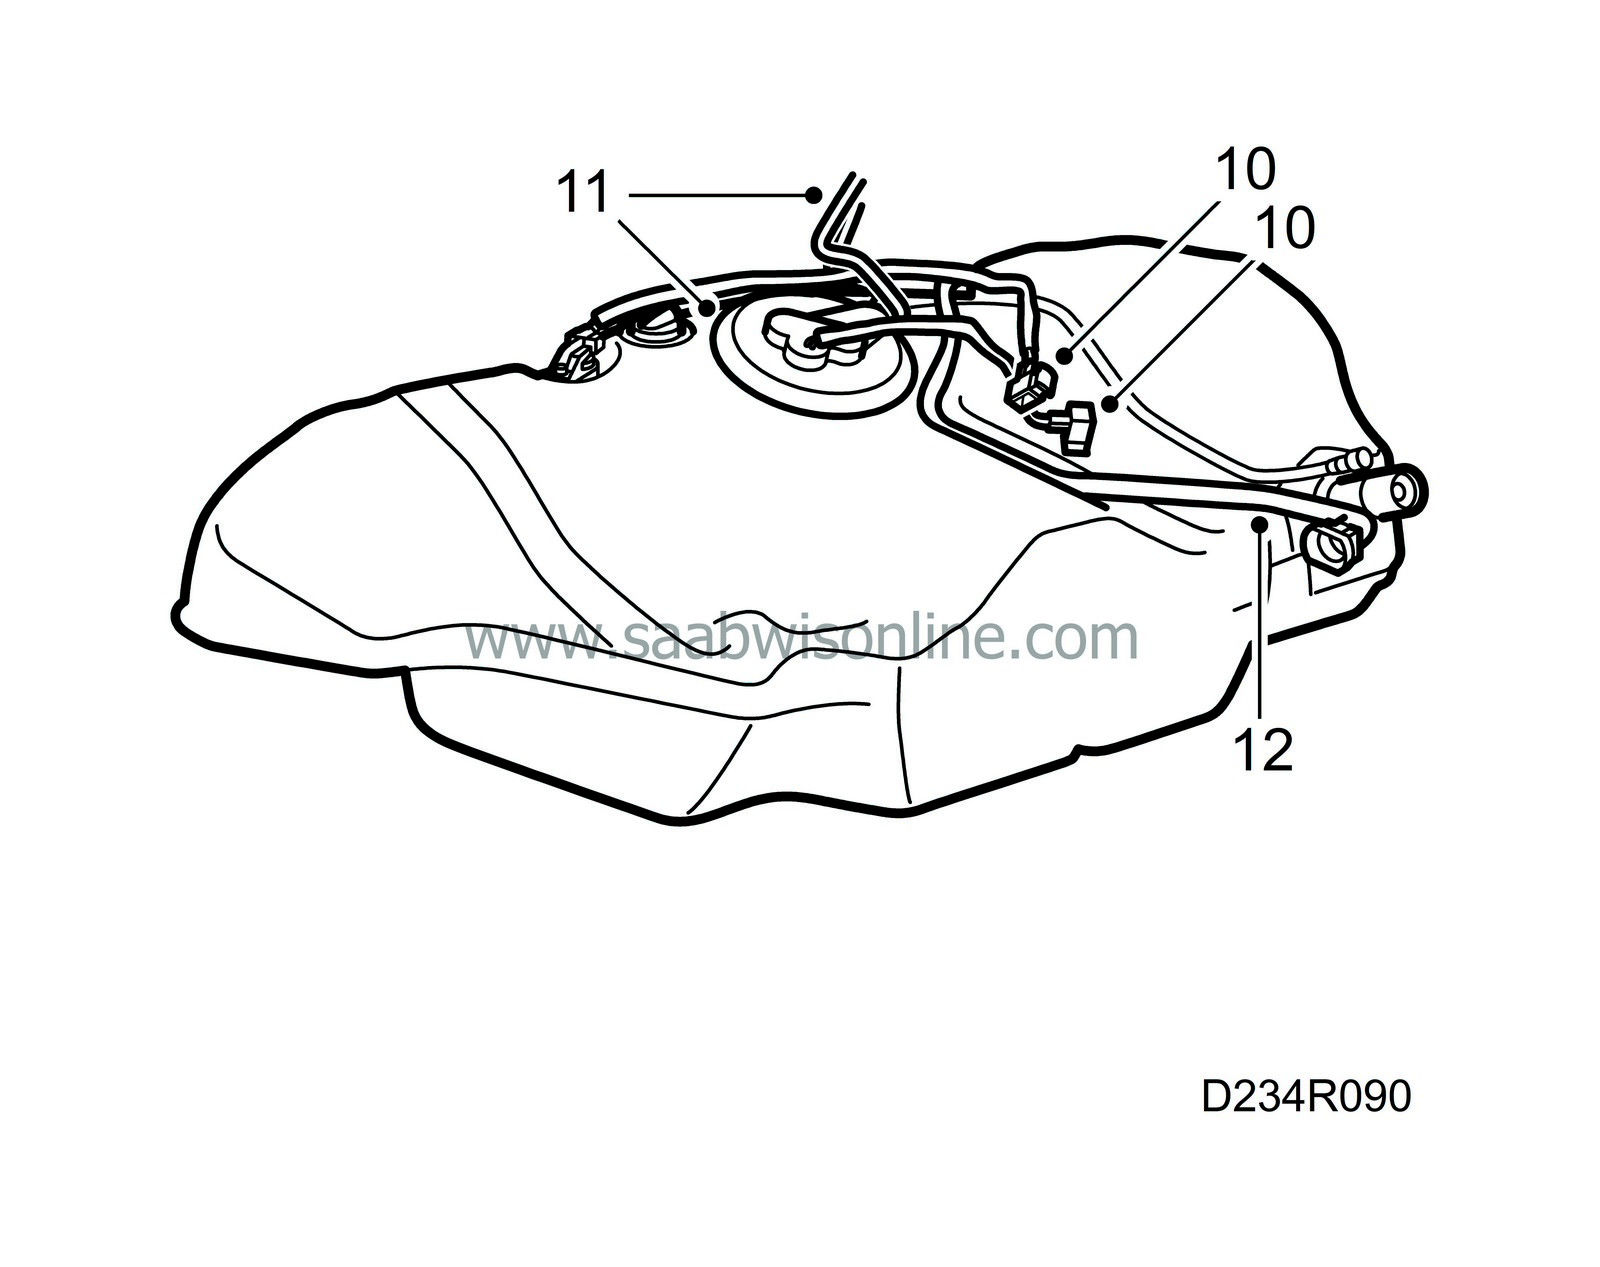
Unplug the connectors to the fuel pump and tank pressure sensor.
|
|
| 11. |
Remove the protective cap and detach the pressure and return lines from the fuel pump.
|
|
| 12. |
Detach the fuel lines from their retainers on the tank.
|
|
| 13. |
Lower the tank further to working height.
|
|
| 14. |
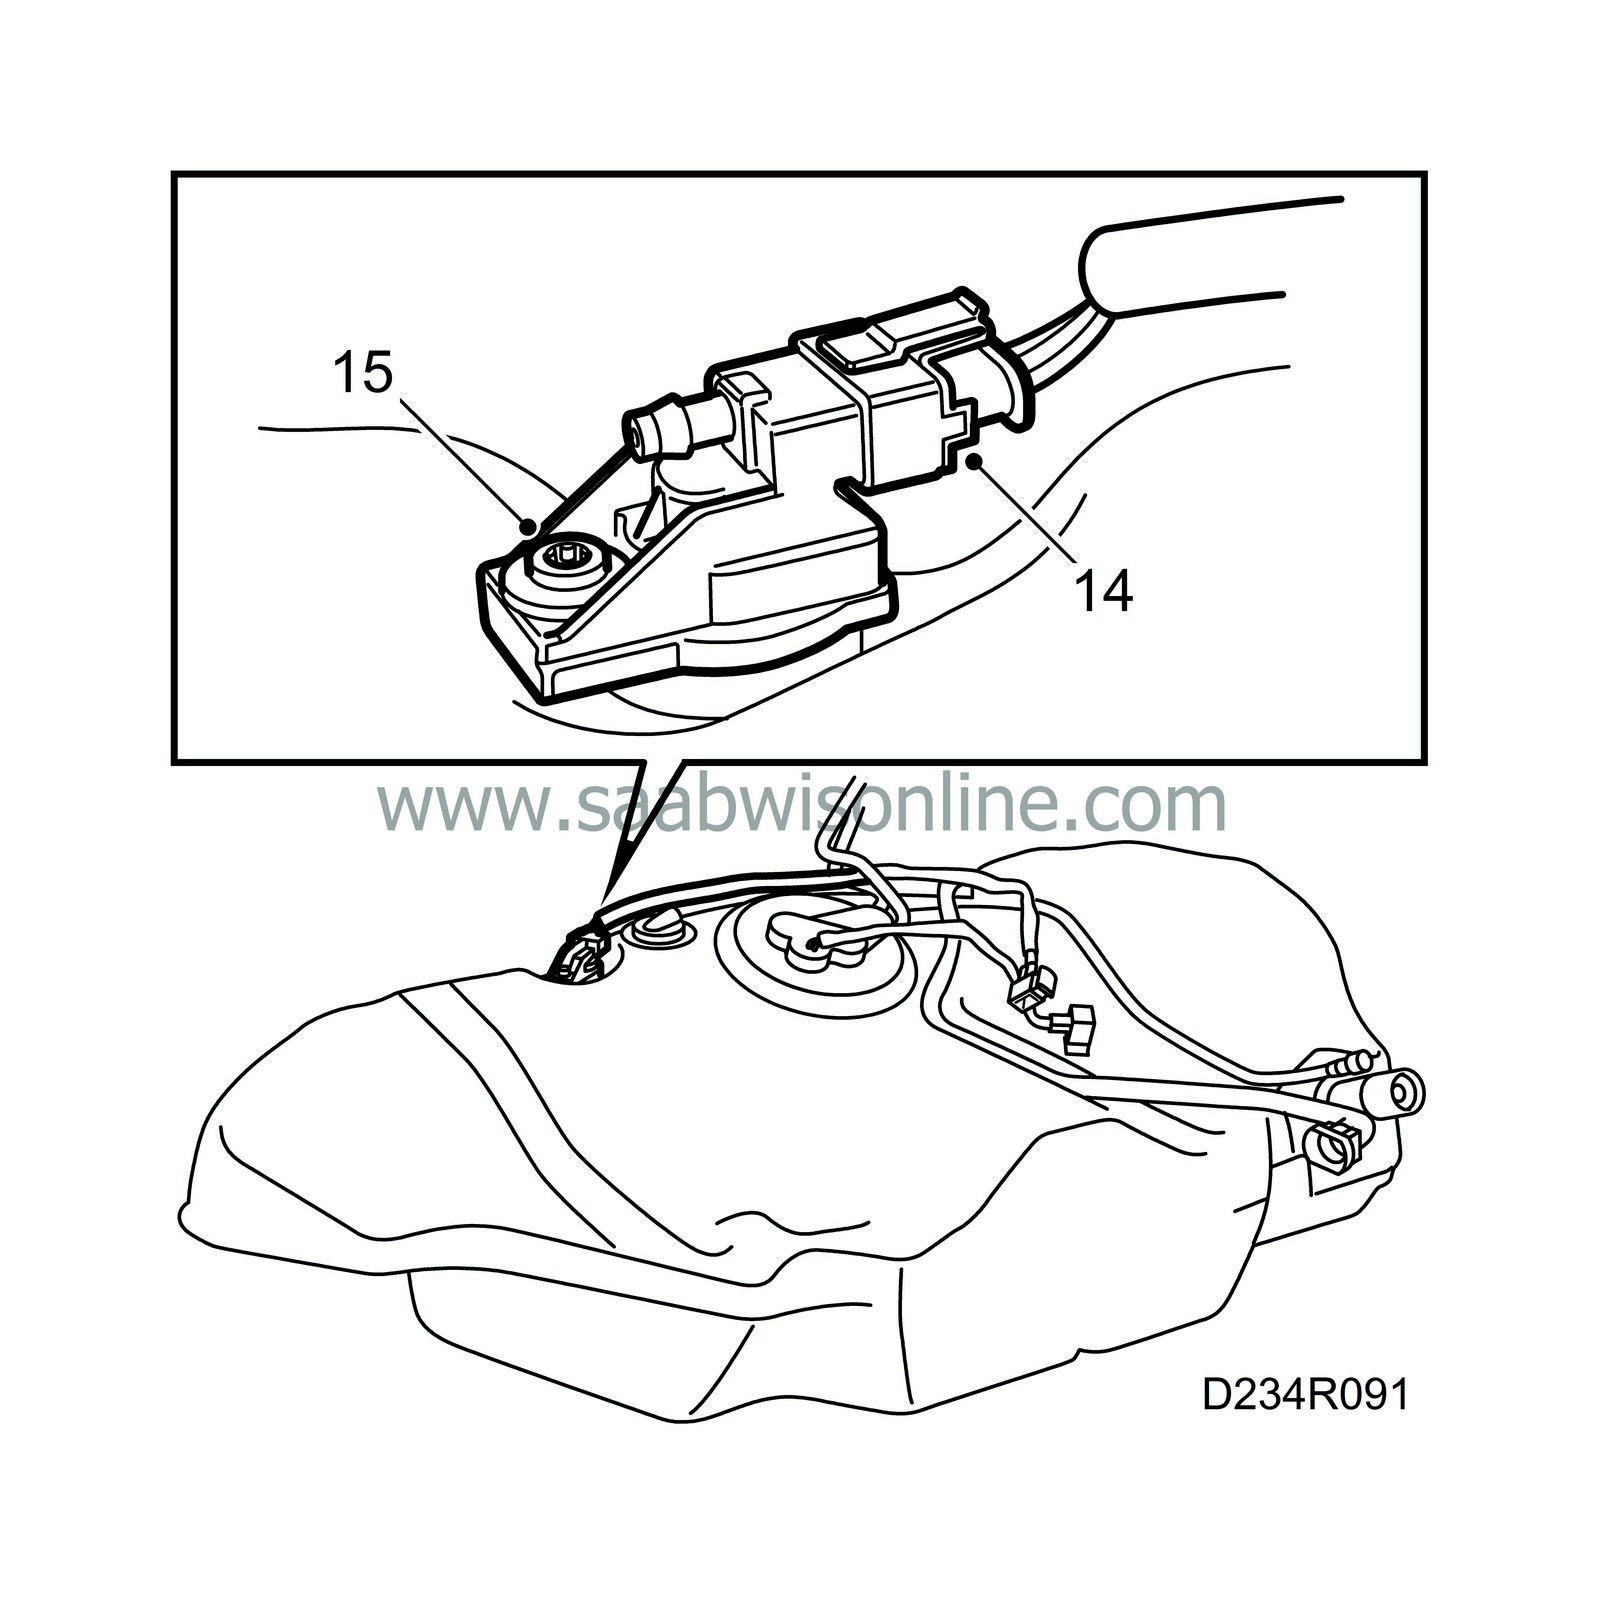
Unplug the tank pressure sensor connector and blow clean the area around the sensor.
|
|
| 15. |
Remove the tank pressure sensor.
|
|
| To fit |
| 1. |
Make sure all sealing surfaces are clean.
|
|
| 2. |
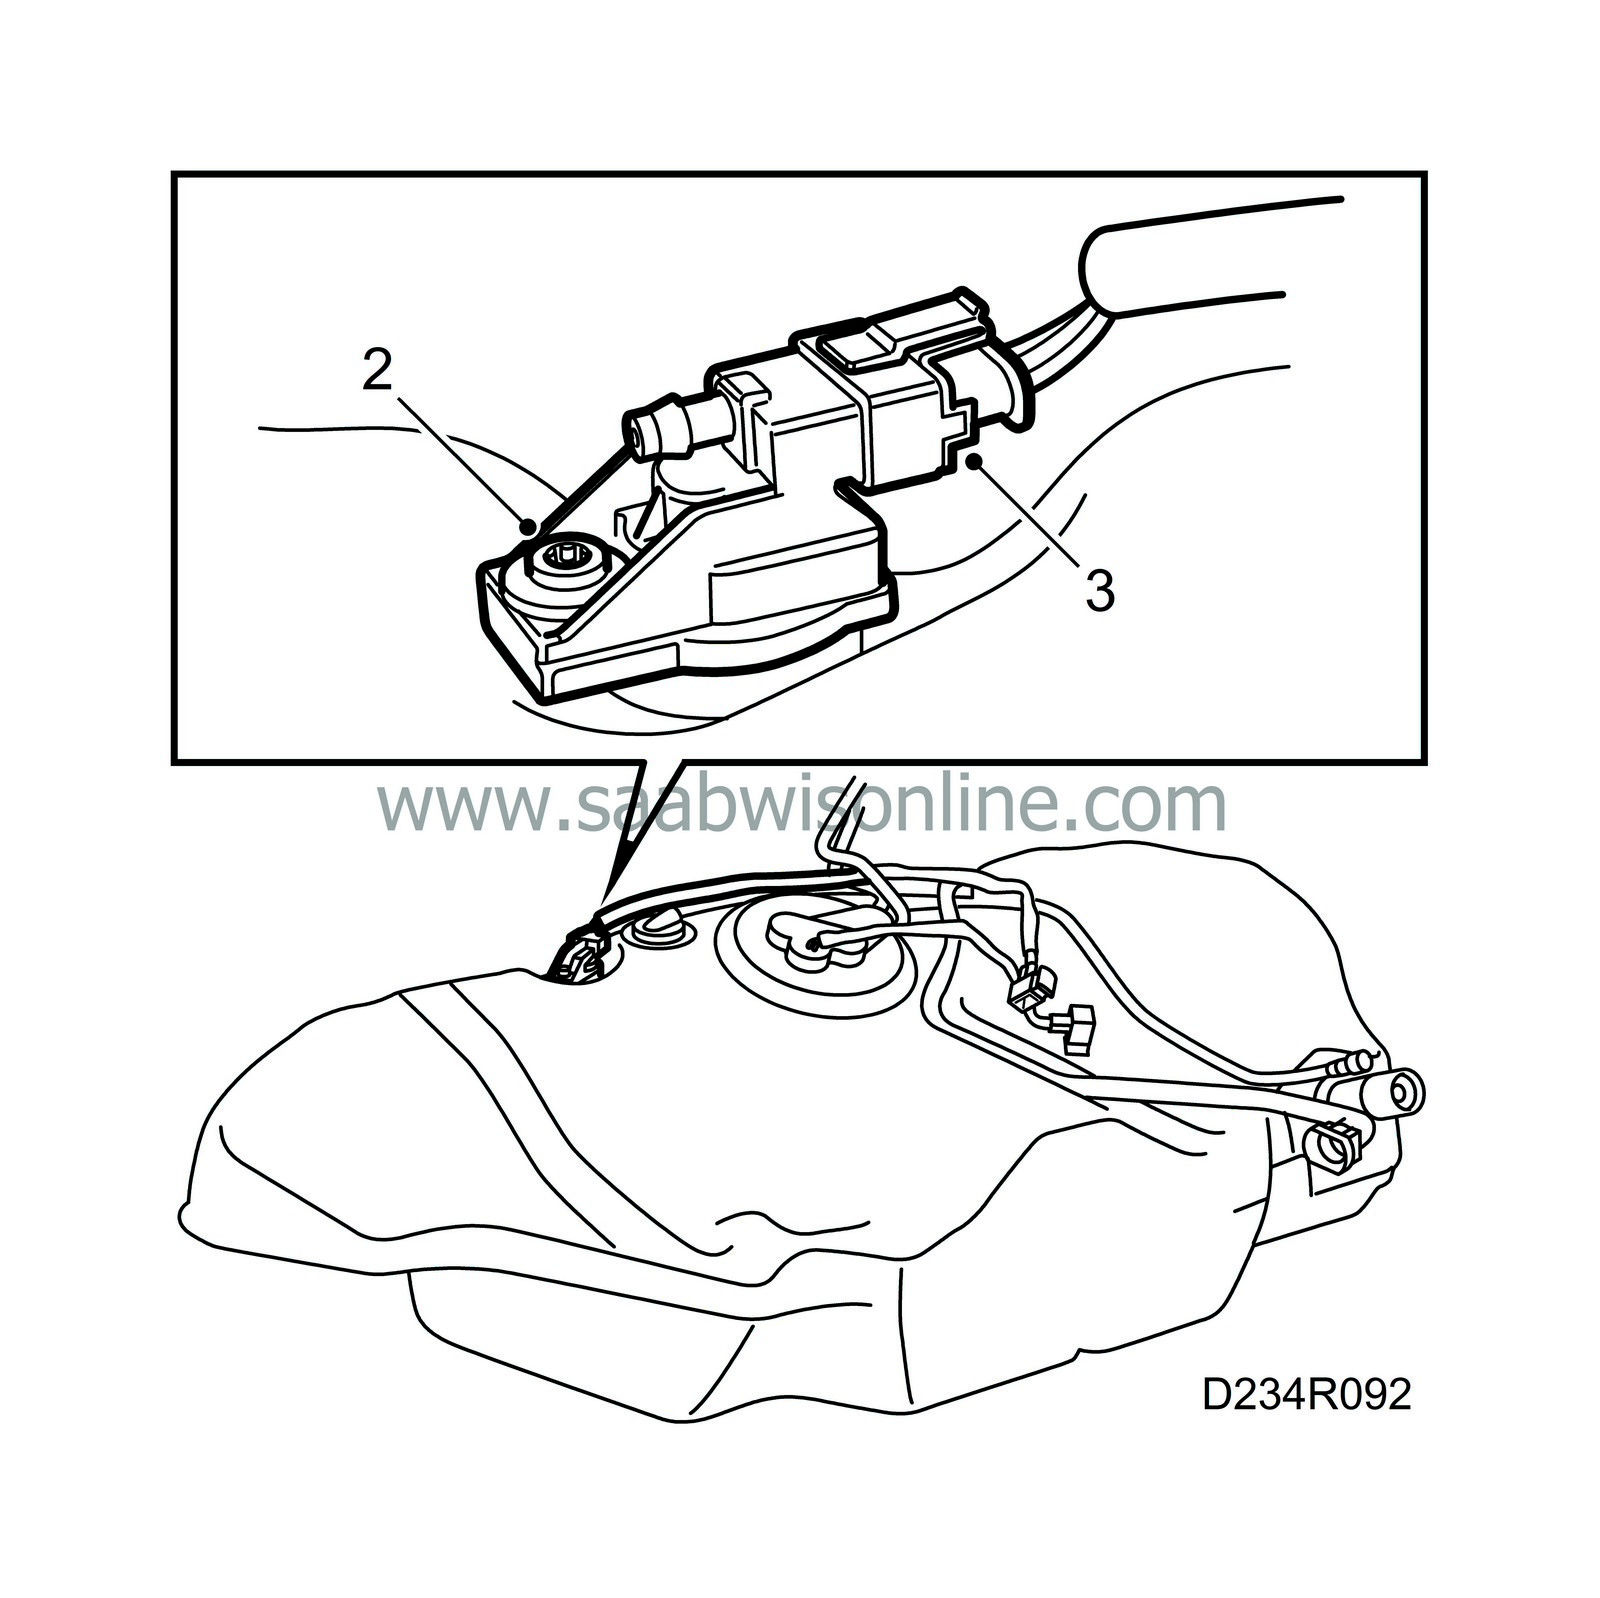
Fit the tank pressure sensor.
|
|
| 3. |
Spray with Kontakt 61 and plug the connector into the sensor.
|
|
| 4. |
Place the tank on a column lift, for example.
|
|
| 5. |
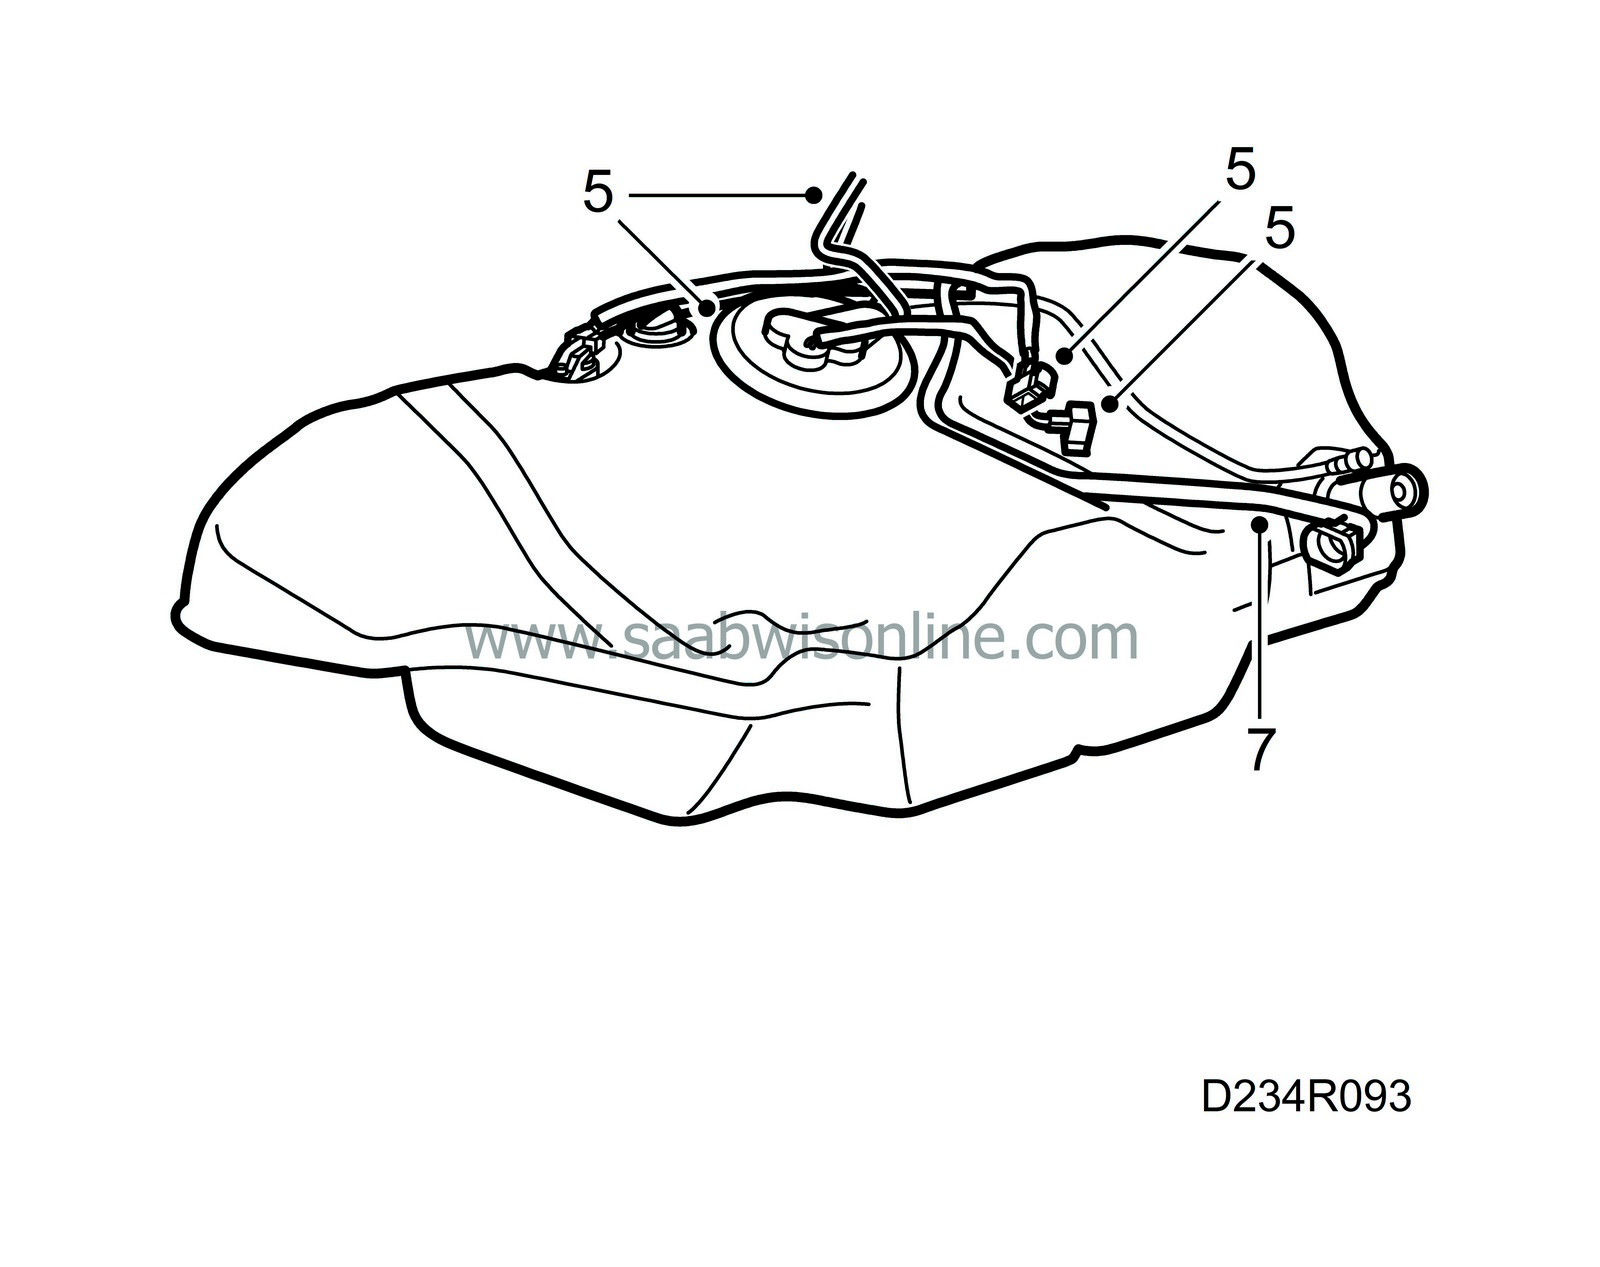
Fit the fuel connections and plug in the cables to the fuel pump and tank pressure sensor.
|
|
| 6. |
Move the handbrake cable for the left-hand wheel to one side and raise the tank slightly, the left-hand side first.
|
|
| 7. |
Secure the fuel lines in their retainers on the tank.
|
|
| 8. |
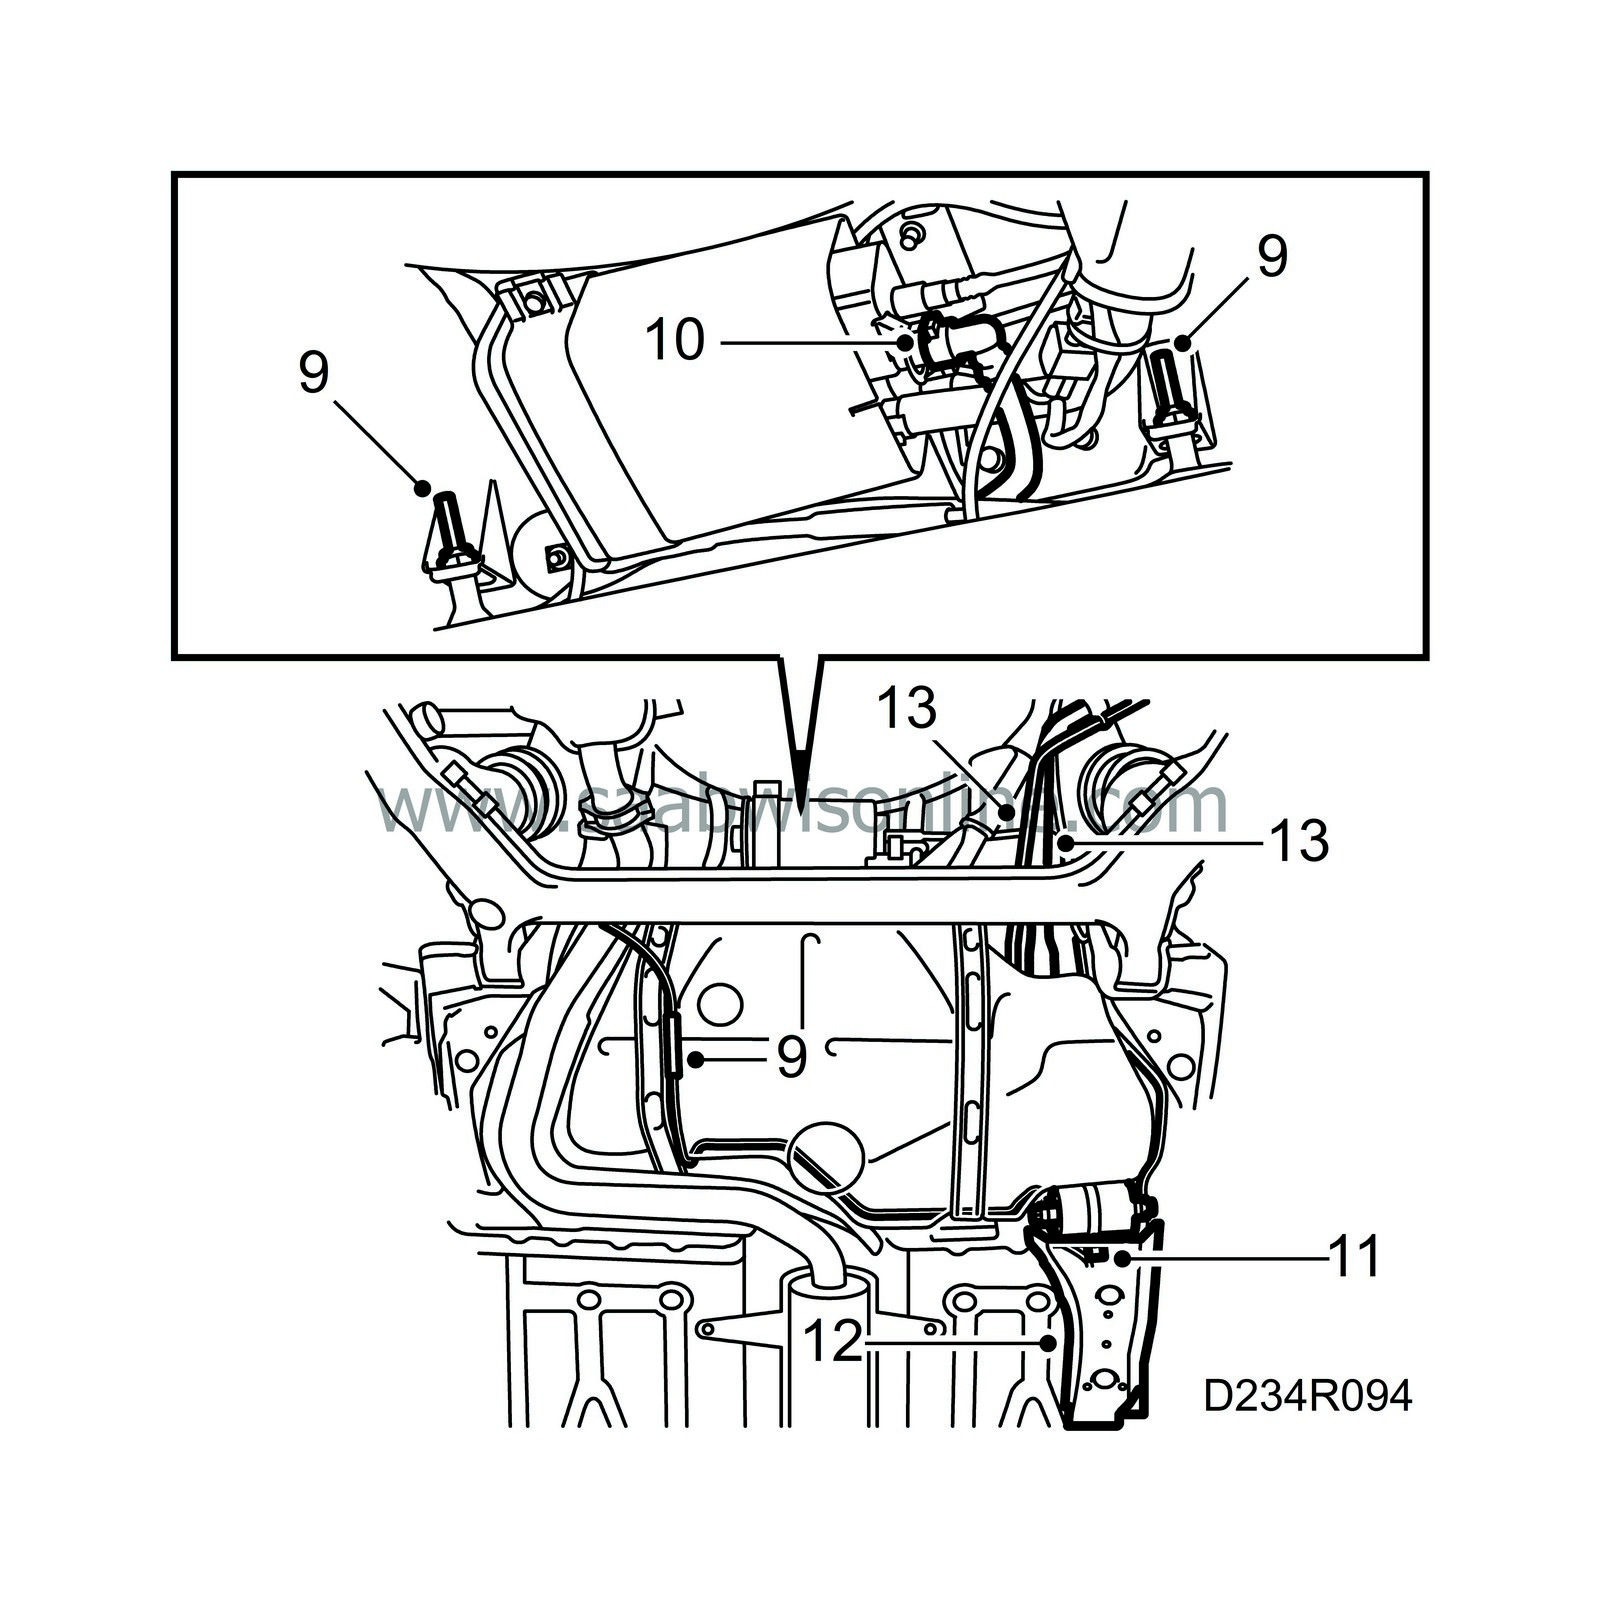
Raise the tank further up to its normal position and fasten the tank straps.
|
|||||||
| 9. |
Tighten the tank straps. The left-hand strap holds the handbrake wire.
|
|
| 10. |
Connect the line from the tank to the EVAP canister.
|
|
| 11. |
Screw on the fuel filter.
|
|
| 12. |
Fit the protective cover on the fuel filter.
|
|
| 13. |
Remove the plug from the tank connection and fit a
new
hose on the filler pipe.
Tightening torques hose clamps 2,0 Nm (1,4 lbf ft) |
||||||||||
| 14. |
Fit the filler pipe purge line.
|
|
| 15. |
Lower the car.
|
|

 Warning

