Airbag, passenger
| Airbag, passenger |
| 1. |
Ignition switch in the OFF position.
|
|
| 2. |
Open the glove box. Open the cover plates and remove the retaining screws.
|
|
| 3. |
Remove the other retaining screws and the retaining bolt together with the expansion rivets in the front edge and detach the snap fastener from the bulkhead console.
|
|
| 4. |
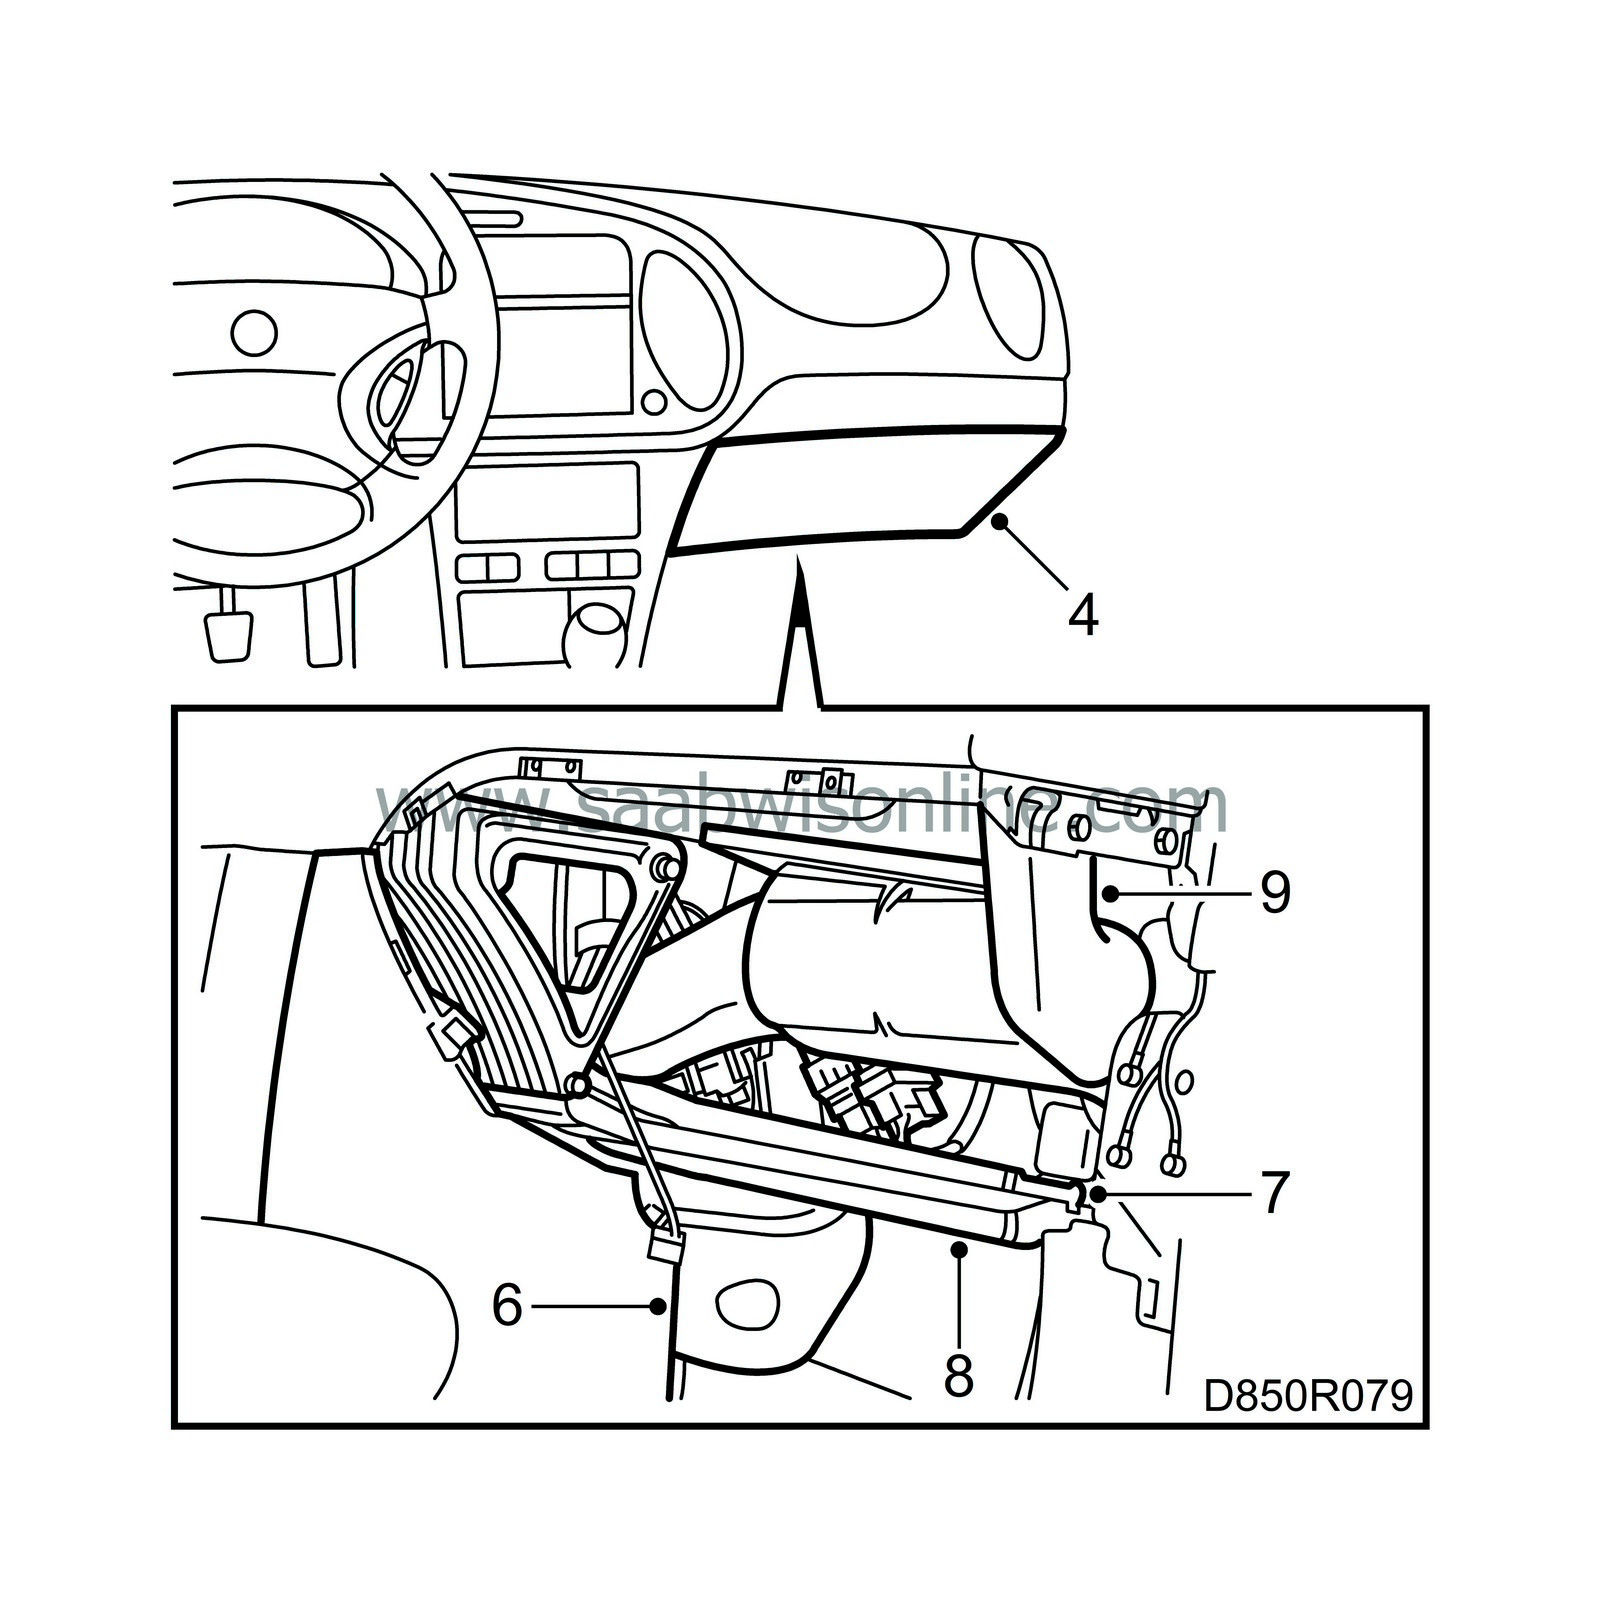
Pull out the glove box and take apart the connector of the glove-box lighting.
|
|
| 5. |
Lift the glove box out.
|
|
| 6. |
Remove the side panel, 1 screw.
|
|
| 7. |
Remove the knee shield; see 1
|
|
| 8. |
Remove the floor air duct.
|
|
| 9. |
Remove the side air duct.
|
|
| 10. |
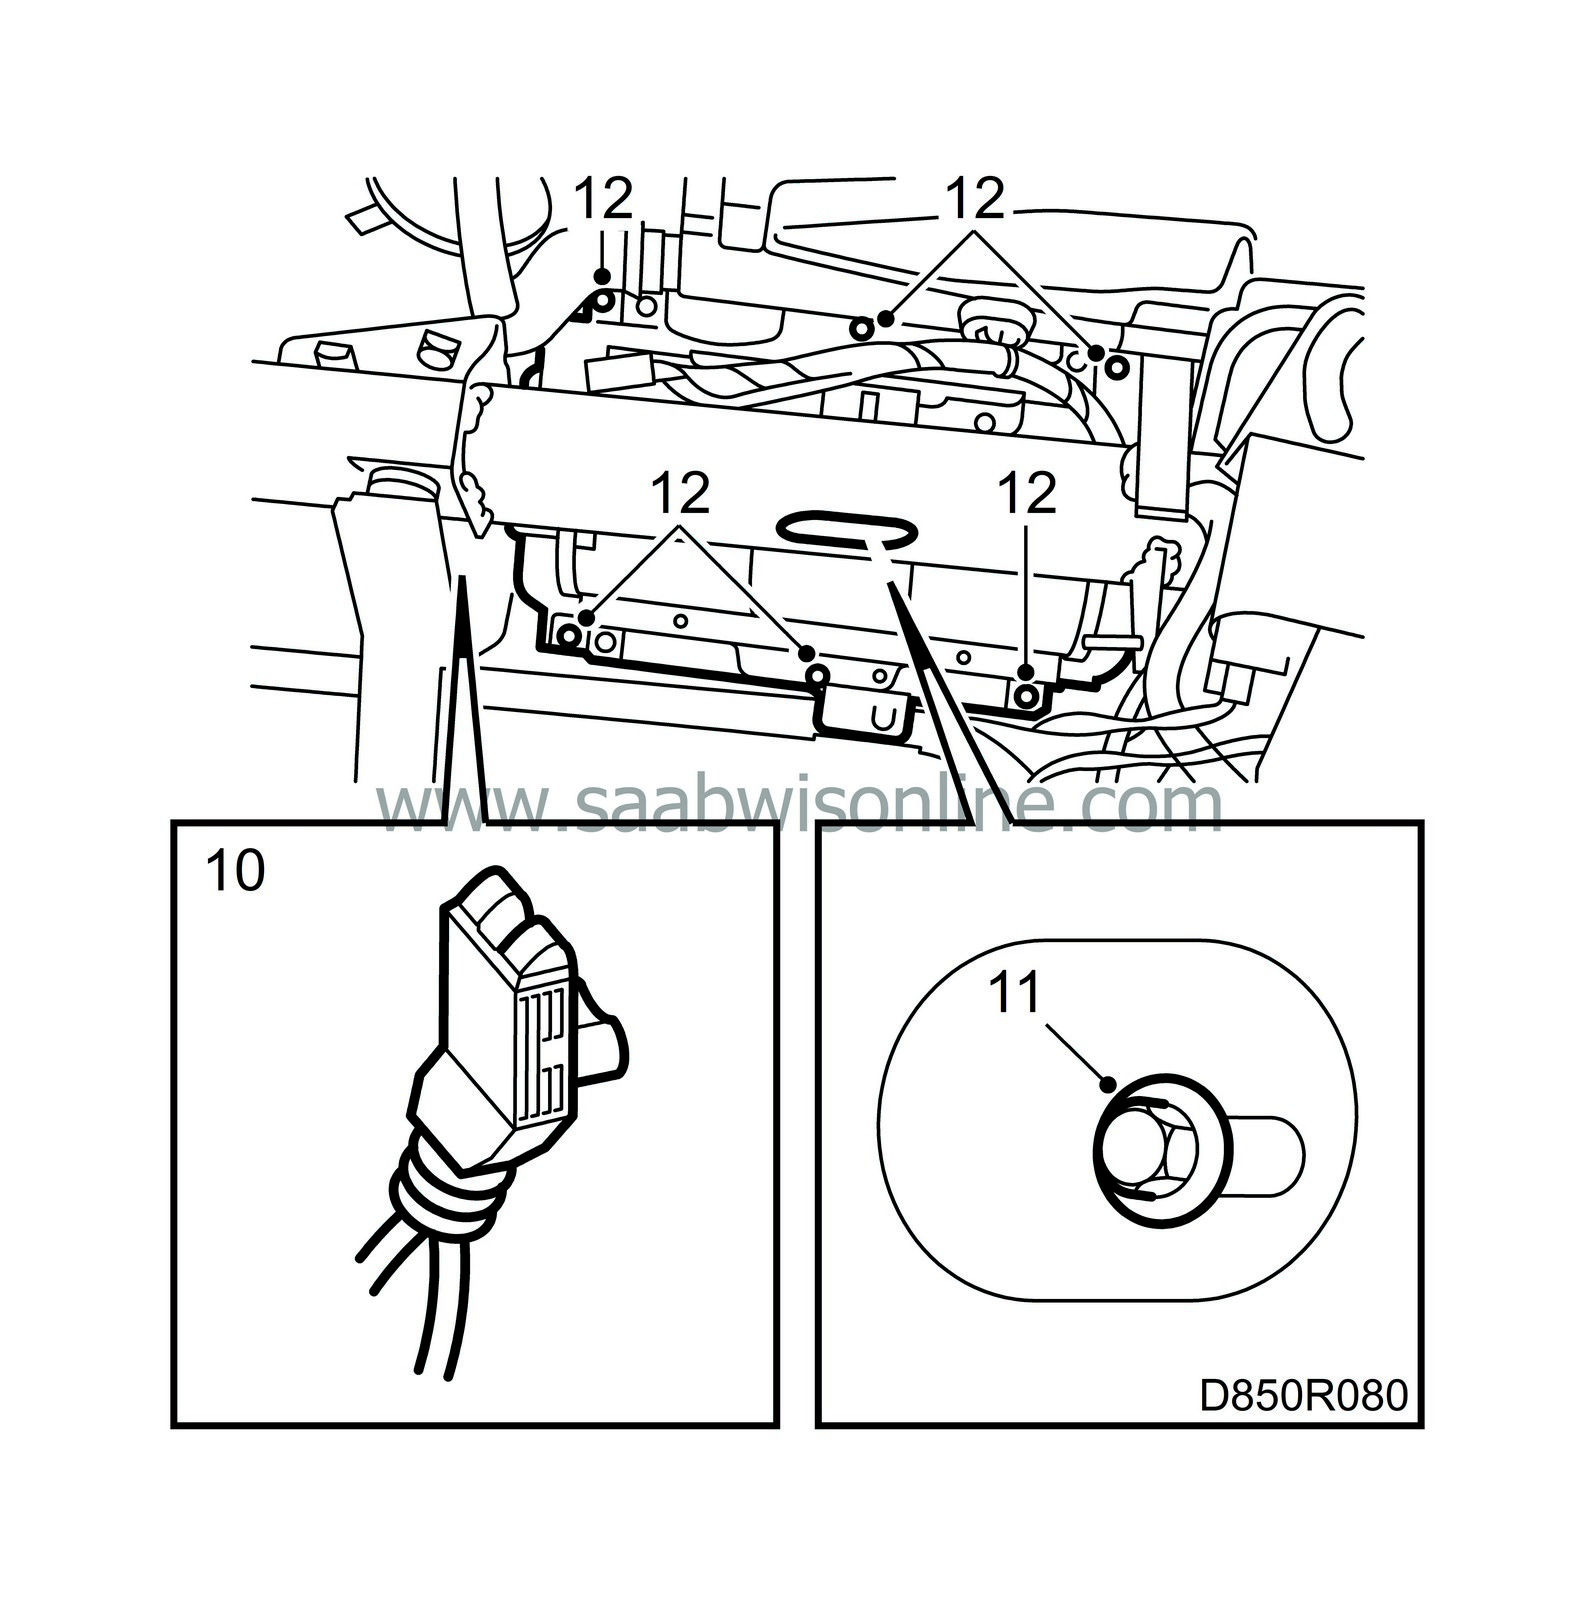
Remove the airbag connector.

|
|
| 11. |
Remove the screw securing the safety band to the steering-wheel beam.
|
|
| 12. |
Remove the six nuts holding the airbag.
|
|
| 13. |
Lift out the airbag.
|
|
| To fit |

|
|||||||
| 1. |
Fit the airbag. Check that there are no loose objects between the dashboard and the airbag. Tighten the six nuts securing the airbag to the dashboard.
Tightening torque: 9 Nm (6.6 lbf ft)
|
||||||||||
| 2. |
Tighten the screw that secures the safety band to the steering-wheel beam. Make sure that the screw engages with its old threads, since it would otherwise cut new ones, which would markedly impair its grip.
Tightening torque: 9 Nm (6.6 lbf ft) |
|
| 3. |
Fit the airbag connector to the airbag.
|
|
| 4. |
Install the side air duct.

|
|
| 5. |
Install the floor air duct.
|
|
| 6. |
Install knee shields; see
 .
.
|
|
| 7. |
Install the side panel, 1 screw.
|
|
| 8. |
Fit the connector of the glove-box lighting.
|
|
| 9. |
Put the glove box back into place.
|
|
| 10. |
Switch the ignition on and check the SRS system and control module with the diagnostic tool as follows:
Connect the diagnostic tool to the diagnostic socket under the dashboard. Clear any diagnostic trouble codes that are present. Turn the ignition off and on again. Wait at least 10 seconds with the ignition on. Check whether a diagnostic trouble code is shown: If a diagnostic trouble code is shown: Carry out the relevant fault diagnosis as described under the respective DTC. If no diagnostic trouble code is shown: The installation is successful. Disconnect the diagnostic tool. |
|

 Warning


