Evaporator low-pressure pipe
| Evaporator low-pressure pipe |
| Removing |
| Important | ||
|
The evaporator low-pressure pipe must be cut when removing. The spare part consists of a two-sectioned pipe. |
||
| 1. |
Position the car on a lift.
|
|
| 2. |
Remove the grille.
|
|
| 3. |
Drain the refrigerant from the A/C system, see
Filling and draining refrigerant with Robinair Smart Cart 10324 Robinair 17234
.
|
|
| 4. |
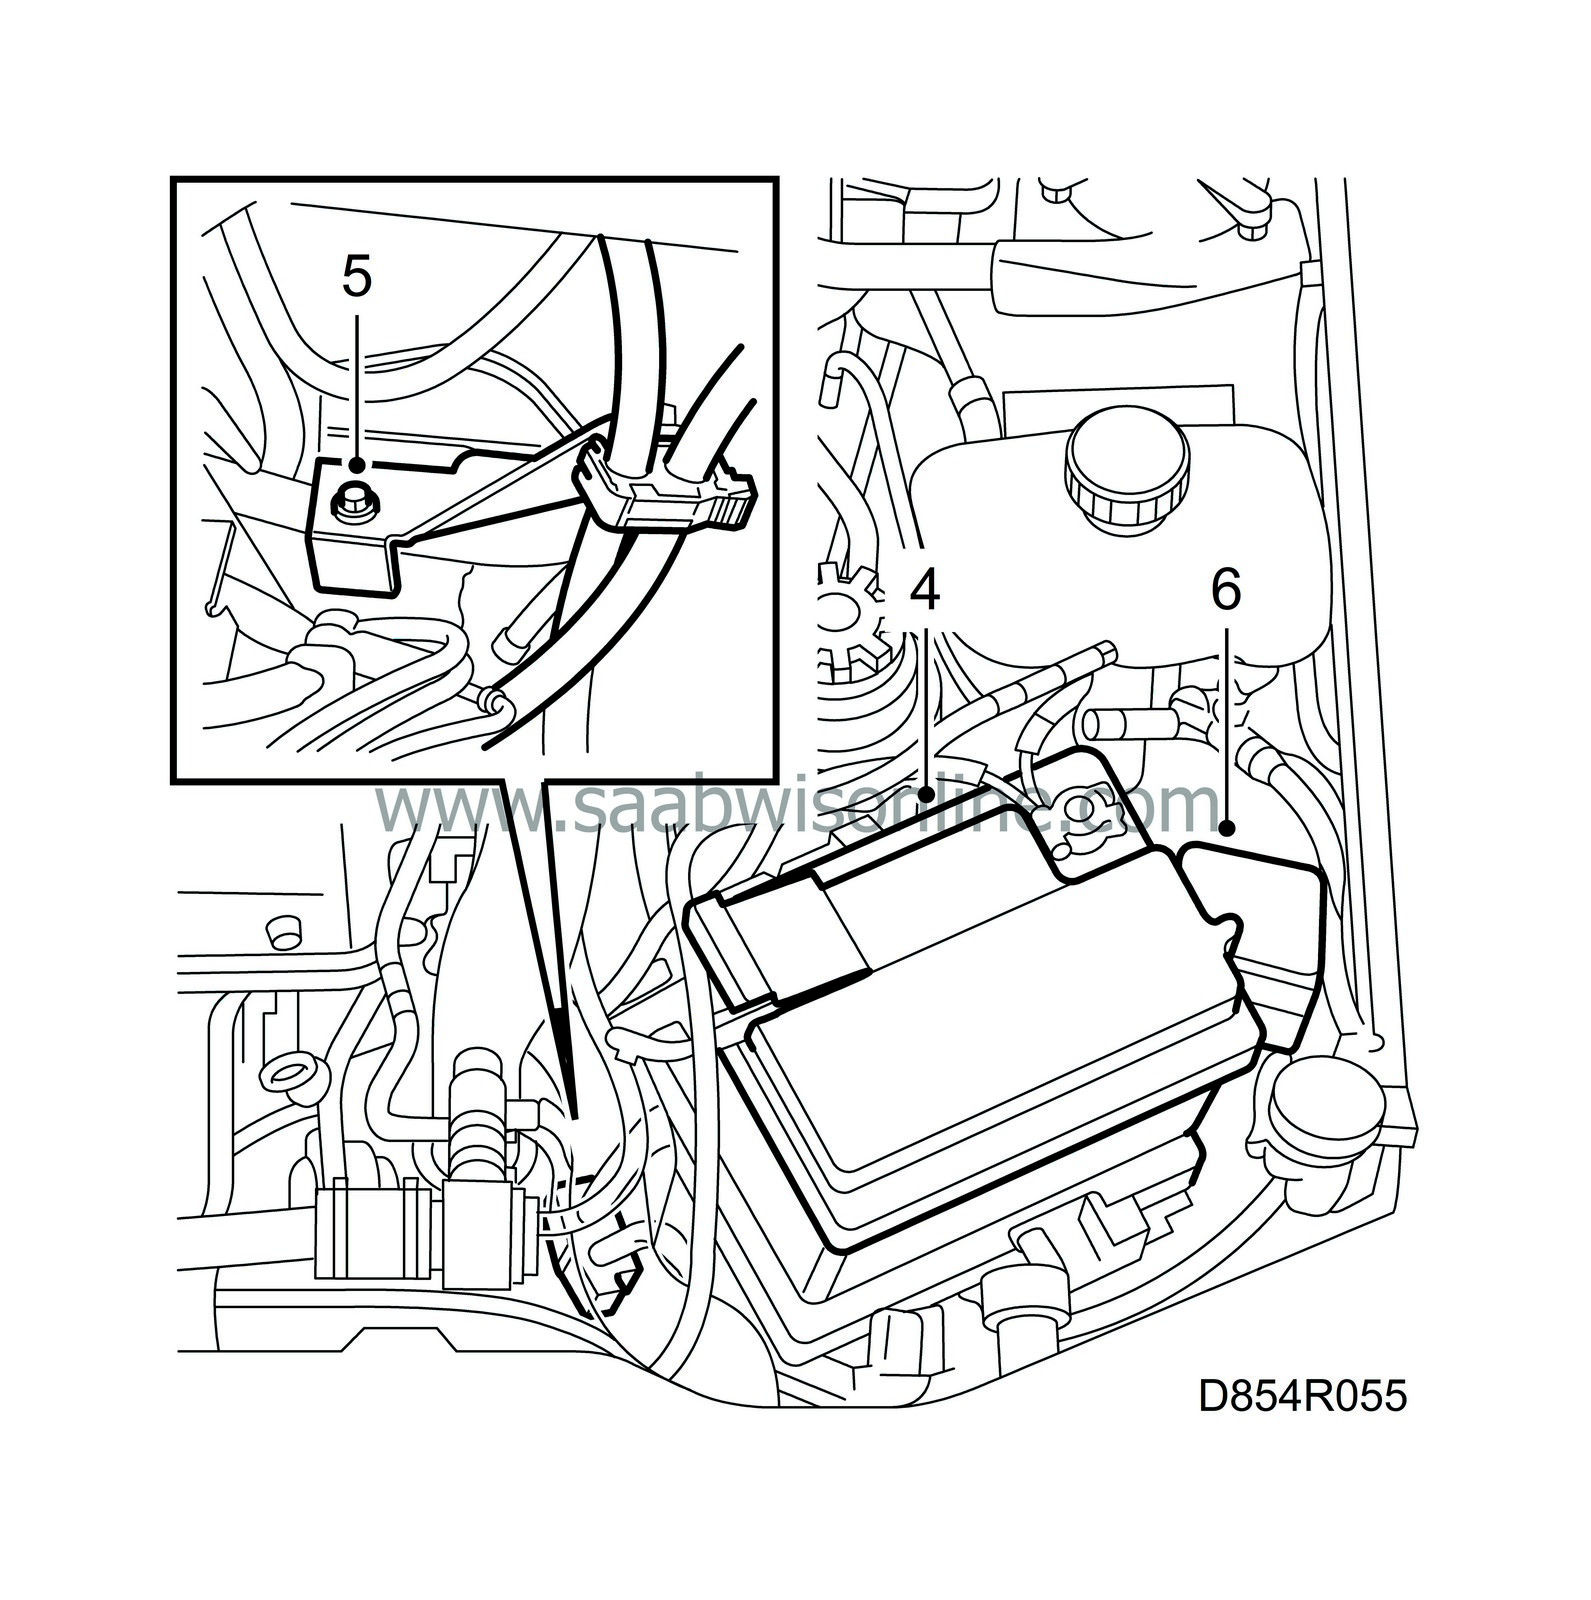
Remove the battery.
|
|
| 5. |
Remove the bolt in the console that secures the battery cable holder.
|
|
| 6. |
Remove the main fuse box.
|
|
| 7. |
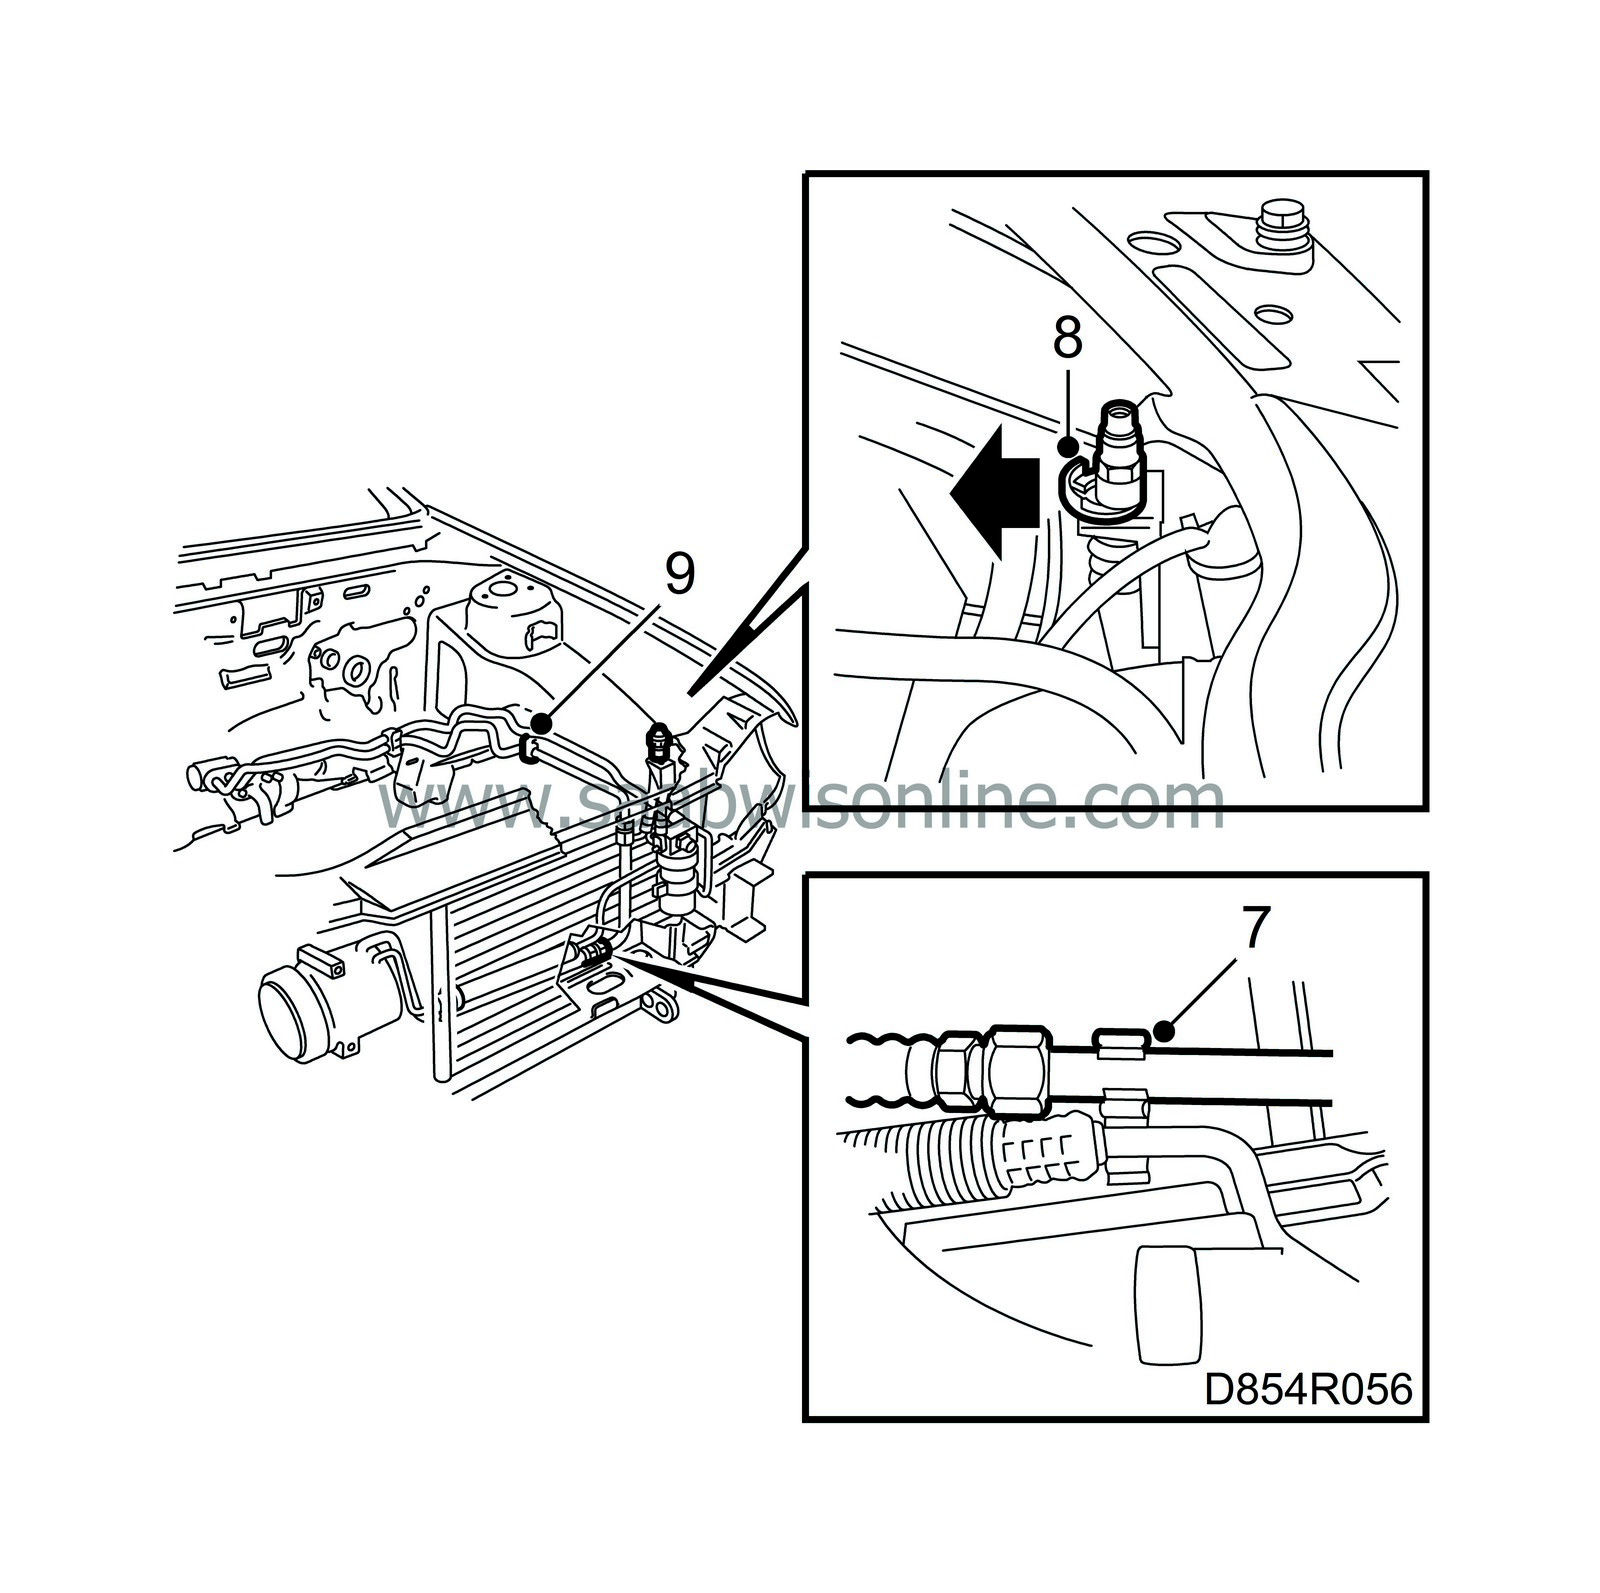
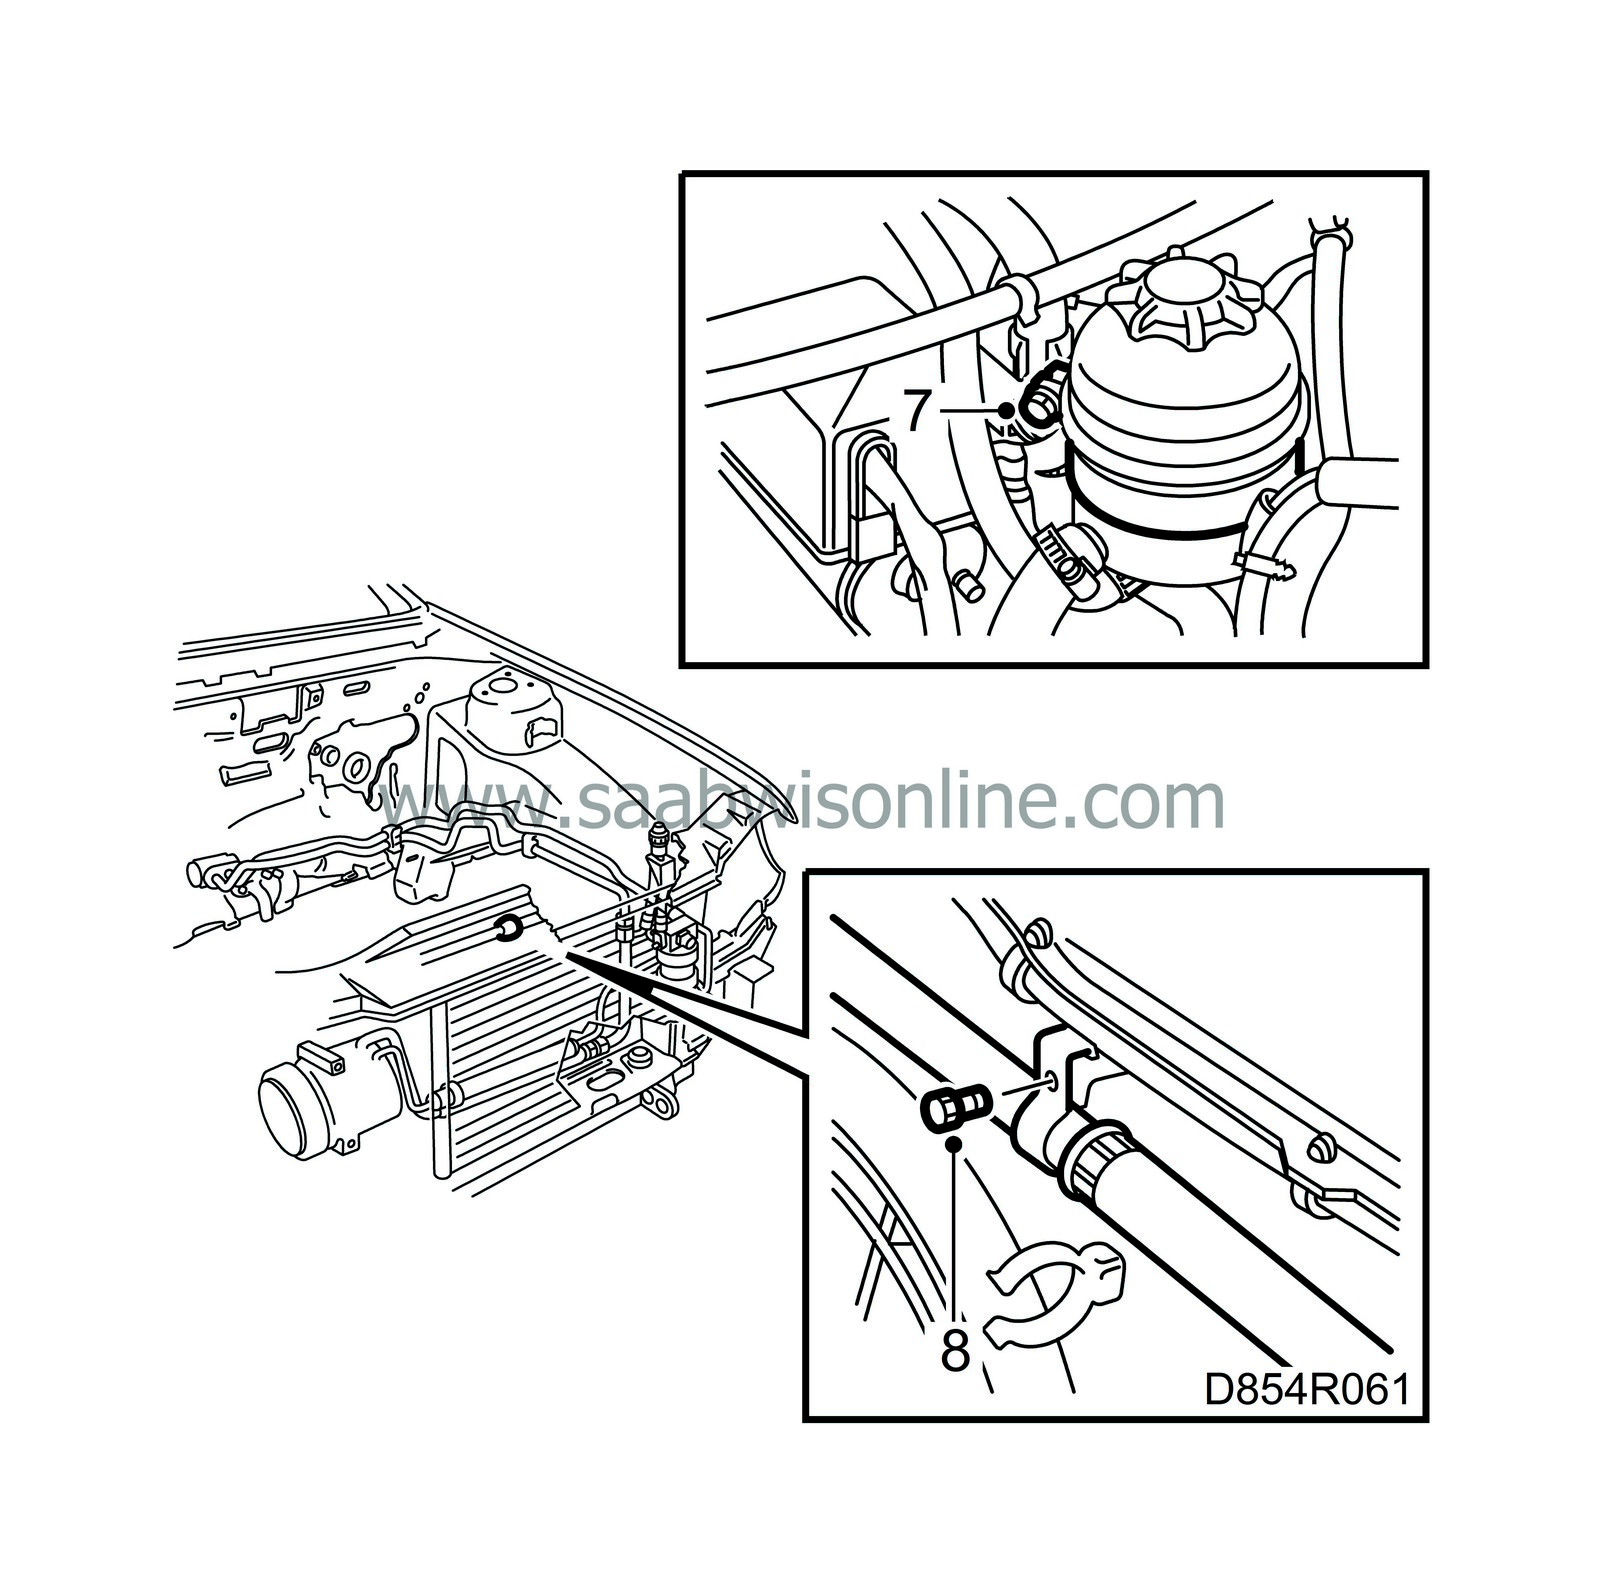
Remove the compressor low-pressure pipe from the holder on the front cross member.
|
|
| 8. |
Remove the clip securing the low-pressure side service connection.
|
|
| 9. |
Remove the evaporator low-pressure pipe from the holder on the wheel housing.
|
||||||||||
| 10. |
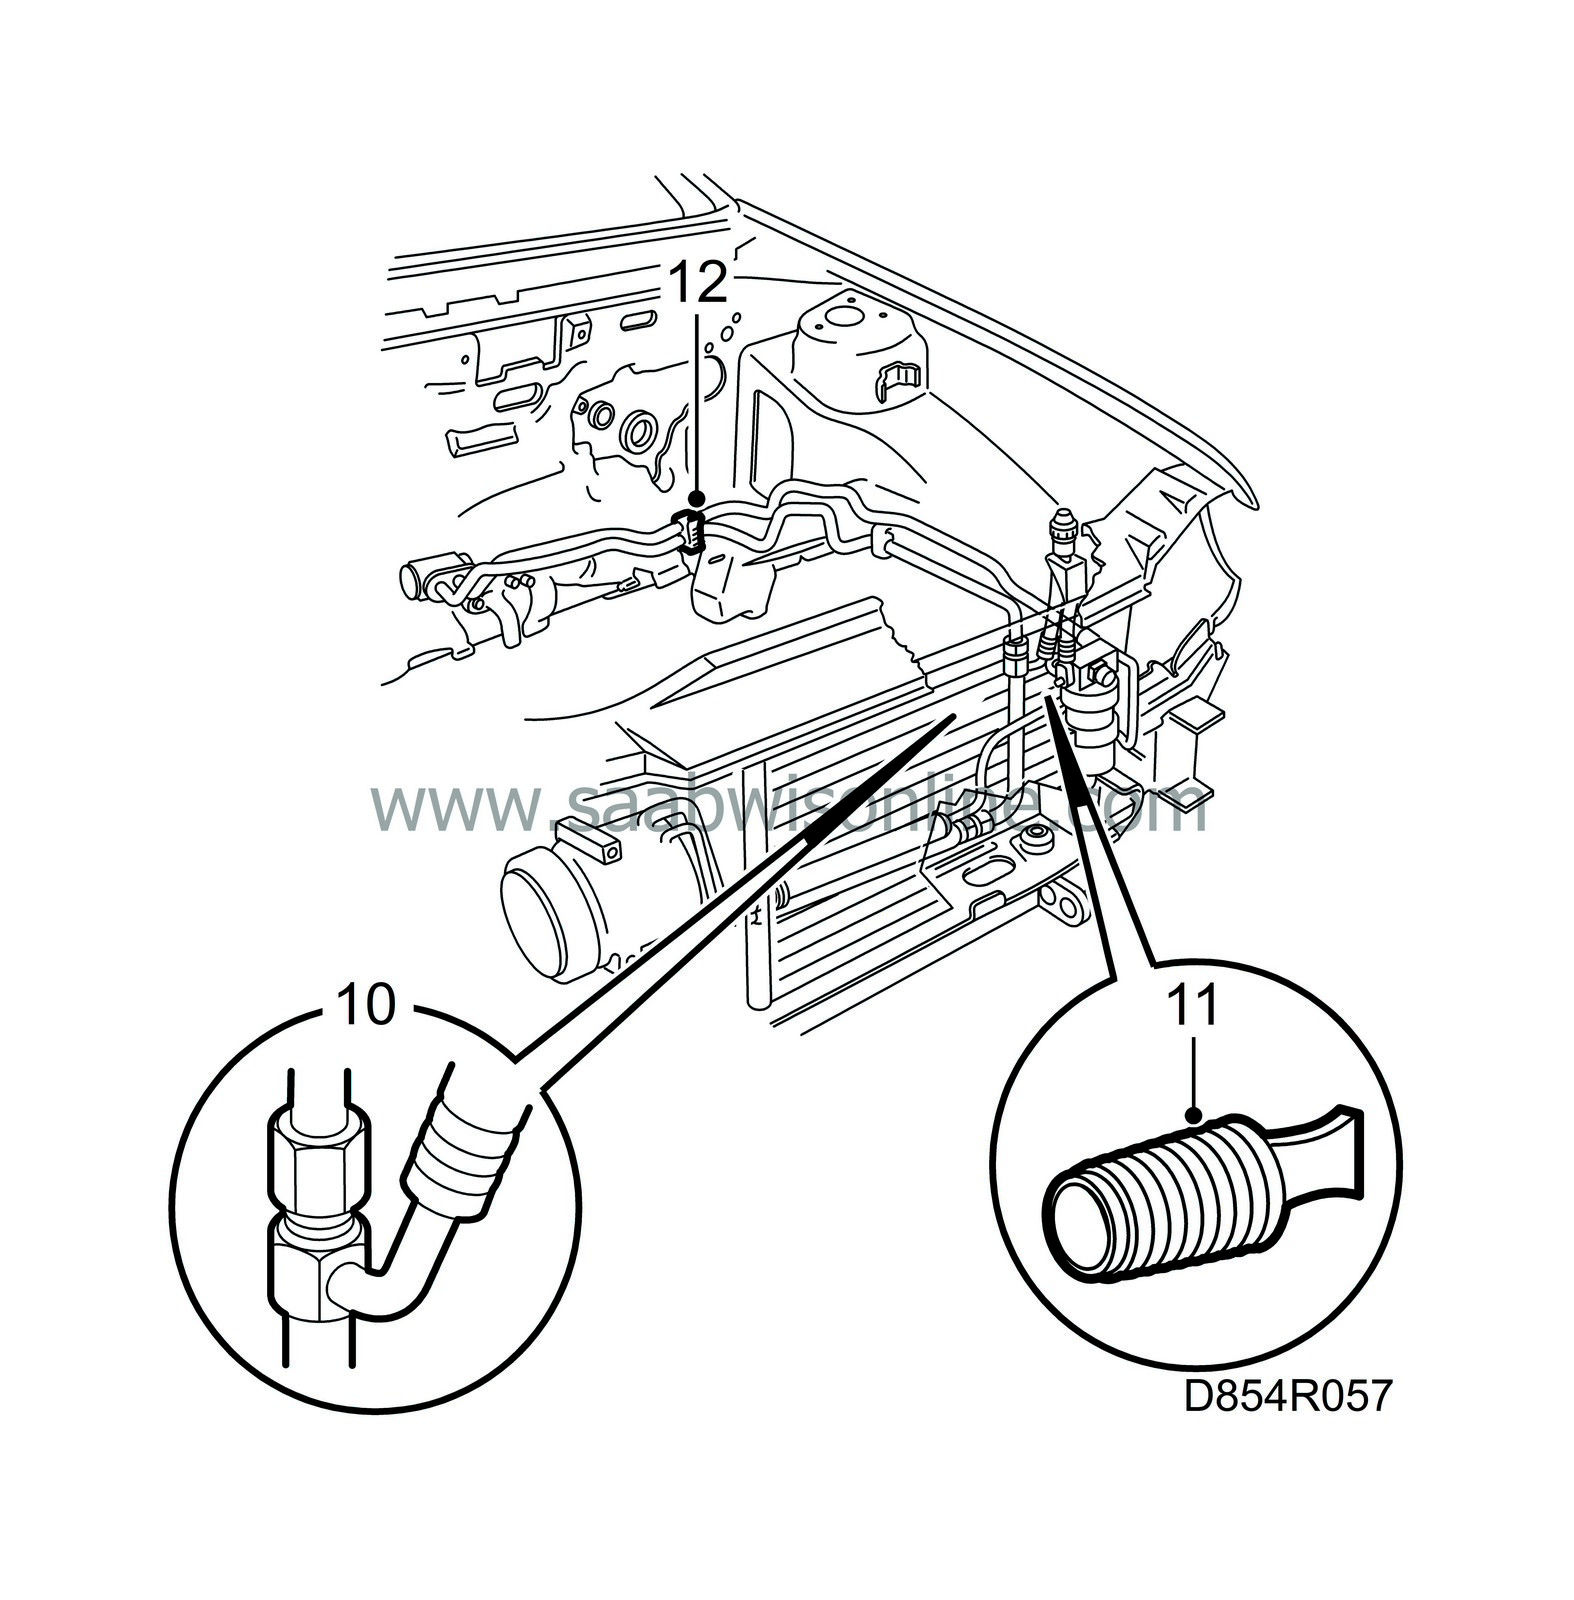
Remove the nut that secures the evaporator low-pressure pipe to the service connection.
|
|
| 11. |
Plug the openings.
|
|
| 12. |
Remove the evaporator low-pressure pipe from the bulkhead bracket.
|
|
| 13. |
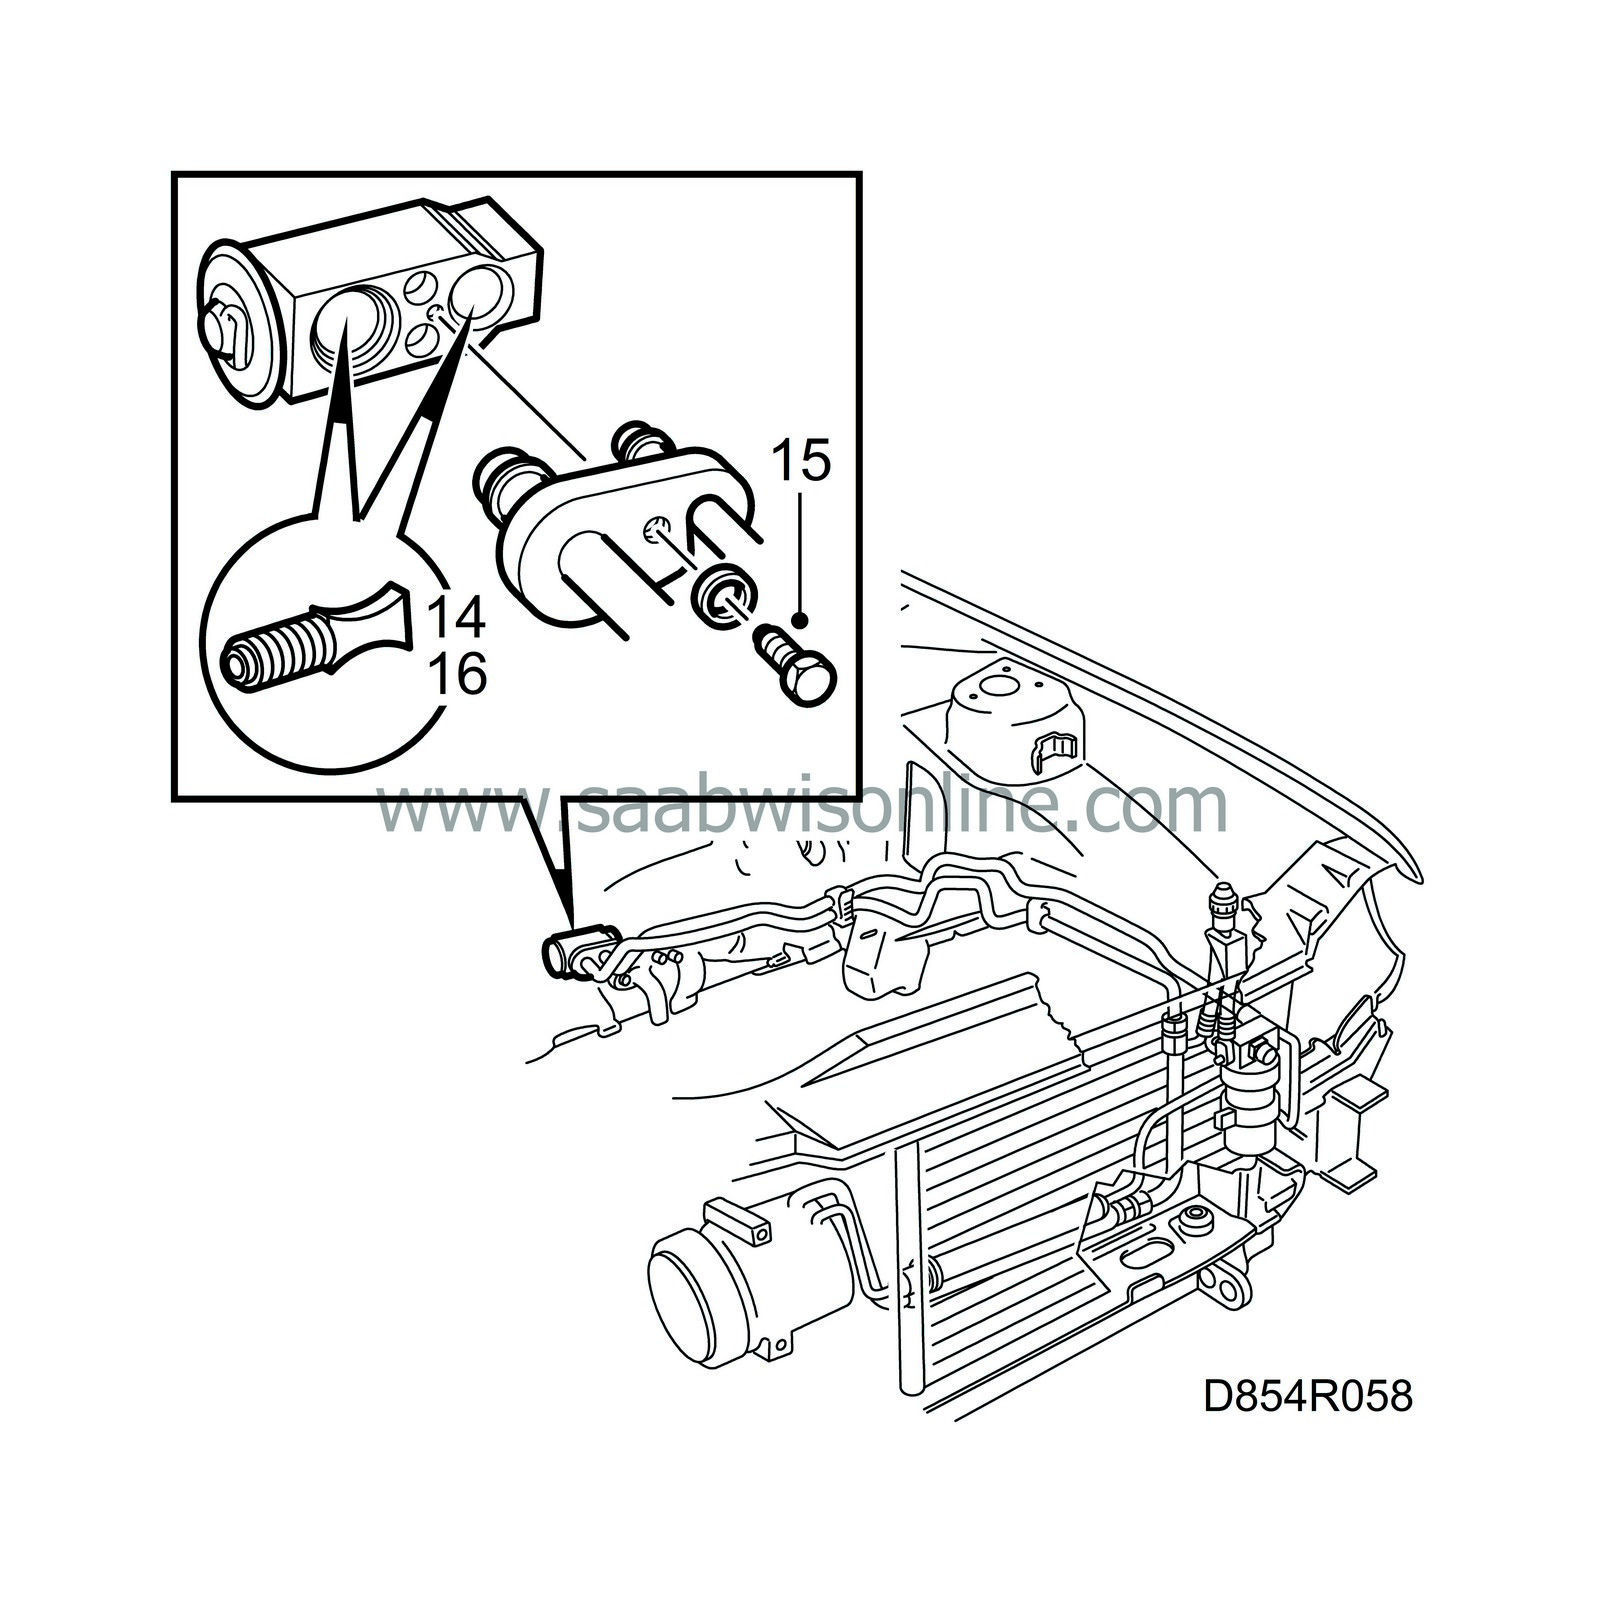
Remove the high-pressure pipe from the PAD-connection by the lead-through in the bulkhead.
|
|
| 14. |
Plug the openings.
|
|
| 15. |
Remove the bolt securing the PAD-connection.
|
|
| 16. |
Plug the openings.
|
|
| 17. |
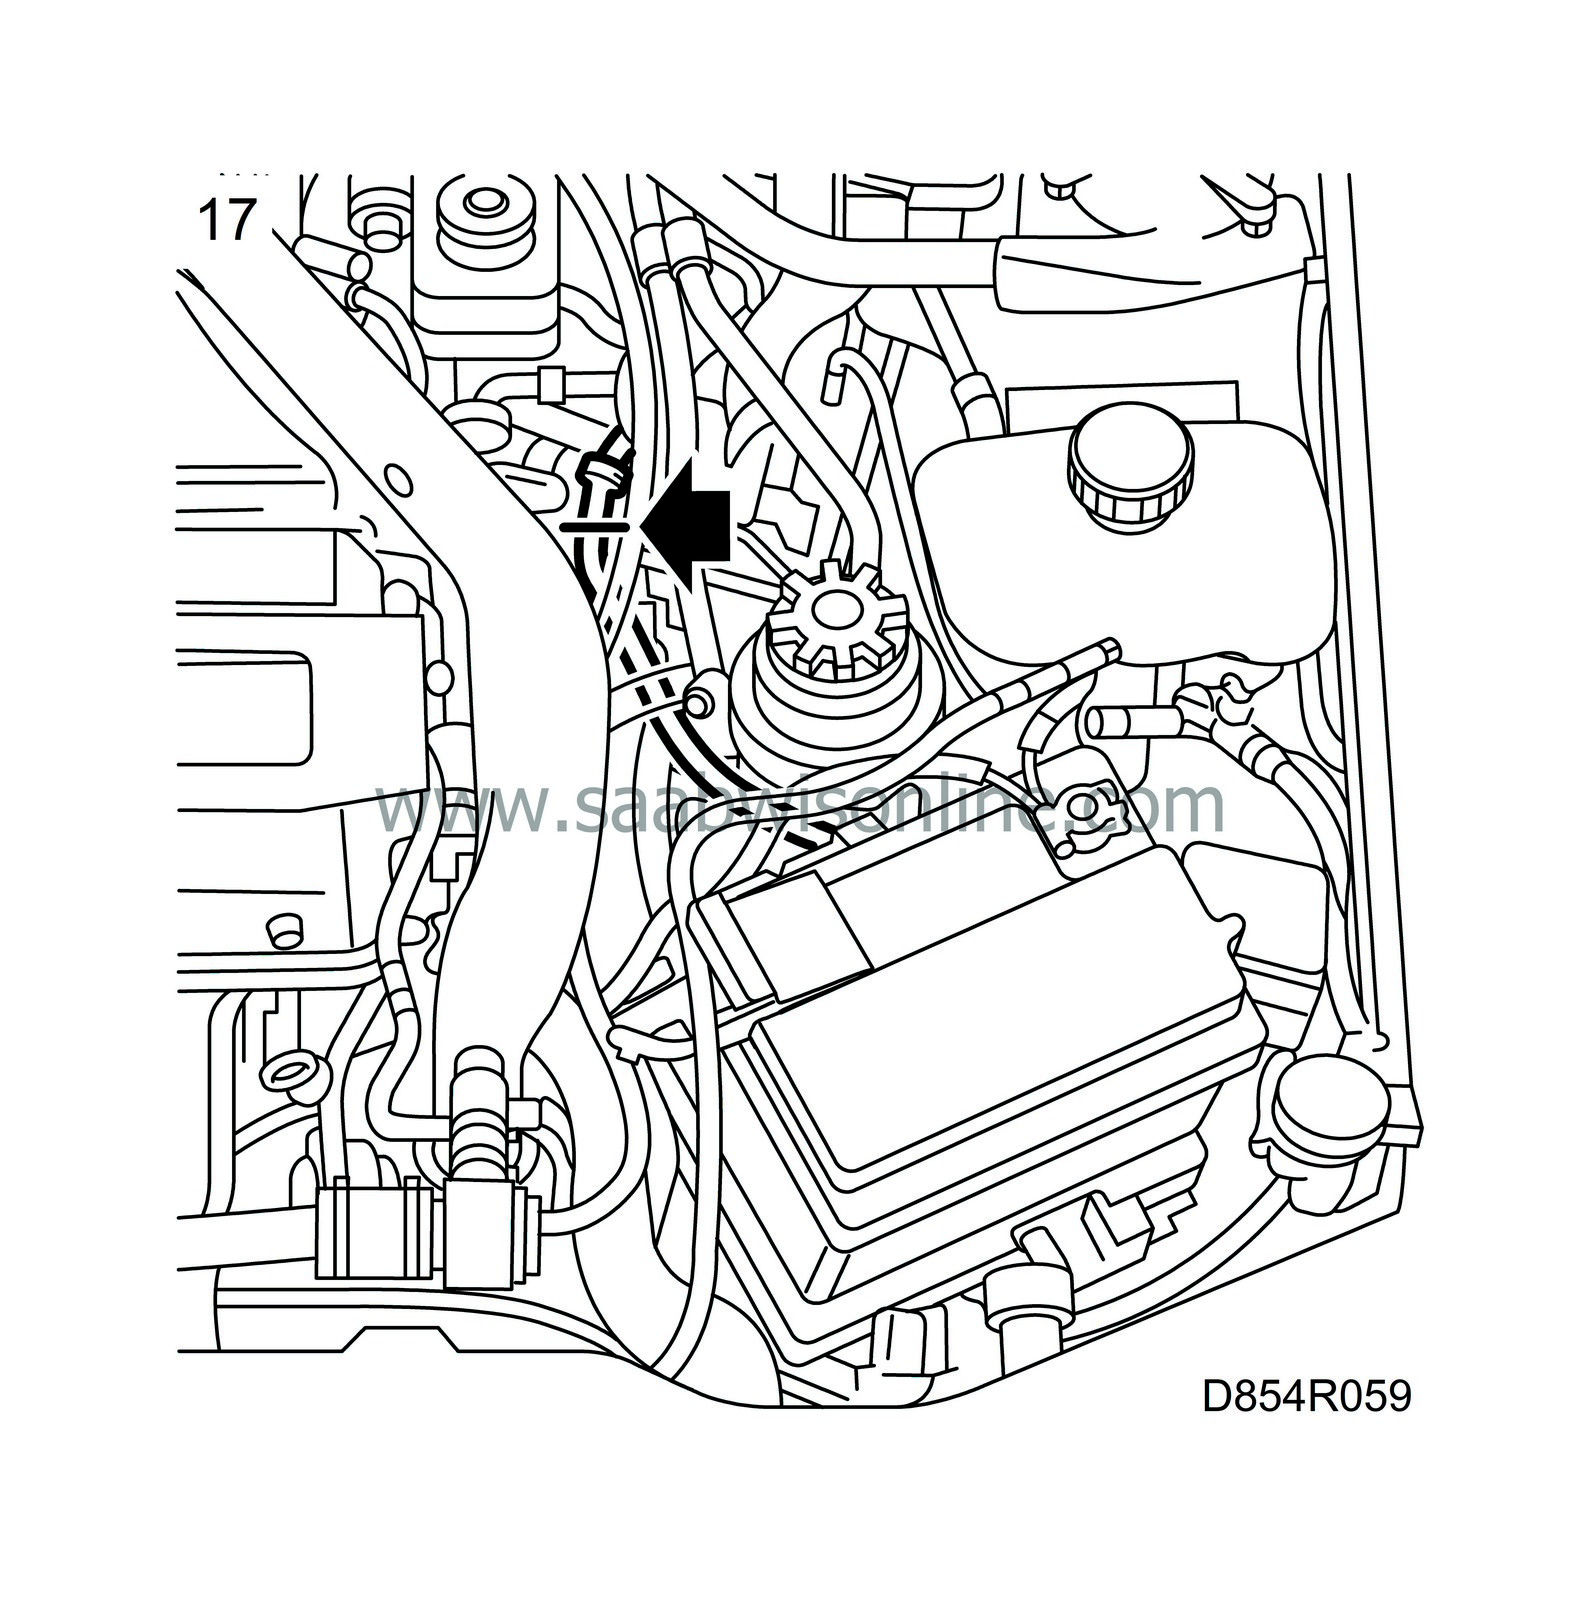
Raise the car. Cut the low-pressure pipe through the wheel housing as shown in the illustration.
|
|
| 18. |
Lower the car and lift up the pipe sections.
|
|
| Fitting |

| 1. |
Fill with compressor oil, see
Filling and adjusting compressor oil
.
|
|
| 2. |
Fit the rear part of the low-pressure pipe from above.
|
|
| 3. |
LHD: Raise the car.
|
|
| 4. |
Lubricate the new O-rings with synthetic vaseline and fit them by the expansion valve.
|
|
| 5. |
Fit the PAD-connection and pipes, tighten the bolt.
Tightening torque: 9 Nm (7 lbf ft) |
|
| 6. |
LHD: Lower the car.
|
|
| 7. |
Remove the bolt that secures the power steering fluid reservoir.
|
|
| 8. |
Remove the power steering fluid reservoir pipe from the bracket by the radiator.
|
|
| 9. |
Cars with turbo:

|
|
| 9.a. |
Remove the hose between the charge air cooler and the throttle body.
|
| 9.b. |
Remove the expansion tank retainer bolt.
|
| 10. |
Cars with manual transmission: Secure the clutch pedal in the depressed position.
|
|
| 11. |
Cars with automatic transmission:
|
|
| 11.a. |
Remove the nut that secures the gearshift selector to the gearbox.
|
| 11.b. |
Remove both bolts that secure the gearshift selector console to the gearbox housing.
|
| 12. |
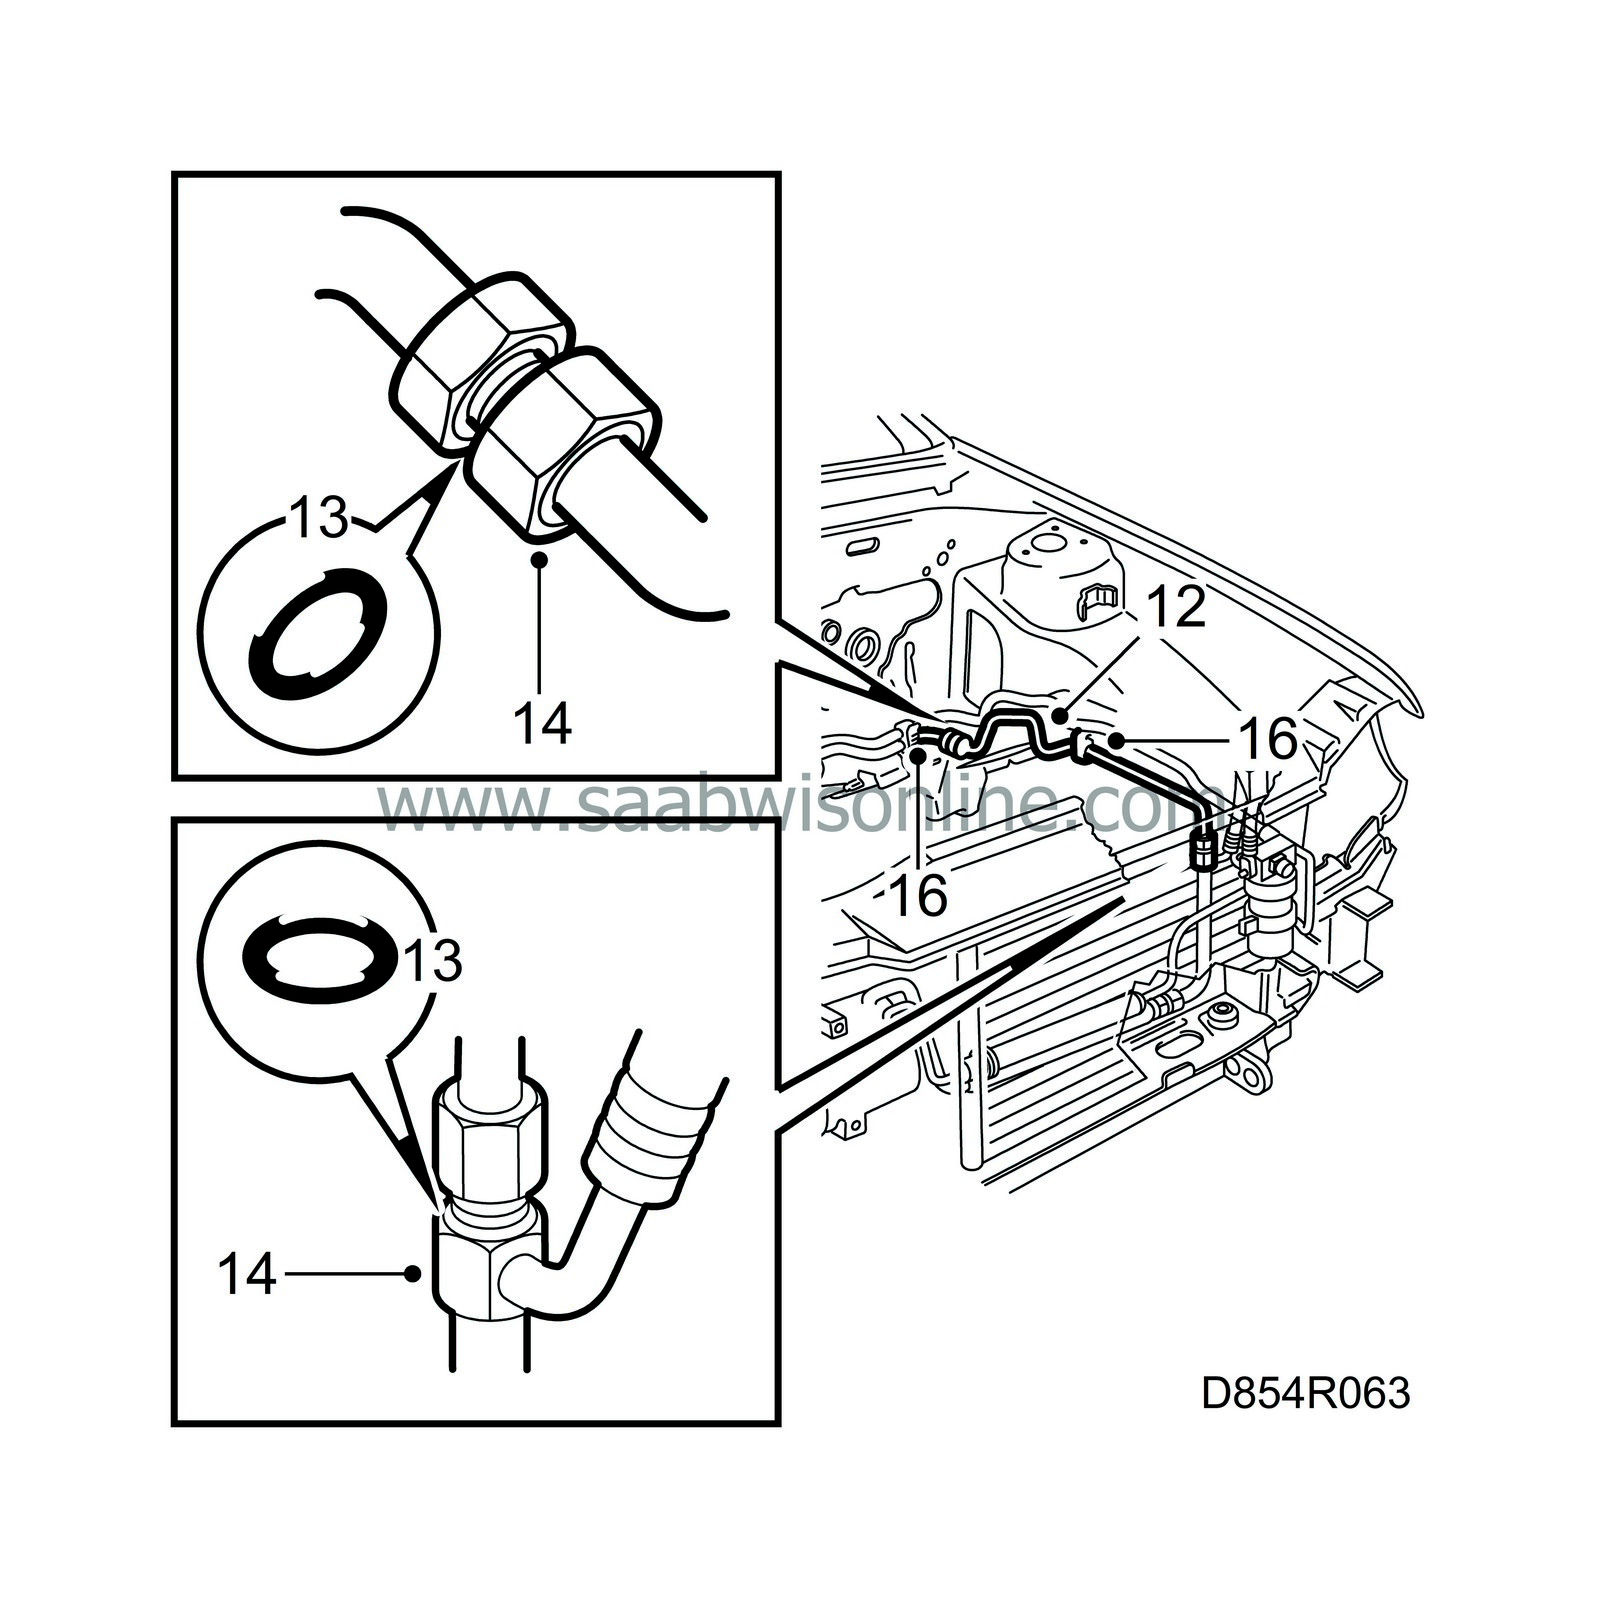
Fit the front part of the evaporator low-pressure pipe.
|
|
| 13. |
Lubricate the new O-rings with synthetic vaseline and fit them in both ends of the low-pressure pipe front section.
|
|
| 14. |
Connect the pipe at both ends.
|
|
| 15. |
Tighten the pipe at both ends.
Tightening torque 34 Nm (25 lbf ft) |
|
| 16. |
Fit the evaporator low-pressure pipe in the brackets on the bulkhead and wheel housing.
|
|
| 17. |
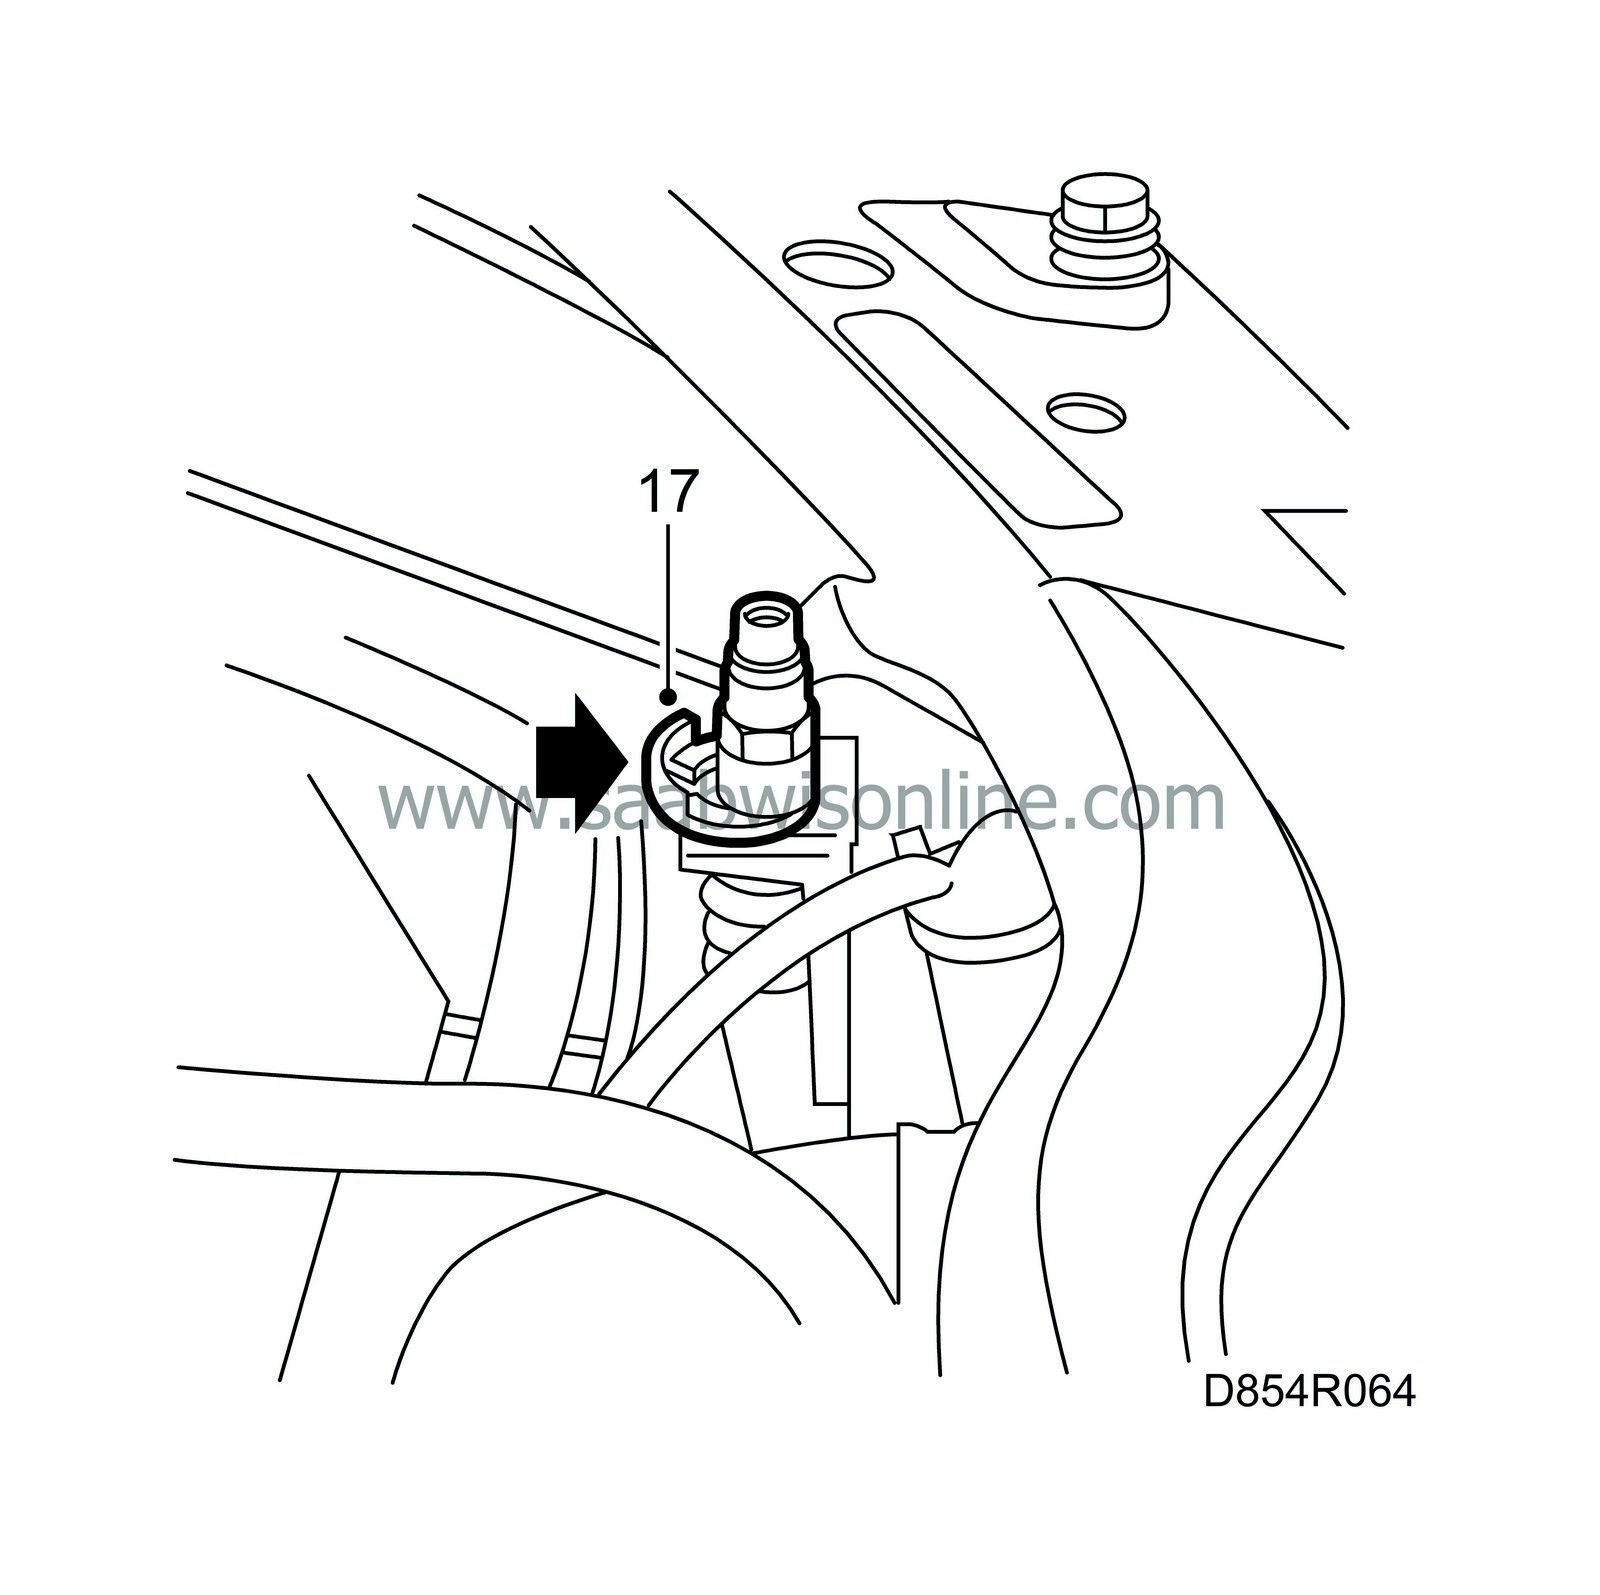
Fit the low-pressure side service connection and press on the clip.
|
|
| 18. |
Cars with automatic transmission:
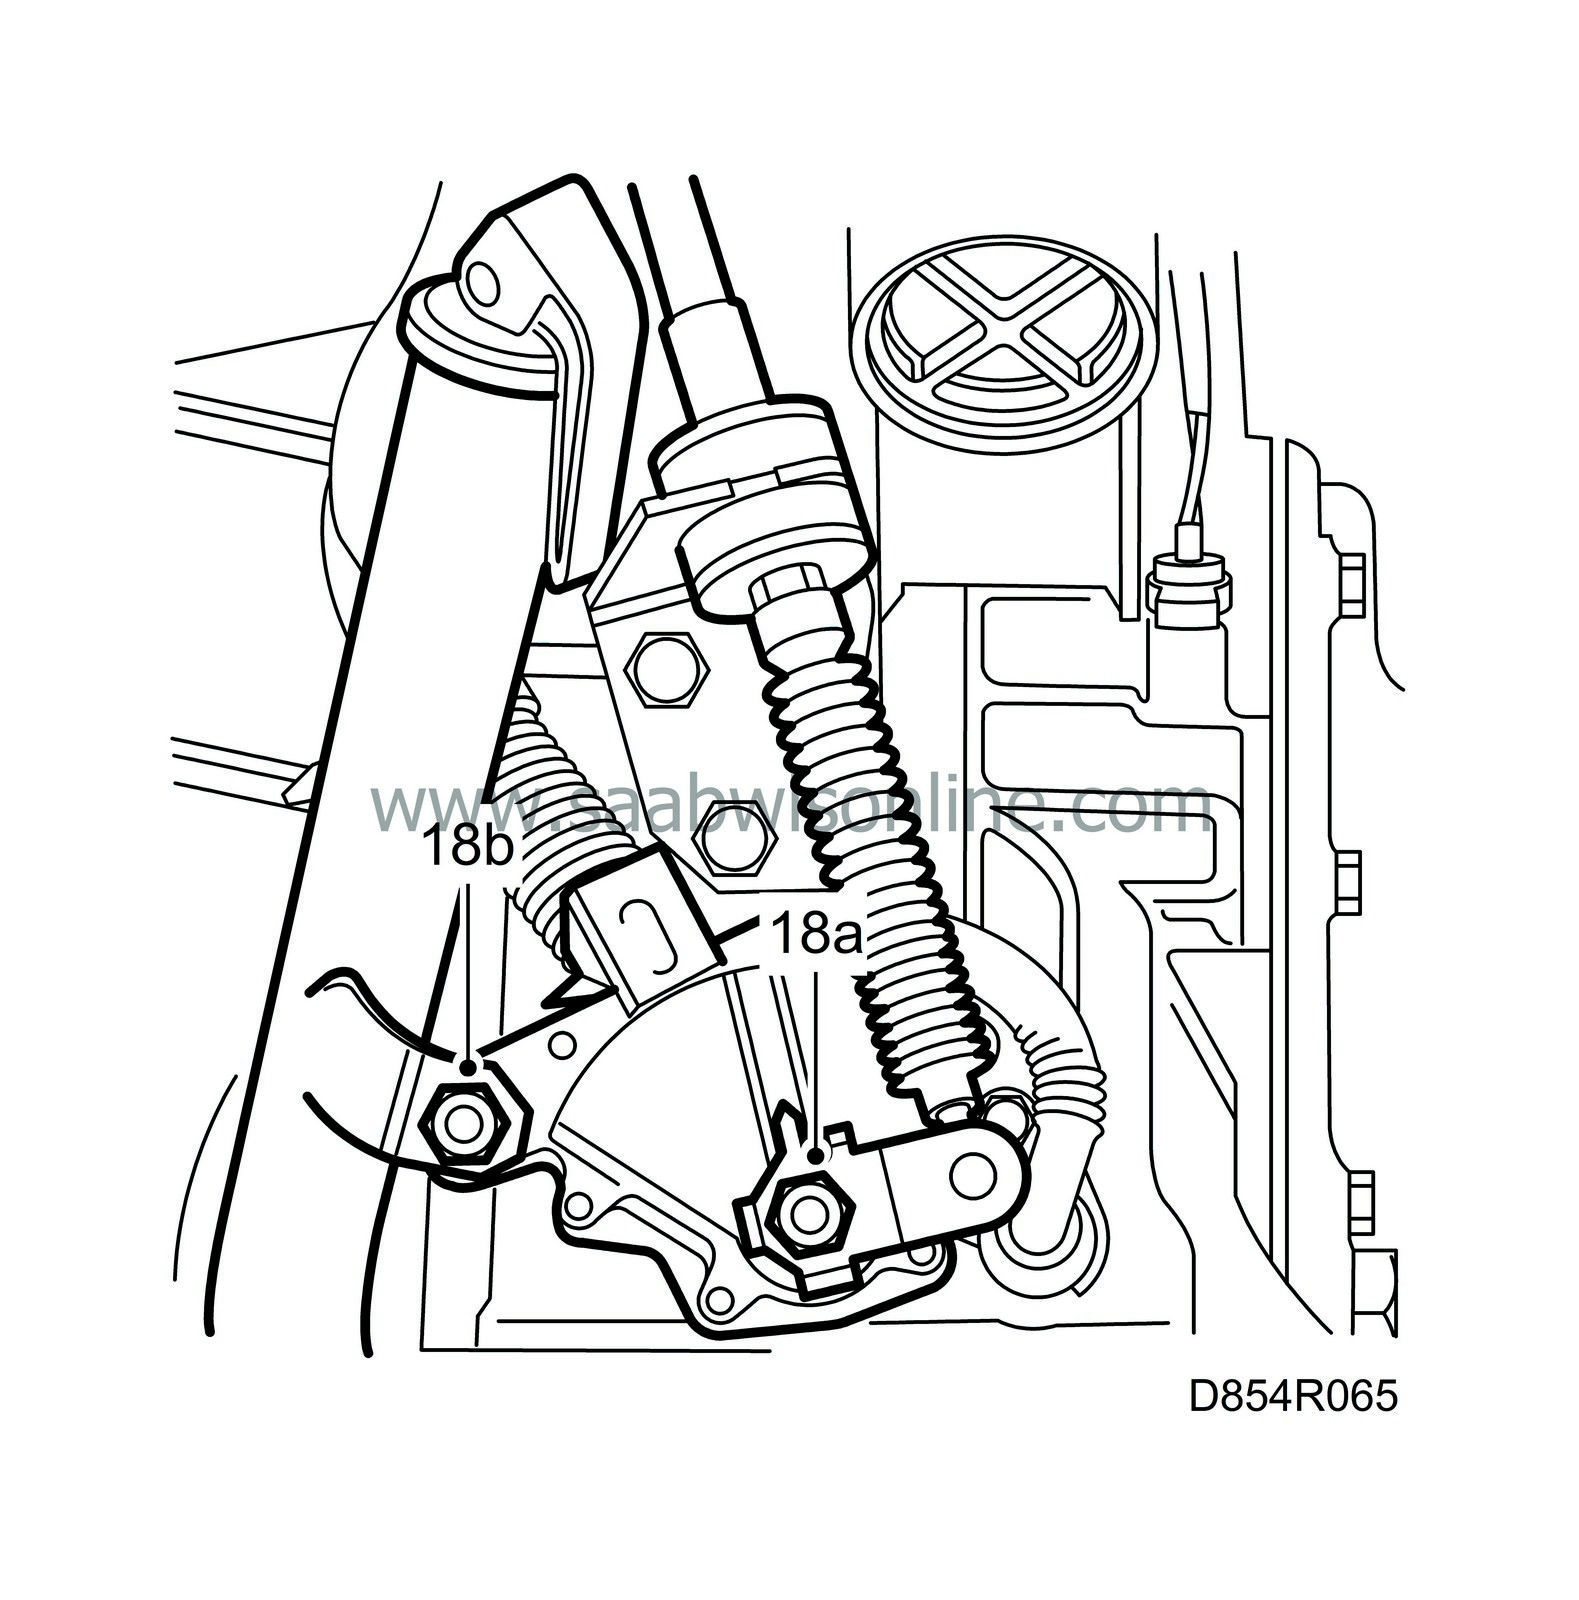
|
|
| 18.a. |
Tighten the nut that secures the gearshift selector to the gearbox.
|
| 18.b. |
Tighten both bolts that secure the gearshift selector console to the gearbox housing.
|
| 19. |
Fit the compressor low-pressure pipe in the holder on the subframe.

|
|
| 20. |
Fit the pipe between the power steering fluid reservoir and the servo pump. Fasten the pipe in the clip and tighten the bolt. Fit the power steering fluid reservoir.
|
|
| 21. |
Refit the main fuse box.

|
|
| 22. |
Tighten the bolt in the console that secures the battery cable holder.
|
|
| 23. |
Refit the battery.
|
|
| 24. |
Cars with turbo:
|
|
| 24.a. |
Refit the hose between the charge air cooler and the throttle body.
|
| 24.b. |
Fit the expansion tank and tighten the bolt.
|
| 25. |
Vacuum pump the A/C system and fill with refrigerant, see
Filling and draining refrigerant with Robinair Smart Cart 10324 Robinair 17234
.
|
|
| 26. |
Refit the grille.
|
|

