Trim, headlining
| Trim, headlining |
| To remove |
|
|||||||

| Note | ||
|
Lift out the headlining through the luggage compartment once it has been detached. |
| 1. |
Remove the sun visors.
|
|
| 2. |
Undo the cover on the rear-view mirror mounting in the roof (fastened with clips).

|
|
| 3. |
Remove the rear-view mirror.

|
|
| 4. |
Cars with sunroof:
Remove the lamp from the motor console (fastened with 2 clips) and disconnect the bulb from the connector.
|
|
| 5. |
Cars with sunroof:
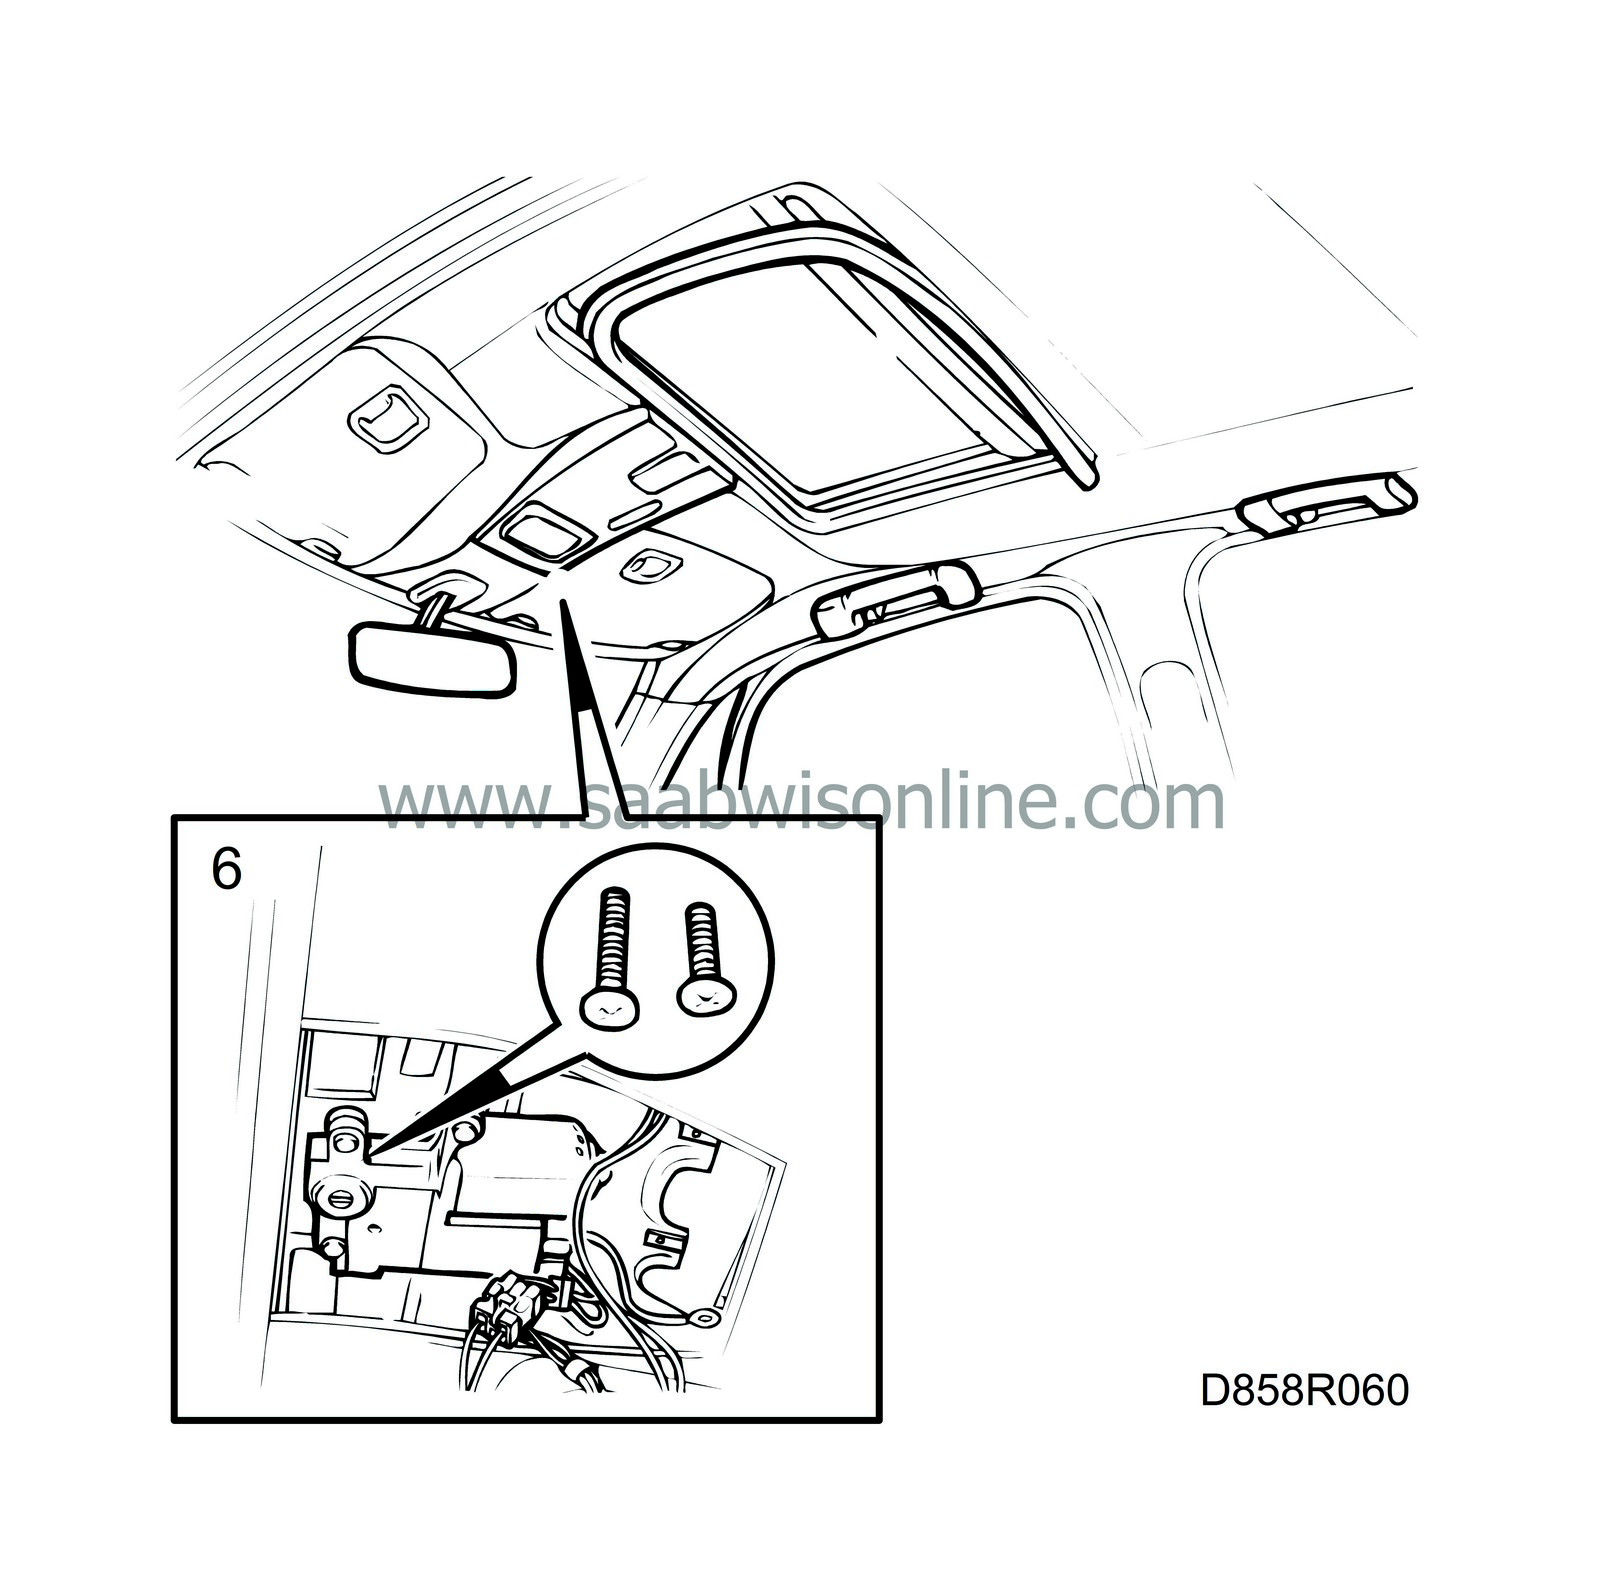
Undo the console retaining screws and pull it off.
|
|
| 6. |
Cars with sunroof:
Loosen the strip around the roof hatch. Unplug the sunroof motor connector.

|
|
| 7. |
Undo the console for the interior lighting.
|
|
| 8. |
Undo the door weather seals on the A-pillars.

|
|
| 9. |
Pull off the A-pillar trim (fastened with clips).
|
|
| 10. |
Remove the courtesy handle.

|
|
| 11. |
3-door:
Remove the B-pillar trim, see
Trim, B-pillar, 3D.
|
|
| 12. |
5-door:
Remove the left B-pillar upper, inner trim (fastened with clips).
|
|
| 13. |
5-door:
Remove the top clip from the left B-pillar upper, outer trim.
|
|
| 14. |
5-door:
Remove the right B-pillar trim, see
Trim, B-pillar, 5D.
|
|
| 15. |
Remove the C-pillar trim, see
Trim, C-pillar.

|
|
| 16. |
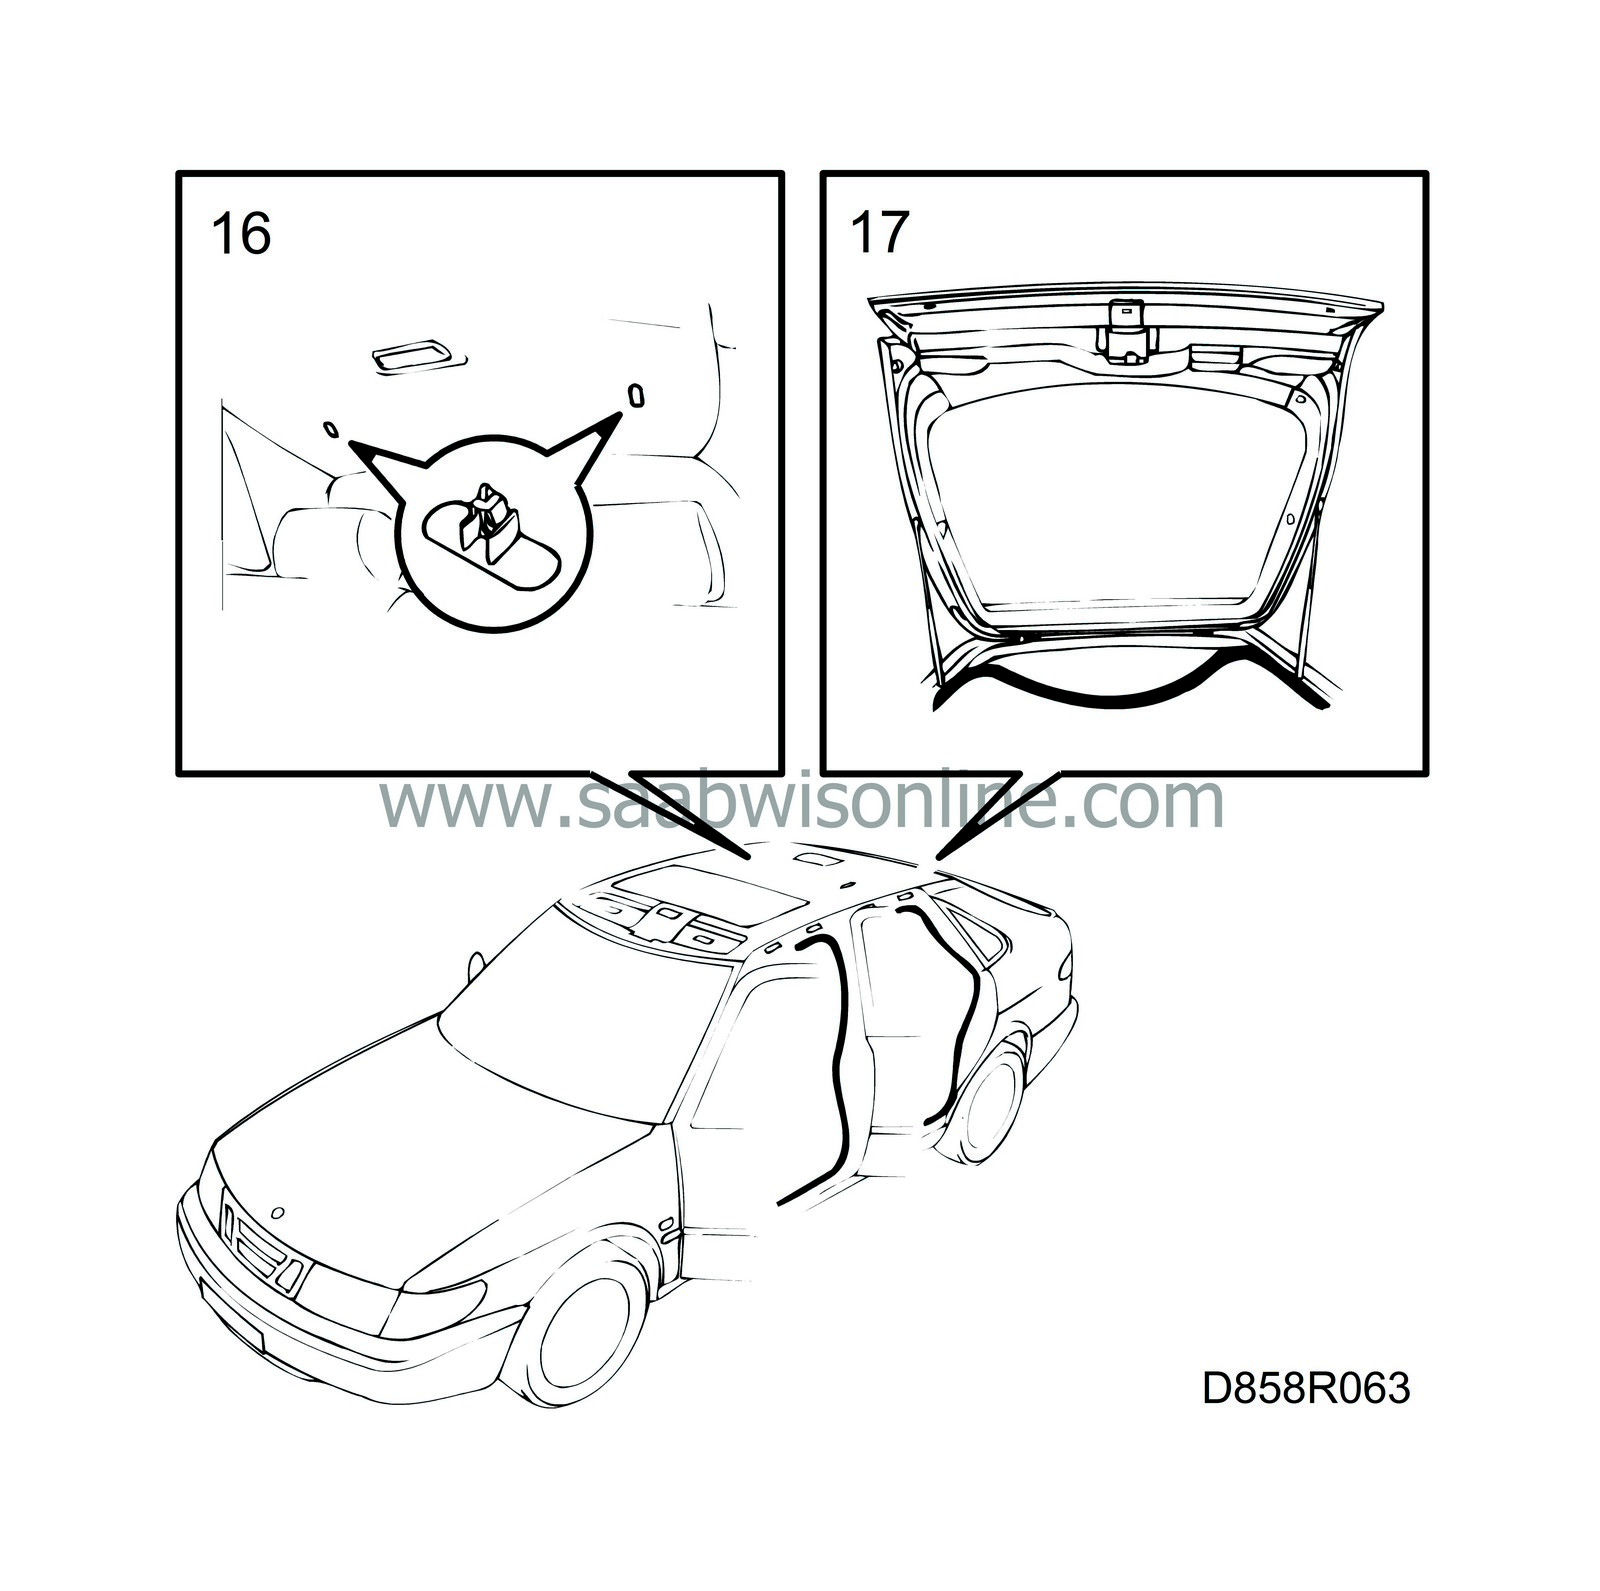
Undo the fastening clips at the back of the headlining. Turn the clip 90°.
|
|
| 17. |
Undo the door weatherstrip securing the headlining.
|
|
| 18. |
Fold down the headlining.
|
|
| 19. |
Detach the wiring harness from the headlining (fixed with tape).
|
|
| 20. |
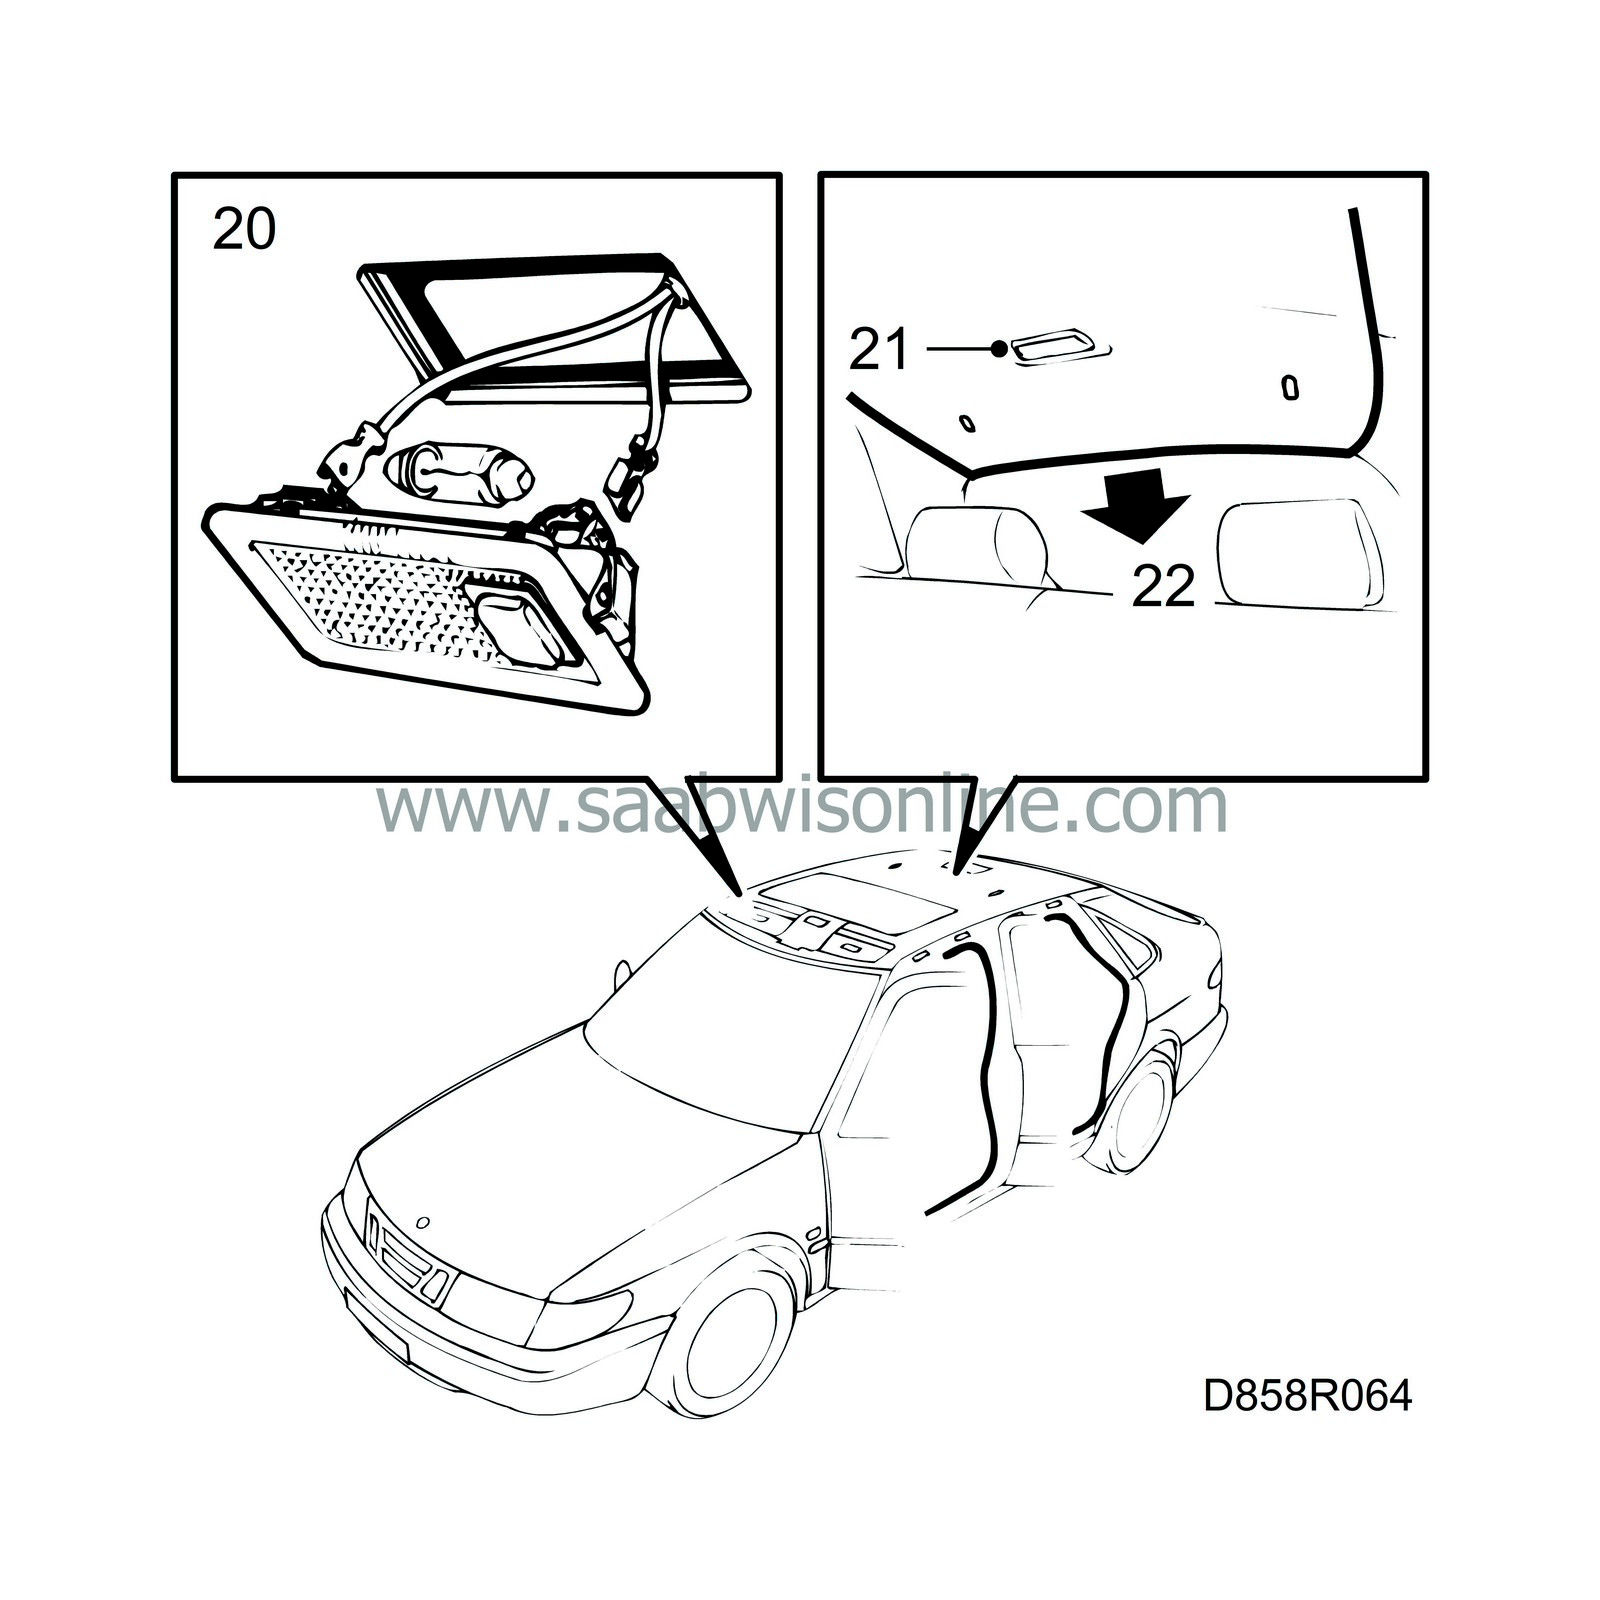
Unplug the connectors to the reading lamps above the front seats.

|
|
| 21. |
Unplug the connector for the rear reading lamp.
|
|
| 22. |
Lift out the headlining through the luggage compartment.
|
|
| To fit |
|
|||||||

Fit in reverse order.
Tightening torque, seat-belt adjuster screws: 24 Nm (18 lbf ft).
Fit the head guards where applicable. It is essential to keep to the dimensions shown in the illustration and that the rear guards are fitted parallel to the side of the roof.
In the event of fitting problems, the pads can be fastened to the roof as shown in the diagram and the headlining then fitted in the usual way.


 Warning

