Removing the power train
| Removing the power train |
| To remove |
|
||||||||||
| 1. |
Put the car on a lift and place covers on the wings.
|
|
| 2. |
Open the expansion tank cap.
|
|
| 3. |
Raise the car slightly and remove the front wheels.
|
|
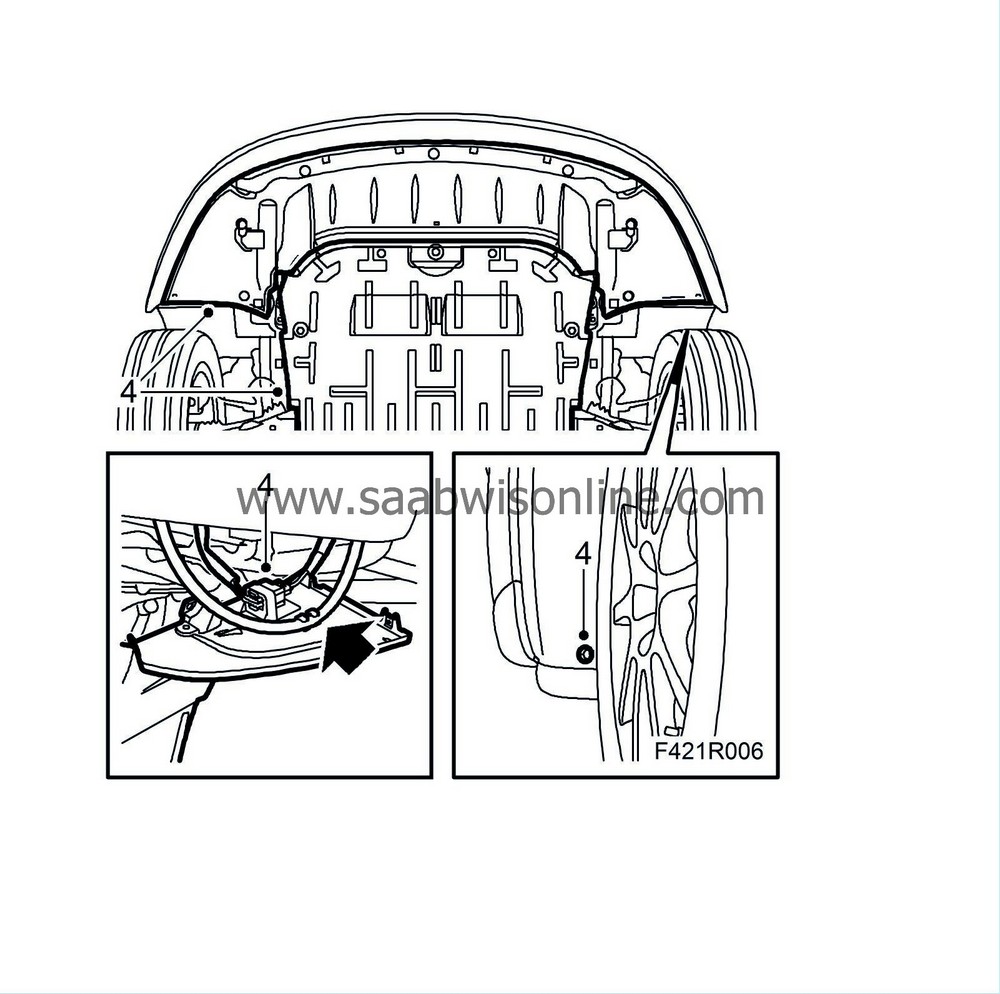
| 4. |
Raise the car and remove the lower engine cover and front spoiler shield. Disconnect the headlight washer hose and unplug and remove the connector.
|
|
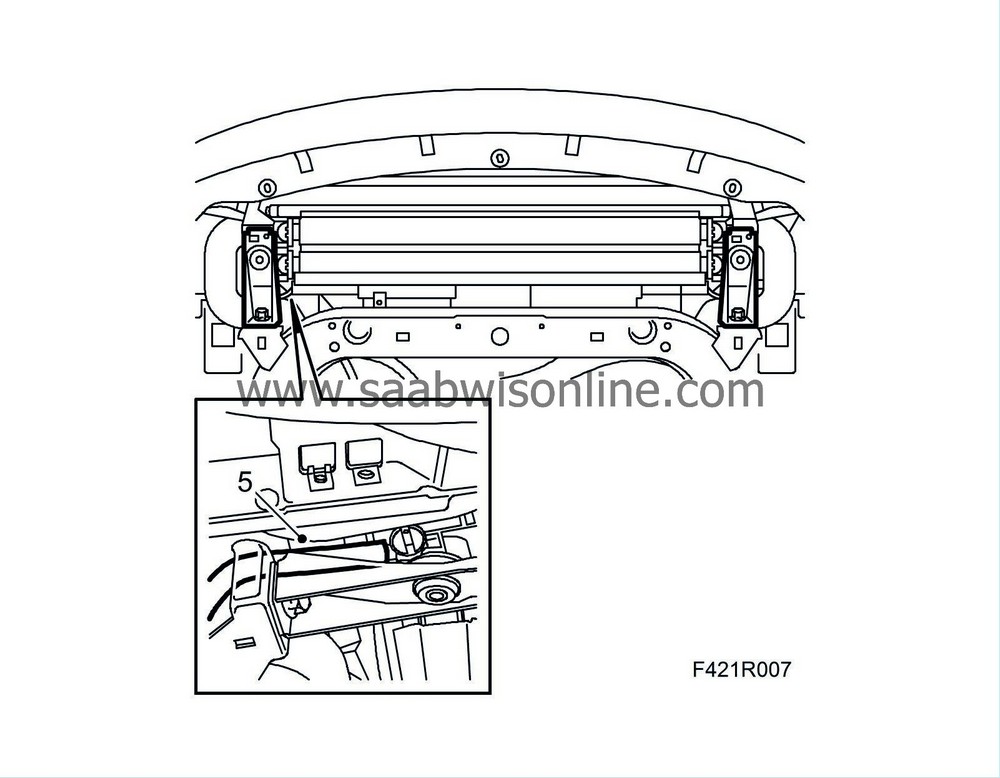
| 5. |
Place a suitable receptacle under the car. Connect a hose to the radiator and drain the coolant.
|
|
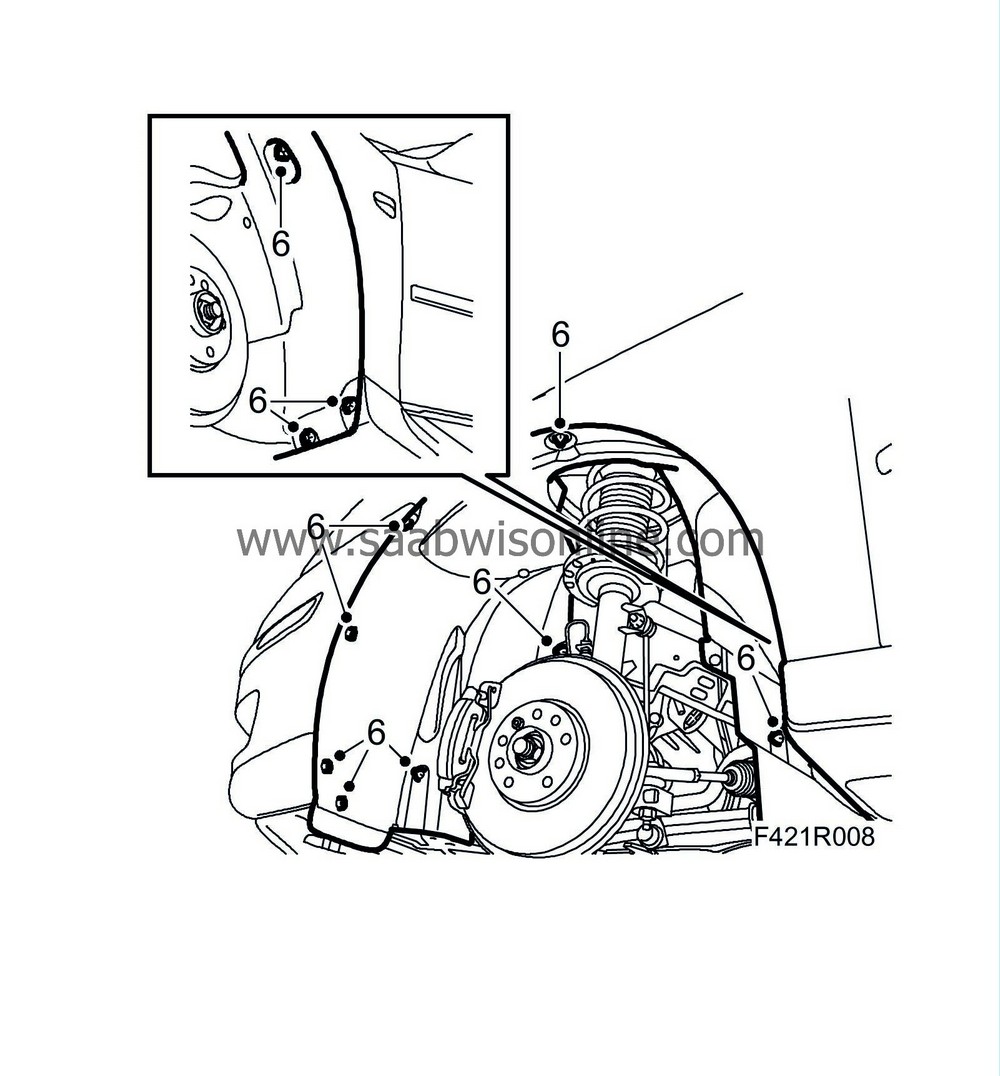
| 6. |
Remove the wing liners from both front wheel housings.
|
|
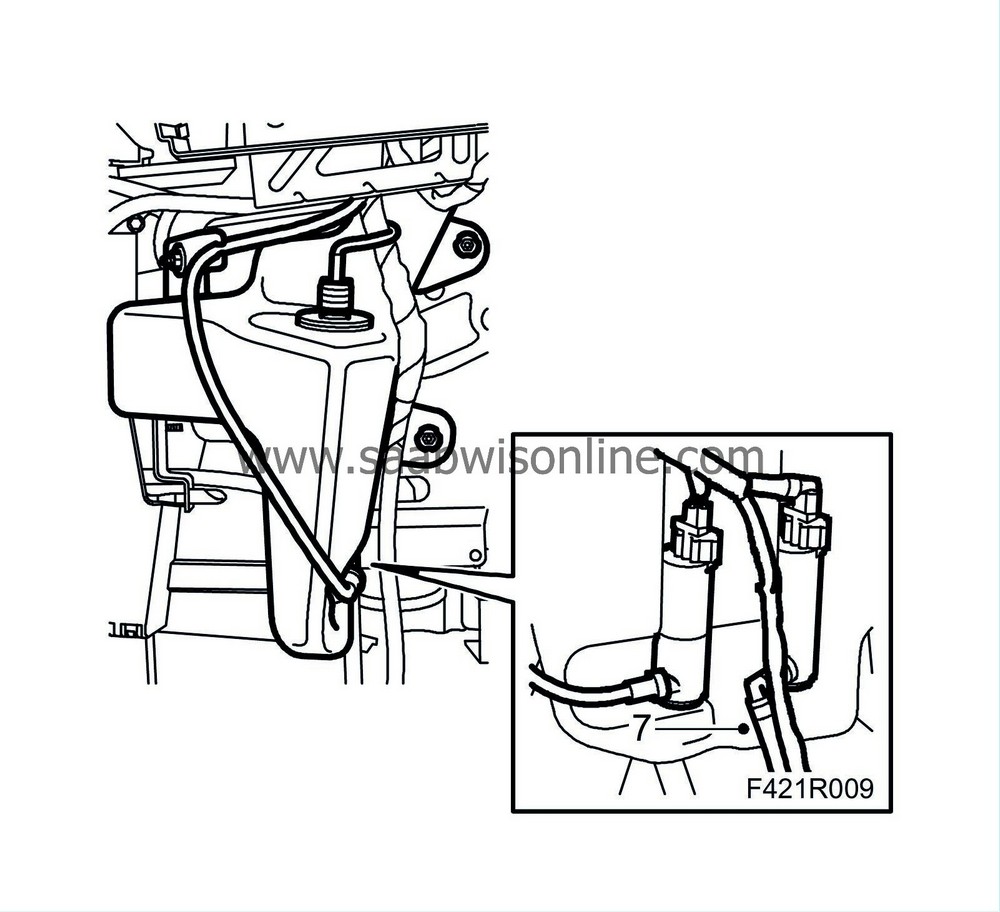
| 7. |
Disconnect the headlight washer fluid hose and drain the washer fluid reservoir.
|
|
| 8. |
Lower the car slightly and remove the bumper.
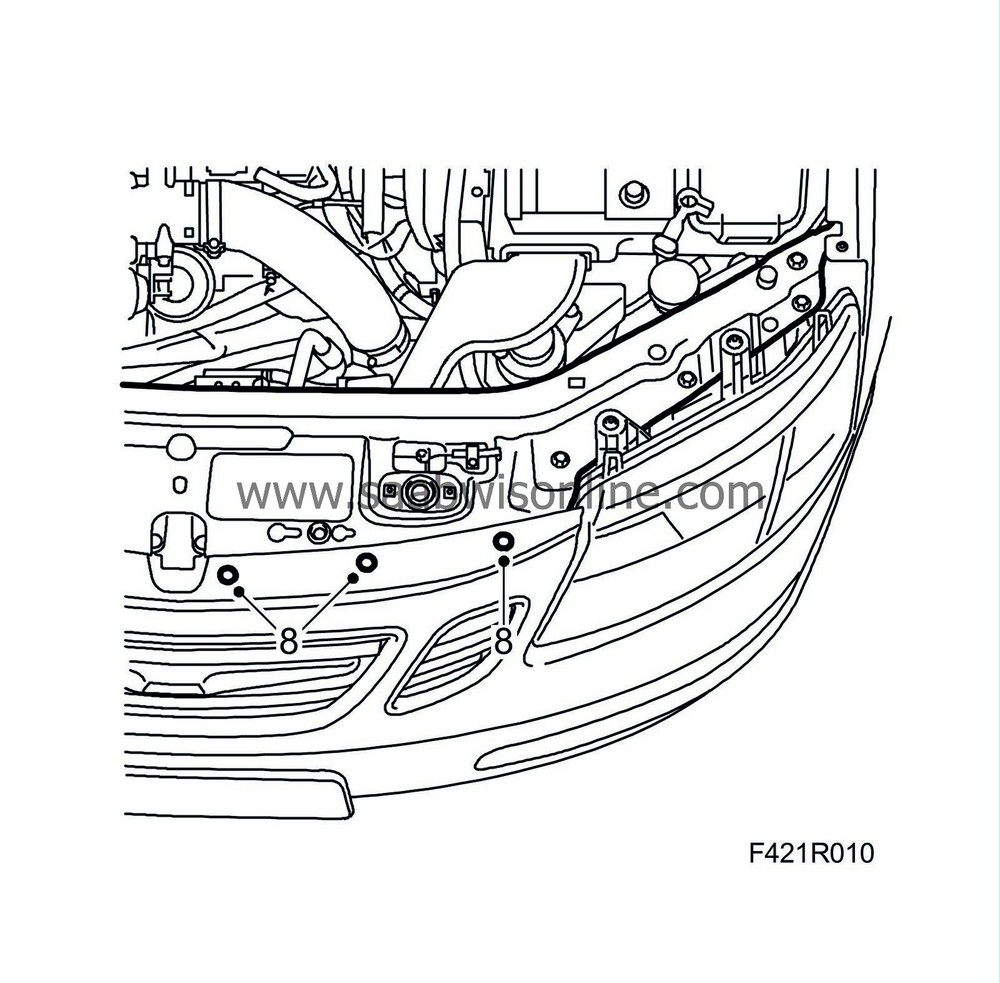
|
|
| 9. |
Remove the cover from the left-hand side and the charge air hose from between the charge air pipe and charge air cooler.
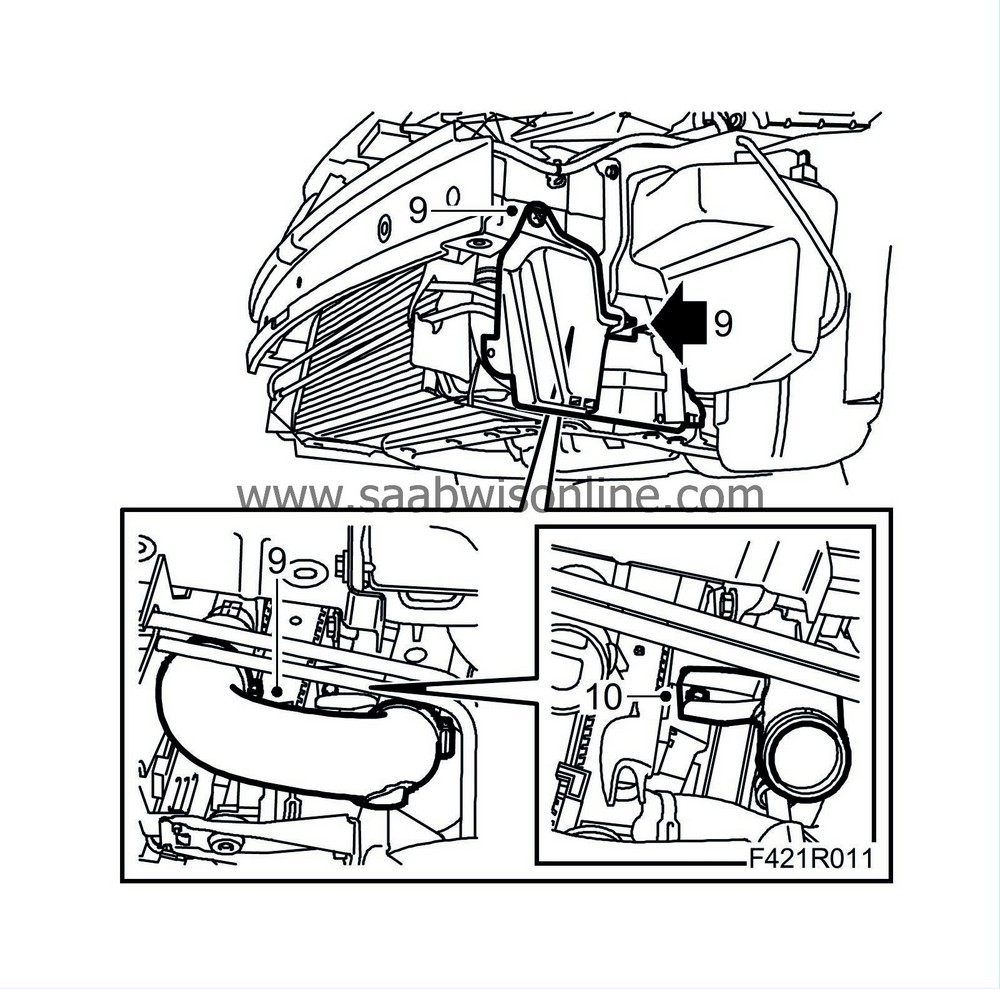
|
|
| 10. |
Detach the lower charge air pipe mounting from the fan cowling.
|
|
| 11. |
Remove the cover from the right-hand side and the hose from between the charge air cooler and charge air pipe.
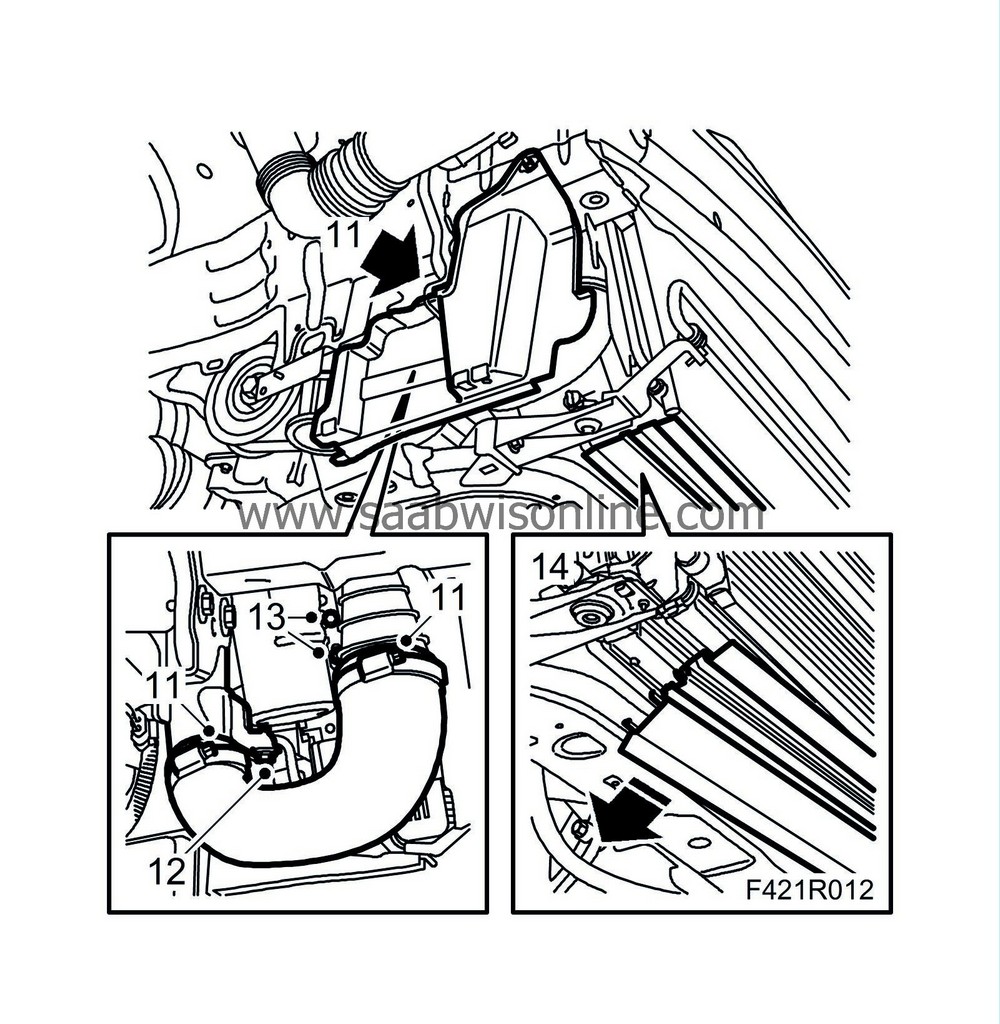
|
|
| 12. |
Remove the lower bolt from the charge air pipe and the bracket from the radiator.
|
|
| 13. |
Remove the bolts securing the receiver drier to the radiator.
|
|
| 14. |
Remove the lower seal from between the charge air cooler and radiator.
|
|
| 15. |
Lower the car and remove the upper engine cover.
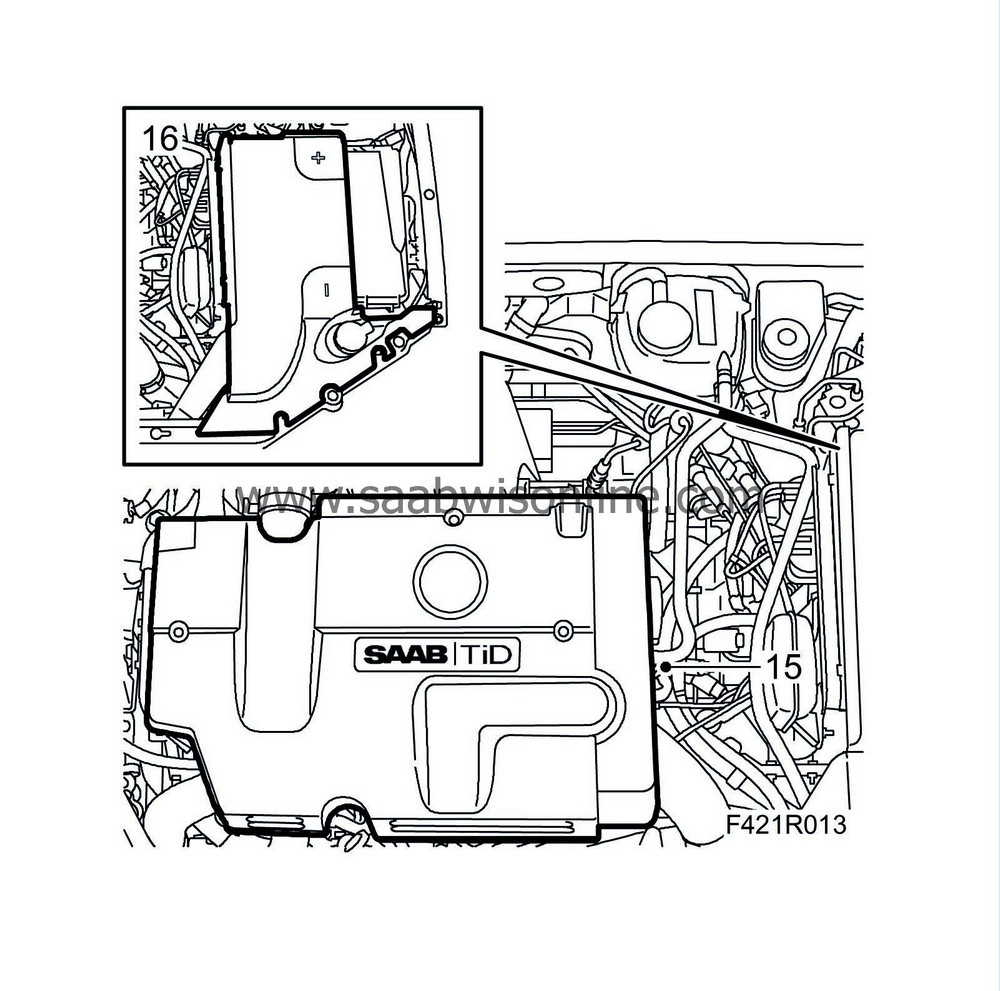
|
|
| 16. |
Remove the battery cover and the battery cooler pipe.
|
|
| 17. |
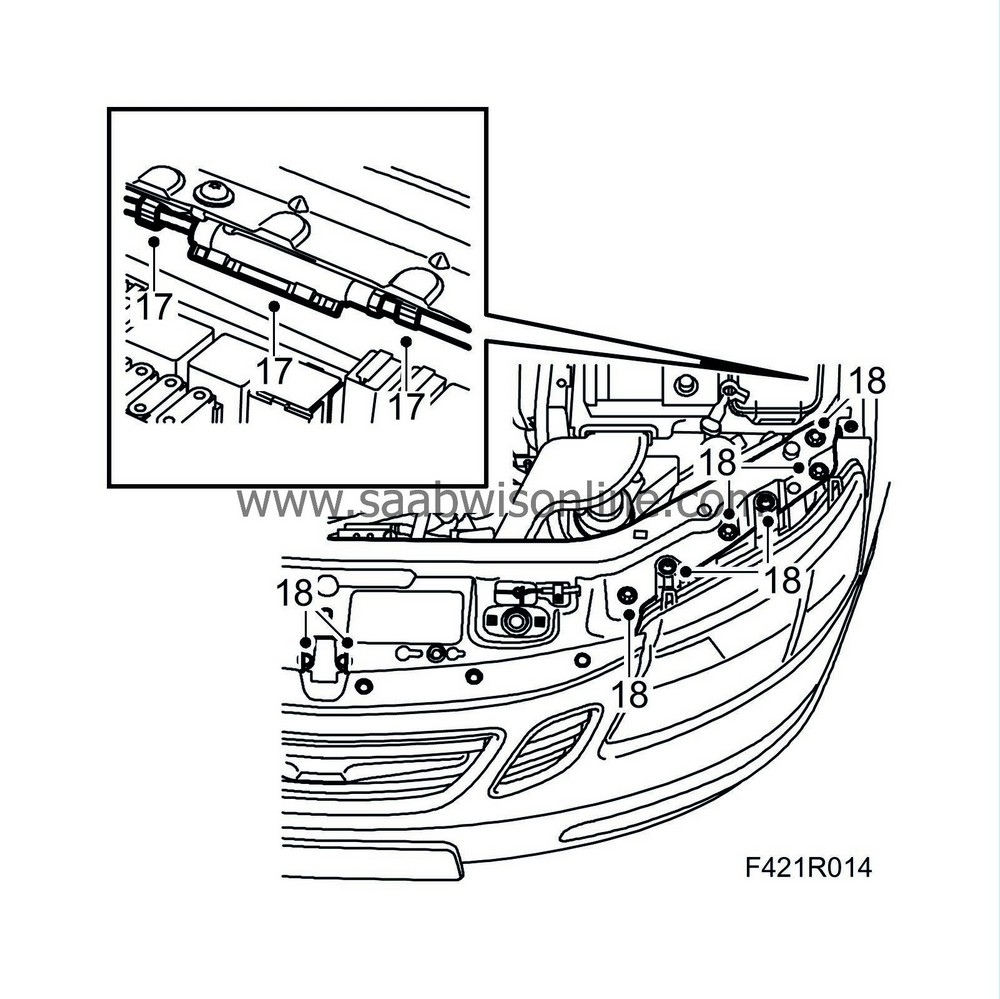
Disconnect the quick coupling on the bonnet cable by first undoing the clips on the body and then parting the quick coupling. Use a screwdriver.
|
|
| 18. |
Remove the upper radiator crossmember.
|
|
| 19. |
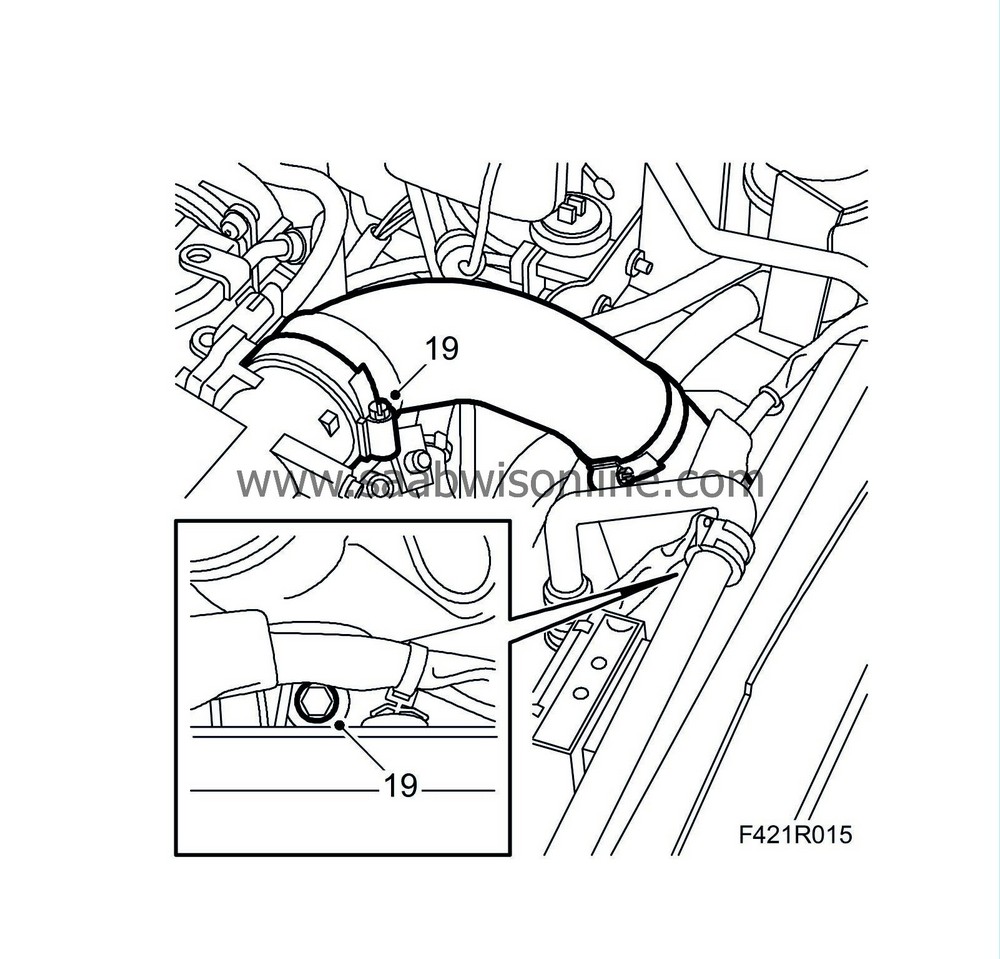
Disconnect the charge air hose from the throttle body and undo the upper mounting holding the charge air pipe to the radiator. Remove the pipe and hose.
|
|
| 20. |
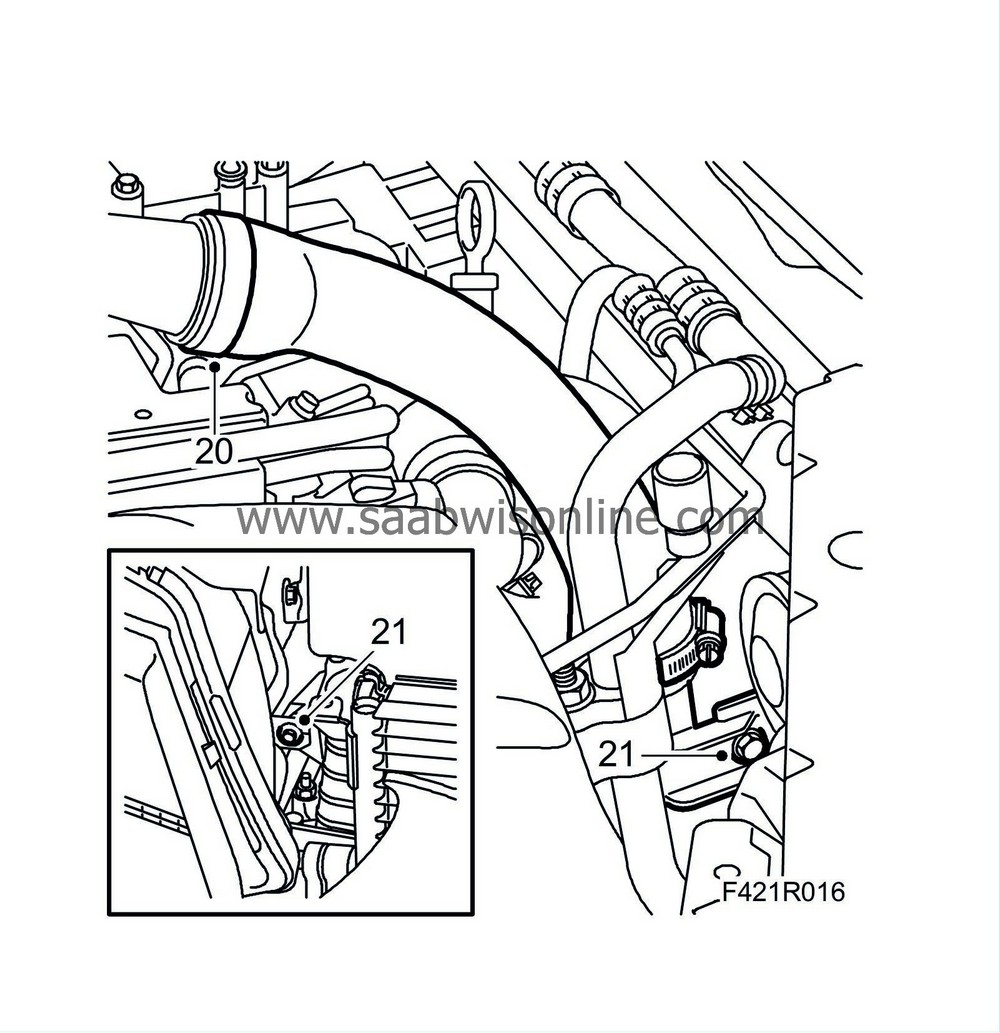
Disconnect the charge air hose from the charge air pipe on the camshaft cover and bend aside the hose.
|
|
| 21. |
Remove the charge air pipe stay and mounting from the radiator. Remove the pipe and hose.
|
|
| 22. |
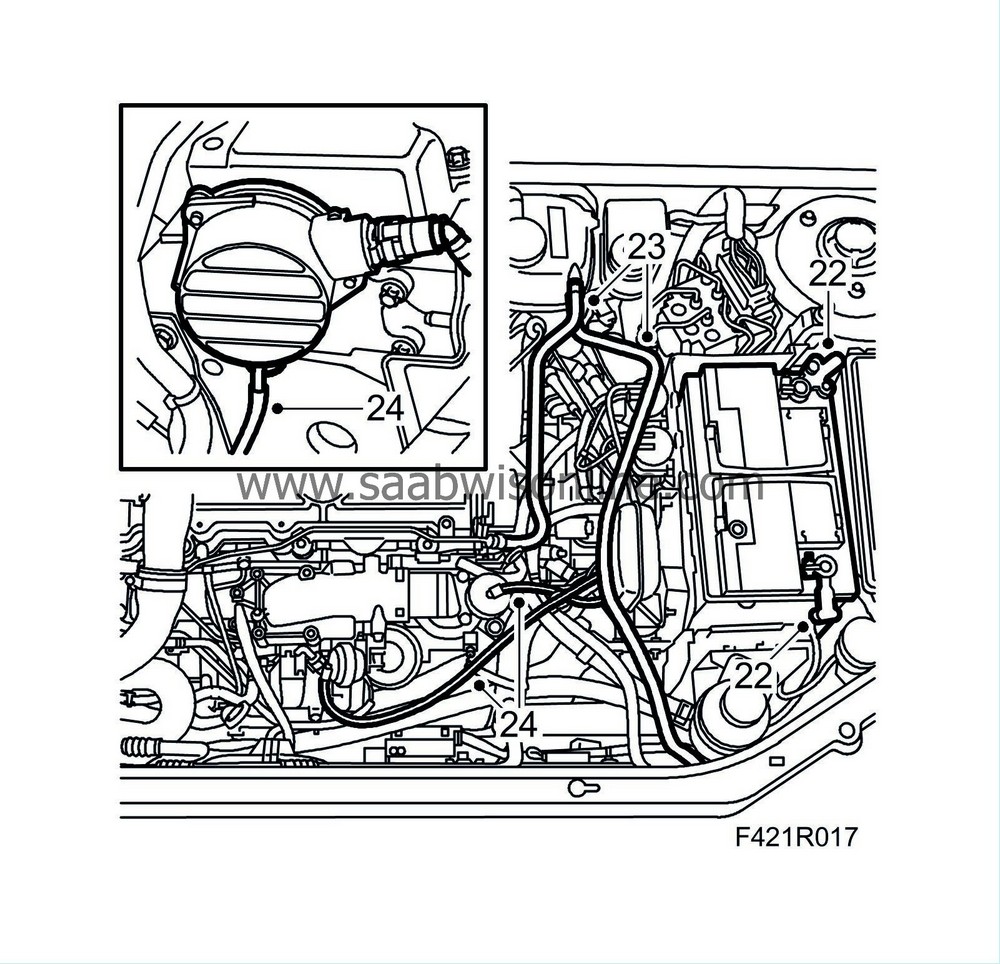
Remove the battery.
|
|
| 23. |
Remove the bleeder hose from the radiator and the pipe from the cylinder head. Bend aside the hose.
|
|
| 24. |
Mark and disconnect the vacuum hoses from the swirl throttle, throttle body, plastic pipe to the vacuum valve, and vacuum pump. Remove the connectors from the cover.
|
|
| 25. |
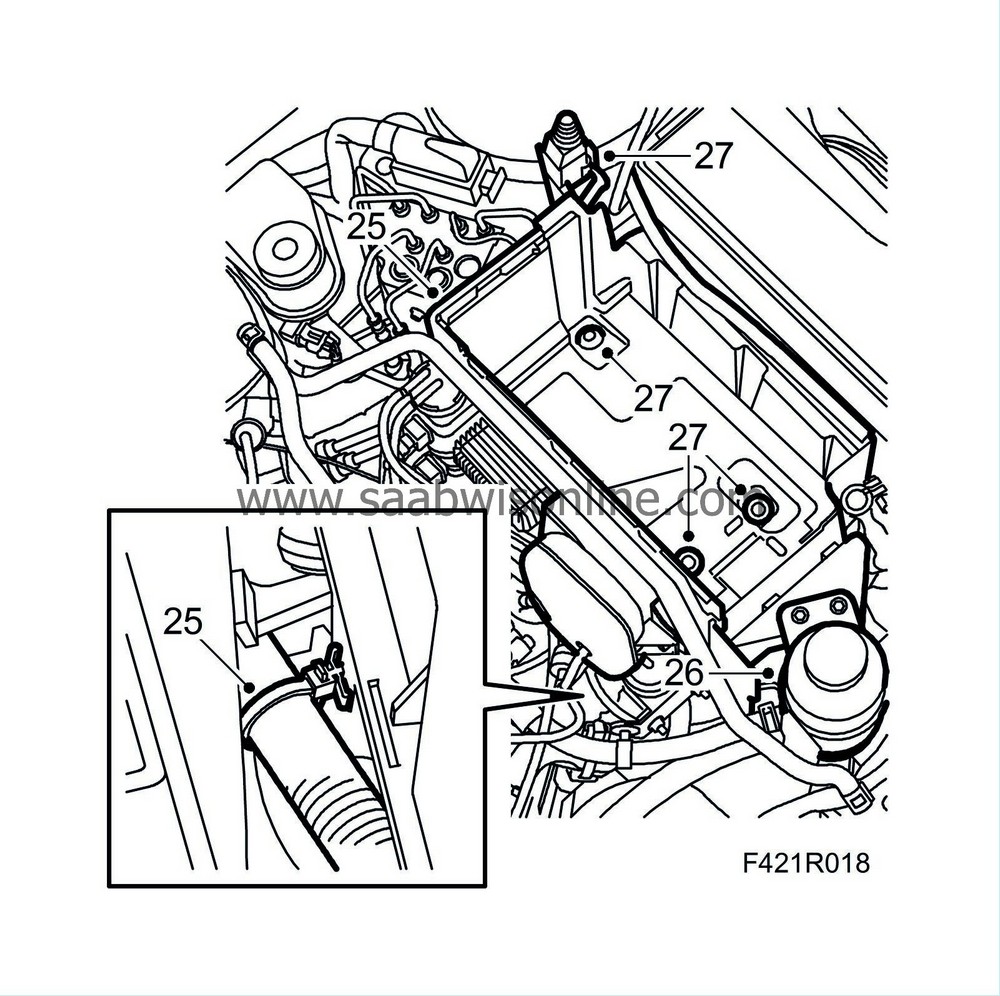
Remove the cover and vacuum tank, etc., and bend aside the hoses.
|
|
| 26. |
Press in the catch and remove the power steering fluid reservoir and bracket.
|
|
| 27. |
Unplug the bonnet switch connector and remove the battery tray.
|
|
| 28. |
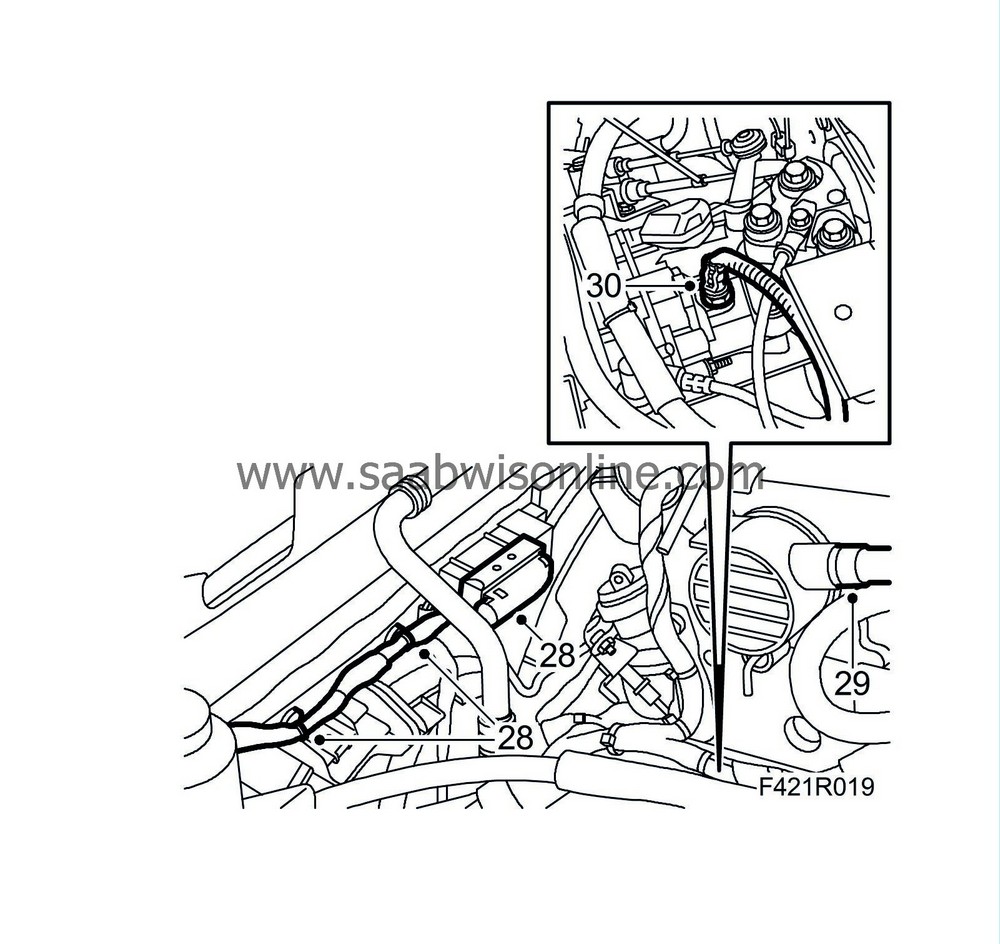
Undo the connector and clips that hold the wiring to the fan cowling.
|
|
| 29. |
Disconnect the hose with a quick coupling from the vacuum pump.
|
|
| 30. |
Unplug the reversing light switch connector.
|
|
| 31. |
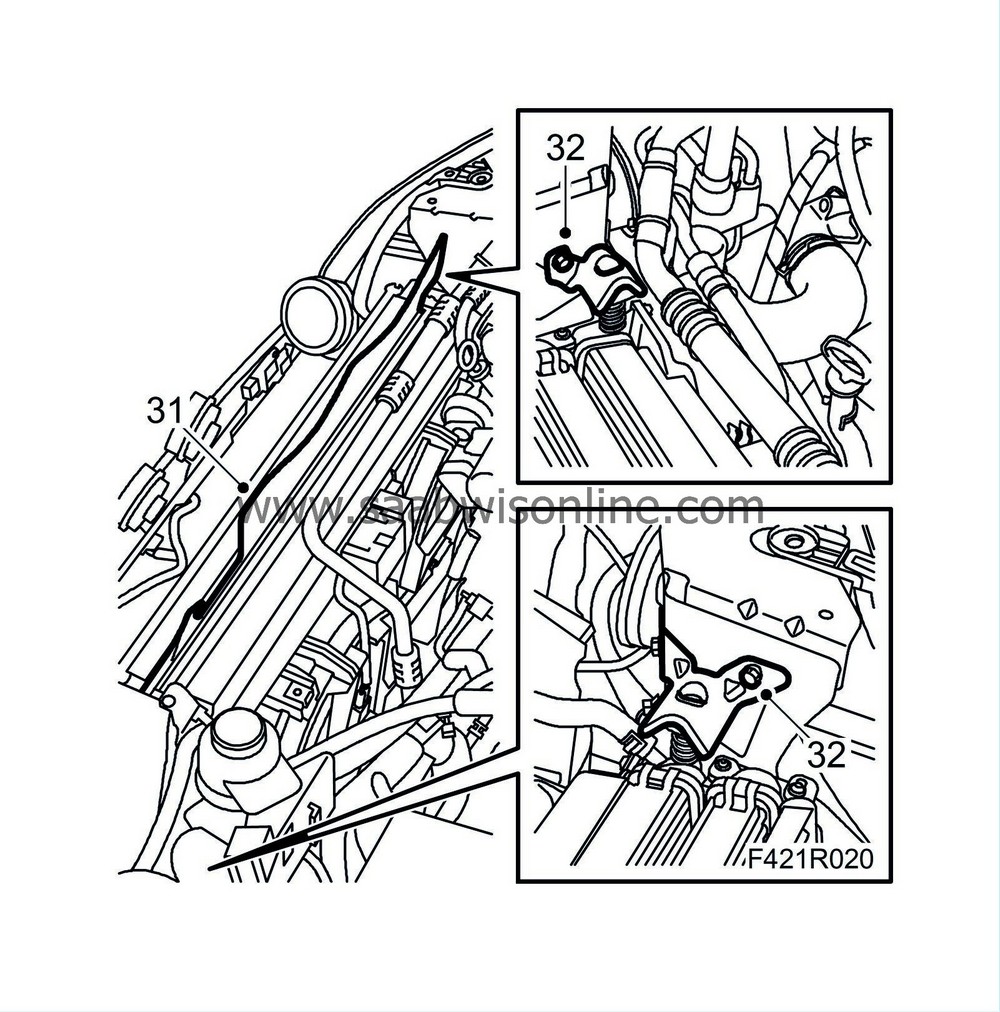
Remove the seal from over the radiator assembly.
|
|
| 32. |
Remove the upper radiator mountings from the body.
|
|
| 33. |
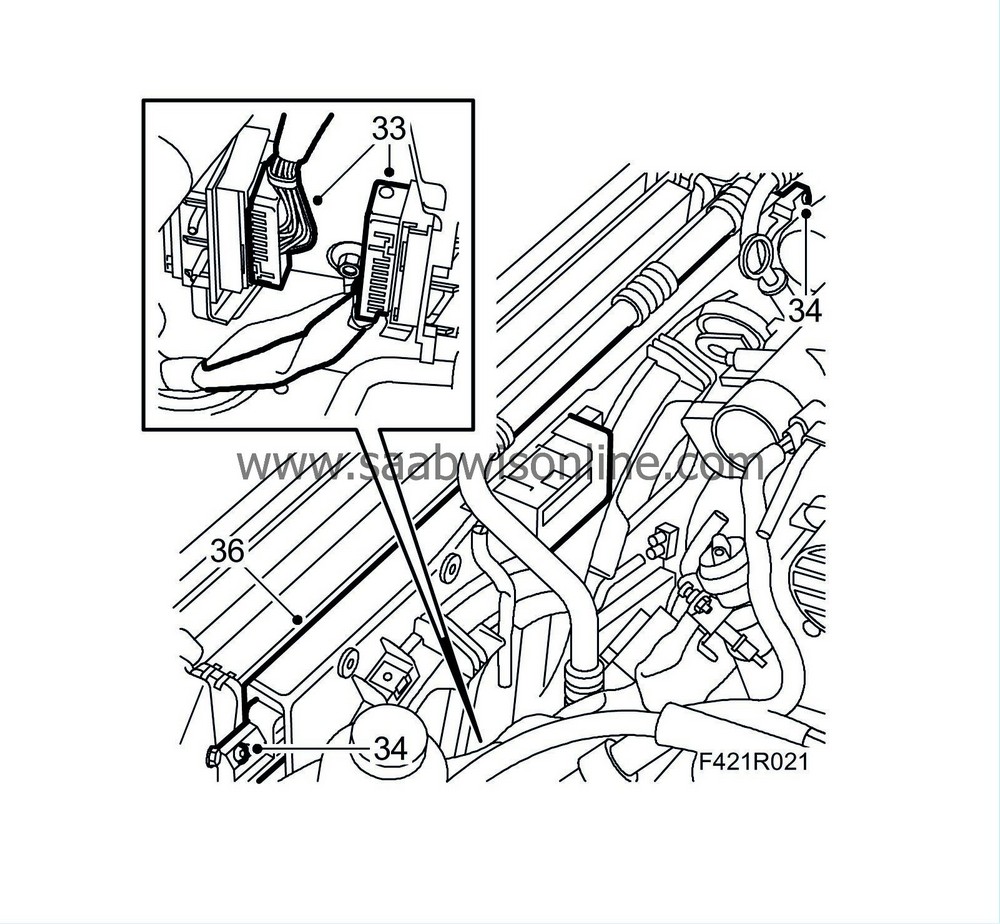
Detach the two connectors from the left-hand structural member.
|
|
| 34. |
Remove the bolts retaining the fan cowling and loosen the cowling slightly.
|
|
| 35. |
Attach the condenser and charge air cooler to the body using cable ties.
|
|
| 36. |
Remove the fan cowling.
|
|
| 37. |
Remove the lower coolant hose.
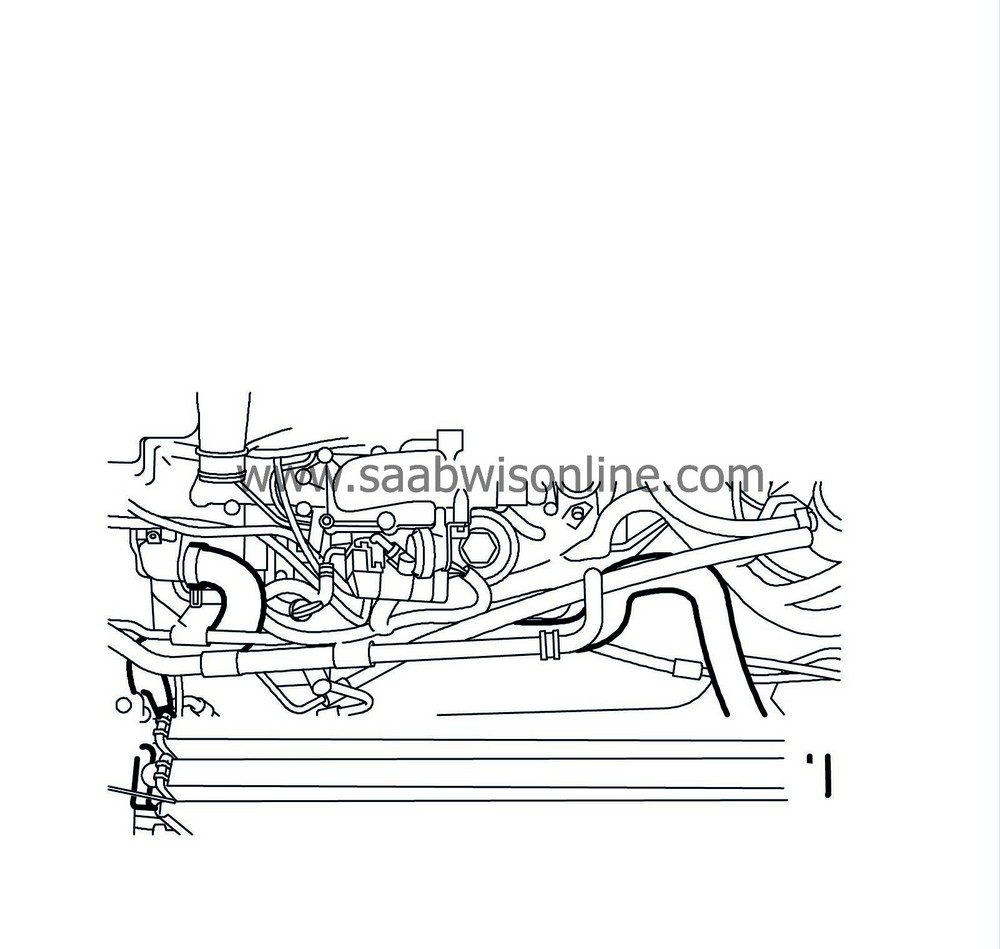
|
|
| 38. |
Remove the upper coolant hose from the thermostat housing.
|
|
| 39. |
Remove the bolts securing the radiator.
|
|
| 40. |
Carefully detach the A/C pipe from the clasp on the right-hand structural member.
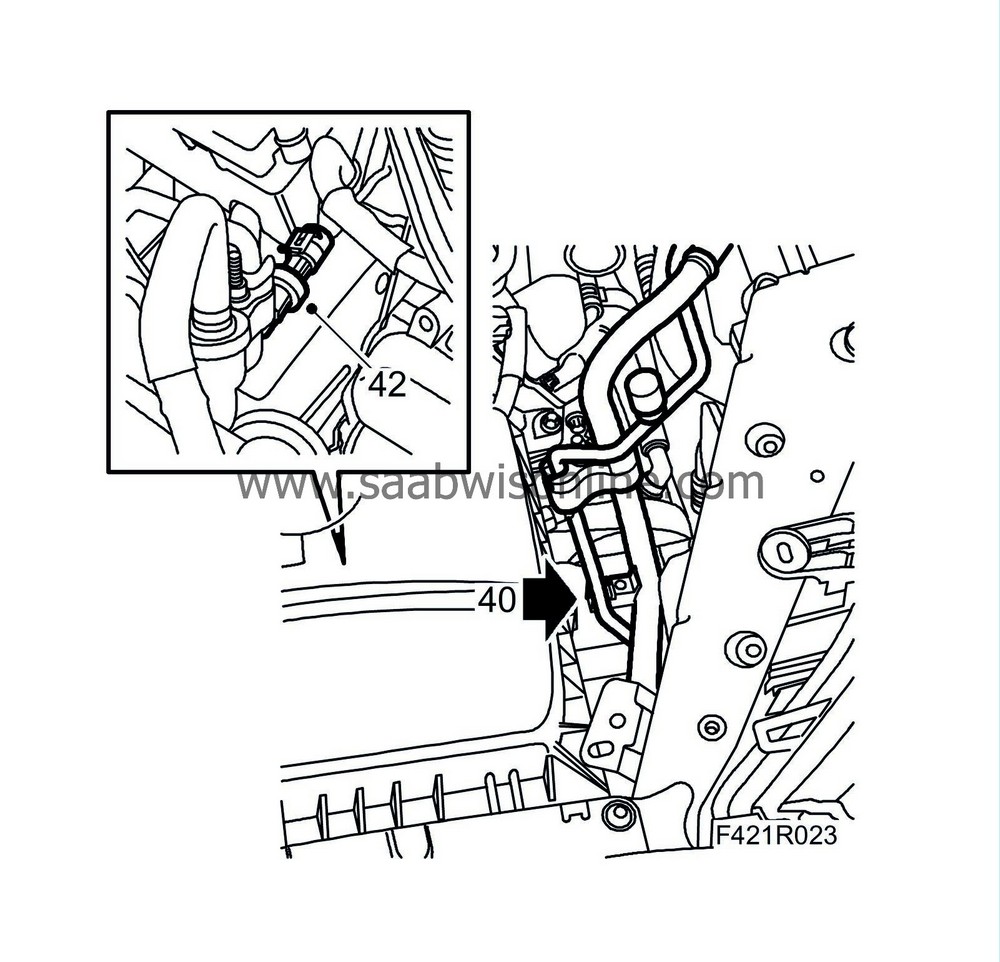
|
|
| 41. |
Remove the radiator.
|
|
| 42. |
Unplug the connector for the A/C pressure sensor.
|
|
| 43. |
Remove the turbocharger intake pipe, detach the crankcase ventilation hose and unplug the mass air flow sensor.
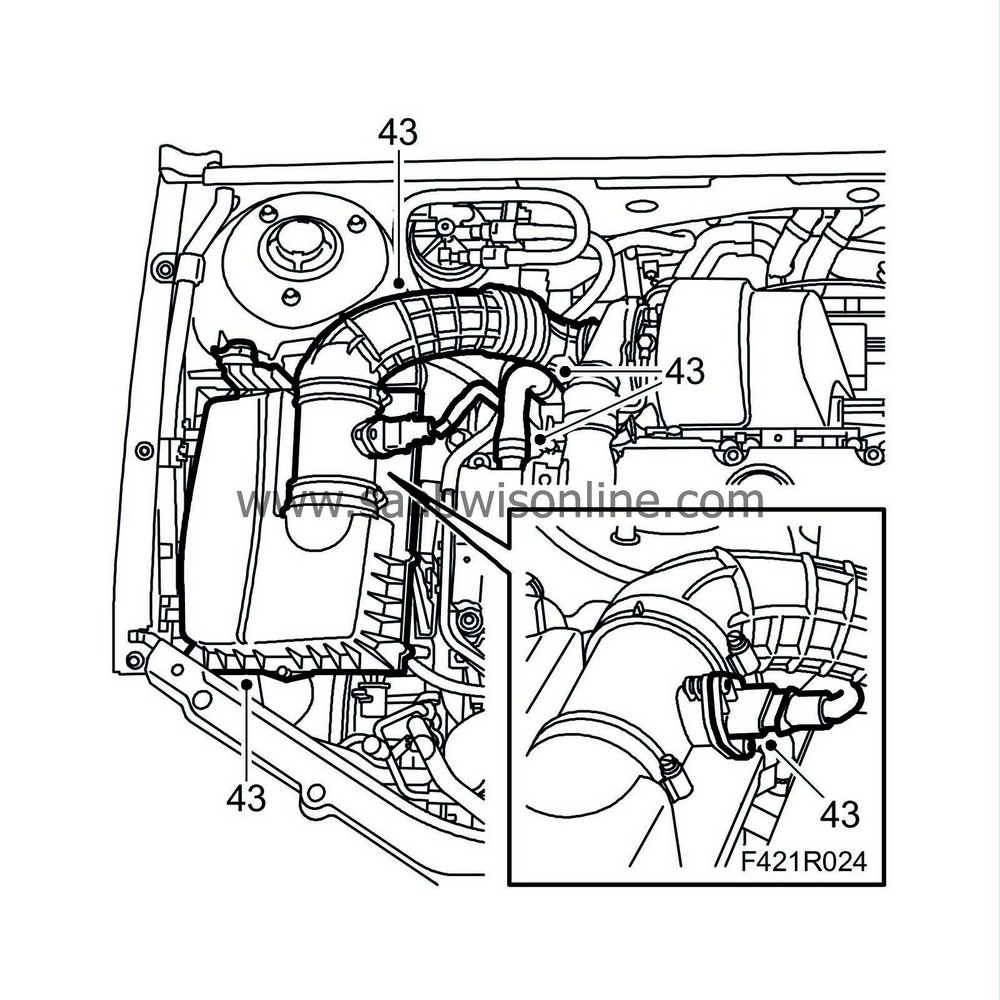
|
|
| 44. |
Remove the air cleaner casing lid and the air filter. Detach the intake hose and remove the air cleaner casing.
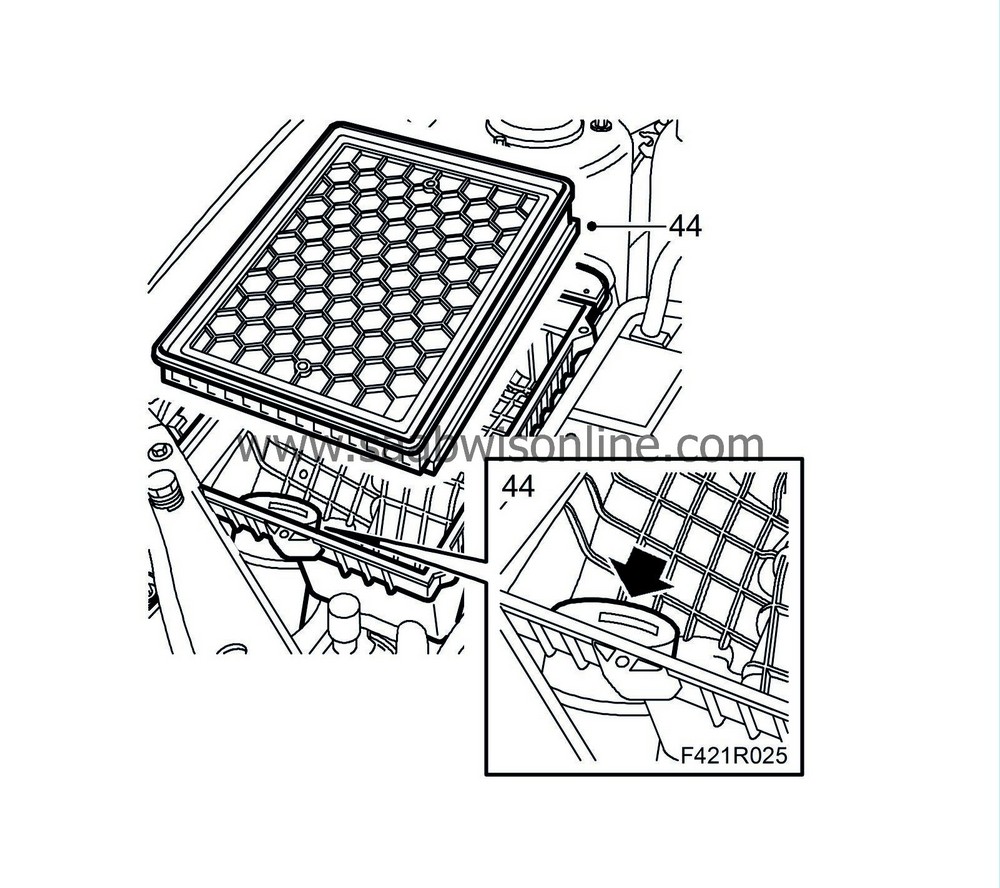
|
|
| 45. |
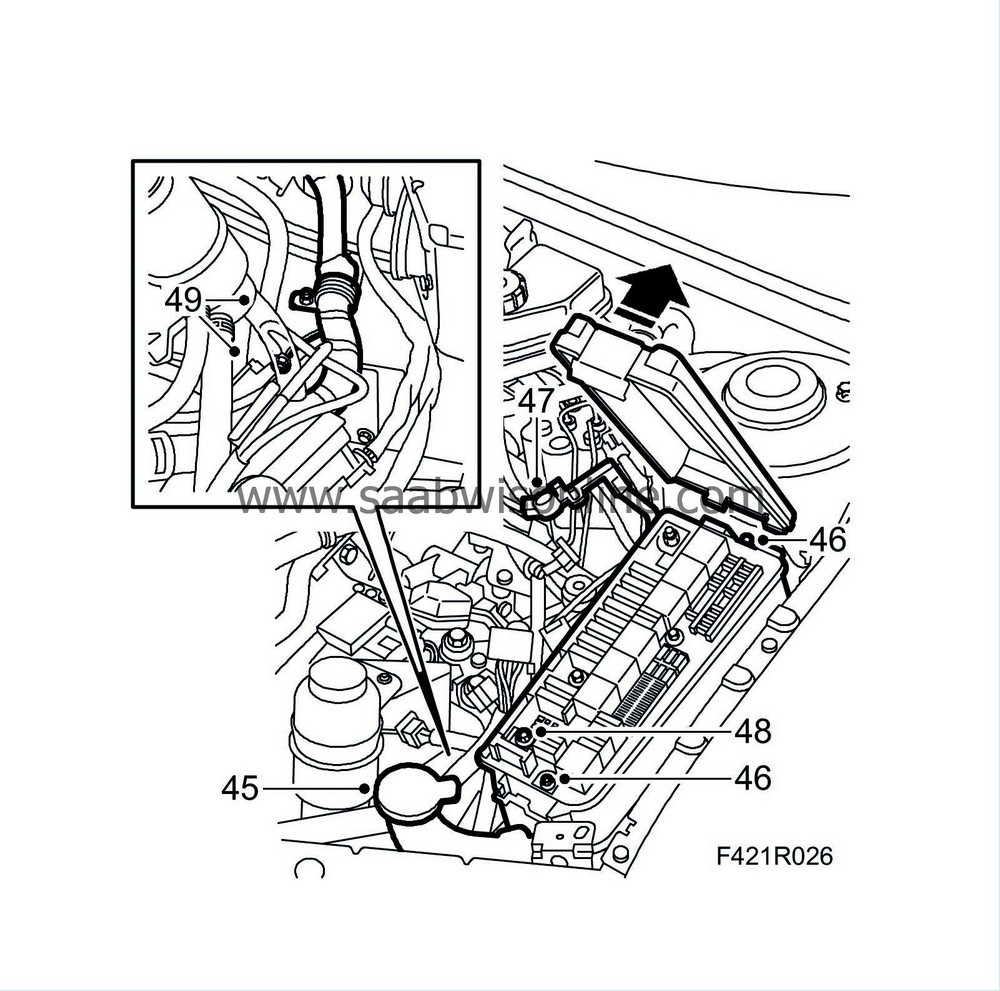
Remove the windscreen washer fluid filler pipe.
|
|
| 46. |
Remove the lid from the electrical centre and the two retaining bolts.
|
|
| 47. |
Remove the positive cable from the battery's positive terminal.
|
|
| 48. |
Undo the screw securing the engine wiring harness connector in the electrical centre.
|
|
| 49. |
Remove the clamp securing the engine wiring harness from the body and the ground cables.
|
|
| 50. |
Raise the engine wiring harness, power steering fluid reservoir, etc. and secure these to the engine lifting eye with
83 95 212 Strap
, for example.
|
|
| 51. |
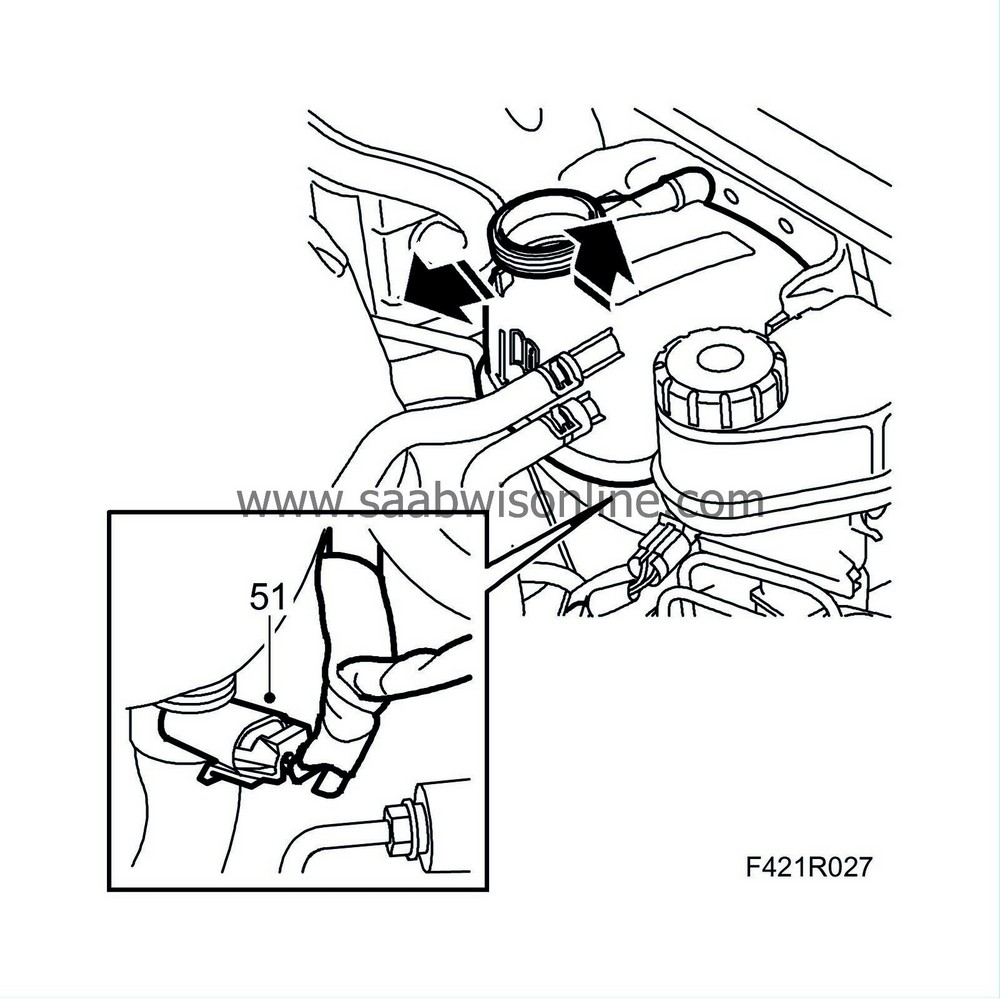
Unplug the connector from the coolant level switch. Remove the expansion tank from the body and secure it to the engine along with the power steering fluid reservoir. Use
83 95 212 Strap
.
|
|
| 52. |
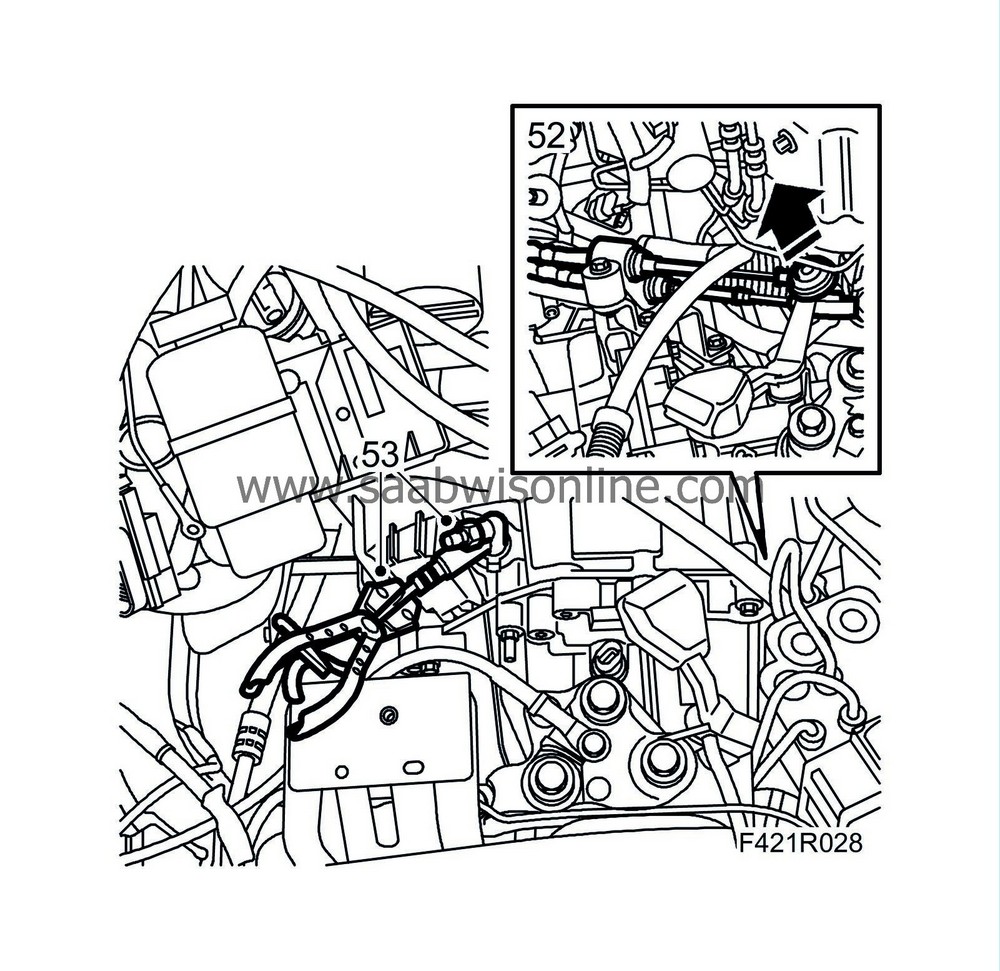
Remove the gear cables from the gearbox. Carefully bend the cables aside and secure them to the expansion tank bracket on the body using a cable tie.
|
|
| 53. |
Attach
30 07 739 Hose pinch-off pliers
to the clutch hose and disconnect the quick coupling from the clutch's slave cylinder.
|
|||||||||||||||||||||||||||||||||
| 54. |
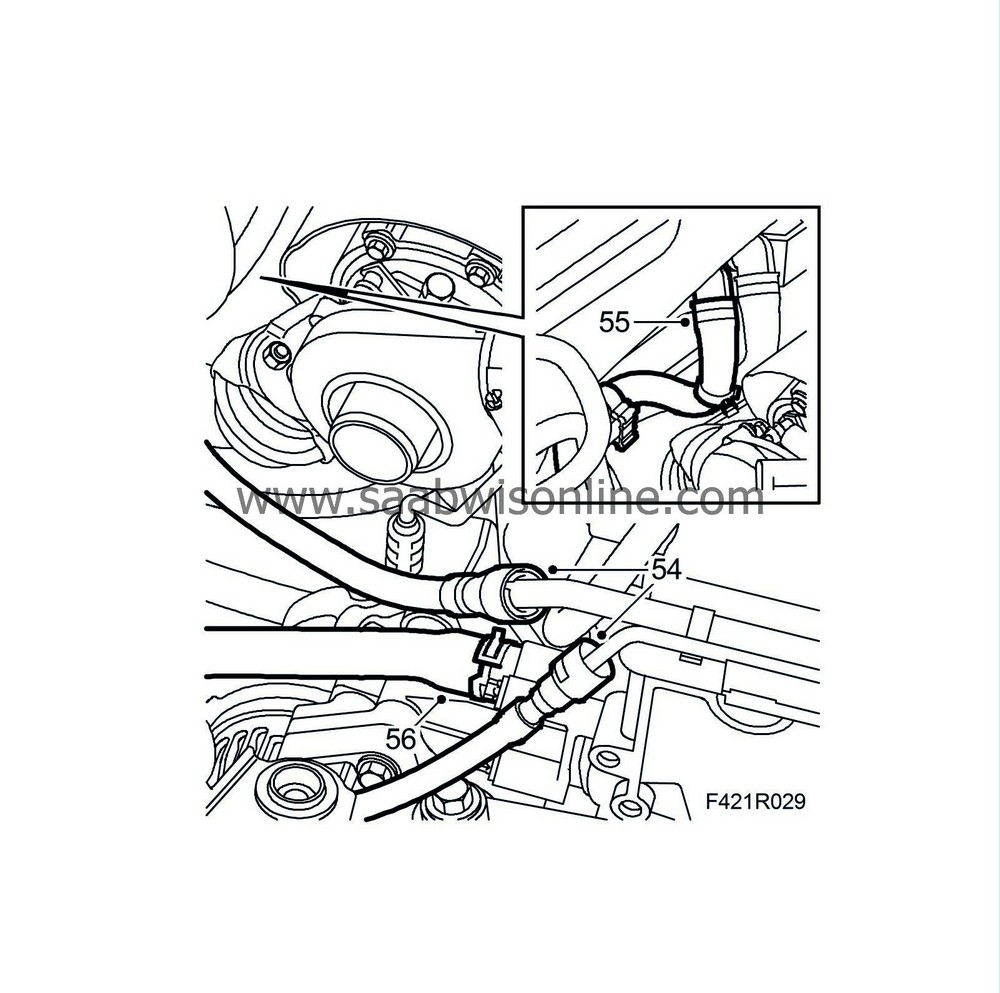
Undo the two quick couplings connecting the fuel lines with the pipes on the engine. Catch any fuel spills. Plug the fuel lines. Use
82 92 948 Plugs, A/C system, kit
.
|
|
| 55. |
Undo the quick coupling on the right-hand coolant hose and the clips on the bulkhead. Catch any spilt coolant. Bend aside the hose and attach it to the engine.
|
|
| 56. |
Cover the generator and detach the coolant hose from the generator bracket.
|
|
| 57. |
Check that the steering wheel and steering assembly are in the straight-ahead position, and if necessary adjust.
|
|||||||||
| 58. |
Disconnect the steering shaft from the steering gear.
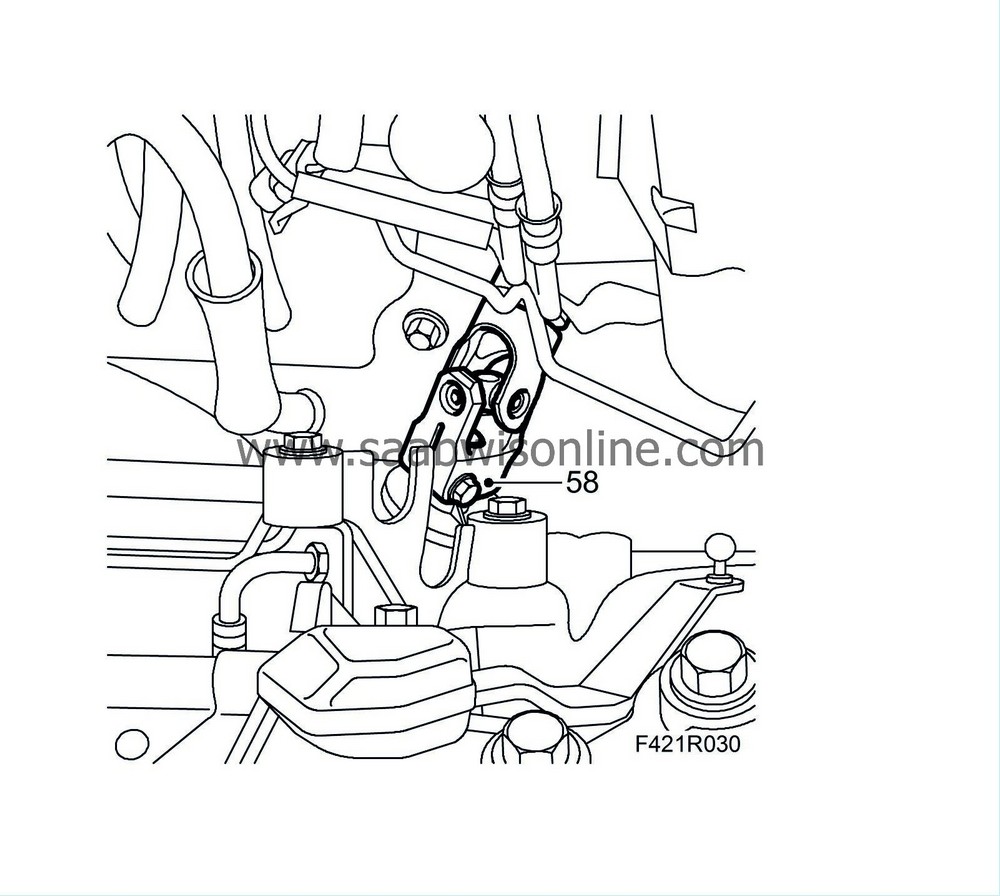
|
|
| 59. |
Raise the car. Detension and remove the poly-V-belt. Mark the belt's direction of rotation.
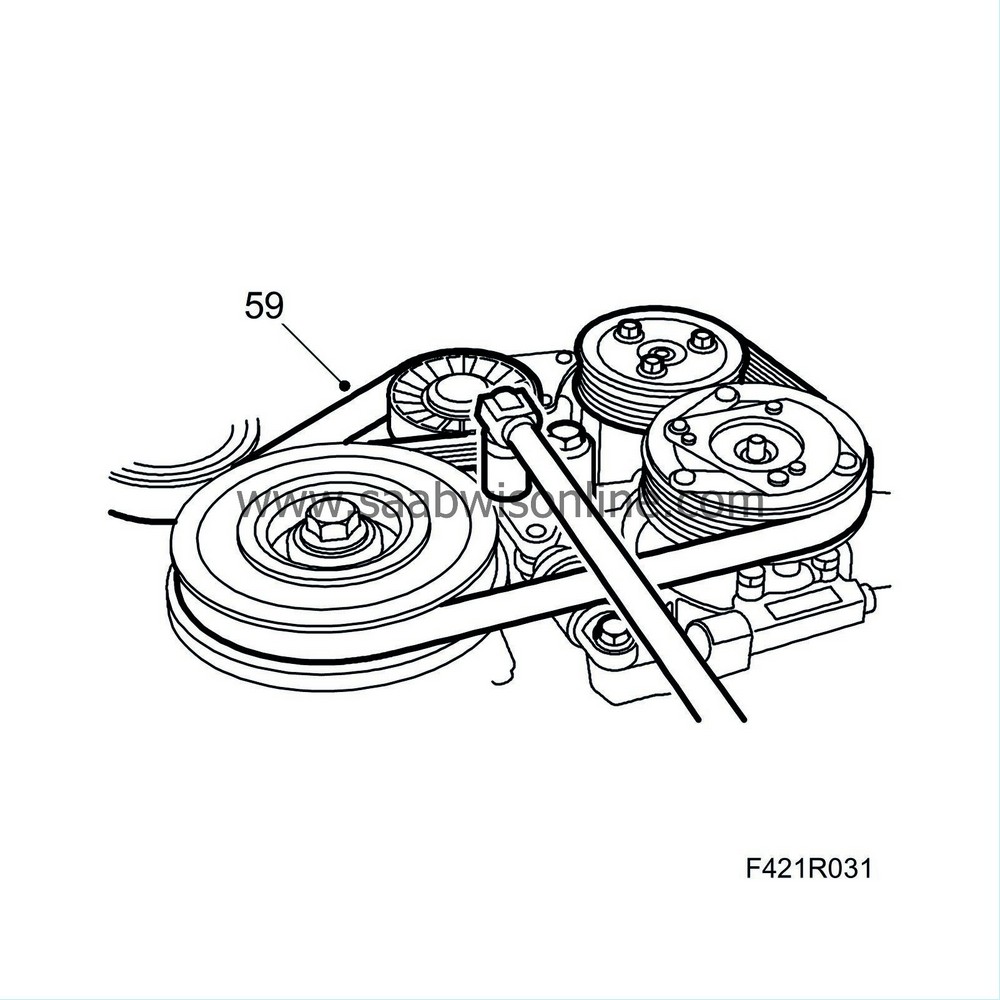
|
|
| 60. |
Unplug the A/C compressor and remove the bolts securing the compressor.
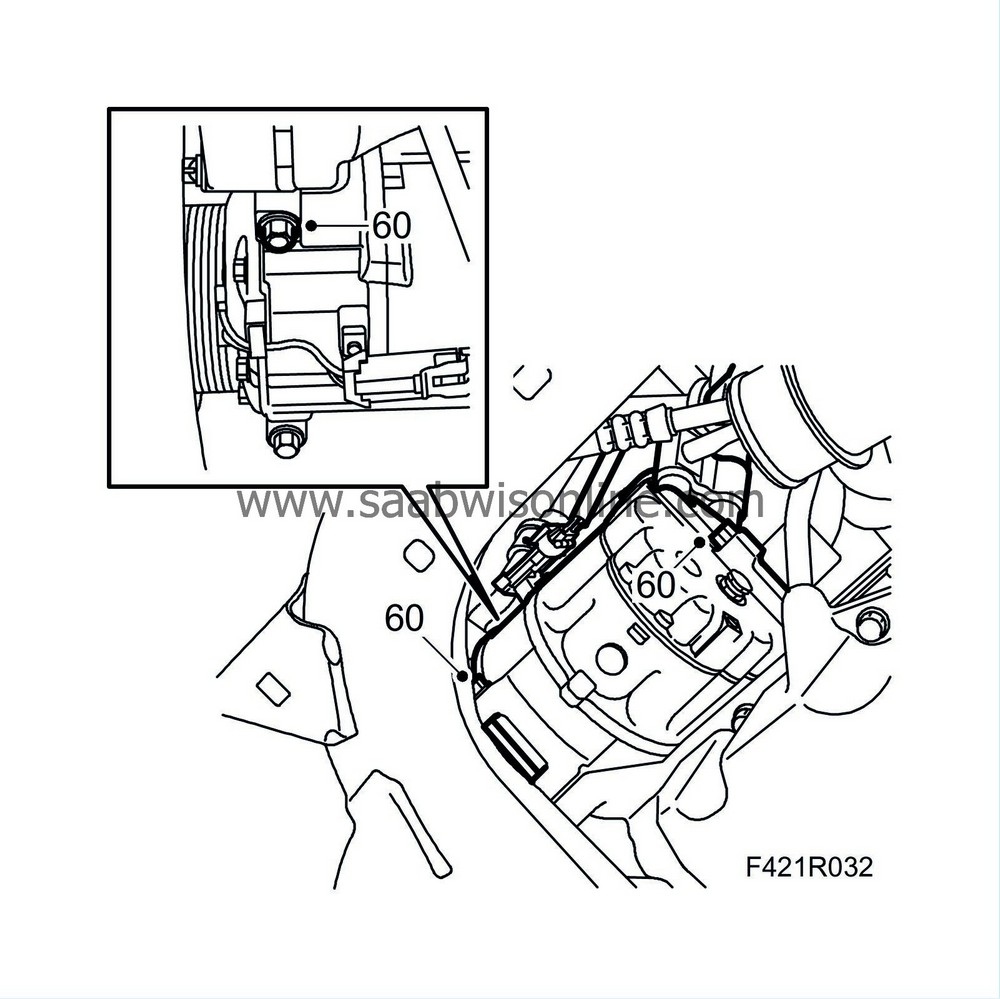
|
|
| 61. |
Slacken the screws securing the clamps holding the power steering pipe to the subframe.
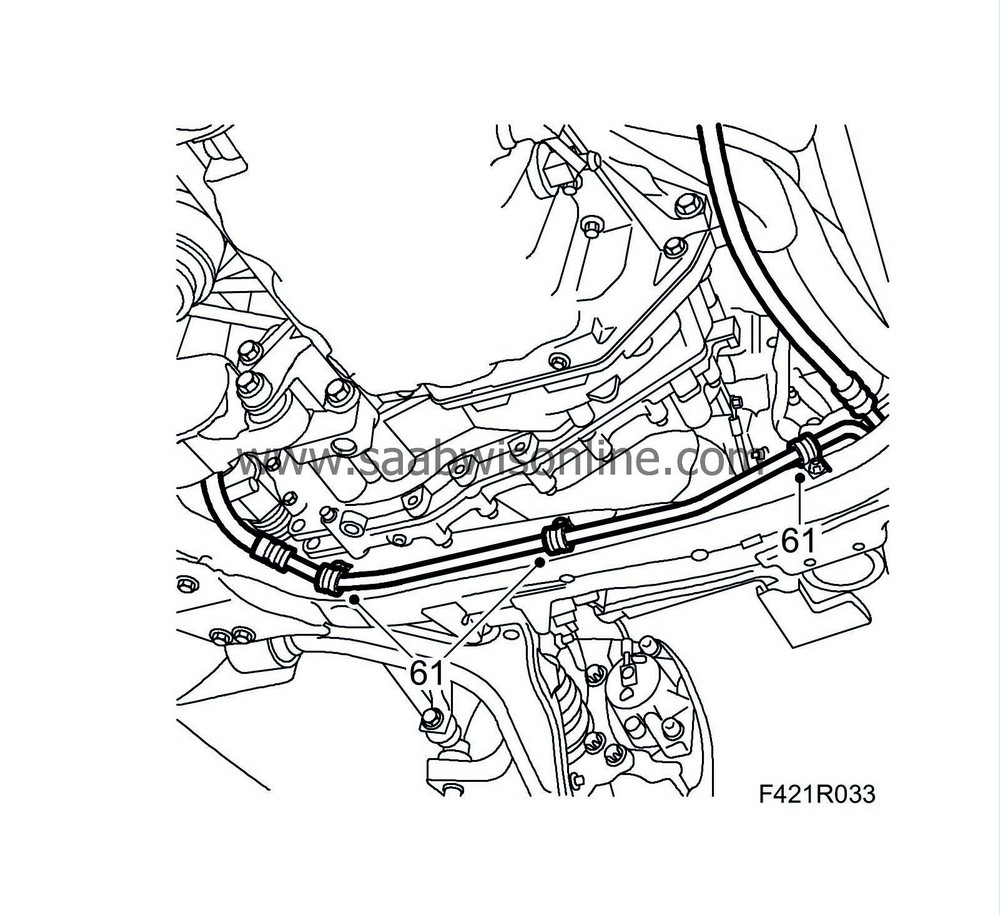
|
|
| 62. |
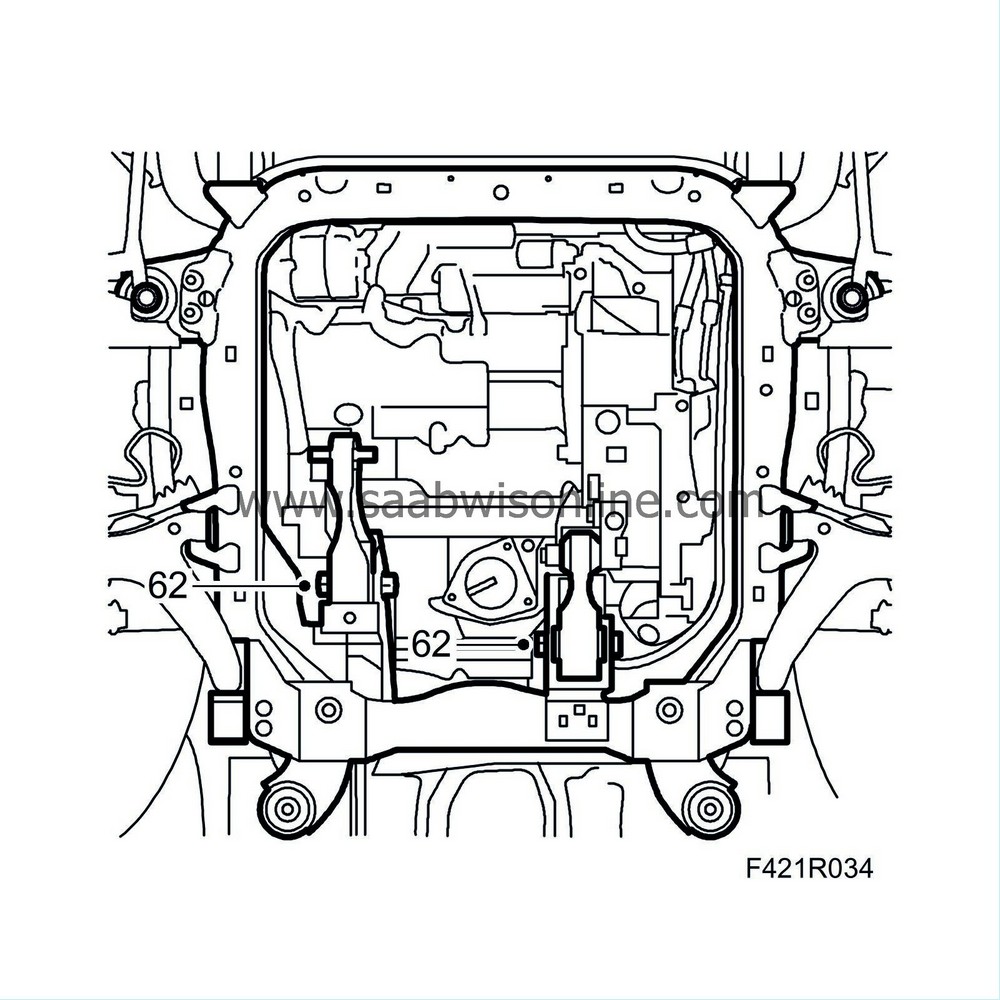
Slacken the rear bolts holding the torque arm.
|
|
| 63. |
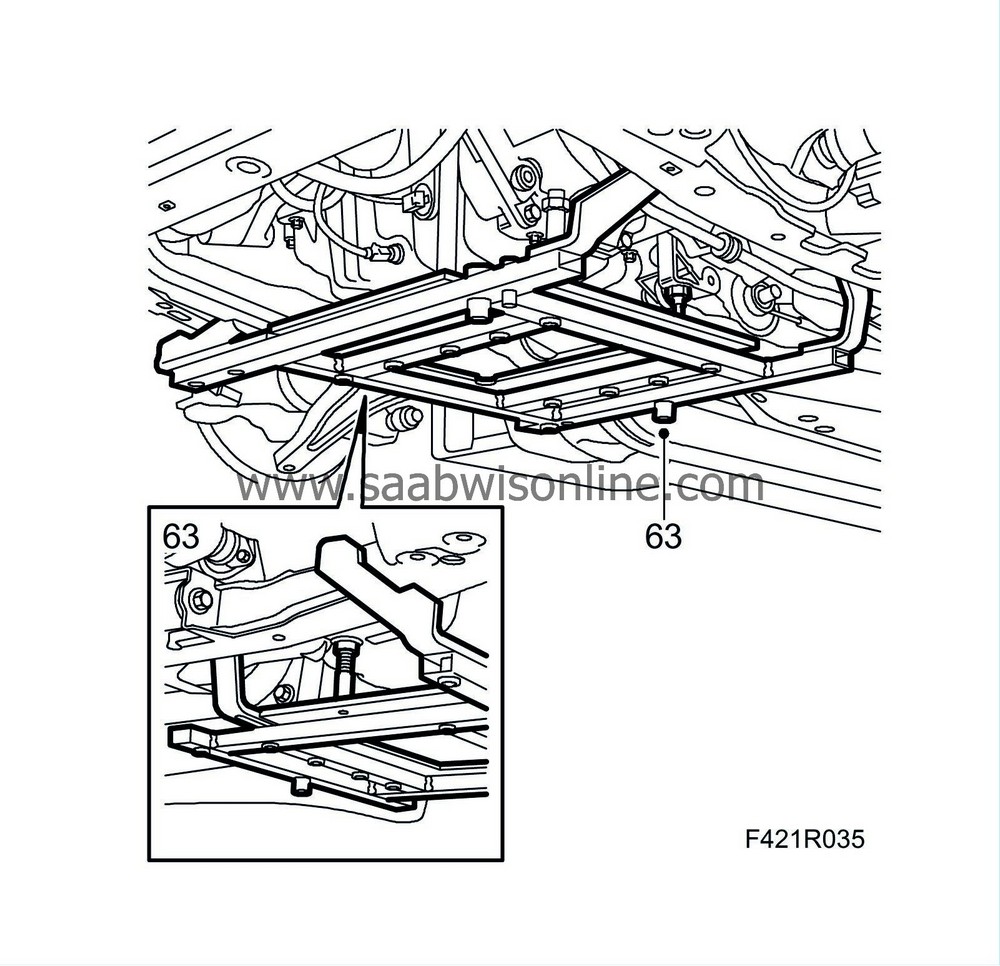
Fit
83 96 152 Centring kit, engine
to the subframe. Due to narrow tolerances on the drive shafts, the centring tool must be used to carefully fit the powertrain to the subframe and body during refitting. See
Centring tool, engine and subframe
.
|
|
| 64. |
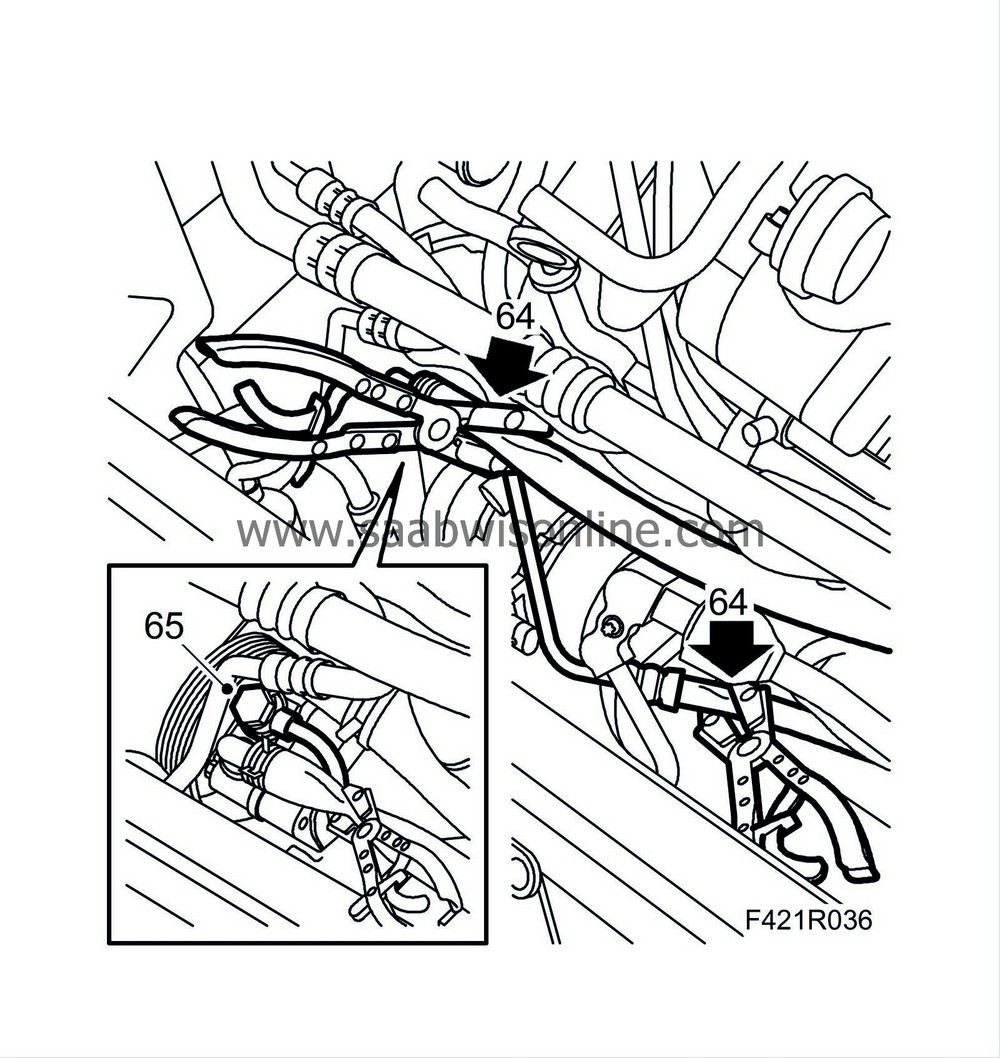
Lower the car and fit
30 07 739 Hose pinch-off pliers
to the return and delivery hoses to the power steering pump.
|
|
| 65. |
Place a receptacle under the car. Clean and disconnect the banjo nipple on the power steering pump. Plug
(82 92 948 Plugs, A/C system, kit
) the banjo bolt and the pump connection
|
|
| 66. |
Place the radiator member back in position.
|
|
| 67. |
Fit
83 95 212 Strap
to the radiator member. Pass the strap down and wind it an extra turn around the A/C compressor to take its weight.
|
|
| 68. |
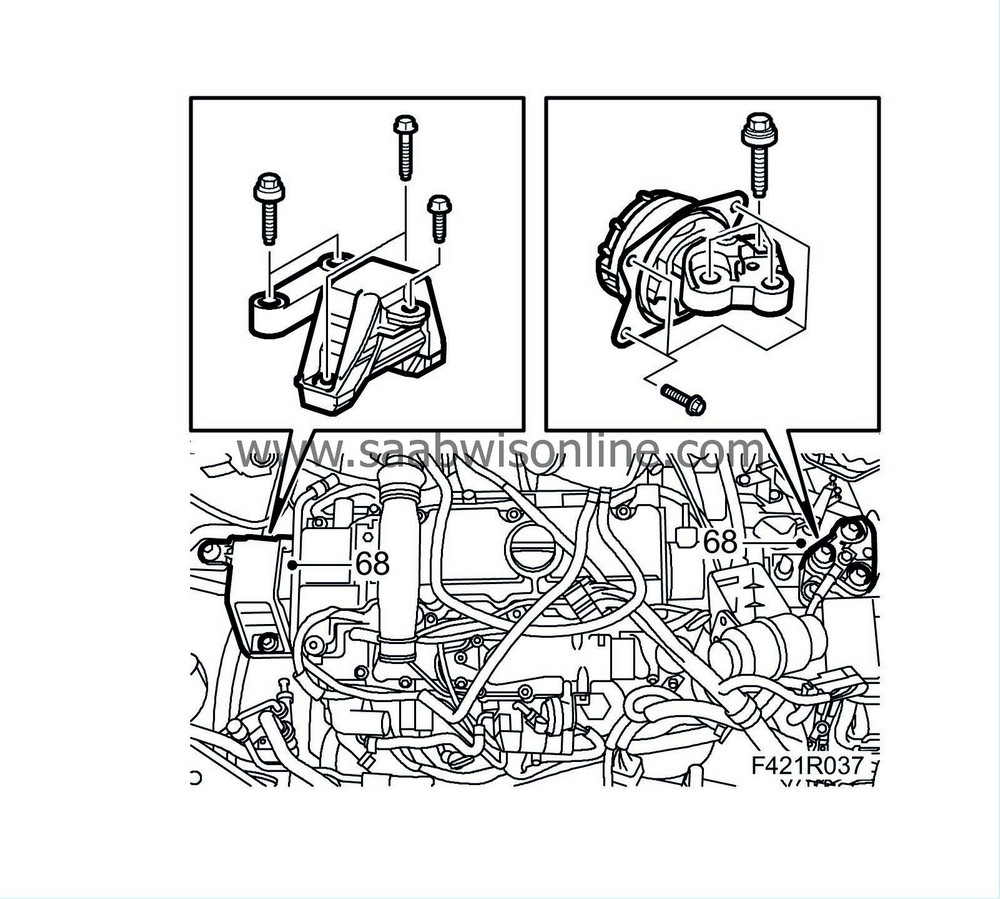
Undo the left and right-hand engine mountings.
|
|
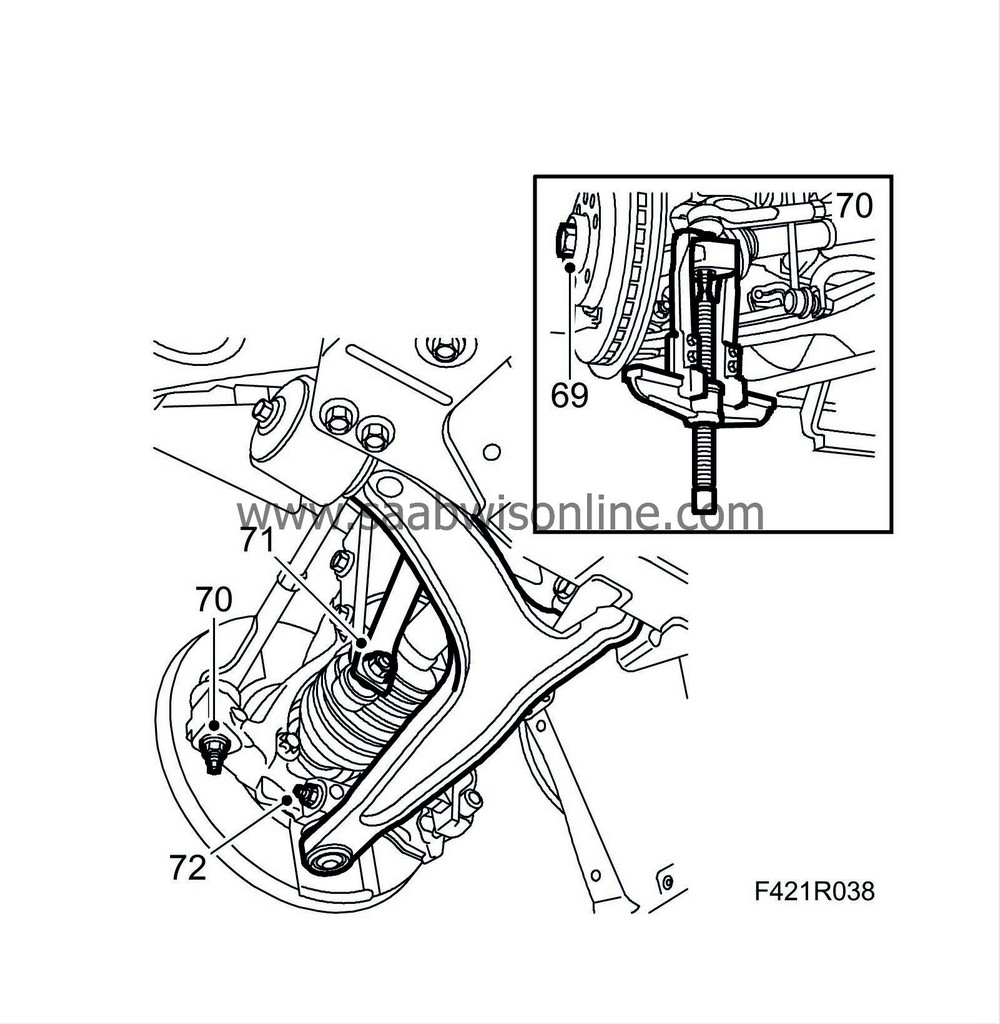
| 69. |
Raise the car and undo the centre nuts on the drive shafts. Tap the driver shafts so that the come loose from the hub. Use
89 96 951 Puller, hub/drive shaft
or a brass drift and hammer.
|
|||||||||
| 70. |
Undo the nuts and remove the track rod ends from the steering swivel members using
87 91 287 Puller, 150 mm
.
|
|
| 71. |
Disconnect the lower links of the anti-roll bar. Use a thin wrench in the keys to hold them still.
|
|
| 72. |
Disconnect the lower suspension ball joints from the steering swivel members and lower the suspension arms.
|
|
| 73. |
Disconnect and move aside the drive shafts.
|
|
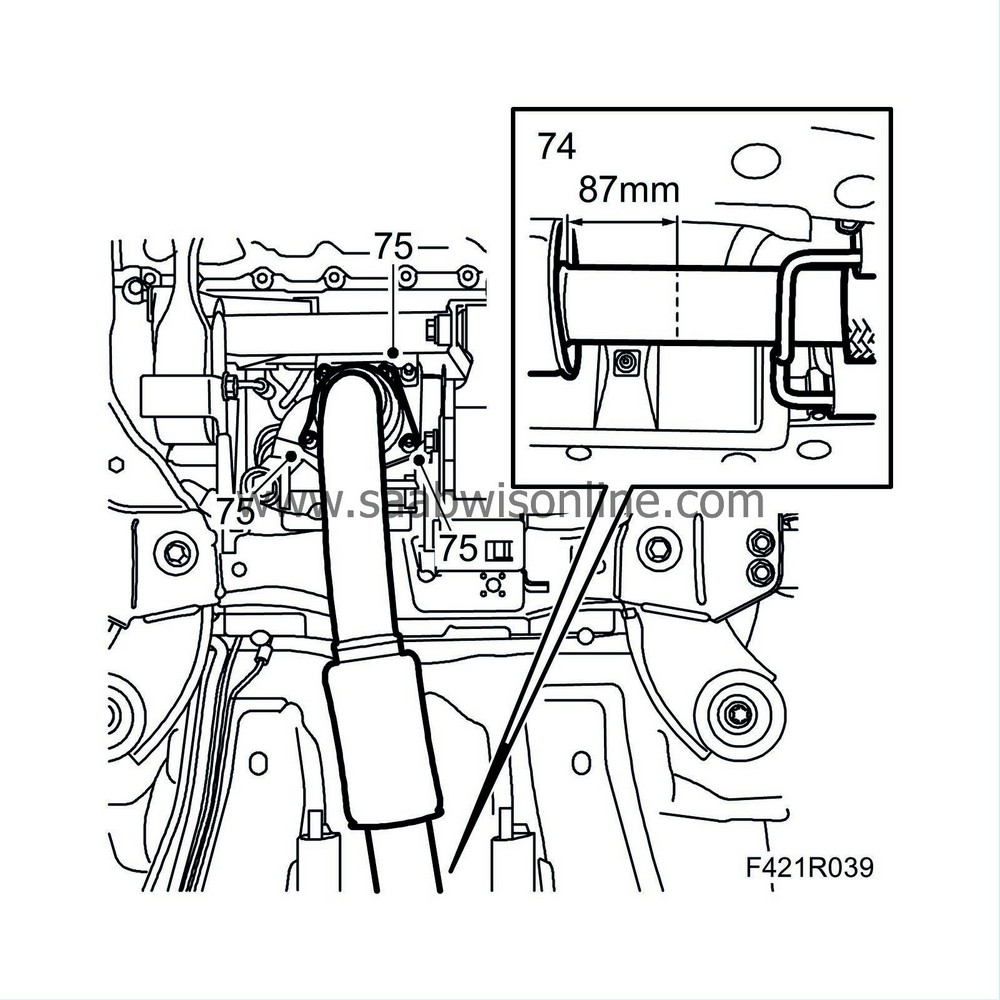
| 74. |
Cut the exhaust pipe 87 mm from the end of the silencer, between the silencer and the flexible section, using a
83 95 667 Pipe cutter, exhaust system
.
|
|
| 75. |
Remove the front pipe from the catalytic converter.
|
|
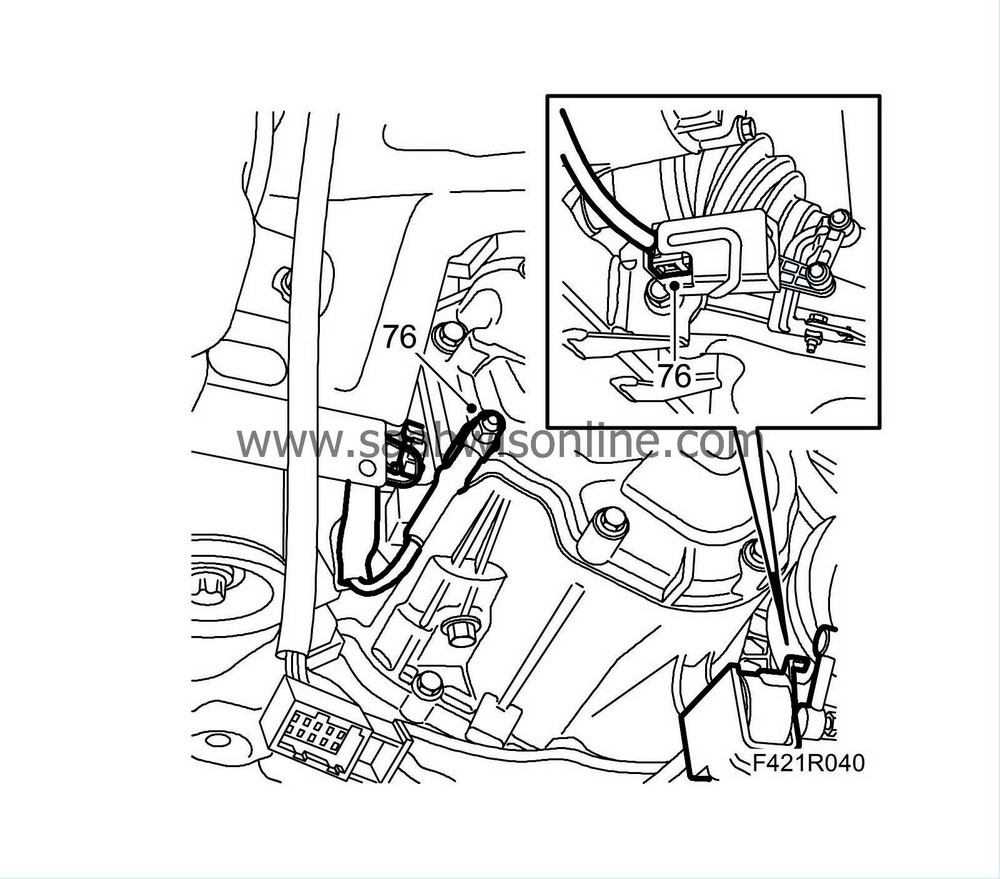
| 76. |
Remove the ground cable from the gearbox and disconnect the angle sensor (option) that is part of the headlight levelling system.
|
|
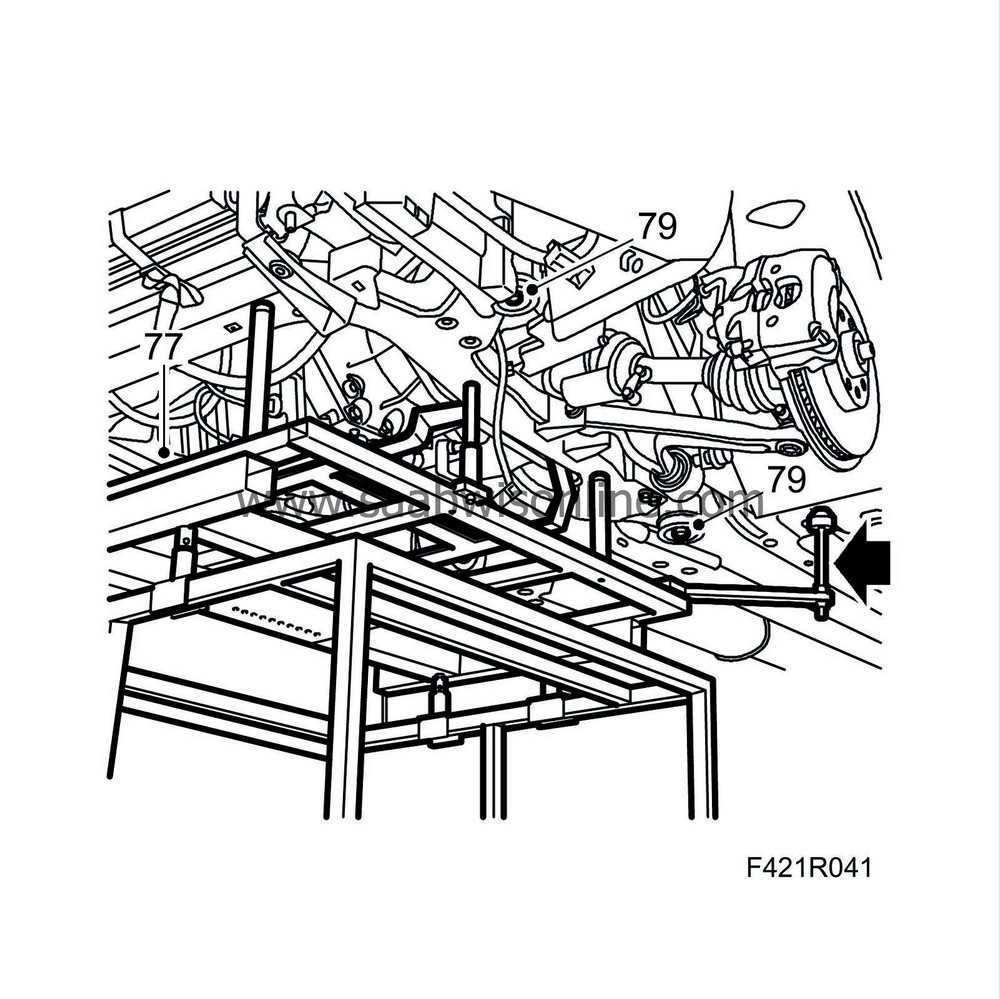
| 77. |
Place
83 96 145 Centring tool, subframe - engine
on the trolley lift. Make sure that the adjustment bolts on the 83 95 170 height adjusters are fully lowered.
|
|
| 78. |
Position the trolley lift; raise and insert the guide pins in the subframe reference holes. Adjust the lifting pillars with the height adjusters, part no. 83 95 170, so that they rest evenly on the subframe. Check with the body guide pins that the subframe is positioned correctly in relation to the body. See
Centring tool, engine and subframe
.
|
|
| 79. |
Raise the trolley lift slightly so that it is firmly pressed against the subframe. Undo the bolts securing the subframe and subframe stay to the body.
|
|
| 80. |
Carefully lower the power unit using the trolley lift. Make sure that nothing gets caught or is damaged.
|
|

 Warning

