Fitting the power train
| Fitting the power train |
| To fit |
|
|||||||
| 1. |
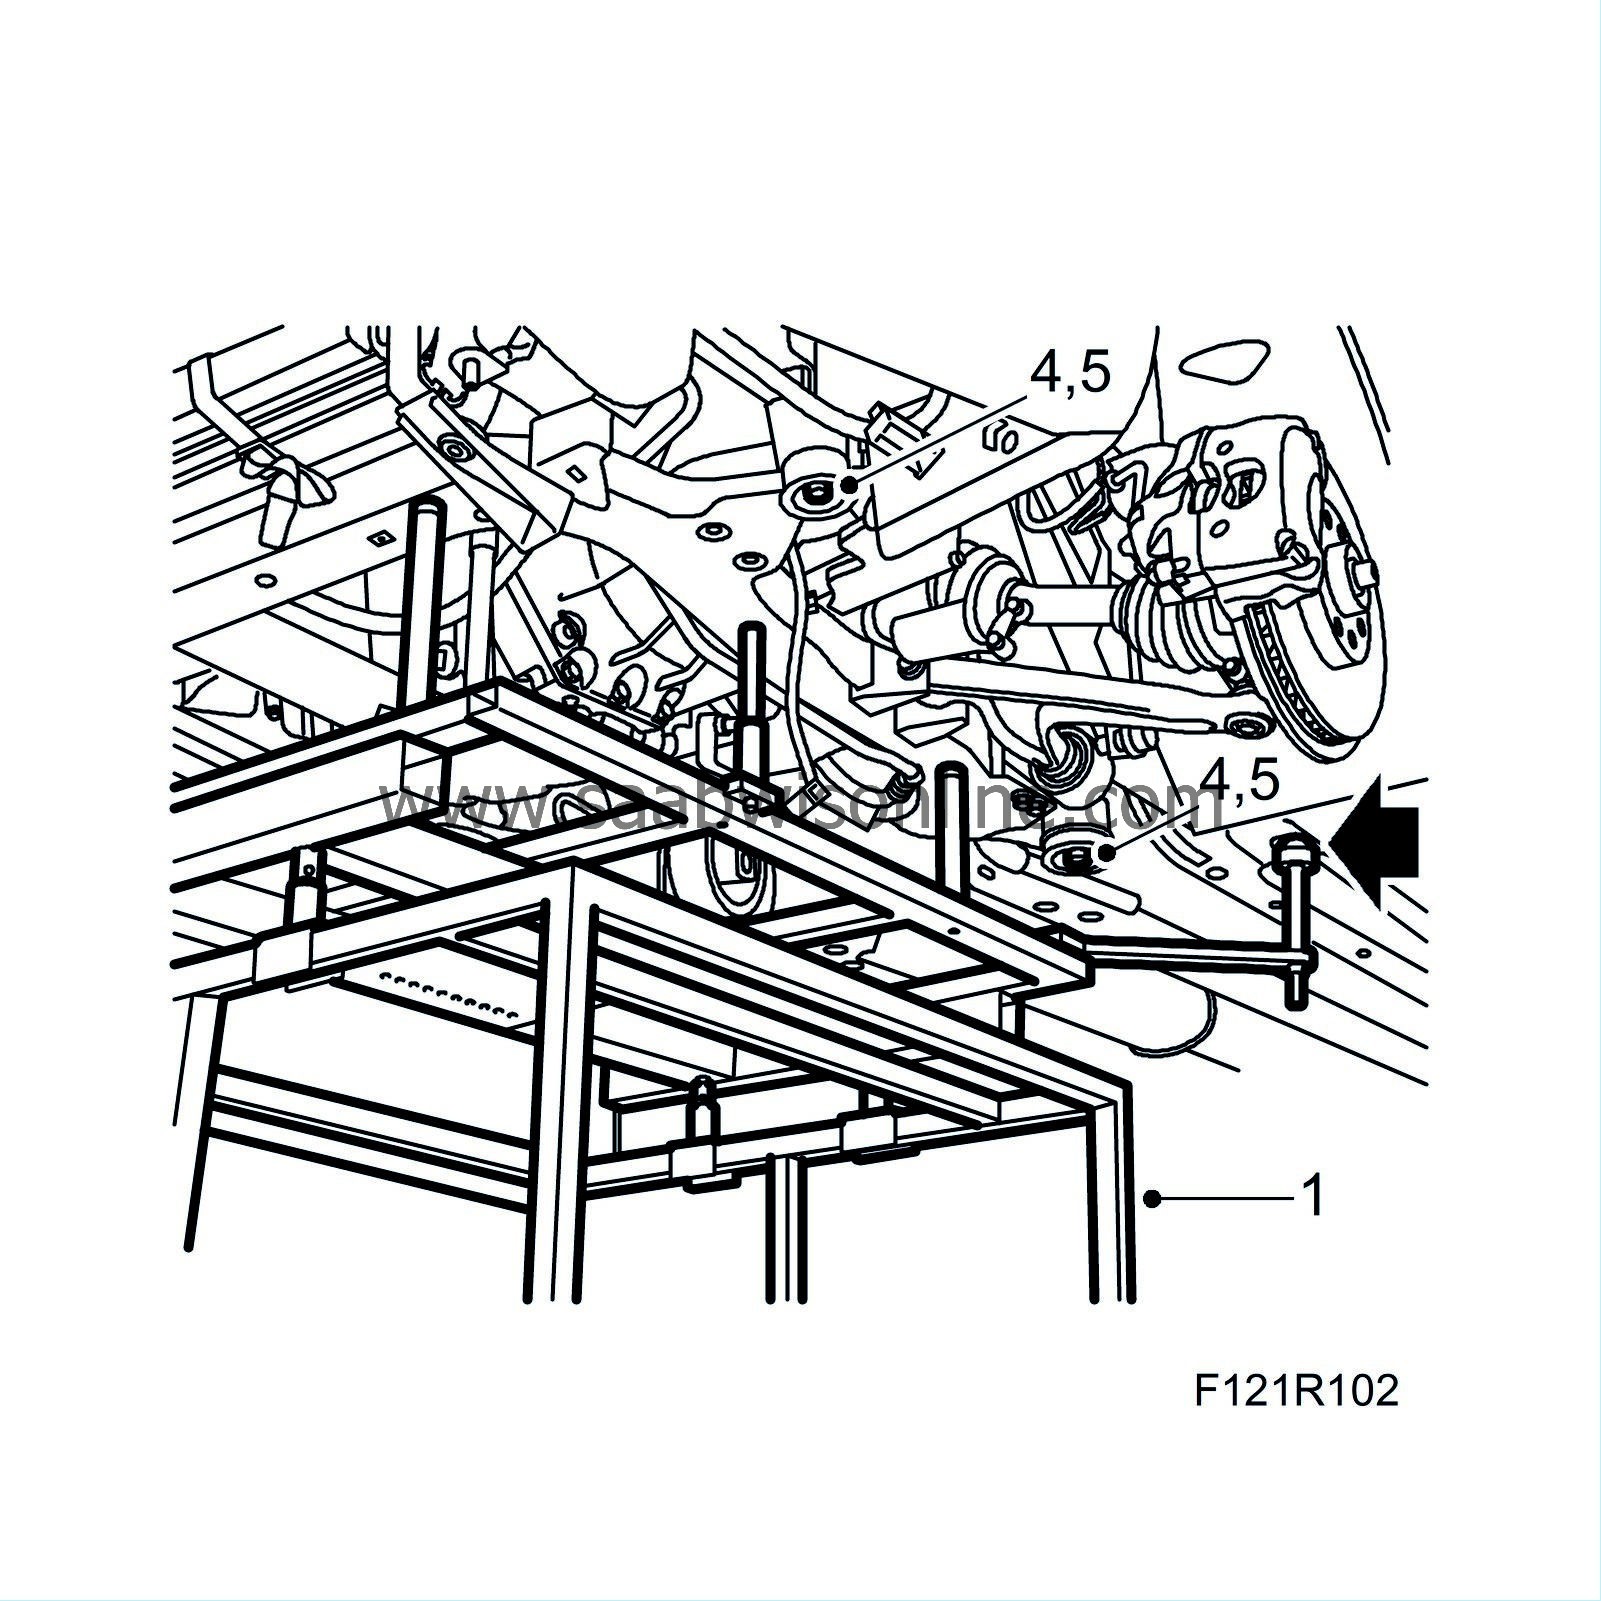
Position the trolley lift with powertrain and adjust its position in relation to the body. Use
82 93 102 Extension, 500 mm, 3/8 square
through the holes in the subframe to the attachments in the body. See
Centring tool, engine and subframe
.
|
|
| 2. |
Lift up the power train until the inboard drive shaft universal joints are level with the wheel hubs and insert the drive shafts into the hubs. Make sure nothing gets caught or damaged.
|
|
| 3. |
Lift a little higher and position the lower swivel joints to the steering swivel members. If necessary, adjust the trolley lift screws to provide even contact with the body. Check that the guide pins are positioned correctly relative the reference holes in the body.
|
|
| 4. |
Position the bolts and screw them through the subframe into the body.
|
|
| 5. |
Raise the engine completely and tighten the subframe bolts.
Tightening torque 75 Nm + 135° (55 lbf ft +135°) |
|
| 6. |
Lower the trolley lift and move it out of the way.
|
|
| 8. |
Position the lower anti-roll bar links and tighten them while gripping the flats with a thin spanner
Tightening torque 64 Nm (47 lbf ft). |
|
| 9. |
Position the outboard steering links and tighten them.
Tightening torque 35 Nm (26 lbf ft). |
|
| 10. |
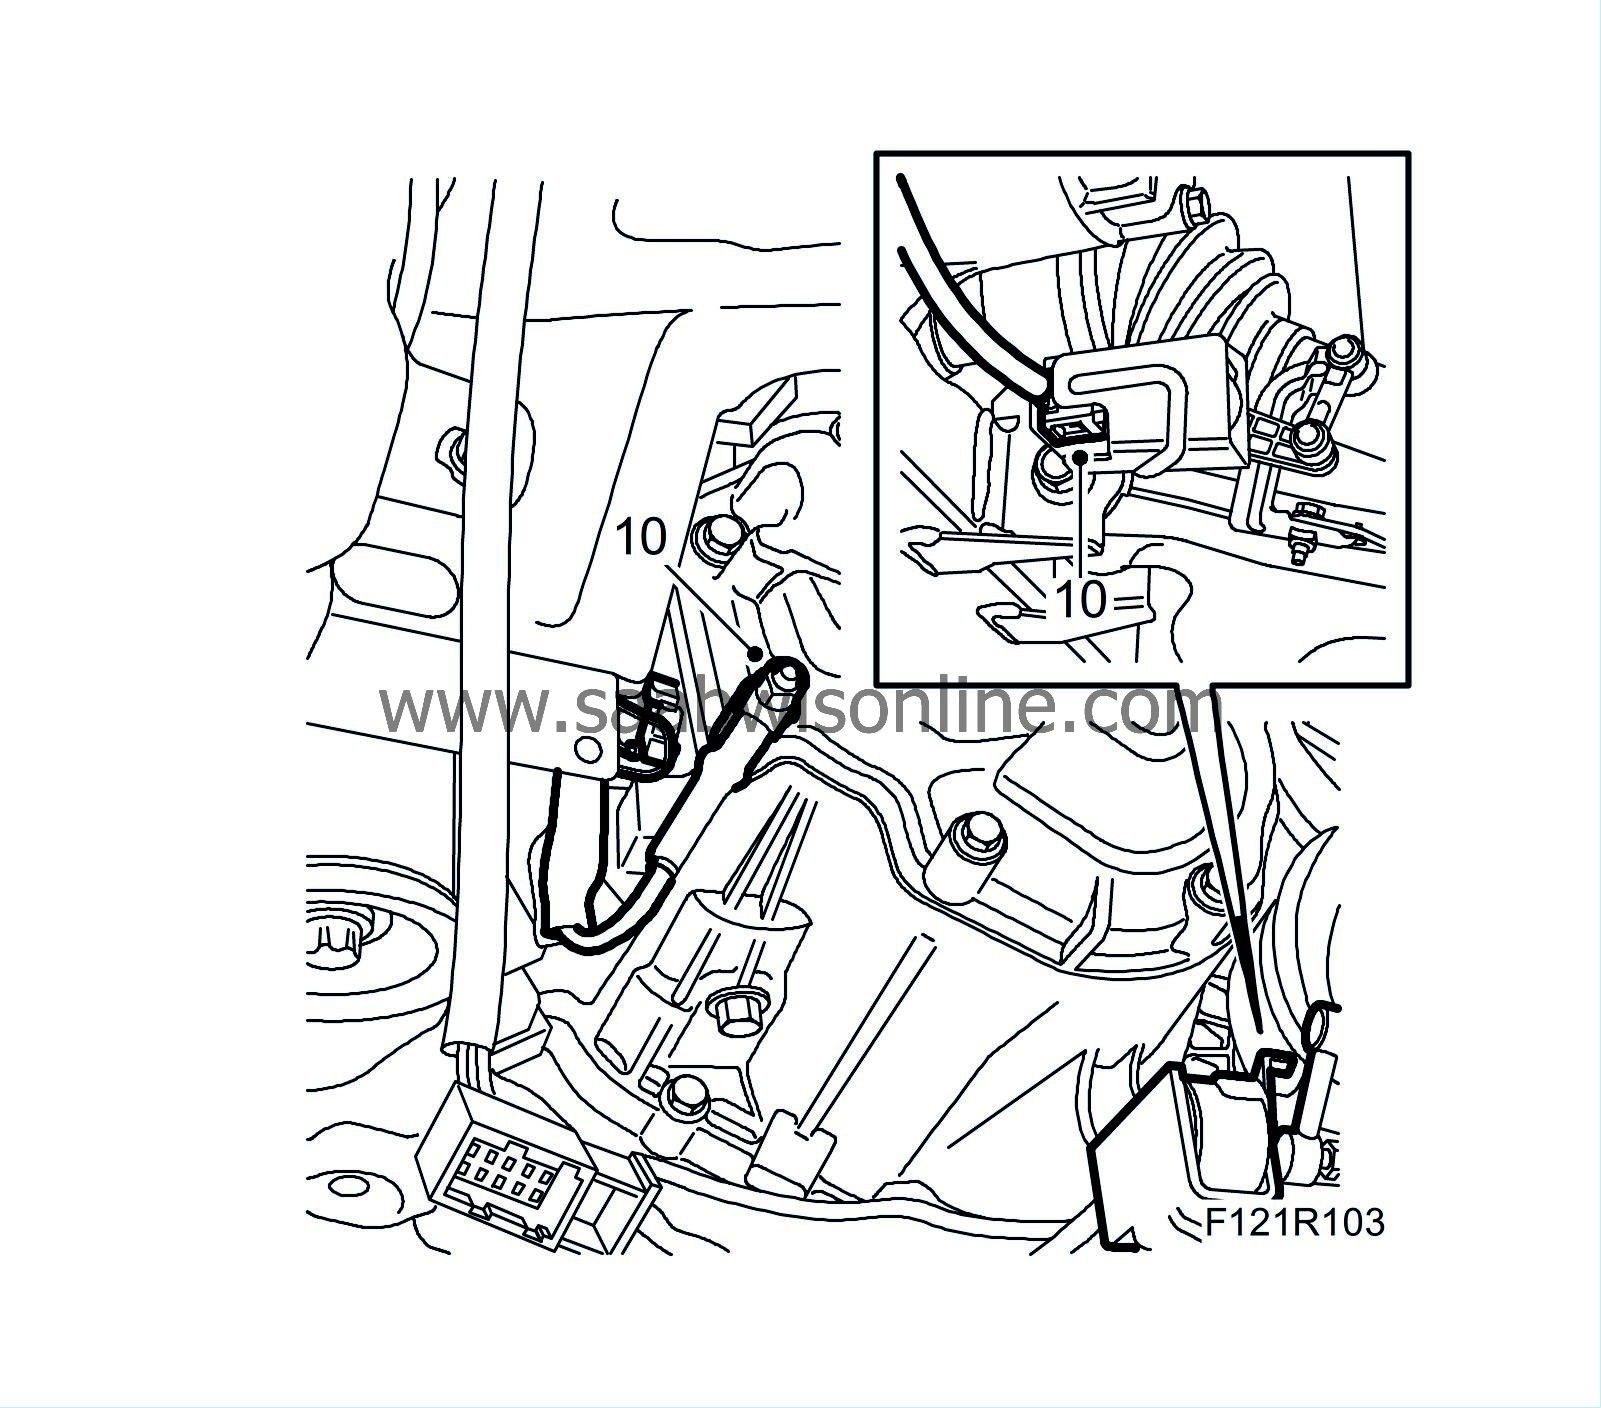
Attach the ground cable to the gearbox and the connector for the angle sensor (option).
|
|
| 11. |
Clean the pipe connections, fit a joint clamp on the front pipe and fit the front exhaust pipe to the catalytic converter. Use a new gasket and new nuts.
Tightening torque 25 Nm (18 lbf ft). |
|
| 12. |
Adjust the joint clamp so that the pipe ends are in the middle. Tighten the joint clamp nuts.
Tightening torque 40 Nm (30 lbf ft). 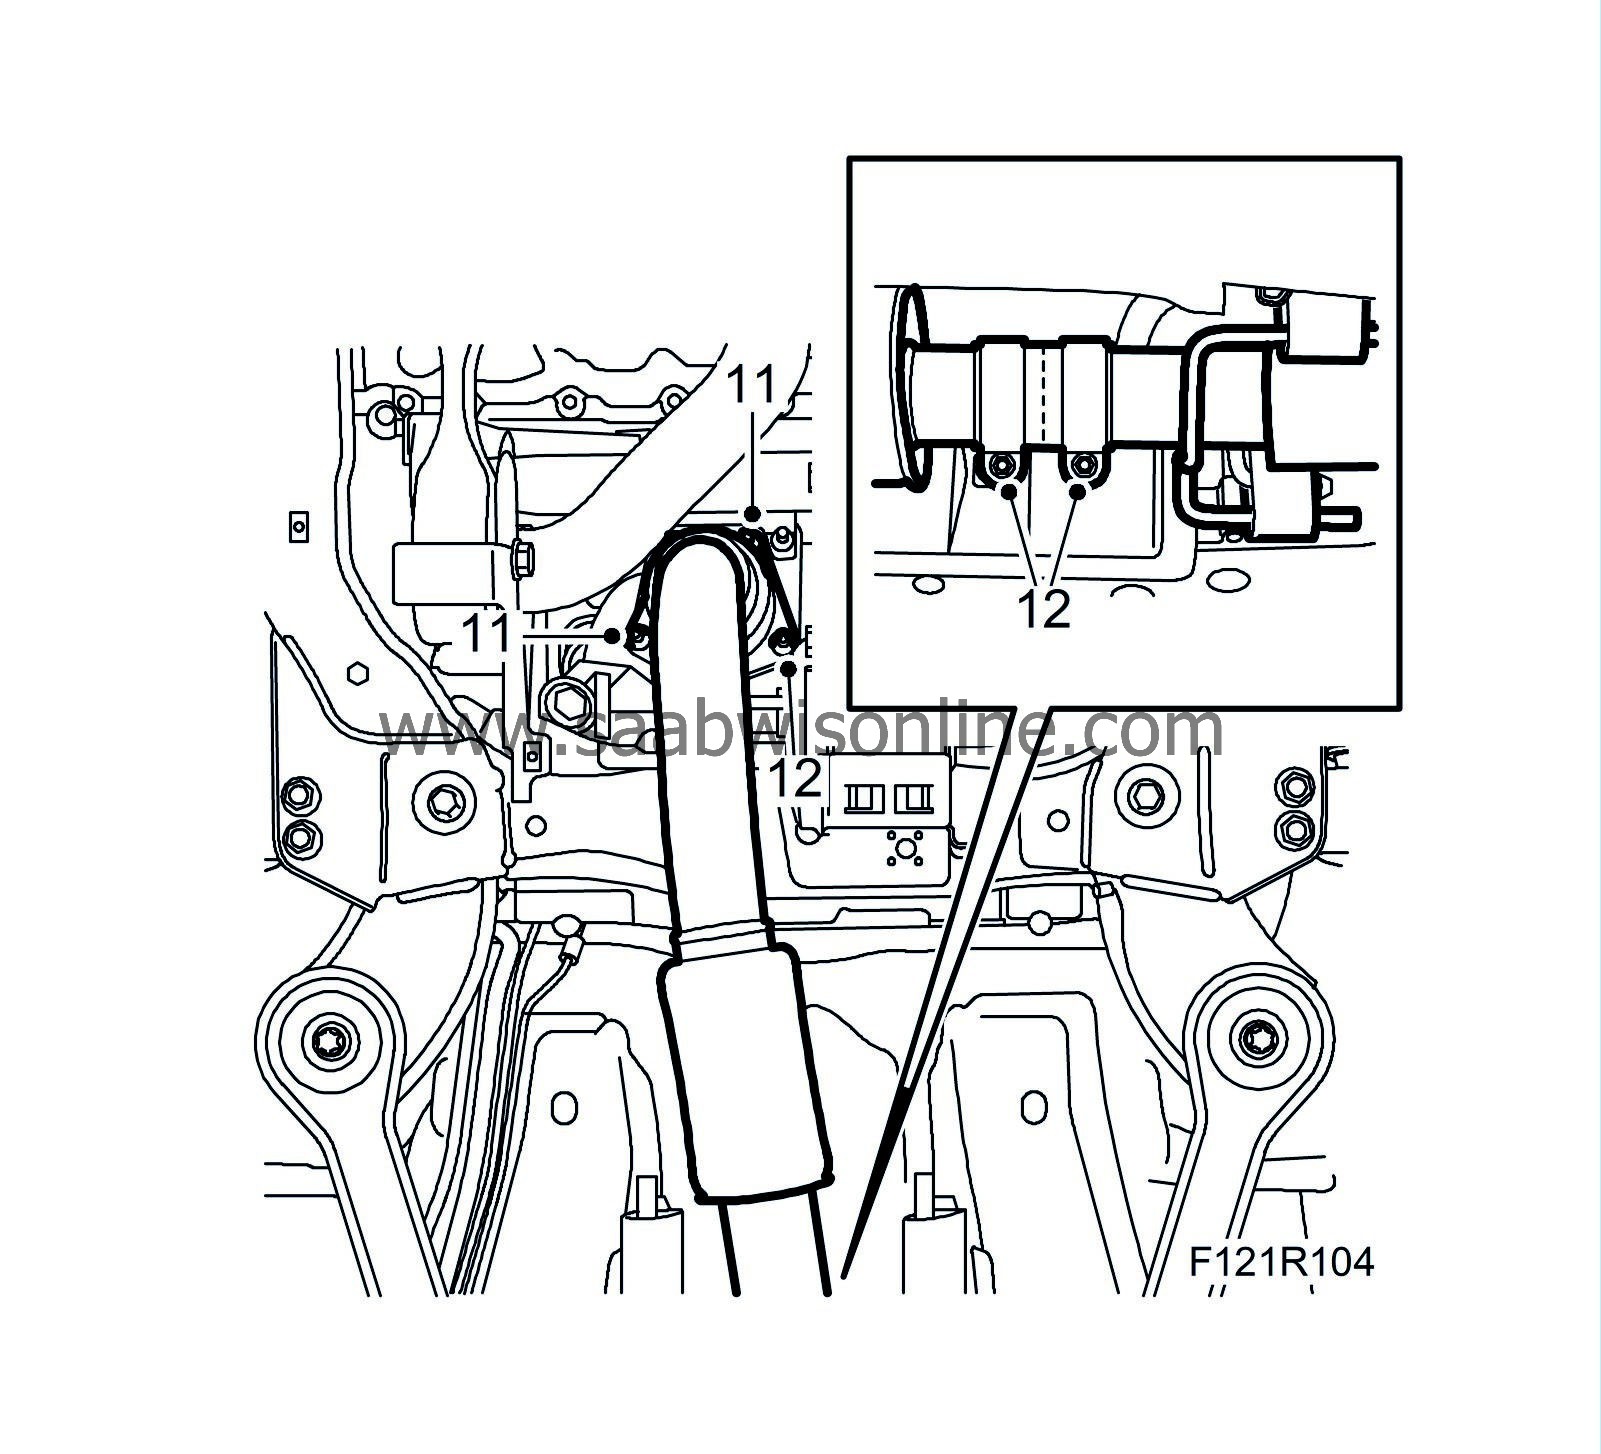
|
|
| 13. |
Lower the car and fit the right and left engine mountings.
Tightening torque, right 70 Nm + 60° (52 lbf ft + 60°) Tightening torque, left 70 Nm + 45° (52 lbf ft + 45°) Tightening torque, right-hand engine pad to body: 40 Nm + 60° (30 lbf ft+ 60°) 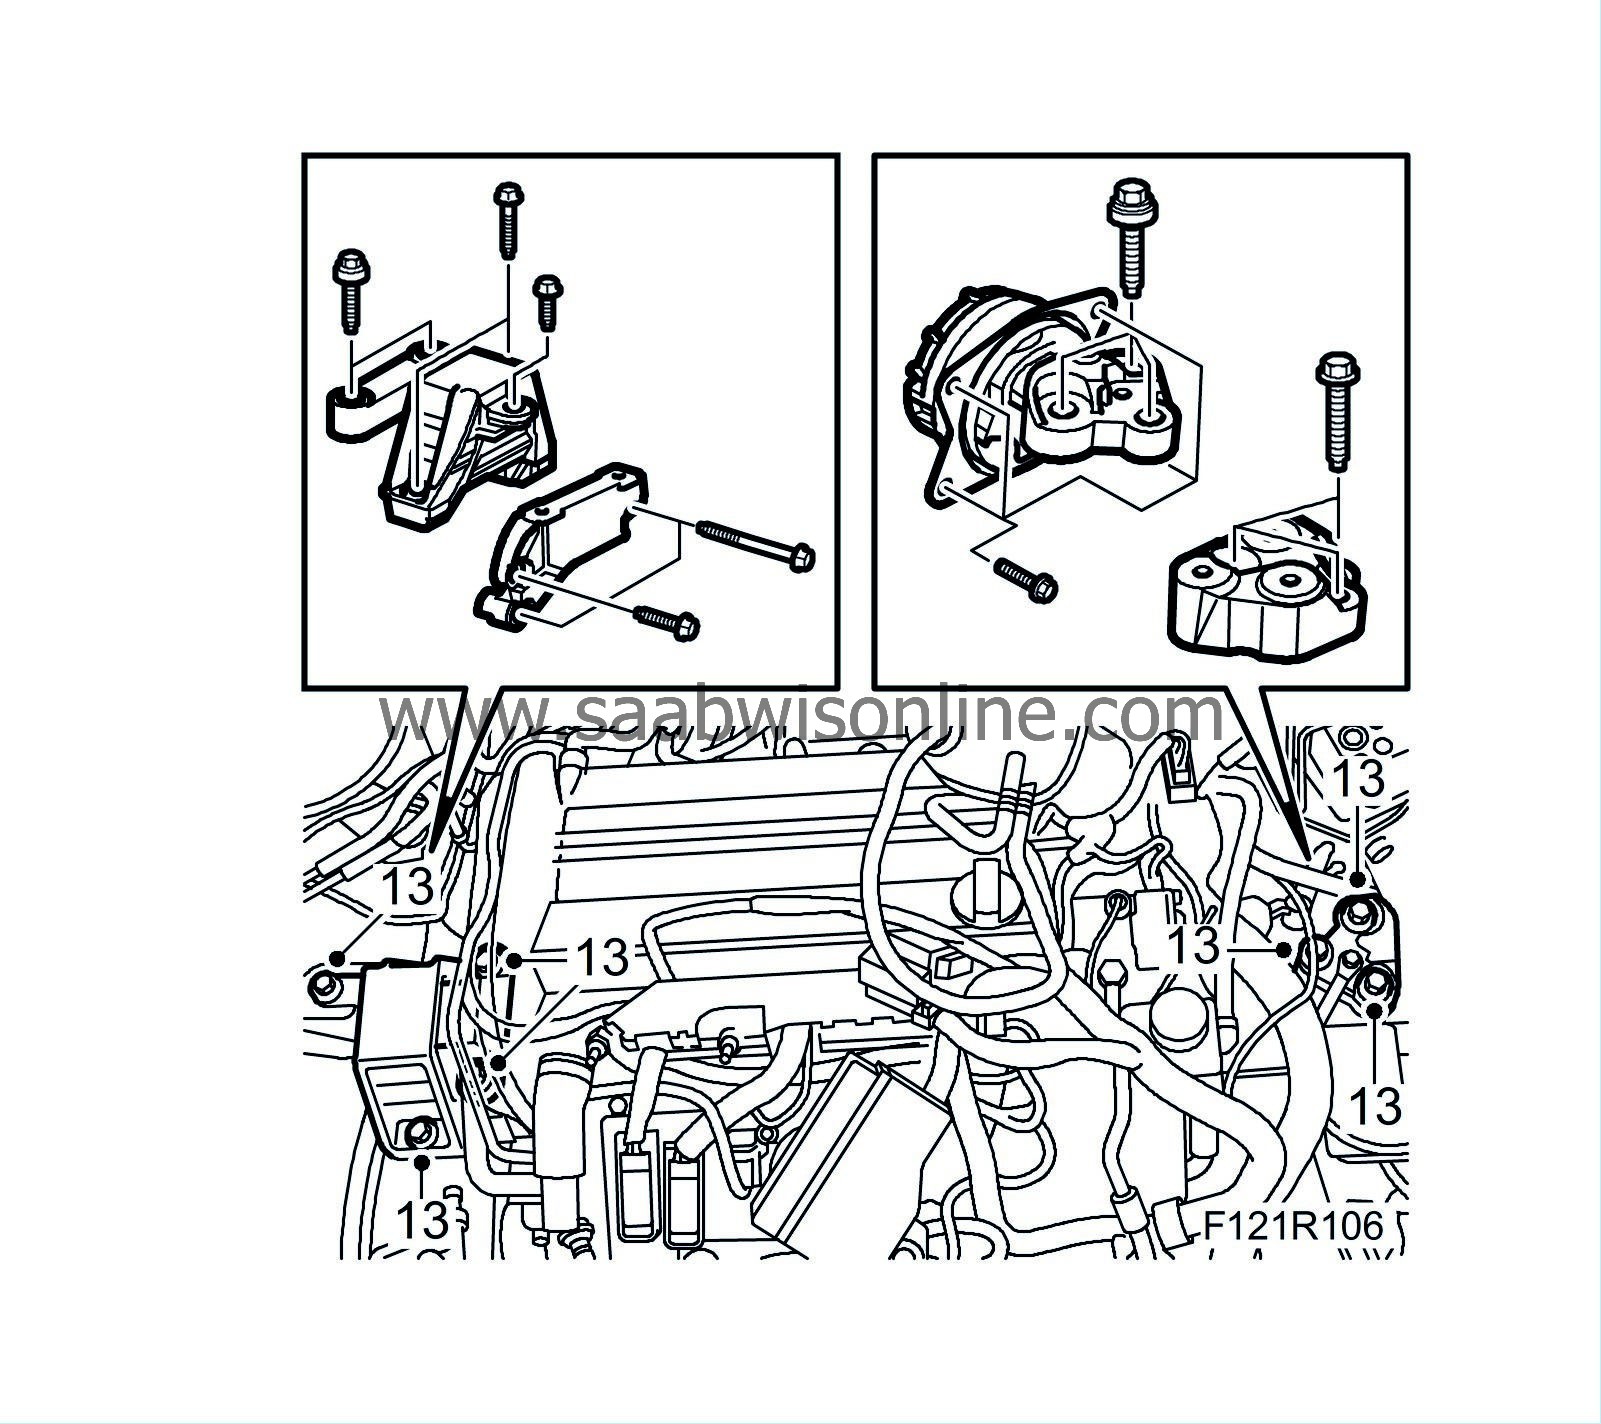
|
|
| 14. |
Remove the strap from the radiator member and the A/C compressor.
|
|
| 15. |
Remove the radiator member.
|
|
| 16. |
Raise the car, relieve
83 96 152 Engine centring tool kit
and remove it from the subframe.
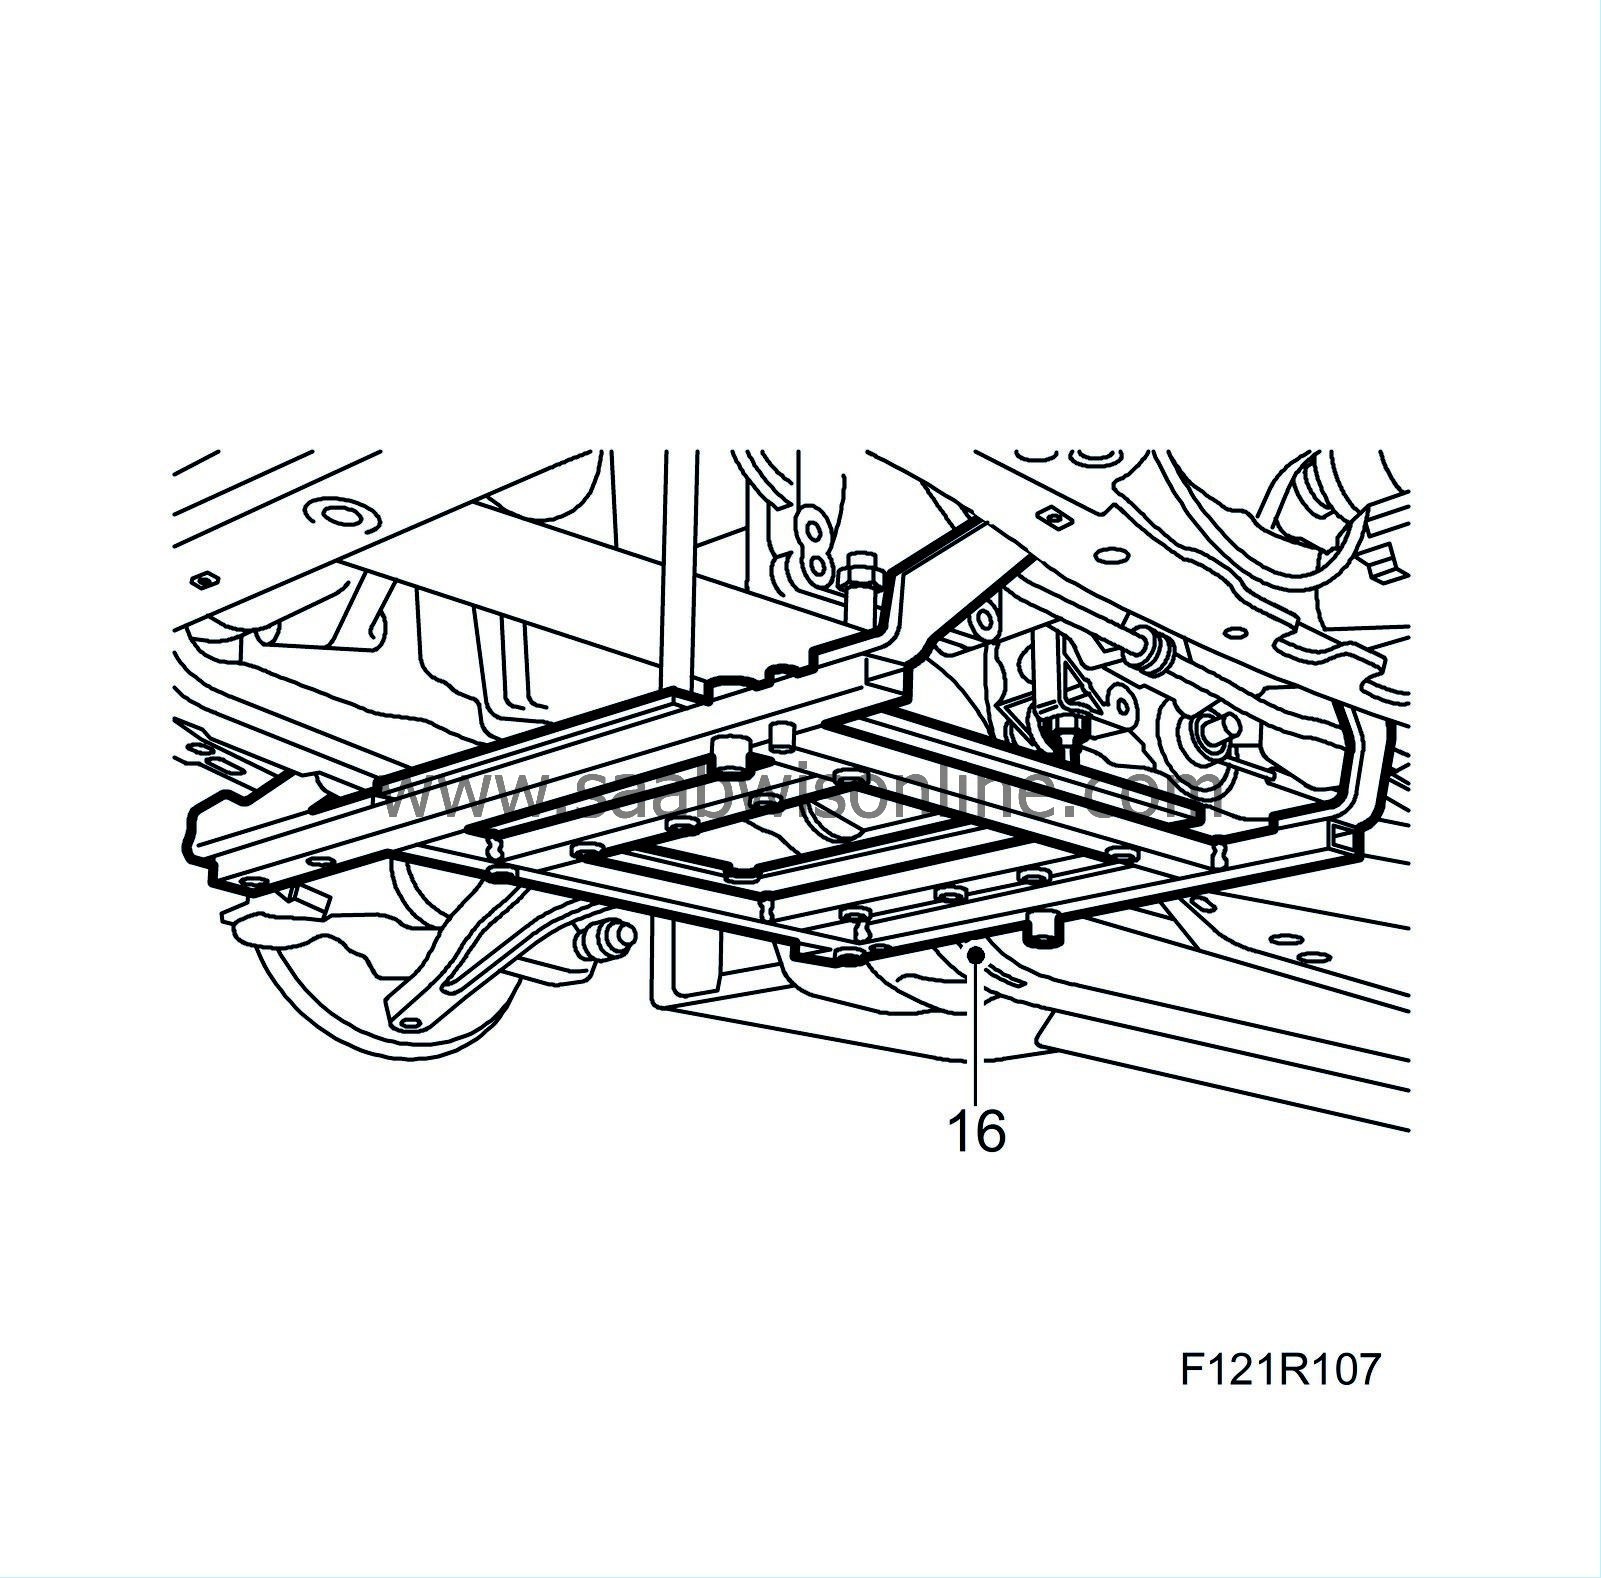
|
|
| 17. |
Fit the rear torque arm bolts.
Tightening torque 70 Nm + 90° (52 lbf ft + 90°) 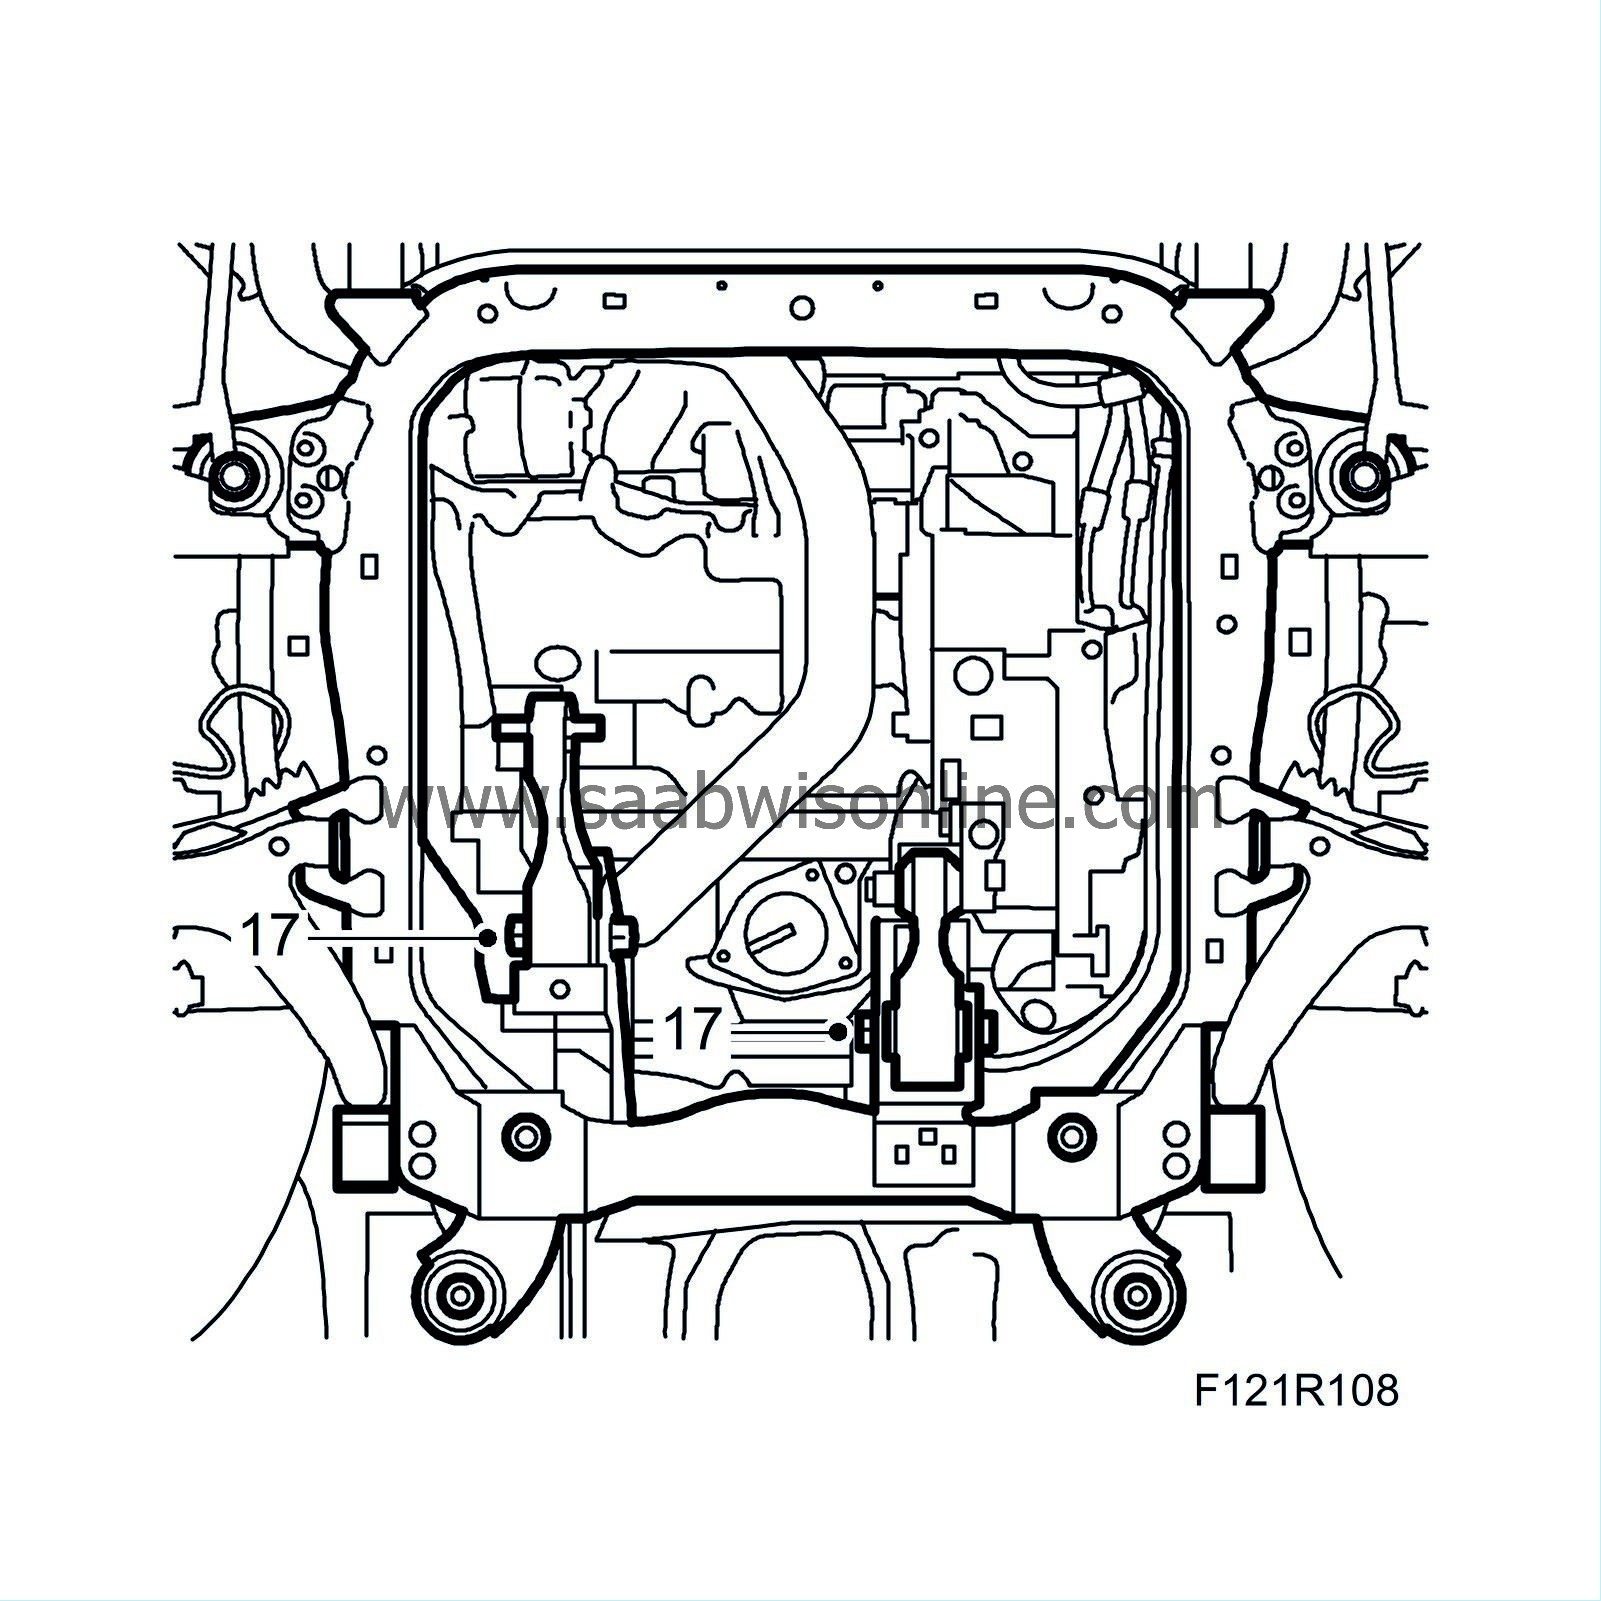
|
|
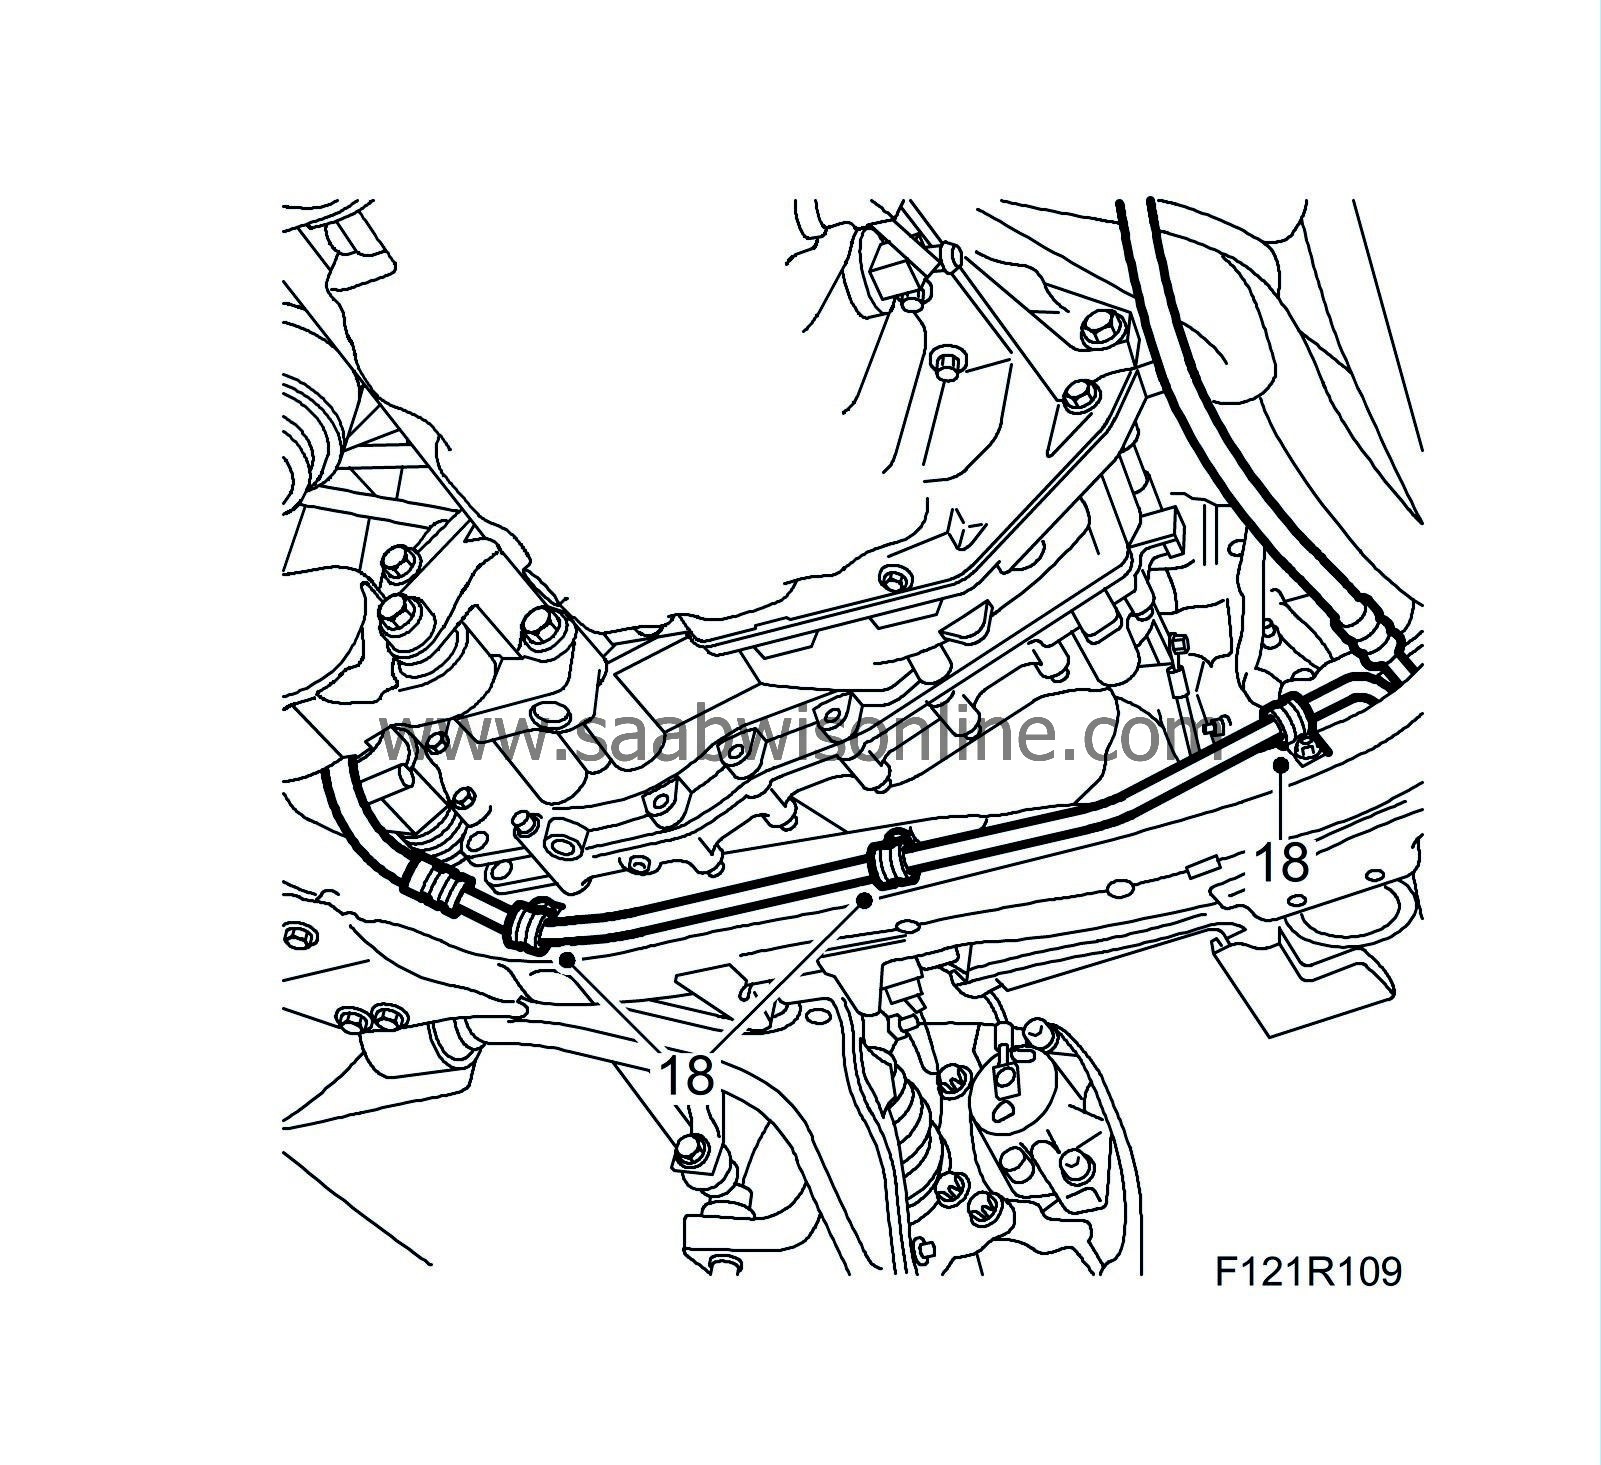
| 18. |
Fit the bolts on the power steering pipe clamps on the subframe.
|
|
| 19. |
Fit the A/C compressor and plug in the connector.
Tightening torque 20 Nm (15 lbf ft). 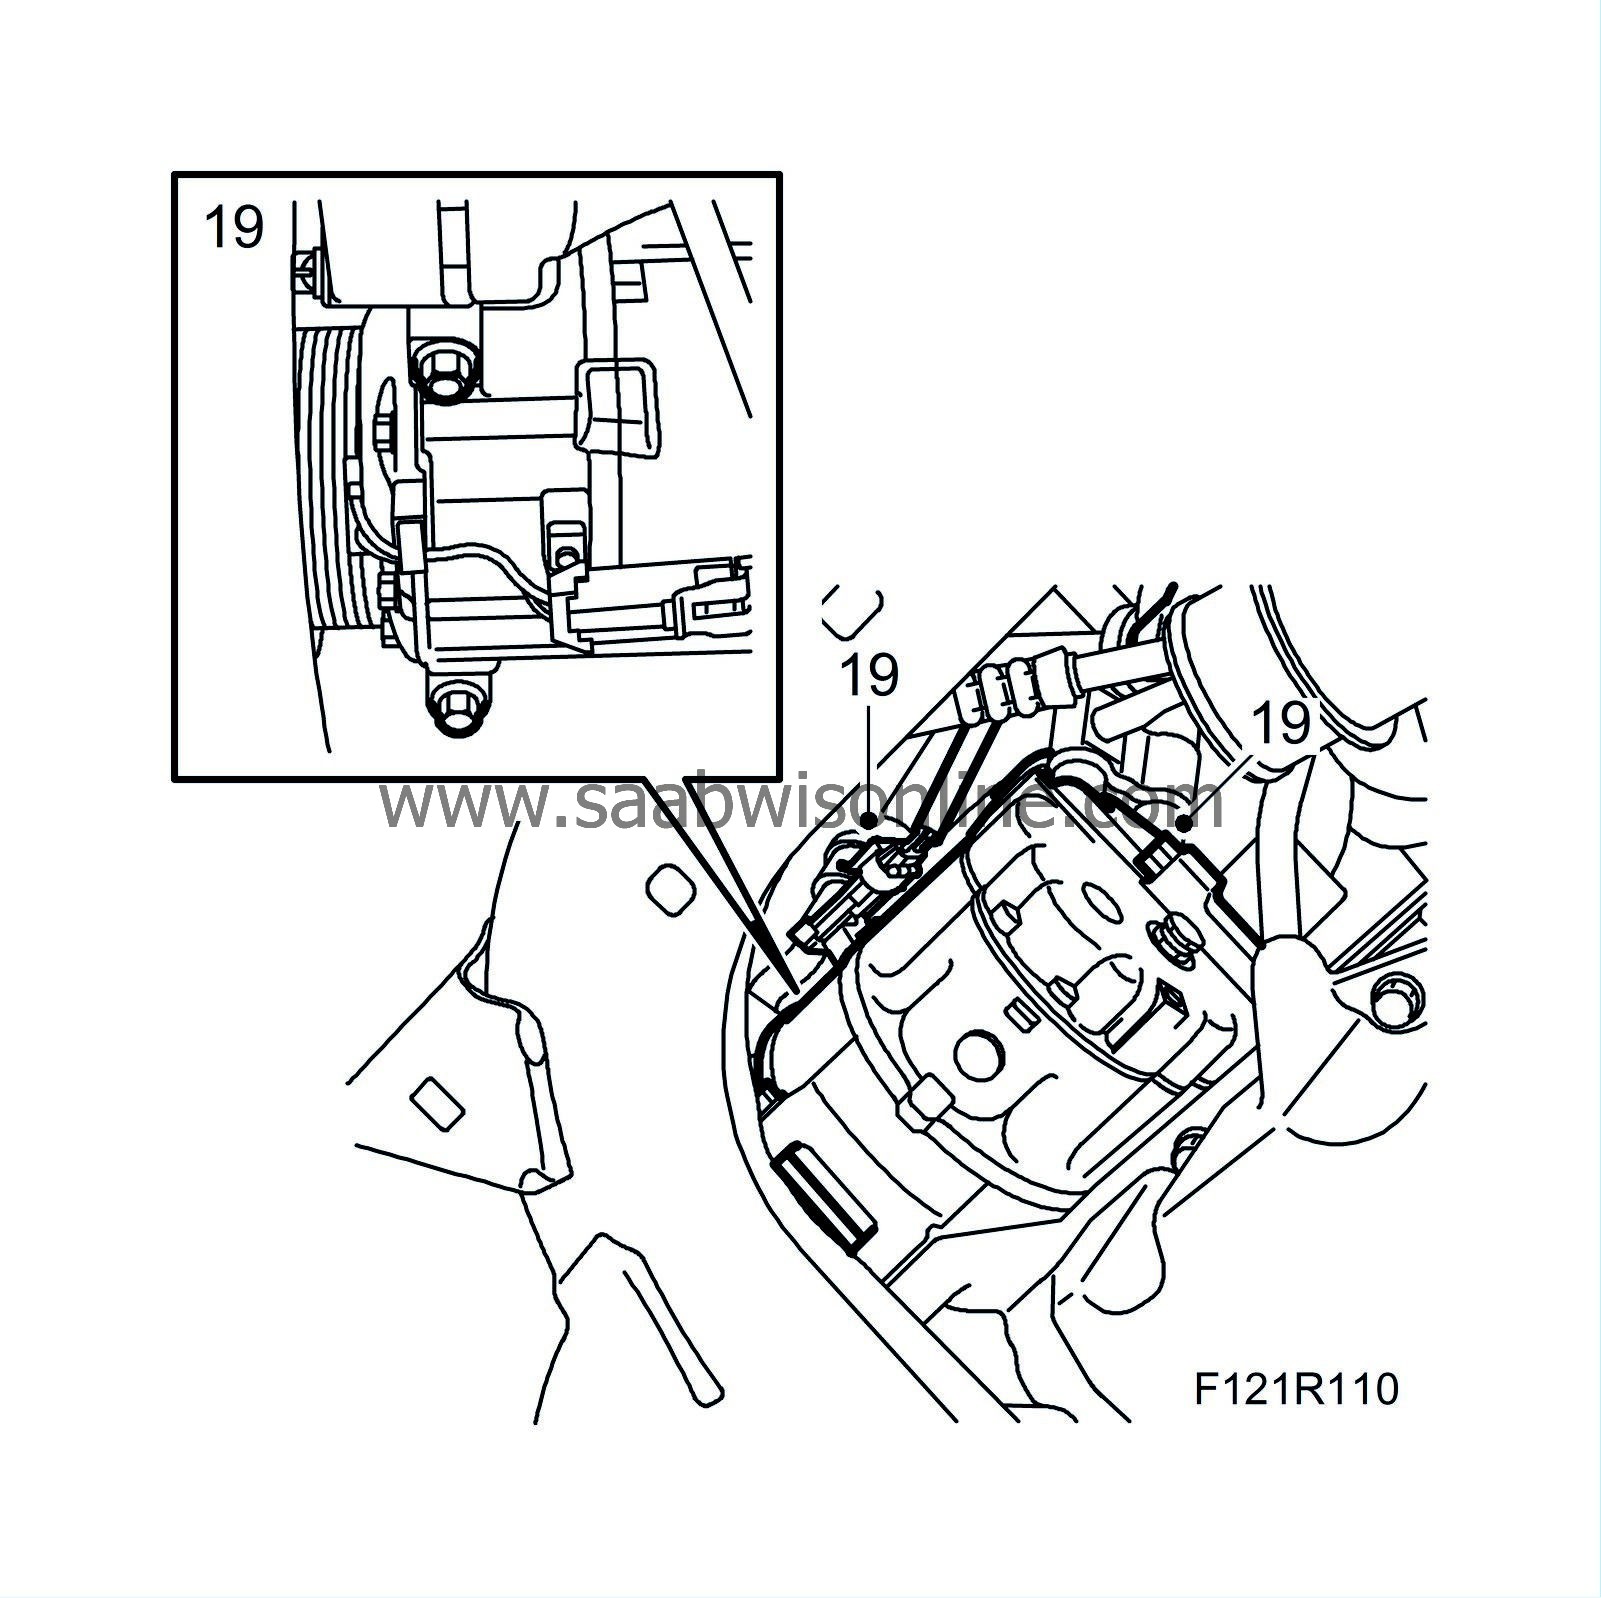
|
|
| 20. |
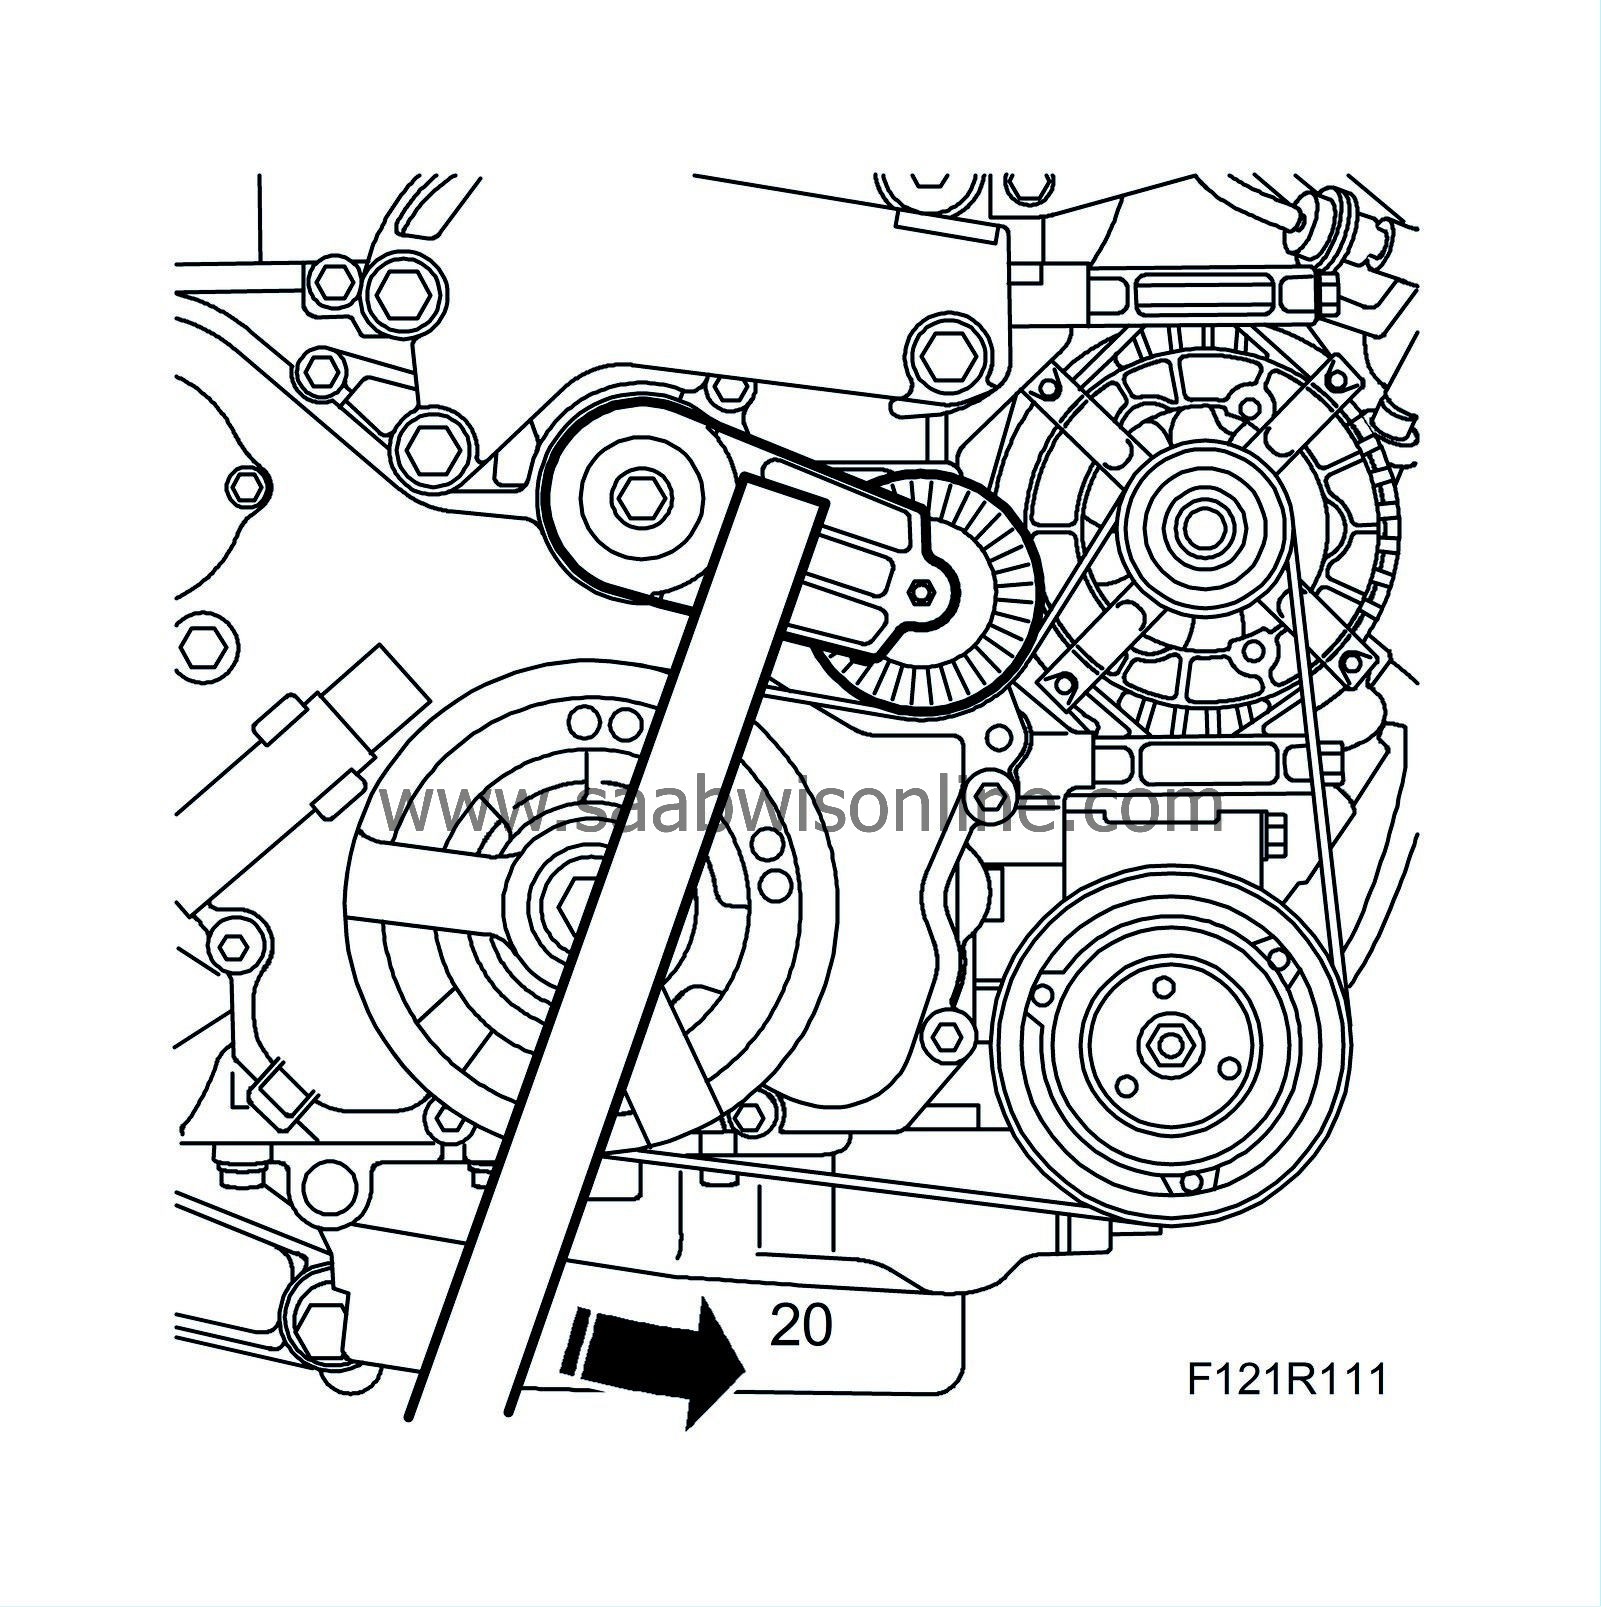
Relieve the multigroove belt and mount it observing the rotation direction noted earlier. Use
83 96 095 Belt circuit relieving tool B207
.
|
|
| 21. |
Make sure the steering assembly is in straight-ahead position. Fit the steering shaft to the steering gear. Use a new bolt.
Tightening torque 27 Nm (20 lbf ft). 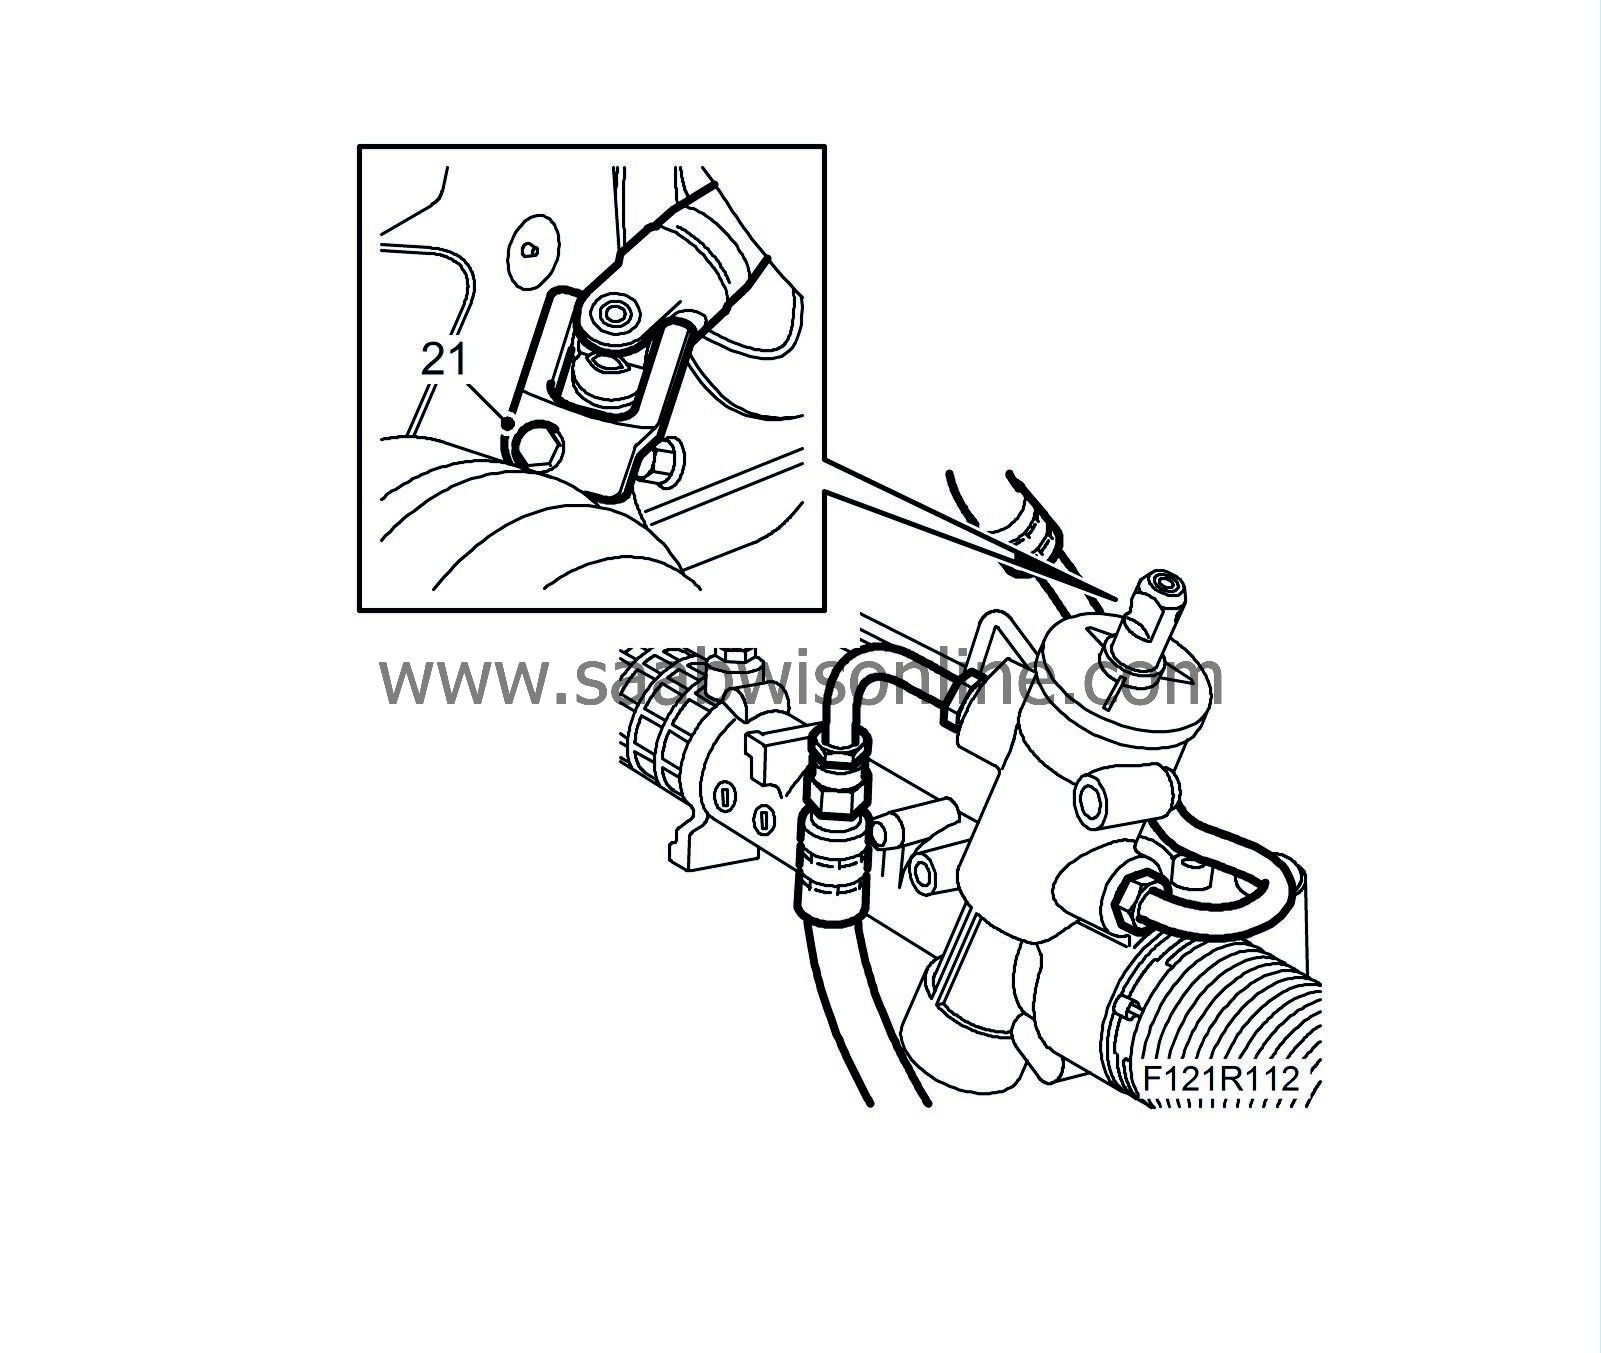
|
|
| 22. |
Lower the car and remove the tape from the steering wheel.
|
||||||||||||||||||||||||
| 23. |
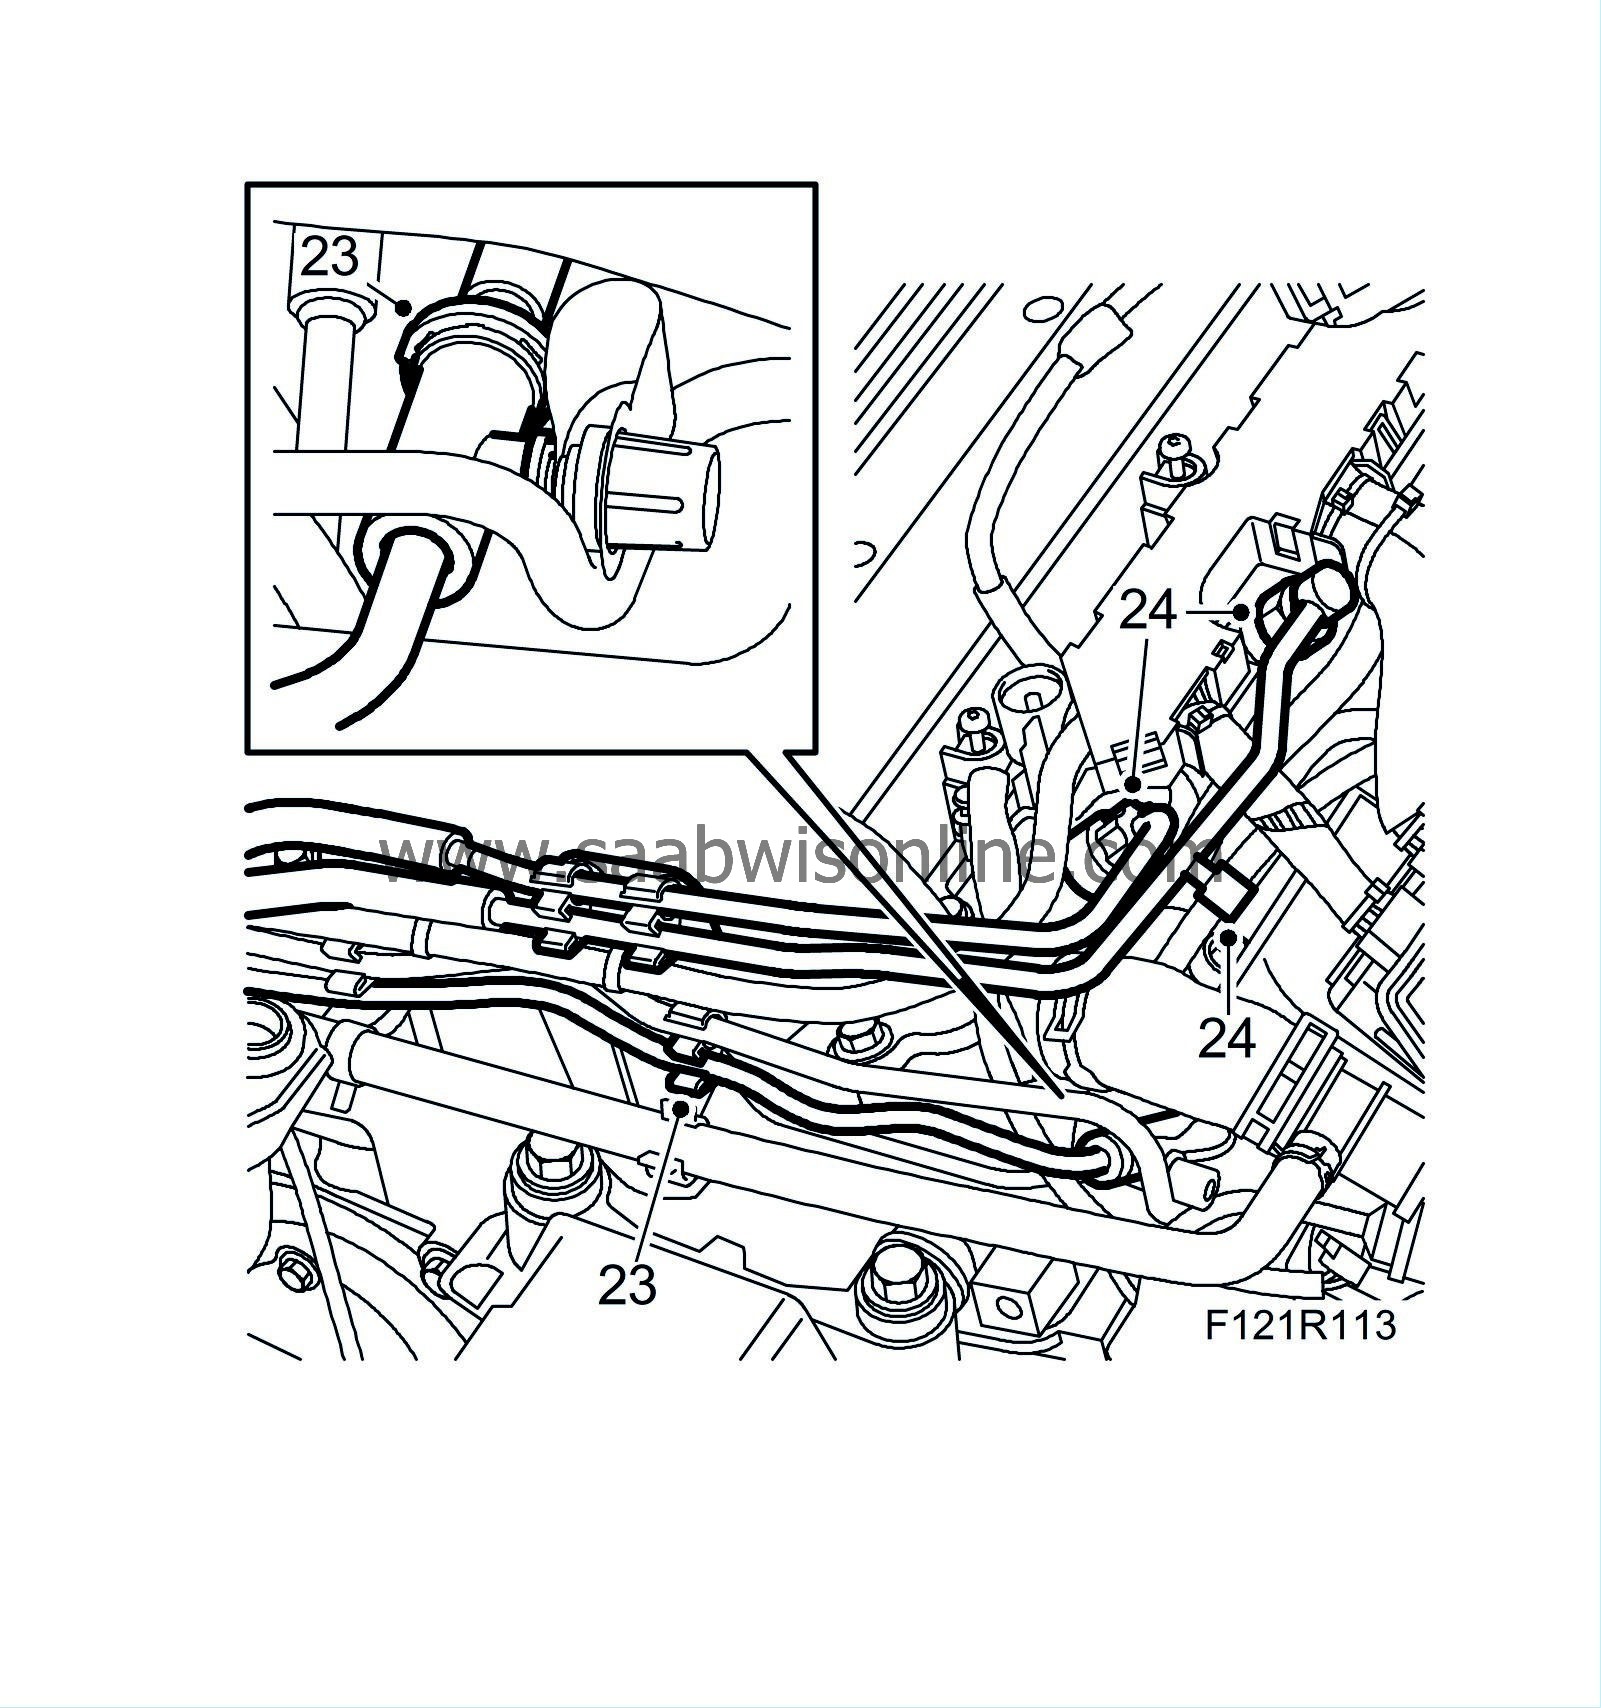
Connect the quick-release coupling on the ventilation line and press the fuel lines and ventilation lines into the clips on the camshaft cover.
|
|
| 24. |
Remove the plugs and connect both fuel lines to the fuel rail while gripping the lower nut. Use new seals.
|
|
| 25. |
Connect the quick-release coupling to the clutch slave cylinder. Remove
30 07 739 Hose pinch-off pliers
from the clutch hose. The connection must be mounted at the correct angle as illustrated. Make sure the connection is secure.


|
|
| 26. |
Attach the gear cables to the gearbox.
|
|
| 27. |
Connect the coolant hose quick-release couplings. Change O-rings if necessary.
|
|
| 28. |
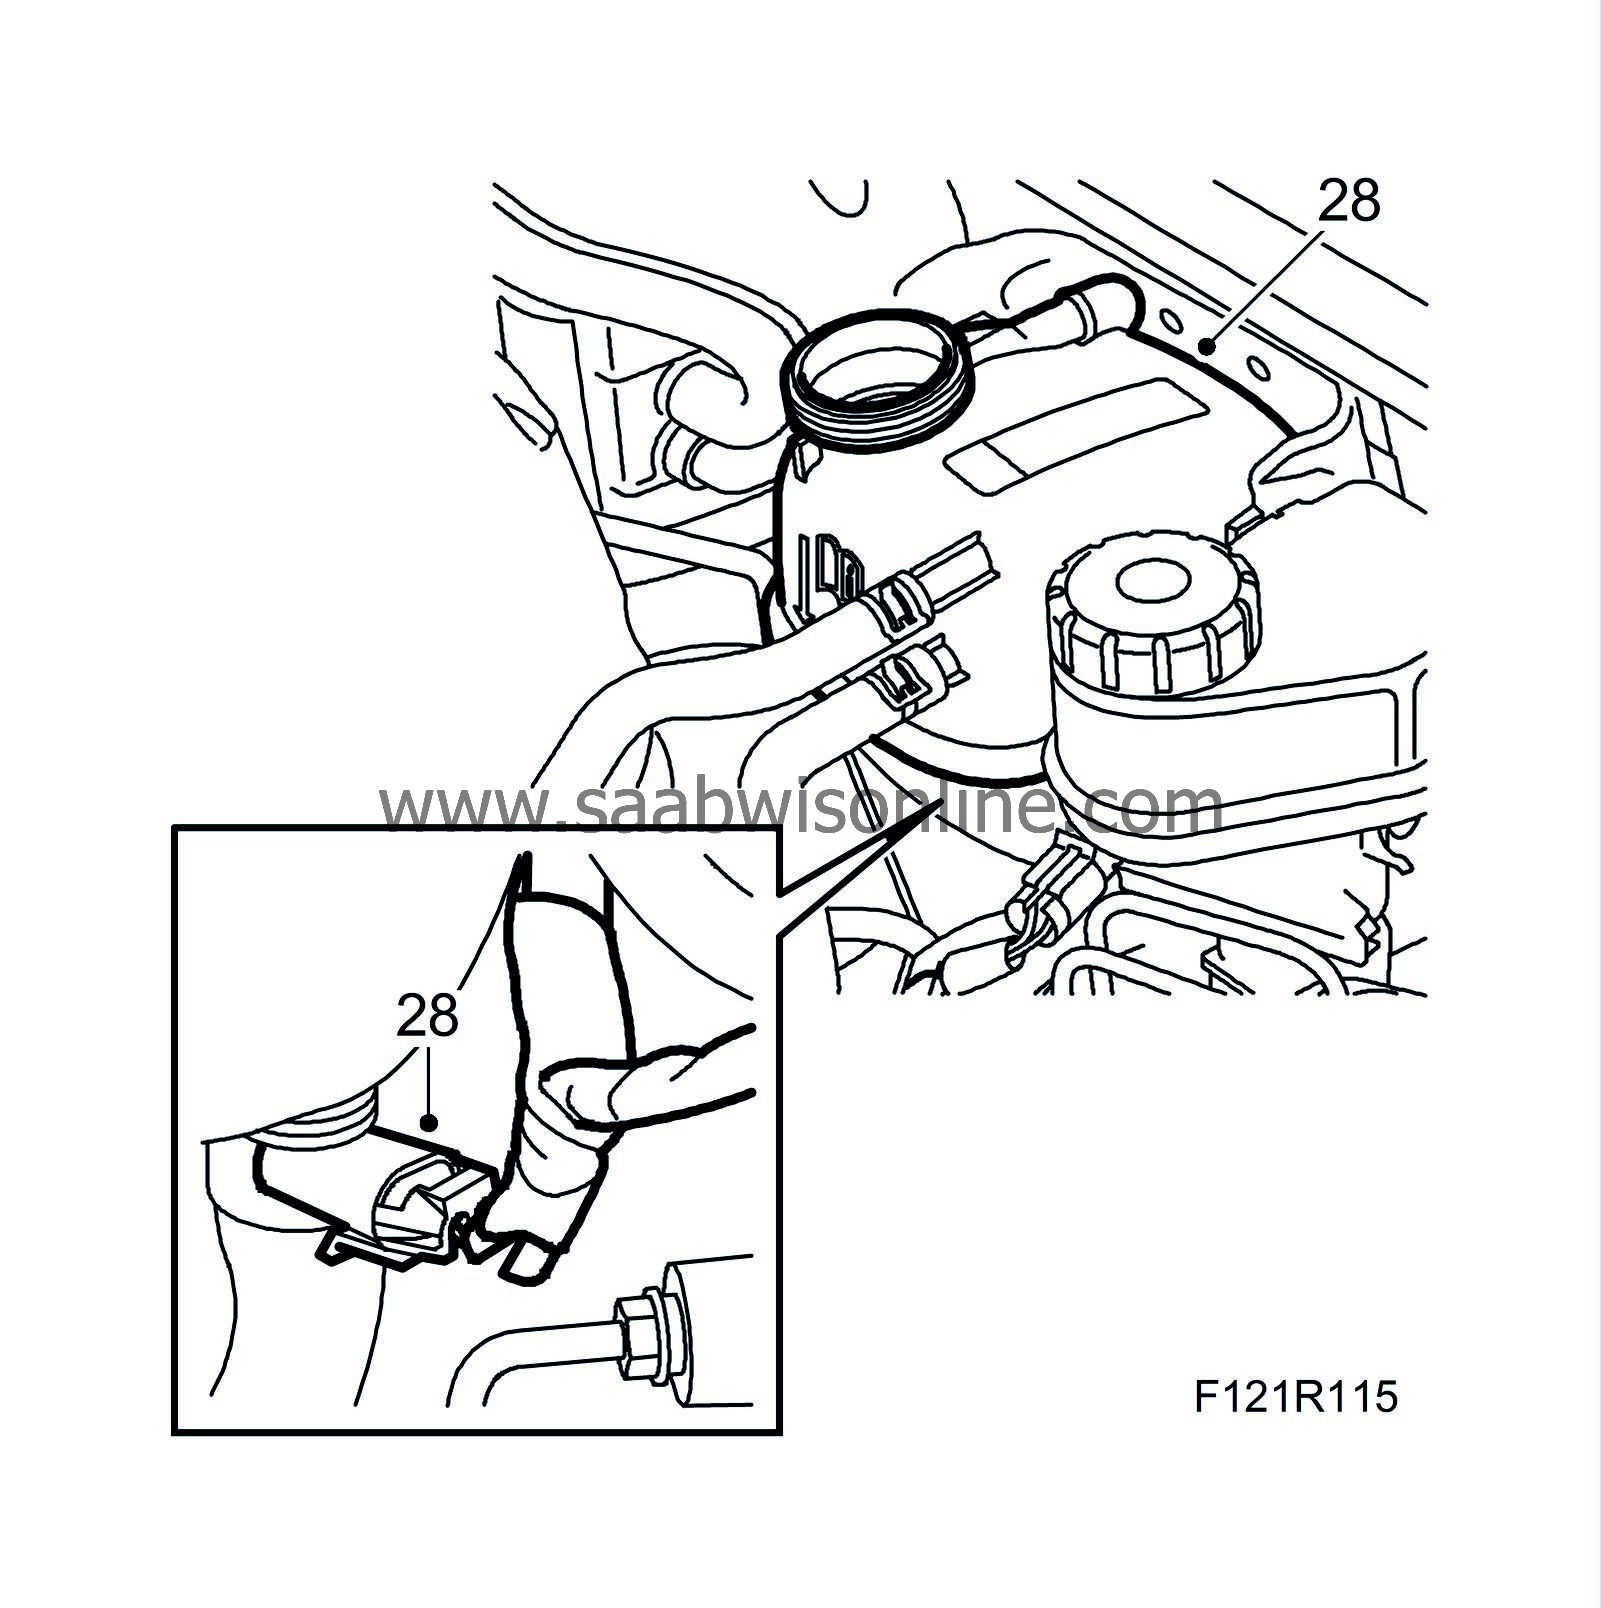
Fit the expansion tank on the body. Plug in the coolant level sensor connector.
|
|
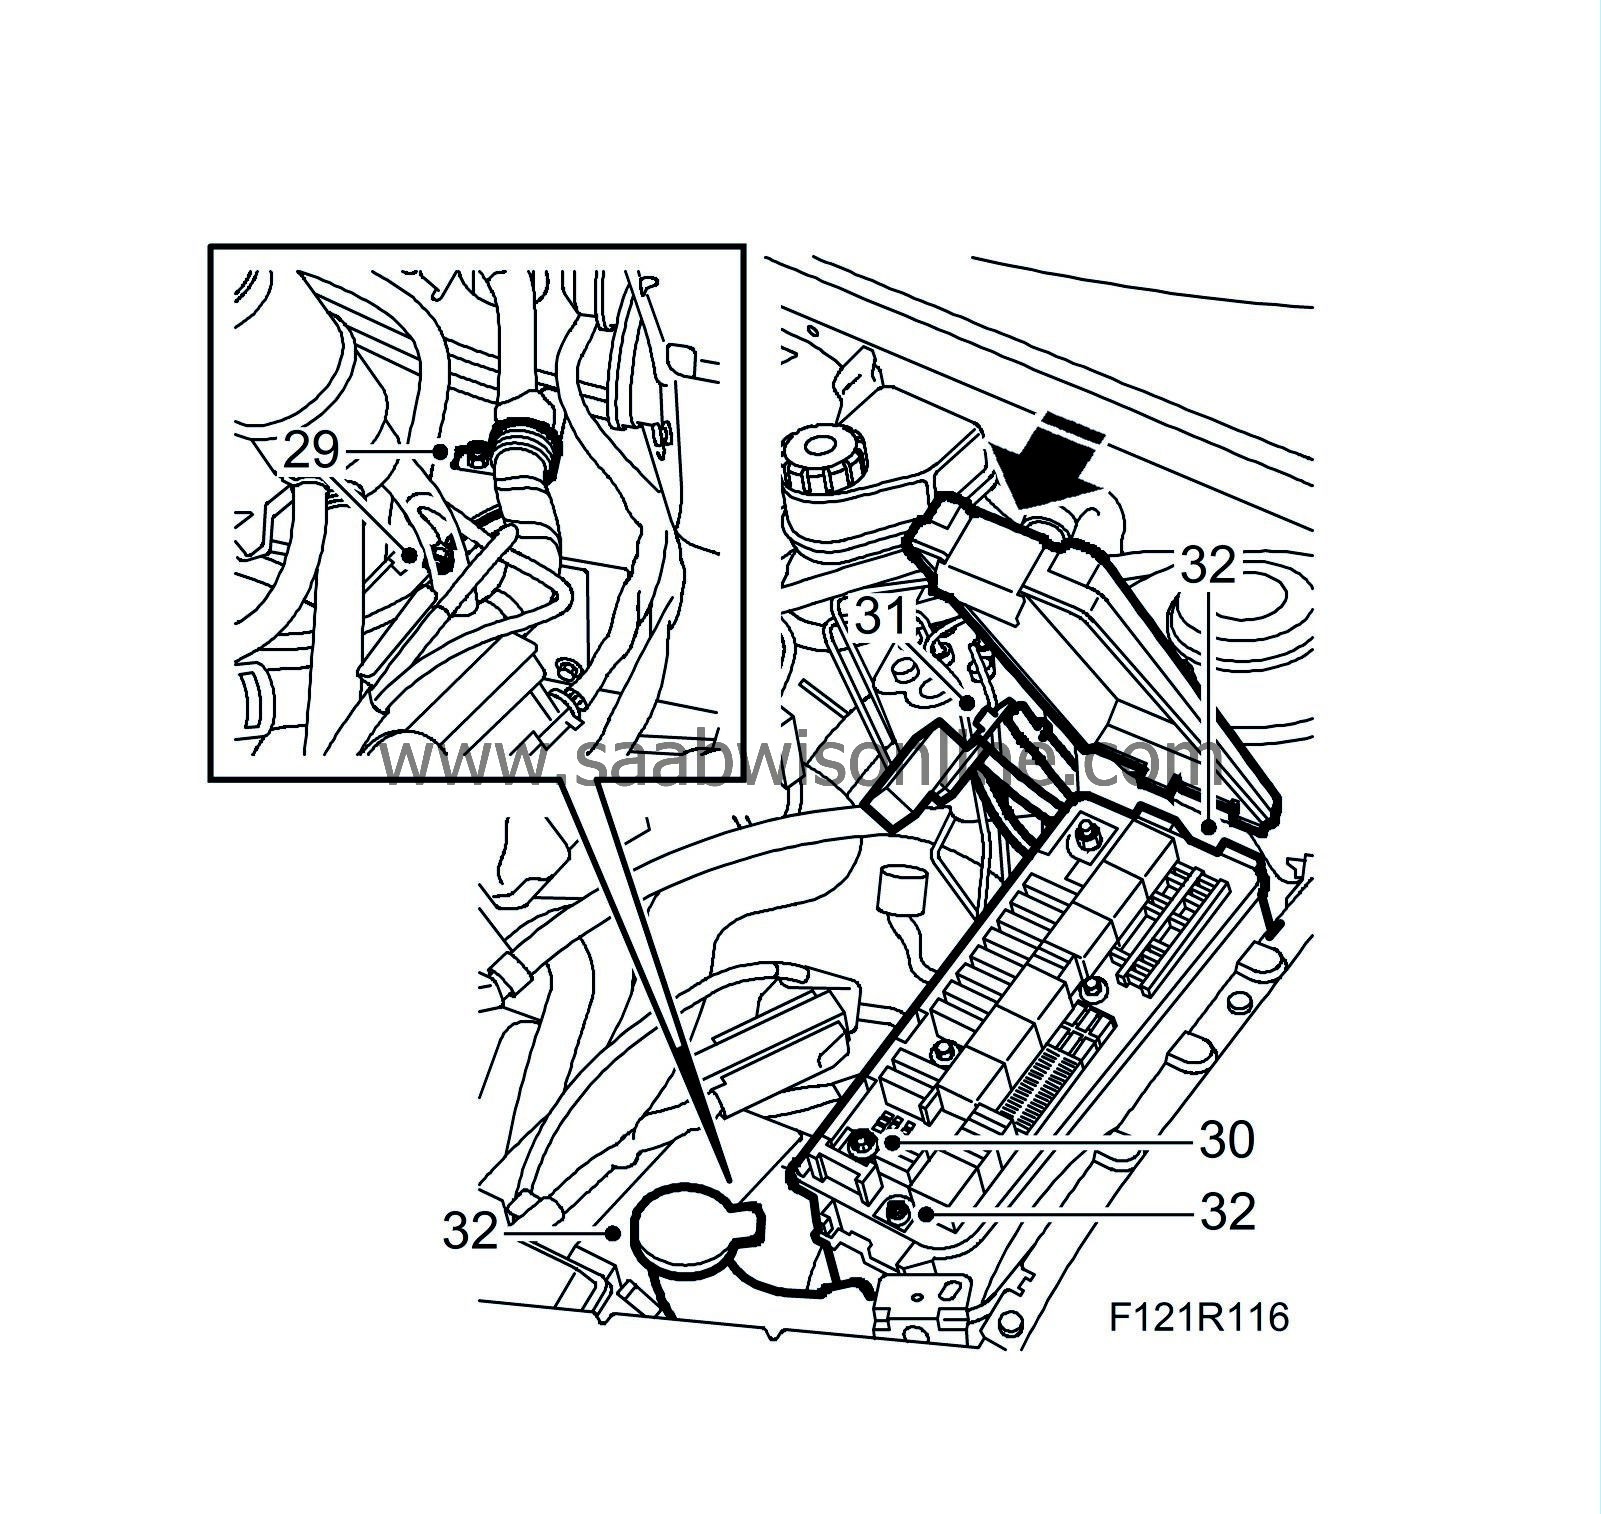
| 29. |
Attach the ground cables and the clamp for the engine harness to the body.
|
|
| 30. |
Fit the retaining screw for the engine harness connector in the main fuse box.
|
|
| 31. |
Connect the positive cable to the battery.
|
|
| 32. |
Fit the two retaining screws for the main fuse box and the main fuse box cover. Fit the windscreen washer filler pipe.
|
|
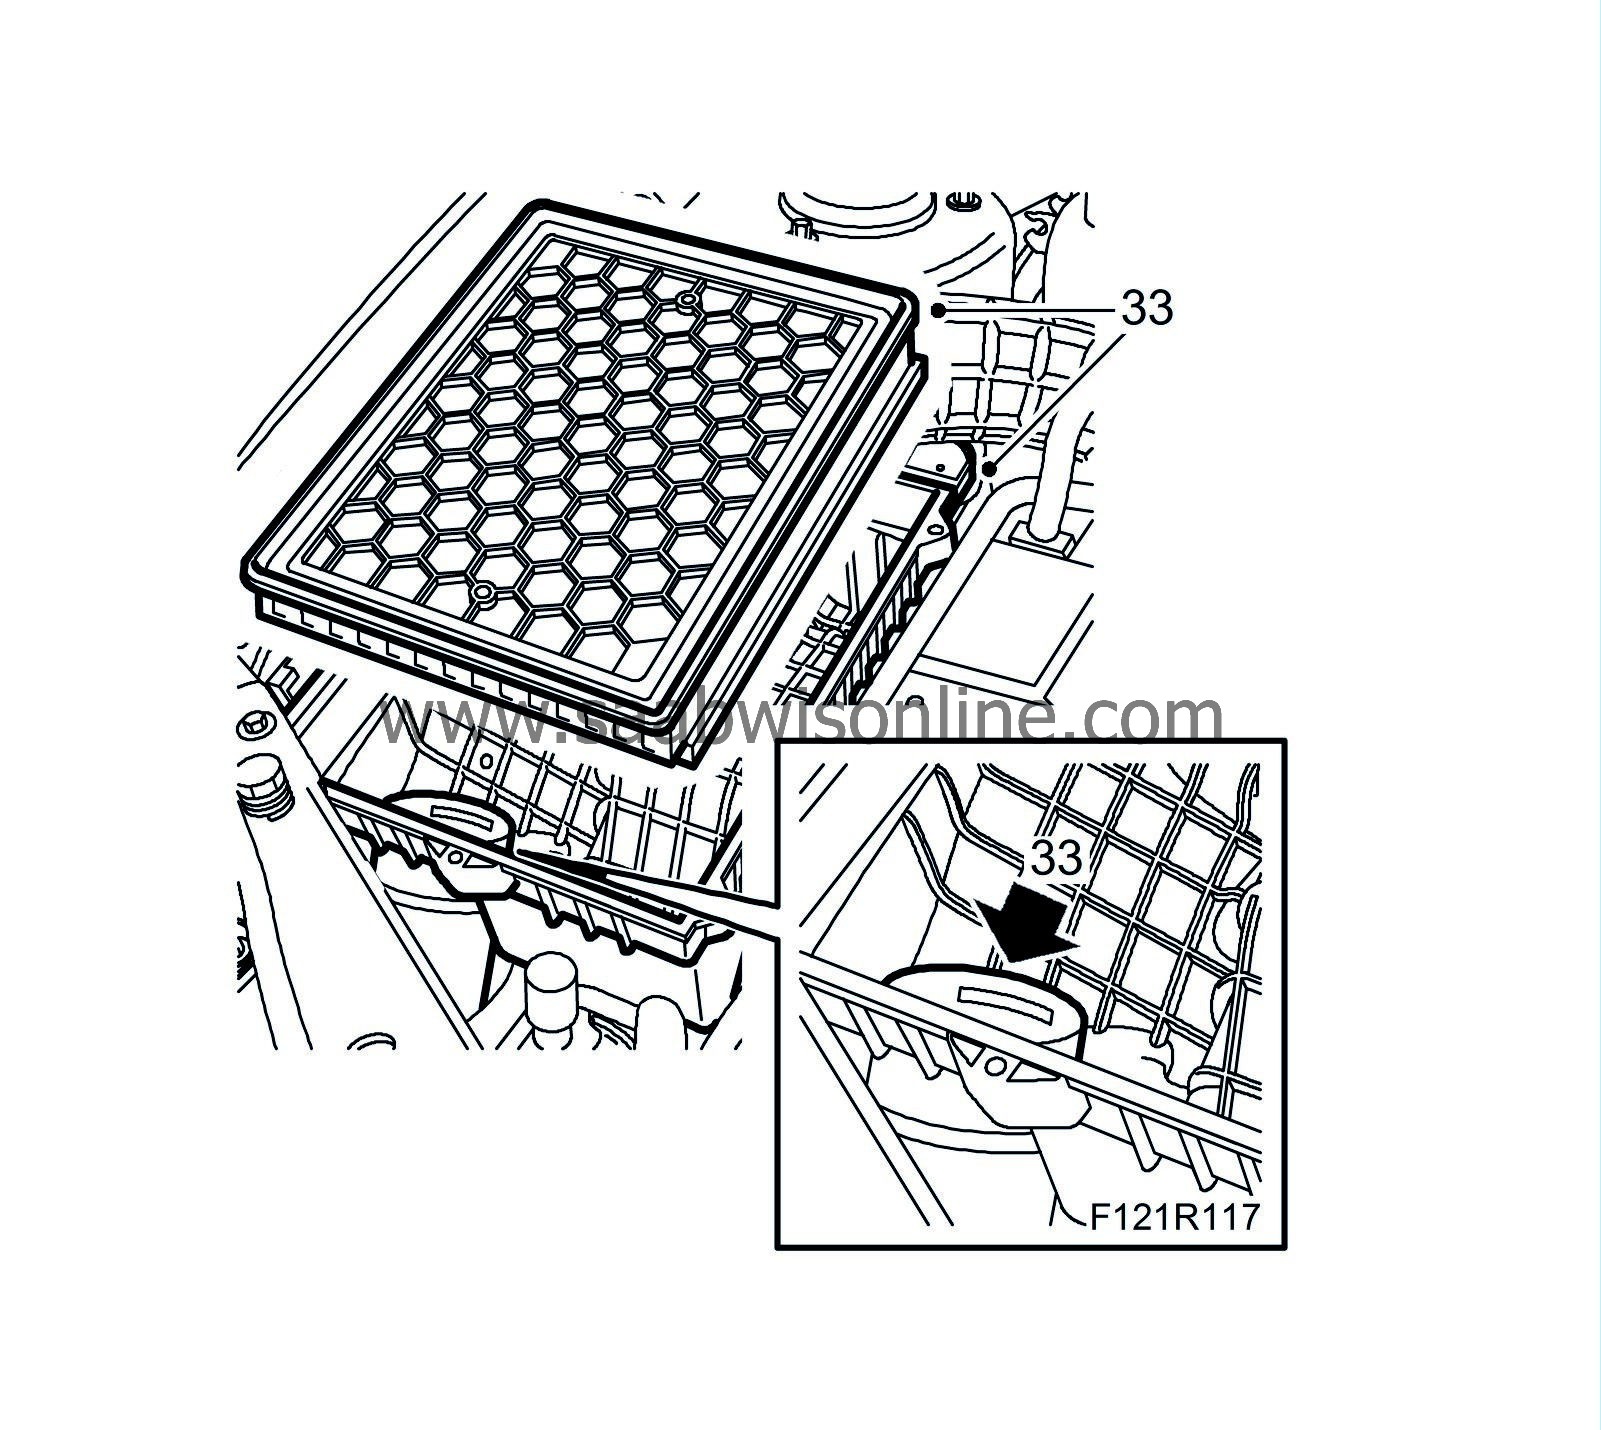
| 33. |
Fit the air cleaner casing and connect the intake hose. Fit the air cleaner and the air cleaner casing cover.
|
||||||||||
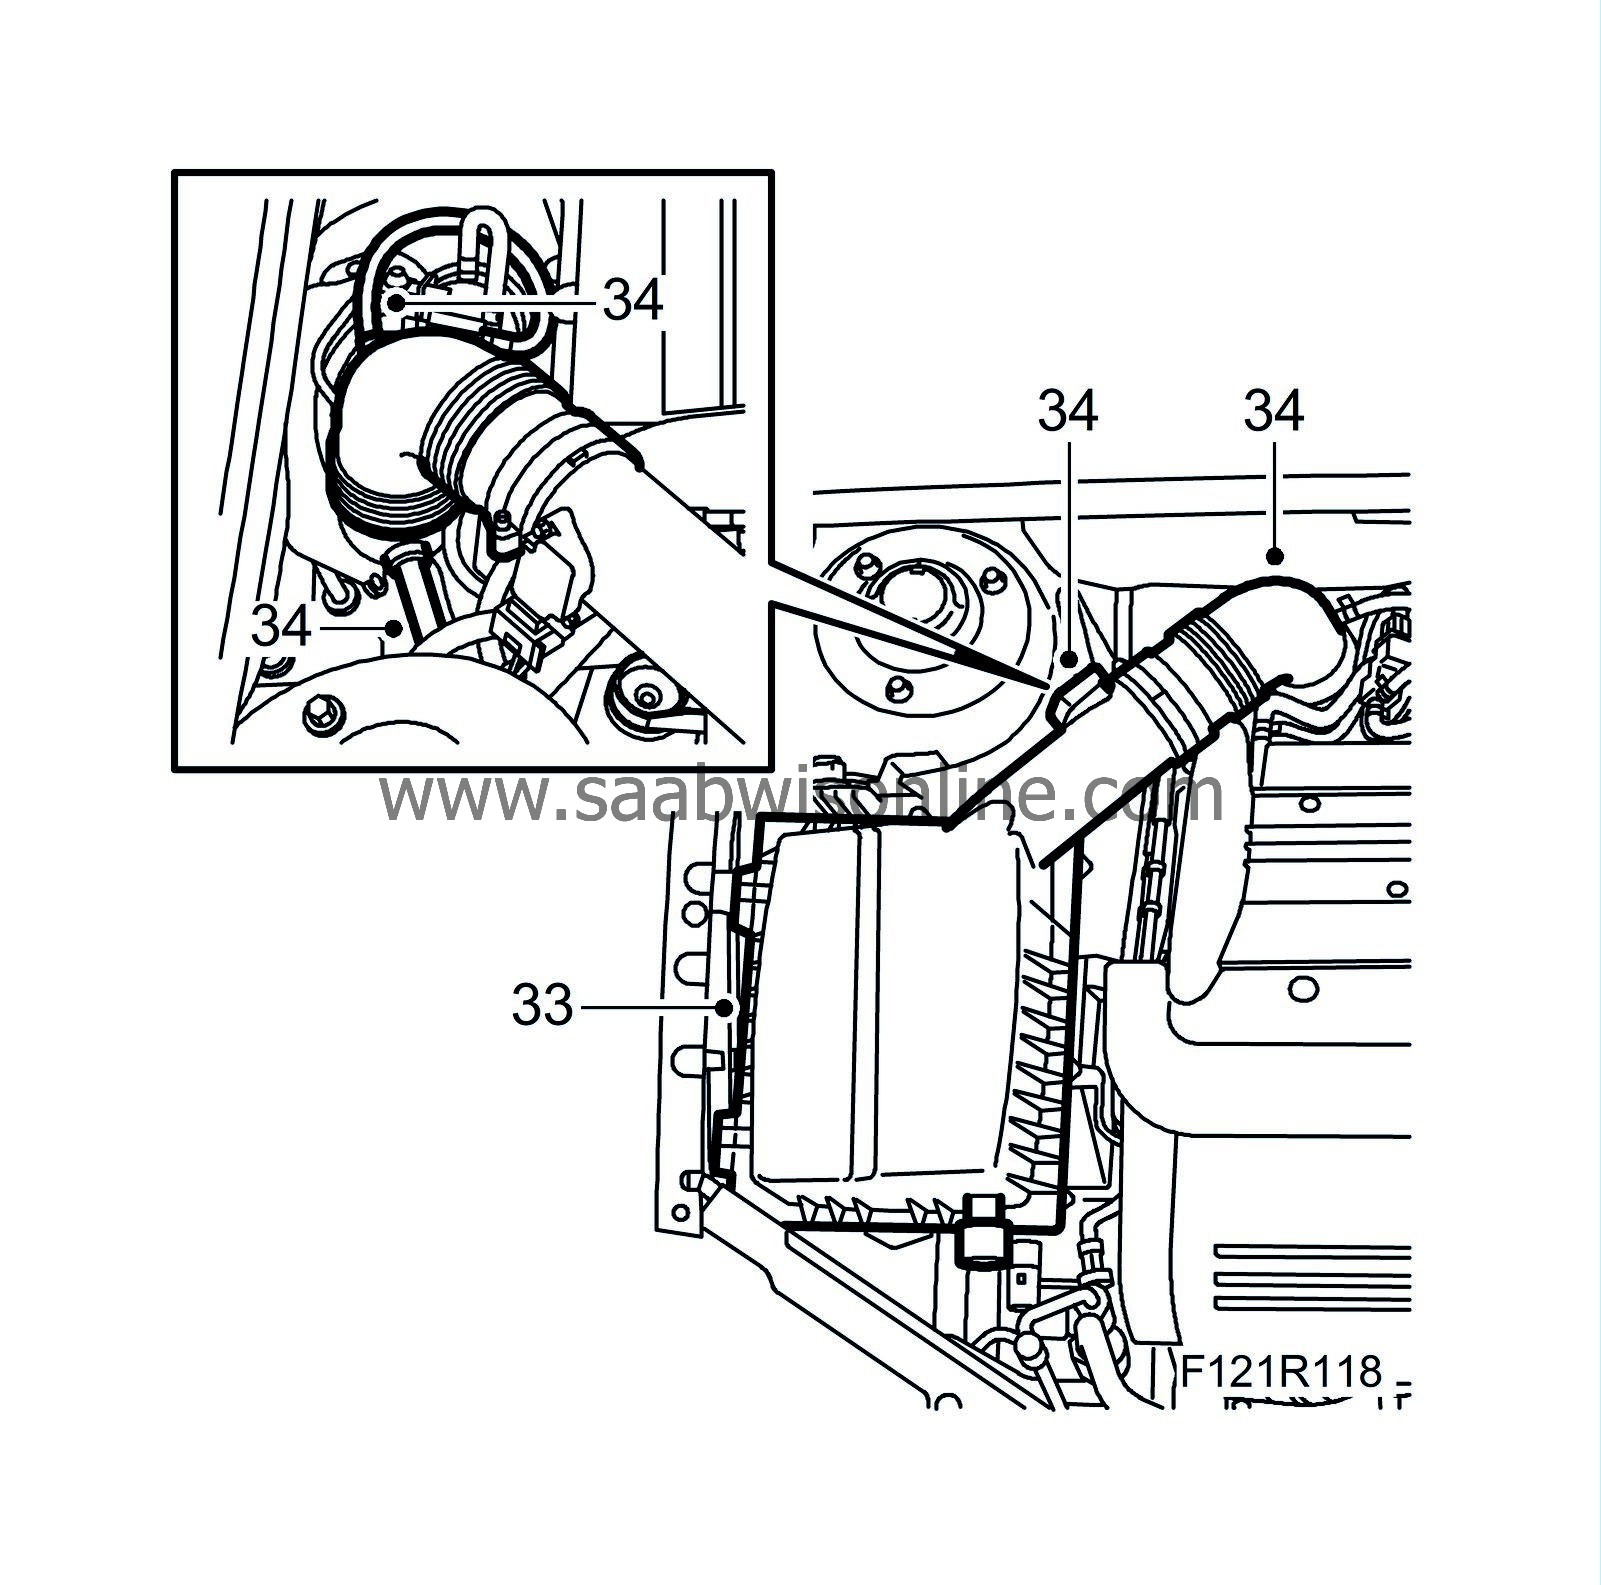
| 34. |
Plug in the mass air flow sensor connector. Remove the plug, fit the turbo inlet pipe and connect the hoses to the inlet pipe.
|
|
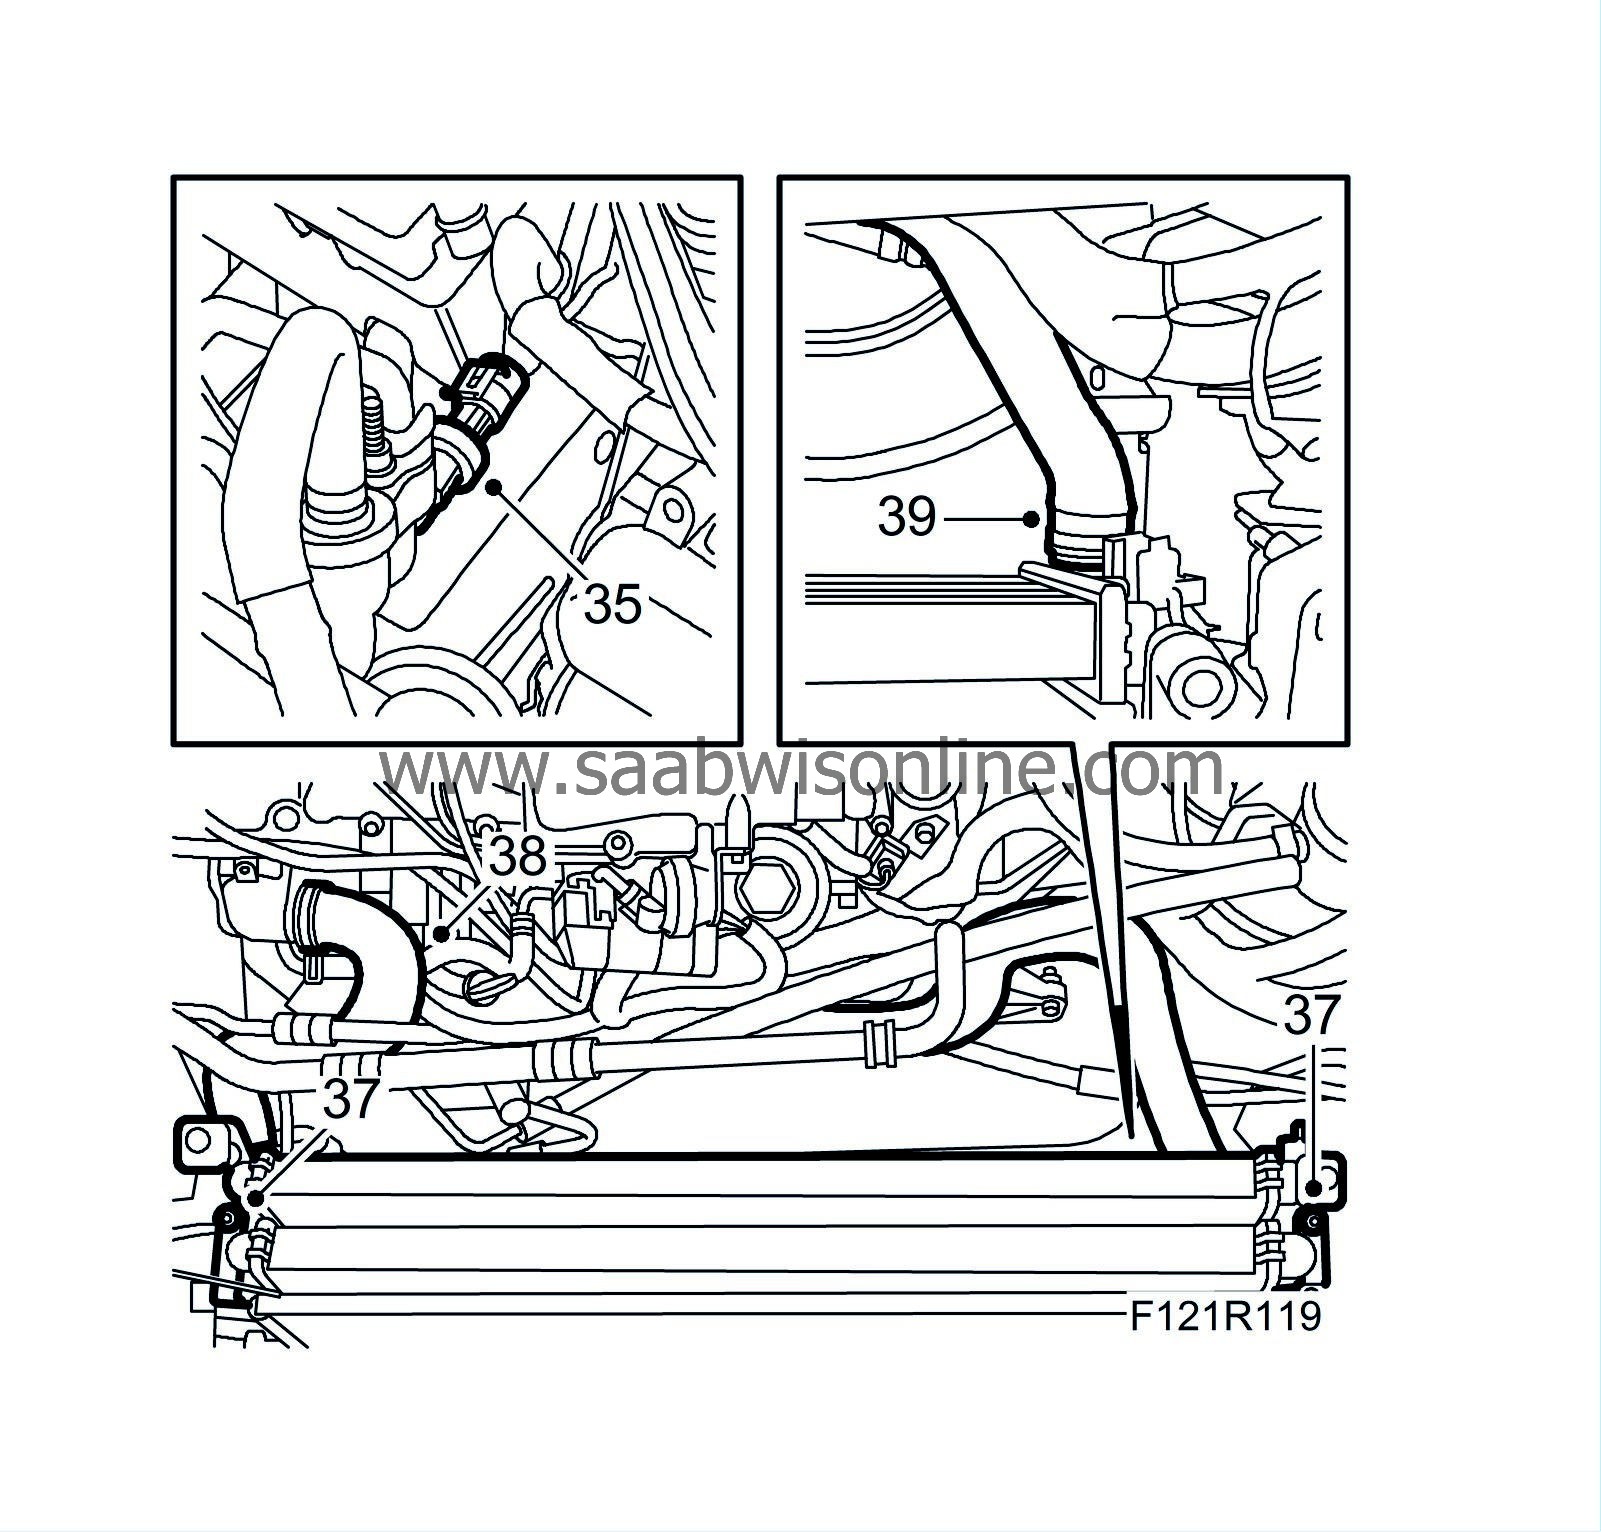
| 35. |
Plug in the connector for the A/C pressure sensor.
|
|
| 36. |
Fit the radiator. Cut off the cable ties.
|
|
| 37. |
Make sure the condenser and charge air cooler hooks are positioned correctly and fit the radiator retaining bolts.
|
|
| 38. |
Fit the upper radiator hose.
|
|
| 39. |
Fit the lower radiator hose.
|
|
| 40. |
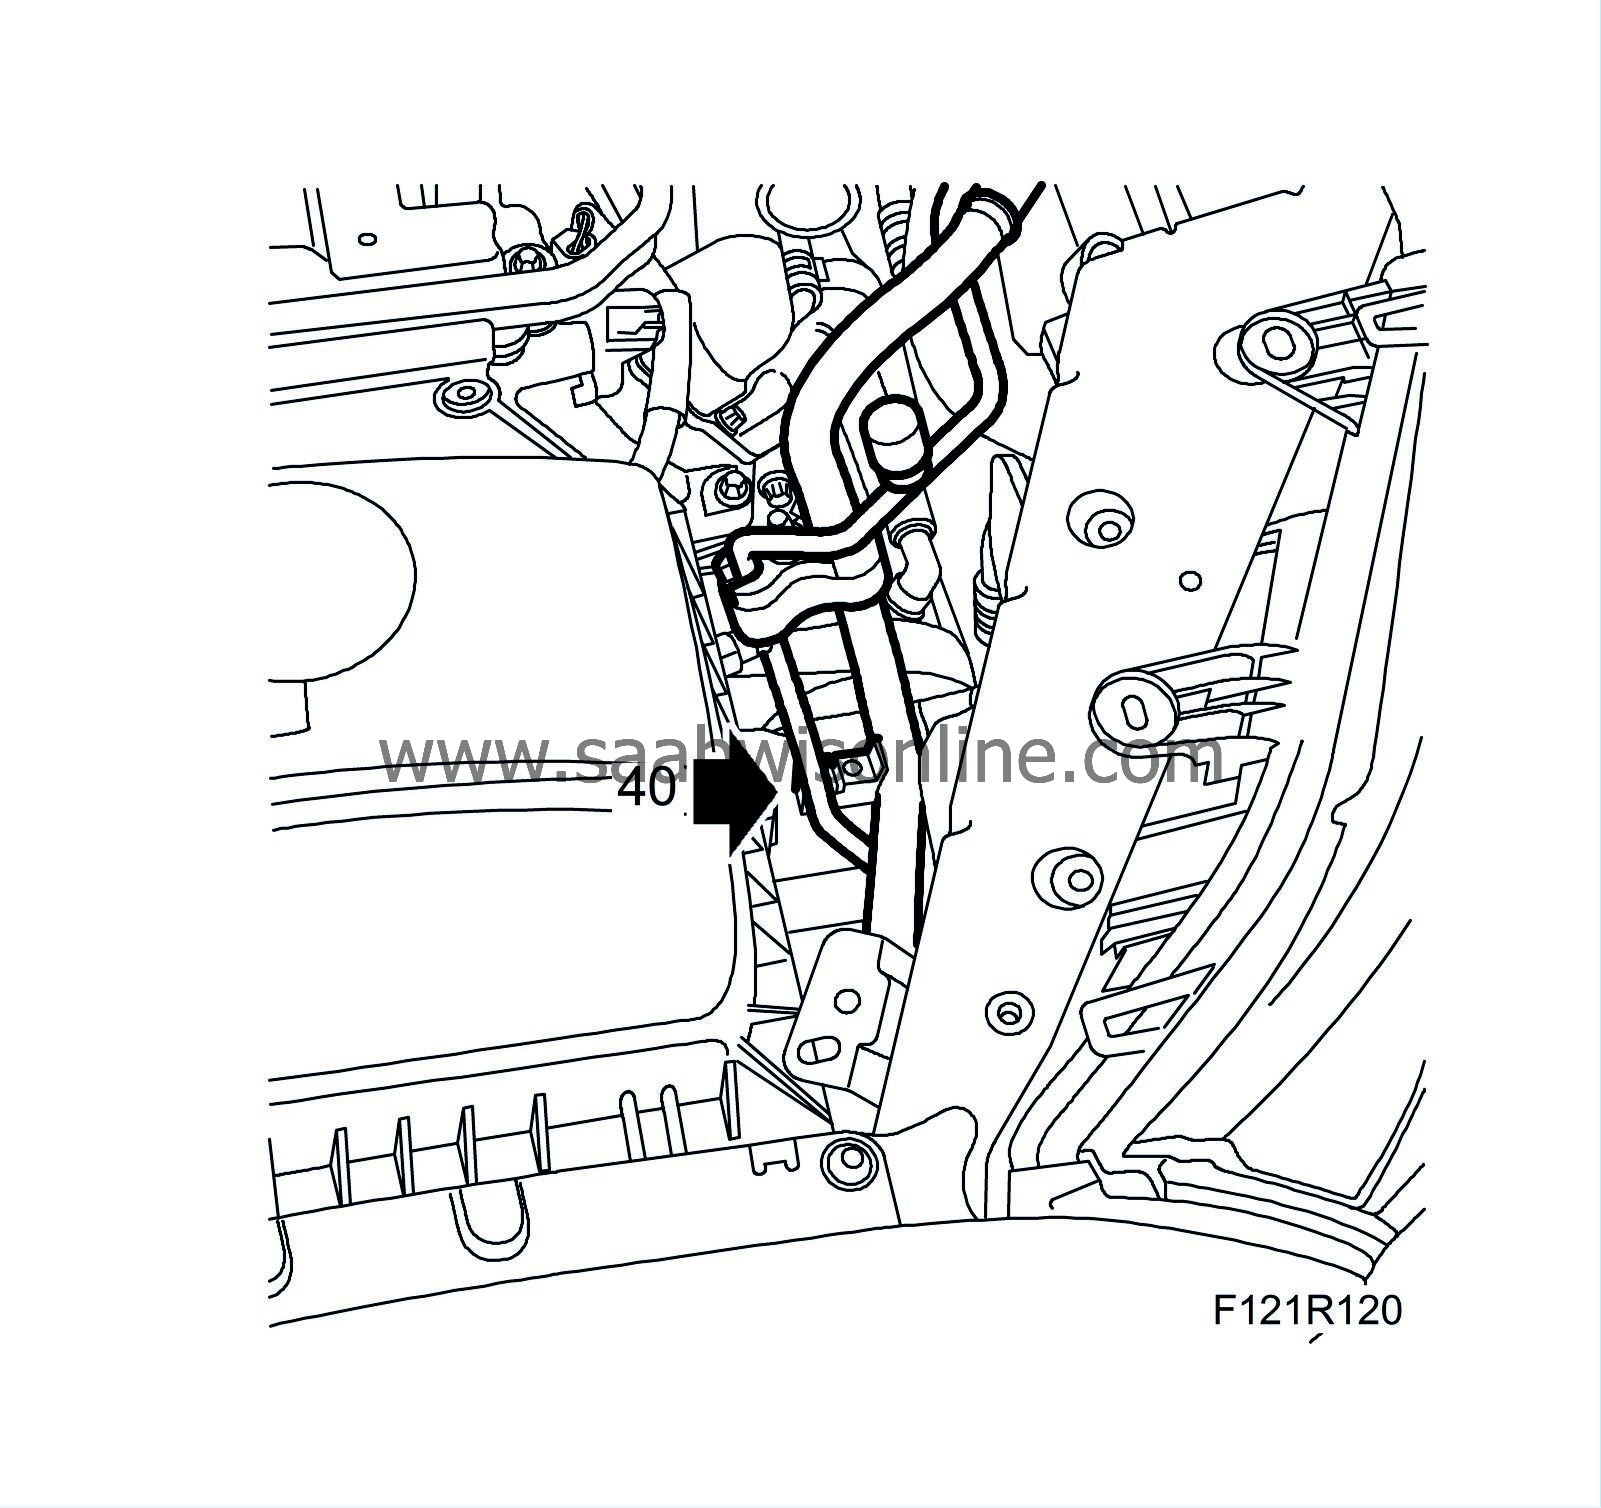
Fit the fan cowling and press the A/C pipes into the retaining clips on the right structural member.
Aut:
Connect the oil pipes from the automatic transmission to the radiator.

|
|
| 41. |
Plug in both connectors on the left structural member.

|
|
| 42. |
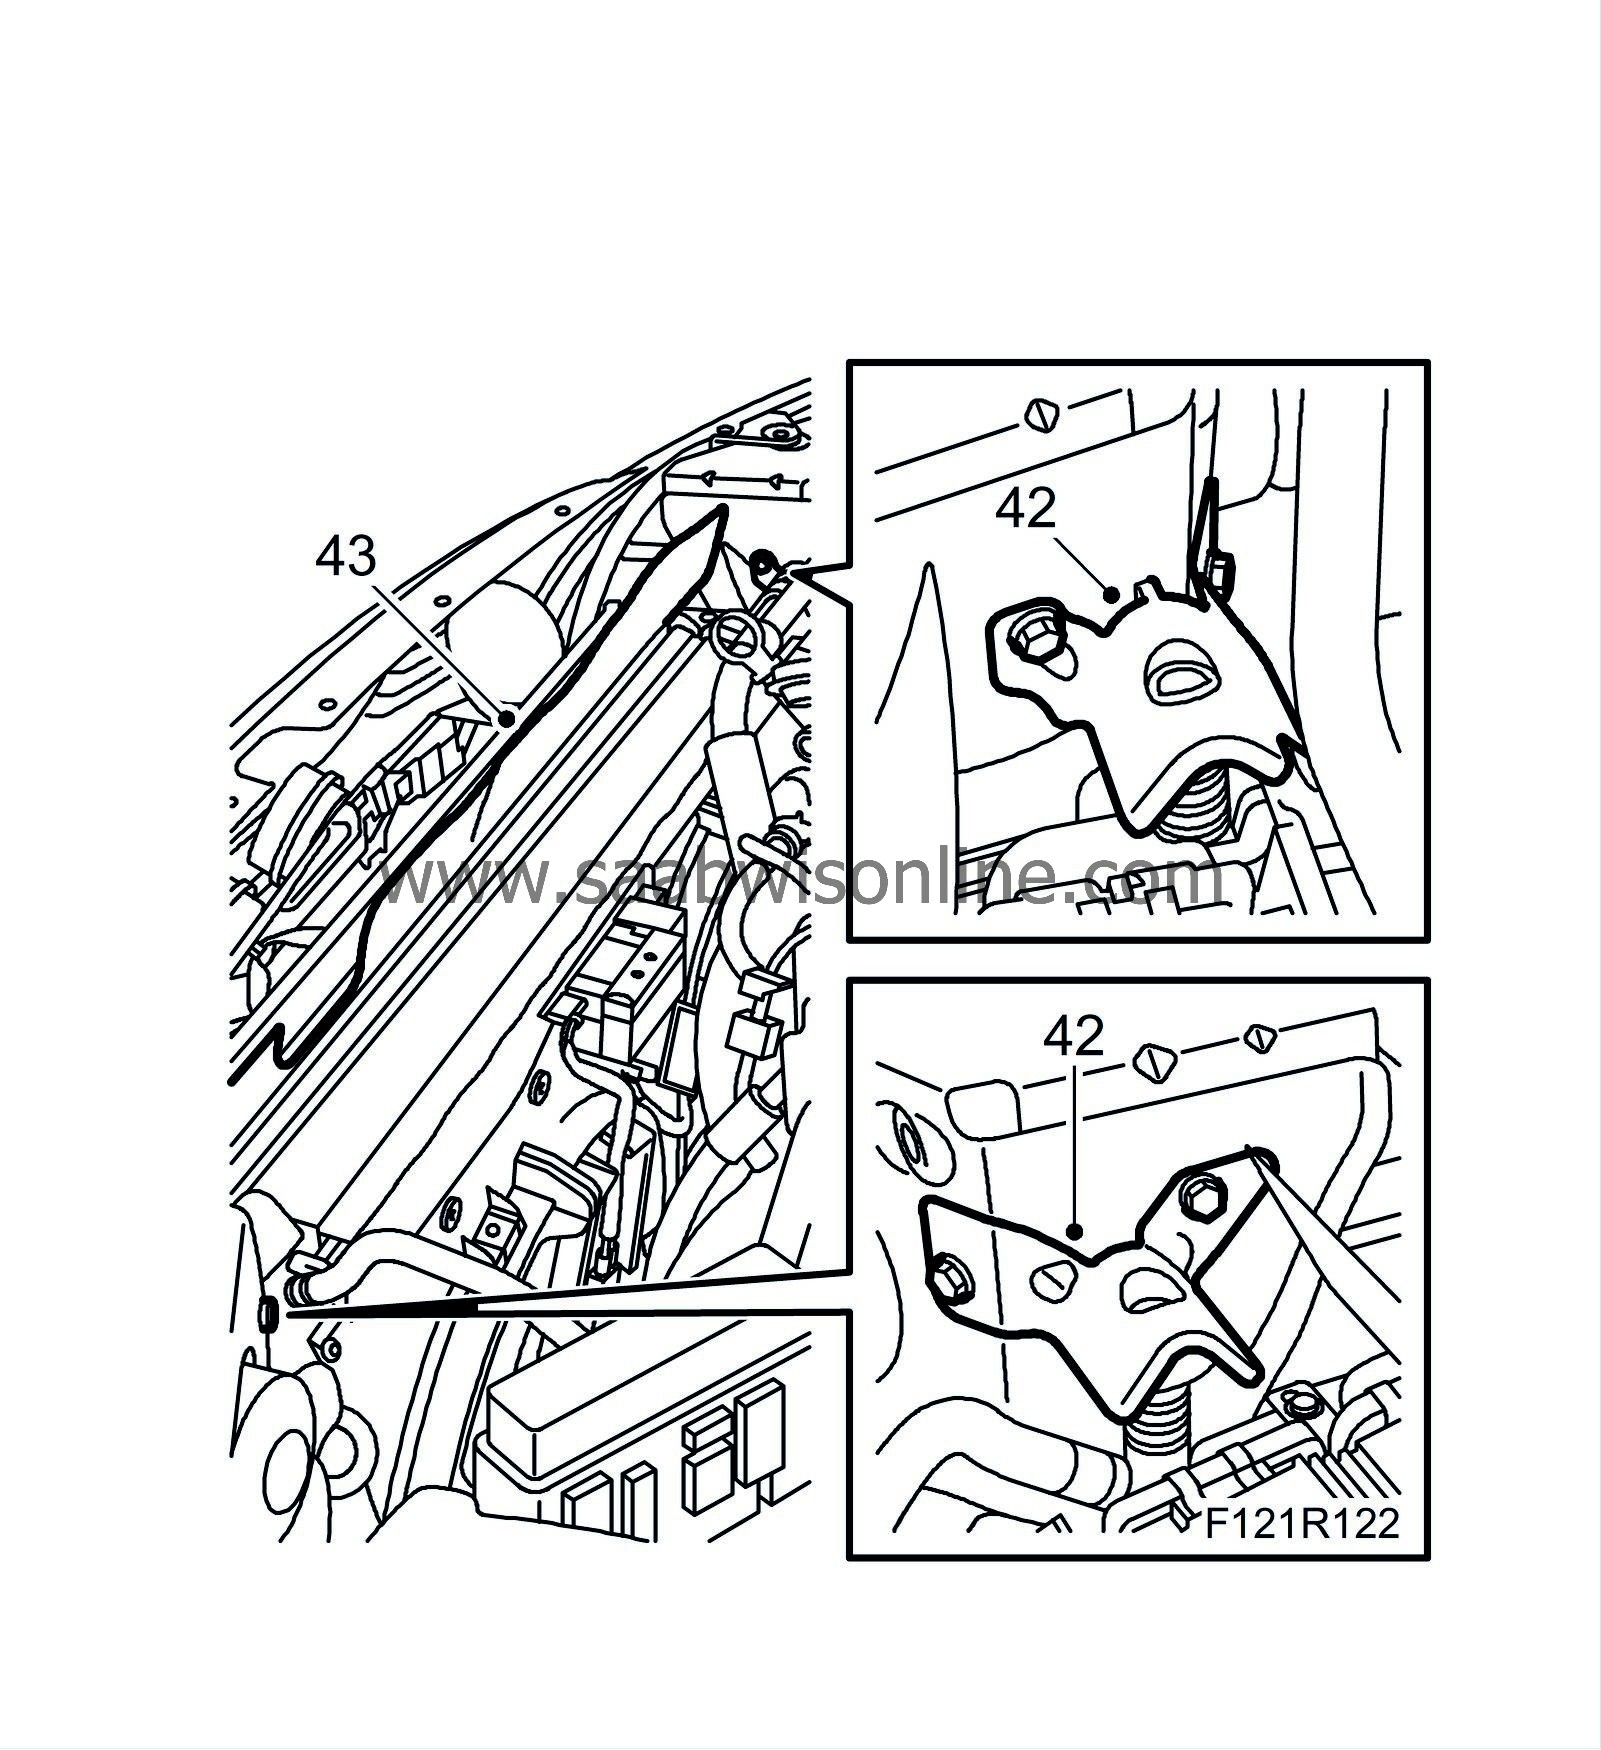
Fit the upper radiator brackets to the body.
|
|
| 43. |
Fit the seal over the radiator core.
|
|
| 44. |
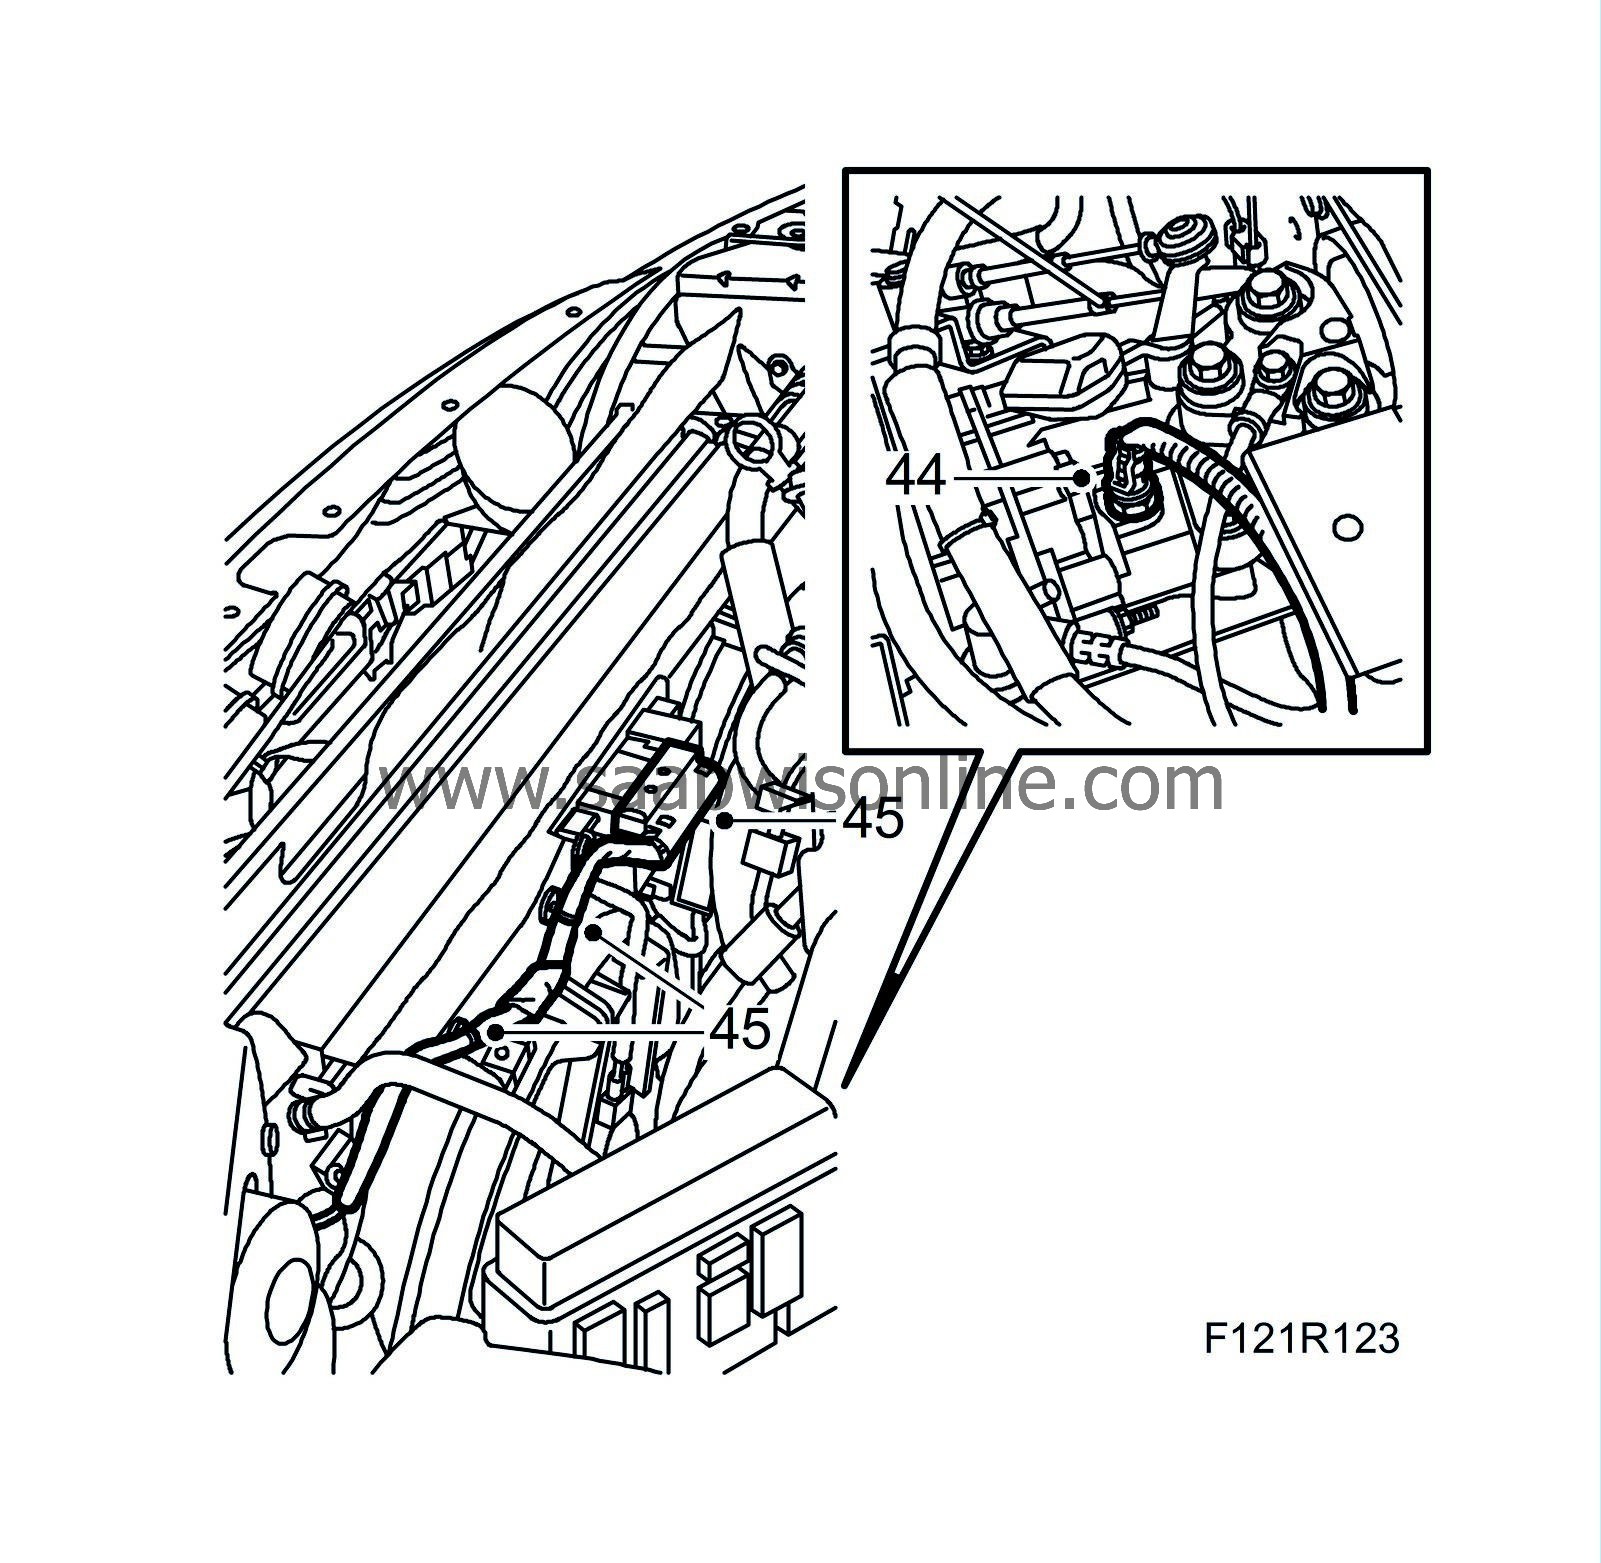
Plug in the reversing light switch connector.
|
|
| 45. |
Plug in the connector and attach the clip securing the cables on the fan cowling.
|
|
| 46. |
Fit the battery tray and the cable clip. Plug in the bonnet switch connector.

|
|
| 47. |
Fit the main fuse box in front of the battery tray. Plug in the connector under the control module.
|
|
| 48. |
Aut:
Fit the cover with the TCM. Plug in the connector to the control module.
|
|
| 49. |
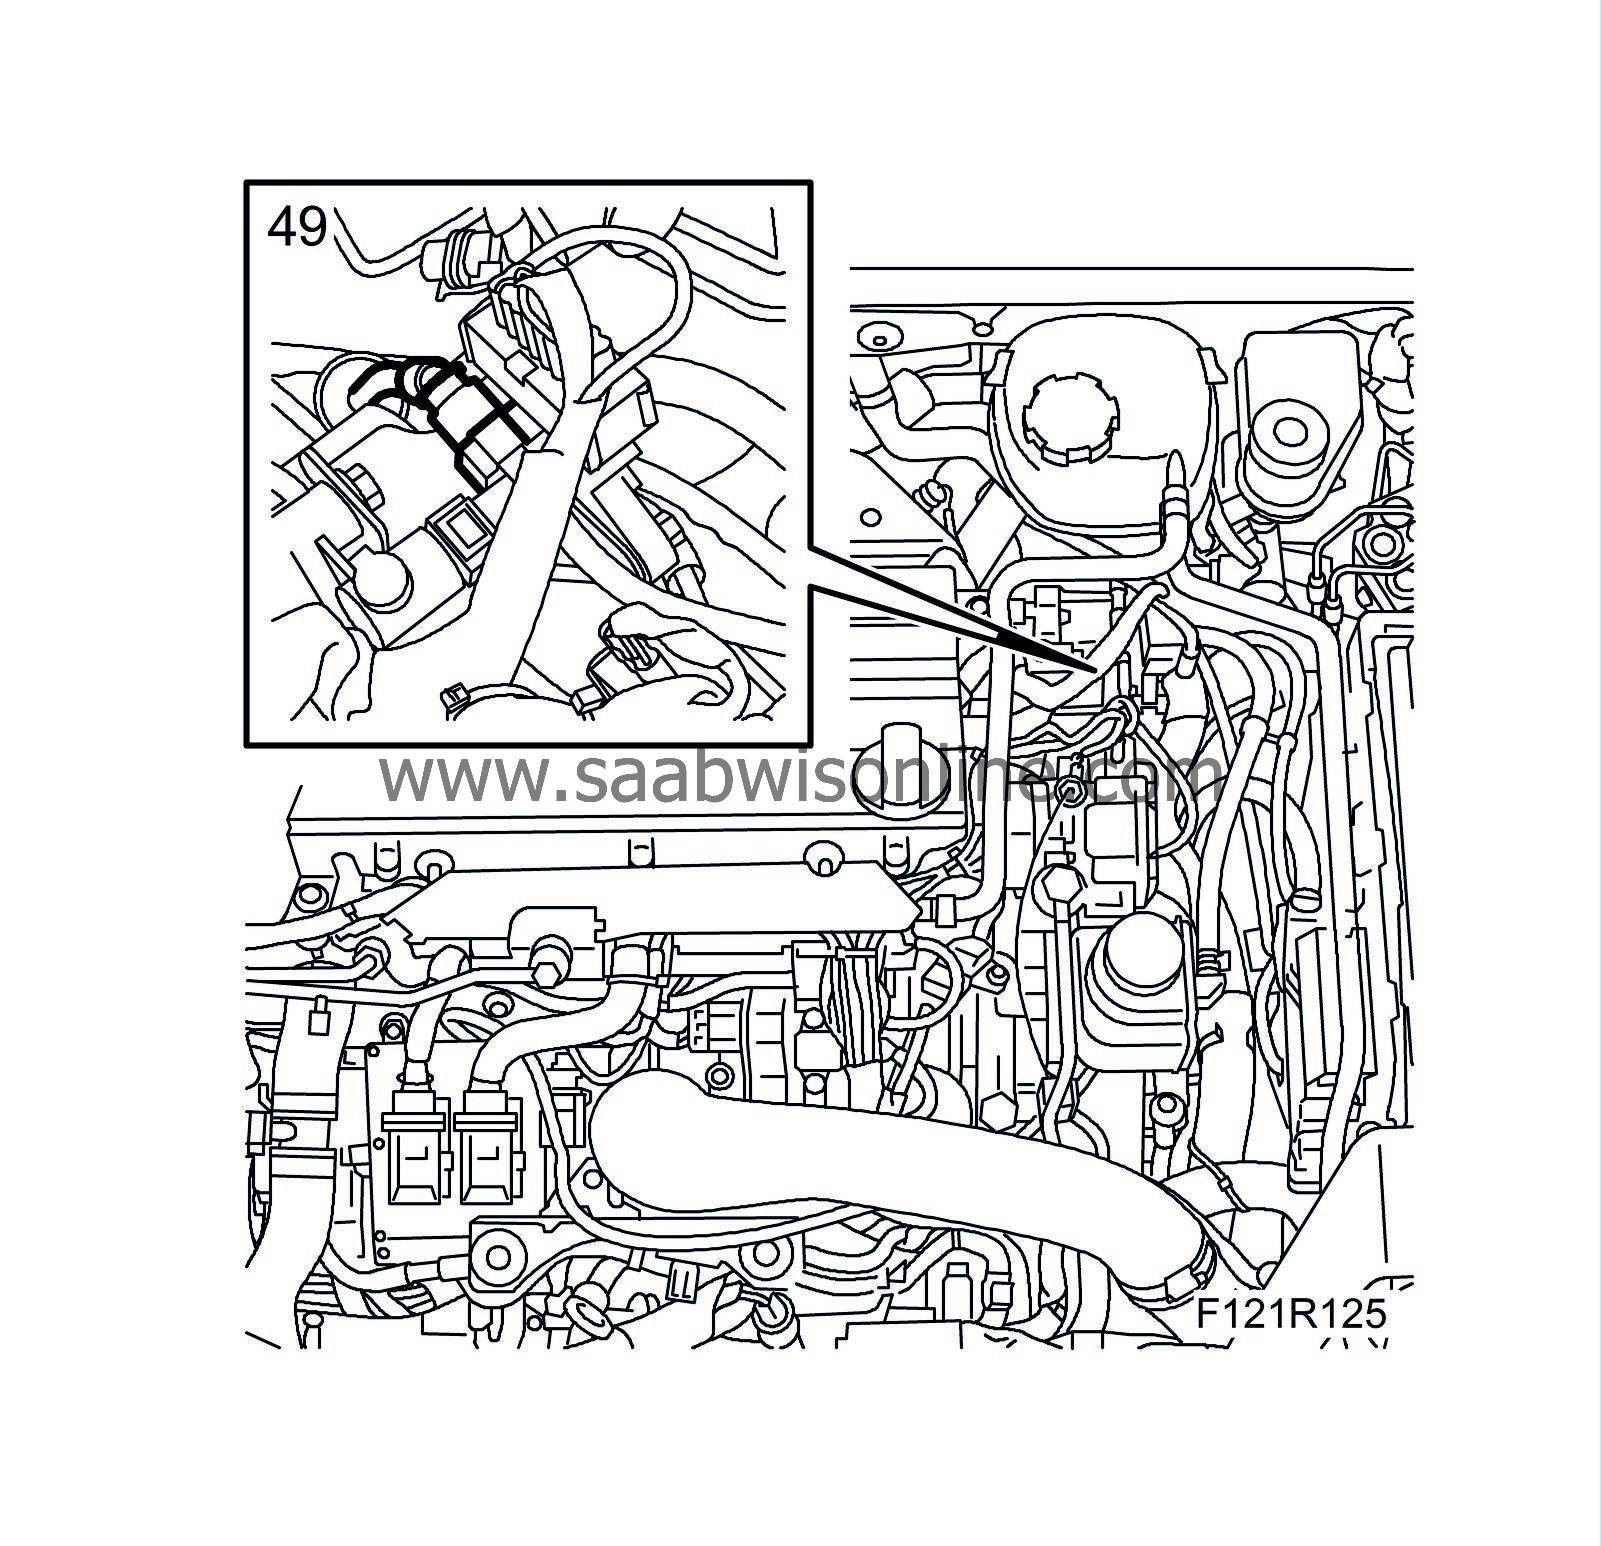
Connect the vacuum hose quick-release coupling to the vacuum pump.
|
|
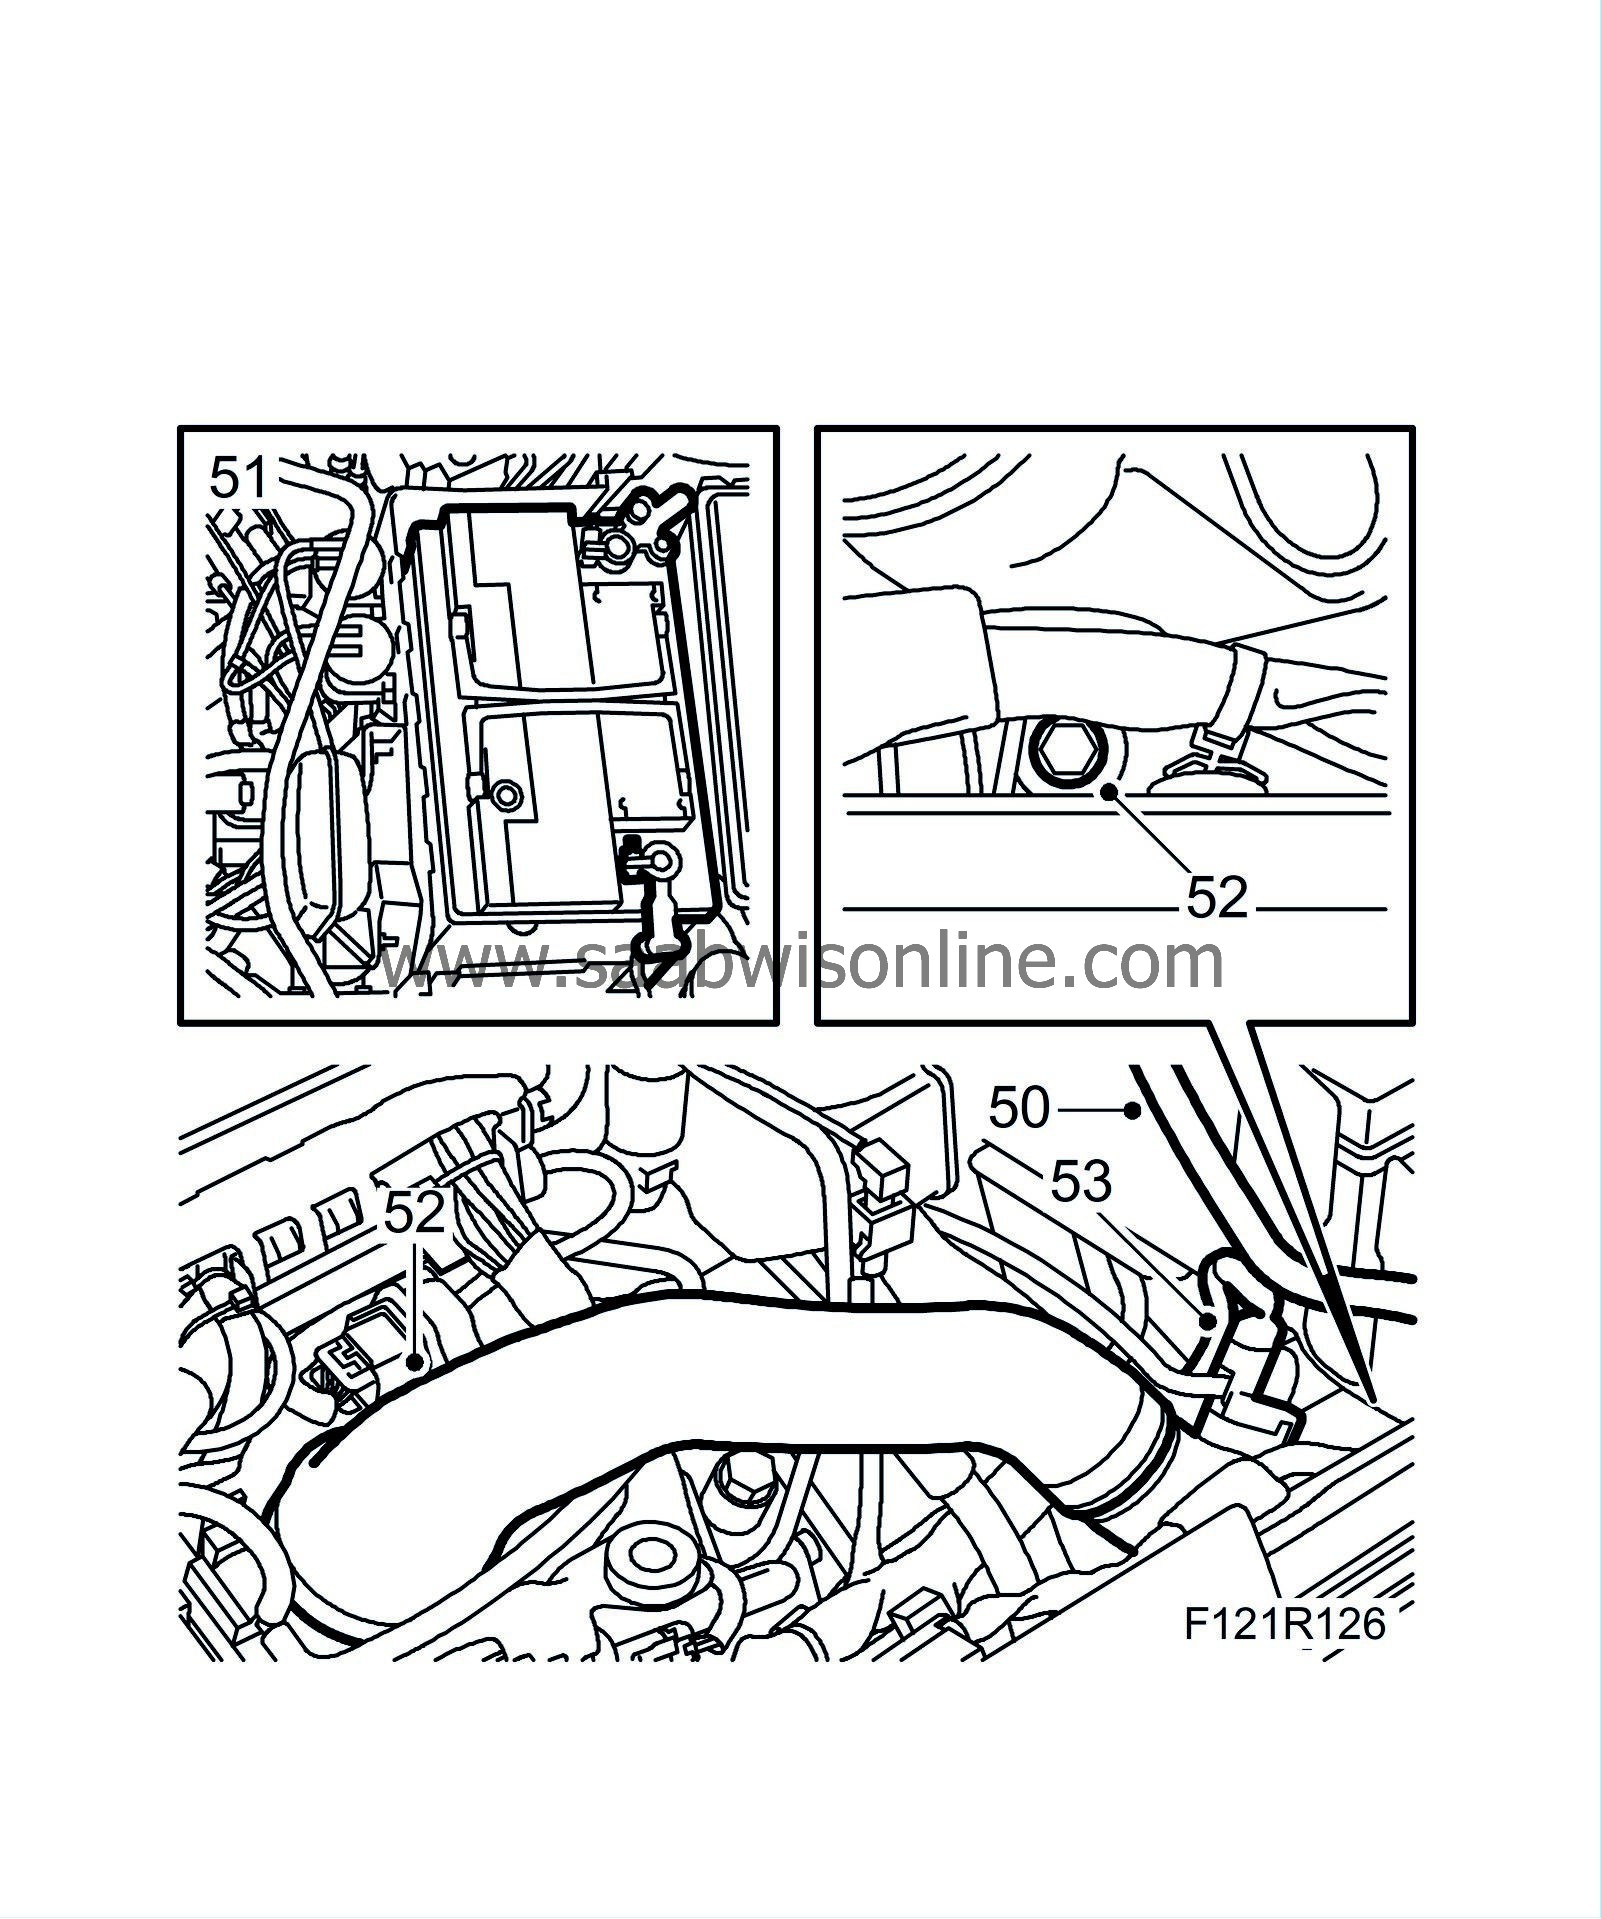
| 50. |
Connect the ventilation hose to the radiator.
|
|
| 51. |
Fit the battery.
|
|
| 52. |
Fit the charge air hose to the throttle body and the upper charge air pipe bracket on the fan cowling.
|
|
| 53. |
Connect the hose to the bypass valve and the connector to the pressure/temperature sensor.
|
|
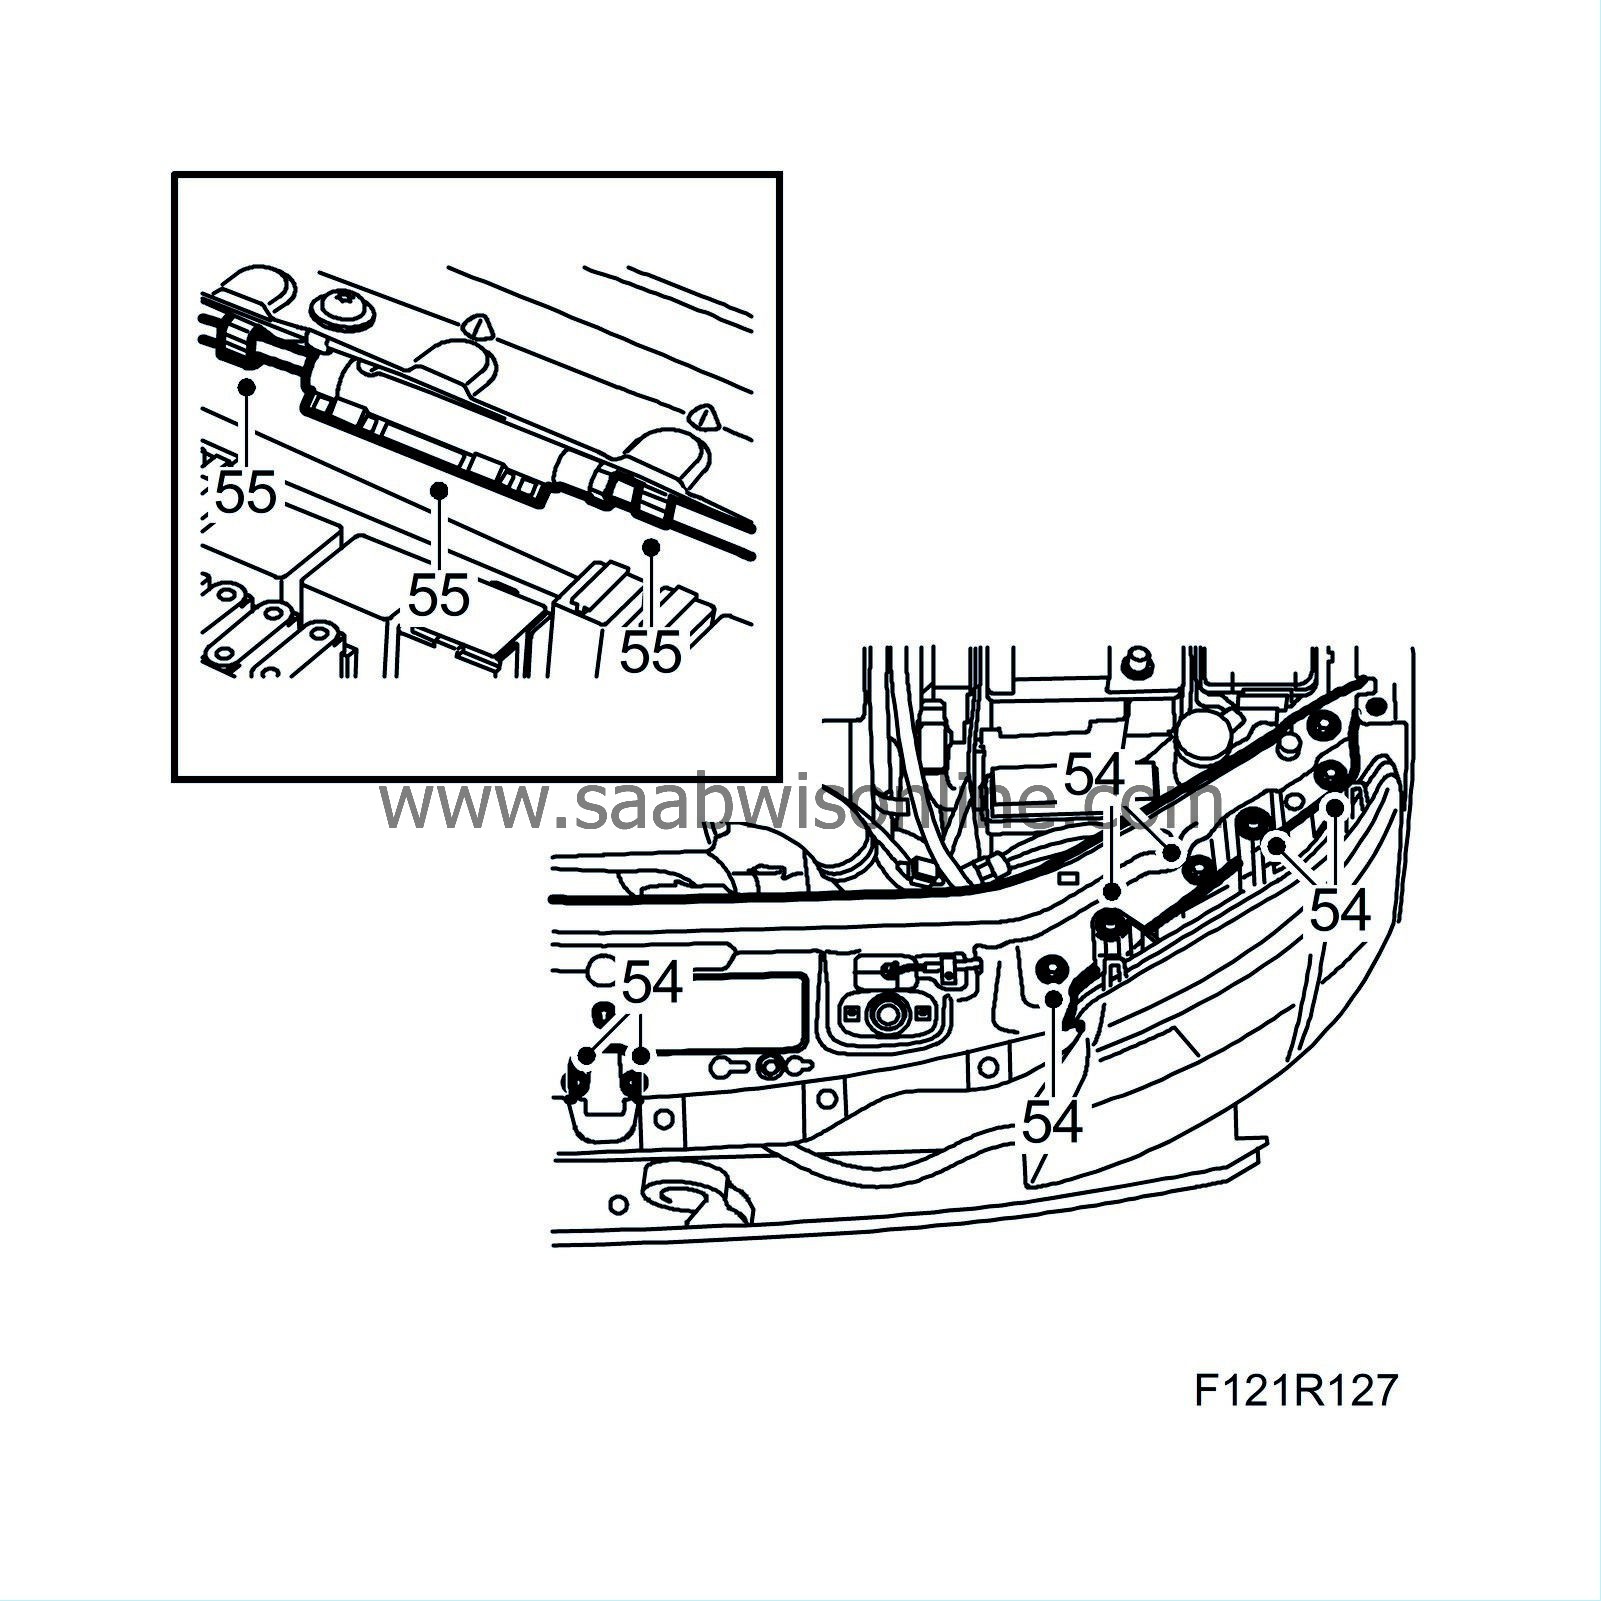
| 54. |
Fit the upper radiator member.
|
|
| 55. |
Connect the bonnet cable quick-release coupling and secure it to the body with new clips.
|
|
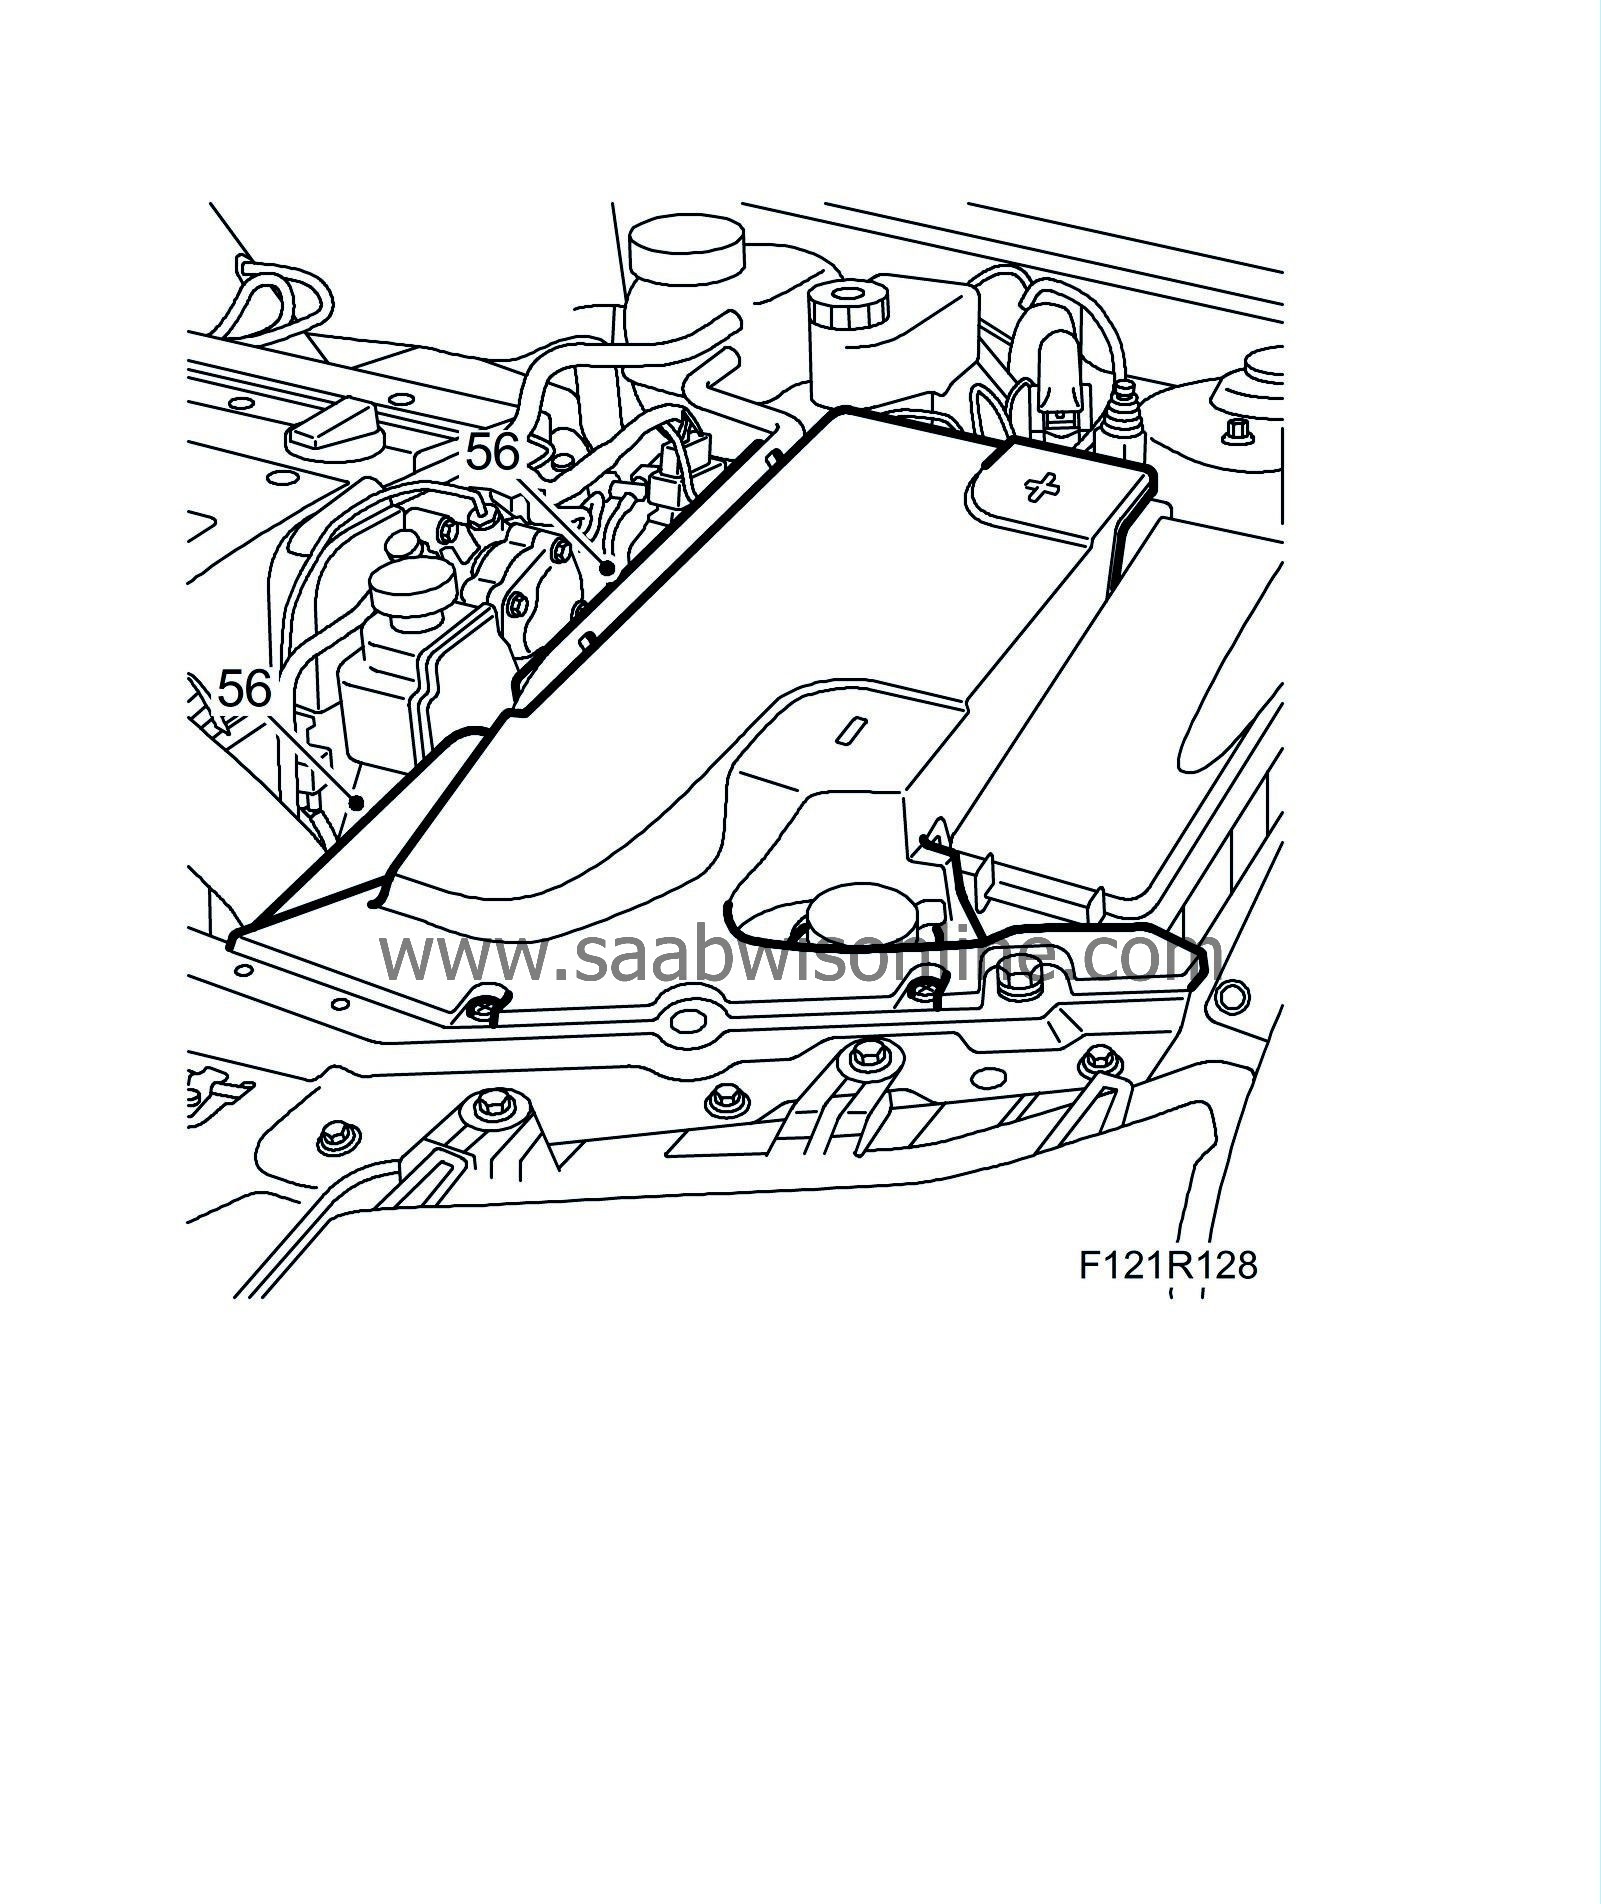
| 56. |
Fit the battery cover and the battery cooler pipe.
|
|
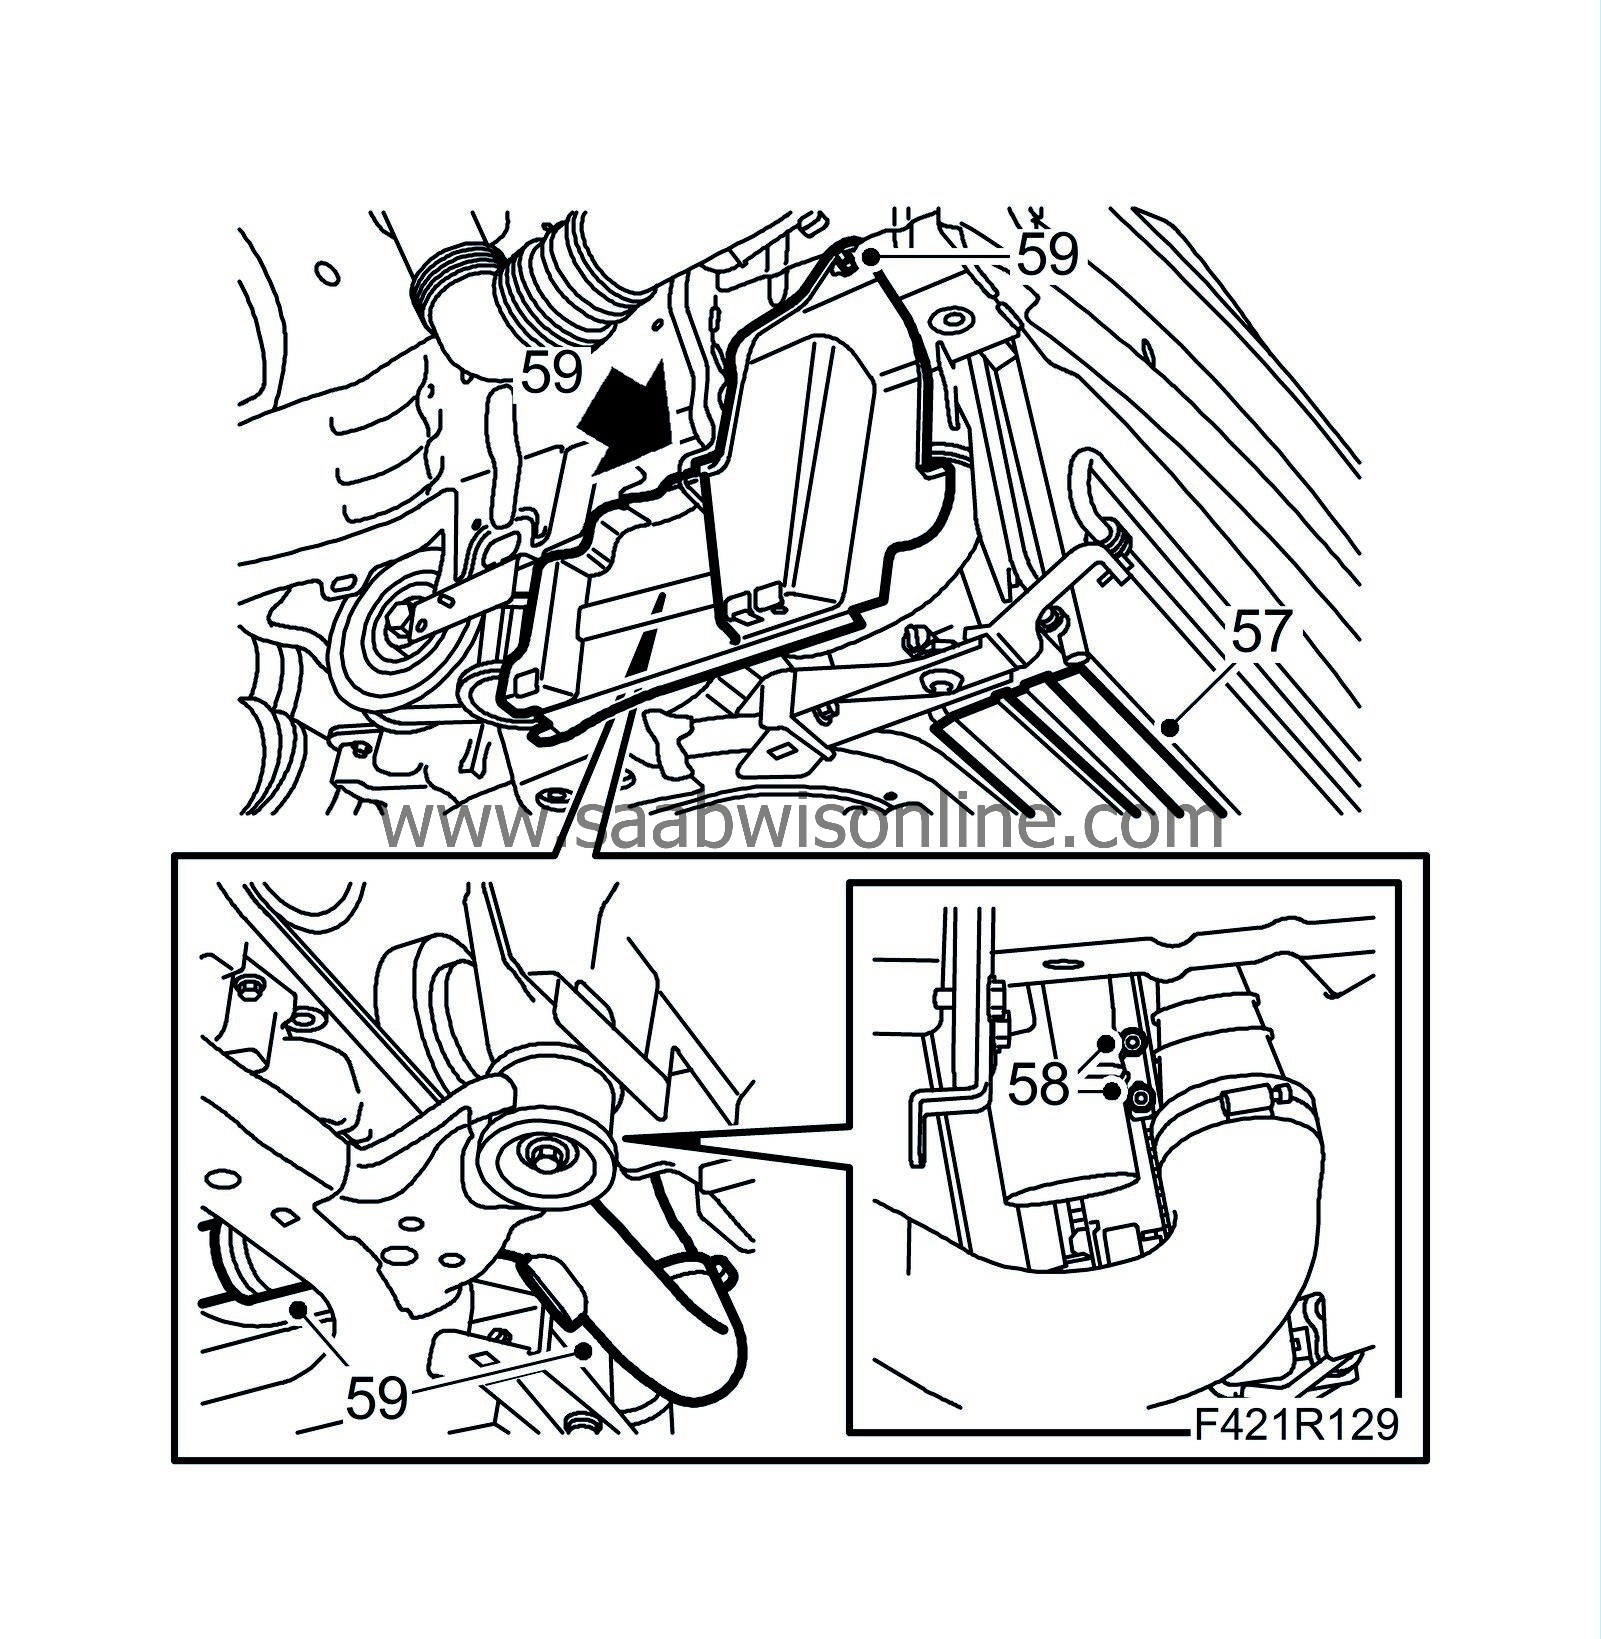
| 57. |
Raise the car and fit the lower seal between the charge air cooler and the radiator.
|
|
| 58. |
Fit the dryer filter bolts to the radiator.
|
|
| 59. |
Fit the hose between the charge air cooler and the charge air pipe and fit the cover on the right-hand side.
|
|
| 60. |
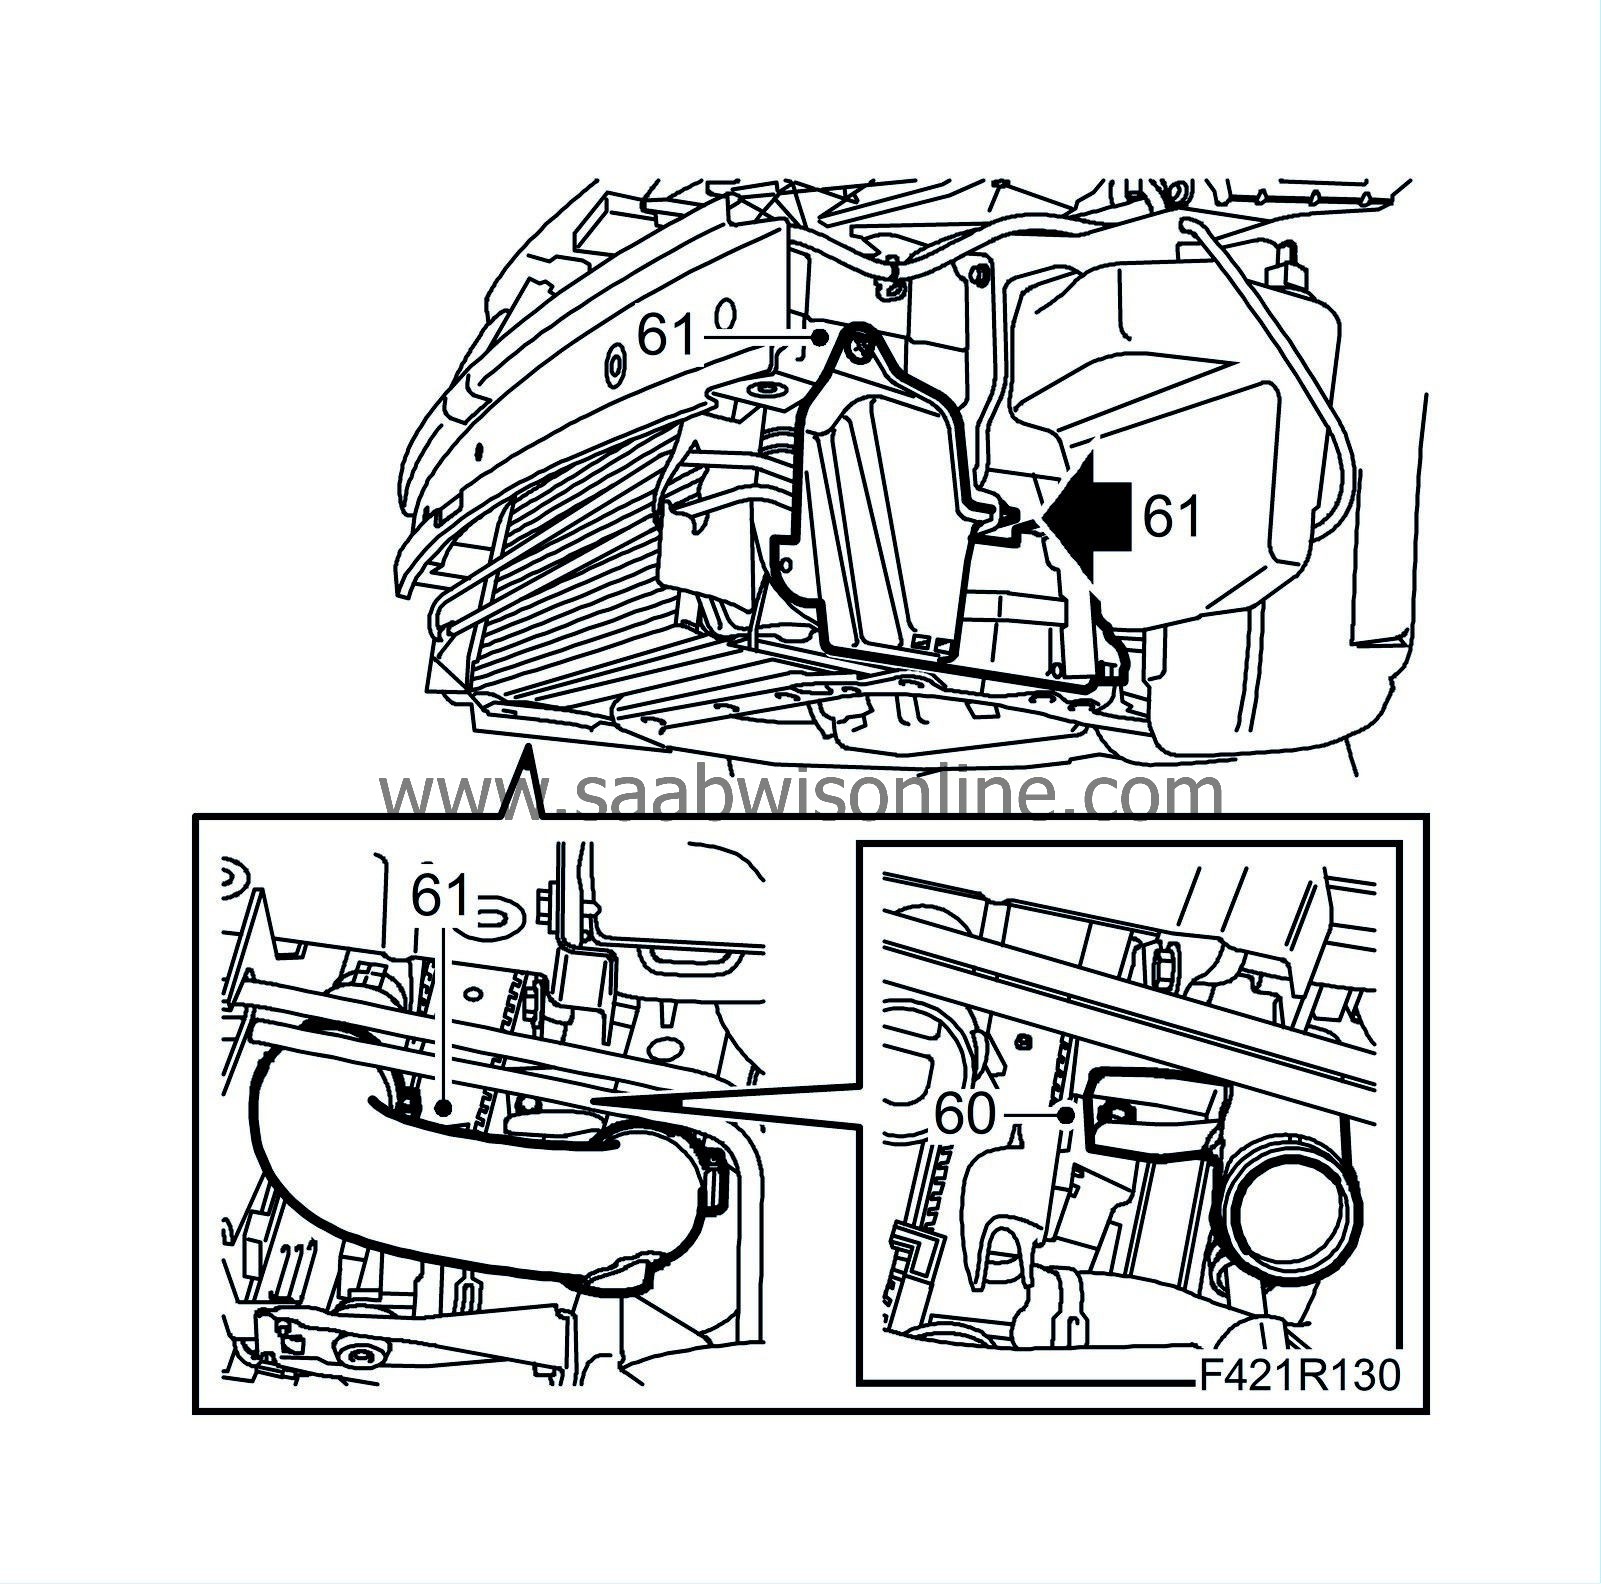
Fit the charge air pipe lower bracket on the fan cowling on the left-hand side.
|
|
| 61. |
Fit the charge air hose between the charge air pipe and the charge air cooler and fit the cover on the left-hand side.
|
|
| 62. |
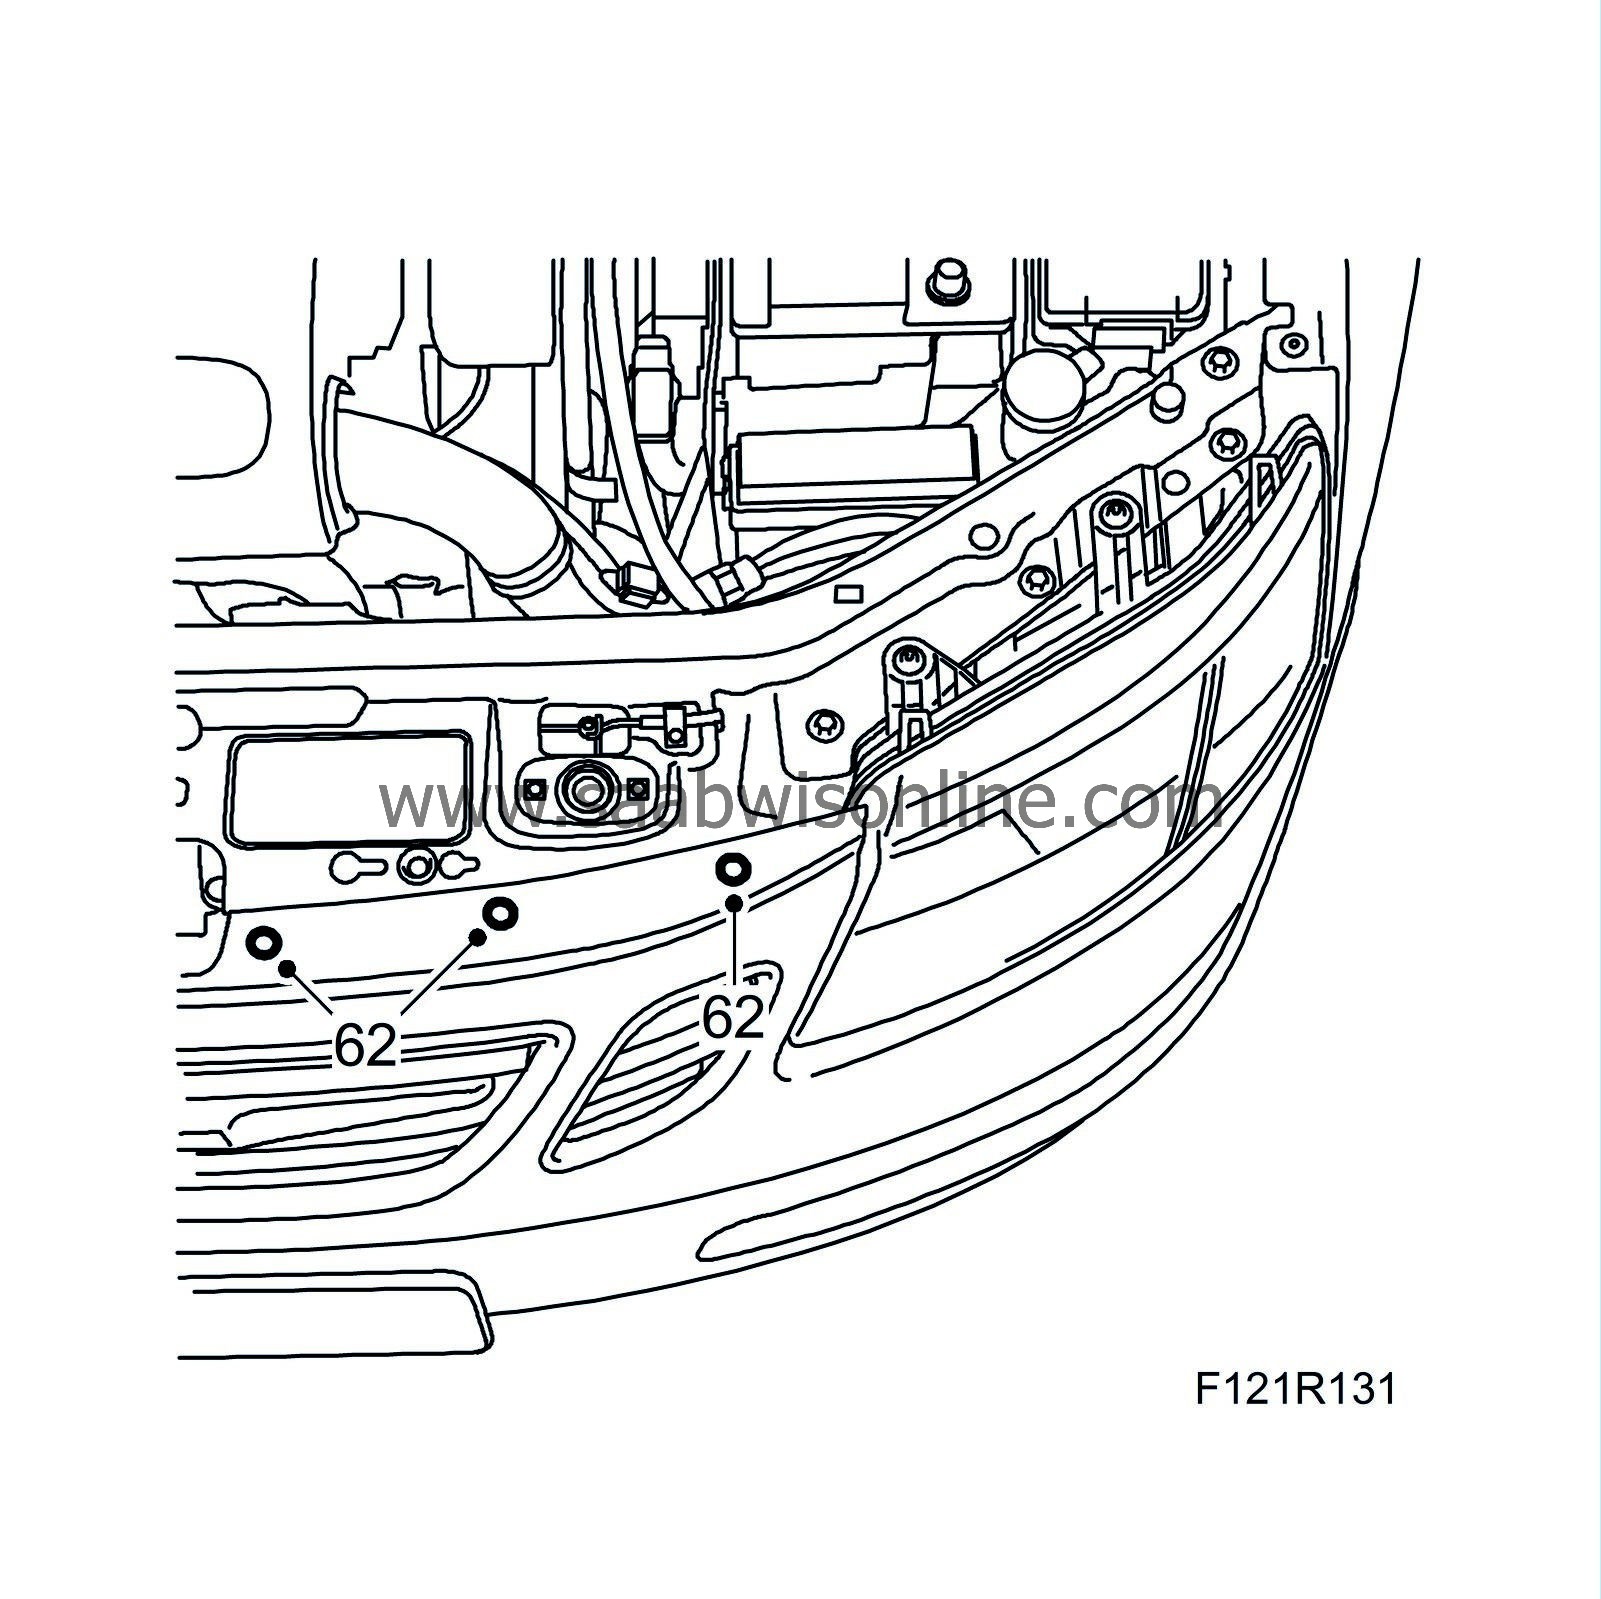
Lower the car slightly and fit the bumper.
|
|
| 63. |
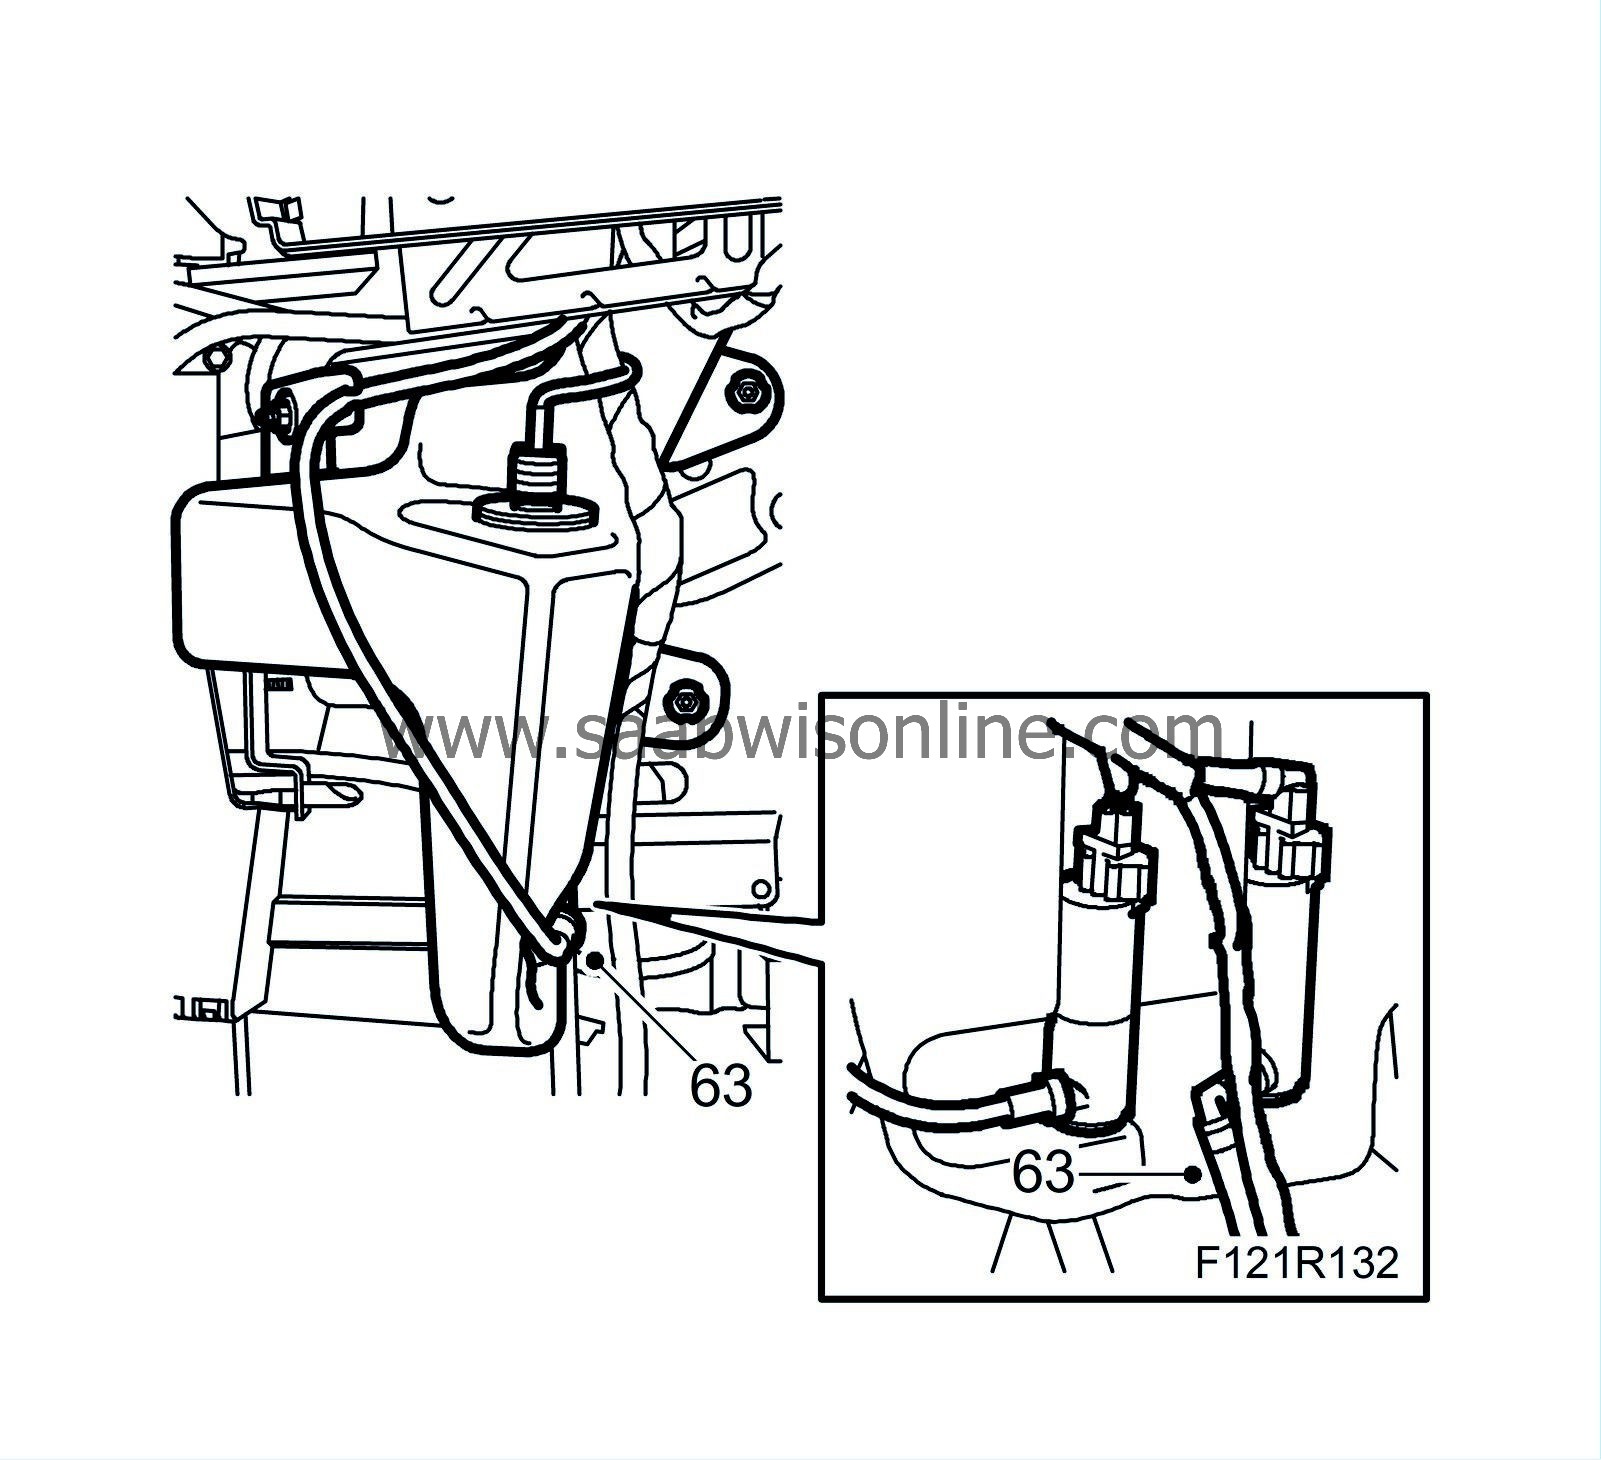
Connect the hose to the headlamp washers.
|
|
| 64. |
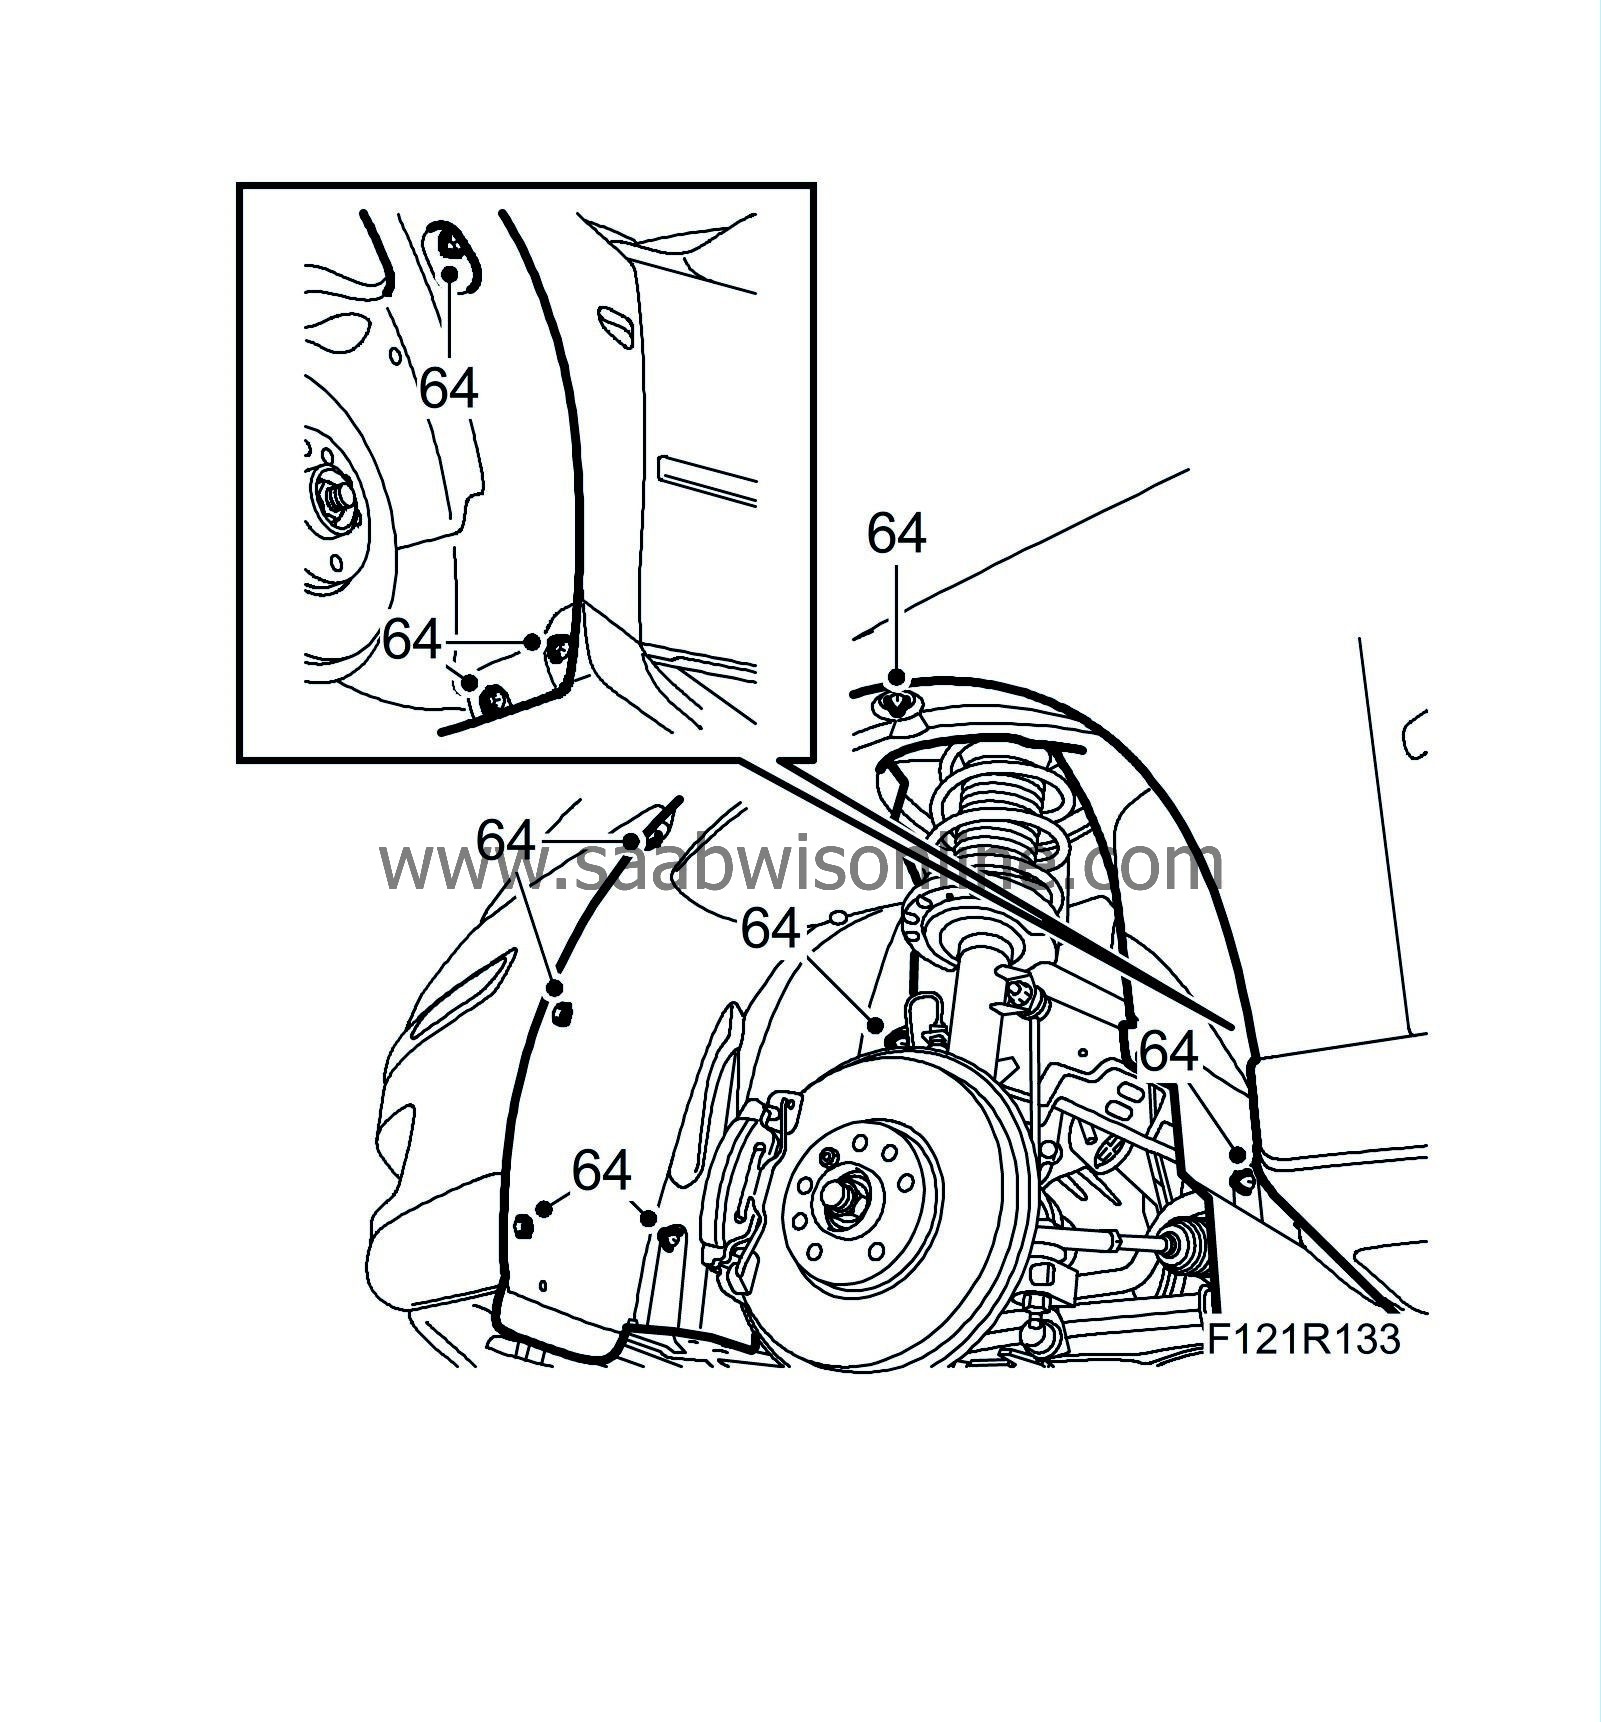
Fit the cover on the gearbox and the wing liners in both front wheel housings.
|
|
| 65. |
Fit the lower spoiler shield and the hose to the headlamp washers. Plug in and fit the connector.
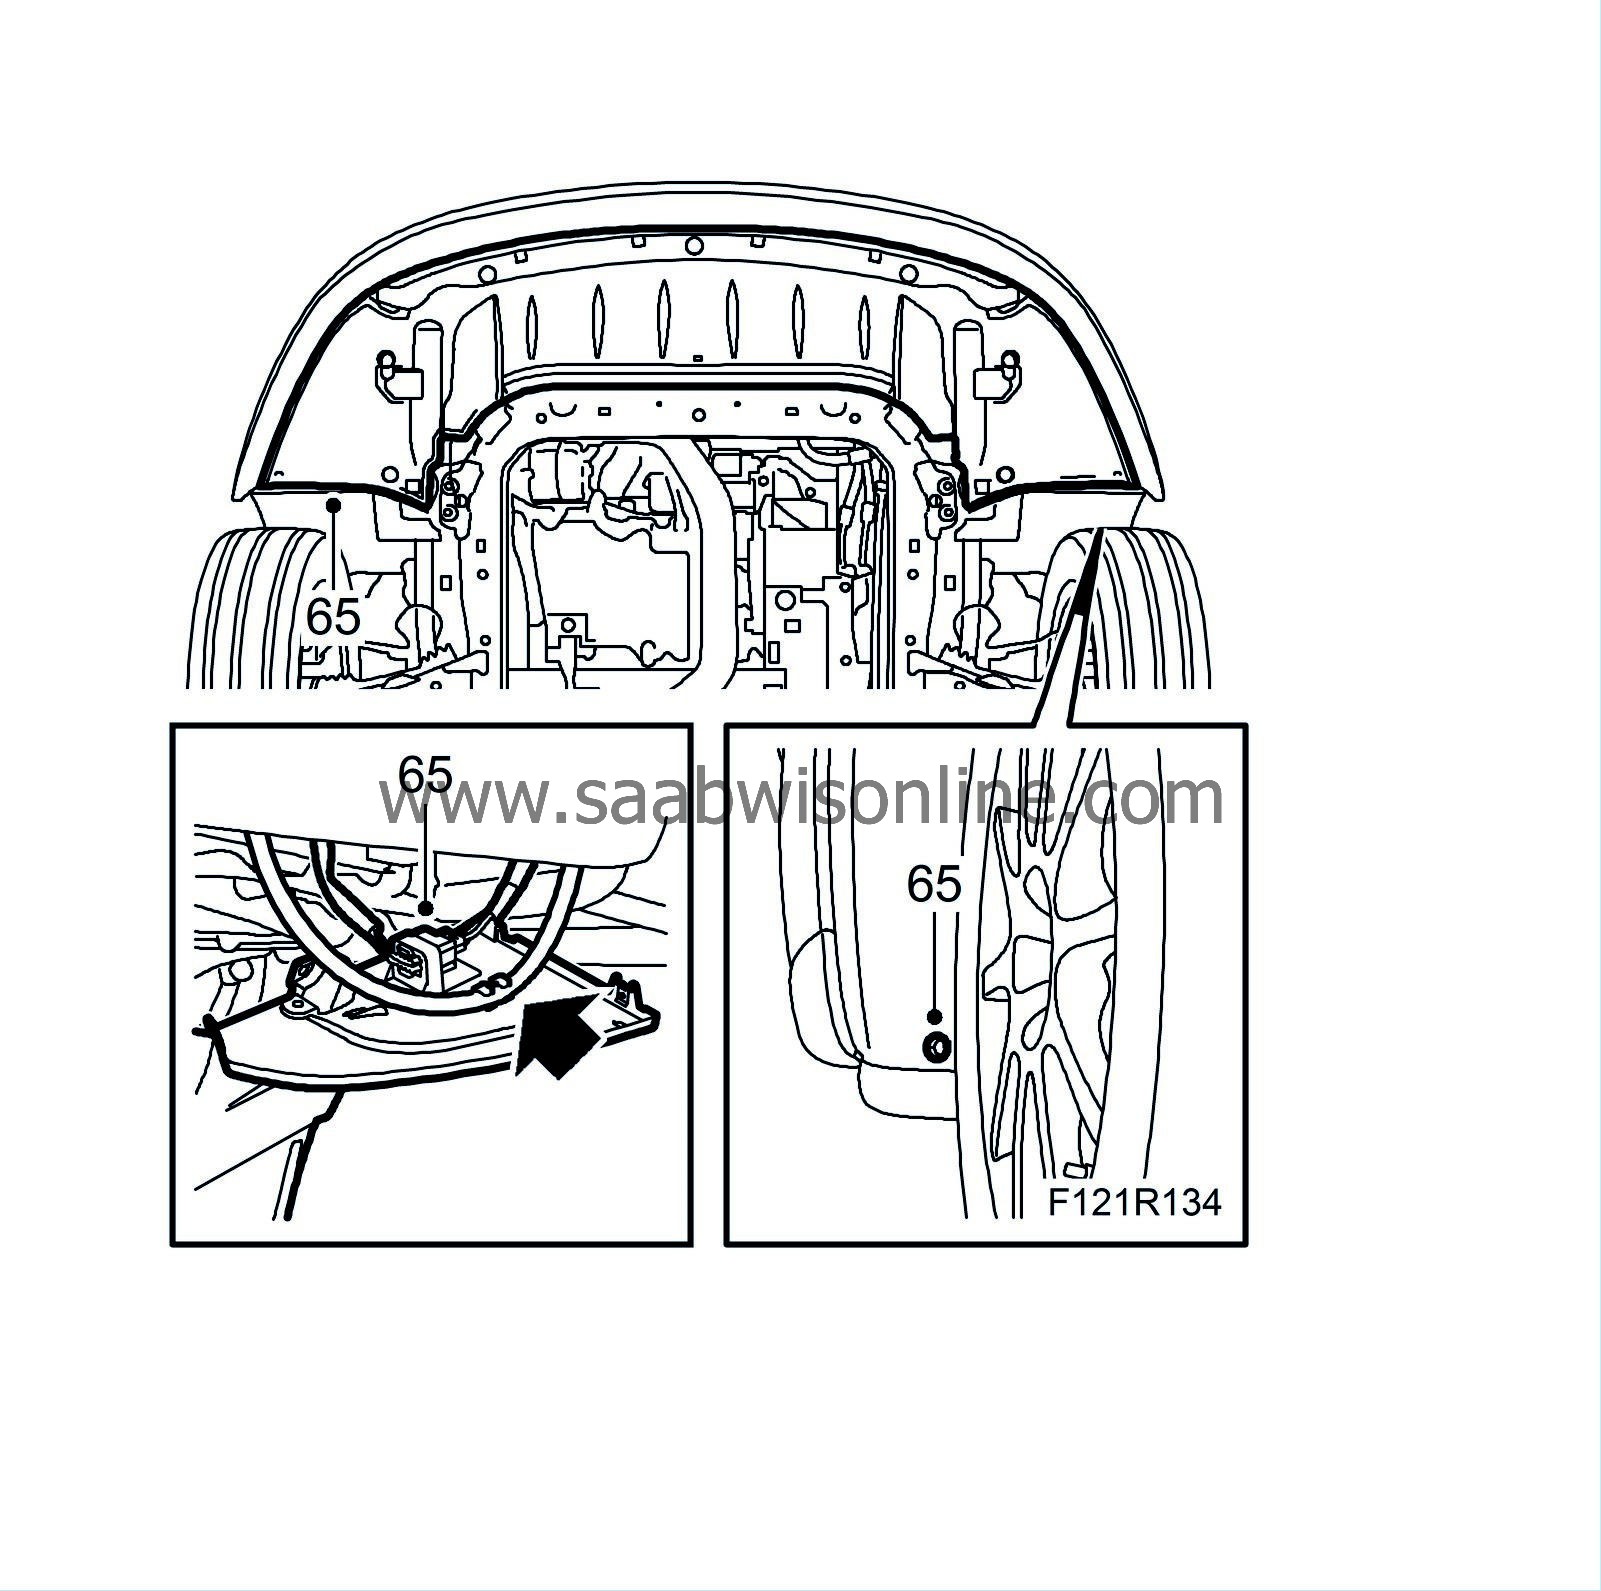
|
|
| 66. |
Fit the drive shafts and tighten the hub centre nuts.
Tightening torque 230 Nm (170 lbf ft). |
|
| 67. |
Fit the front wheels. See
Wheels.
|
|
| 68. |
Check oil level and top up as necessary. Fill with coolant to approx. 20 mm above the mark on the expansion tank. If a new engine is being fitted, follow the instructions
Bleeding the cooling system when working on the oil cooler
.
|
|
| 69. |
Fill with washer fluid.
|
|
| 70. |
Bleed the clutch as described in
Bleeding the clutch hydraulic system in car
.
|
|
| 71. |
Check the level of the automatic transmission fluid.
|
|
| 72. |
Remove the wing covers and restore car electrical functions, see
After disconnecting the battery
.
|
|
| 73. |
Fit the upper engine cover.

|
|

 Warning


