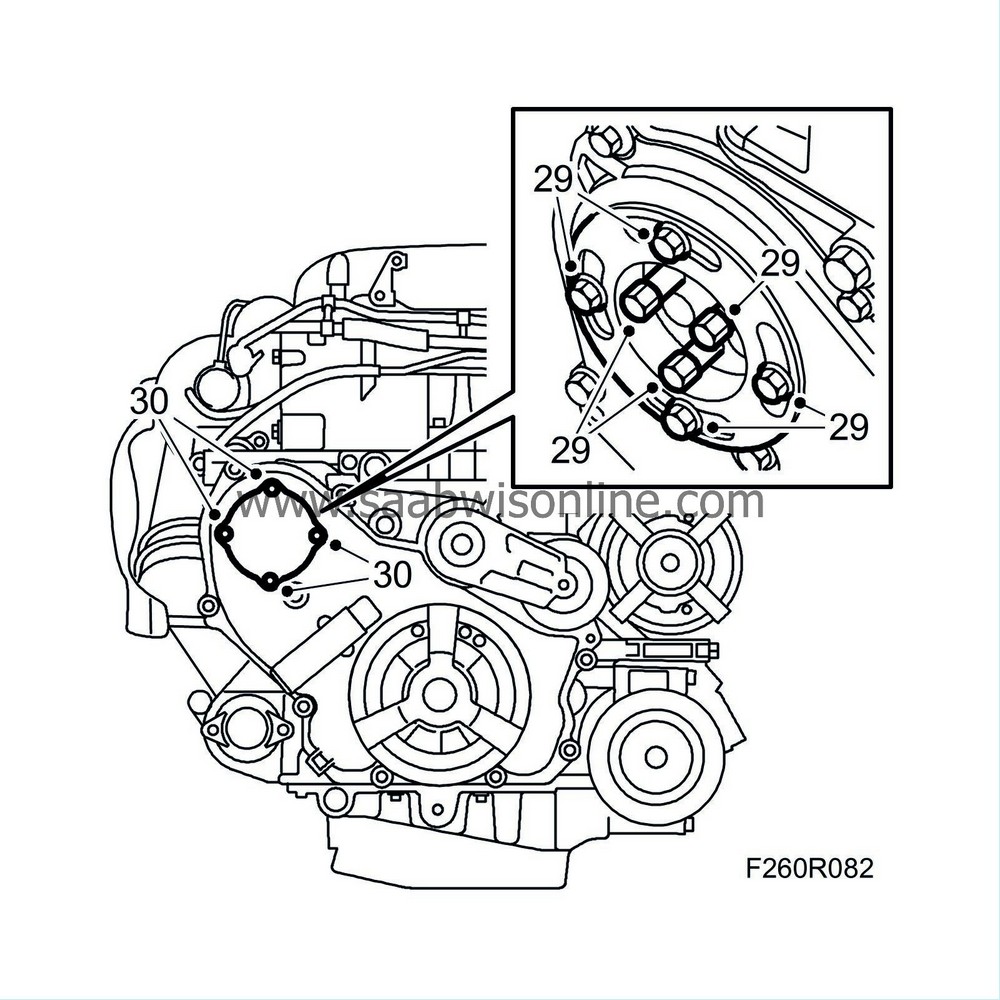
Coolant pump
| Coolant pump |
| To remove |
|
|||||||||||||
| 1. |
Carefully undo the cap on the expansion tank and release the pressure.
|
|
| 2. |
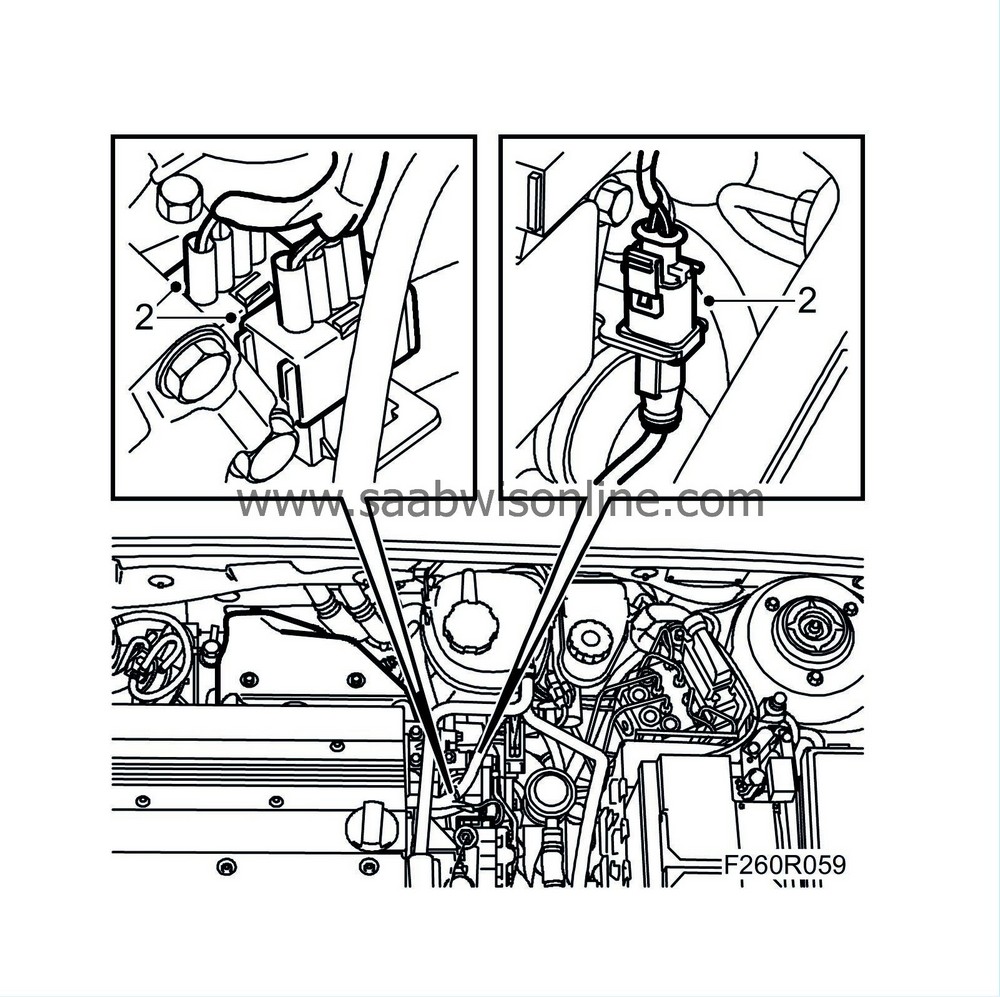
Unplug the connectors for the oxygen sensors and temperature sensor and carefully lower the cables.
|
|
| 3. |
Unplug the connector from the mass air flow sensor.

|
|
| 4. |
Detach the hose from the mass air flow sensor.
|
|
| 5. |
Remove the cover on the air cleaner casing.
|
|
| 6. |
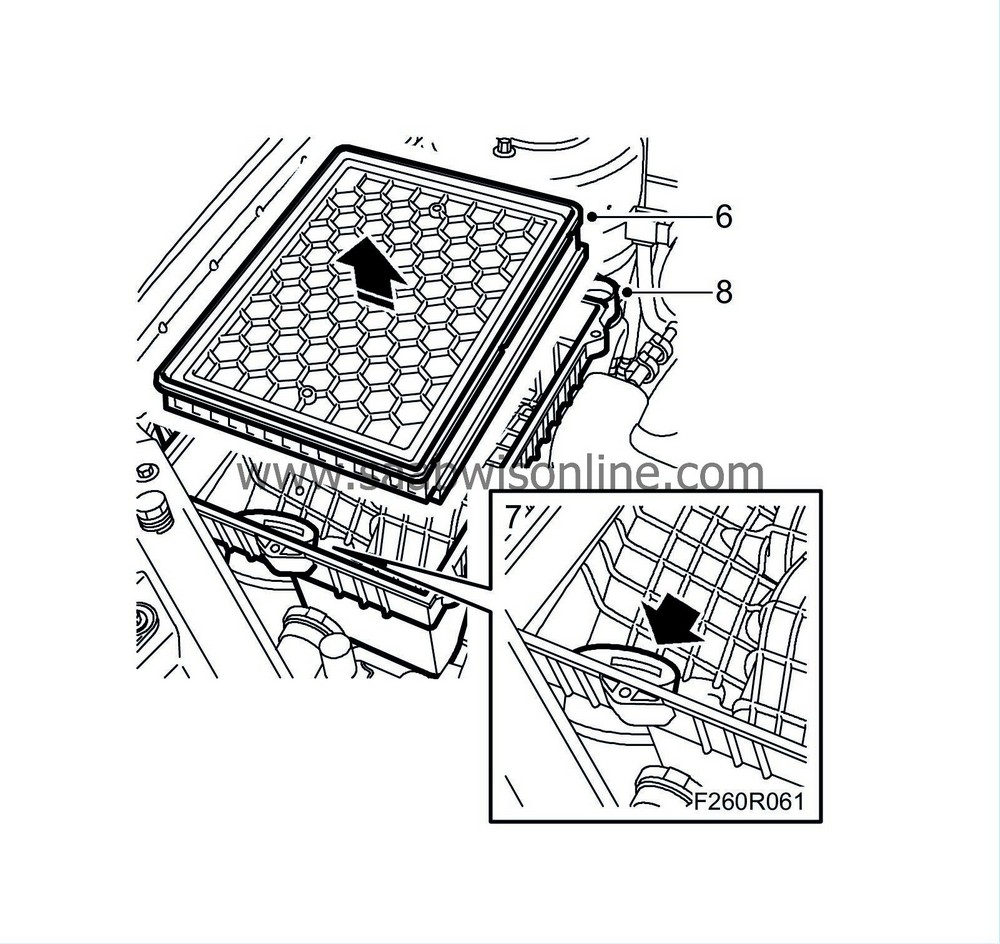
Remove the filter element.
|
|
| 7. |
Detach the inlet air hose from the air cleaner casing.
|
|
| 8. |
Remove the air cleaner casing.
|
||||||||||
| 9. |
Remove the inlet hose to the turbocharger, cover the turbocharger inlet.
|
|
| 10. |
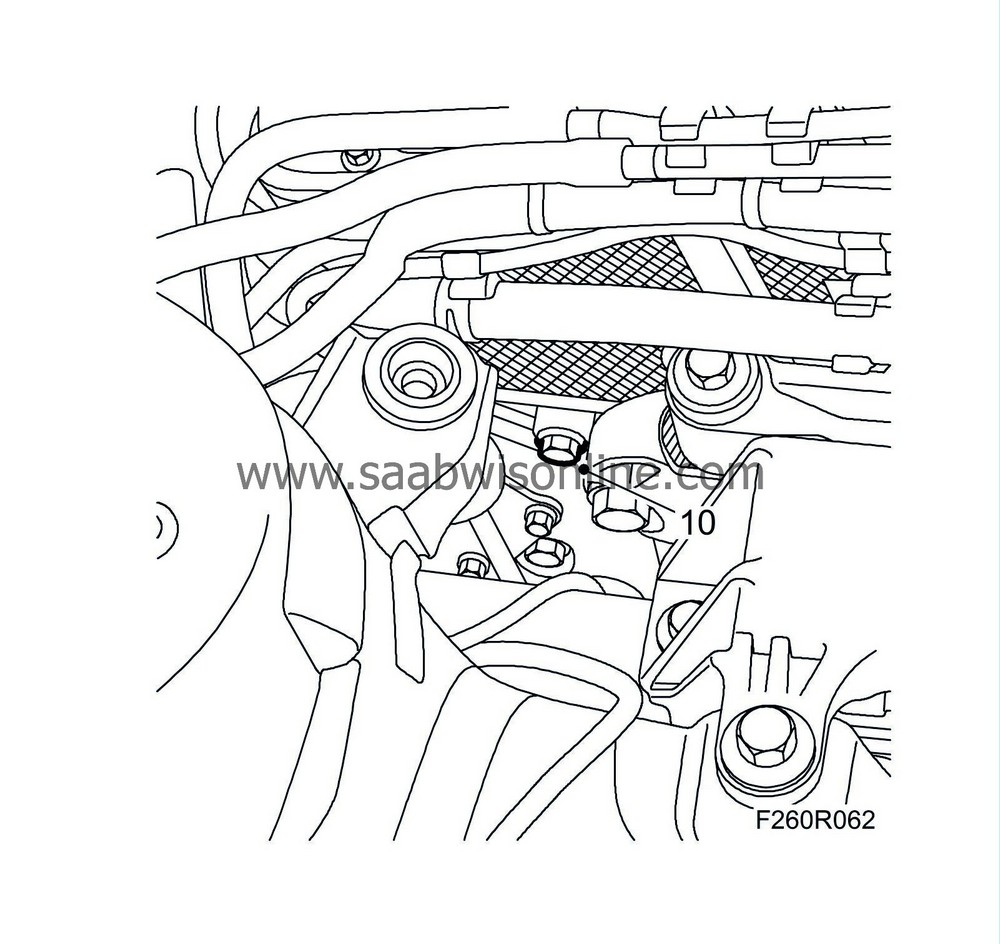
Remove the upper bolt for the water pump in the timing cover and engine block.
|
|
| 11. |
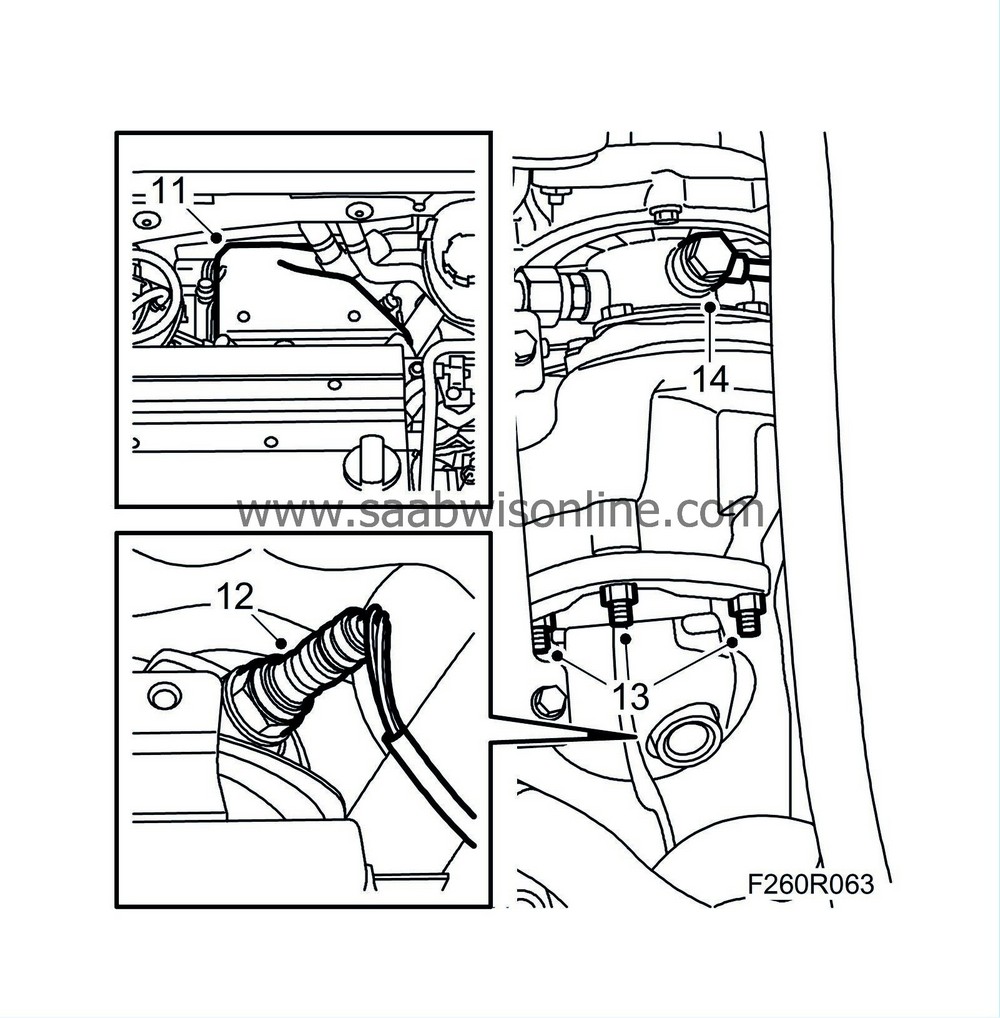
Remove the heat shield over the turbocharger.
|
|
| 12. |
Remove the upper oxygen sensor.
|
|
| 13. |
Remove the nuts for the catalytic converter connection with the turbocharger.
|
|
| 14. |
Undo the bolt for the turbocharger oil delivery pipe.
|
|
| 15. |
Raise the car slightly.
|
|
| 16. |
Remove the front right wheel.
|
|
| 17. |
Lift the car a little more.
|
|
| 18. |
Remove the front spoiler shield
.
|
|
| 19. |
Remove the right wing liner
.
|
|
| 20. |
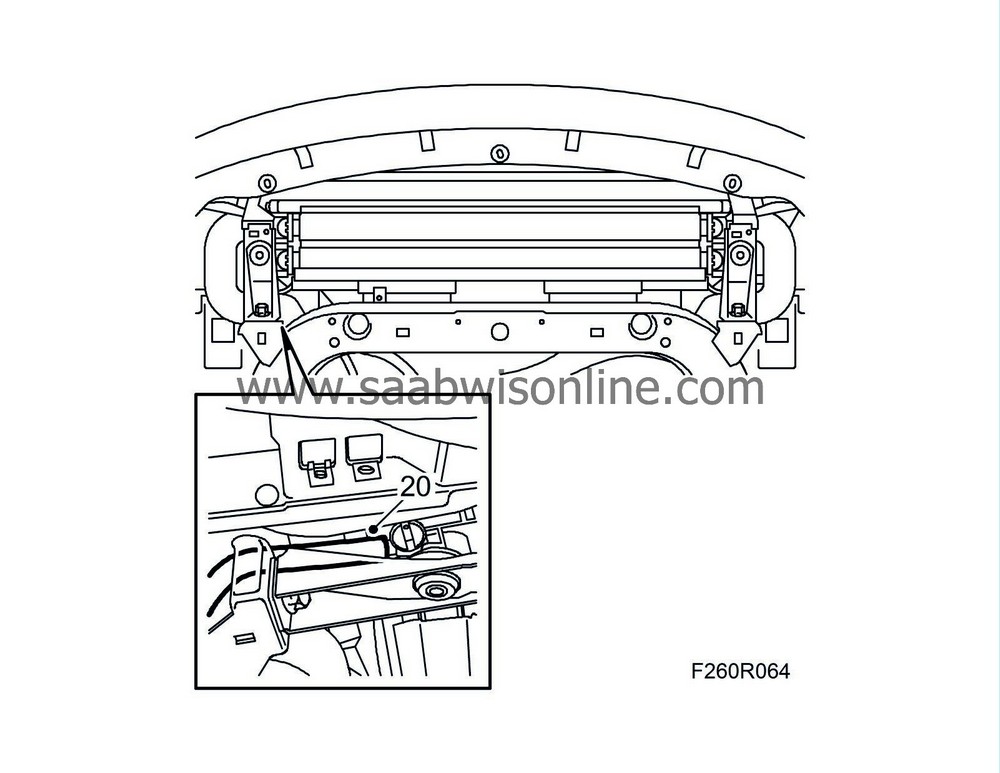
Place a receptacle under the car, connect a hose to the radiator and drain the coolant.
|
|
| 21. |
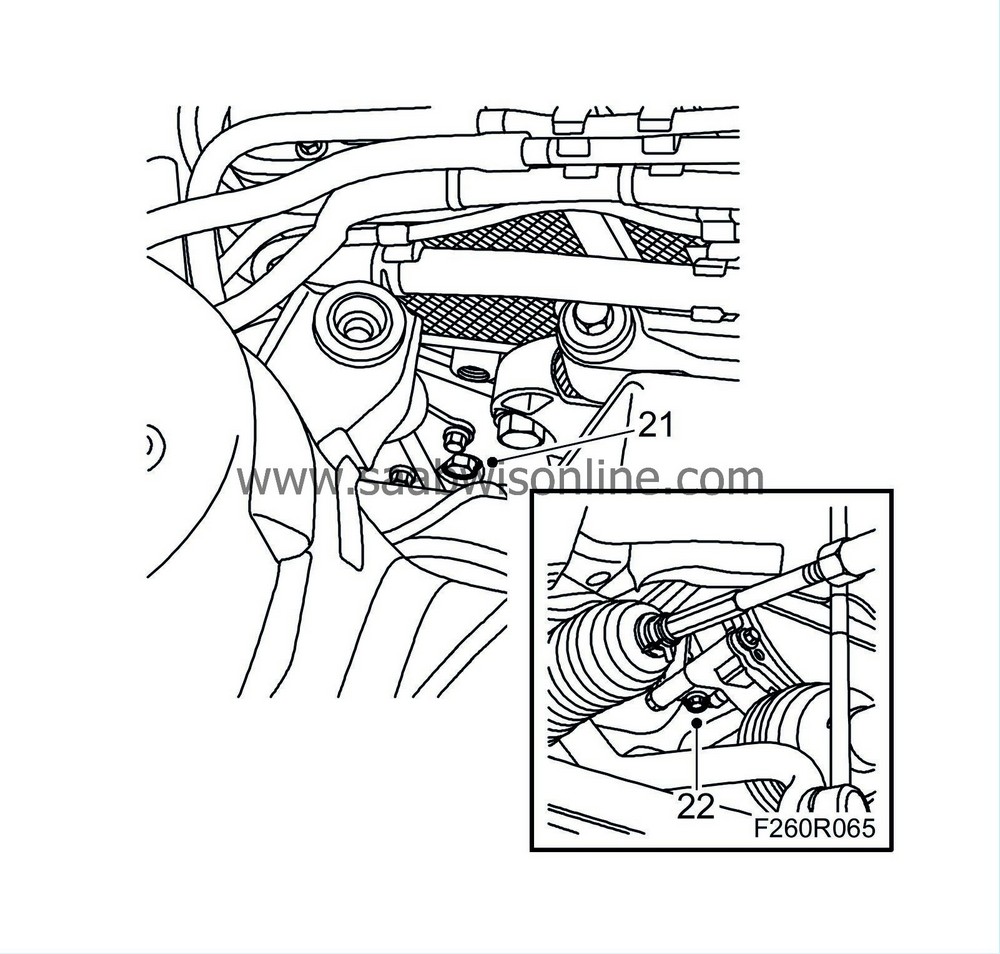
Remove the lower bolt for the water pump in the timing cover and engine block.
|
|
| 22. |
Place a receptacle under the car, loosen the plug and drain the coolant pump.
|
|
| 23. |
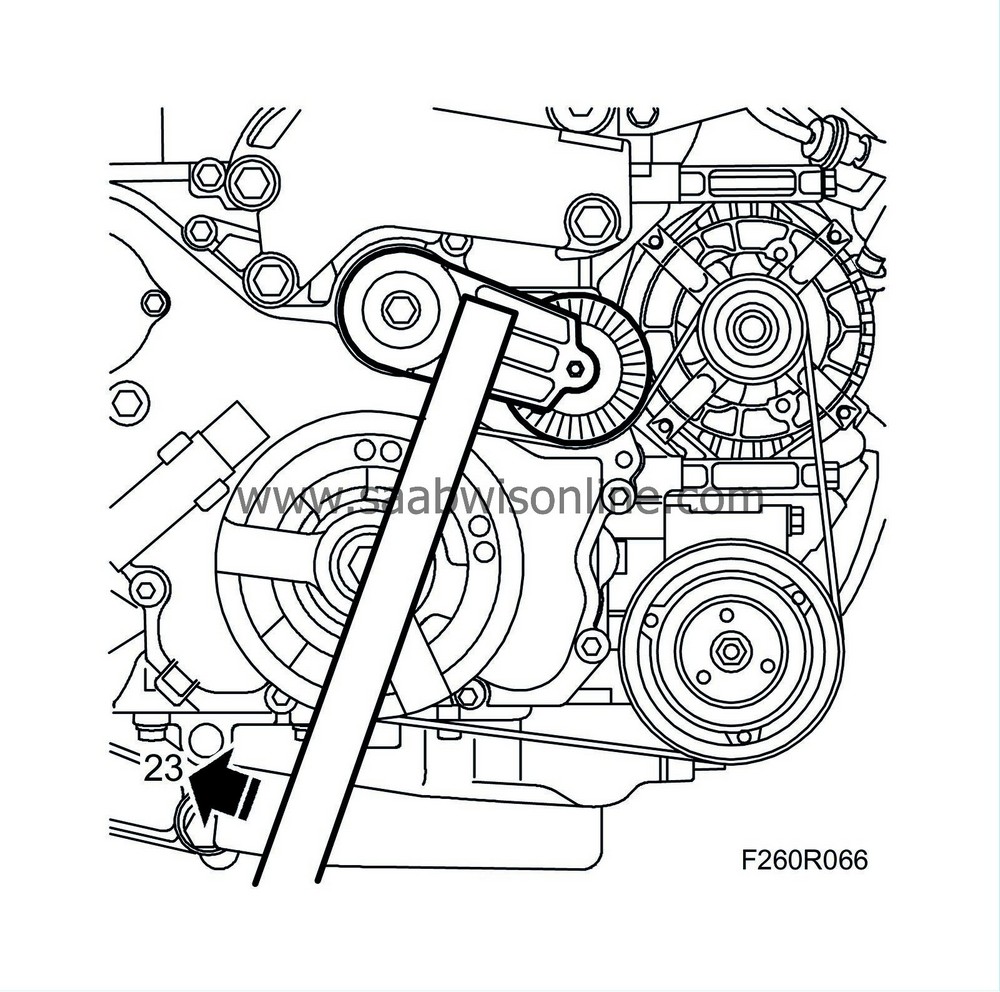
Mark the direction of rotation, relieve the multigroove belt and remove it using
83 96 095 Belt circuit relieving tool B207
.
|
|
| 24. |
Remove the lower turbocharger pressure pipe.

|
|
| 25. |
Remove the front pipe
.
|
|
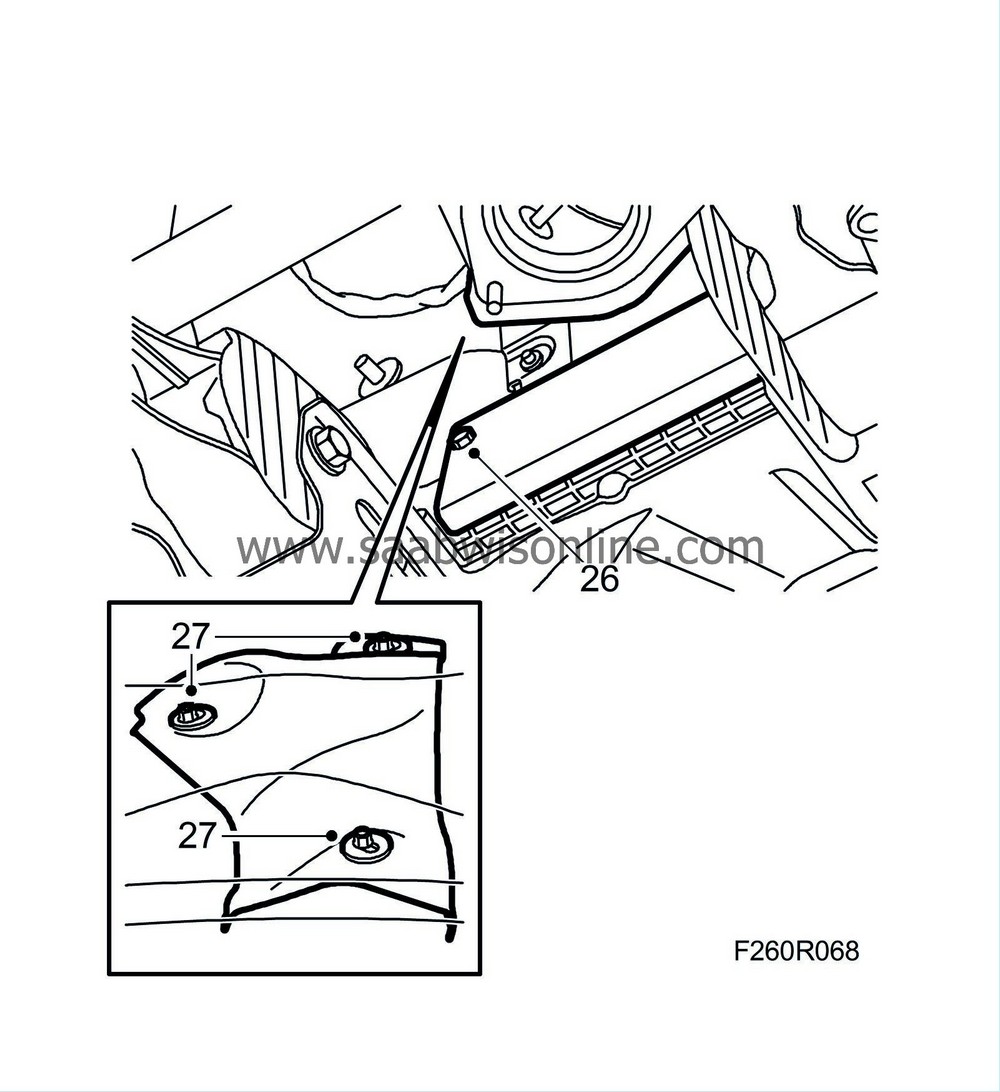
| 26. |
Remove the heat shield over the steering gear.
|
|
| 27. |
Remove the heat shield over the catalytic converter.
|
|
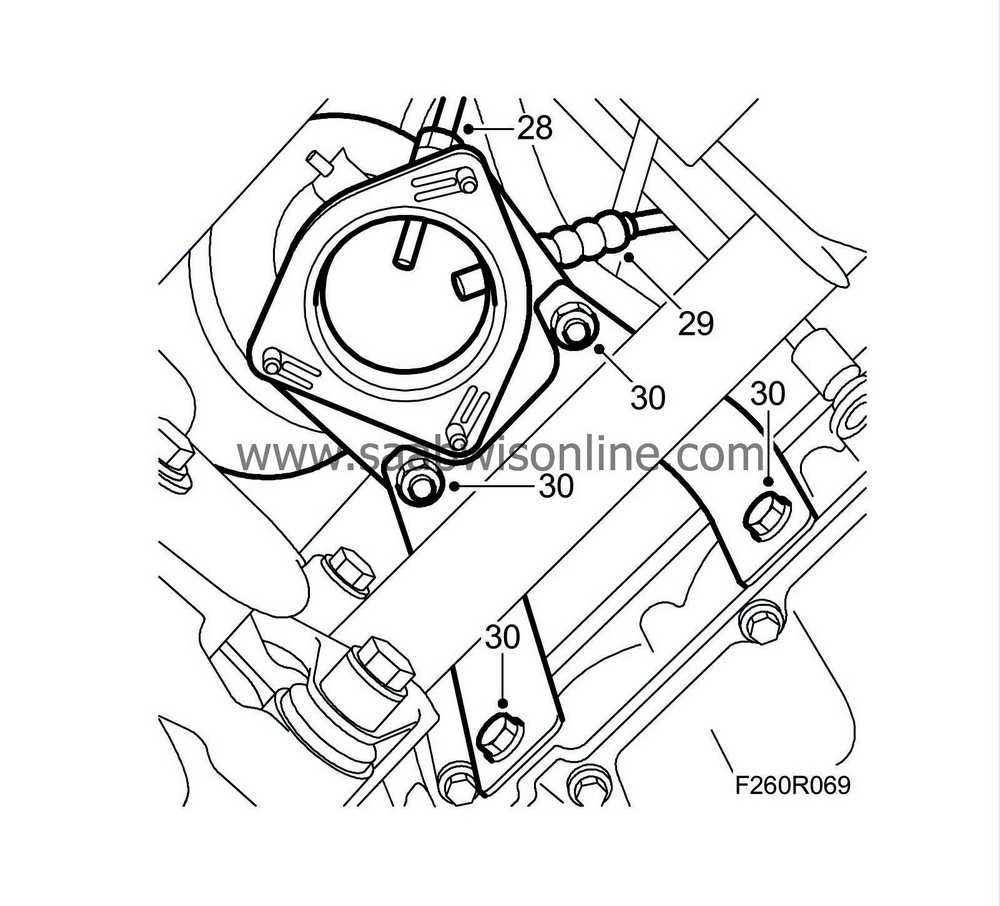
| 28. |
Remove the temperature sensor.
|
|
| 29. |
Remove the lower oxygen sensor.
|
|
| 30. |
Remove the catalytic converter bracket from the engine block and the catalytic converter.
|
|
| 31. |
Remove the catalytic converter.
|
|
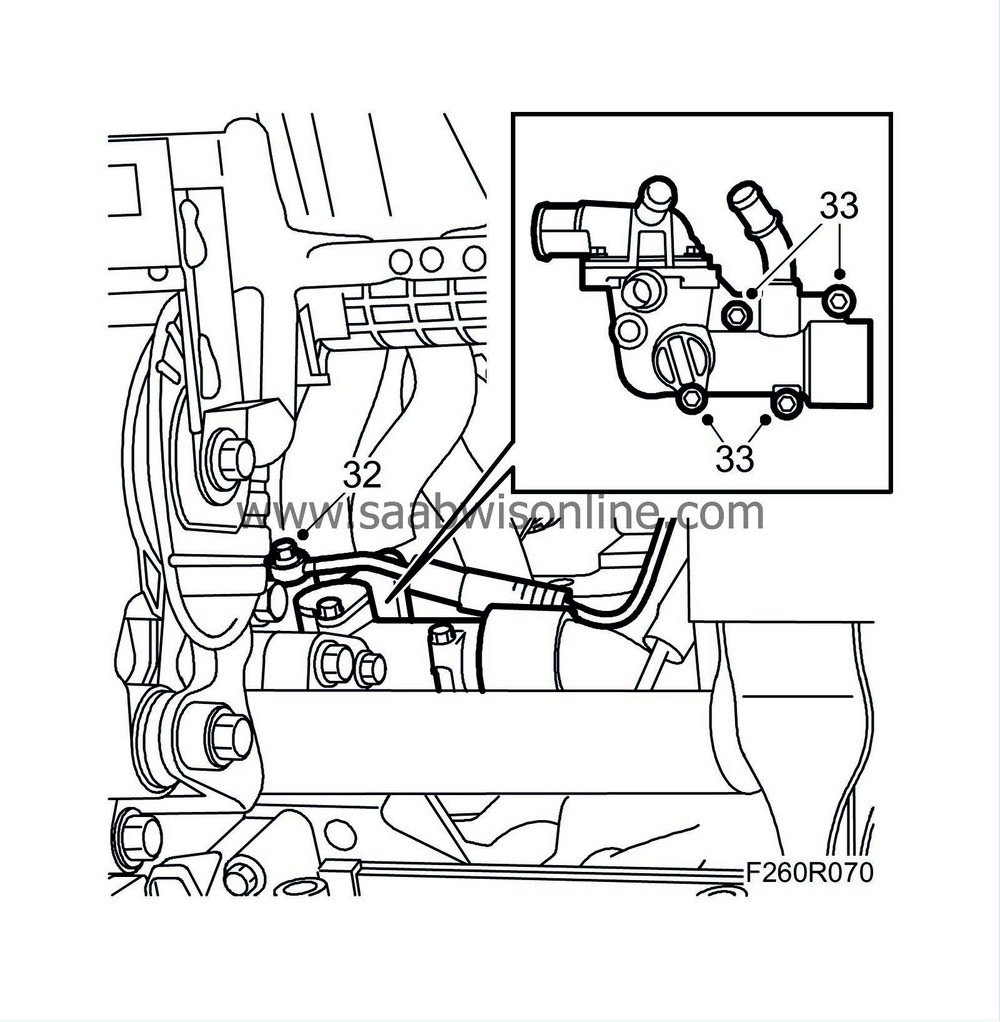
| 32. |
Remove the turbocharger coolant pipe from the thermostat housing and the turbocharger.
|
|
| 33. |
Remove the bolts on the thermostat housing.
|
|
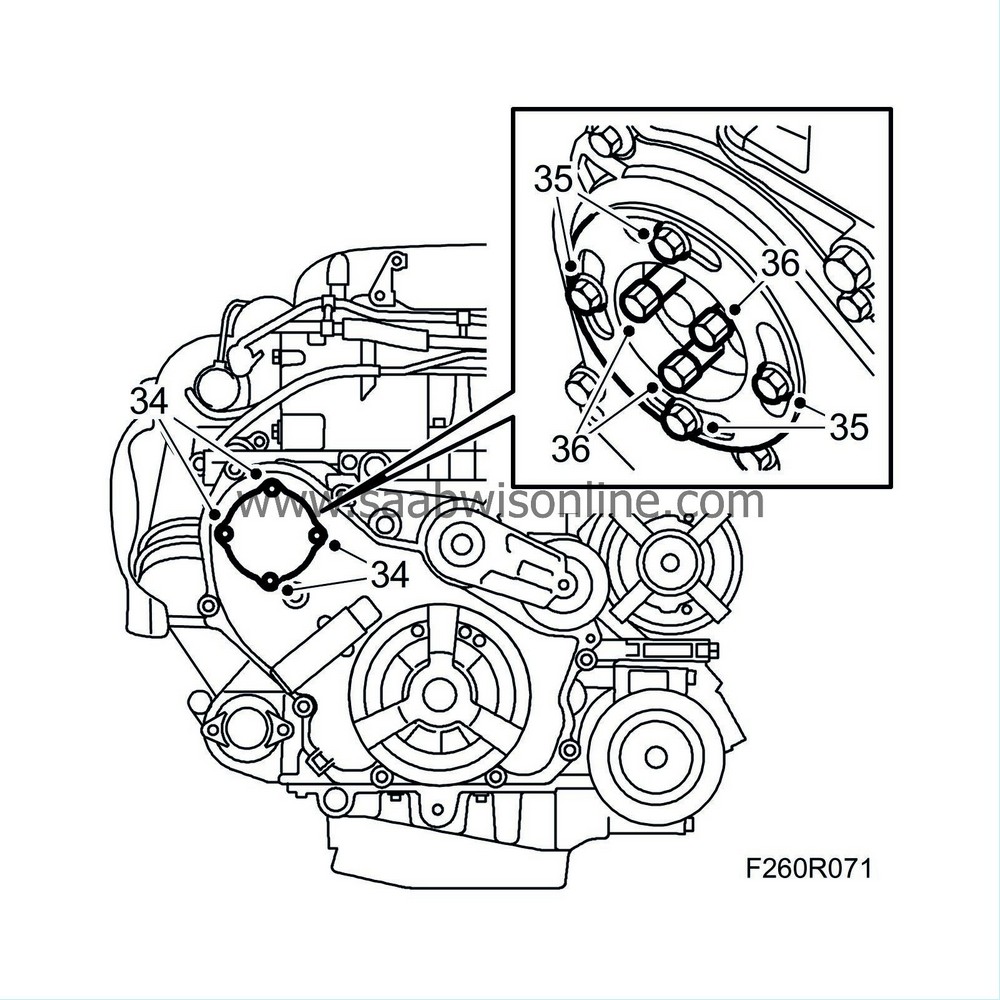
| 34. |
Remove the coolant pump cover from the timing cover.
|
|
| 35. |
Position and fit
83 96 103 Coolant pump holder tool B207
to secure the balancer shaft pinion.
|
|
| 36. |
Remove the pinion bolts. Use a magnetic socket to remove the bolts from the holder.
|
|
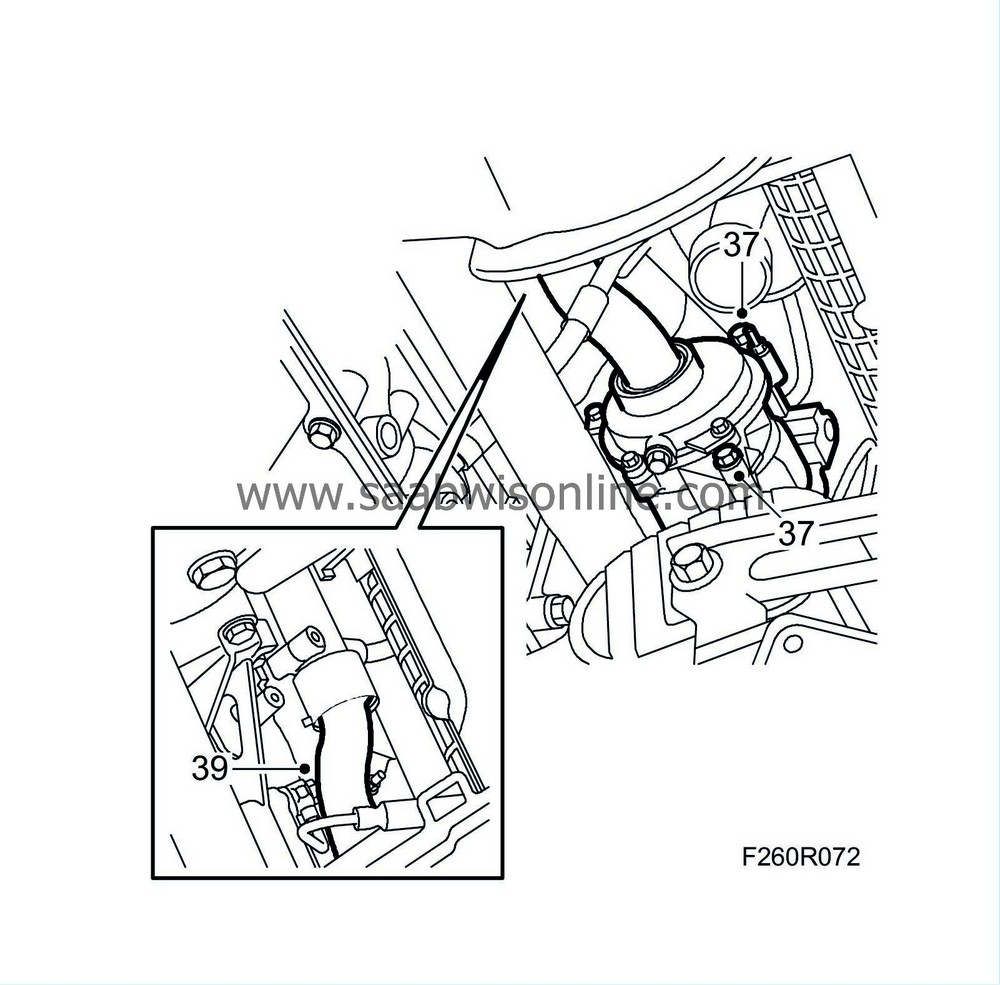
| 37. |
Remove the bolts on the back of the coolant pump.
|
|
| 38. |
Move aside the thermostat housing with pipe and remove the coolant pump.
|
||||||||||
| 39. |
Remove the water pipe from the thermostat housing.
|
|
| To fit |
| 1. |
Clean and fit new O-rings on the coolant pipe, lubricate sparingly with
Vaseline, non-acidic
.
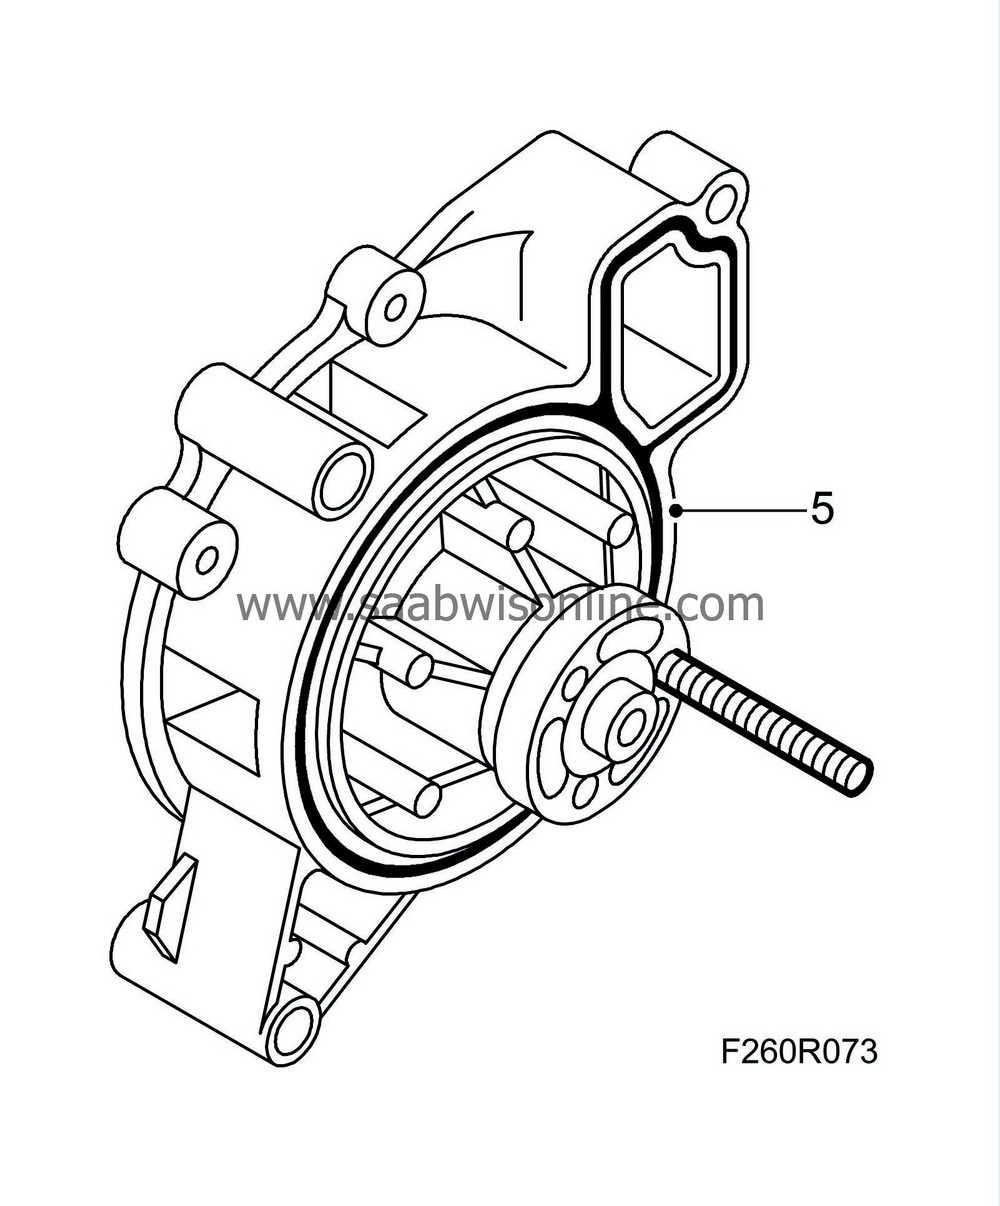
|
|
| 2. |
Clean the connections on the thermostat housing, fit a new seal and fit the water pipe.
|
|
| 3. |
Fit the stud to the coolant pump driver using
83 96 103 Holding tool for changing water pump, B207
from the tool kit.
|
|
| 4. |
Fit the coolant pump with new seal, sparingly lubricated with
Vaseline, non-acidic
by guiding in the stud through one of the holes in the balancer shaft sprocket.
|
|
| 5. |
Insert the coolant pump bolts, the two rear bolts and the lower bolt through the timing cover.

|
|
| 6. |
Lower the car.
|
|
| 7. |
Insert and tighten the upper bolt through the timing cover.
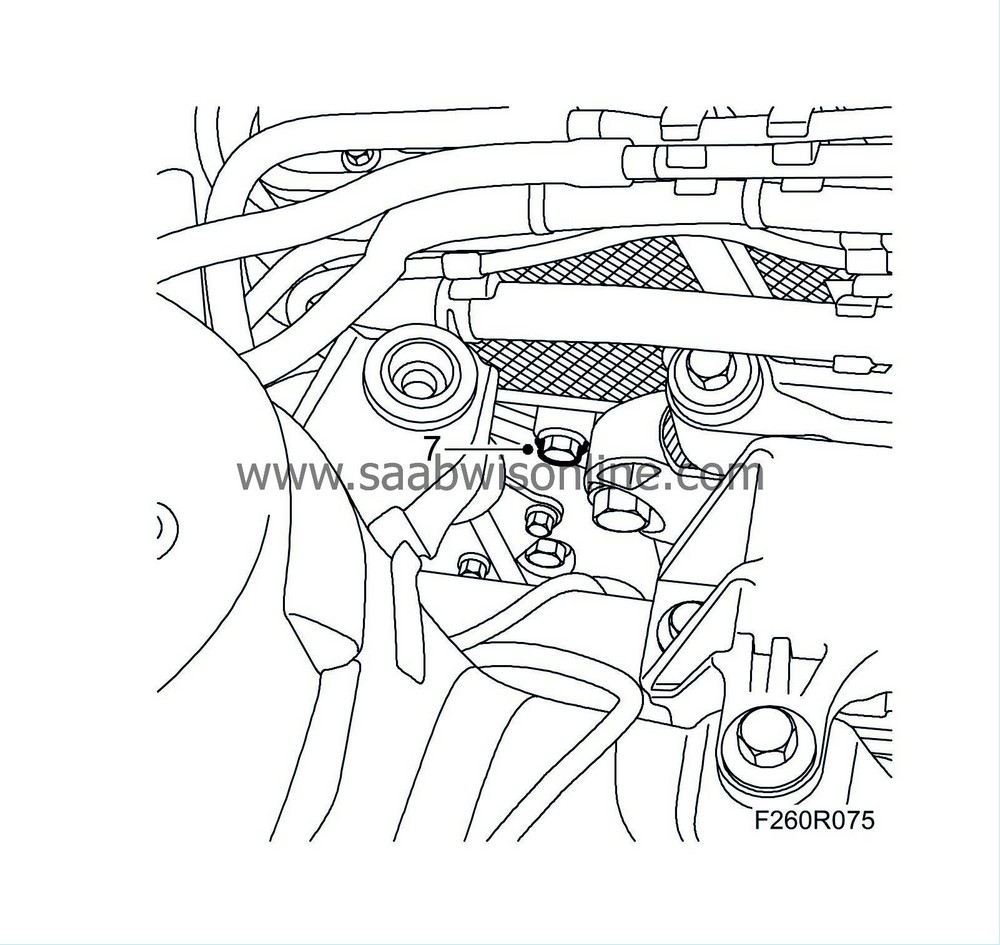
|
|
| 8. |
Raise the car.
|
|
| 9. |
Tighten the coolant pump bolts.
Tightening torque, short bolts 20 Nm (15 lbf ft). Tightening torque, long bolts 25 Nm (18 lbf ft). |
|
| 10. |
Fit the coolant pipe to the pump and fit the thermostat.
Tightening torque 10 Nm (7 lbf ft). 
|
|
| 11. |
Fit the coolant pipe between the turbocharger and the thermostat housing with new seals.
Tightening torque 20 Nm (15 lbf ft) . |
|
| 12. |
Lift up the catalytic converter, position its bracket to the studs on the engine block and position the catalytic converter to the turbocharger connection.

|
|
| 13. |
Insert the catalytic converter bracket bolts into the engine block and new nuts on the studs.
|
|
| 14. |
Lower the car.
|
|
| 15. |
Lubricate the turbocharger studs with
30 20 971 Screw-thread paste
.
|
|
| 16. |
Fit the catalytic converter with new nuts so that it is firmly against the turbocharger.
Tightening torque 10 Nm (7 lbf ft). 
|
|
| 17. |
Tighten the turbocharger oil delivery pipe using new seals. Grip the pipe so that it does not rotate.
Tightening torque 15 Nm (11 lbf ft). |
|
| 18. |
Raise the car.
|
|
| 19. |
Tighten the catalytic converter nuts and bolts a last time.
Tightening torque, bolts: 25 Nm (18.5 lbf ft) 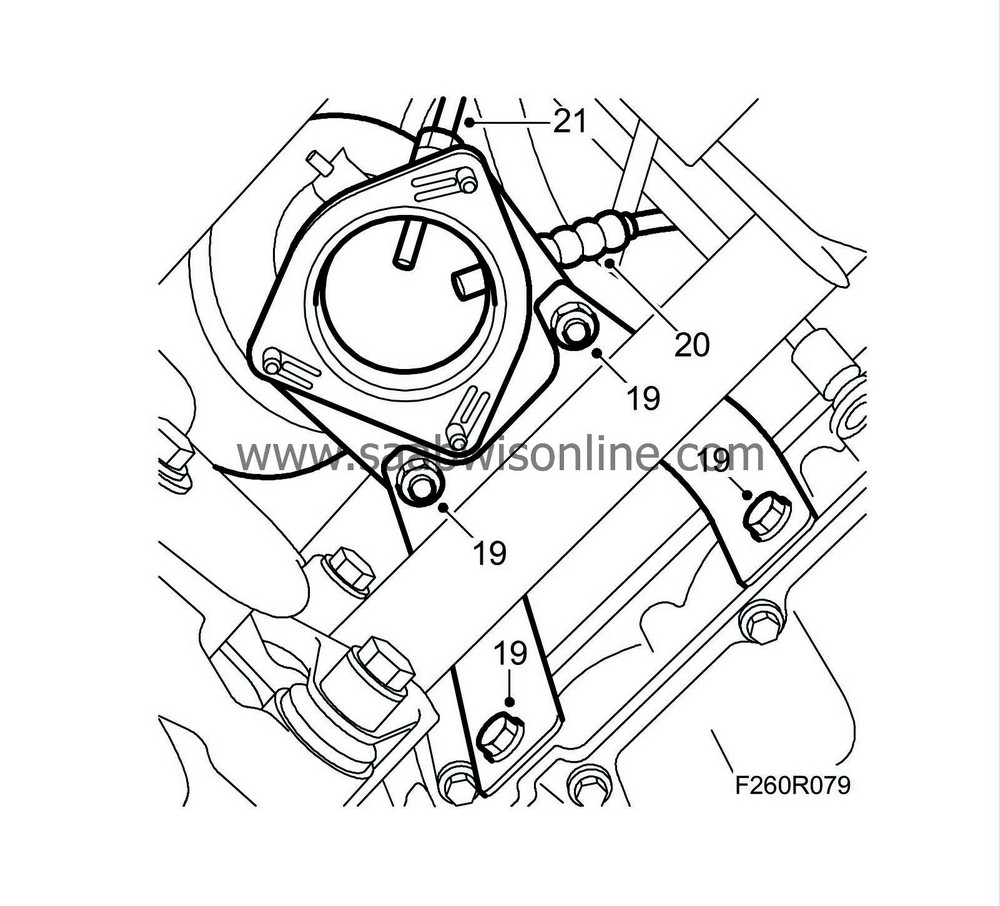
|
|
| 20. |
Lubricate the threads sparingly with
30 20 971 Screw-thread paste
and fit the lower oxygen sensor.
Tightening torque 40 Nm (30 lbf ft).
|
||||||||||
| 21. |
Lubricate the threads sparingly with
30 20 971 Screw-thread paste
and fit the temperature sensor.
Tightening torque 45 Nm (33 lbf ft). |
|
| 22. |
Lift up the oxygen sensor and temperature sensor cables.
|
||||||||||
| 23. |
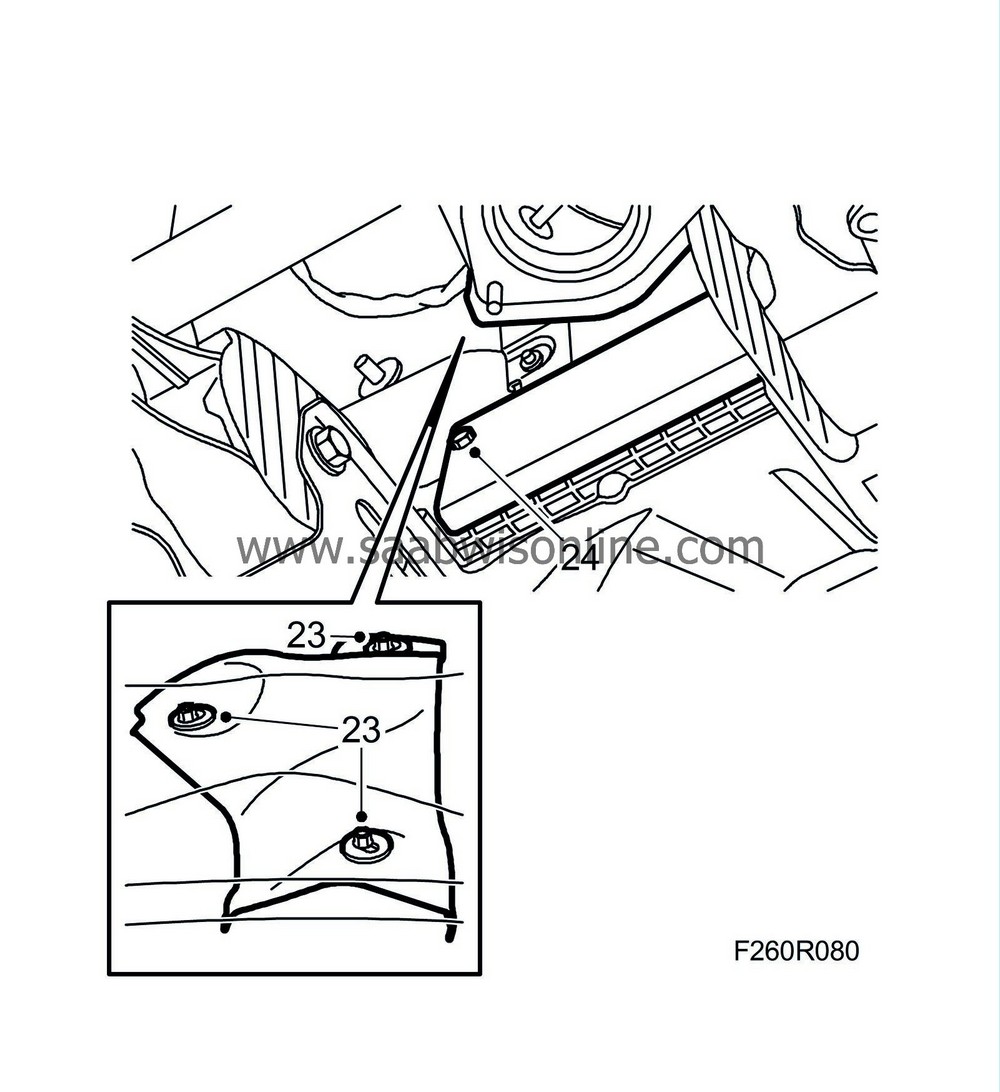
Fit the heat shield onto the catalytic converter.
|
|
| 24. |
Fit the heat shield over the steering gear.
|
|
| 25. |
Clean the joint on the catalytic converter and the pipe connection to the front silencer, mount the joint clamp and fit the front pipe with a new gasket, new nuts and rubber mountings. Lubricate the studs with
30 20 971 Screw-thread paste
.

|
|
| 26. |
Move over the joint clamp so that the pipe ends are in the middle of the clamp.
|
|
| 27. |
Tighten the joint with the catalytic converter.
Tightening torque 25 Nm (18.5 lbf ft). |
|
| 28. |
Tighten the joint clamp nuts.
Tightening torque 40 Nm (30 lbf ft). |
|
| 30. |
Fit the cover on the timing cover with a new gasket.
Tightening torque 8 Nm (6 lbf ft) . |
|
| 31. |
Fit the multigroove belt in the direction of rotation noted earlier, making sure it is positioned correctly over the pulleys. Use
83 96 095 Belt circuit relieving tool B207
.

|
|
| 32. |
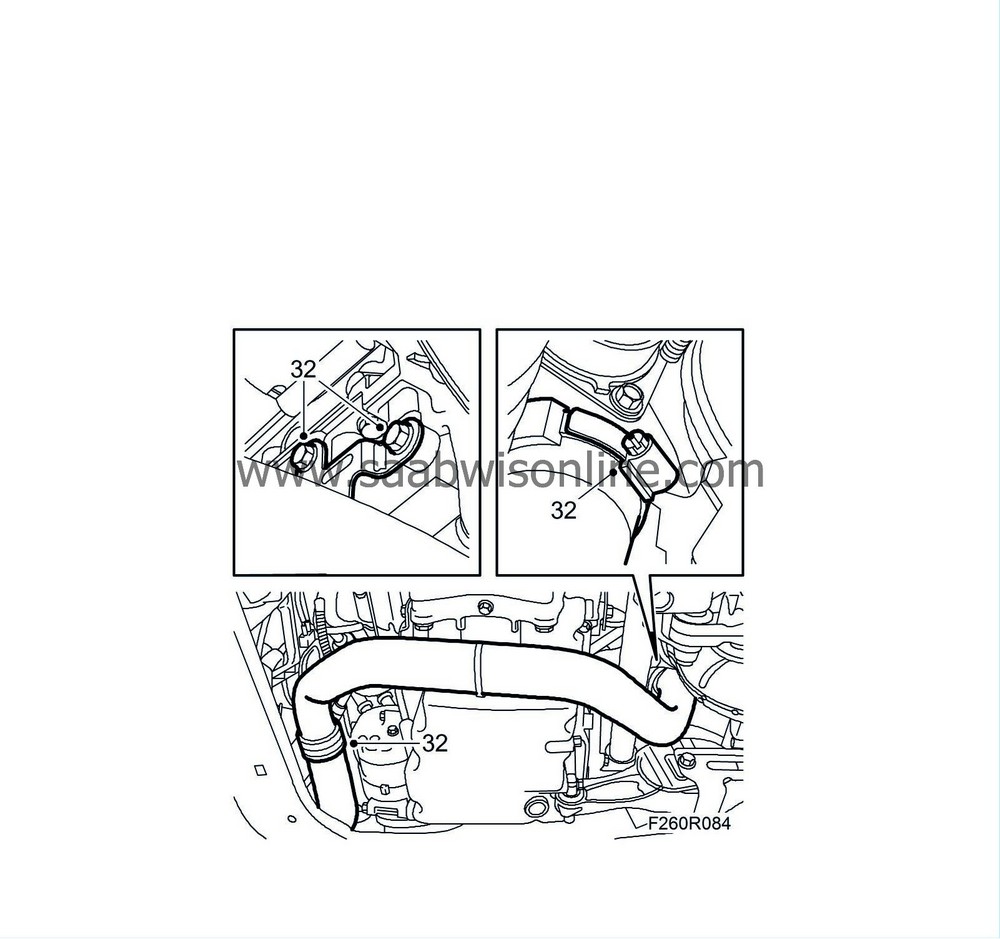
Fit the lower turbocharger delivery pipe.
|
|
| 33. |
Close the radiator drain.
|
|
| 34. |
Lower the car.
|
|
| 35. |
Lubricate the threads sparingly with
30 20 971 Screw-thread paste
and fit the upper oxygen sensor.
Tightening torque 40 Nm (30 lbf ft). 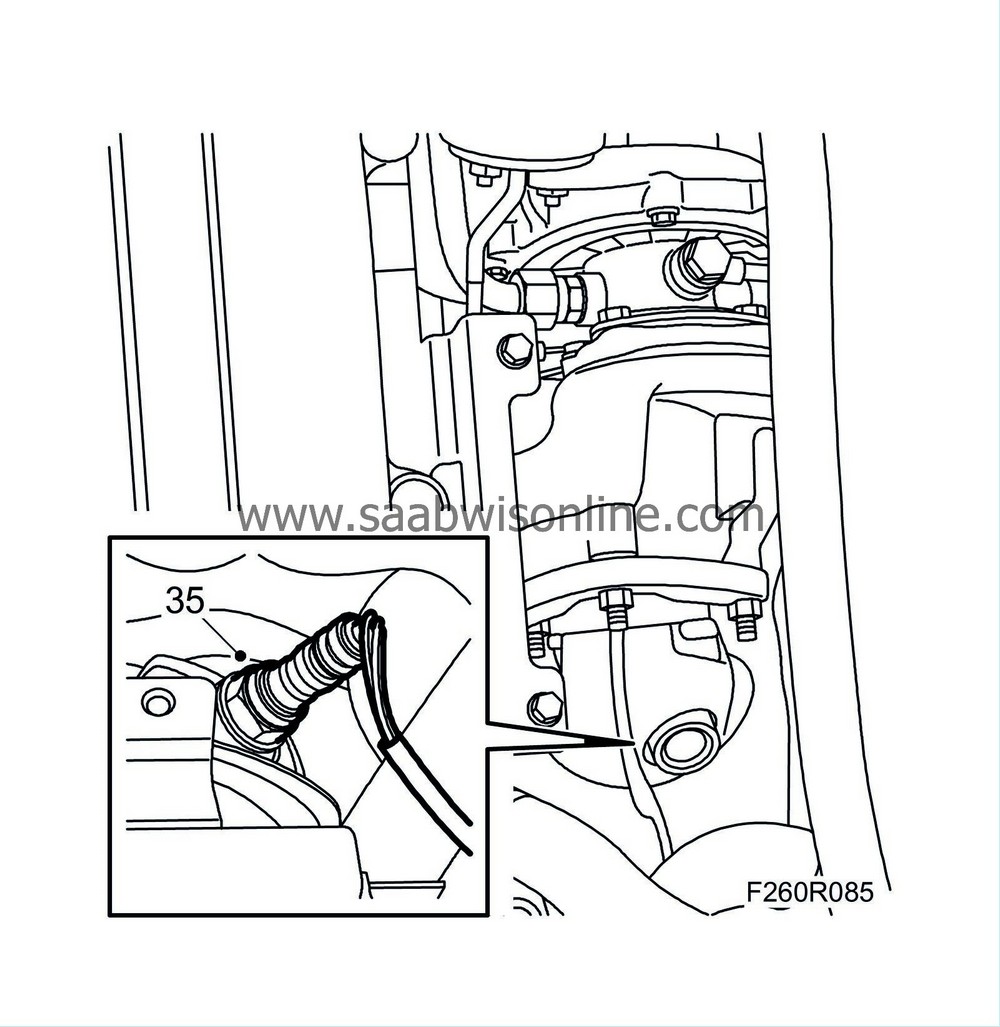
|
|
| 36. |
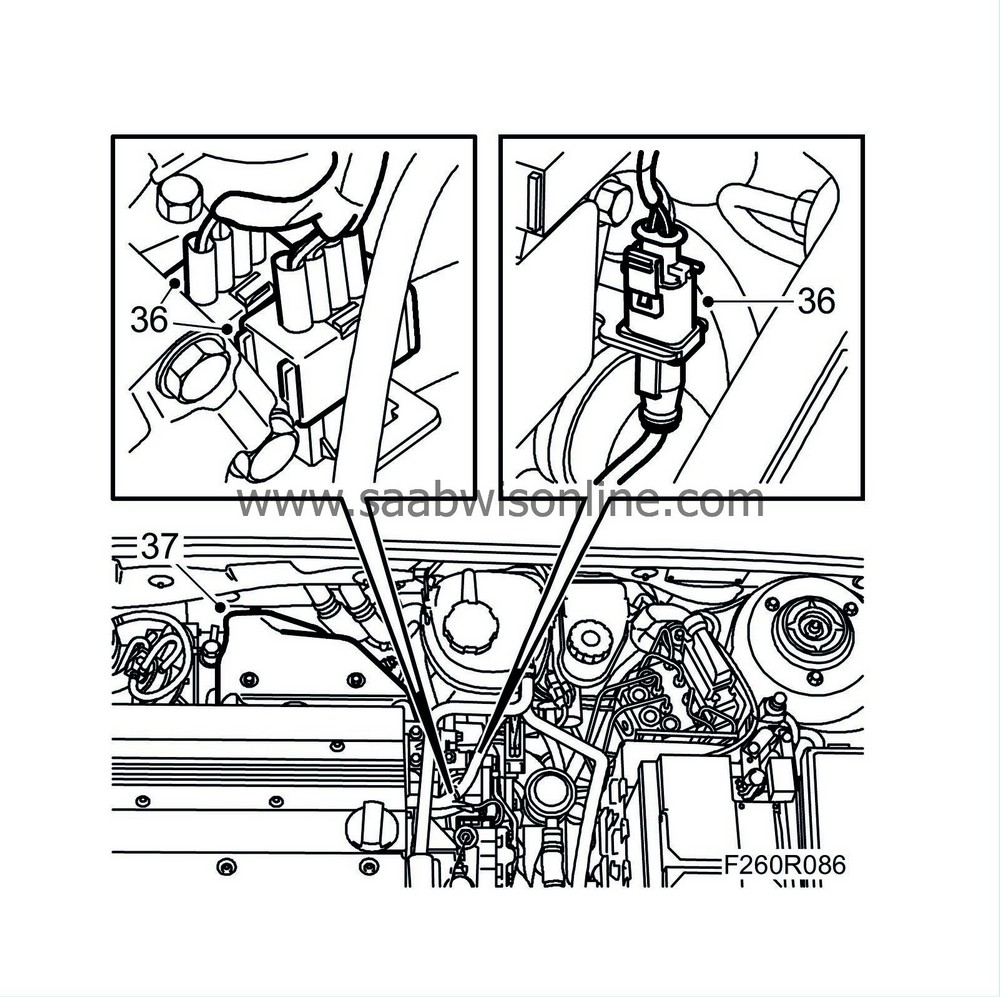
Plug in and secure the oxygen sensor and temperature sensor connectors.
|
|
| 37. |
Fit the turbocharger heat shield.
Tightening torque 20 Nm (15 lbf ft). |
|
| 38. |
Fit the air cleaner casing and connect the inlet hose.

|
|
| 39. |
Fit the filter and the air cleaner casing cover.

|
|
| 40. |
Fit the turbocharger inlet hose.
|
|
| 41. |
Plug in the mass air flow sensor connector.
|
|
| 42. |
Fill with coolant to approx. 20 mm above the mark on the expansion tank.
|
|
| 43. |
Check for coolant leaks.
|
|
| 44. |
Raise the car.
|
|
| 45. |
Fit the right wing liner and wheel
.
|
|
| 46. |
Fit the front spoiler shield
.
|
|
| 47. |
Lower the car.
|
|
| 48. |
Check the coolant level and top up as necessary.
|
|

 Warning
