(391-2394 Ed. 2) Update of OnStar system
Symptom: The OnStar system cannot be activated.
| MODIFICATION INSTRUCTION | |
| Bulletin Nbr: | 391-2394 Ed. 2 |
| Date: ........... | September 2003 |
| Market: | US |
| Update of OnStar system |
| Customer Satisfaction Campaign 154 21 |
Cars in stock must be rectified before delivery.
| Cars affected |
Saab 9-3 (9440) M03 with VIN within the interval 31000012-31026045
| Background |
The car must be updated so that the OnStar system can be activated. The software in ICM and ACC must also be updated to improve background lighting.
Symptom description
The OnStar system cannot be activated.| Parts required |
02 91 955 OnStar installation kit
If necessary (affects only 60 cars):
12 800 458 BA Communication Unit (CU)
| Procedure |
| Note | ||
|
In order to perform this work the following special tools are required: |
||
| - |
Genesis
|
|
| - |
Tech2 with 32 Mb card
|
|
| - |
CANdi box
|
|
Replacing the cupholder
| 2. |
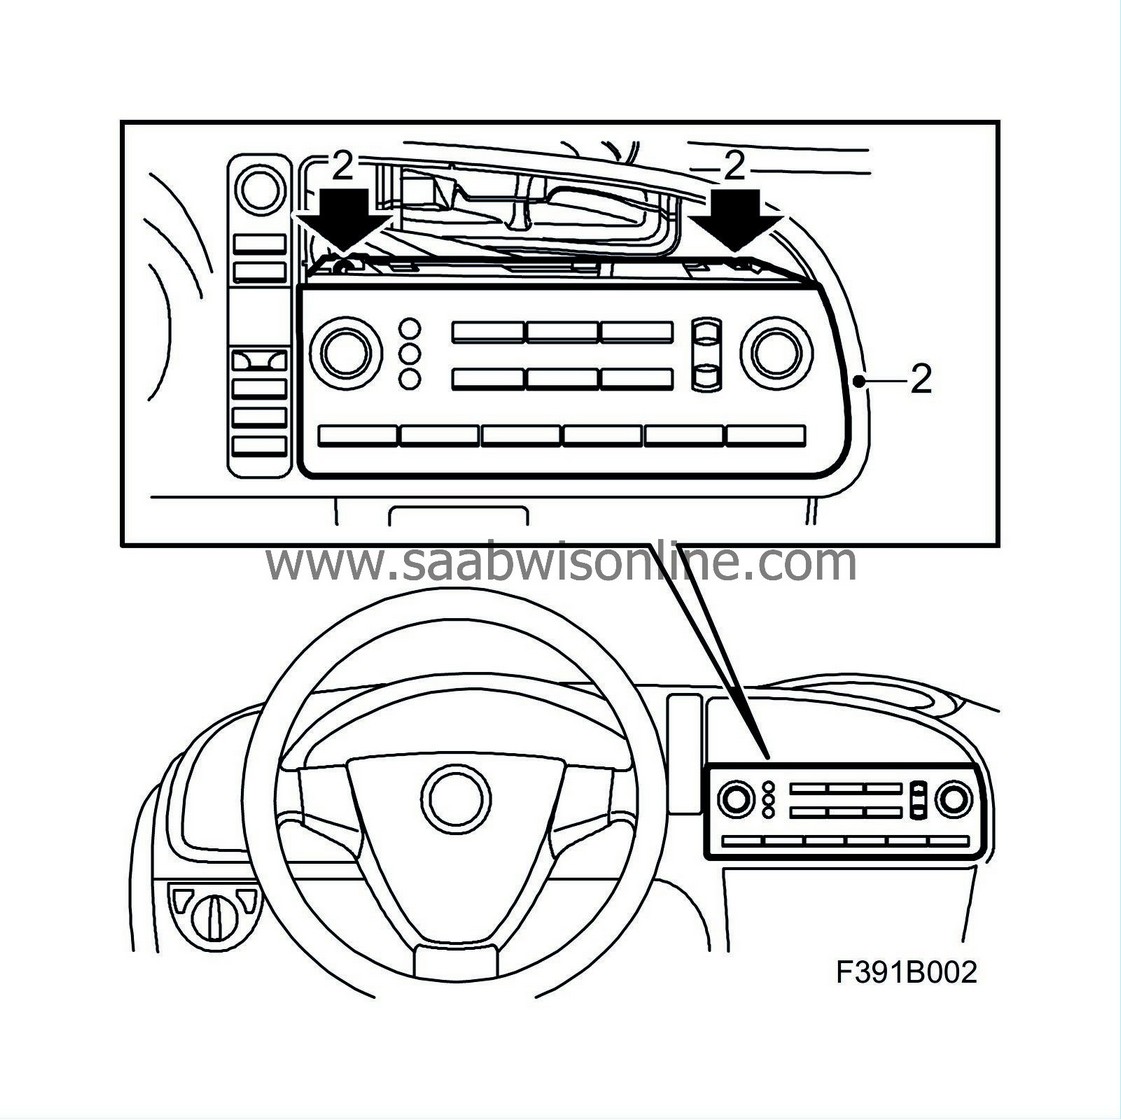
Remove the control panel of the infotainment system (ICM unit).
|
|
| 3. |
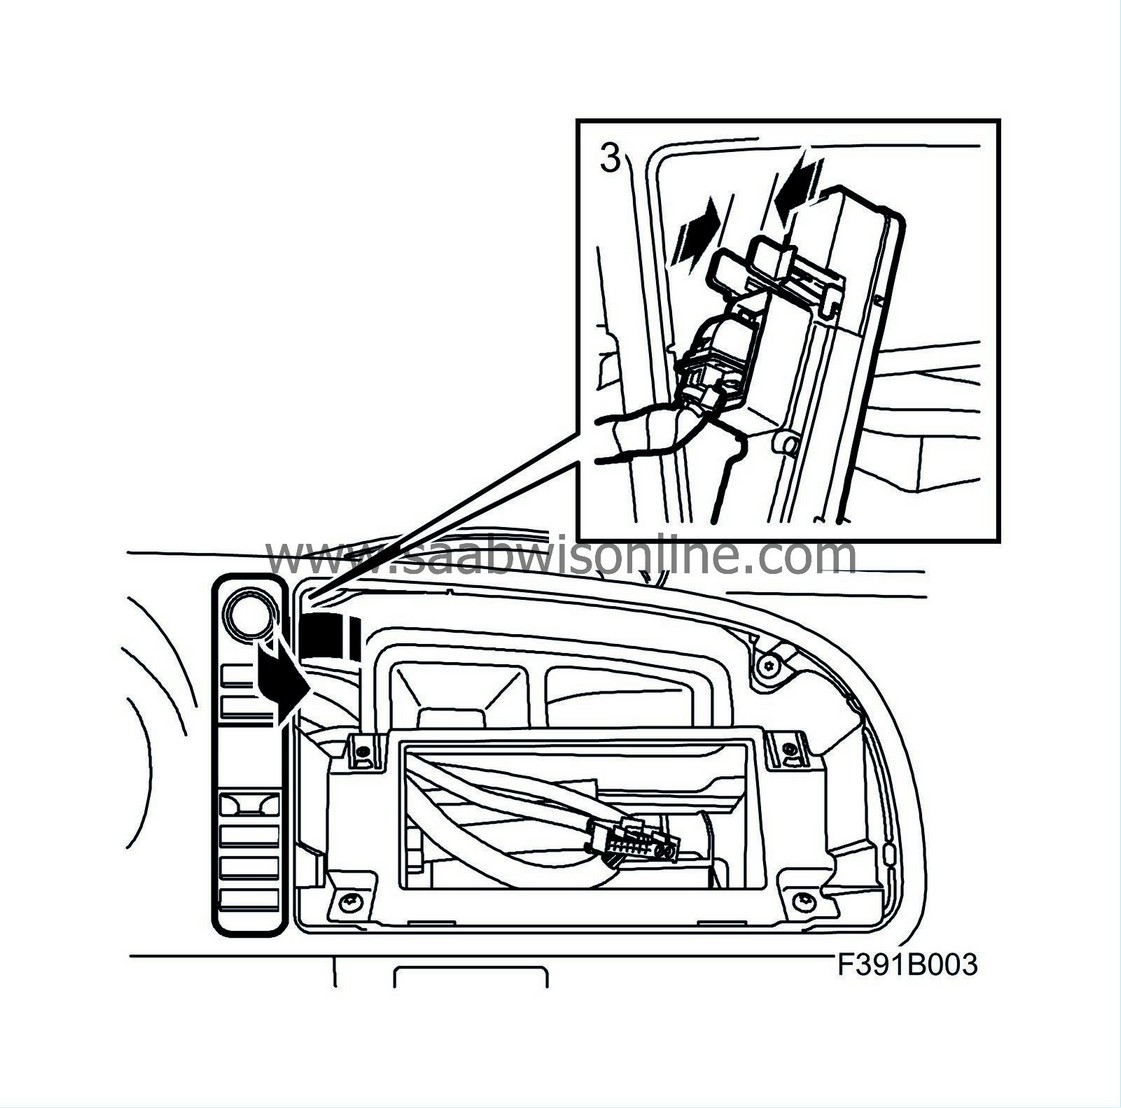
Remove the SID unit control panel (SIDC) from the rear by pressing the two tabs together and then pressing the SIDC forward. Start with the top edge.
|
|
| 4. |
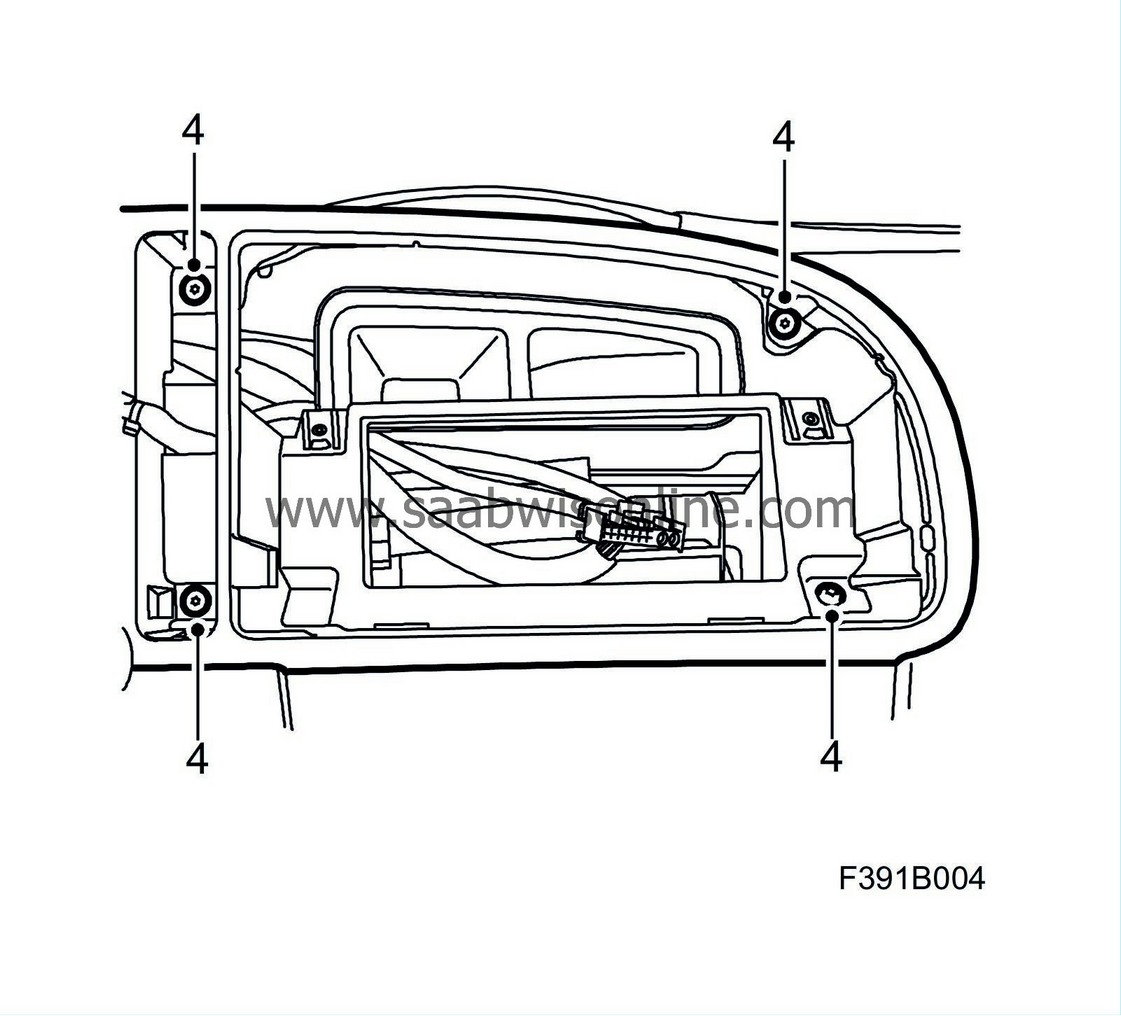
Remove the screws from the instrument plate.
|
|
| 5. |
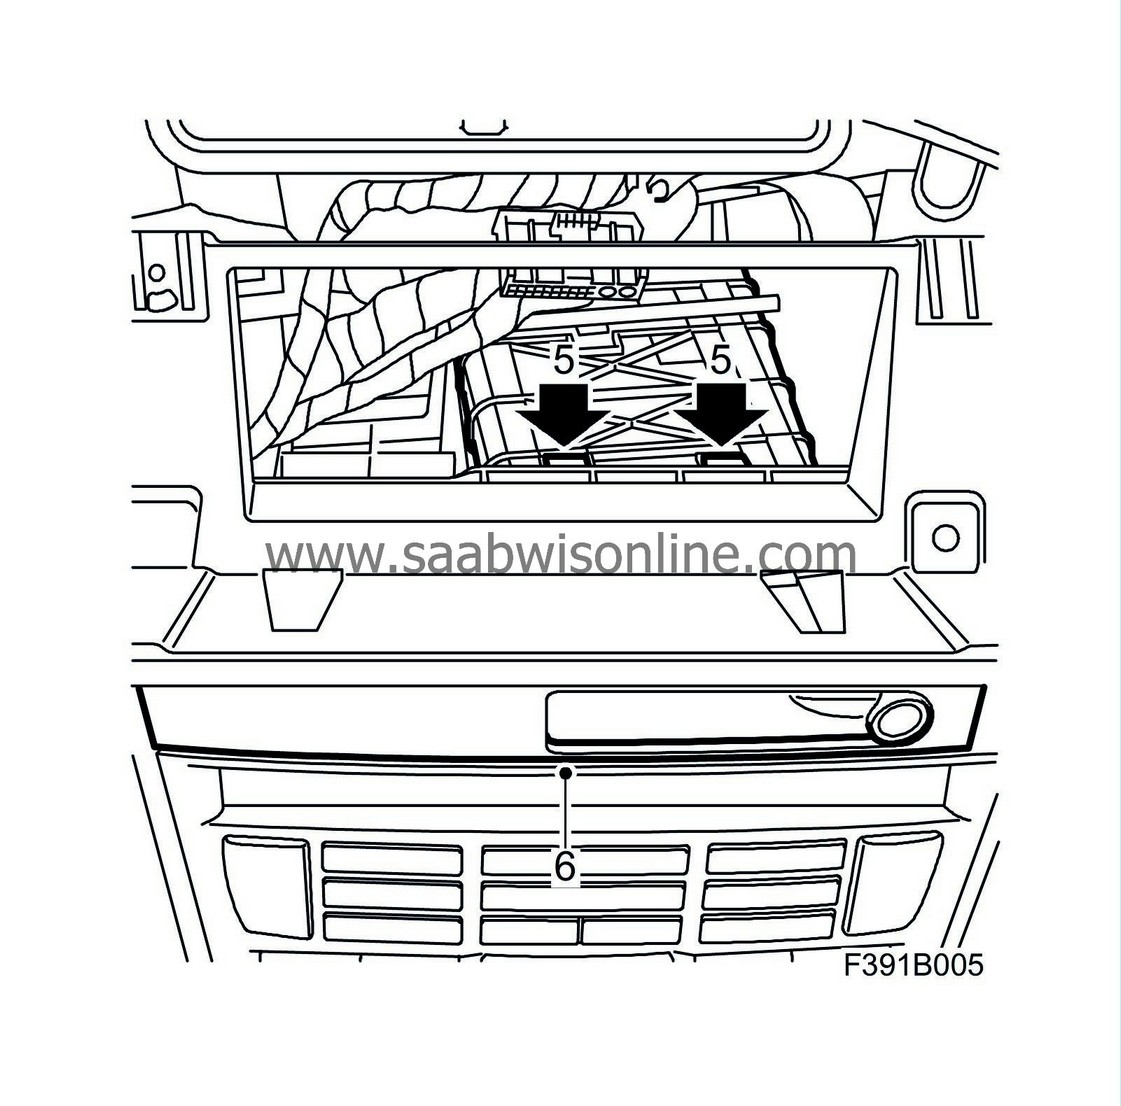
Depress the catches on the top of the cup holder and withdraw the holder.
|
|||||||
| 6. |
Lift out the cupholder.
|
|
| 7. |
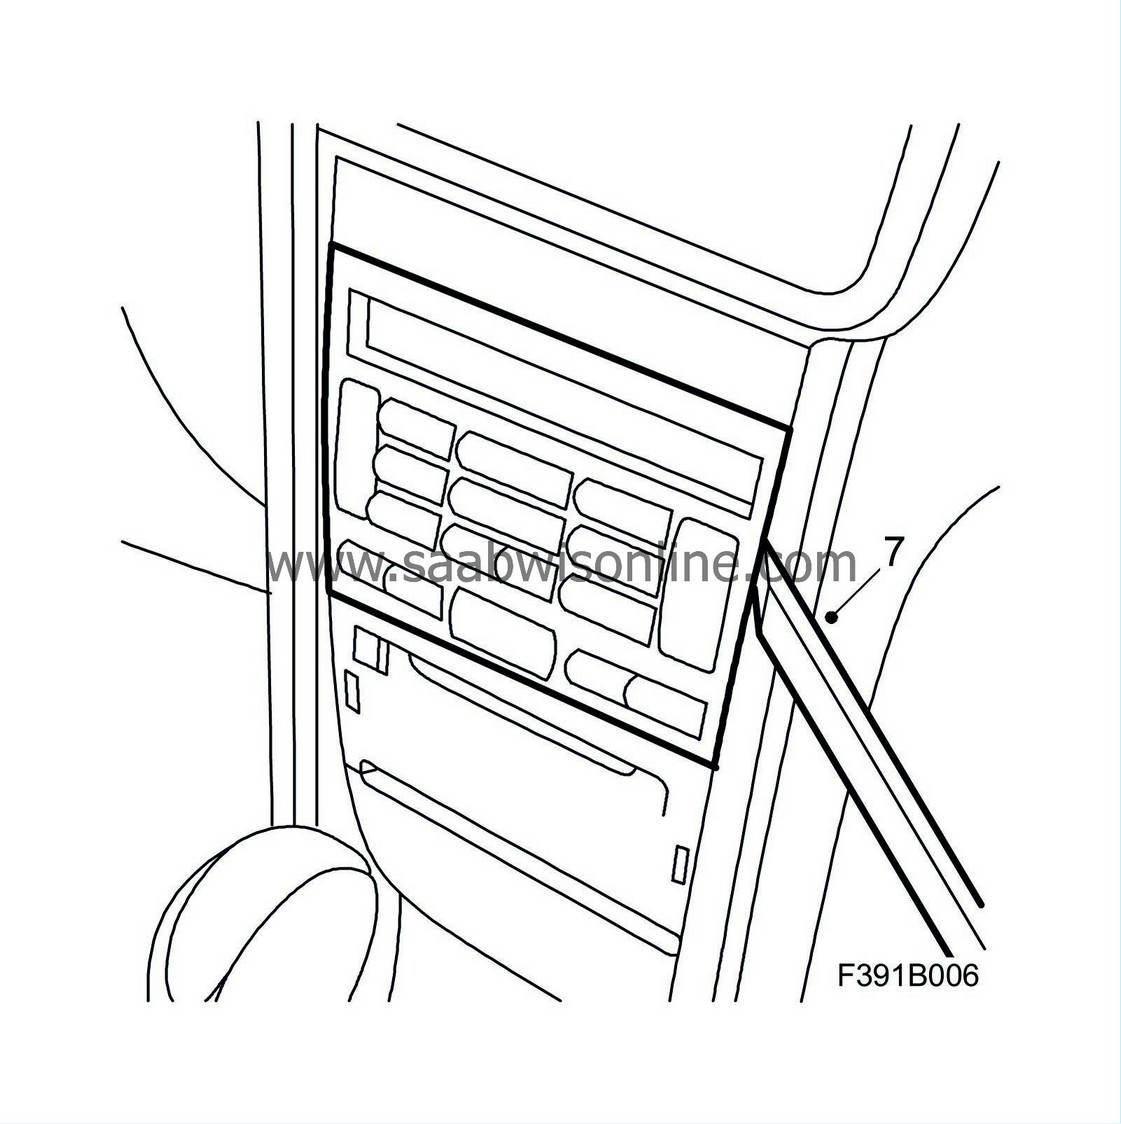
Remove the ACC/MCC unit by carefully pulling it out. Use the removal tool, part no. 82 93 474.
|
|
| 8. |
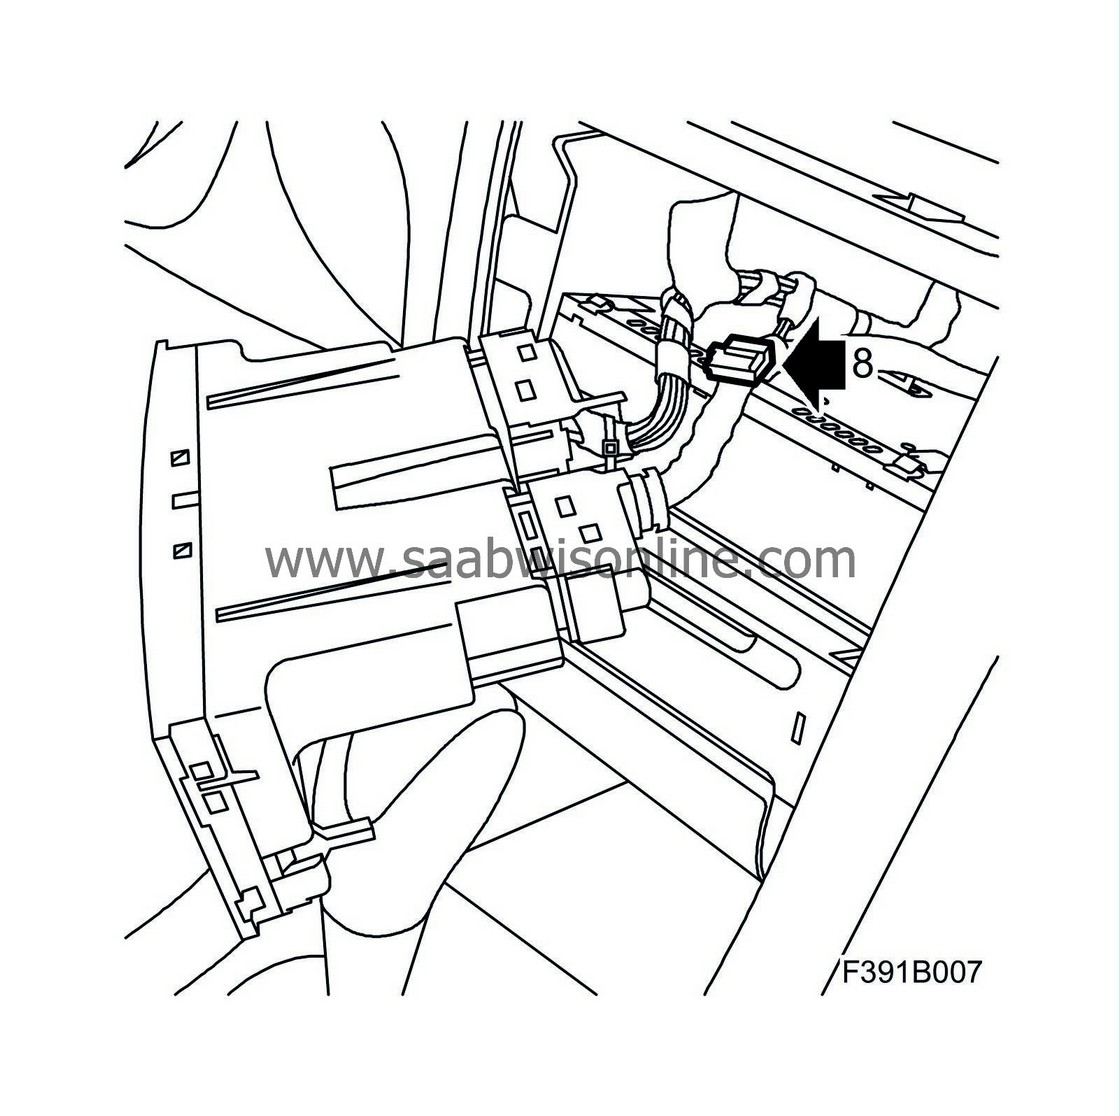
Remove the tape from the wiring harness of the OnStar buttons.
|
|
| 9. |
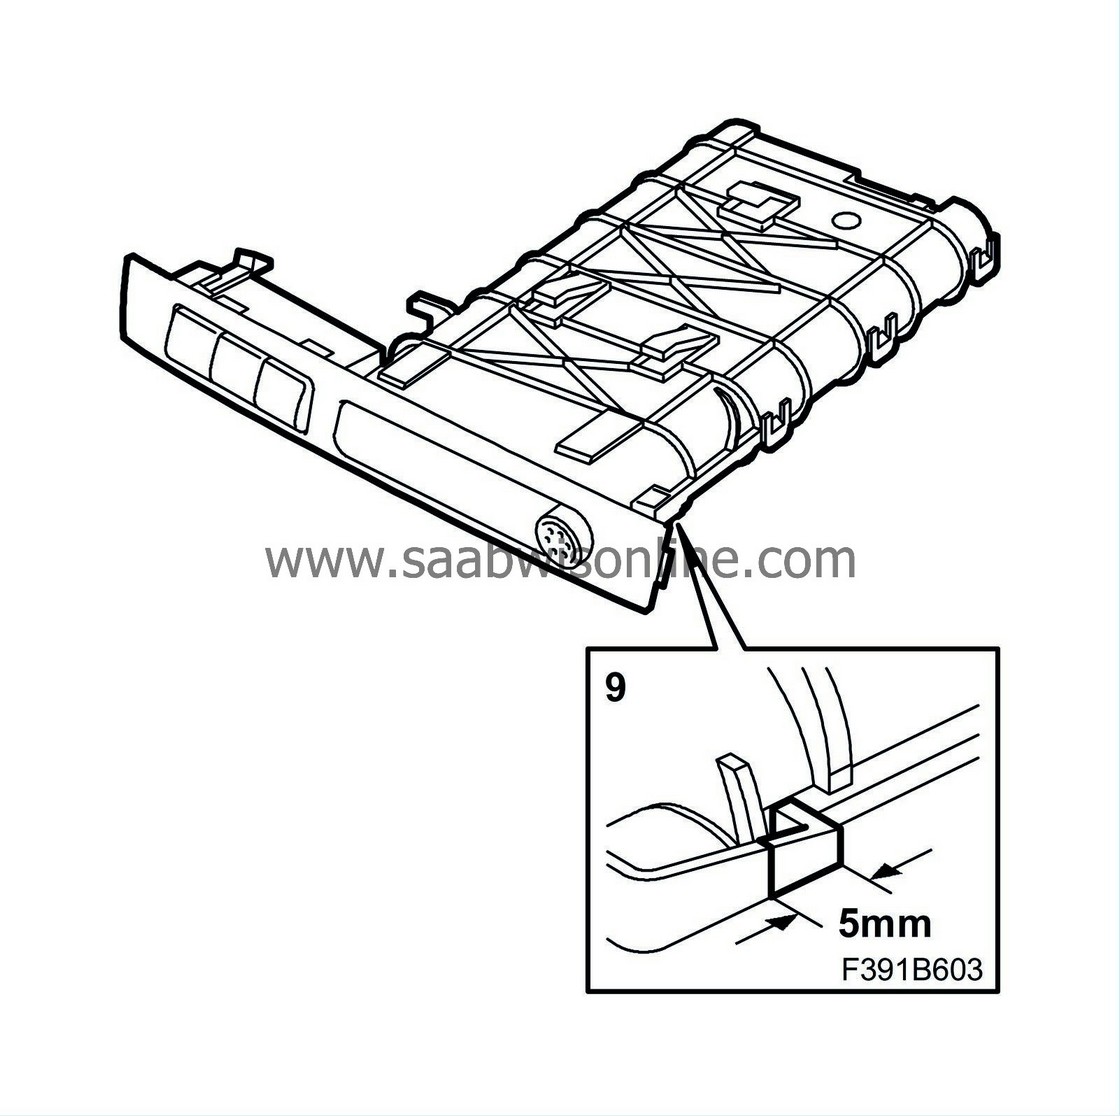
Cut 5 mm off the right-hand support of the cupholder. Measure precisely.
|
|
| 10. |
Cut off 1 mm from the 3 clefts holding the cupholder. Measure precisely.

|
|
| 11. |
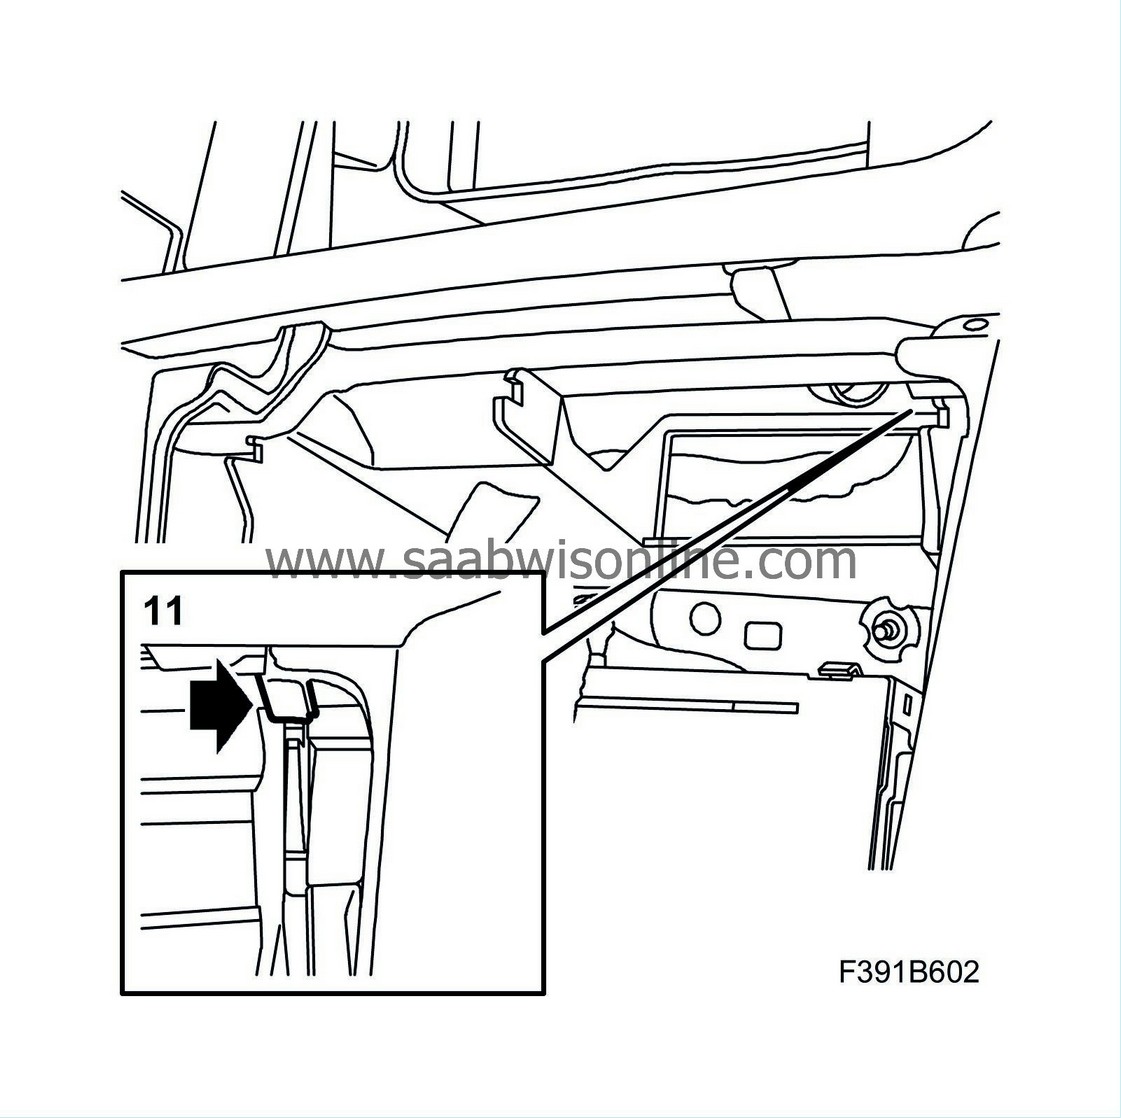
Fit the thin spacer at the top of the inside of the right-hand cleft.
|
|
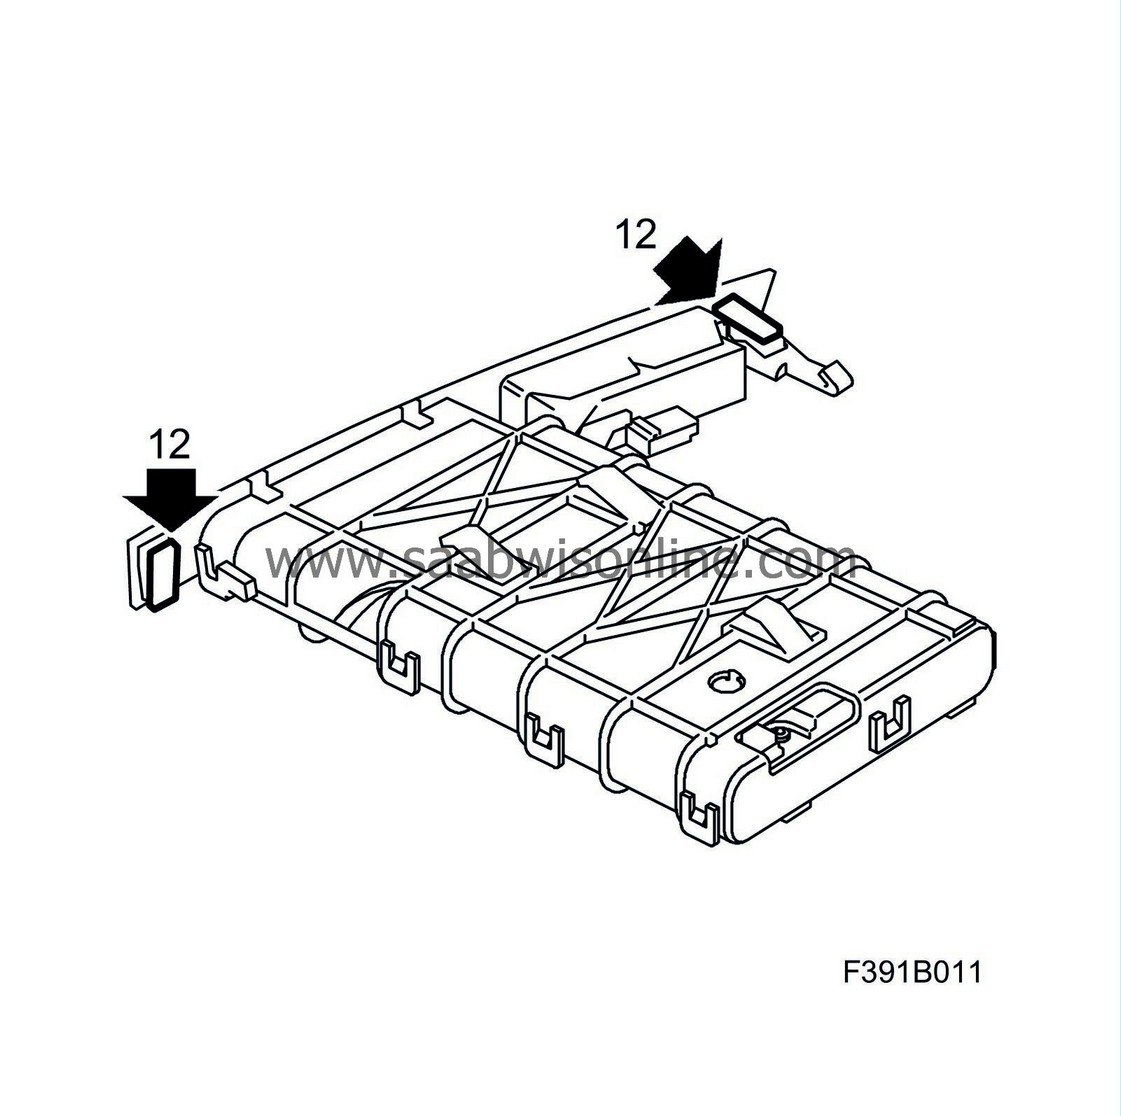
| 12. |
Remove the protective paper and fit the thicker spacers on the left-hand clip and the rear of the right-hand front.
|
|
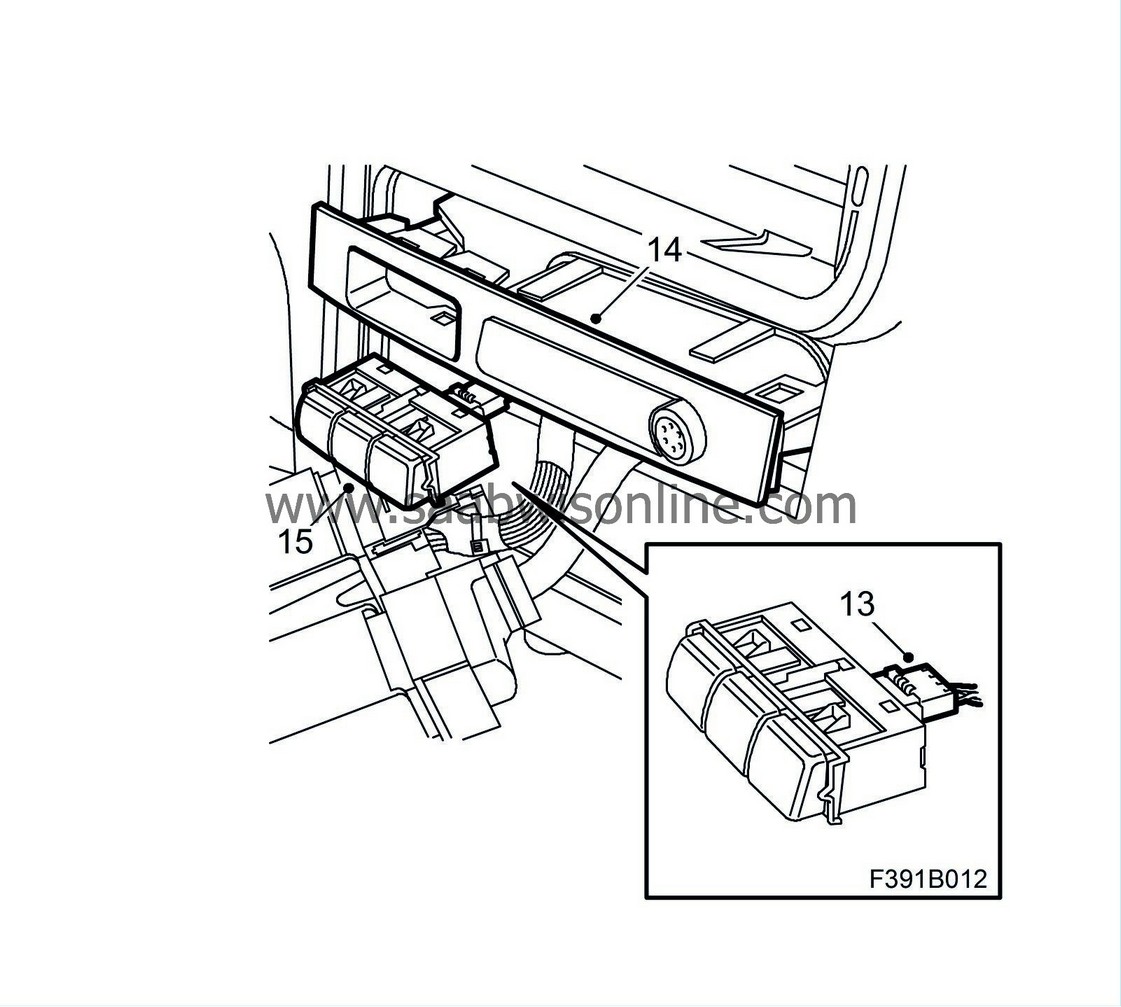
| 13. |
Plug in the connector for the OnStar buttons.
|
|
| 14. |
Fit the new cupholder in the panel, pressing it in so that it snaps in place.
|
|
| 15. |
Press in the OnStar keypad from the back so that it snaps in place.
|
|
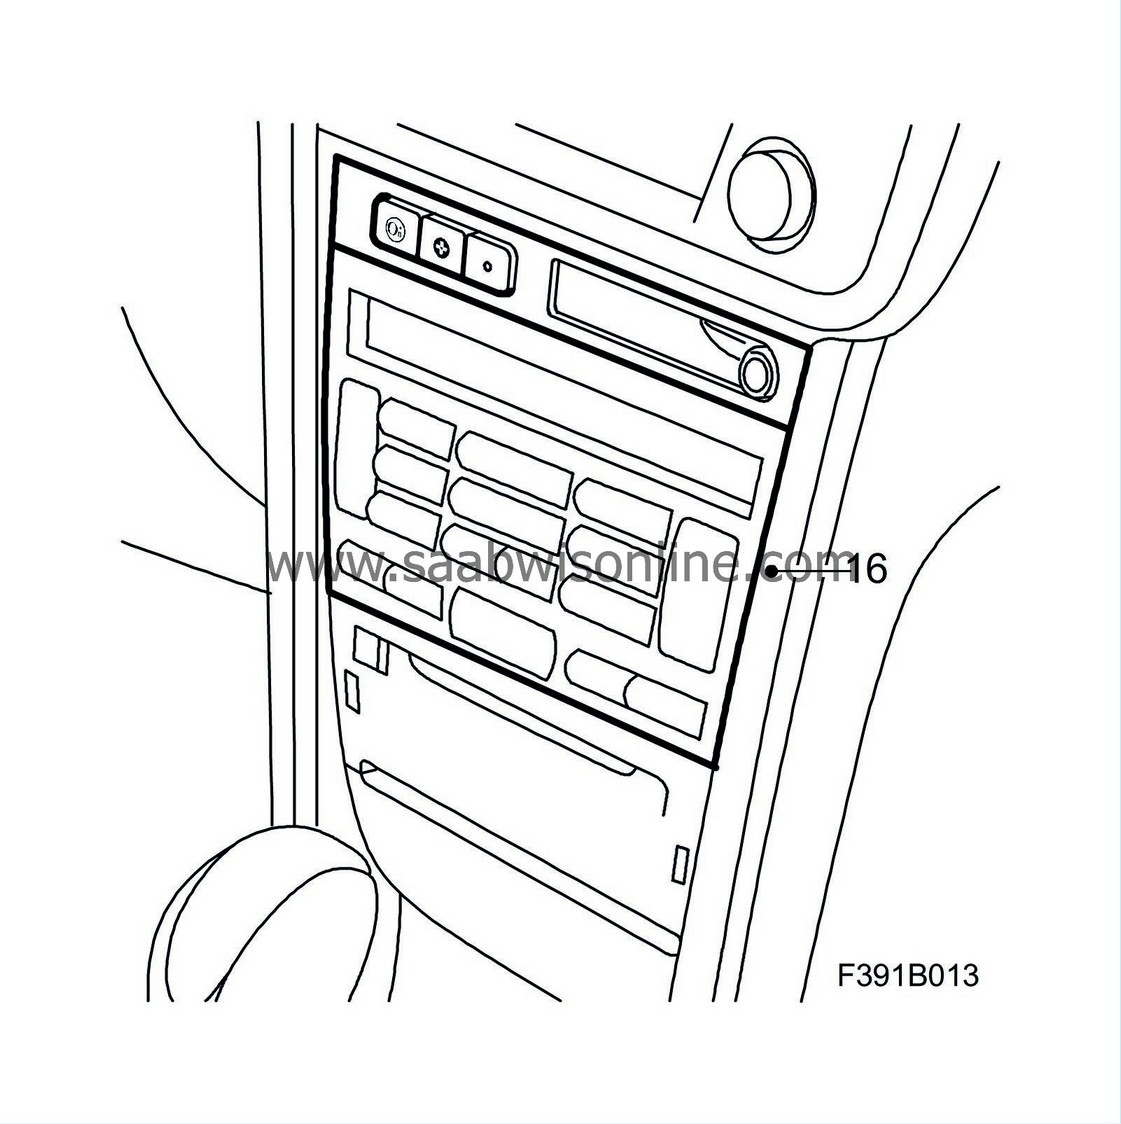
| 16. |
Fit the ACC/MCC unit.
|
|
| 17. |
Check the functionality of the cupholder.
|
|
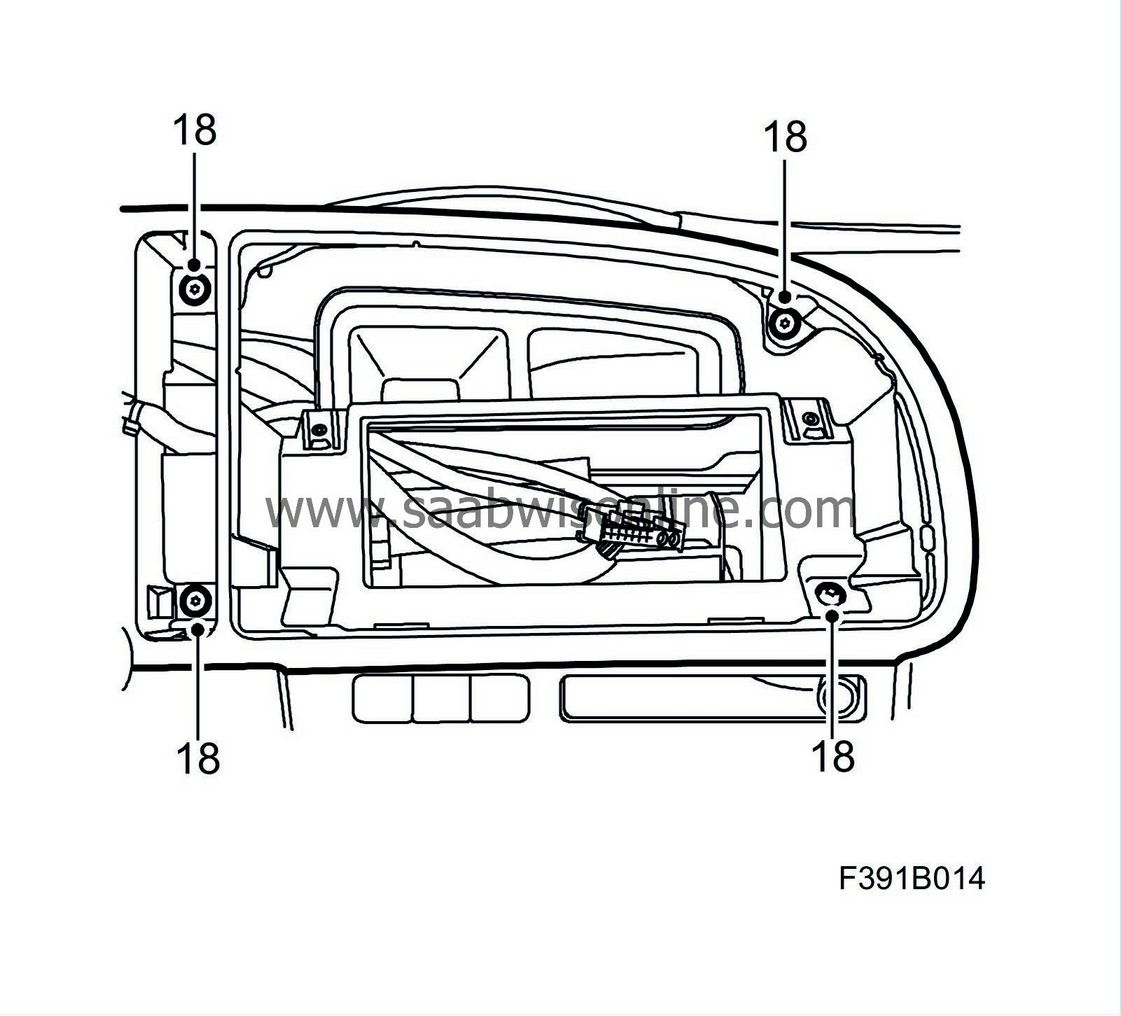
| 18. |
Fit the instrument plate screws.
|
|
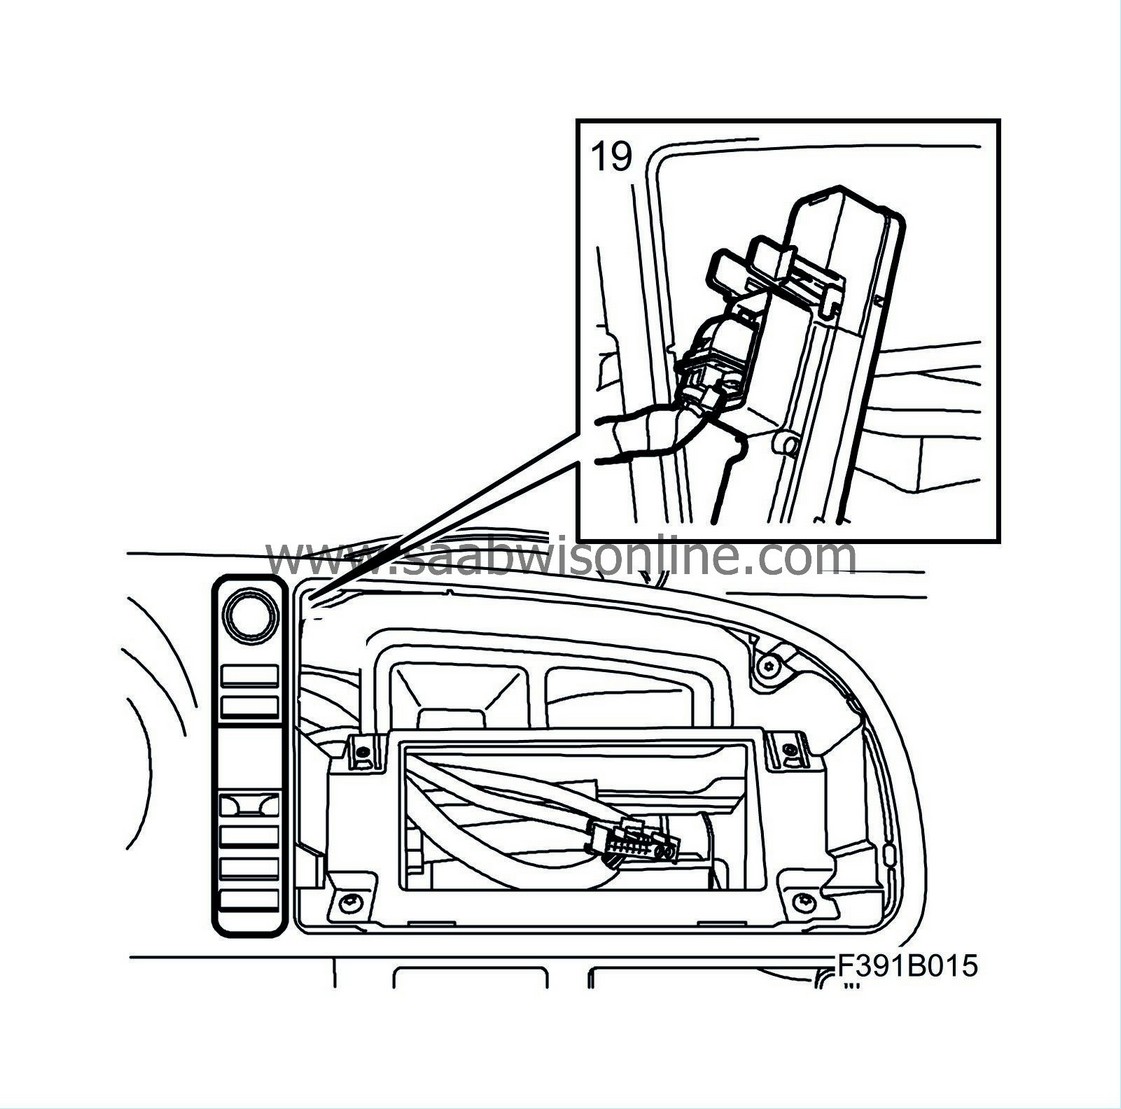
| 19. |
Fit SIDC by fitting the catch in the lower edge and then pressing the upper edge into place.
|
|
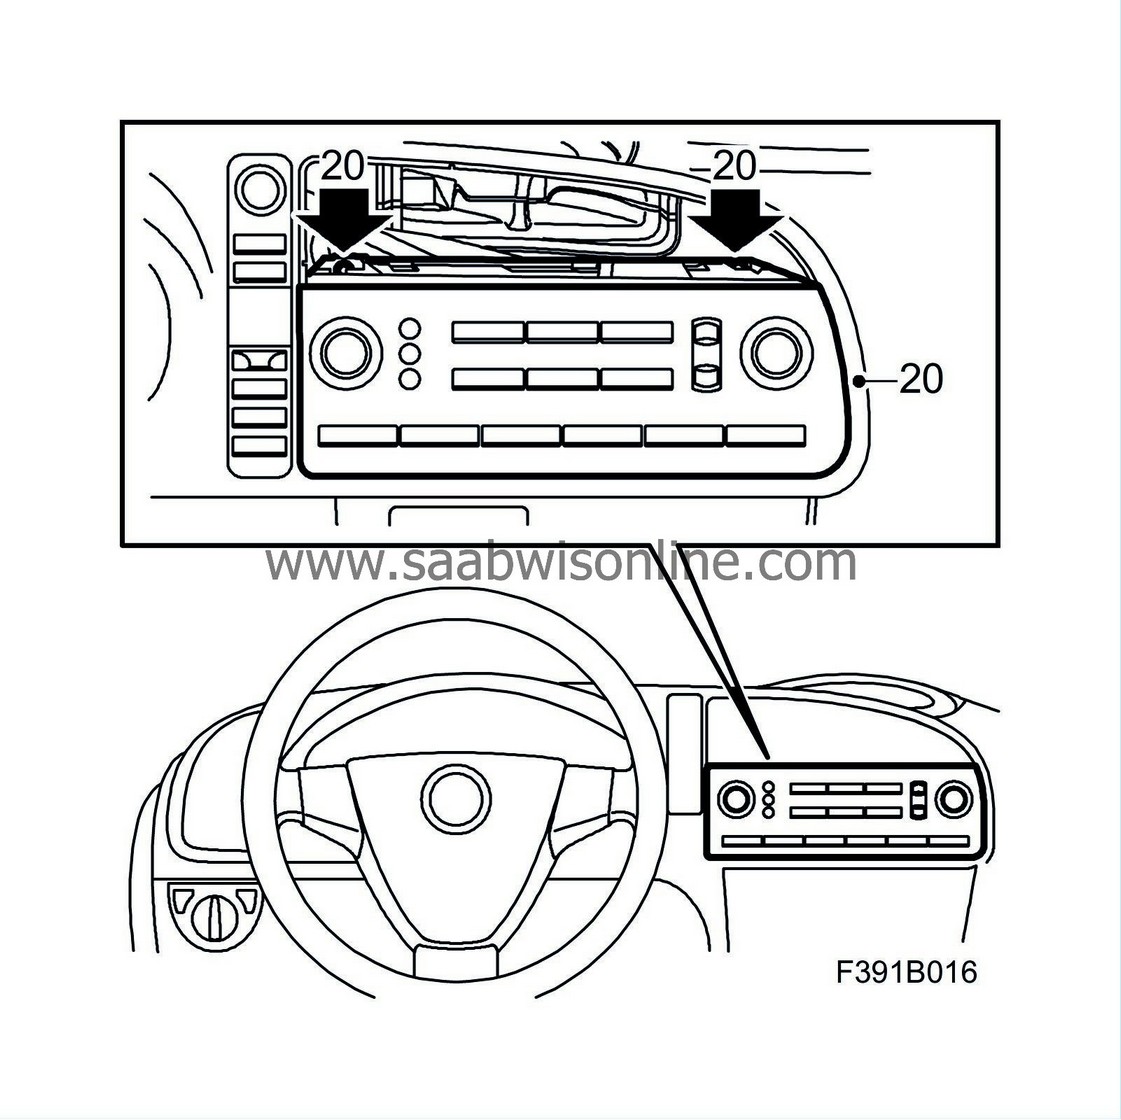
| 20. |
Fit the ICM unit.
|
|
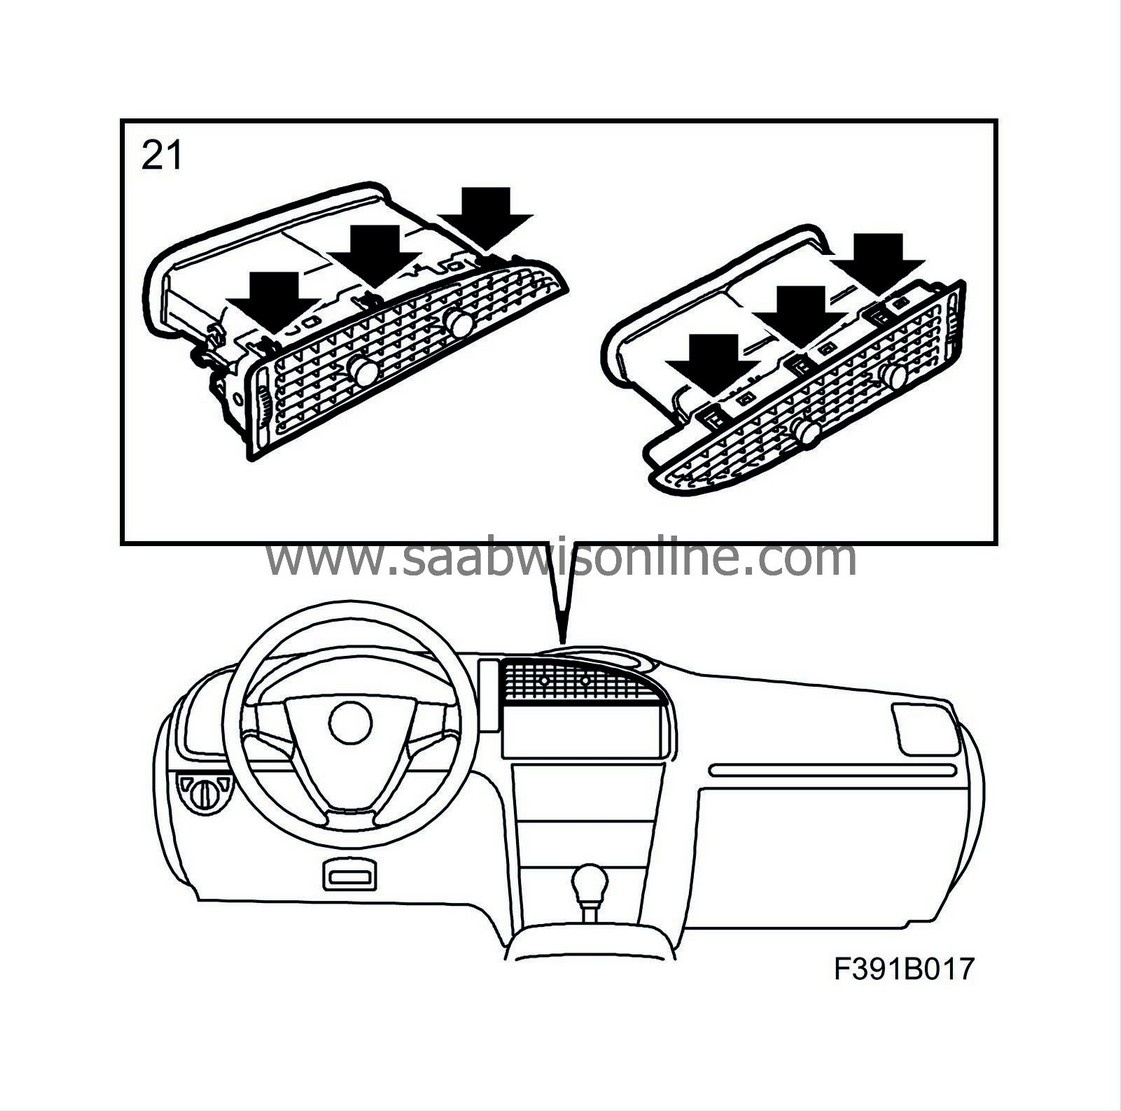
| 21. |
Position and fit the centre panel vent. Make sure that the catches fasten securely.
|
|
| 22. |
Check the fit, play and functionality of the cupholder.
|
|
Programming and functional testing
| 1. |
Remove fuse 23 (40A maxi fuse) from the dashboard fuse box.
|
|
| 2. |
Connect the battery charger to the car battery.
|
||||||||||
| 3. |
Reset the communication unit (CU) to zero by removing the connector from the unit.
|
|
| 4. |
Turn the ignition key to ON.
|
|||||||
| 5. |
Connect Genesis to the car's data link connector.
|
|
| 6. |
Check the status of the lamps and carry out the correct diagnostic procedure as per the "Indicator lamps" table below.
Indicator lamps
|
|||||||||||||||||||||||||||||||||||||||||||||
| 7. |
Disconnect the battery charger from the car.
|
|
| 8. |
Fit fuse 23 into the dashboard fuse box.
|
|
| 9. |
Check the time and date in SID; adjust as necessary.
|
|
| 10. |
Cars with pinch protection:
Set pinch protection for the window lifts.
|
|
| 11. |
Check the functionality of the OnStar system.
|
|
| 11.a. |
Press the "OnStar Services Button" once. An audio message is then played from the speakers.
|
| 11.b. |
End by pressing the "White dot button".
|
| 12. |
Read off diagnostic trouble codes using Tech 2 in order to confirm that no fault remains.
|
|
| Time/Warranty information |
See separate information.
| Appendix 1 |
Replacing the Communication Unit (CU)
| 1. |
Fold down the back rest in the rear seat.
|
|
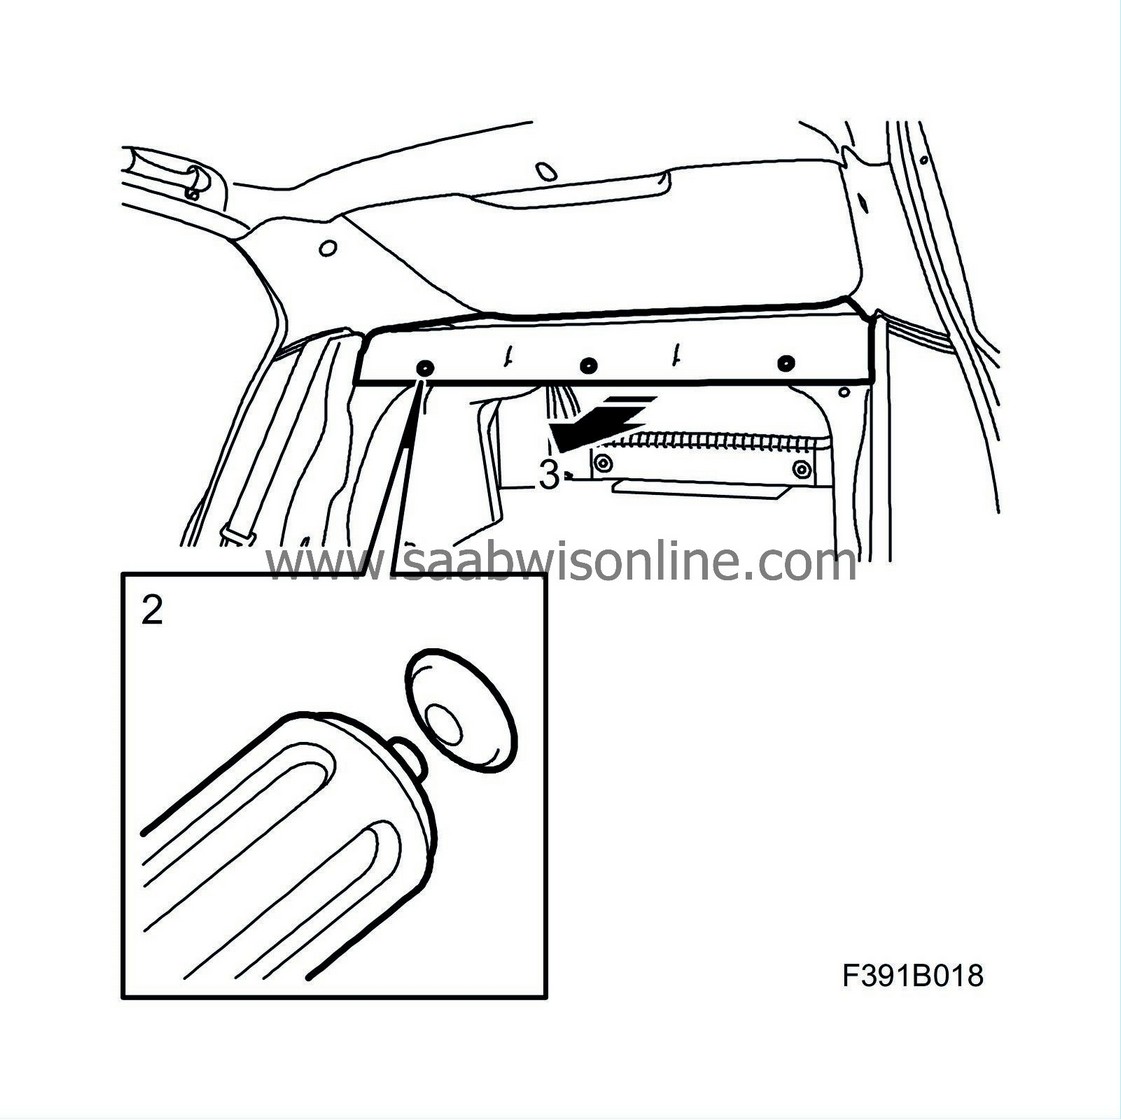
| 2. |
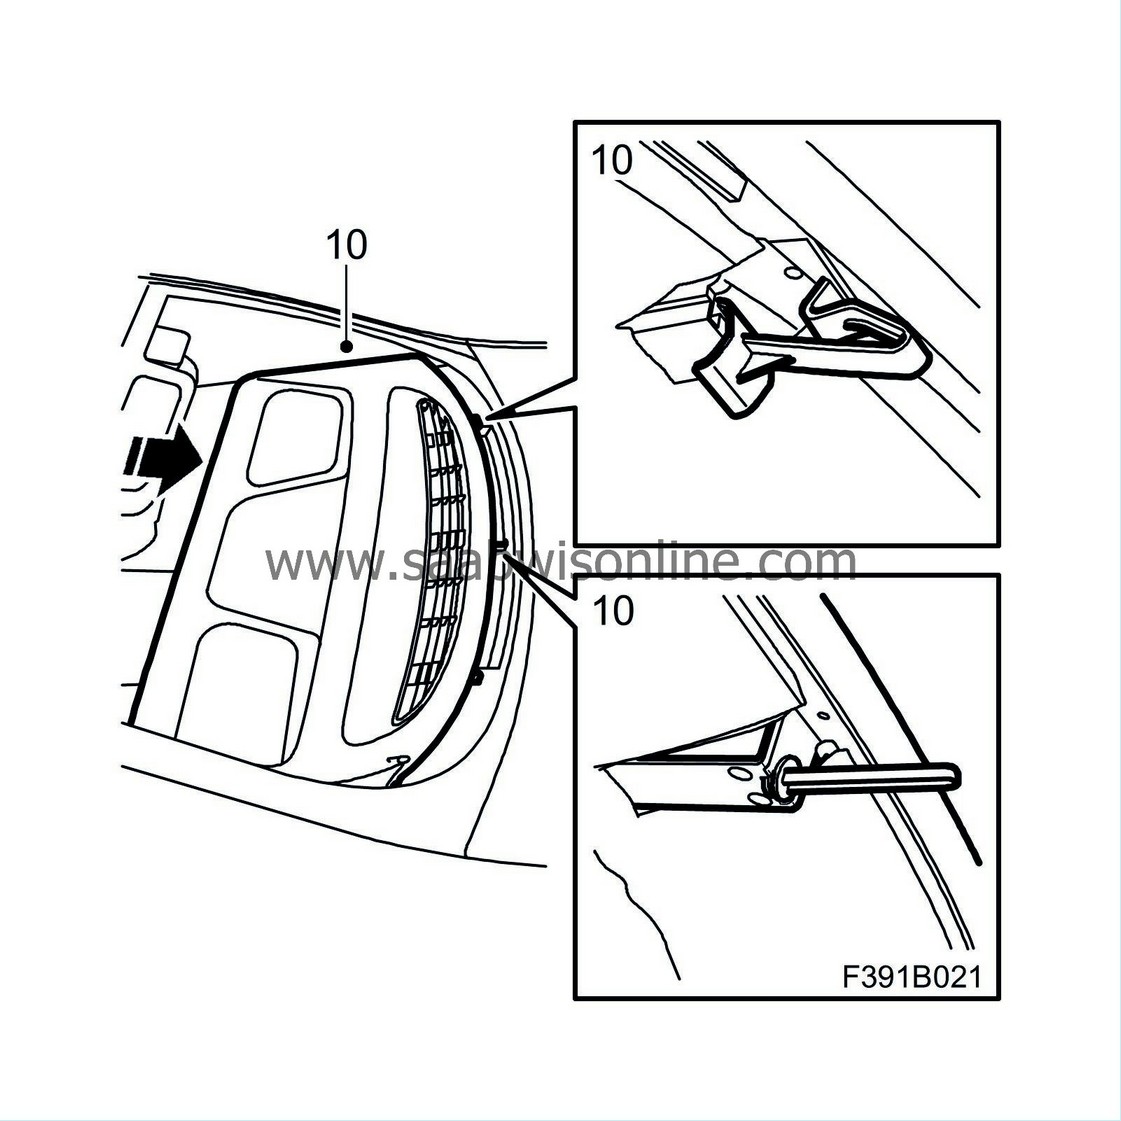
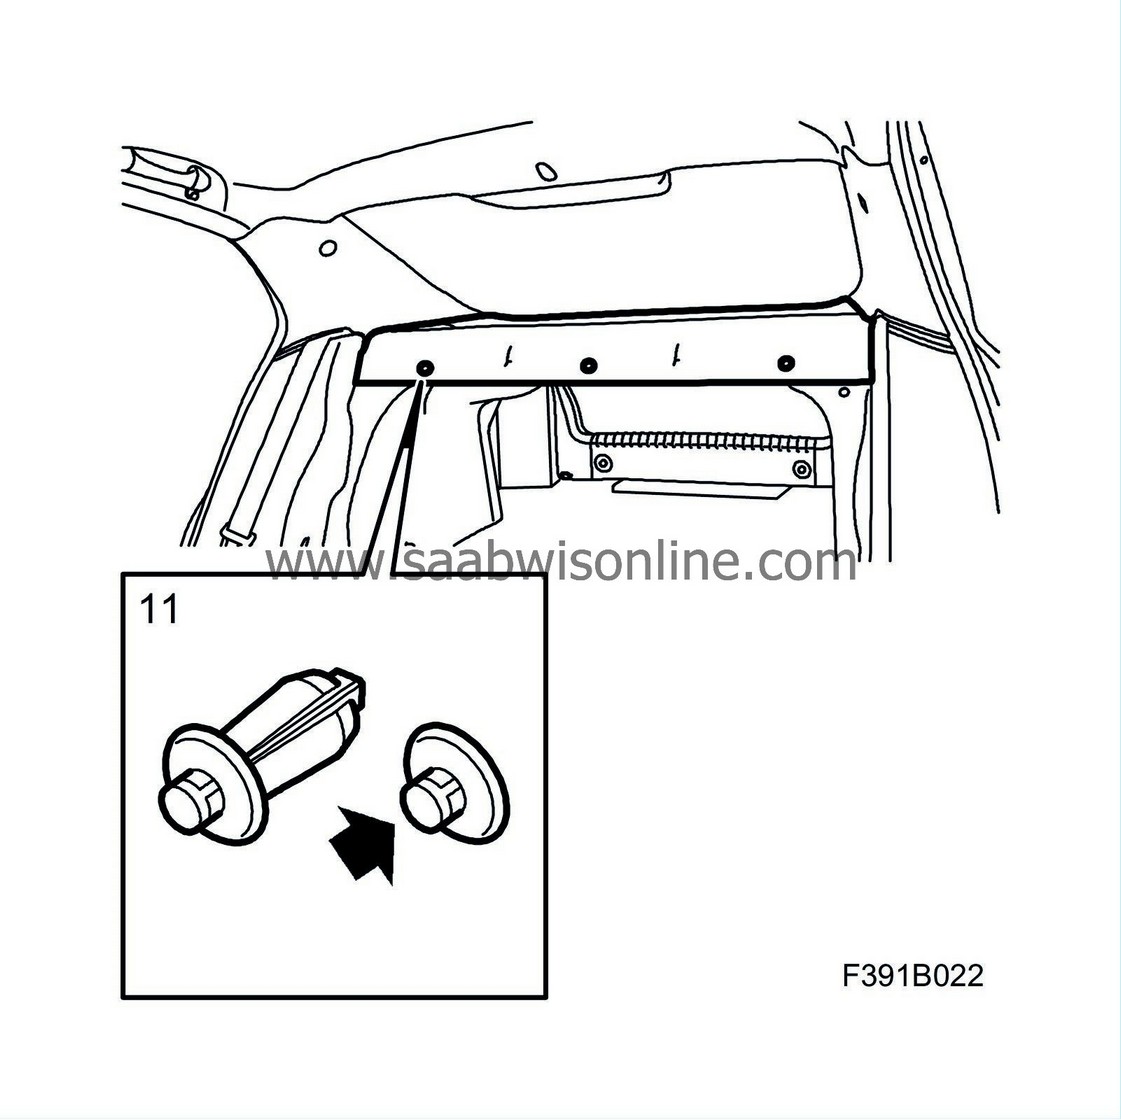
Remove the clips holding the parcel shelf trim.
|
|
| 3. |
Draw the parcel shelf trim straight out forwards.
|
|
| 4. |
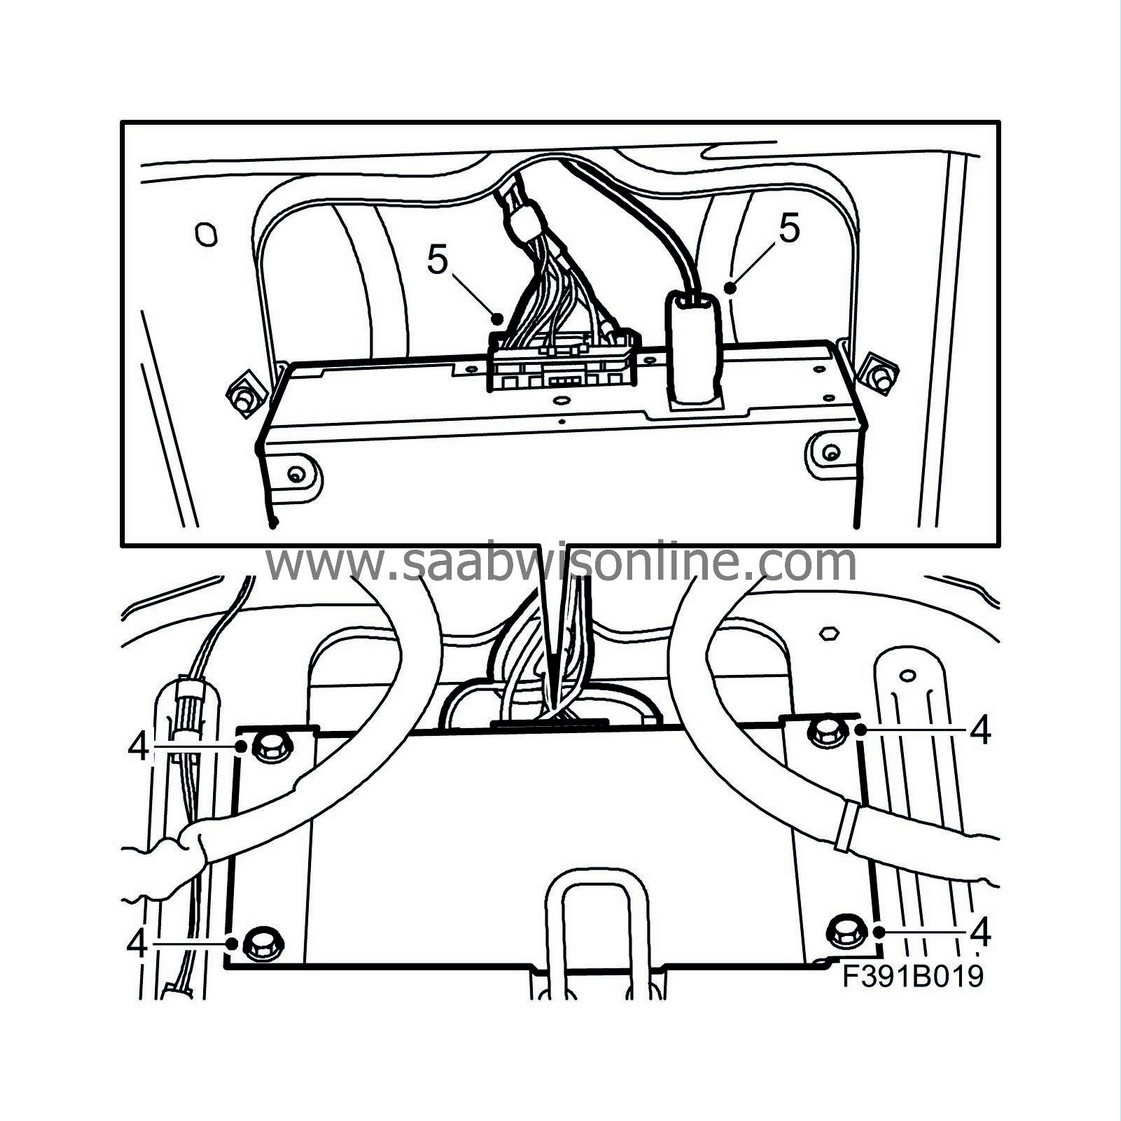
Remove the screws.
|
|
| 5. |
Remove the connector.
|
|
| 6. |
Lift out the communication unit.
|
|
| 7. |
Set the new communication unit in the correct position.
|
|
| 8. |
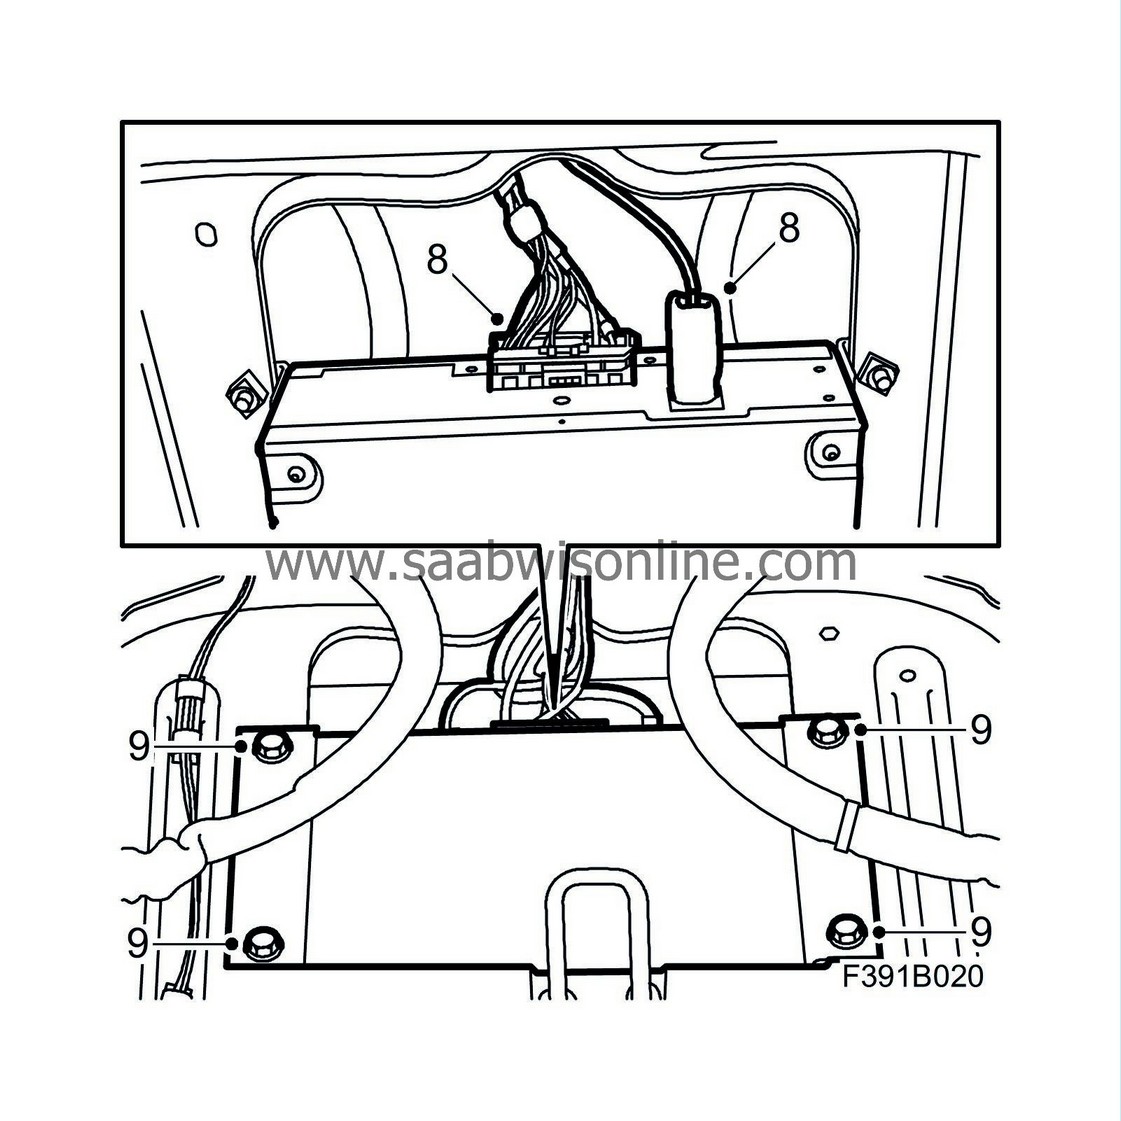
Connect the connector.
|
|
| 9. |
Fit the screws.
|
|
| 10. |
Slide in the parcel shelf trim. Make sure the lugs fully engage the mountings in the parcel shelf plate.
|
|
| 11. |
Fit the clips to the parcel shelf trim.
|
|
| 12. |
Fold up the back rest. Check that the back rest is locked.
|
|


