Outer sill
| Outer sill |
Depending upon the damage, the two methods described below can be combined.
| Replace the middle section of the sill |
| 1. |
Remove the doors.
|
|
| 2. |
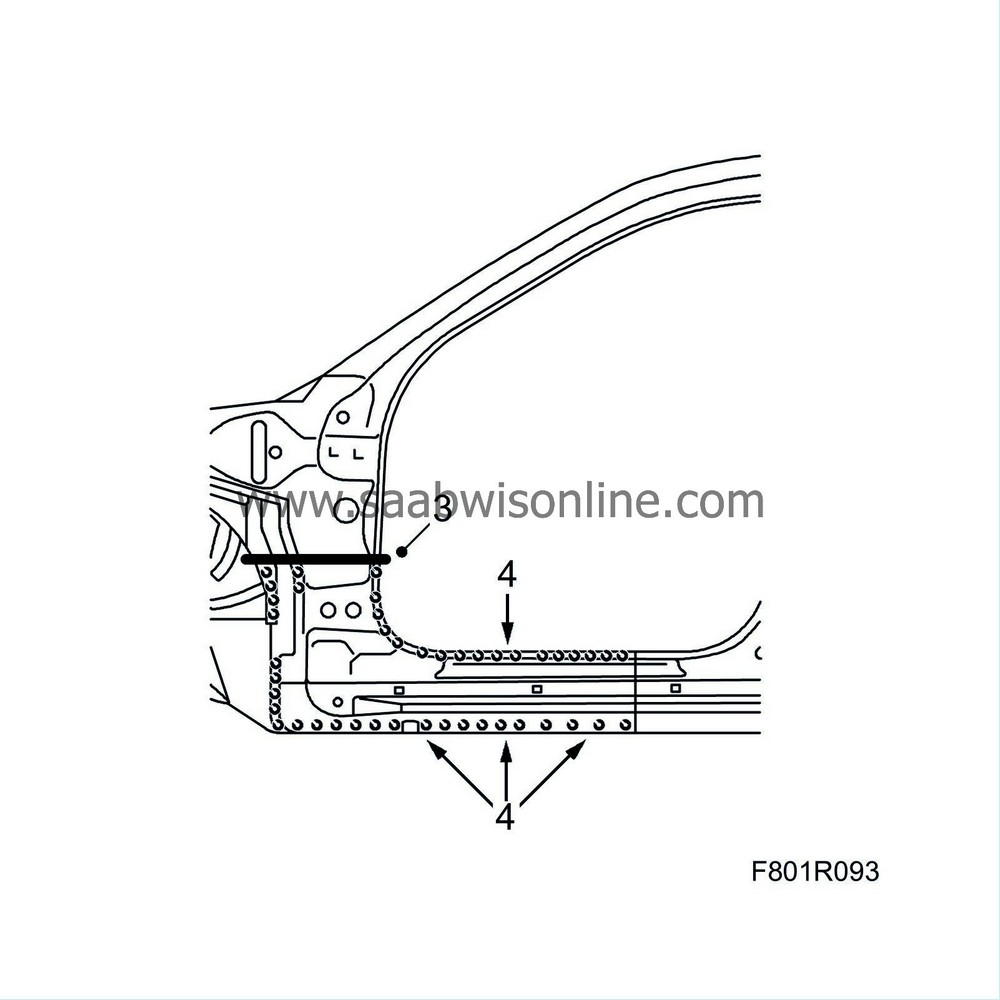
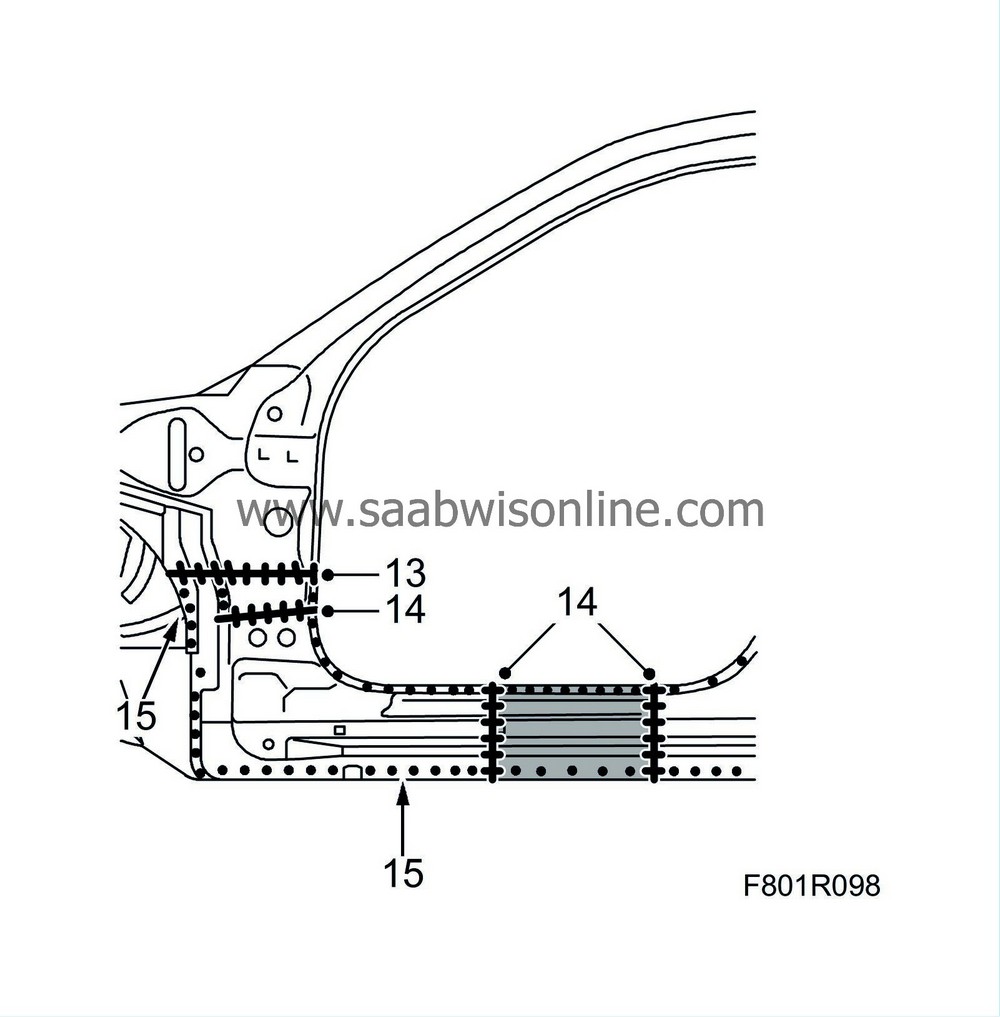
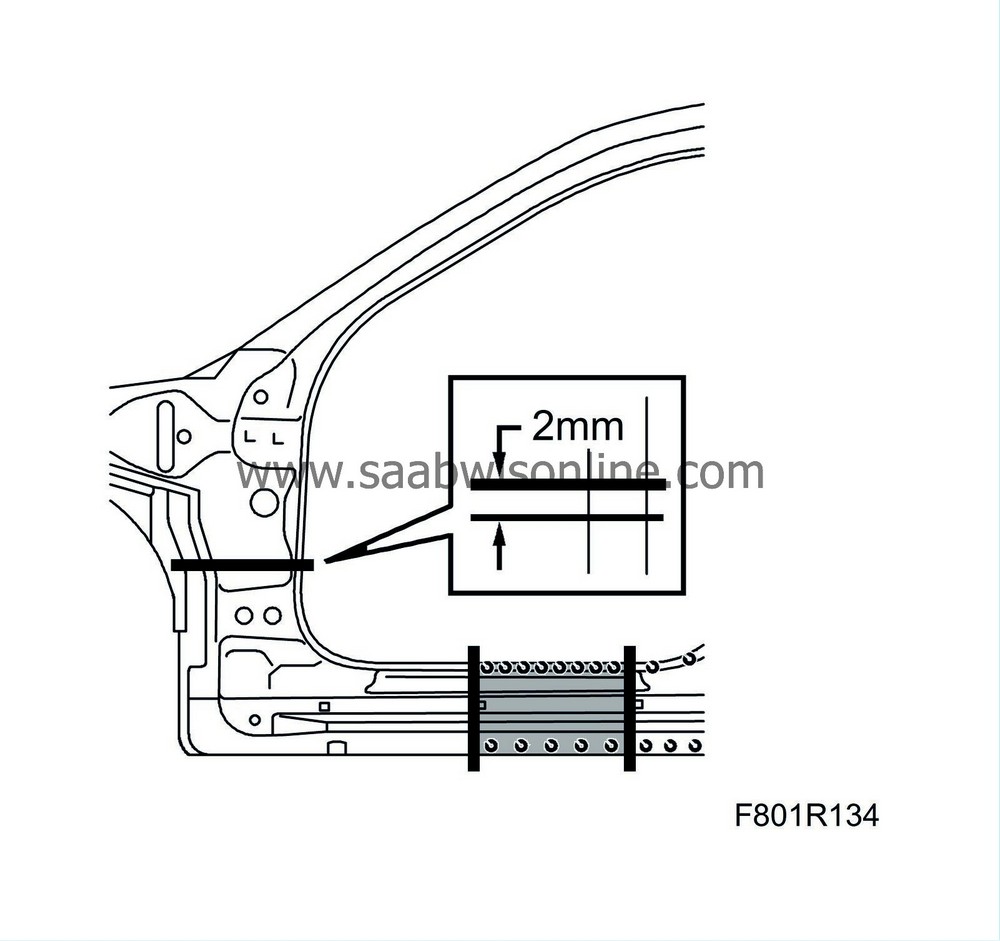
Cut the rear section of the sill as indicated by the marks. Within the shaded area the cut can be made anywhere depending upon the damage.

|
|
| 3. |
Cut the lower B-pillar as illustrated. Only cut through the outer panel.
|
||||||||||||||||
| 4. |
Drill out the spot welds.

|
|
| 5. |
Tap out the sill.
|
|
| 6. |
Cut the replacement panel so that it fits against the cuts previously made.

|
|
| 7. |
Drill holes for plug welds on the lower section of the sill against the frame member.

|
|
| 8. |
Position the replacement panel and make fine adjustments to the sill.
|
|
| 9. |
Grind all surfaces that are to be welded.
|
|
| 10. |
Apply welding primer to the surfaces to be spot and plug welded. Use Teroson Zink Spray
|
|
| 11. |
Fit the replacement panel in place and secure with clamps. Check and adjust the fit.
|
|
| 12. |
All-weld the sill joints.

|
|
| 13. |
Attach the remainder of the sill with spot and plug welds.
|
|
| 14. |
Grind the welds.
|
|
| 15. |
Wash away surplus welding primer. Welding primer reduces the adhesion of paint, filler and sealant.
|
|
| 16. |
Apply primer to all bare metal surfaces.
|
|
| 17. |
Seal joints and seams with sealant.
|
|
| 18. |
Apply anti-corrosion agent after painting. Use Terotex HV 400 or Mercasol 1.
|
|
| Change the front section of the sill |
| 1. |
Remove the front door
|
|
| 2. |
Cut the rear section of the sill as indicated by the marks. Within the shaded area the cut can be made anywhere depending upon the damage.

|
|
| 3. |
Cut the front section of the sill as illustrated. Cut through both panels.

|
|
| 4. |
Drill out the spot welds.
|
|
| 5. |
Tap out the sill.
|
|
| 7. |
Cut away a section of the outer panel of the replacement panel in order to be able to weld the reinforcement. Save the piece which is removed.

|
|
| 8. |
Drill holes for plug welds in the front sill and in the loose piece.

|
|
| 9. |
Fit the replacement panel and adjust the rear sill and front reinforcement.
|
|
| 10. |
Grind the surfaces which are to be welded.
|
|
| 11. |
Apply welding primer to the surfaces to be spot and plug welded. Use Teroson Zink Spray
|
|
| 12. |
Fit the replacement panel in place and secure with clamps. Check and adjust the fit.
|
|
| 13. |
All-weld the forward sill reinforcement.

|
|
| 14. |
Allweld the rear section of the sill and the cut out section.
|
|
| 15. |
Attach the remainder of the sill with spot and plug welds.
|
|
| 16. |
Grind the welds.
|
|
| 17. |
Wash away surplus welding primer. Welding primer reduces the adhesion of paint, filler and sealant.
|
|
| 18. |
Apply primer to all bare metal surfaces.
|
|
| 19. |
Seal joints and seams with sealant.
|
|
| 20. |
Apply rust protector after painting. Use Terotex HV 400.
|
|


