Front window lift
| Front window lift |
| To remove |
| 1. |
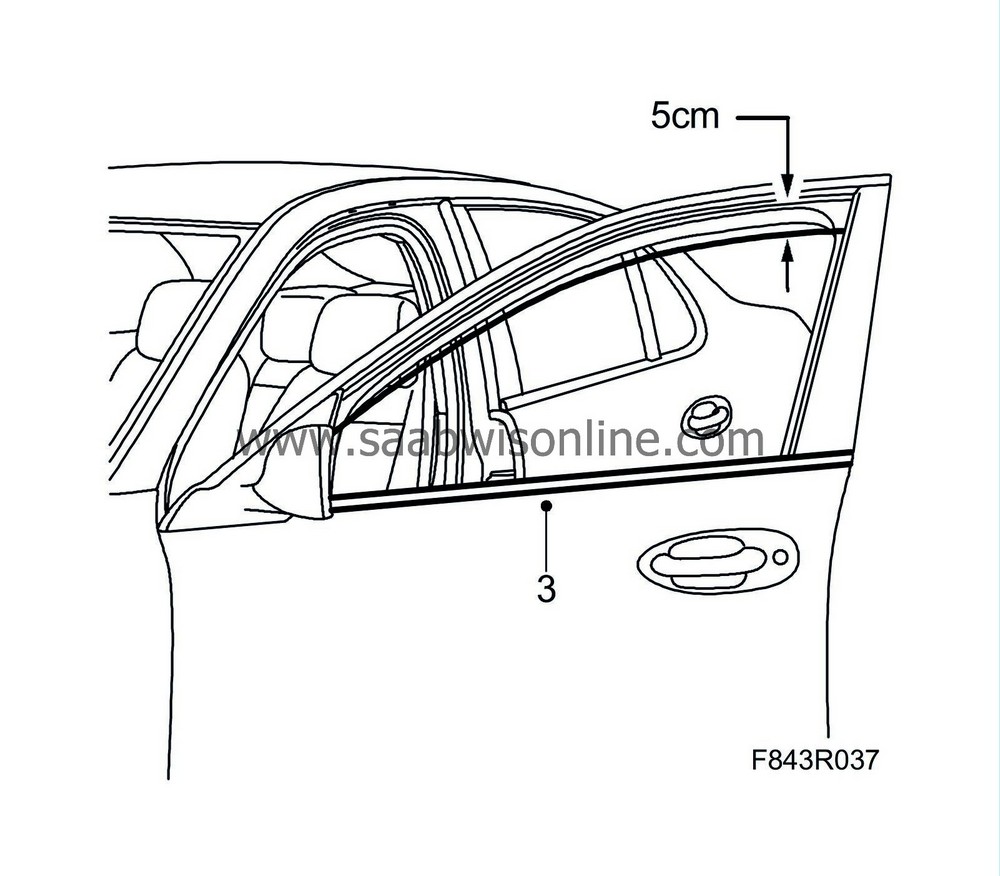
Open the window about 5 cm.
|
|
| 2. |
Remove the
Front door trim, 4D
and fold down the water barrier.
|
|
| 3. |
Remove the outer window weatherstrip. Lift the back of it with the removal tool.
Pull out the moulding from the base of the door mirror. |
|
| 4. |
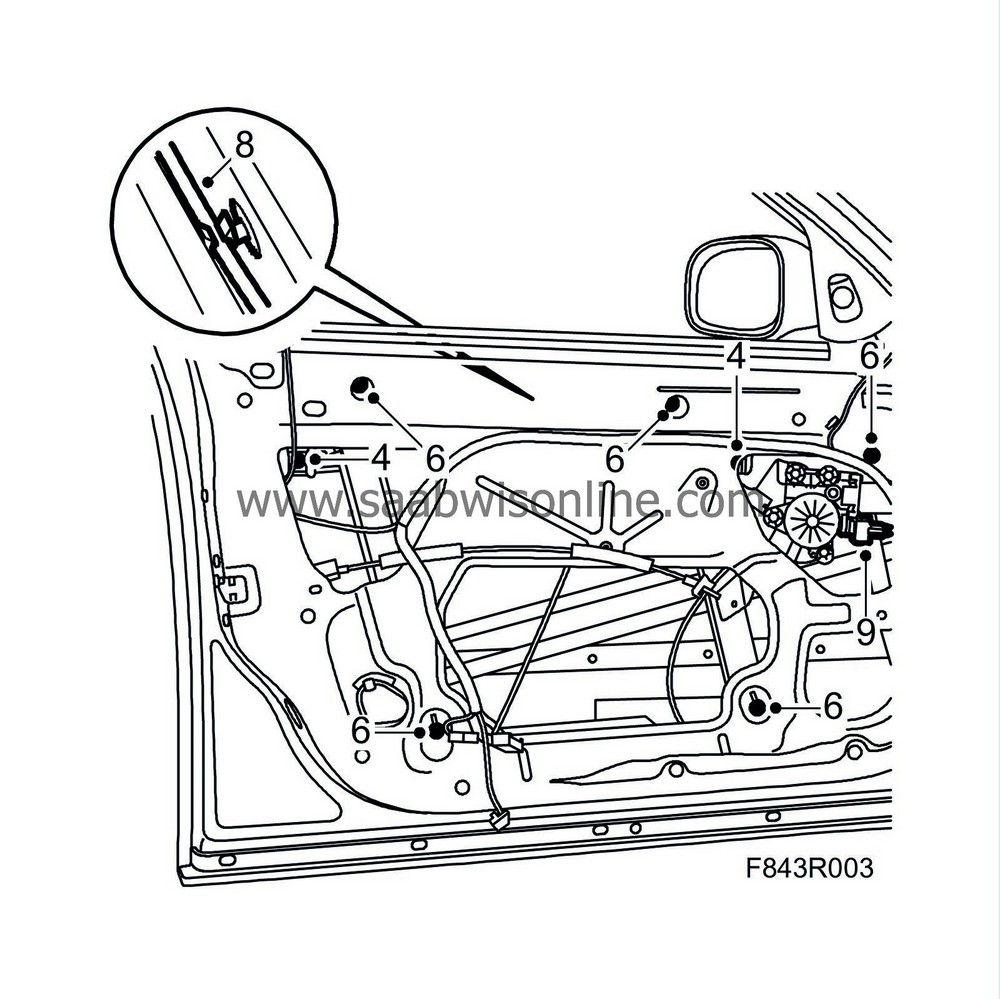
Undo the screws to loosen the window slightly.
|
|
| 5. |
Lift the back edge of the window. Lift it up at an angle.
|
|
| 6. |
Remove the window lift nuts and bolt.
|
|
| 7. |
Press out the window lift so that the studs comes loose from the mounting holes.
|
|
| 8. |
Remove the lift cable from the clip.
|
|
| 9. |
Unplug the motor connector.
|
|
| 10. |
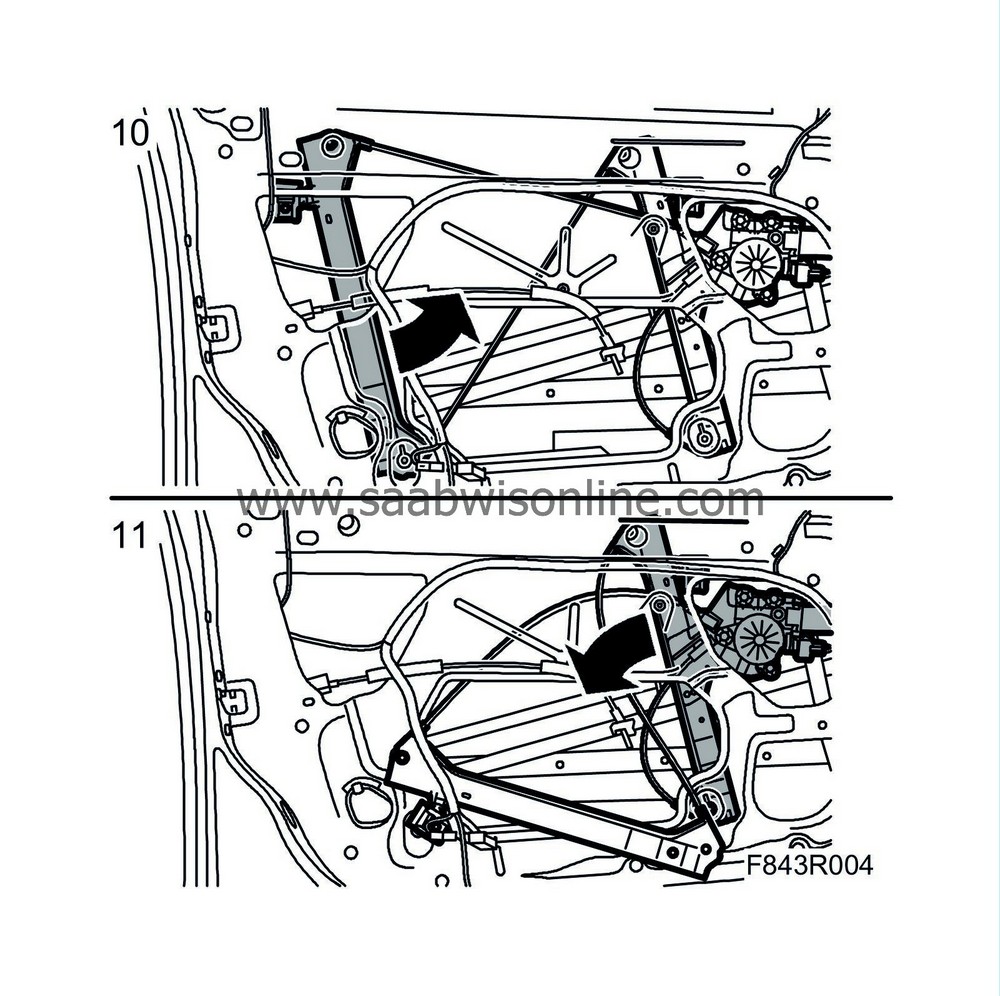
Extract the rear rail at an angle through the opening.
|
|
| 11. |
Follow with the front rail together with the motor.
|
|
| To fit |
| Note | ||
|
Cars with pinch protection : If the window lift is replaced with M04- then the door control module must also be from M04-. |
||
|
To distinguish the window lift from M03 and M04-, check the colour of the pulley behind the window lift motor. |
||
|
M03 = White |
||
|
M04 = Light brown/beige |
||
|
Check the above in order to avoid the pinch protection incorrectly deploying. |
||
|
The pinch protection can be deactivated using Tech 2 (version 127.000 or later) under the menu, Fault diagnosis - Model year 2003 - Saab 9-3 Sport (9440) - All - Service - Activate/Deactivate pinch protection. |
||
|
This deactivation means that the "Express up" function is deactivated. |
| 1. |
Check that the rubberised mountings for the window lift are in place.
Insert the motor section at an angle and fit the studs in to the mounting holes. 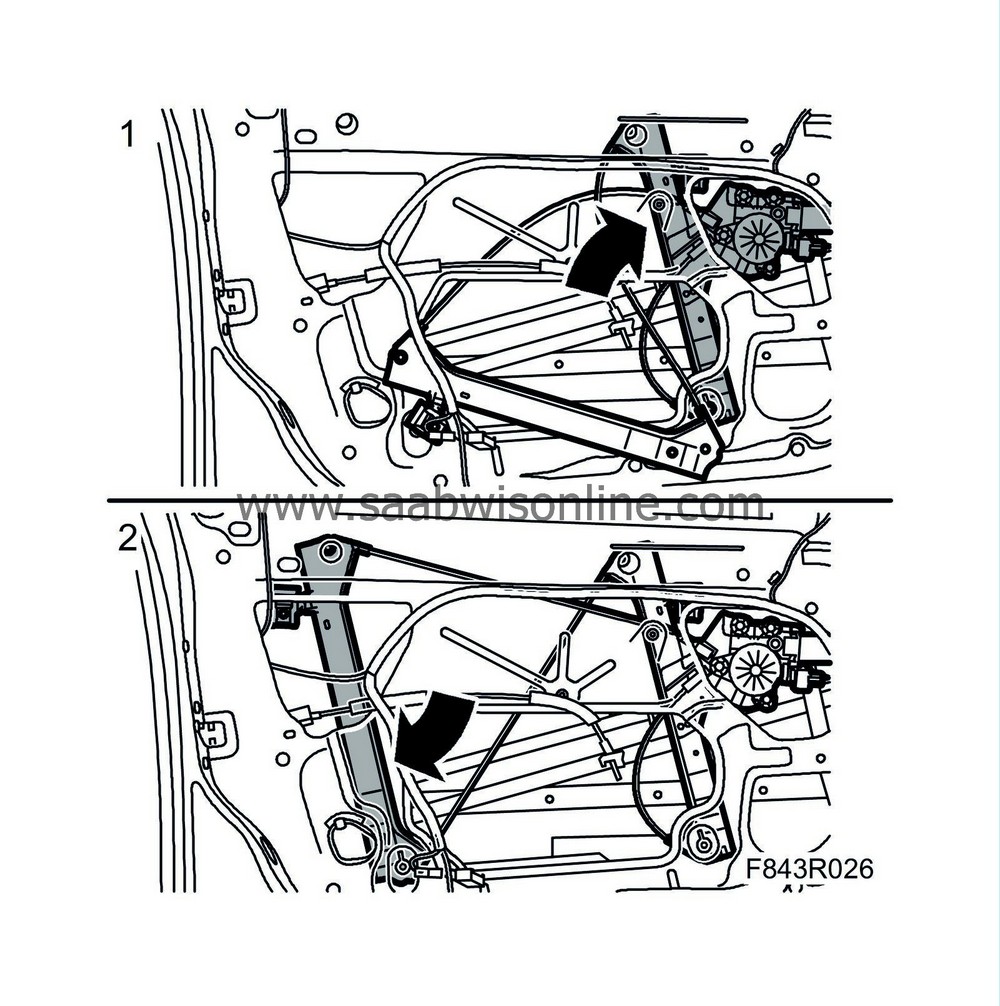
|
|
| 2. |
Follow with the other section and fit the studs into the mounting holes.
|
|
| 3. |
Fit the upper lift cable to the clip.

|
|
| 4. |
Fit the nuts and bolt. Start at the top.
|
|
| 5. |
Plug in the connector.
|
|
| 6. |
Fit the front edge of the window into the U-moulding. Keep the rear edge at an angle so it locates into the U-moulding. Make sure the window is located in the U-moulding by closing and opening the window.
|
|
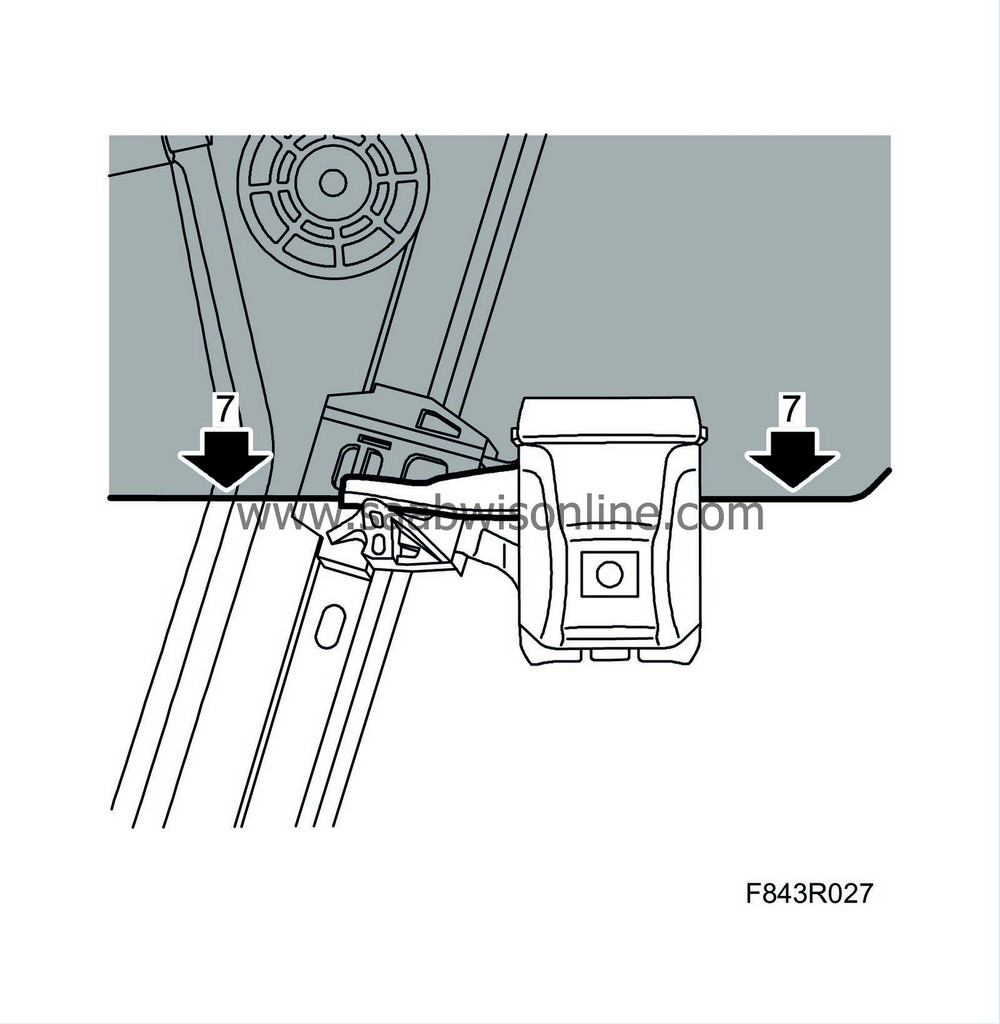
| 7. |
Press down the window so that it is resting on its rubberised mountings. (Illustrated from outside.)
|
|
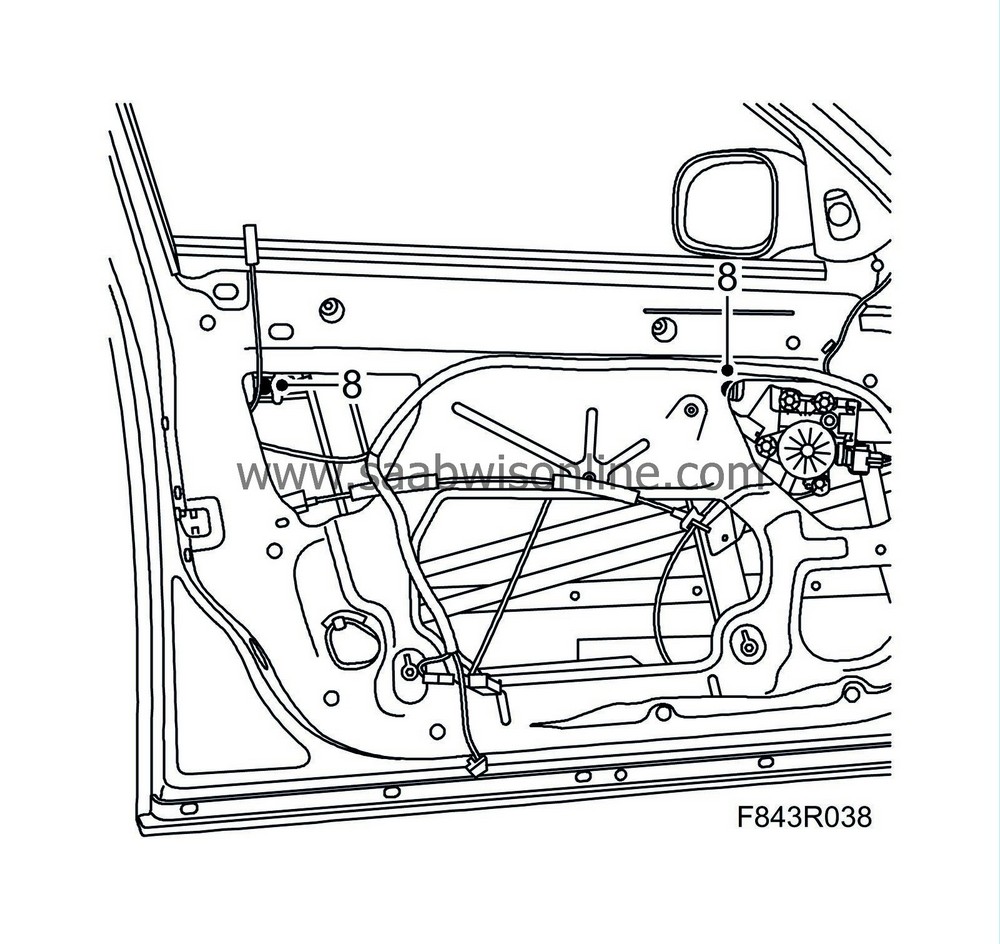
| 8. |
Tighten the window screws.
|
|
| 9. |
Fit the outer weatherstrip.
|
|
| 10. |
Attach the window lift connector to the door trim. Close and open the window a few times to check its operation.
|
|
| 11. |
Fit the water barrier and
Front door trim, 4D
.
|
|
| 12. |
Cars with pinch protection:
Perform
Programming of the pinch protection.
|
|
| 13. |
Clean the window.
|
|


