Chain guide
| Chain guide |
| To remove |
| 1. |
Remove
Timing chain and camshaft sprocket.
|
|
| 2. |
Remove the chain's guide rails.
|
|
| • |
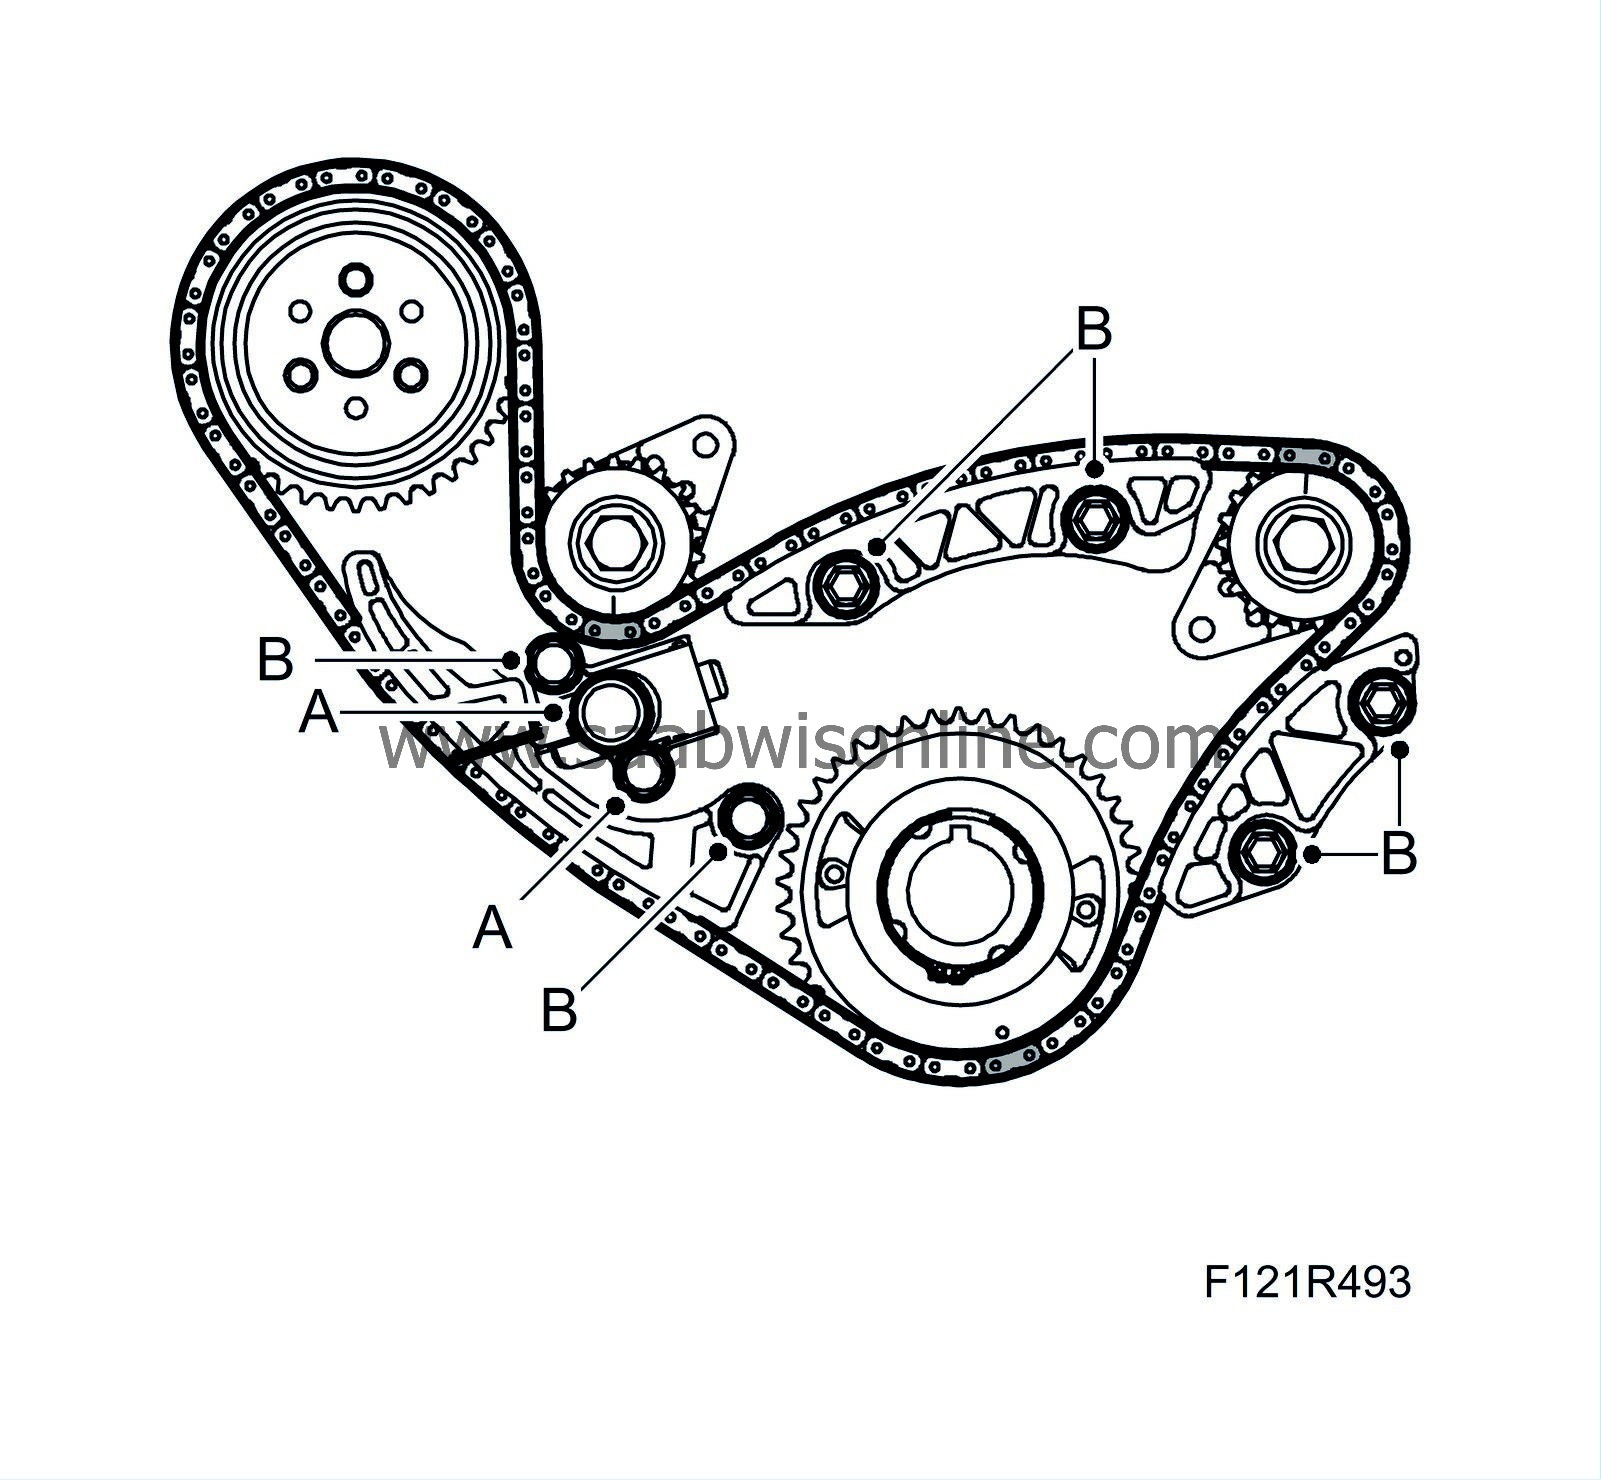
Remove the chain tensioner (A)
|
| • |
Remove the chain's guide rails (B)

|
| To fit |
| Important | ||
|
The colour markings on the balancer shaft chain must correspond with the markings on the gears. |
||
| 1. |
Fit the chain:
|
|
| • |
Start to fit the water pump pinion.
|
| • |
The silver-coloured link must be fitted to the exhaust side balancer shaft sprocket (B).

|
| • |
The copper-coloured link must be fitted to the intake side balancer shaft sprocket (C)
|
| • |
The silver-coloured link must be fitted to crankshaft sprocket (D).
|
| 2. |
Fit the chain's guide rails. Use
Thread locking adhesive Loctite 242
.
Tightening torque 10 Nm (7 lbf ft) |
|
| 3. |
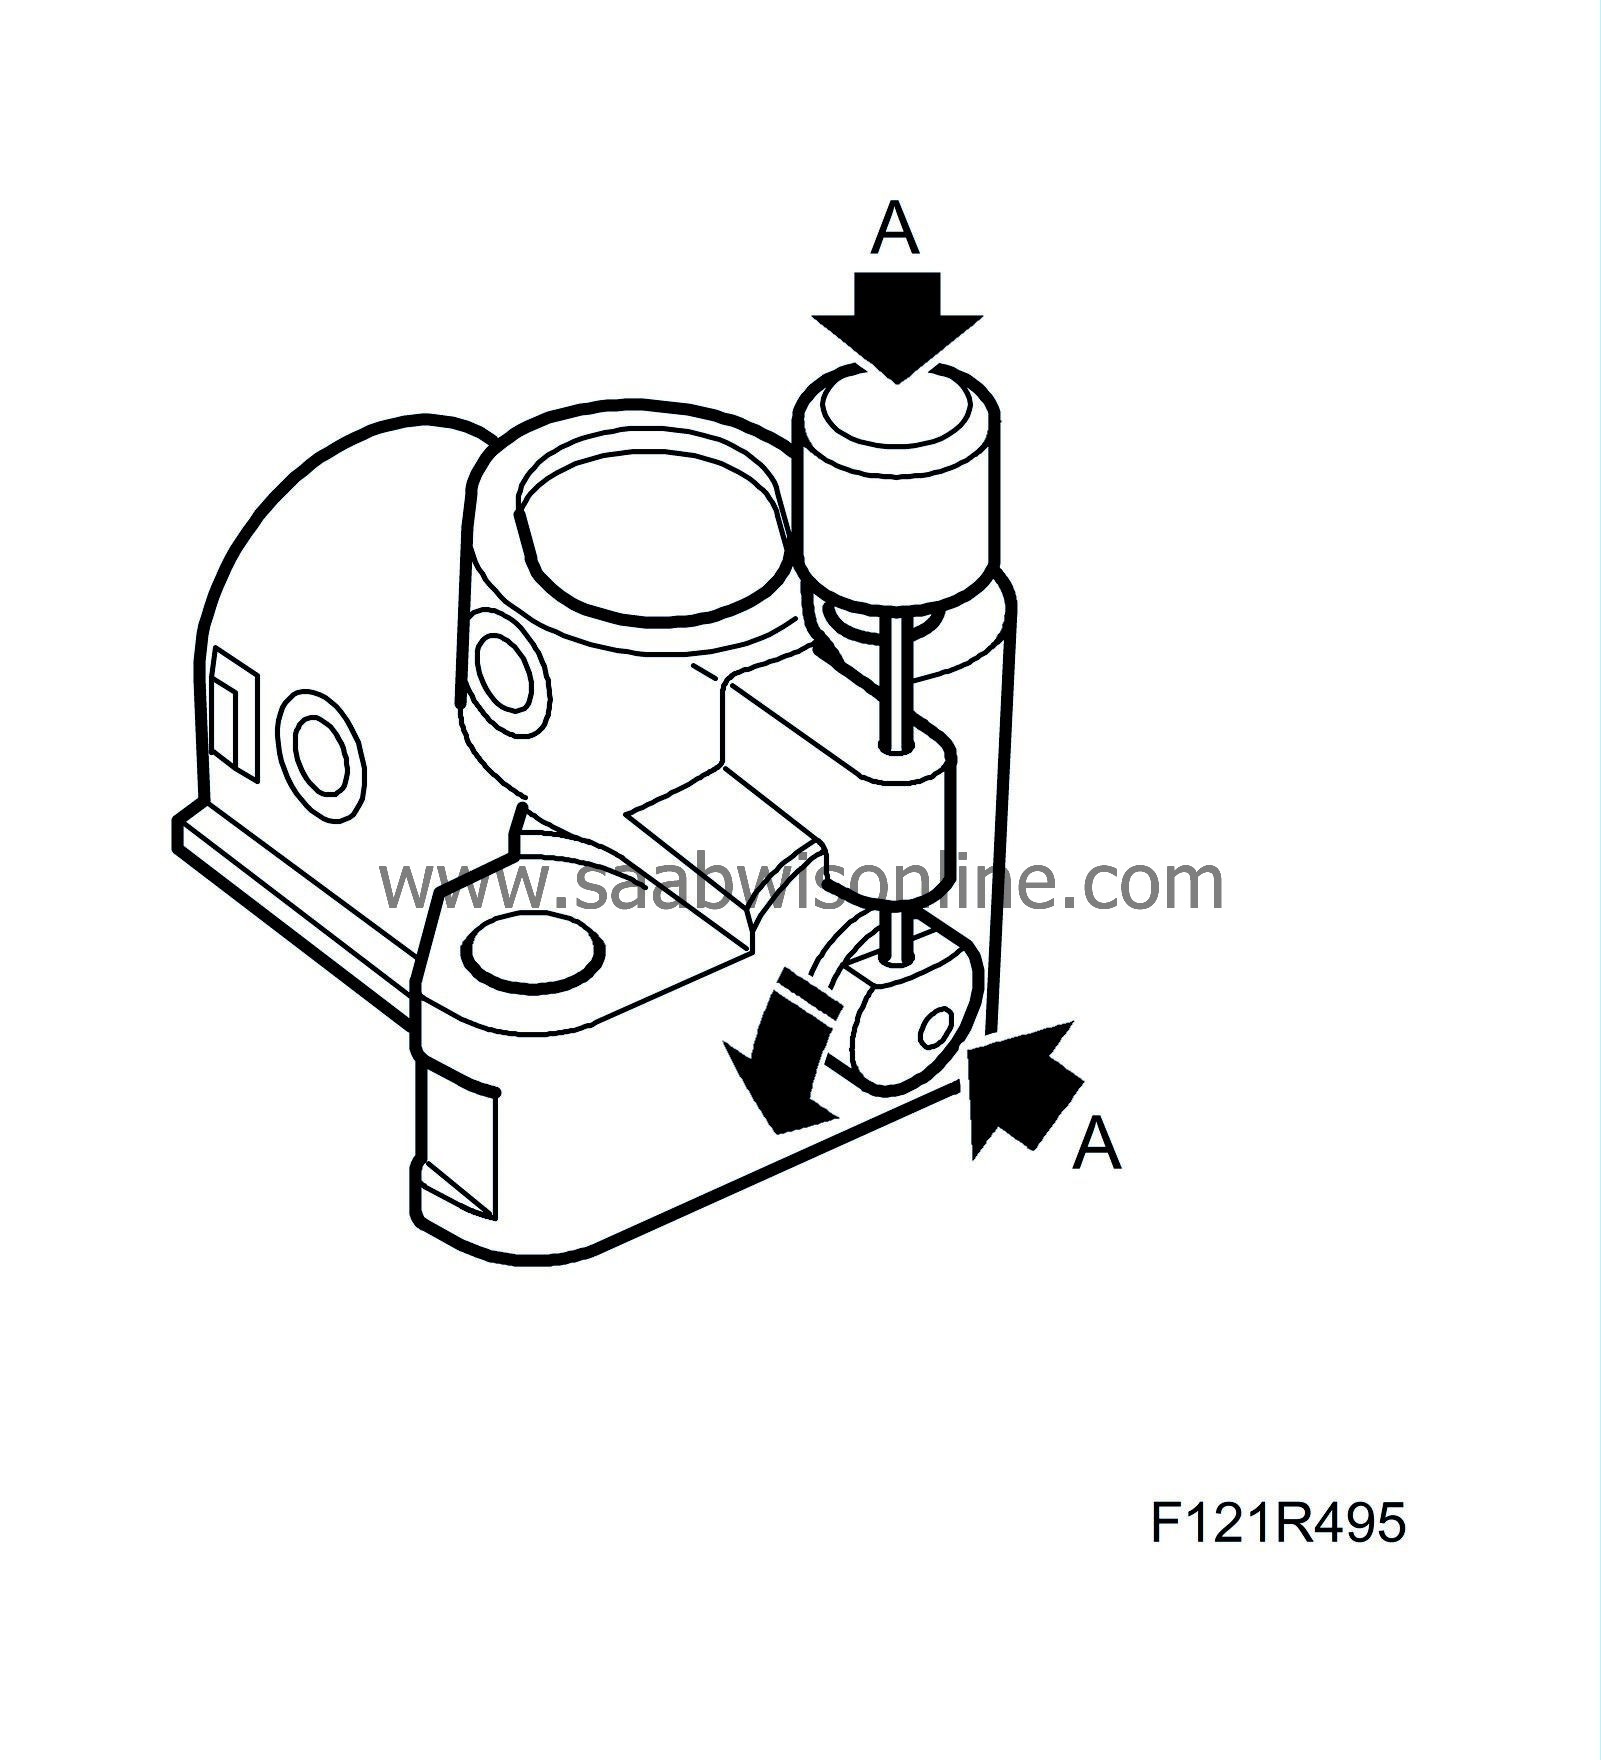
Fit the chain tensioner. Load the chain tensioner by pressing in the plunger and turning to the right (A). Then secure with tool
83 96 392 Lock pin
.

|
|
| 4. |
Fit the chain tensioner screws (A). Use
74 96 268 Thread locking adhesive
.
Tightening torque 10 Nm (7 lbf ft) 
|
|
| 5. |
Remove the tool from the tensioner. Press the tensioner guide rail to check that backward movement of the plunger is prevented.
|
|
| 6. |
Fit
Timing chain and camshaft sprocket
.
|
|


