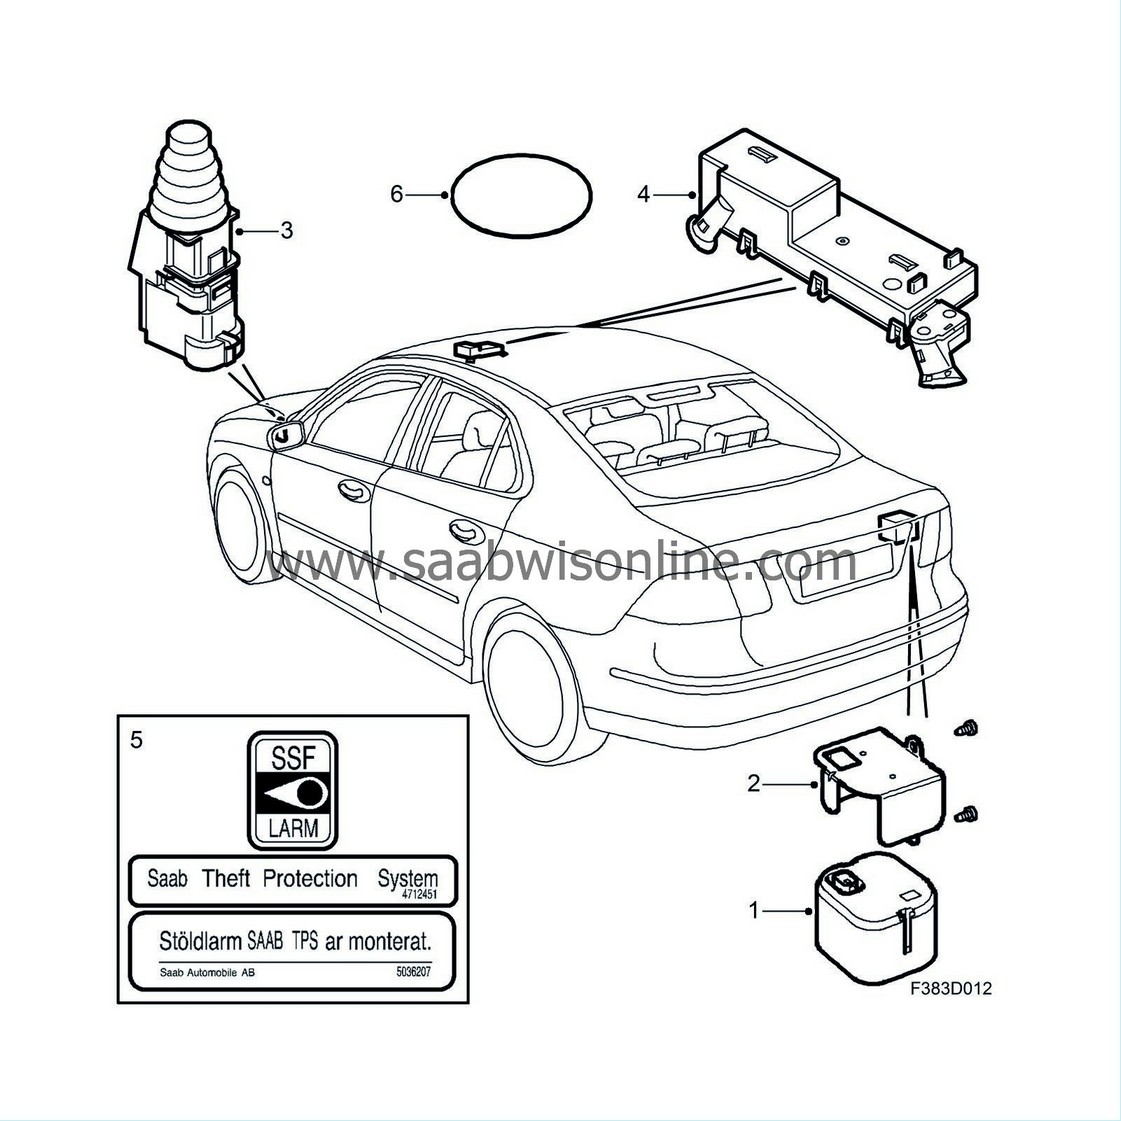
Fitting kit, anti-theft alarm, 4D
| Fitting kit, anti-theft alarm, 4D |
| 1. |
Siren
|
|
| 2. |
Siren console
|
|
| 3. |
Bonnet switch
|
|
| 4. |
Anti-theft alarm sensor
|
|
| 5. |
Labels
|
|
| 6. |
Self-adhesive foam plug, diam. 50 mm.
|
|
| Siren |
| 1. |
Open the boot lid.
|
|
| 2. |
Open the right side hatch in the luggage compartment and remove
Sound insulation, luggage compartment right.
|
|
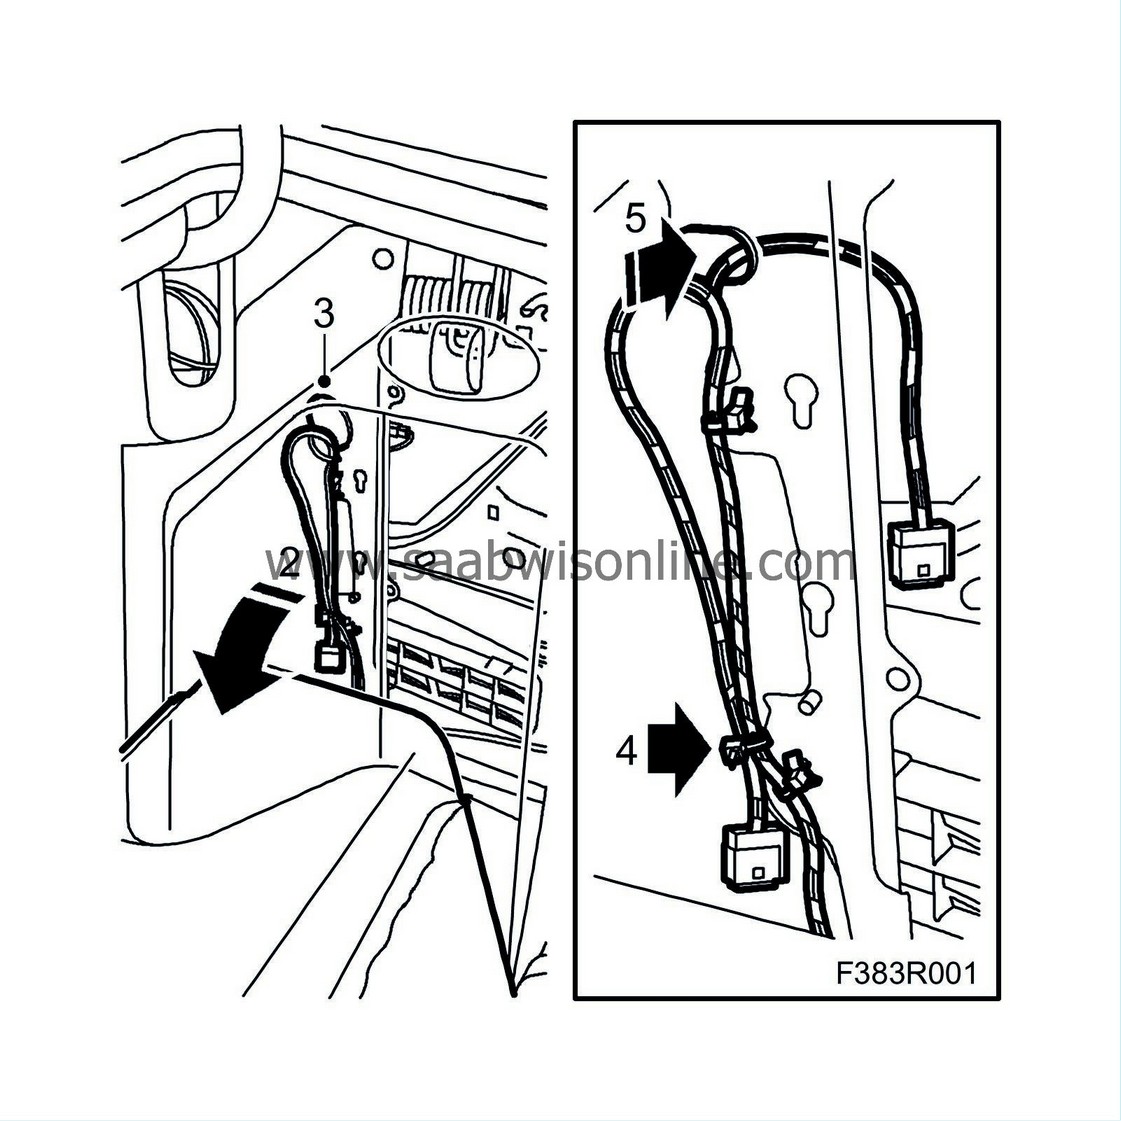
| 3. |
Remove the foam plug.
|
|
| 4. |
Remove the cable ties holding the cables.
|
|
| 5. |
Insert the cables through the hole.
|
|
| 6. |
Plug in the connector to the siren.

|
|
| 7. |
Fit the siren.

|
|
| 8. |
Tighten the 2 bolts securing the siren.
Tightening torque 4.0 +/- 1.2 Nm |
|
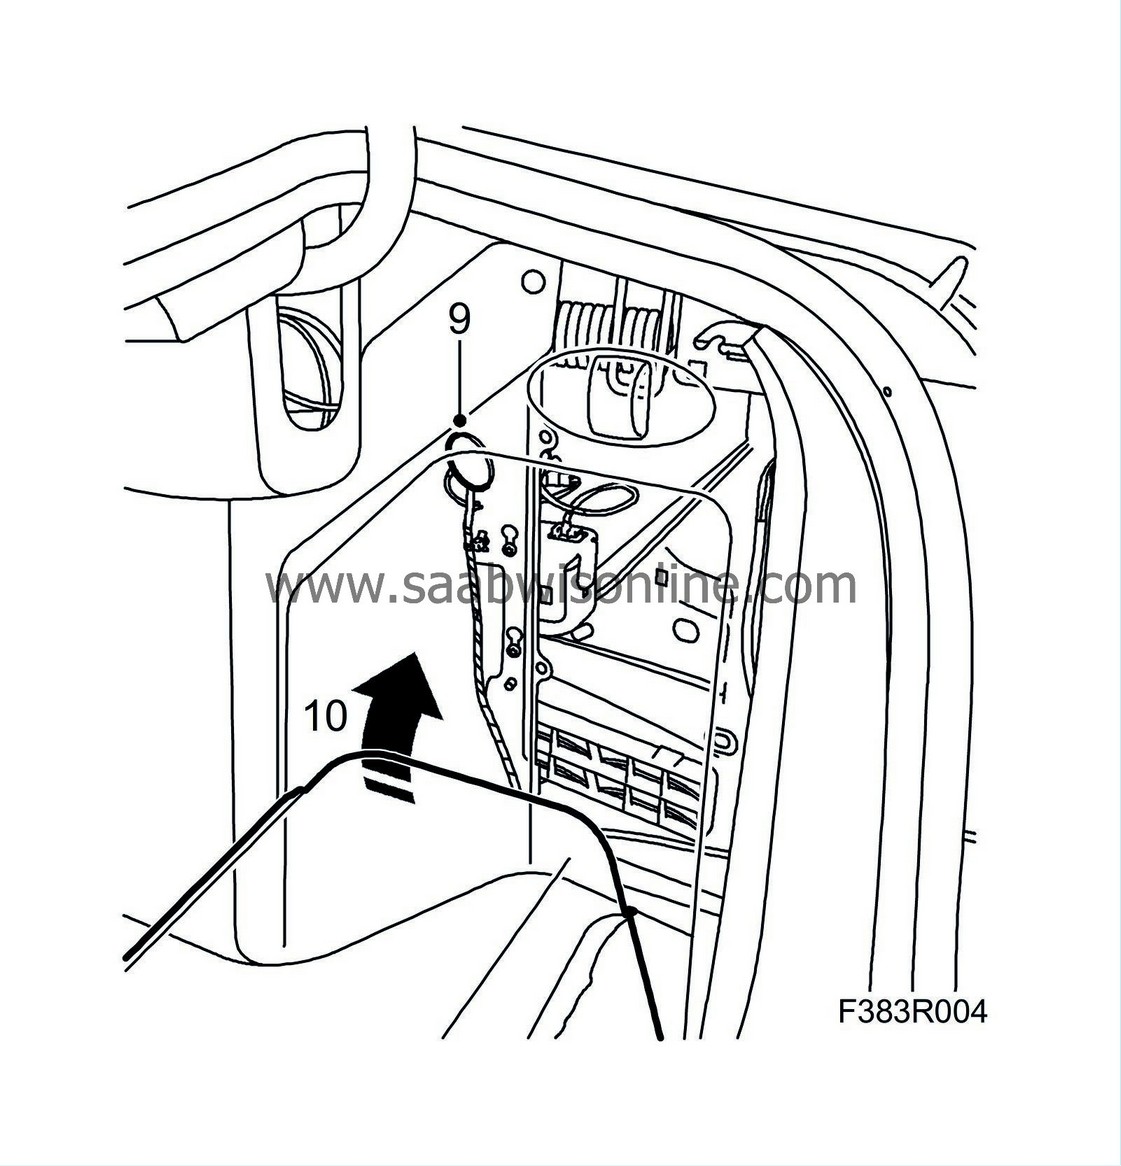
| 9. |
Fit the foam plug.
|
|
| 10. |
Install
Sound insulation, luggage compartment right
and close the side hatch.
|
|
| 11. |
Close the boot lid.
|
|
| Bonnet switch |
| 1. |
Open the bonnet.
|
|
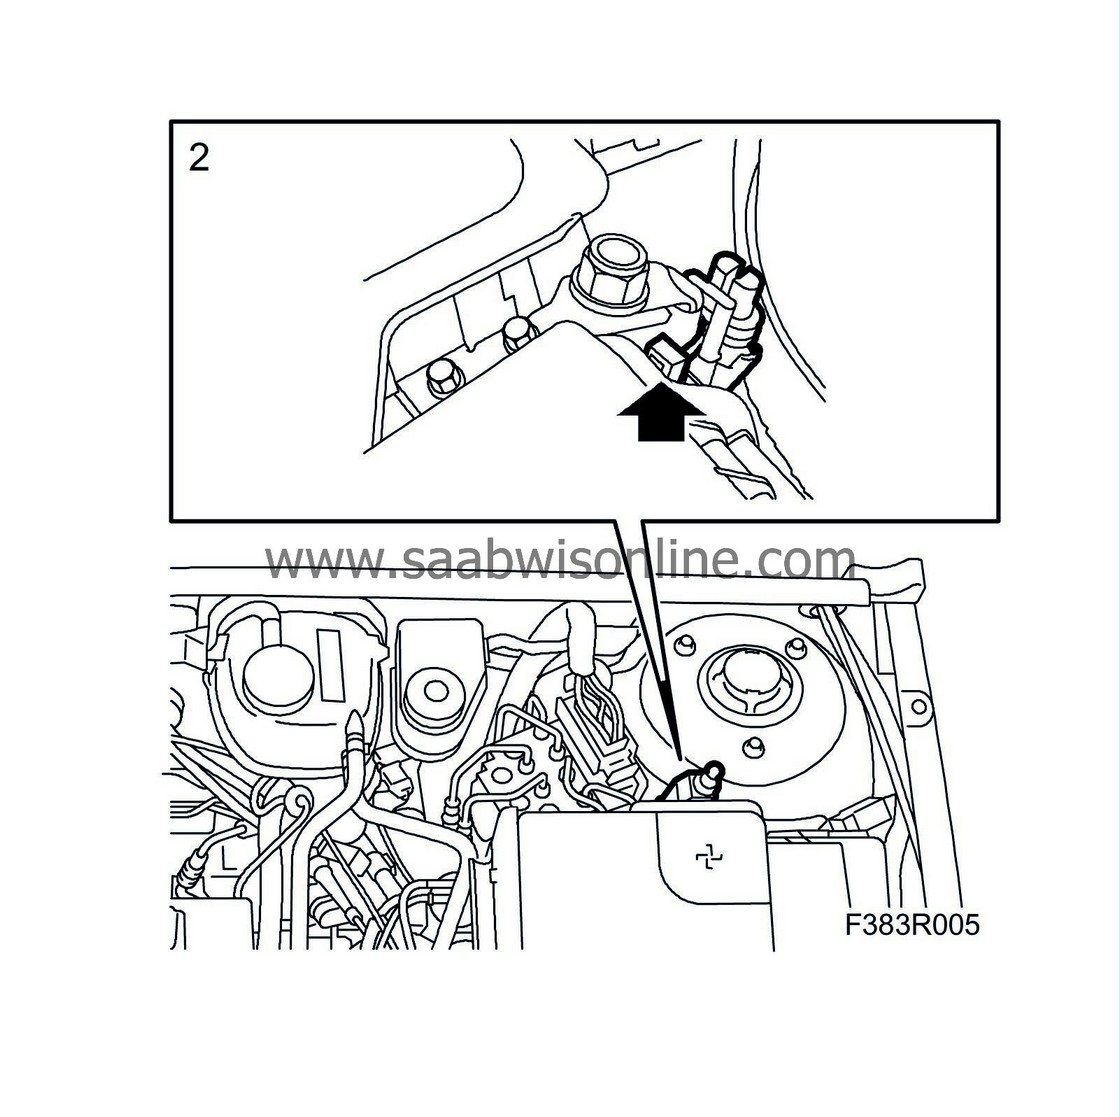
| 2. |
Remove the clip holding the cables.
|
|
| 3. |
Plug in the connector to the bonnet switch.

|
|
| 4. |
Fit the bonnet switch.
|
|
| 5. |
Close the bonnet.
|
|
| Anti-theft alarm sensor |
| 1. |
Remove the lens protector from the dome light.
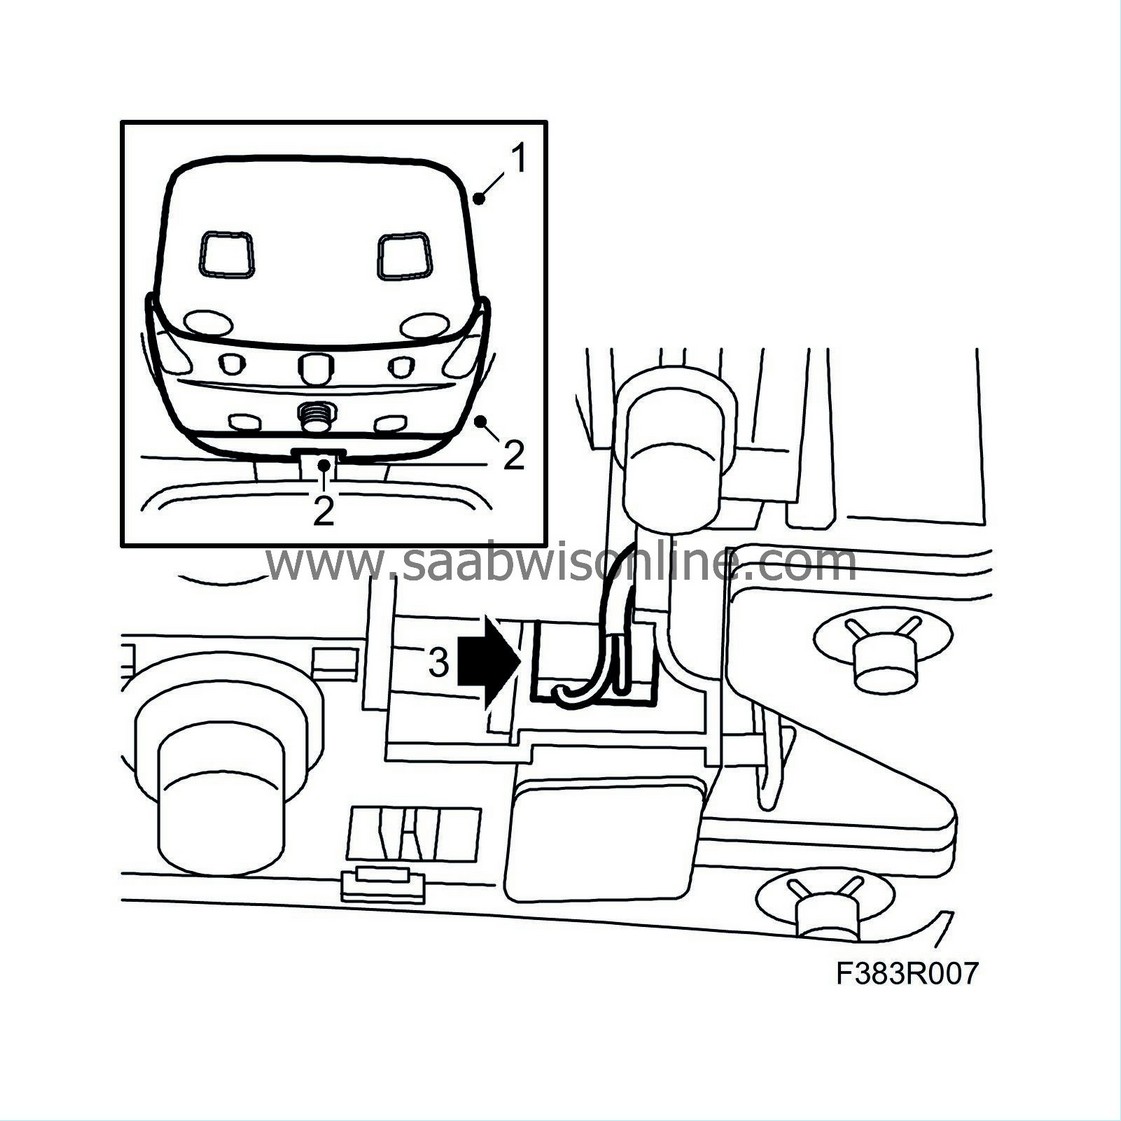
|
|
| 2. |
Remove the switch panel.
|
|
| 3. |
Remove the connector from its mounting.
|
|
| 4. |
Connect the connector to the anti-theft alarm sensor.
|
|
| 5. |
Fit the anti-theft alarm sensor. A click should be heard.
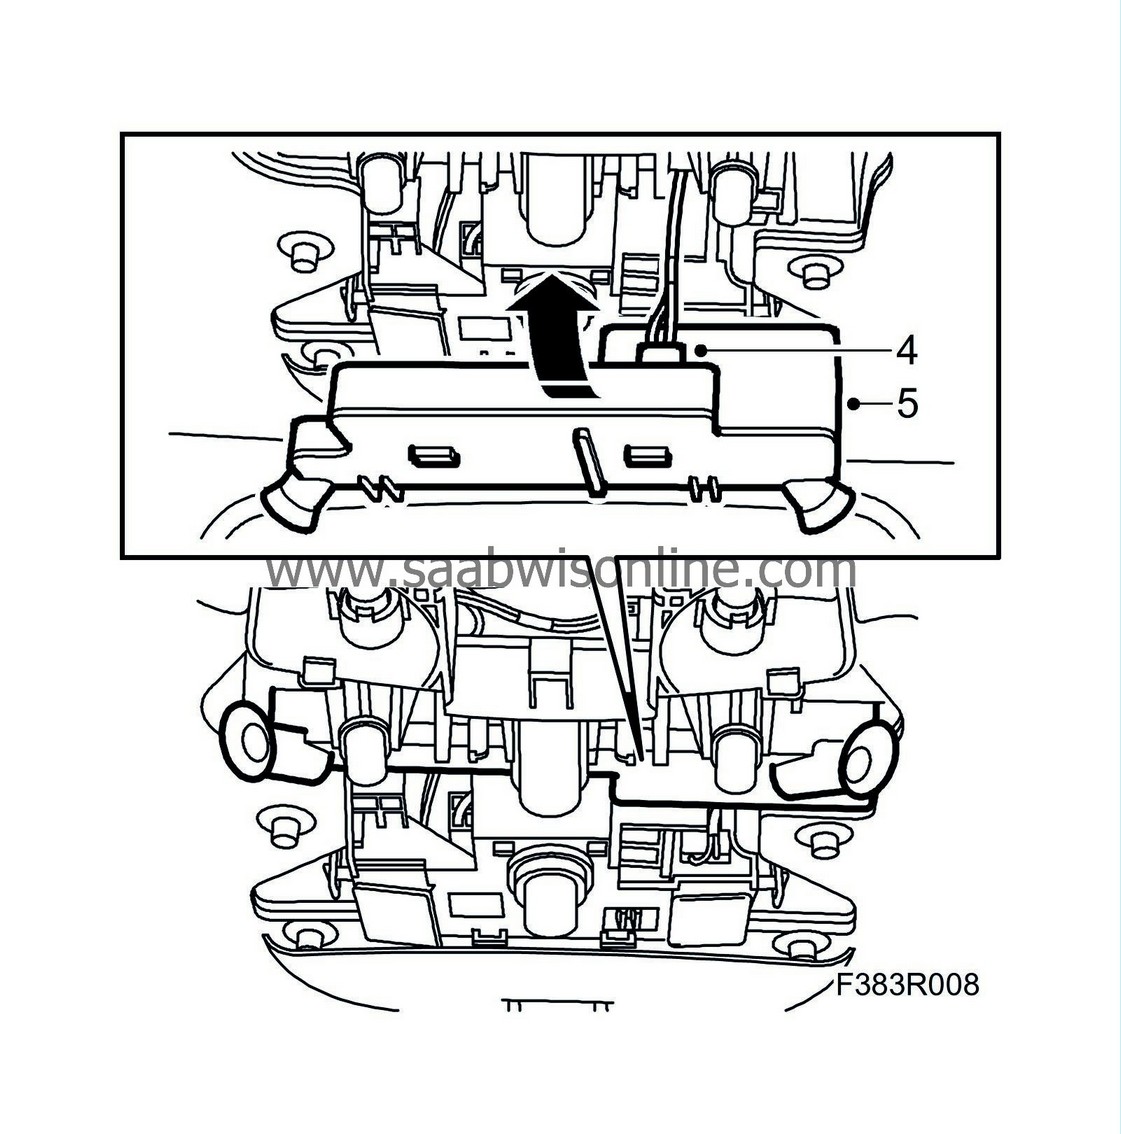
|
|
| 6. |
Remove the two protective cases from inside the switch panel.
|
|
| 7. |
Fit the switch panel.

|
|
| 8. |
Fit the lens protector.
|
|
| 9. |
Connect the diagnostic tool.
|
|
| 10. |
Select
Add / Remove- Accessories -
Theft Alarm and then follow the on-screen instructions.
|
|
| Affix anti-theft alarm labels |

