(551-2433 utg.2) Handbrake lever jamming/cannot be lowered
Symptom: Handbrake lever jamming/cannot be lowered.
| TECHNICAL SERVICE BULLETIN | |
| Bulletin Nbr: | 551-2433 utg.2 |
| Date: ........... | Mars 2004 |
| Market: | enl. lista |
| Handbrake lever jamming/cannot be lowered |
| Cars affected |
9-3 (9440) within the following Vehicle Identification Number ranges:
4D: M03-04 31000001 - 41011608
CV: M04 46000001 - 46003610
| Background |
The handbrake lever adjusting housing can twist after a while or when major force is applied to the handbrake release button. Similarly, the gear segment can twist forward. In both cases this leads to the working travel decreasing and the play increasing. At this point it becomes almost impossible to release a handbrake which has been too firmly applied, especially if it is not possible to lift the handbrake lever before pressing the button.
In the case of customer complaint the following procedure must be undertaken.
Symptom description
Handbrake lever jamming/cannot be lowered.| Parts required |
79 63 937 Screw (x1)
79 75 535 Screw (x1)
If the handbrake lever assembly must be replaced:
12 788 215 Handbrake lever assembly LHD
12 788 216 Handbrake lever assembly RHD
| Note | ||
|
Estimated defective production issue for handbrake lever assembly is 1%. |
If the height of the handbrake lever must be adjusted when replacing the lever assembly:
12 788 227 Spacer 4 mm
12 788 228 Spacer 5 mm
12 786 769 Spacer 6 mm
12 788 229 Spacer 7 mm
If the handbrake handle needs replacing:
12 802 419 Handle, handbrake lever
| Procedure |
Is the handbrake lever in its lowest position?
YES: Continue with step 1 of the procedure.
NO: Continue in accordance with the following to move the lever to its lowest position:
| • |
Start the engine.
|
|
| • |
Press hard on the footbrake.
|
|
| • |
Try to release the handbrake.
|
|
If this does not work:
| • |
Open the armrest cover.
|
|
| • |
Remove the coin holder.
|
|
| • |
Undo the adjustment nut until the handbrake releases.
|
|
If this does not work:
| • |
remove the centre console rear side panel.
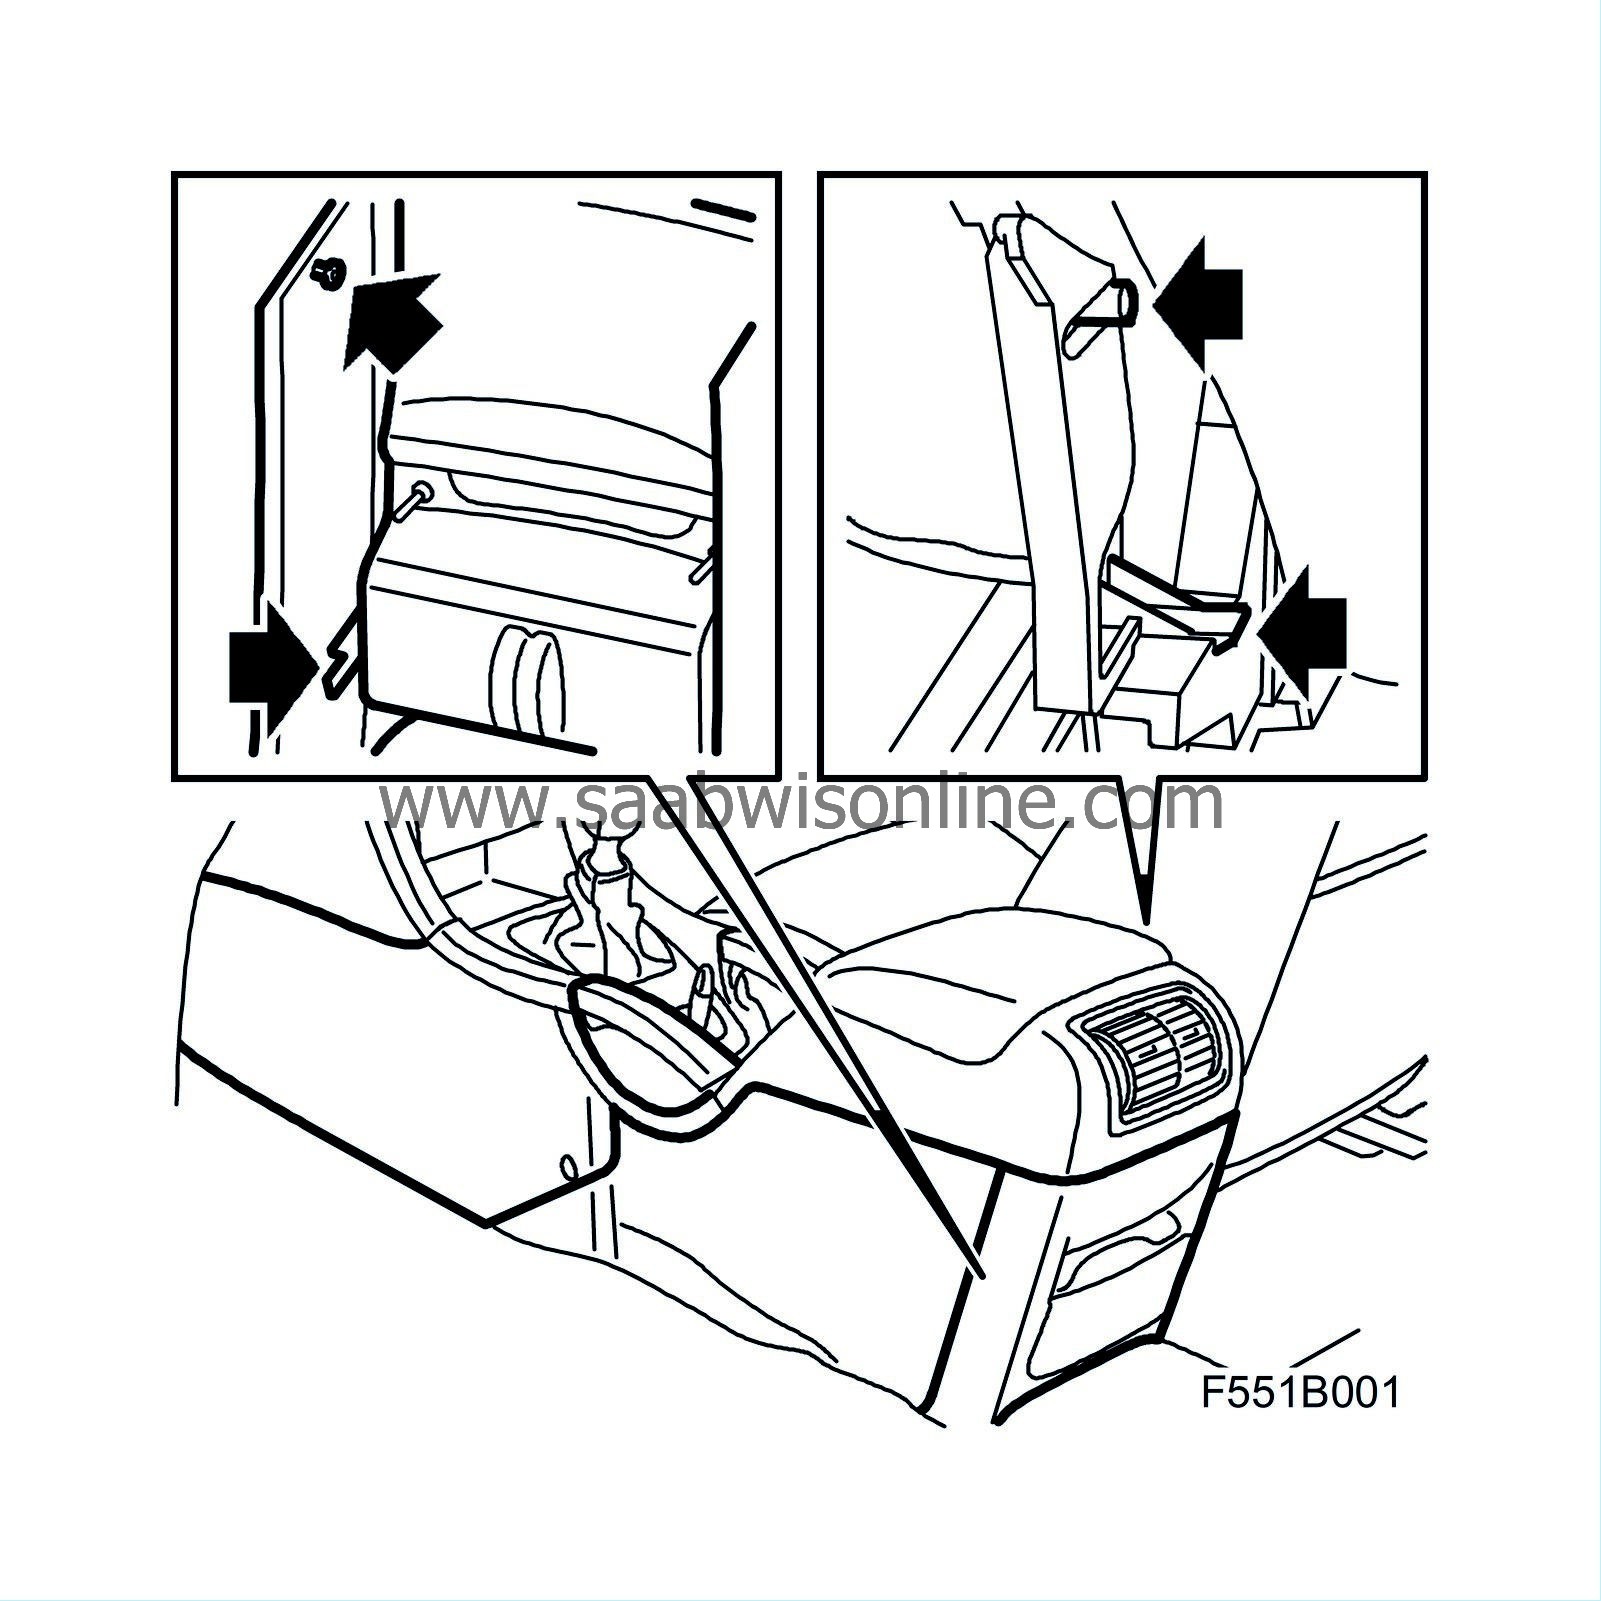
|
|
| • |
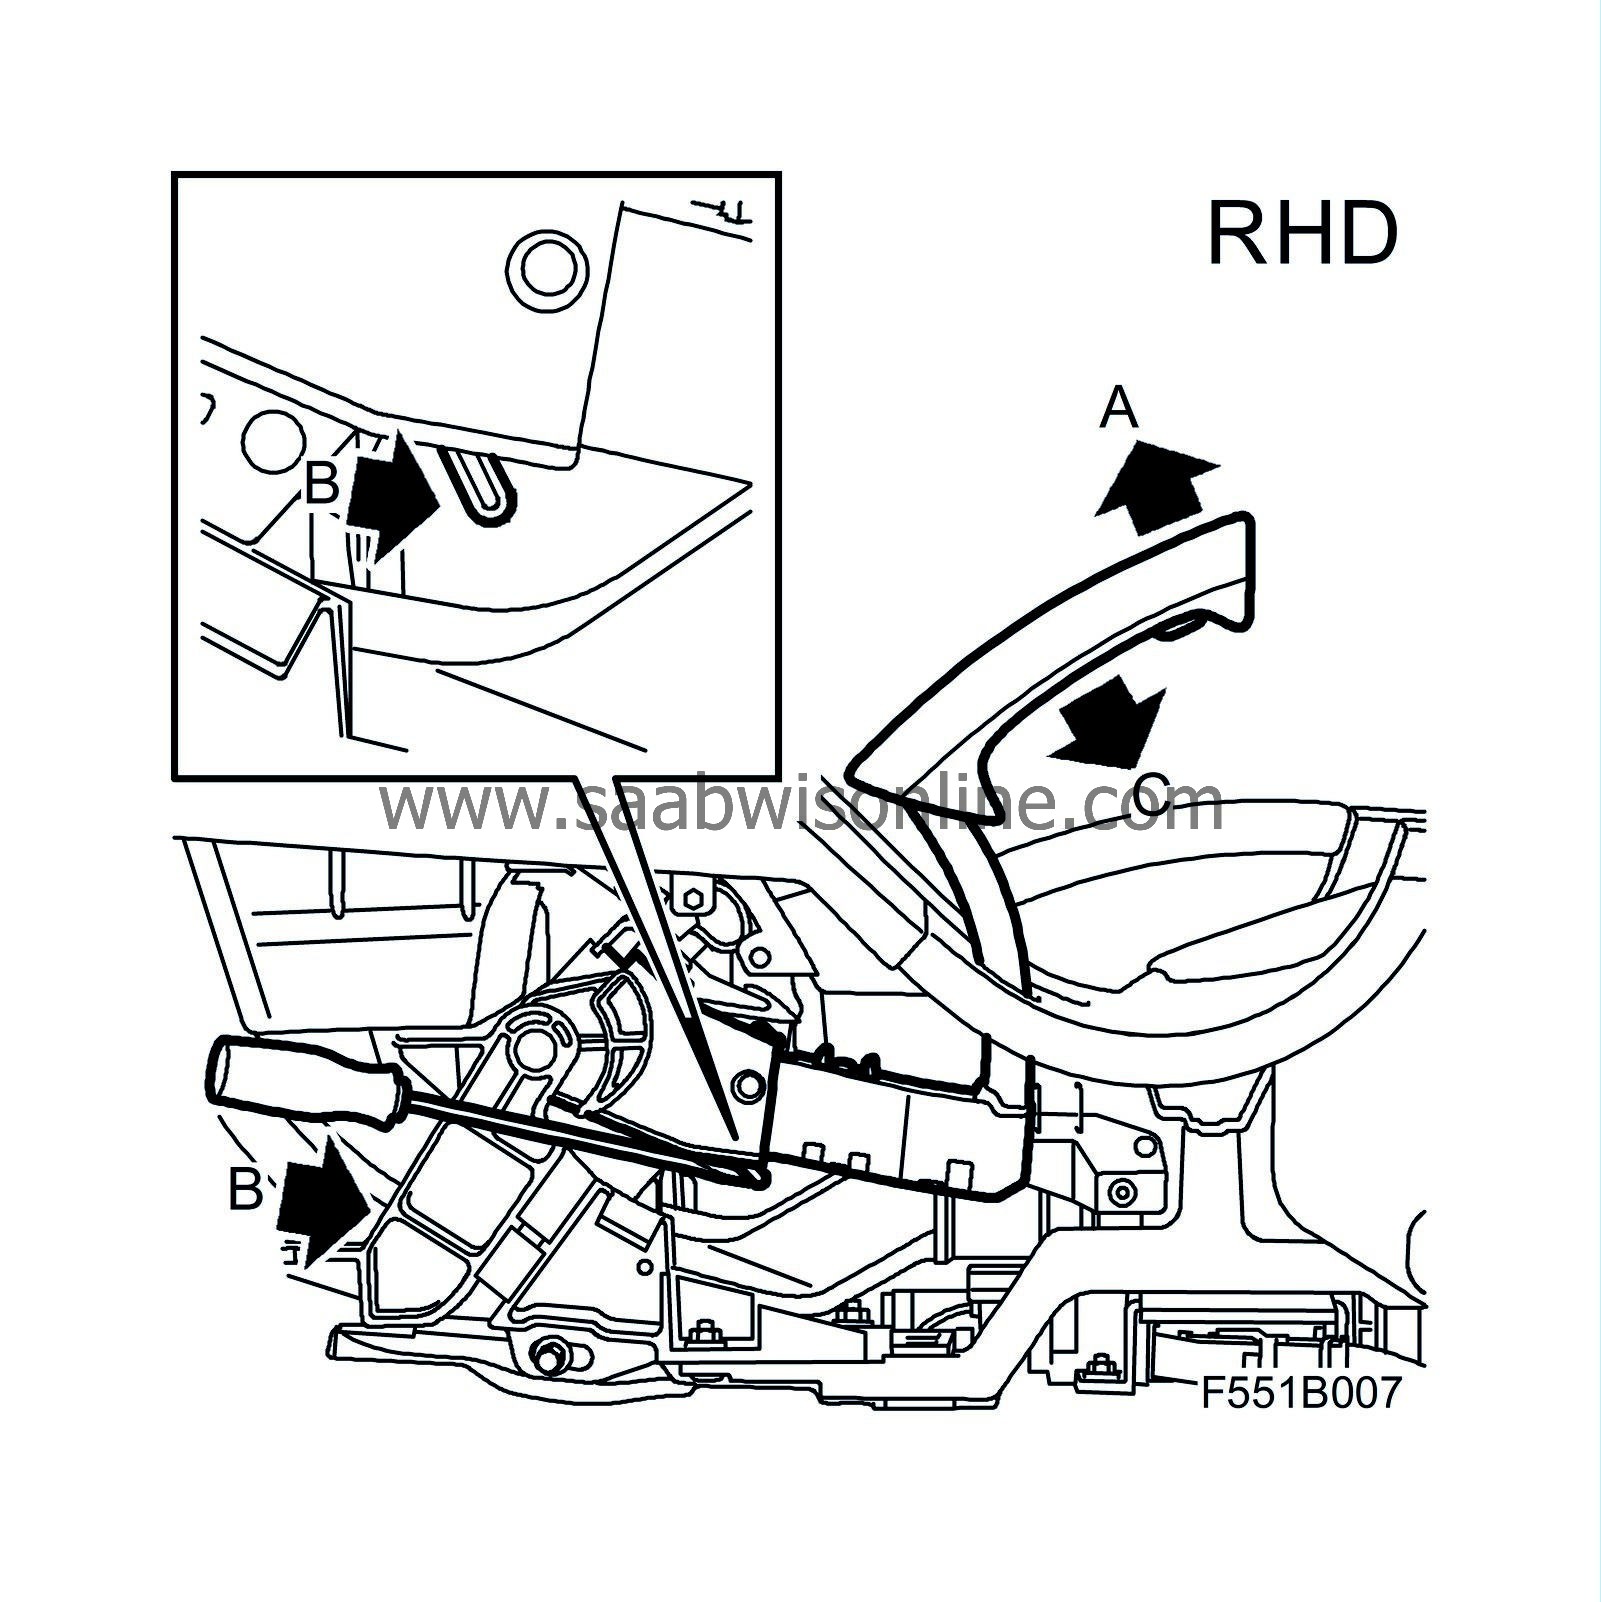
A. Raise the handbrake lever as far as possible.

|
|
| • |
B. Press the white plastic catch on the underside forwards using a screwdriver.
|
|
| • |
C. Lower the handbrake lever.
|
|
If this does not work the following alternative can be used which means that the handle must be replaced:
| • |
Remove the handbrake lever handle in accordance with WIS "Brakes - Handbrake - Adjustment/Replacement - Handle for handbrake".
|
|
| • |
Grip the cable for the release button using pliers and pull the cable at the same time as the lever is lifted slightly. At this point release the catch and the lever can be lowered to its lowest position.
|
|
| • |
Fit a new handle in accordance with WIS "Brakes - Handbrake - Adjustment/Replacement - Handle for handbrake".
|
|
Continue with the procedure in accordance with the following:
| 1. |
Remove the driver's seat in accordance with WIS "Body - Seats - Adjustment/Replacement - Front seat".
|
|
| 2. |
Remove the floor console rear cover and side panel on the same side as the handbrake lever.

|
|
| 3. |
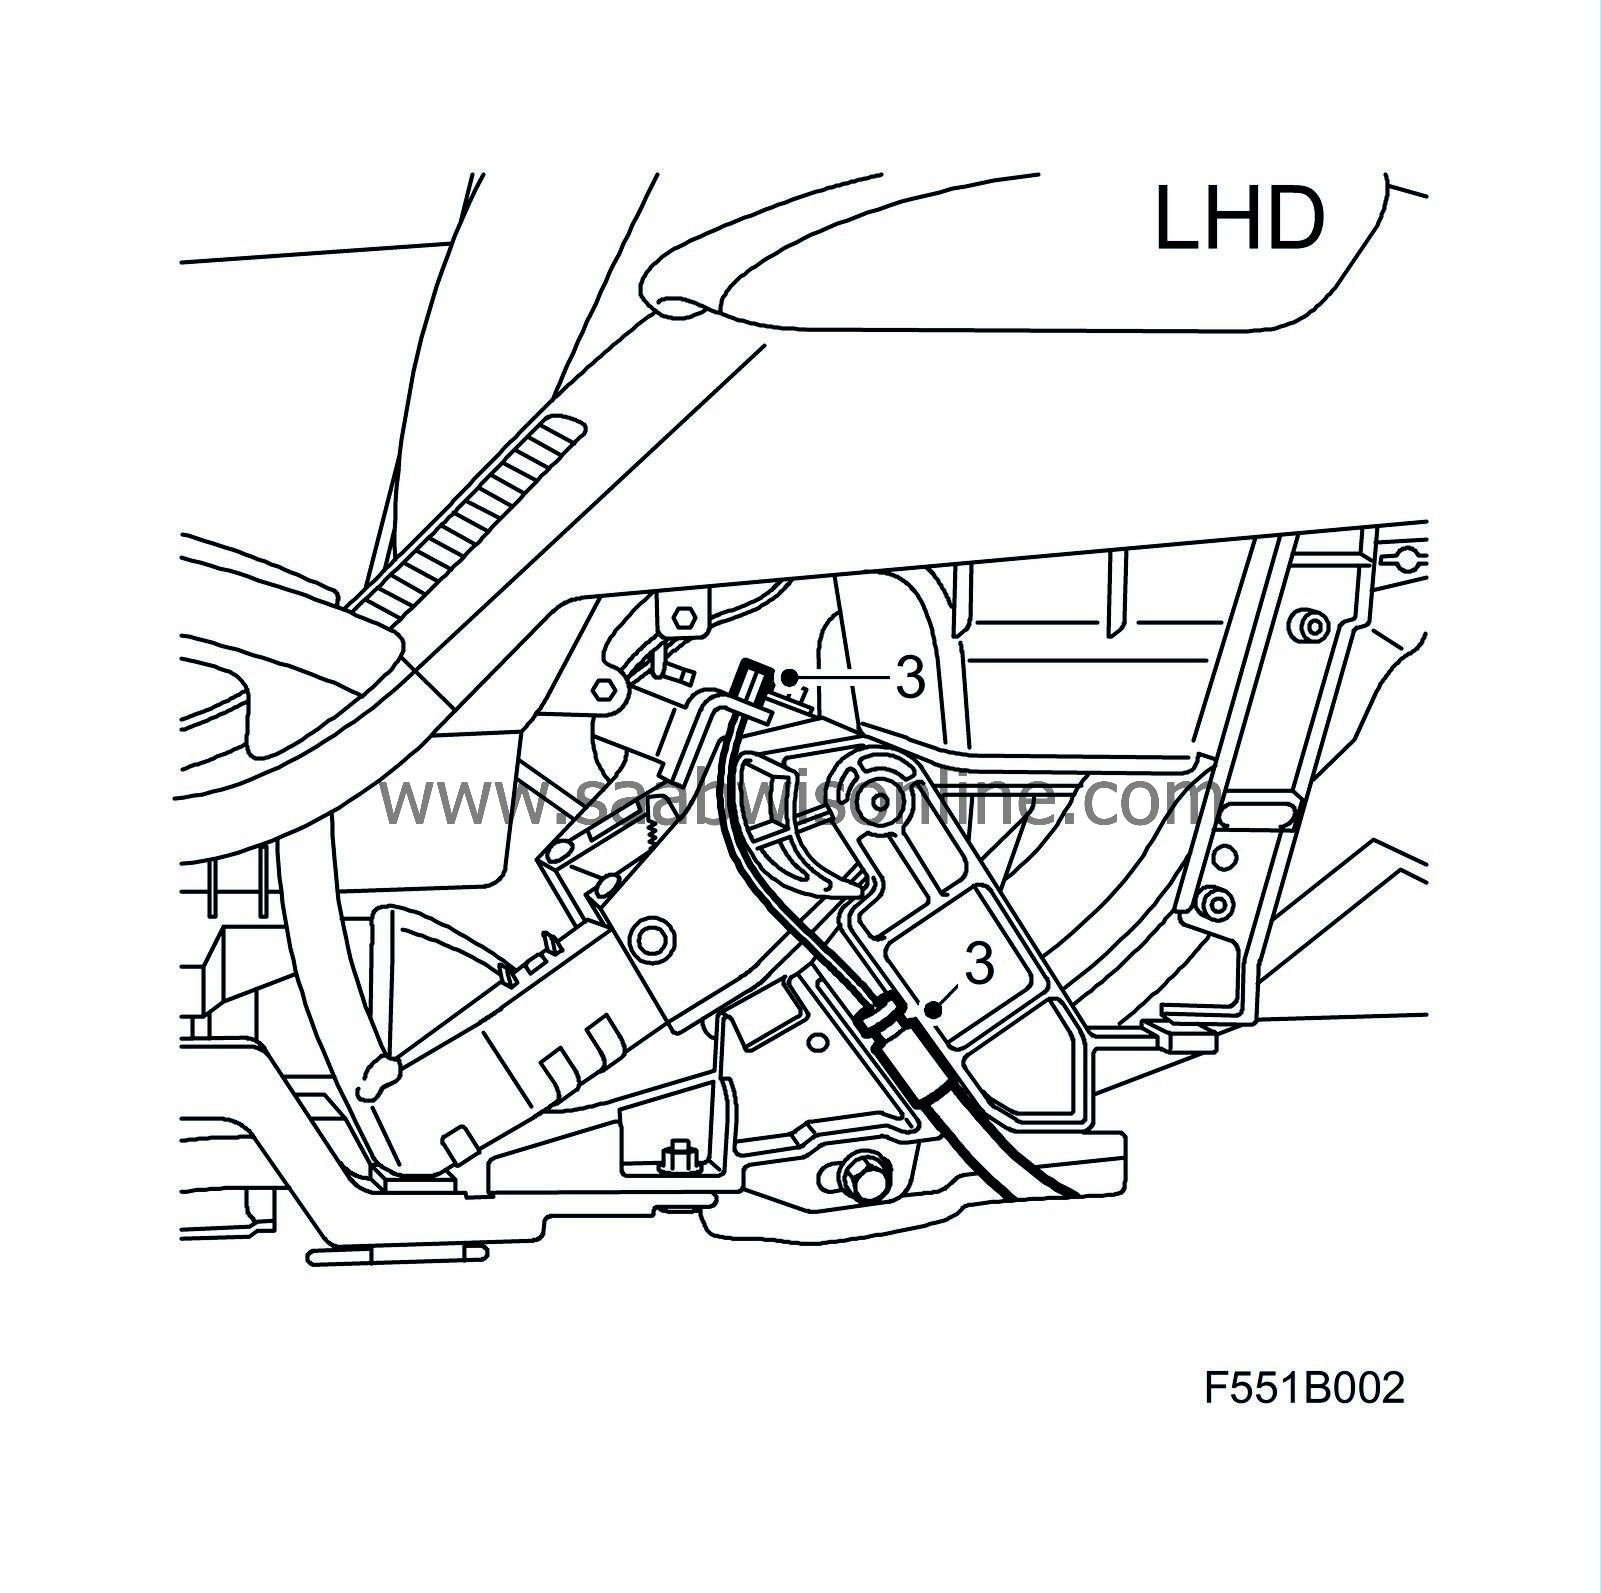
Undo the cable from the floor console. Start at the cable sheath and then detach the cable from the lever.

|
|
| 4. |
Raise the handbrake lever until it reaches the centre console.
|
|
| 6. |
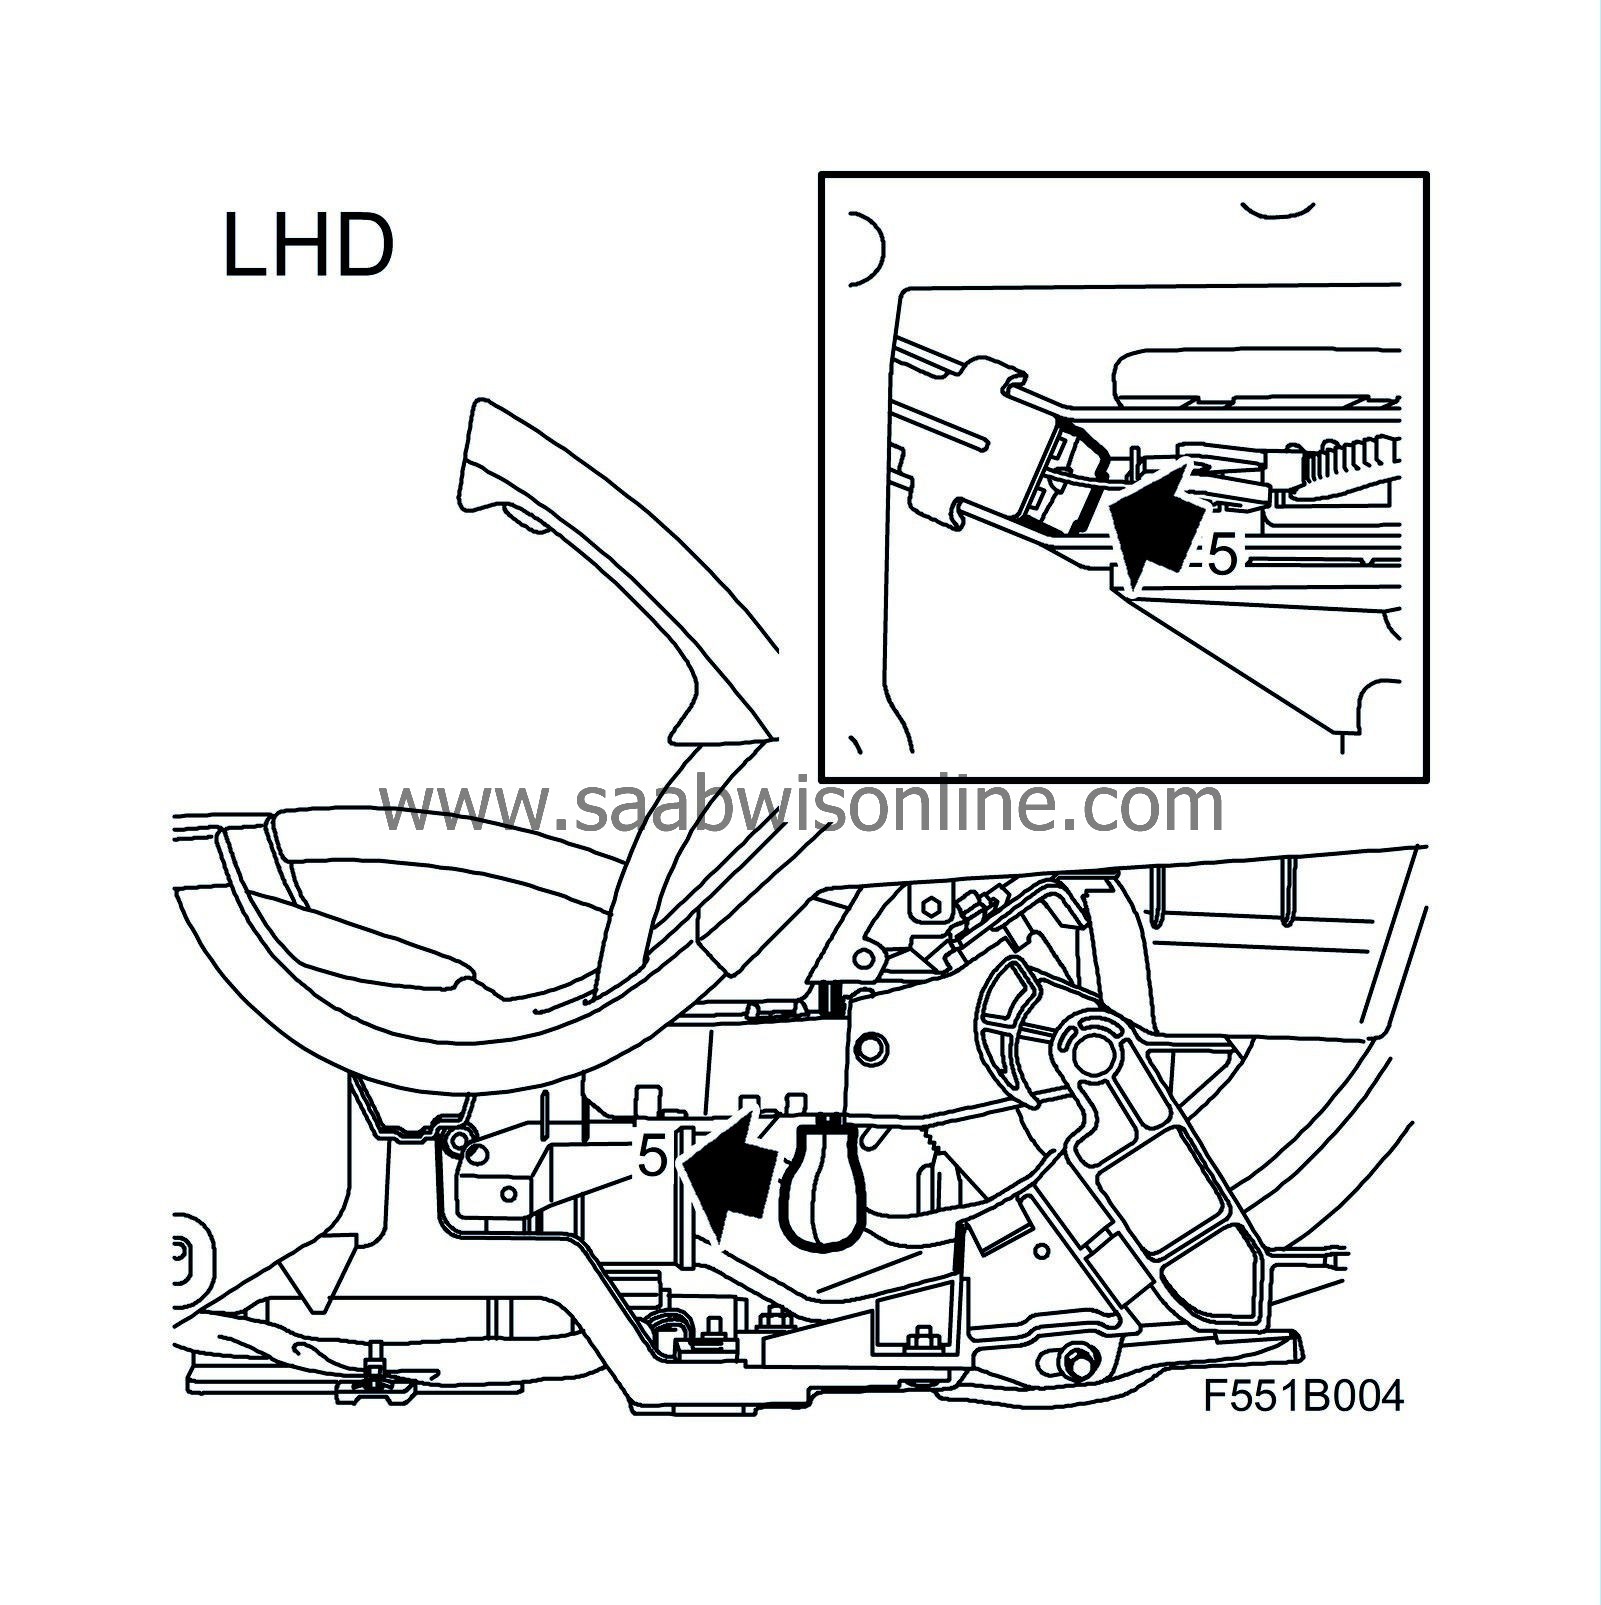
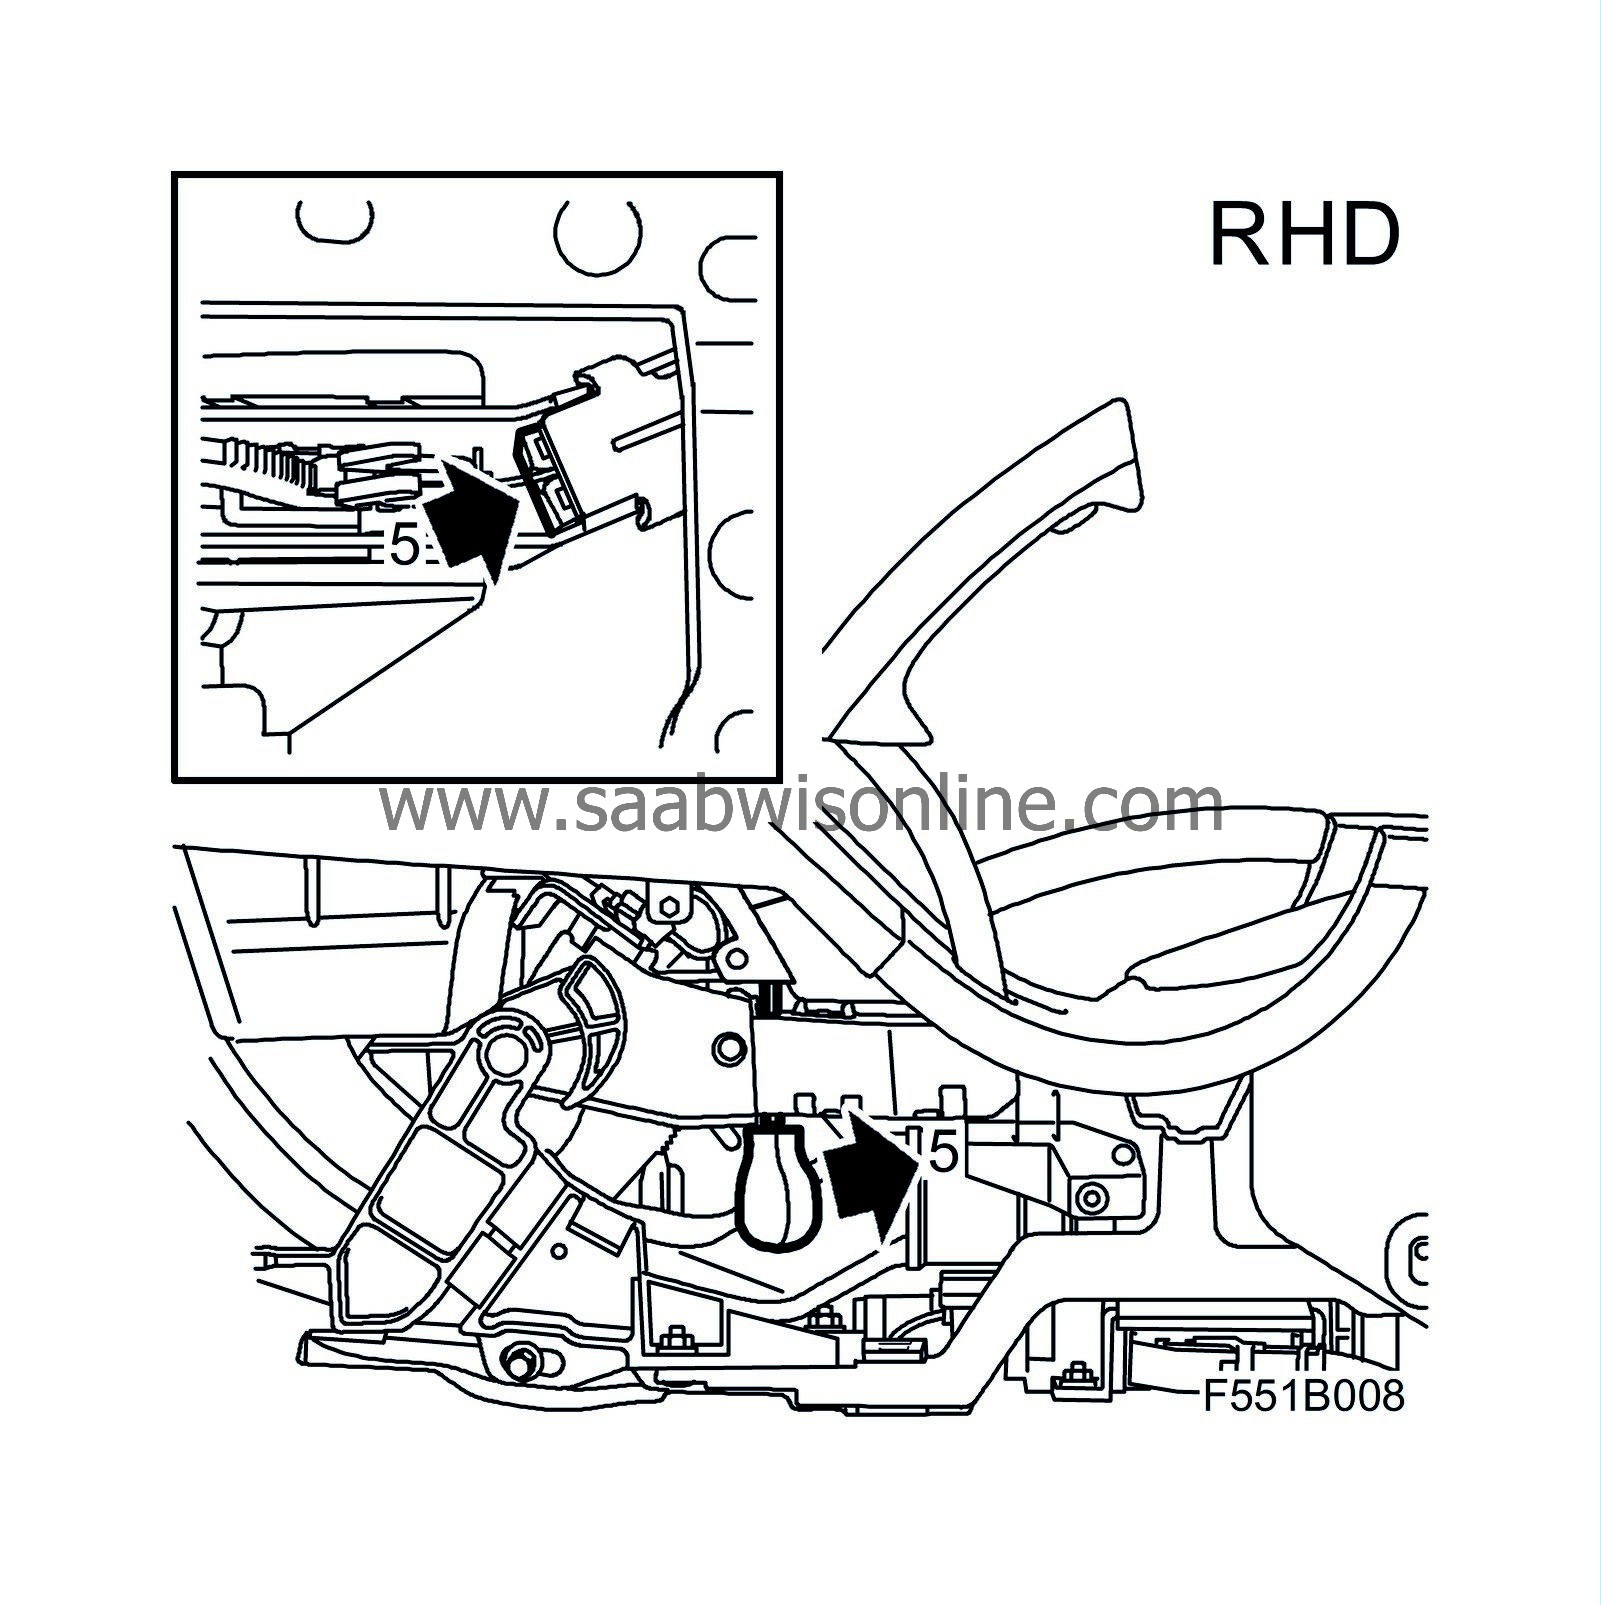
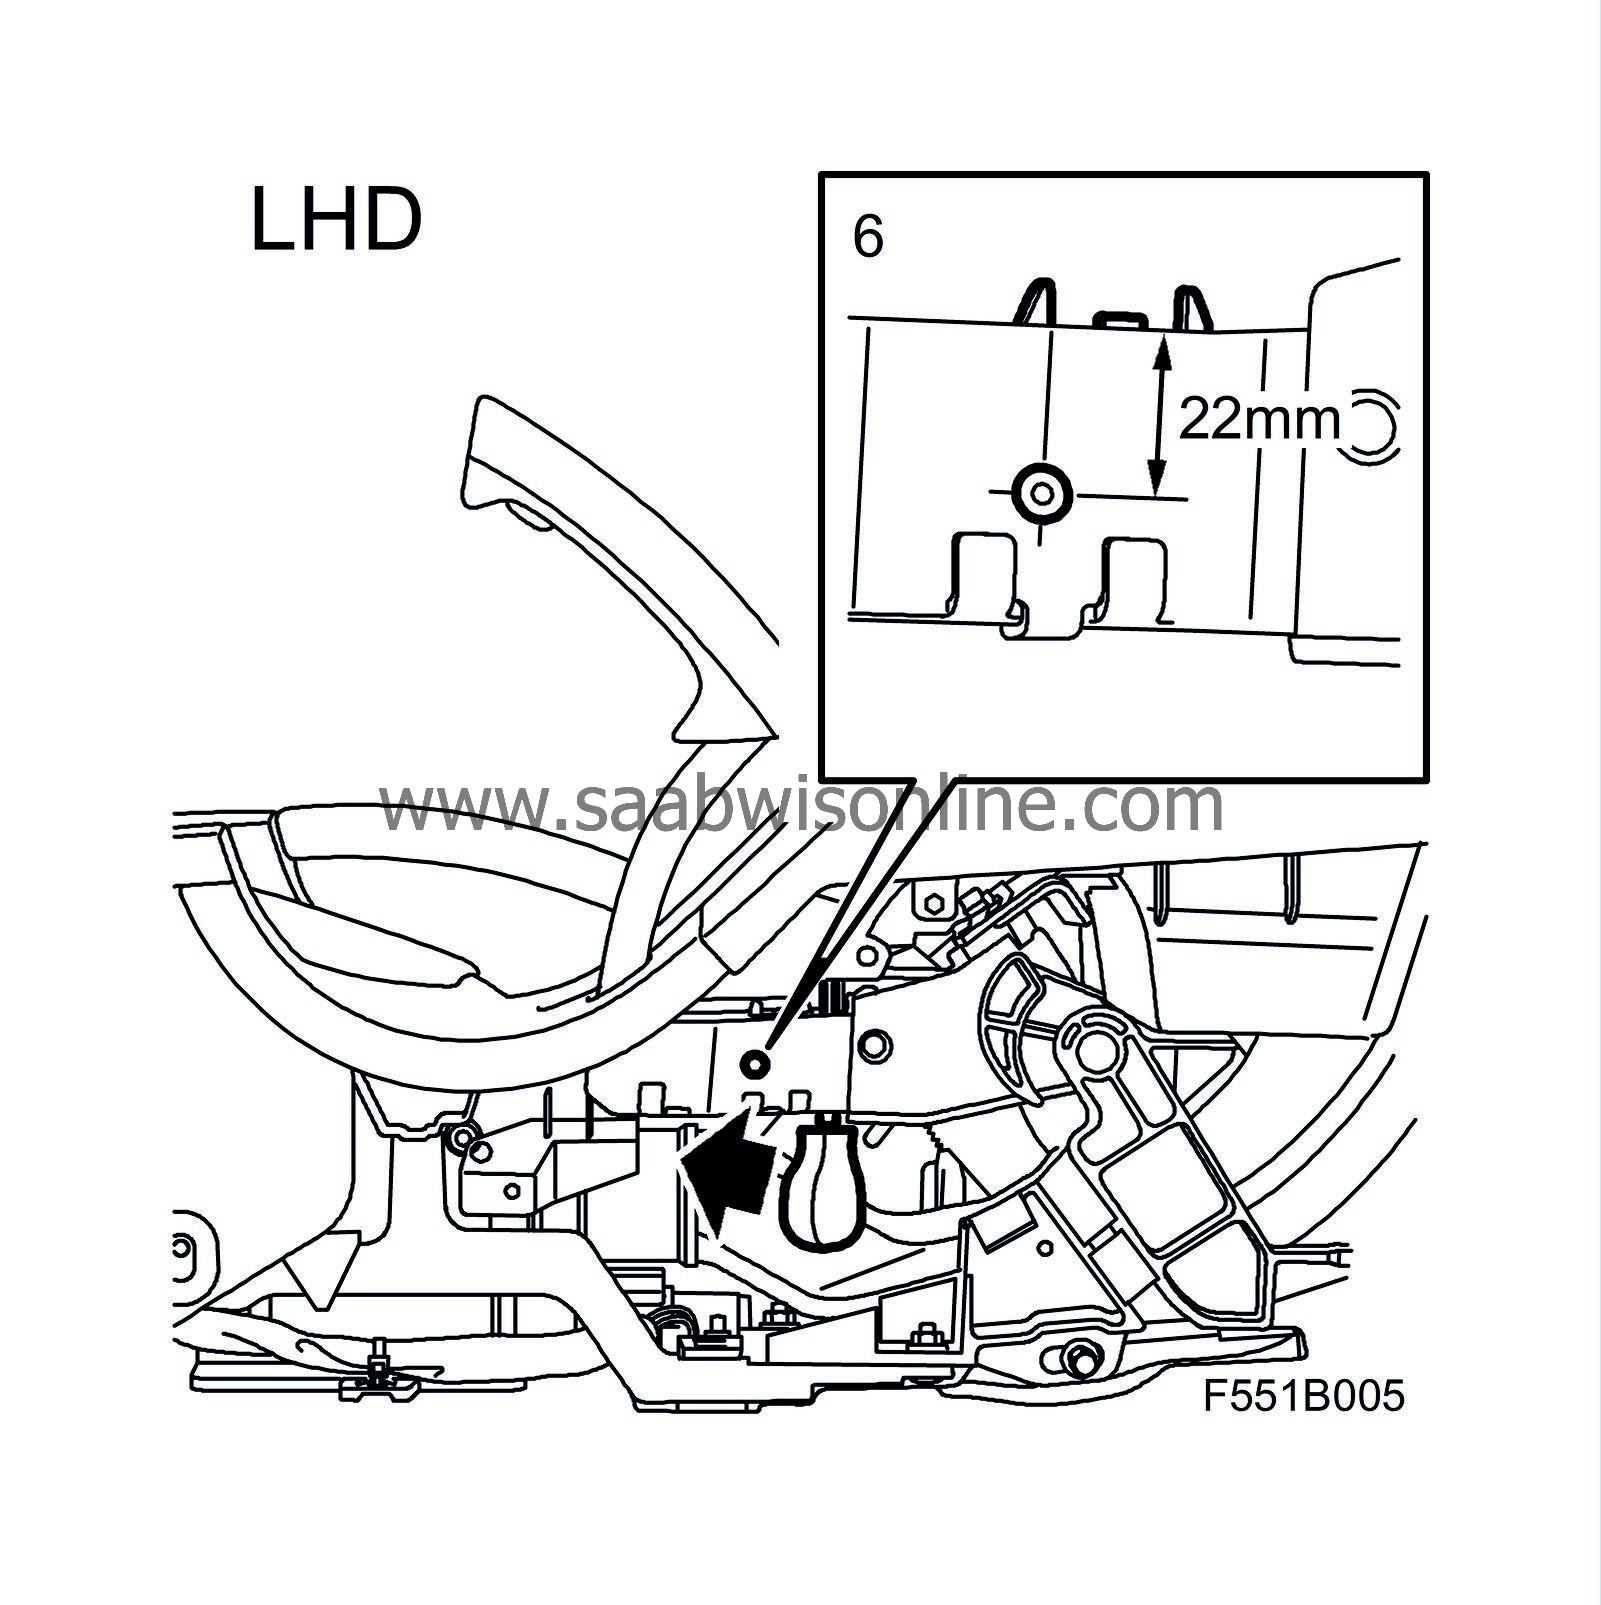
Using a punch, mark the position of the hole 22 mm down on the arm in accordance with the illustration.

|
|
| 7. |
Press the adjusting housing to its front position while drilling a 3 mm hole straight through the housing and fit screw 79 63 937 (long screw). Blow clean from drilling filings inside the handbrake lever.
|
|||||||
| 9. |
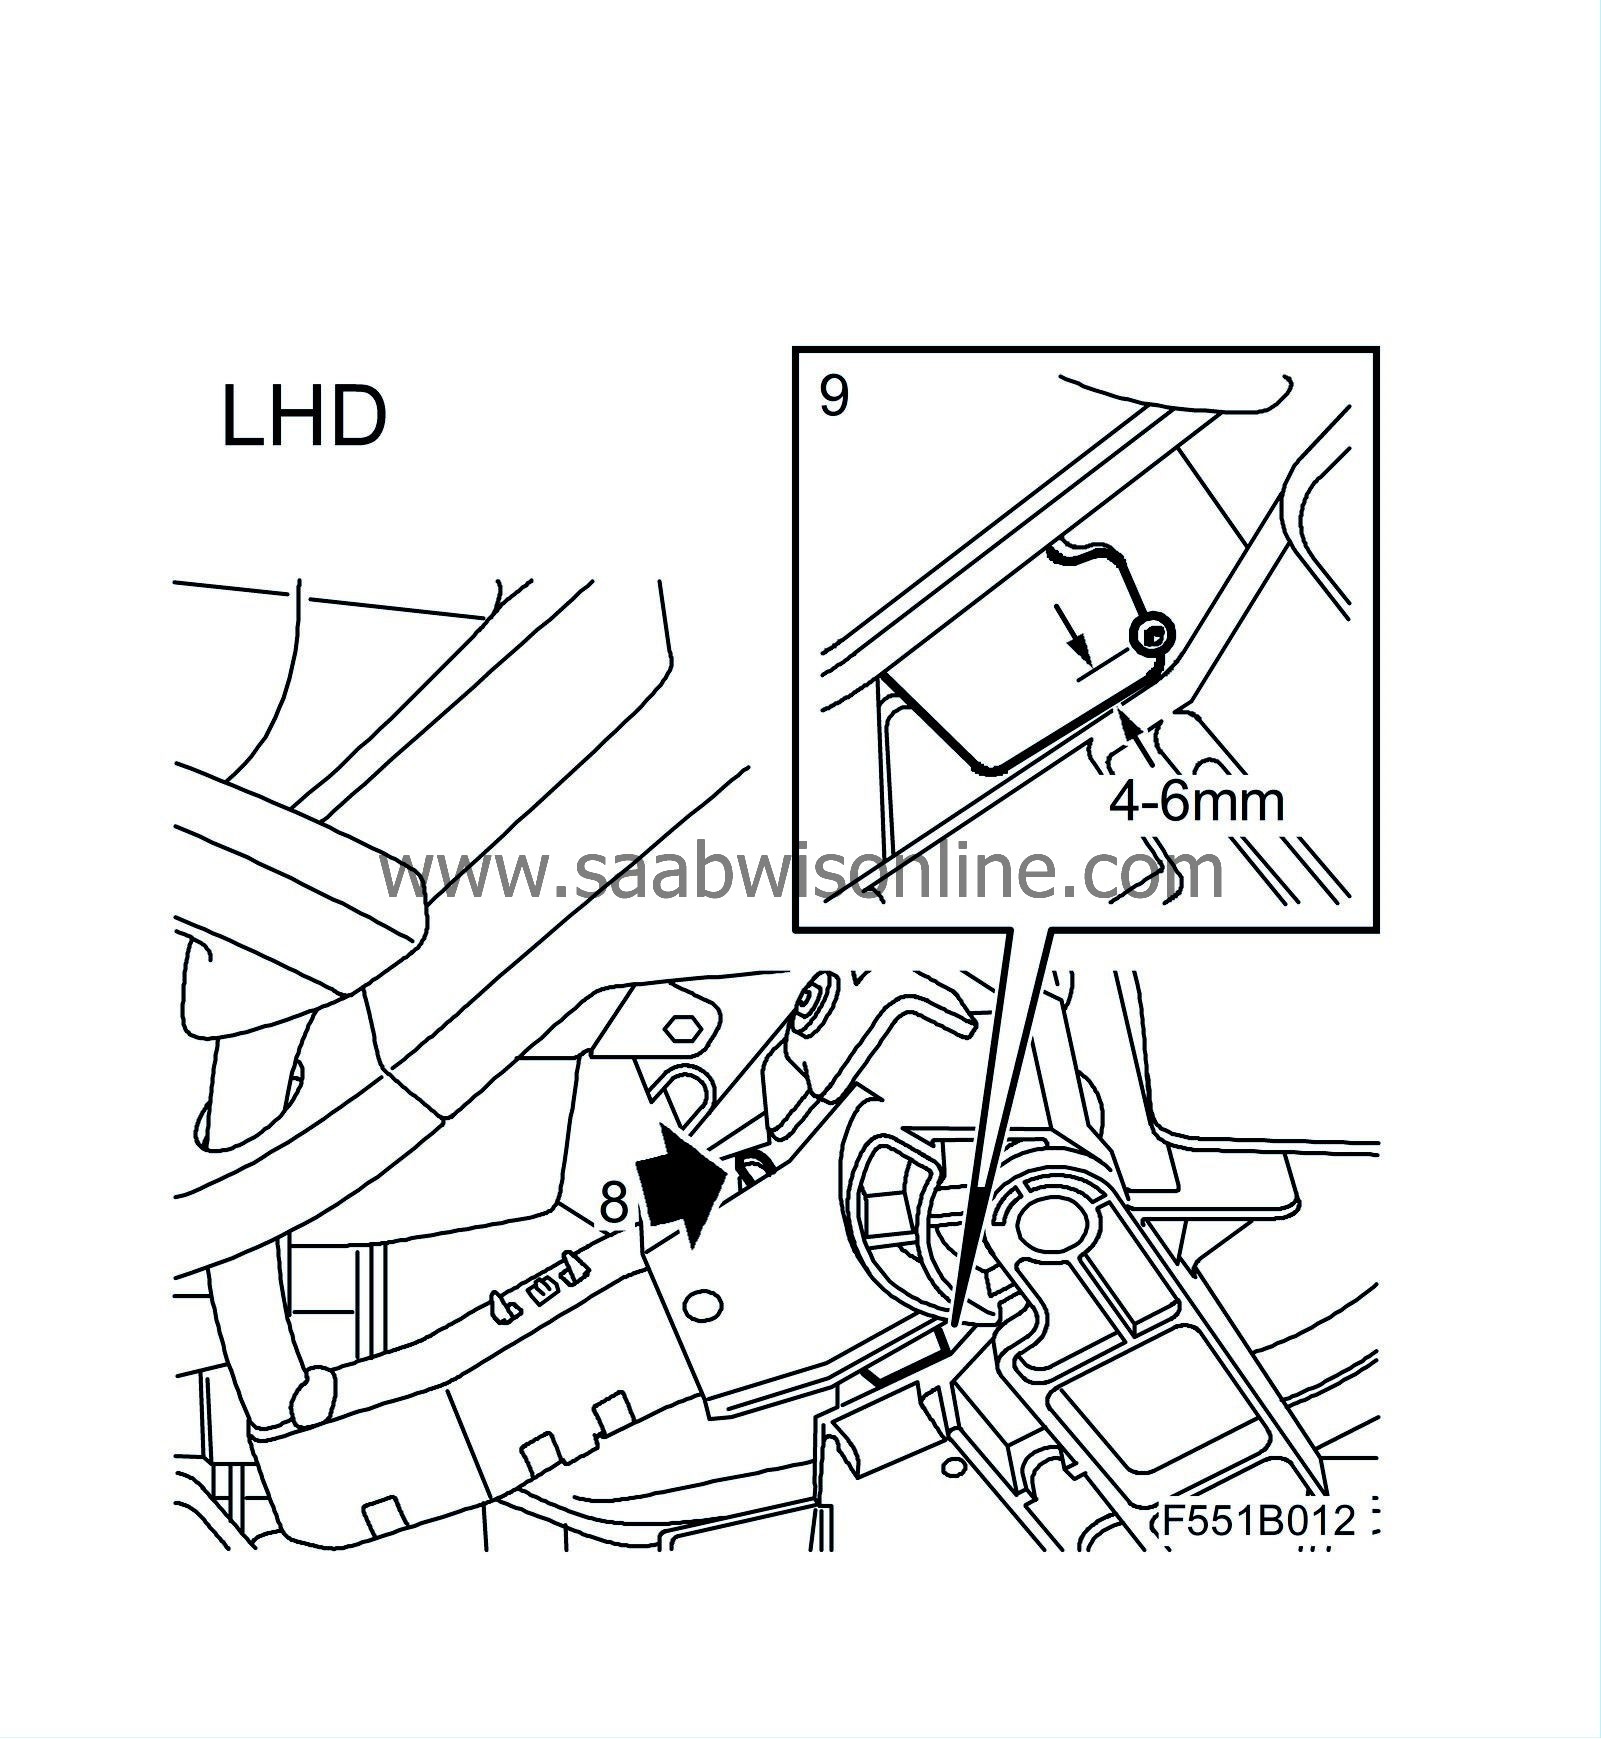
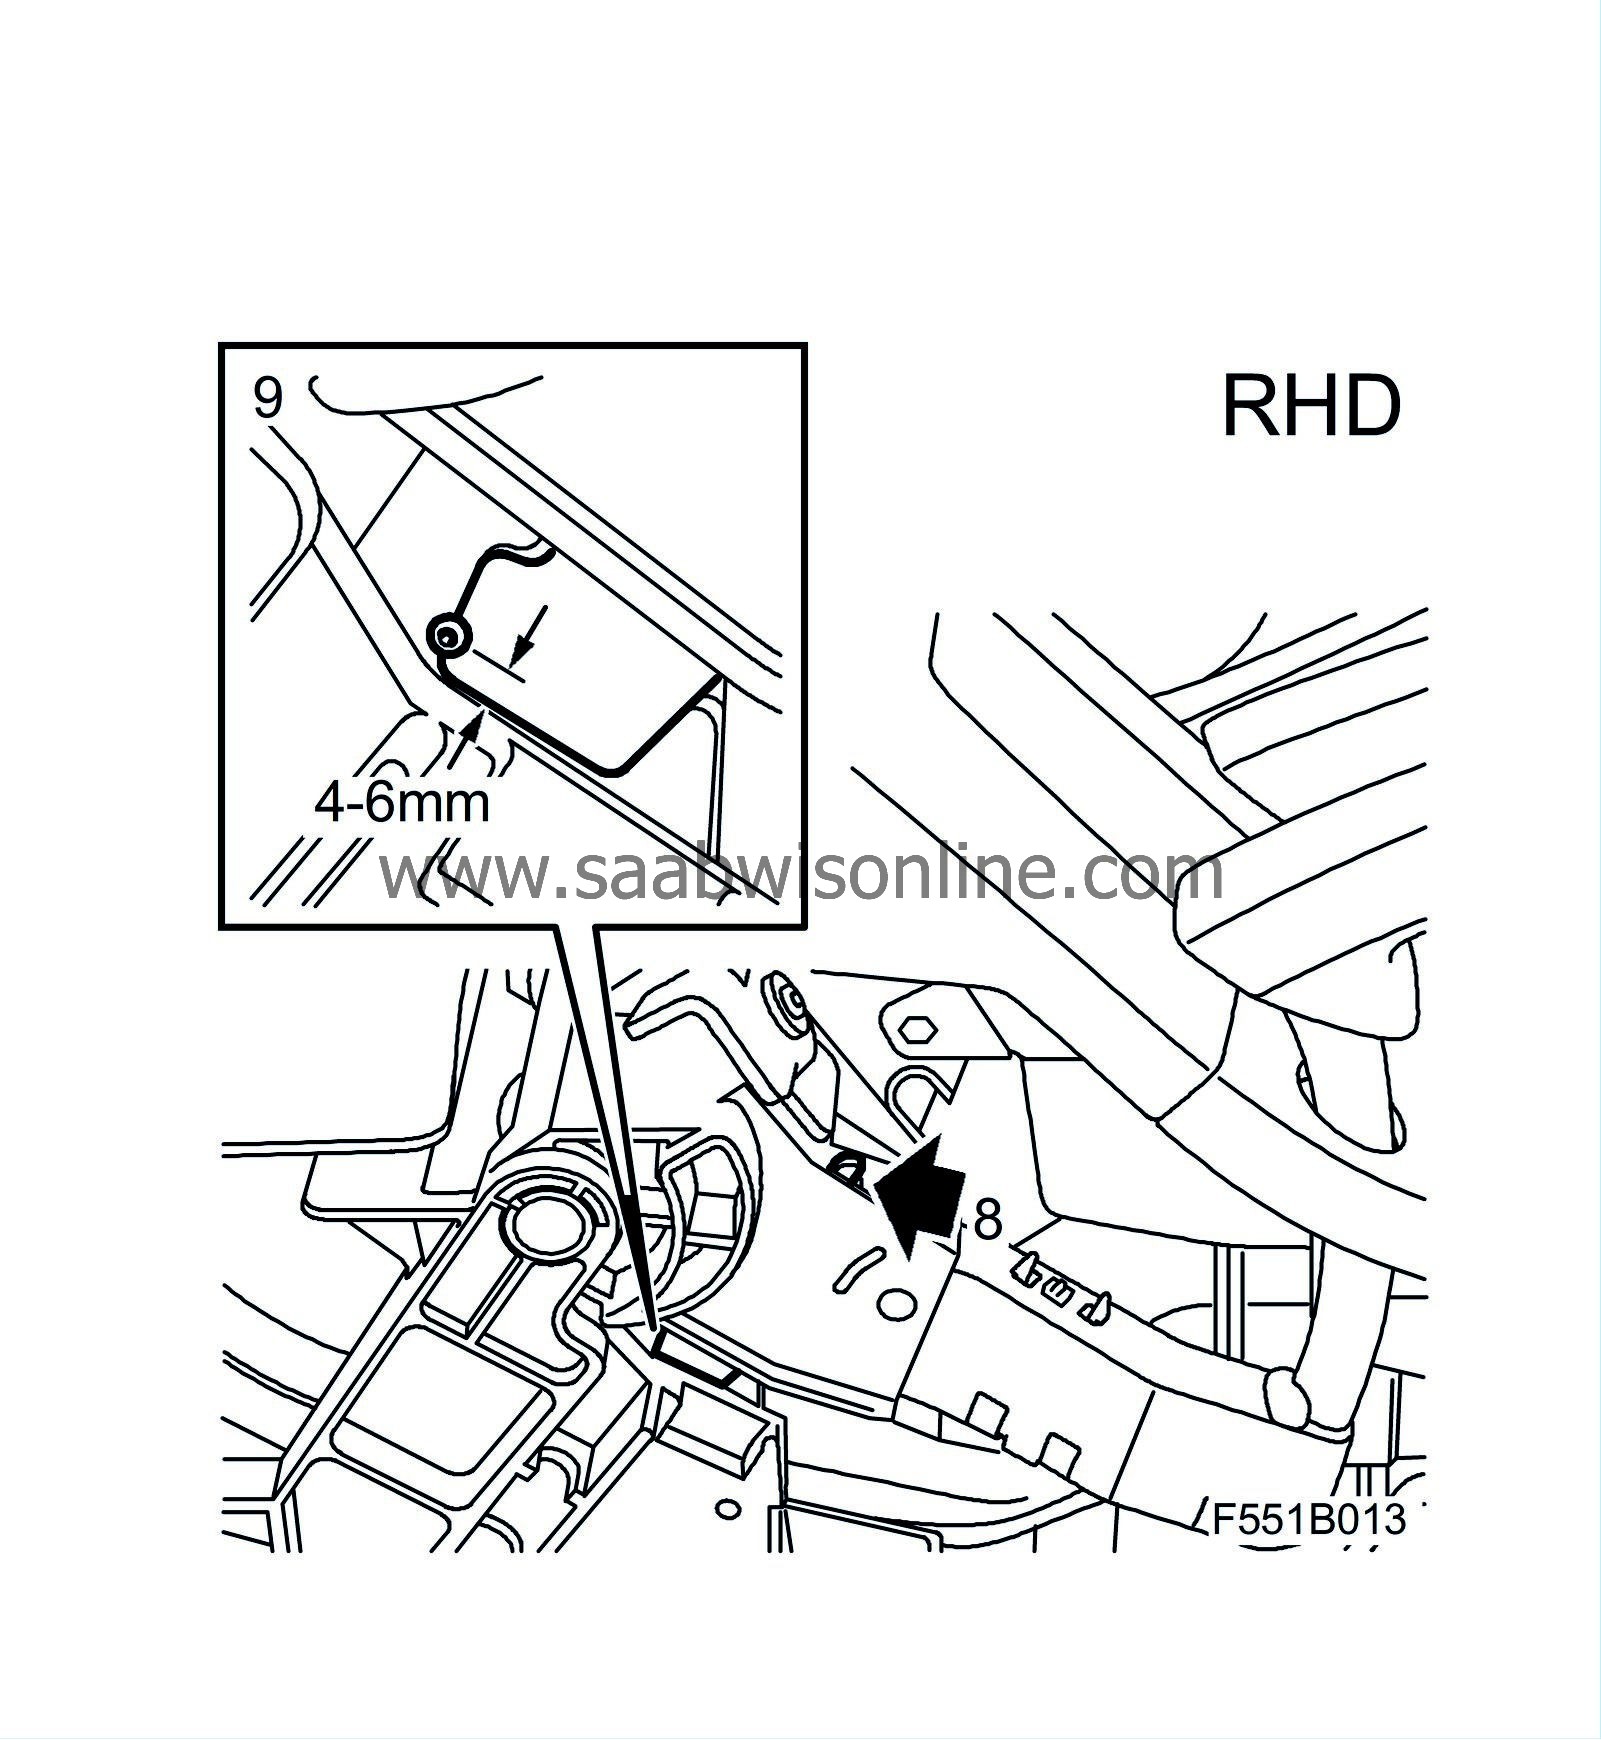
Make a punch mark in the intermediate area, 4-6 mm from the lower edge (the screw head must run freely but must not come up too high).
|
|
| 10. |
Check that the gear segment is still in its rearmost position and remains there during the drilling. First drill a 2mm hole and then drill it up to 2.5 mm and fit screw 79 75 535 (short screw). The drill bit will automatically penetrate the softer aluminium material.
|
|||||||
| 11. |
Vacuum clean the metal filings.
|
|
| 12. |
Fit the handbrake cable.
|
|
| 13. |
Adjust the handbrake cable in accordance with WIS "Brakes - Handbrake - Adjustment/Replacement - Adjusting the handbrake cable".
|
|
| 14. |
Test the release function by
|
|
| • |
pulling the handbrake lever to notch 4-6
|
| • |
pressing the handbrake lever downwards with a force of approximately 100 N (22.5 lbf) which equates to a weight of 10 kg (22 lb) while pressing the release button twice.
|
| 15. |
Following which, check that it is easy to release a firmly applied handbrake lever.
|
|
| 16. |
Does it operate OK?
YES: Continue with step 17. NO: Replace the handbrake lever assembly in accordance with WIS "Brakes - Handbrake - Adjustment/Replacement - Handbrake lever". Continue with step 18.
|
|||||||
| 17. |
Fit the floor console rear side panel and cover.
|
|
| 18. |
Fit the driver's seat in accordance with WIS "Body - Seats - Adjustment/Replacement - Front seat".
|
|
| Warranty/Time Information |
| • |
In the case of customer complaint and if the car is
within the warranty period
, use the following information to fill out the claim
|
|
or
| • |
In the case of customer complaint up to and including 2005-12-31 and if the car is
not
within the warranty period, use the following information to fill out the claim.
|
|
Securing the adjusting housing
Failed Object: 15905Fault/Reason code:26
Location code: 09
Warranty type: 55
Repair/Action code: 05
Time: 0.7 hr
Securing the adjusting housing + replacement of handbrake lever
Failed Object: 15905Fault/Reason code:26
Location code: 09
Warranty type: 55
Repair/Action code: 01
Time: 1.6 hr

