(831-2464) No central locking switch on passenger side
|
TECHNICAL SERVICE BULLETIN
|
|
Bulletin Nbr:
|
831-2464
|
|
Date:
...........
|
April 2004
|
|
Market:
|
US/CA
|
|
|
No central locking switch on passenger side
|
Saab 9-3 CV (9440) M04 within Vehicle Identification Number range 46002934 - 46012060
The central locking switch on the passenger side has not been fitted within the above Vehicle Identification Number range.
In the case of customer complaint, the following procedure must be carried out.
12 791 171 Switch, central locking system
If necessary:
12 833 182 Wiring harness (cars with pinch protection)
12 833 186 Wiring harness (cars without pinch protection)
|
1.
|
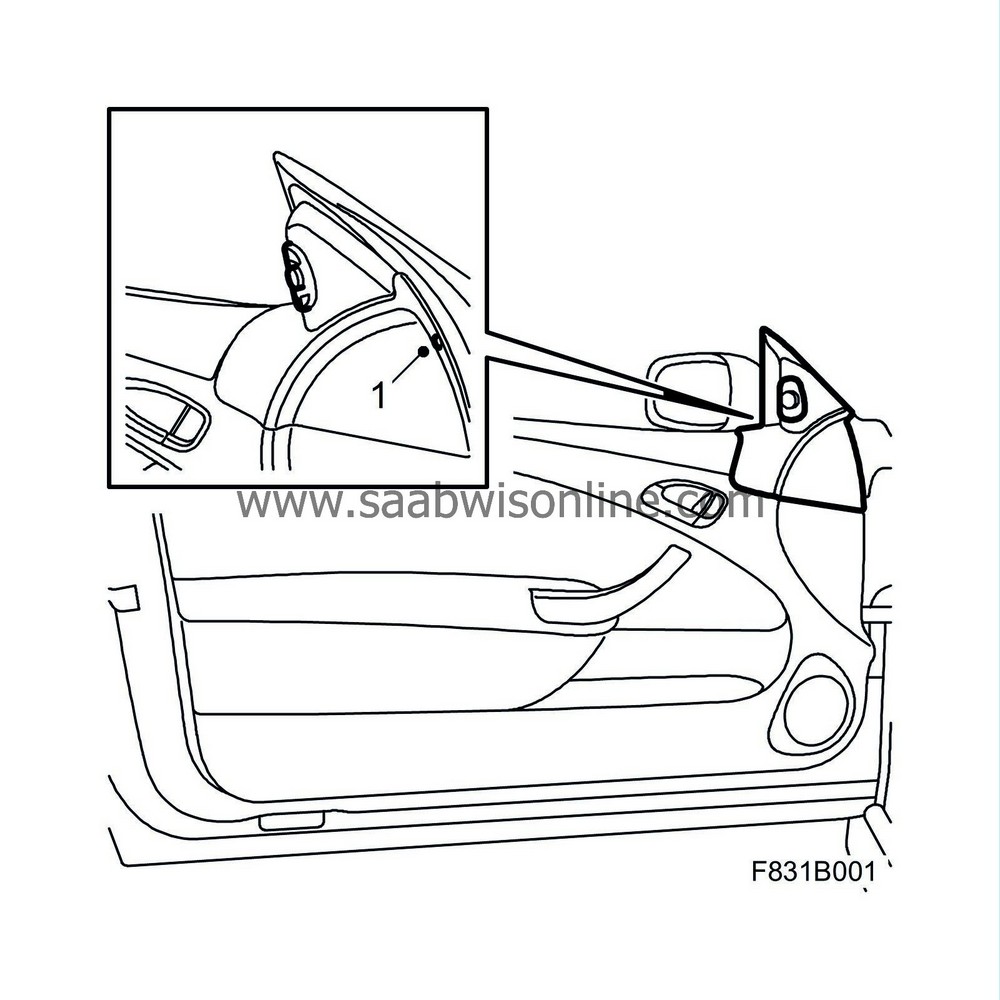
Remove the mirror base cover.
|
|
2.
|
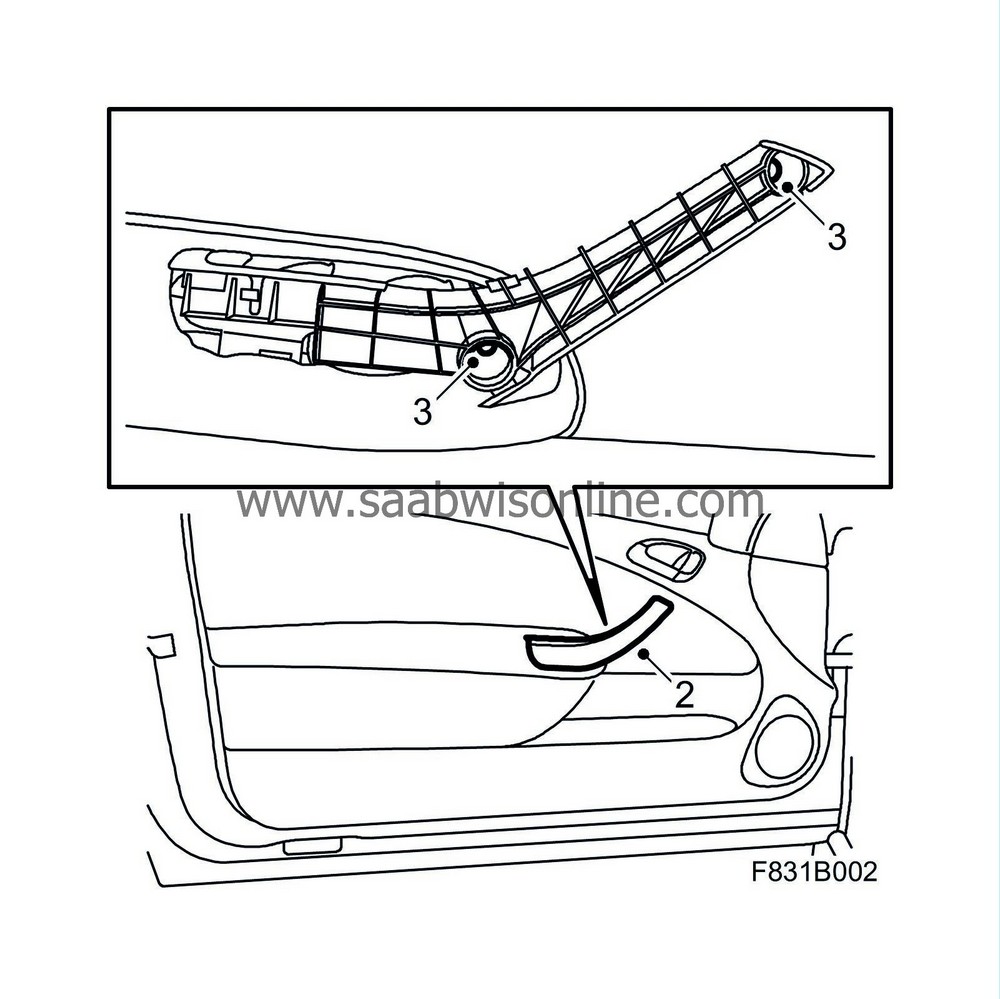
Remove the cover from the door pull. Use 82 93 474 Removal tool.
|
|
3.
|
Remove the screws from the handle.
|
|
4.
|
Lift the door trim up so that the hooks detach from the door. Use 82 93 474 Removal tool to detach the guide pin at the rear edge of the trim.
|
|
5.
|
Check whether the correct wiring harness is fitted as follows:
|
|
|
5.A.
|
Turn the ignition key to the ON position.
|
|
|
5.B.
|
Close the driver's door.
|
|
|
5.C.
|
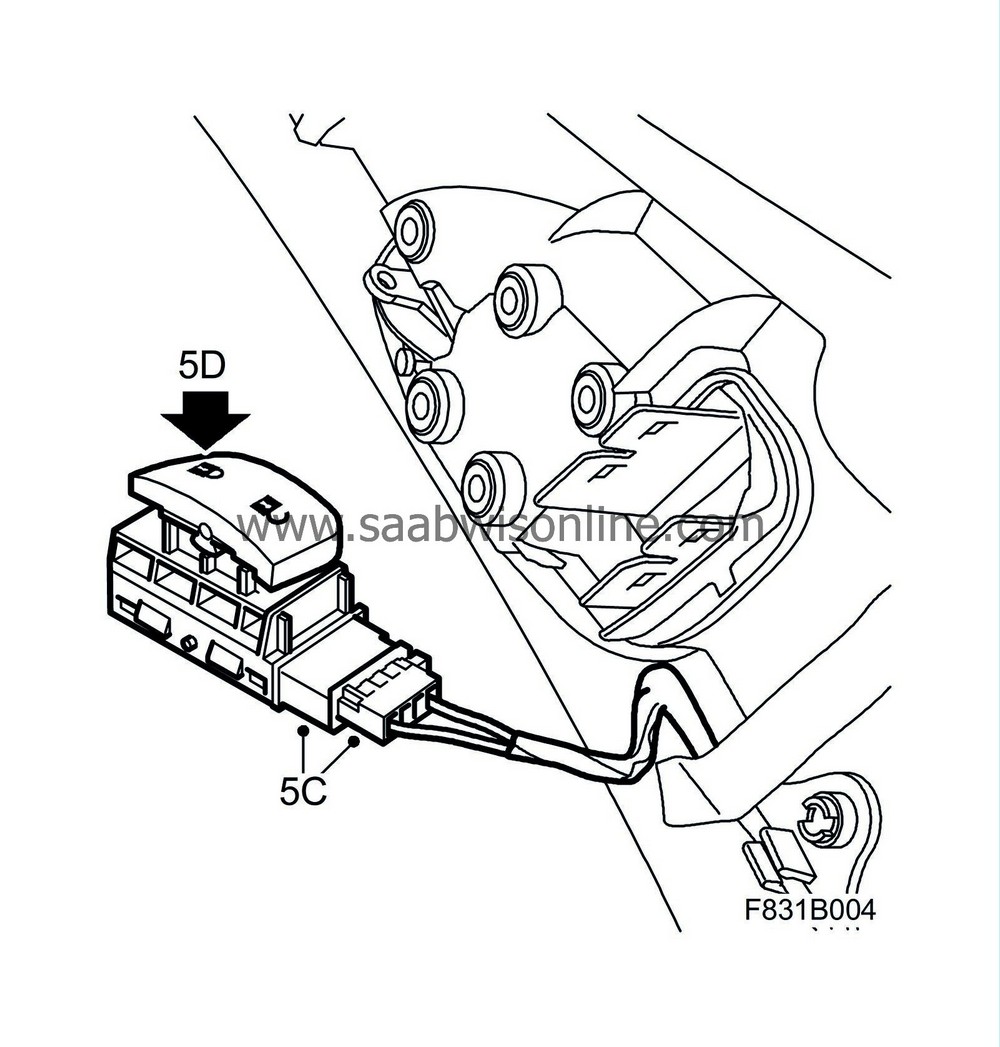
Connect the new switch to the central locking system connector.
|
|
|
5.D.
|
Press the switch to check whether the locking function is working.
|
|
|
5.E.
|
Turn the ignition key to the OFF position.
|
If the function is OK carry out procedure
A
. If the function fails then the wiring harness must be replaced, see procedure
B
.
Procedure A
|
1.
|
Remove the cover and fit the switch.
|
|
2.
|
Fit the door trim in accordance with WIS 9-3 (9440) - M04 - Body - Interior equipment - Door trim, front door.
|
|
3.
|
Check the operation of the switch.
|
Procedure B
|
1.
|
Remove the cable sheath and cable to the door handle. Unplug the connectors from the door trim and lift the trim away.
|
|
2.
|
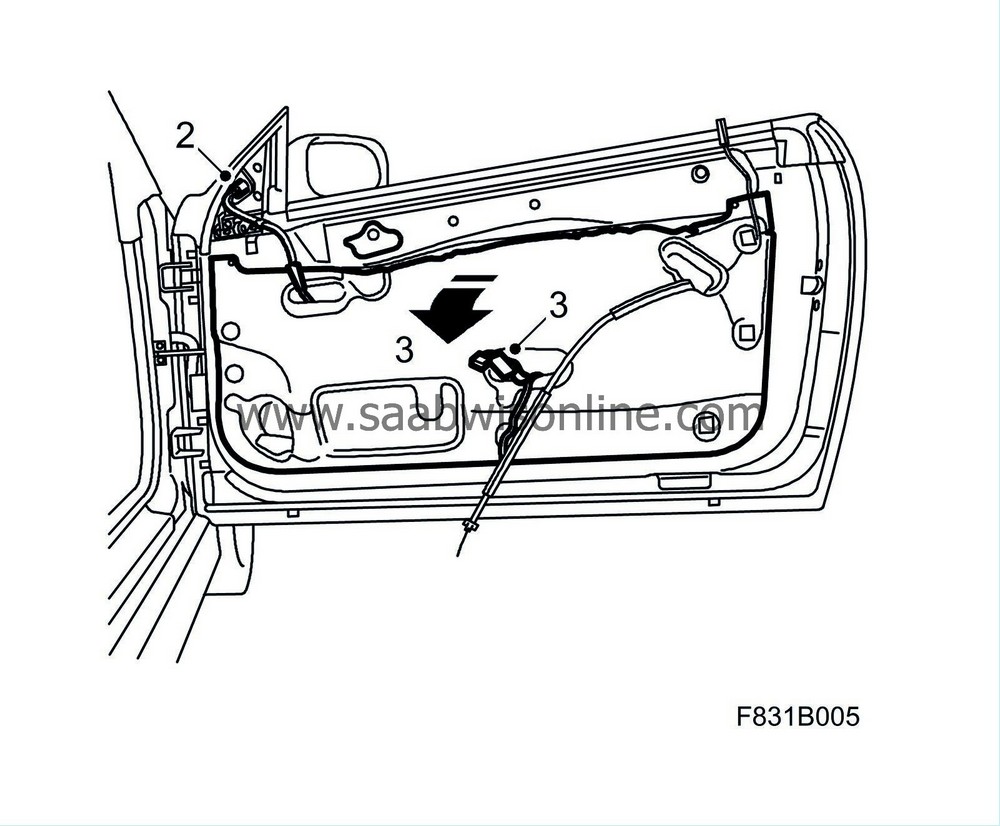
Detach the door mirror connector.
|
|
3.
|
Detach the water barrier at the top edge and on the sides using Removal tool 82 93 474. Pull the connectors out from the water barrier.
|
|
4.
|
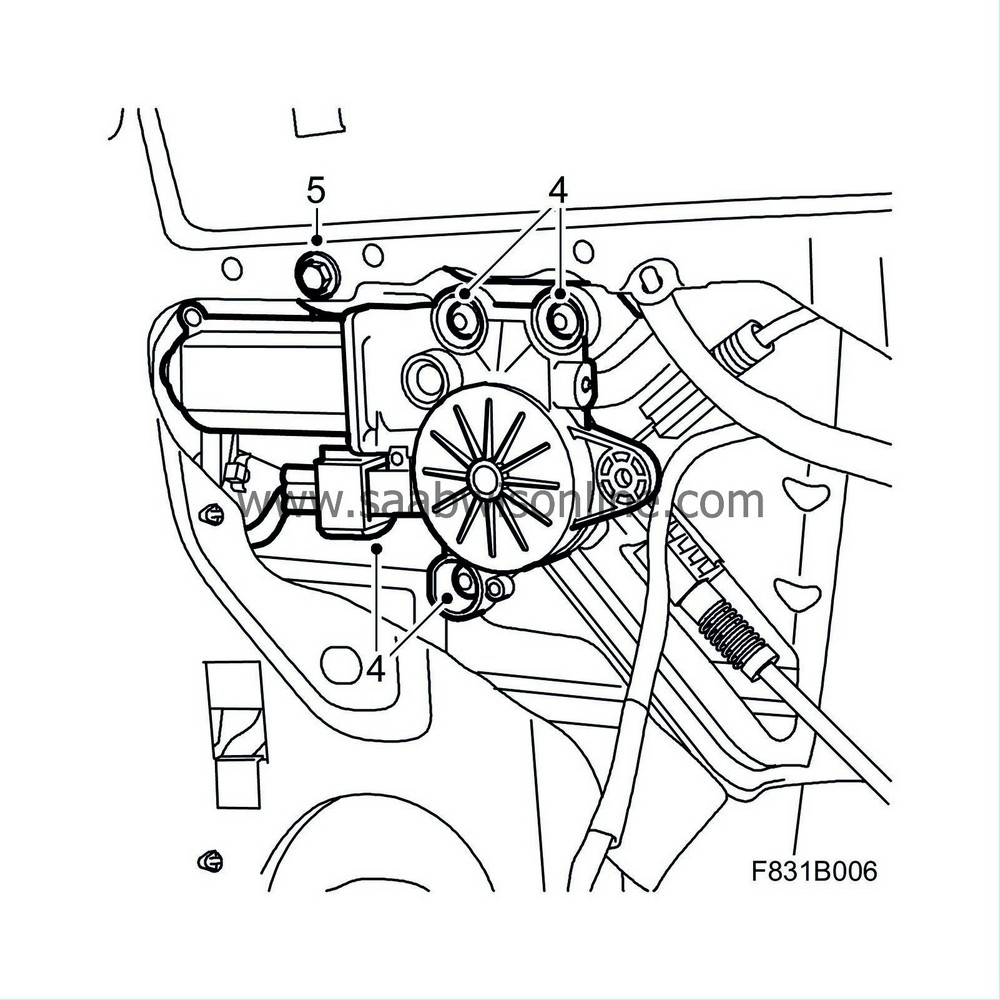
Remove the window lift motor.
|
|
5.
|
Remove the bracket screw.
|
|
6.
|
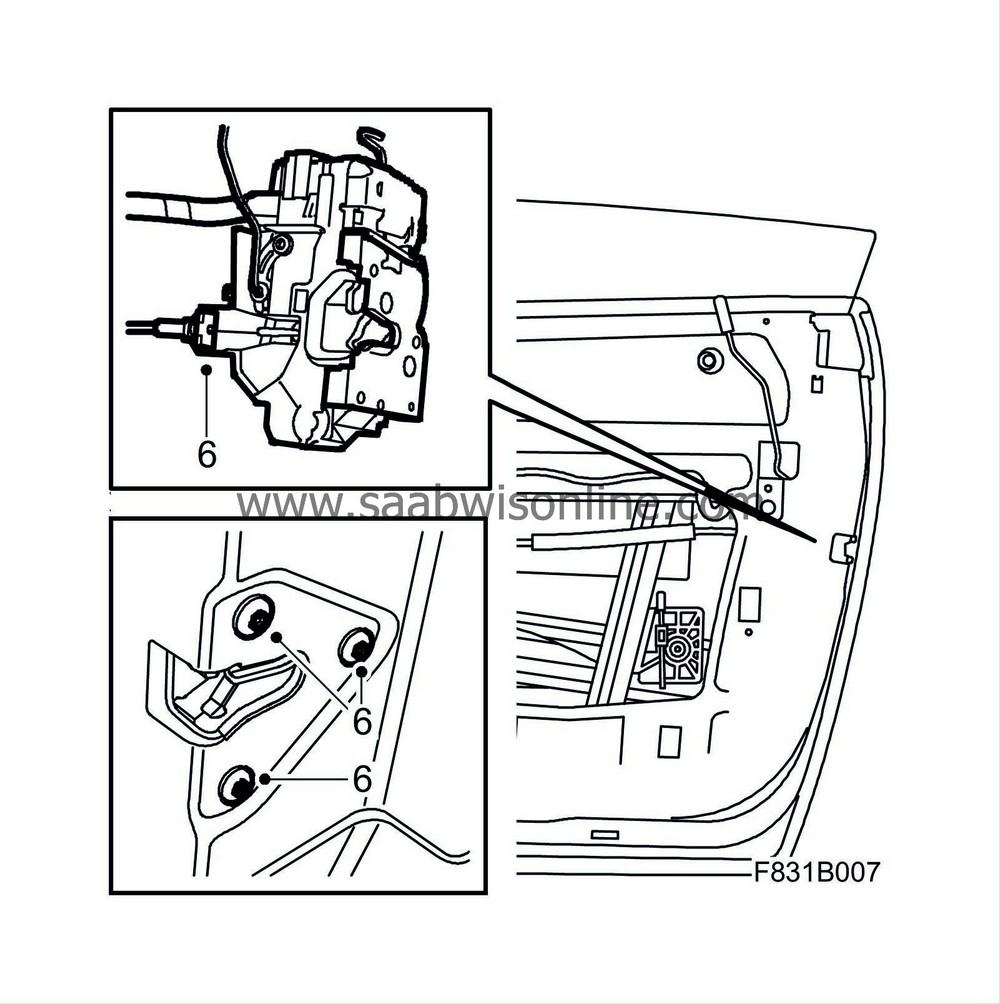
Detach the lock to access the connector. Unplug the lock's connector.
|
|
7.
|
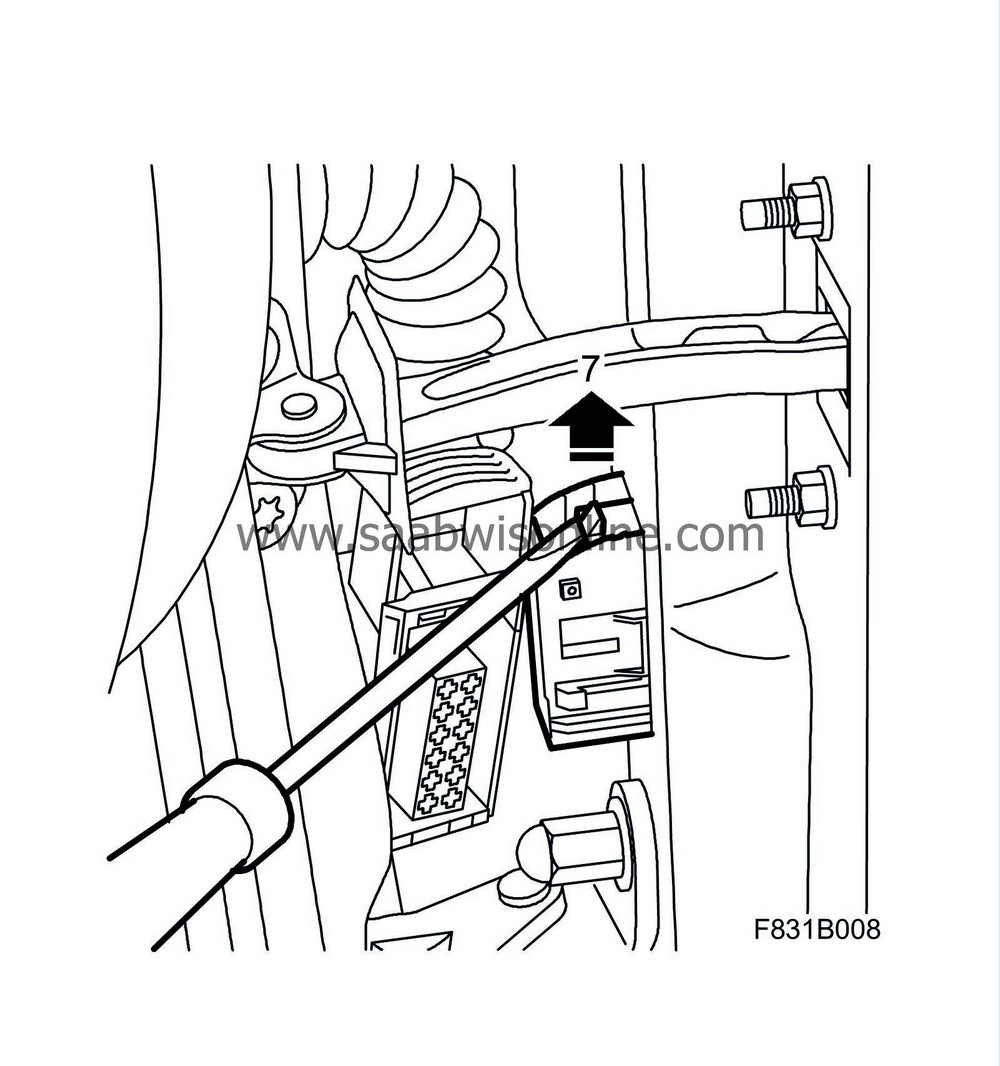
Detach the door's connector as follows:
|
|
|
•
|
Lift up the connector's secondary locking catch using a screwdriver.
|
|
|
•
|
Following which, press in the catches to detach the connector from the door panel.
|
|
8.
|
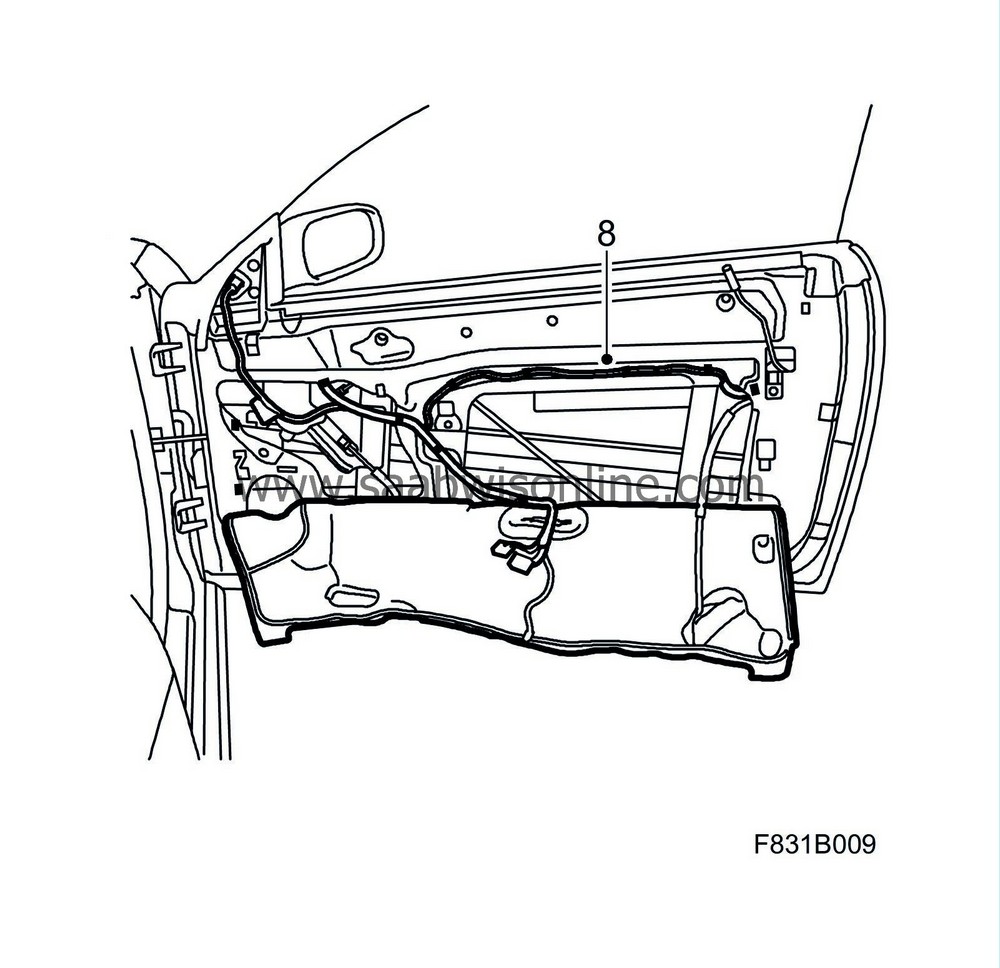
Remove the wiring harness. Note down the position and attachment of the wiring harness.
|
|
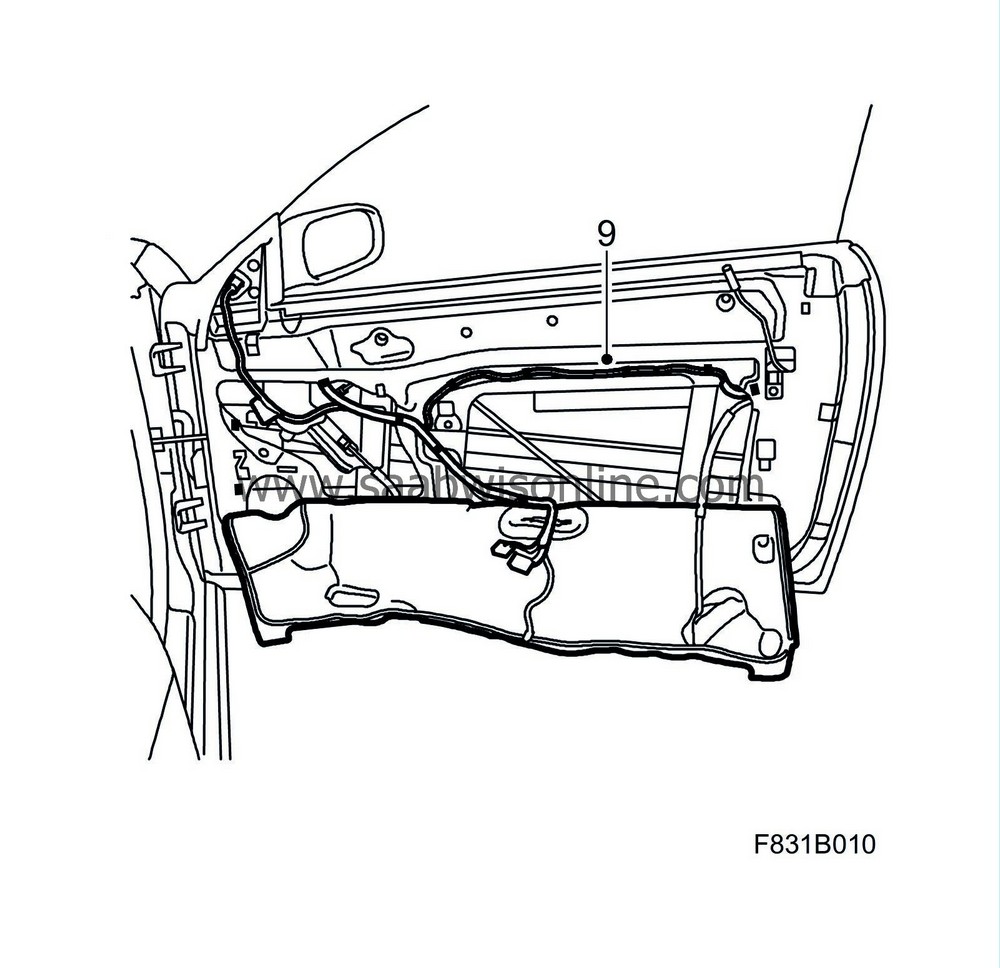
9.
|
Fit the new wiring harness.
|
|
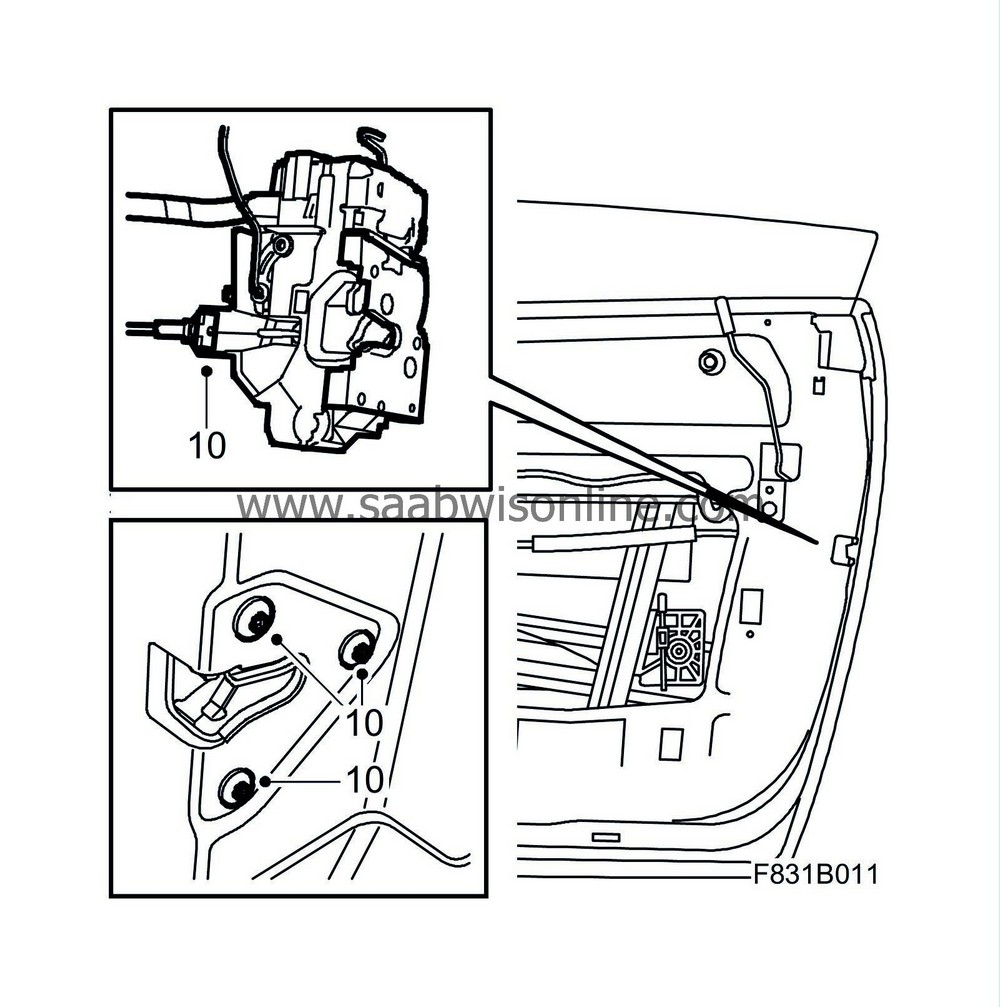
10.
|
Plug in the door lock connector and fit the lock.
|
|
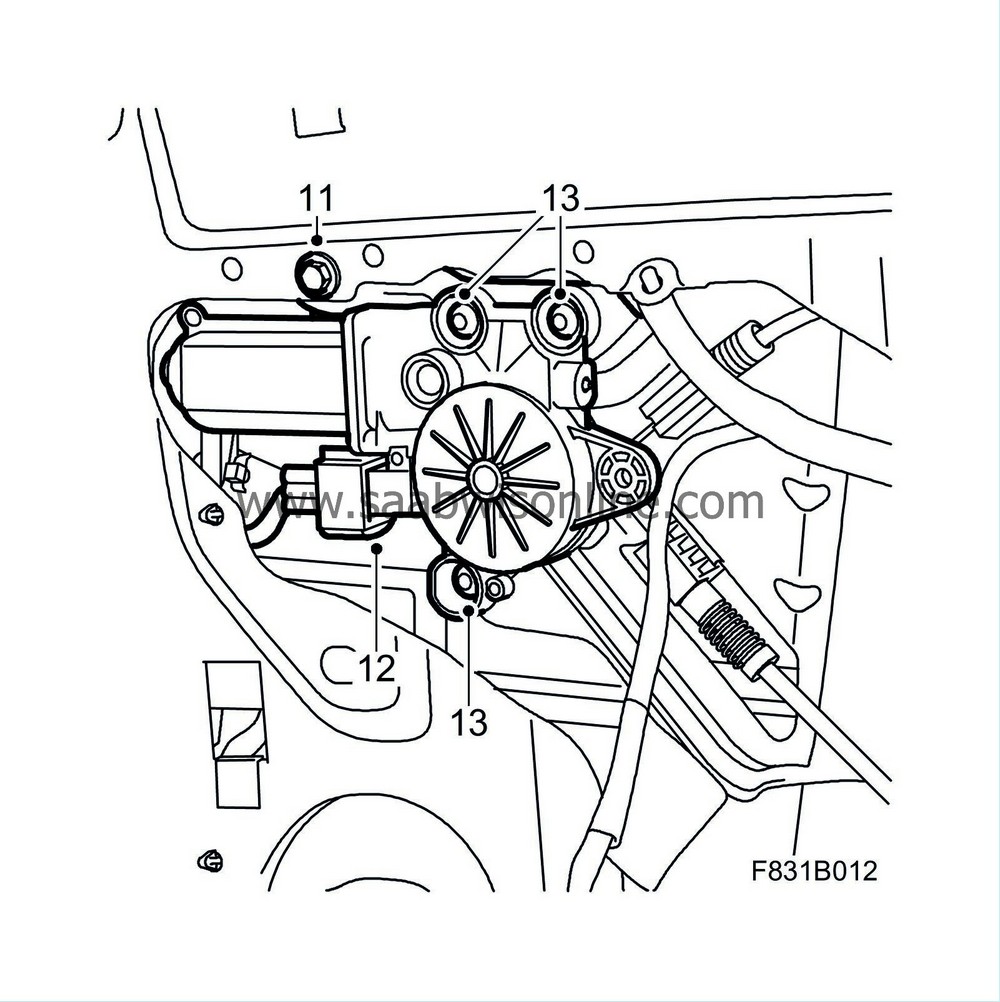
11.
|
Fit the bracket screw.
|
|
12.
|
Attach the window lift motor connector.
|
|
13.
|
Fit the window lift motor.
|
|
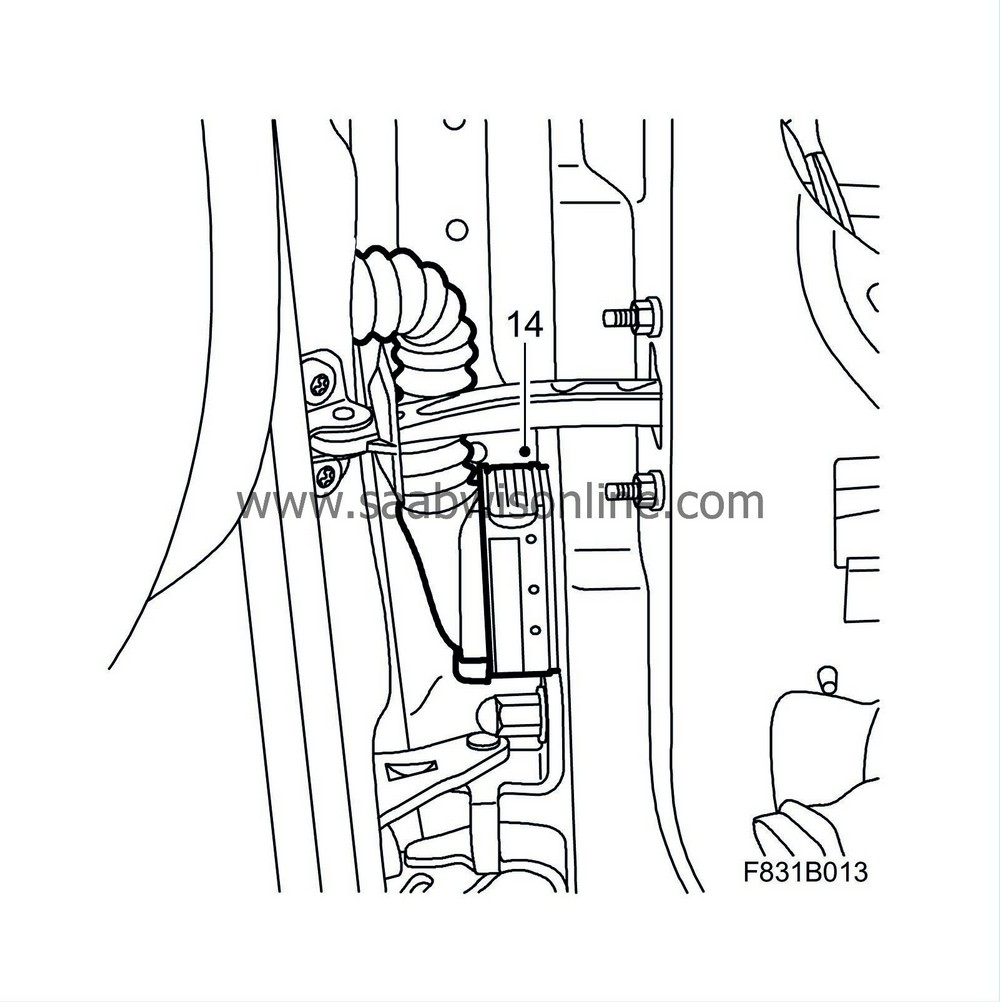
14.
|
Attach the door's connector.
|
|
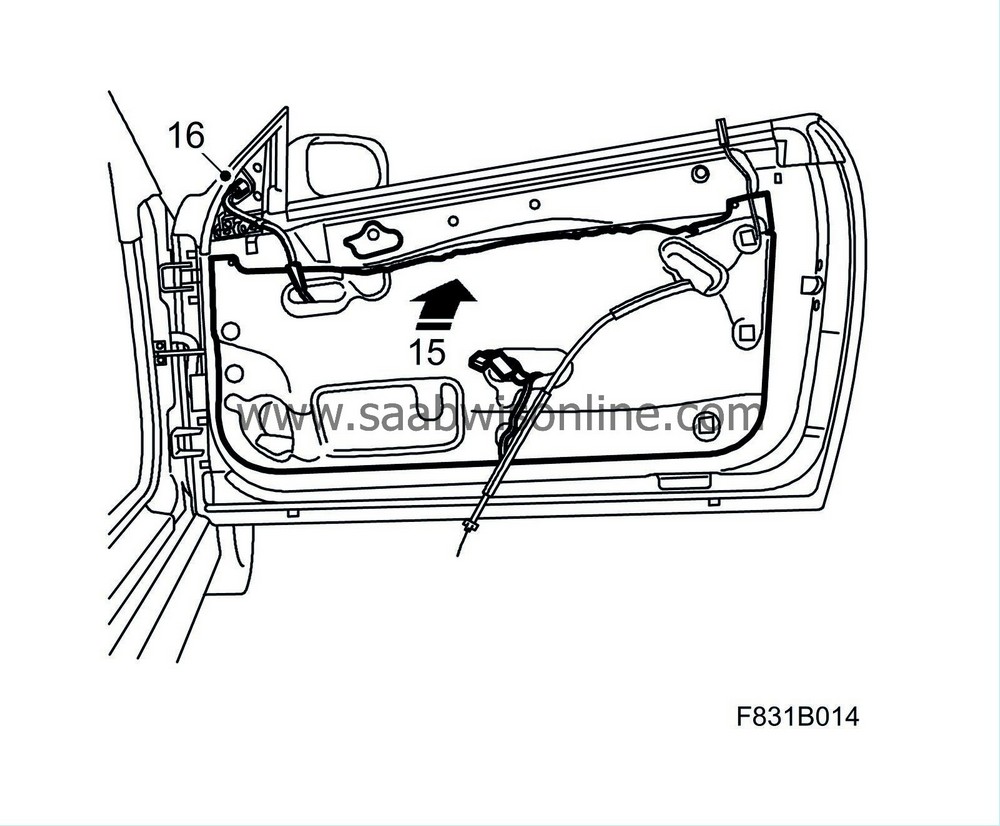
15.
|
Fit the water barrier.
|
|
16.
|
Attach the door mirror connector.
|
|
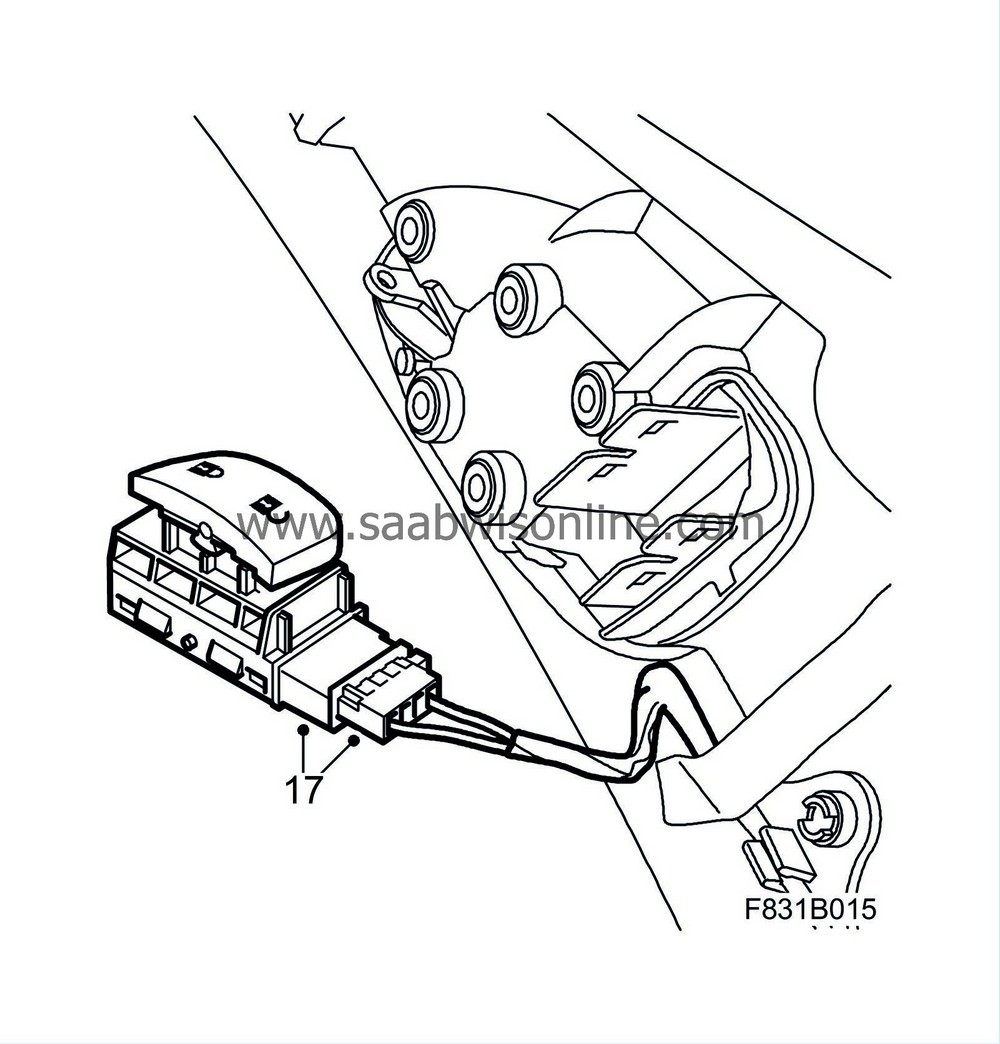
17.
|
Remove the cover and fit the switch.
|
|
18.
|
Fit the door trim in accordance with WIS 9-3 (9440) - M04 - Body - Interior equipment - Door trim, front door.
|
|
19.
|
Check the operation of the switch.
|
|
Warranty/Time Information
|
In the case of customer complaint and if the car is
within the warranty period
, use the following information to fill out the claim:
Failed Object: 36441
Fault/Reason code: 03
Location code: 09 (US=9)
Warranty Type (US): 01
Repair/Action code: 10 (fitting the switch) or 01 (fitting the switch and wiring harness)
Labour Operation (US):
3644103 (fitting the switch)
3644104 (fitting the switch and wiring harness)
Labour Operation (CA): N2133
Time:
Fitting the switch 0.2 hr (incl. checking)
Fitting the switch and wiring harness 0.4 hr (incl. checking)


