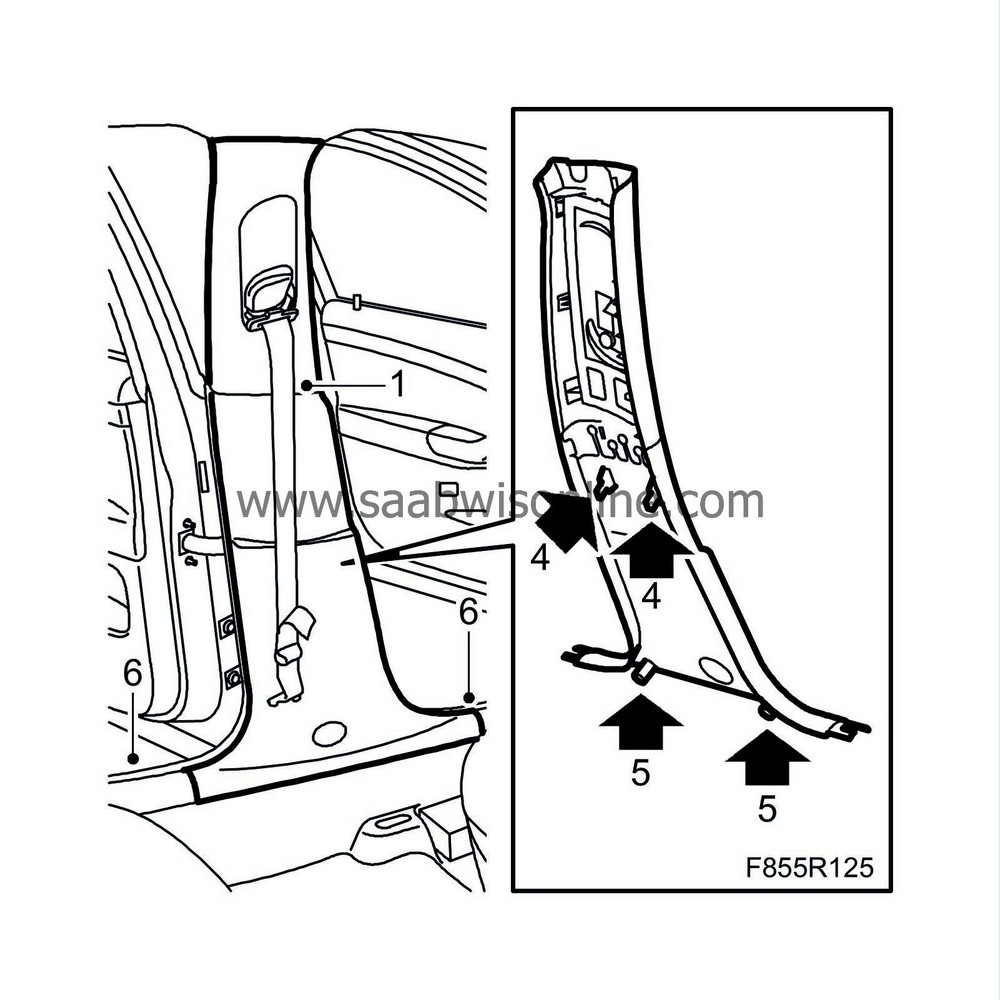
B-pillar trim
| B-pillar trim |
| To remove |
| 1. |
Move the seat all the way forward and tip the backrest forward.
|
|
| 2. |
Remove the cover and seatbelt mounting from the seat.

|
|
| 3. |
Detach the rear seat by lifting it at its front edge. Remove the seat.
|
|
| 4. |
Remove the front and rear scuff plates. Lift up the bottom edge of the backrest bolster to remove the rear scuff plate.

|
|
| 5. |
Adjust the belt height to the lowest position.
|
|
| 6. |
Remove the B-pillar trim by pulling outwards from the bottom.
|
|
| 7. |
Manoeuvre the B-pillar trim downwards.
|
|
| 8. |
Thread the belt out through the belt slot.
|
|
| To fit |
| 1. |
Thread the belt in through the belt slot in the B-pillar trim.

|
|
| 2. |
Push up the upper section of the B-pillar trim so that it engages in the fastenings on the headlining.
|
|
| 3. |
Adjust the trim vertically so that it aligns with the B-pillar.
|
|
| 4. |
Push in the trim against the middle of the B-post so as to engage the centre clip. Ensure that the clip engages correctly.
|
|
| 5. |
Push in the trim at the bottom so as to engage the lower clip. Be careful not pinch the rubber moulding around the door frame.
|
|
| 6. |
Fit the seatbelt mounting and cover to the seat.

|
|
| 7. |
Fit the forward scuff plate, 4 clips. Fit the rear scuff plate by guiding its rear section up behind the bolster. Secure the bolster by engaging its fixing lug.
|
|
| 8. |
Fit the rear seat.
|
|


